

How to Make a Stand Alone I-Cord
The i-cord alone is used to make a thick cord of yarn. Use it for a purse handle, top of a hat, or for any time a long “rope” is needed.
Do it this way: using double-pointed knitting needles in a size that works for your yarn weight, cast on 4. See my page if you need help casting on.
Slide those 4 stitches to the opposite end of the double-pointed needle and then knit them. The yarn will be coming from the opposite end of the stitches which wraps around to make the cord. Do this over and over for as long as you need the cord to be, then bind off. (Watch the video below if you need to.)
Knitter Elizabeth Zimmerman gets the credit for this simple idea.
Below is a video (not mine) showing how to begin, knit and bind-off the i-cord. It’s a bit slow and tedious, but that could be good for beginners.
How to Create An I-cord Edging
The i-cord edging can be used to make a neat edge on any project you like. This would work on a scarf, blanket, dishcloth (good practice piece) or whatever you choose.
You will need 3 stitches on each end of the item (6 extra stitches total) to create this look. When following a pattern, be sure to cast on those additional stitches which will be worked separately, in addition to, the number of stitches needed for the original pattern.
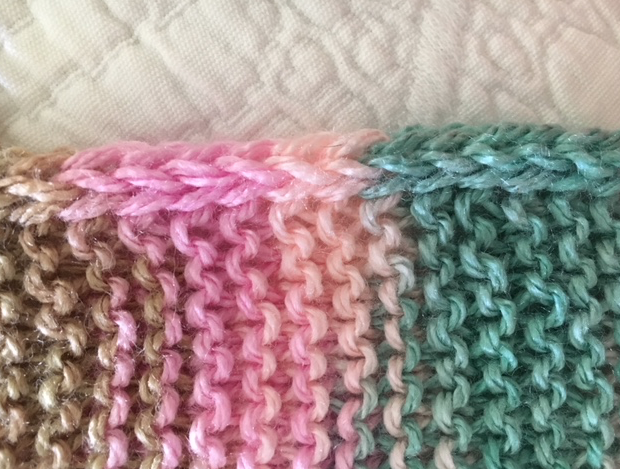
On your first row after the cast on, when you reach the last three stitches on the row, slip each one purlwise with the yarn held in front. It will look like the photo below.
Turn the work, and then pull the yarn from behind and knit each of the first three stitches. Keep doing this – slipping the last 3, so yarn will come from behind when you work the knits at the beginning of the following row. The yarn wraps around to create this neat little rope edge.

How To Make a Simple Neat Edge
If you don’t want to bother with the i-cord edge, try this simple move to keep a neat edge. At the end of each row purl the last stitch. When beginning the next row slip the first stitch purl wise then do the pattern. Either incorporate that stitch to replace one in the pattern or add an additional stitch to the row. This will make a neater edge along a scarf, blanket, or flat piece of work.

