How to Grow the Beautiful Rudbeckia

Growing the rudbeckia “Rising Sun” flowering perennial pollinator plant.

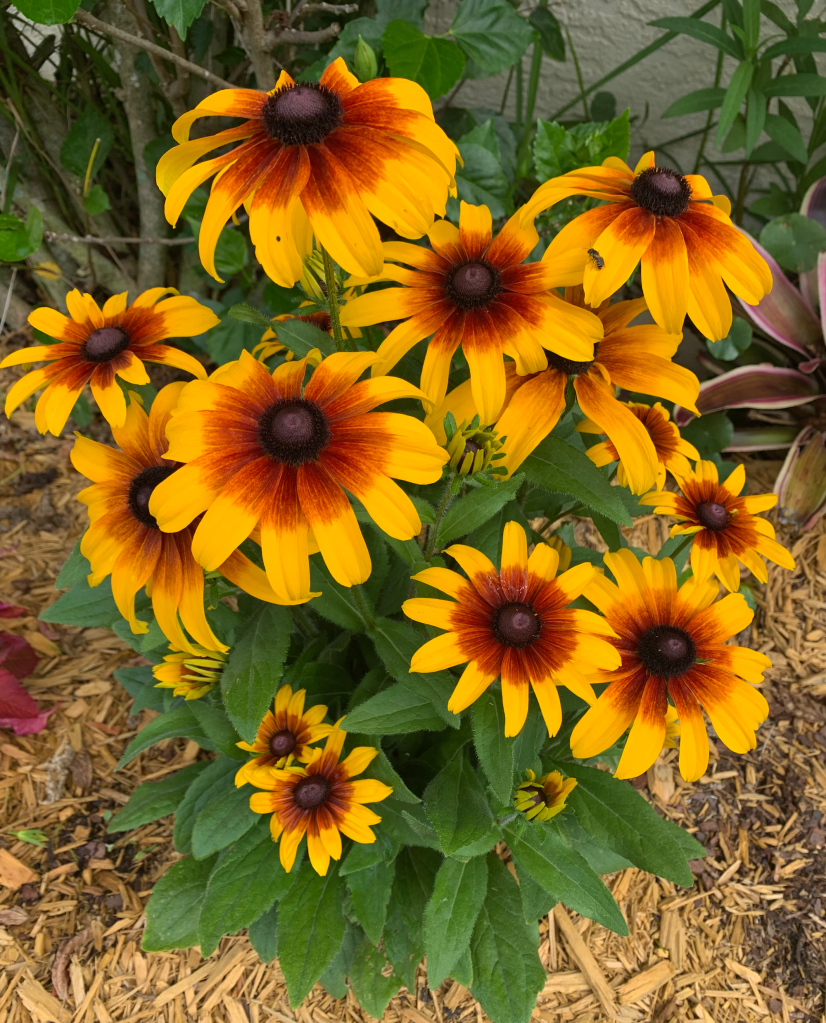
While dashing through the local nursery, I spotted this pretty yellow flowering plant. It was a Rudbeckia called “Rising Sun”. It had a couple of flowers and a few more buds. It went into my new little flower garden.

In a Nutshell

Rudbeckia is a perennial. It should be dug up and divided, once it is large, to propagate. It is easy to grow, after making sure it has plenty of water in the beginning. Grow in full sun, deadhead old flowers, and enjoy watching bees visit the flowers.

When planting, I added some bone meal and fish fertilizer along with compost to the hole. I do that generally for all transplants. I planted the new garden in May, so it was hot, but not horrible. I made sure to water the new plants every morning because we were getting no rain back then. I added mulch to help.

Flowering Rudbeckia plant
Rudbeckia plant

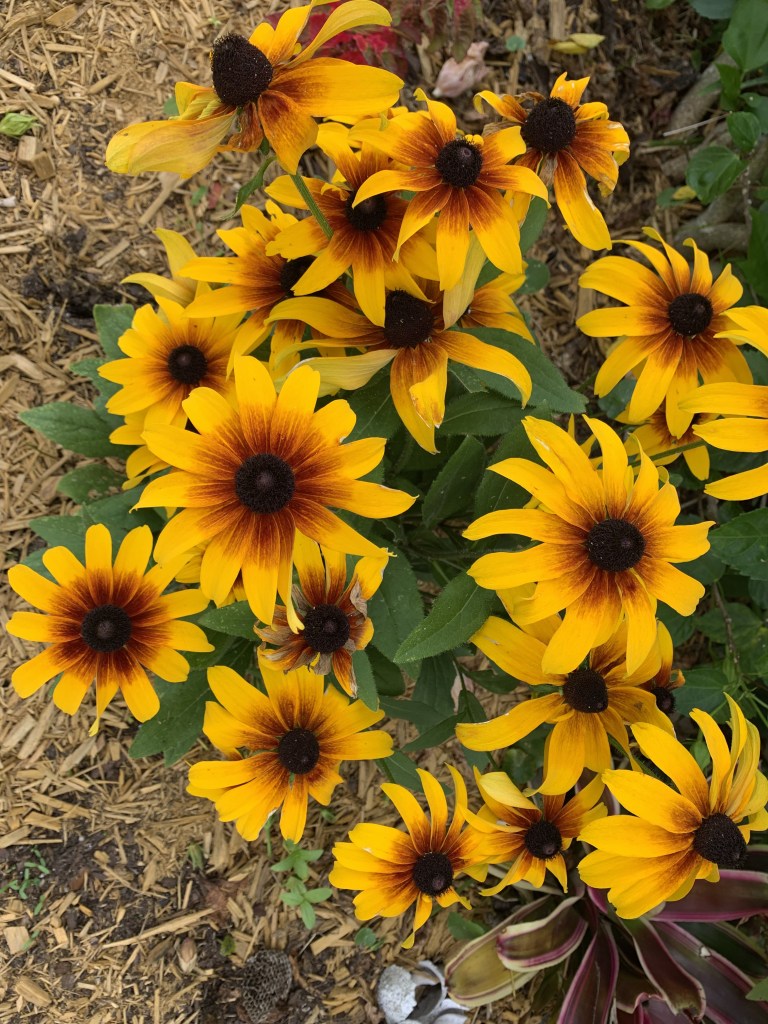
Because I went out every morning to water, it gave me the opportunity to view changes. It seemed to bloom with at least one new big yellow bloom each day! The plant grew and bloomed like mad, and is now just gorgeous.

Bees Love Rudbeckia

I was hoping to attract bees and butterflies and this plant is perfect. Each morning I see little bees crawling around the flowers. One day I saw a bee sleeping on one of the petals! He was resting or something because he was not moving, but he was not dead. On the photo above you can see a bee on one of the big flower’s petals.

Deadheading and Propagation

Rudbeckia needs to be deadheaded. As soon as I read this, I went out and cut off the old blooms. I brought them inside to see if I could get some seeds from the center when they dry fully. Deadheading helps the plant put energy into creating new blooms and not caring for the old, wilting ones. Many flowering plants benefit from this.

My Rudbeckia even survived us having a new roof installed. If you have ever gone through roof replacement, you know what a mess it makes. I was so worried about my garden and yard, but most things came through okay.

Rudbeckia spreads by rhizomes underground. In other words, when it gets too full, it can be dug up and split into two or more plants. This is one way to propagate. Every 4-5 years or so, or when the plant is really full and not growing as many flowers, it means it needs to be divided. This is similar to peonies. I remember doing just that to divide my beautiful peonies when I grew them in New Hampshire.

Also, apparently the rudbeckia can grow from seed. Each flower will drop little seeds from that center brown “eye”. So the flowers I cut will be saved to see if I can get seeds.

I would love to link to this info, but all the sites I visited had WAY too many ads! I won’t send my readers to them, but if you search for this info, you will find it elsewhere.

I’ve never grown the rudbeckia before, but I truly love it. At some point I will buy more of them to put into the landscape. This plant came from Lindley’s Nursery in New Smyrna Beach.

Keep reading my gardening stories…

Starting New Tomato Plants From Suckers

I always plant little tomato plant seedlings when I garden. But there is a way to start new little plants from the original seedlings.

Once the seedling begins to grow, it will probably grow “suckers” which sprout from between stems.  (If you don’t know what I am talking about, see an image of suckers at the Gardener’s Journal site.)  The key is to only remove suckers below the fruit producing area. Usually down by the first or second stems of the plant. The reason is to give the tomato plant fewer stems and leaves to deal with, sending production to the tomatoes themselves.

But the suckers can be turned into new plants! Warning if you live in an area of the country with a short growing season. The season is too short for these propagated plants to produce before the weather turns cold. I’ve tried.

The “sucker” below was pulled off one of my store bought plants and I simply stuck it into the dirt in my garden bed. Each day I gave it plenty of water, and in the beginning it looked droopy. But they come back and begin to grow (plenty of water is the key here).

It doesn’t get any easier to have yourself a new, free tomato plant!

tomato propagating
Little tomato plant started from original, store bought plant

The other sucker plant (below) was brought into the house and stuck in a vase of water for about a week, or until it sprouted little white roots. Then I put it out in the garden.

As you can see, the water grown sucker looks better than the one simply stuck into the dirt. But you can do it either way. I look forward to seeing if these free plants do grow tomatoes eventually. It may become too hot before they get the chance.

propagating tomato plant
Propagating tomato

On a side note, this green pepper plant sprung up in the garden beneath my big pepper plant. I moved it to a better spot and it is growing nicely.

Be careful when weeding, and know what is what. I recognized the leaves of this little pepper and let it grow. It’s easy to simply pull out all the “weeds” and inadvertently remove a volunteer plant!

seed pepper volunteer
Bell / Green pepper plant started from a seed which dropped from the big plant

Spring Surprise – A New Little Hydrangea Plant!

As I uncovered the leaves from the base of the Blushing Bride hydrangea, I found that a couple of the branches had formed roots which will be new plants!  This form of ‘root layering’ or ‘ground layering’ is a great way to start a new shrub from an established one.

little hydrangea offshoot
Rooted Hydrangea Branch

It’s bare and spindly looking stems are curving out from the center and then upward and at least two of them were touching the ground enough to form roots. Now, new growth is showing beyond the roots which means I will have a couple of new little baby hydrangea plants!
I have propagated hydrangeas this way before, back when I lived in my rental house. I had found a rooted stem with big leaves and a flower that was growing separate from the main bush, so I dug it up and planted it near the front steps. You can read about how I did it on my Propagating Hydrangeas page about root layering.
So for now I will let the babies grow – attached to the main plant – until they get larger. I’ll probably dig them up in the Fall and find them a place to grow on their own.  I love to find free ways to landscape.  Isn’t that exciting?

How To Propagate Hydrangeas

stem cutting
Hydrangea cutting with roots and new leaves.

Propagating means starting a new shrub from an existing one. There are a couple of ways you can do this with hydrangea plants.  Hydrangeas grow quite fast, and within a couple of years you will have a nice size addition to your landscape.

Taking stem cuttings, using new growth, sometimes works.  I have not used this method much yet, but while I was planting my new shrubs, a few of the stems broke so I stuck them into a vase of water to see what would happen.  After a few weeks, one of the cuttings has begun to sprout new little leaves and is growing roots – right in the water.  So I plan to get that into a pot and baby it along until Fall when I’ll add it to the yard. (Pictures to come!)

I’ve had success with root layering, and hydrangeas, with their low hanging branches, are perfect for doing this.  In fact if you check around the base of your plants that droop to the ground, you may find that a branch or two is already rooting itself into the soil.  The mophead variety tends to have the low to the ground stems.

I started a new plant by digging up the rooted stem and planting it in another area of the yard one Spring.  I was renting the house, so I don’t know how it’s doing today, but by the time I moved, a beautiful new hydrangea shrub was gracing the front yard at no cost to the homeowner.

Read how I did it, with pictures along the way, at my Wizzley page about Propagating Hydrangeas.

Baby Hydrangea In Second Year After Propagation

Hydrangea planting
New Plant - Second Year

Want to see my baby?  This little hydrangea bush was propagated from a large one.

Sometime in the summer of 2009 I noticed that the big, blue hydrangea plant in my front yard had a “baby” growing next to it. It didn’t have a bloom, so I dug it up and put it by the front steps.

**Note: I’ve since read that before digging up a new plant, first chop it from the “mother” plant and then leave it where it is for a while to let it get accustomed to growing on it’s own. After a month or so it’s safe to dig it up and it will be more ready for life out on it’s own!

Anyway, it is thriving and even has little buds showing this year. Last year, summer of 2010, it grew two long stalks, but no flowers. I was worried about it this winter with all the snow we had, but the brown stalks were still there once the snow was gone and leaves began to grown from it quickly. Besides new growth on the stalks, it is filling in with more stems and I look forward to seeing the flowers of course and am a bit curious what color they will be. I am thinking blue.