New England native, Florida resident. Blogging about boating, beach-combing, gardening, camping, and knitting. Work for Zazzle as a designer since 2008.
Hurricane Milton is coming. We are as ready as we can be, and now we are waiting.
We went camping over the weekend. When we came home Monday, we unpacked and began hurricane preparations for Milton.
Hurricane Helene mostly missed us, but this big one named Milton will not. We are in the path, with the eye going just a bit south. I live on the east coast and then projection is for a Category 1 by the time it gets here.
The Gulf will be devastated, and I can’t even imagine facing a Category 4. Many people have evacuated. Gas stations are without gas.
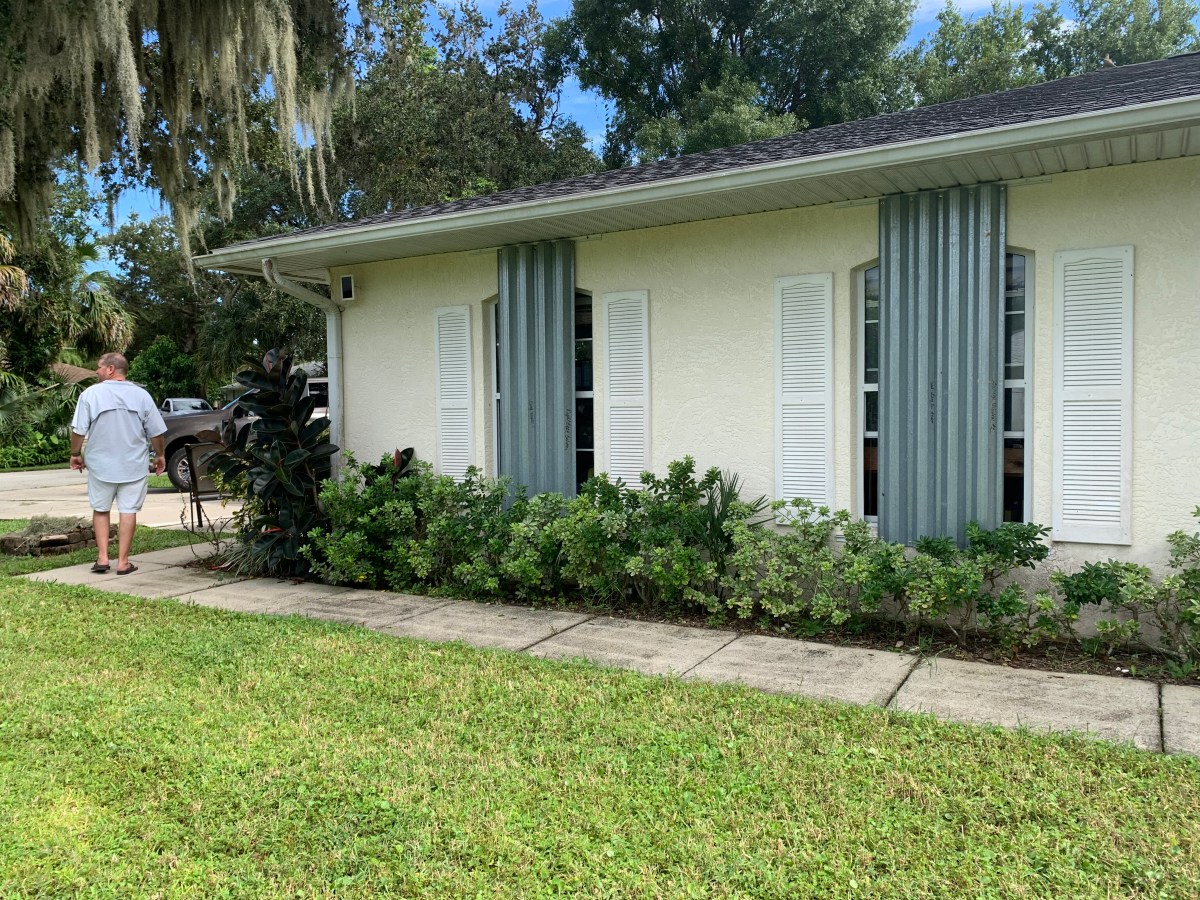
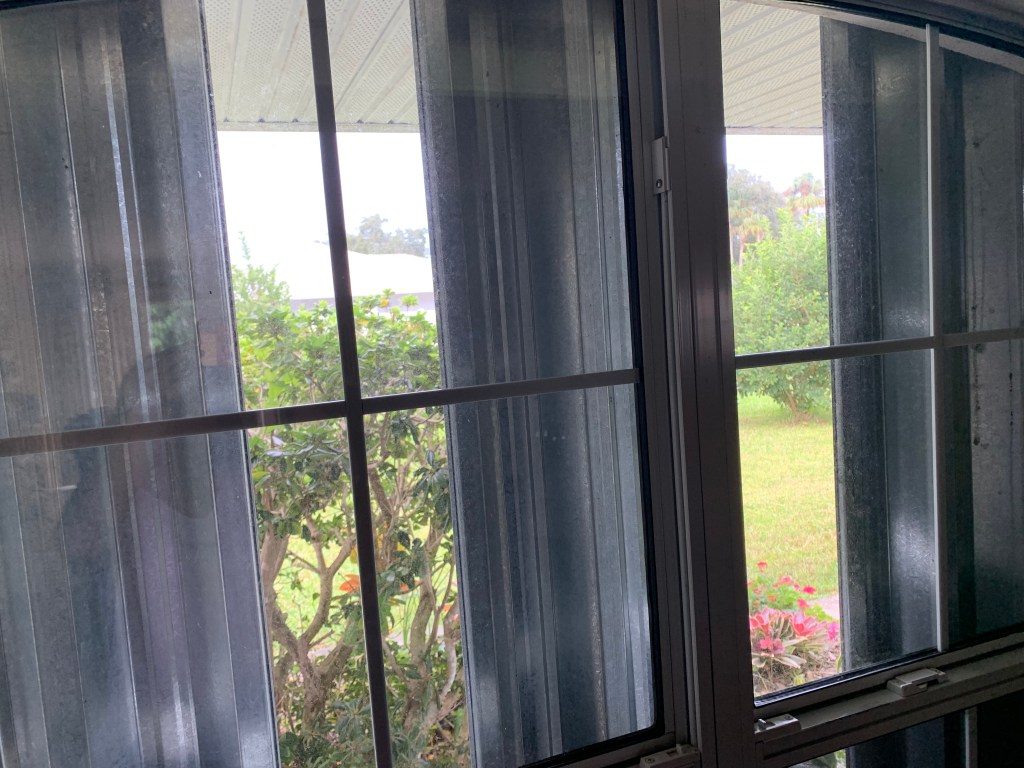
We spent the day putting up metal shutters on all our windows. We left some gaps in order to see outside and get fresh air with open windows once the storm has passed. There will be no power – for how long?
My son is a firefighter and is heading into work a day early. I hope the city will not be sending them out when the wind gets bad. People need to be self-reliant during times like this.
I expect power to go out and trees limbs to come down. Hopefully the flooding will not be bad, but lots of people were getting sand bags.
By tomorrow night we’ll be getting wind and then it’s a matter of riding out the storm into Friday. This is a big one, and damage will be extensive across the state.
After growing Roselle Hibiscus for a year, I have decided that one plant is enough for me.
This was my first year growing Roselle hibiscus. I was very happy to have bushy, big plants that would give me lots of tea to drink. But there are problems with this plant.
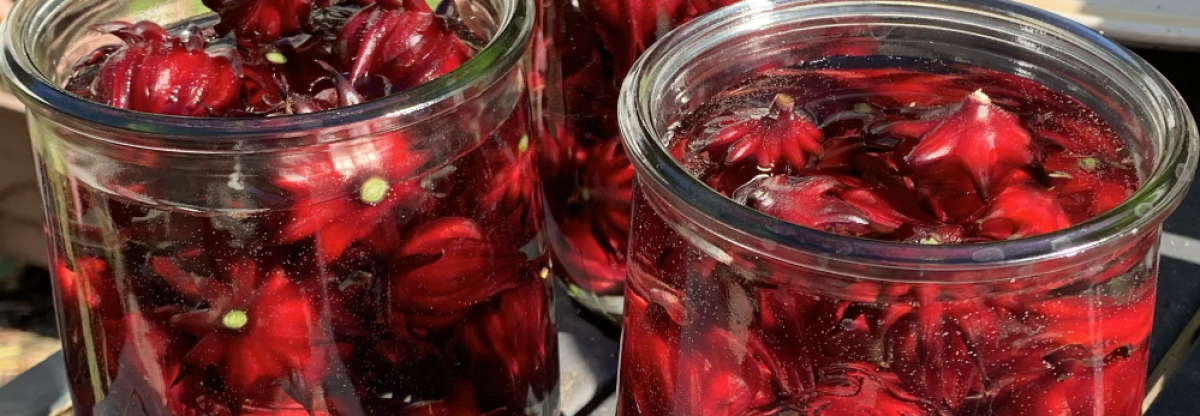
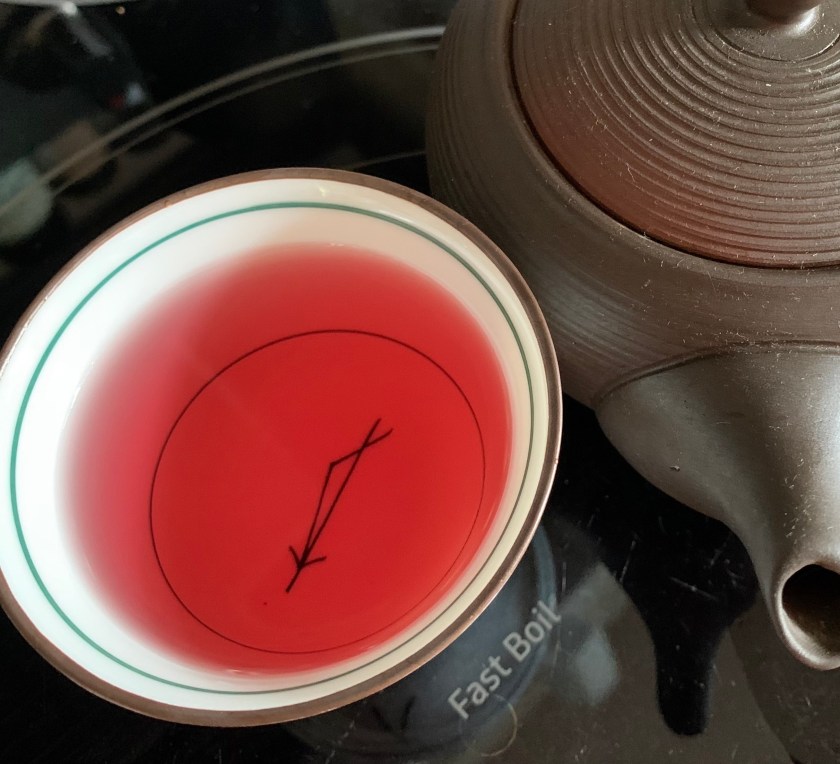
Growing Roselle was an experiment. I didn’t know much about it, but the tea is good for the heart, blood pressure and other things. It is grown for the red pods, called calyces that form after flowering. They are peeled, and the red petals are used for tea. The tea is delicious and healthy. The center of the pod is where the seeds form. Where I live, the bush is very easy to grow. I had no idea how much Roselle would love my yard. It took over.
Pros
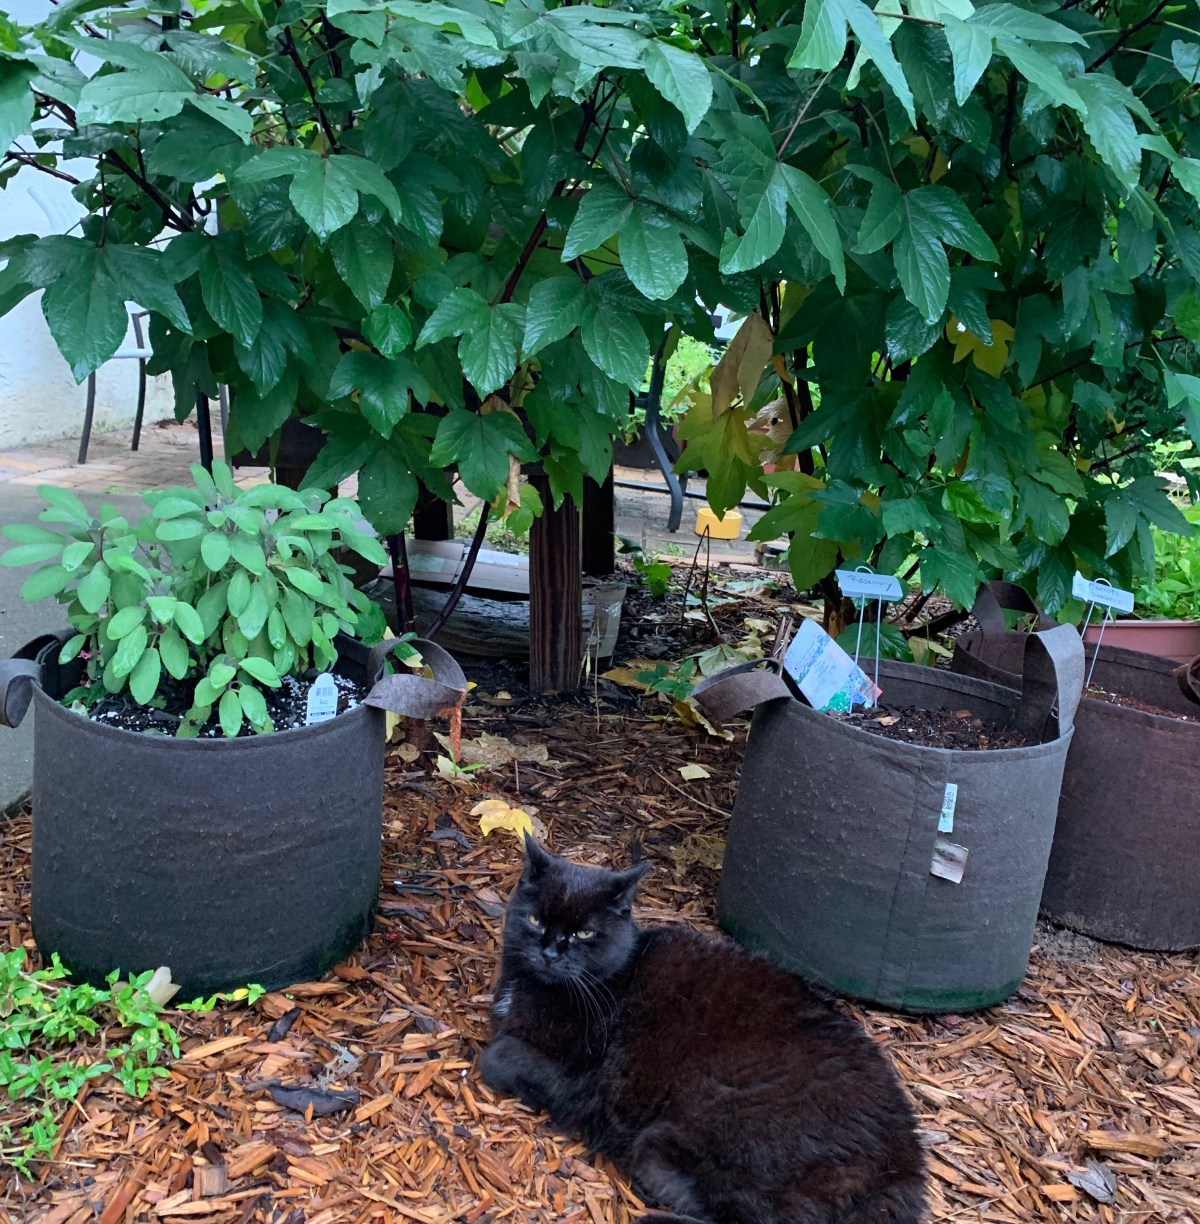
Roselle is one of the easiest things I have ever grown. Plant seeds, or simply cut a small branch from an existing plant and stick it into the ground. It will grow! The plants are beautiful, with big dark green leaves. The flowers don’t last long, but new ones bloom every day – in the Fall. Then it’s time for saving the calyces to have tea in the months to come. I simply peel and freeze mine – if I can pick them before the ants come.
Cons
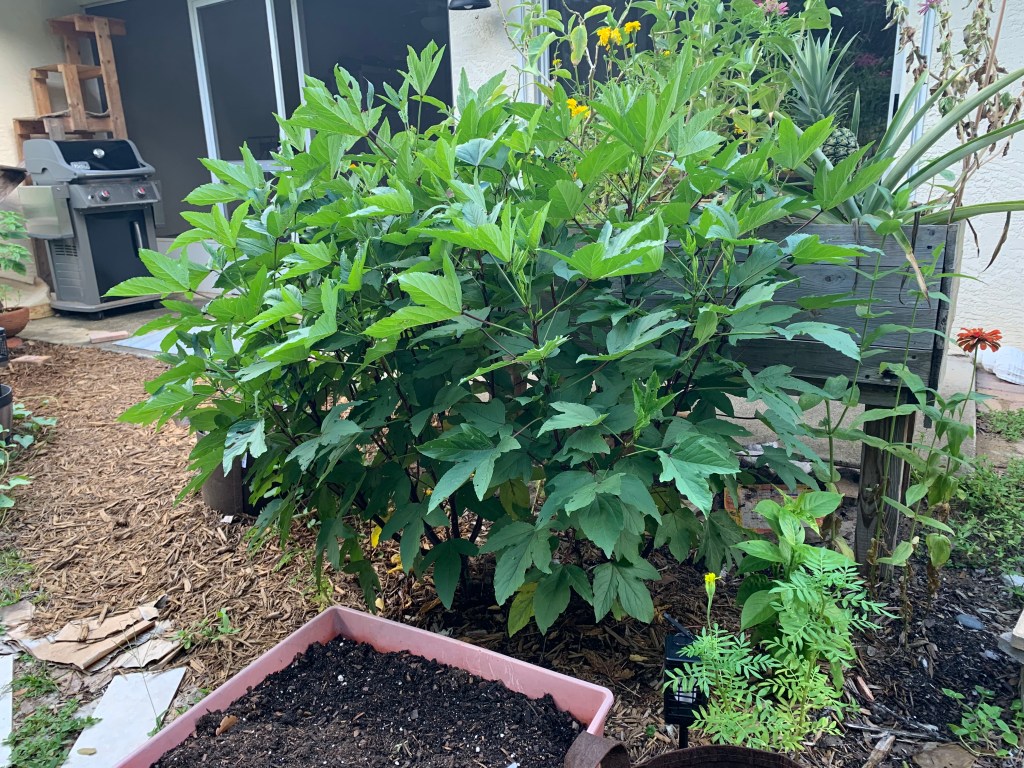
The beautiful bushes are not very strong. Strong wind catches the leaves and the whole bush will split down to the ground. Or, branches will break off. I lost one of my biggest bushes over the summer during a storm. Then Hurricane Helene damaged the others.
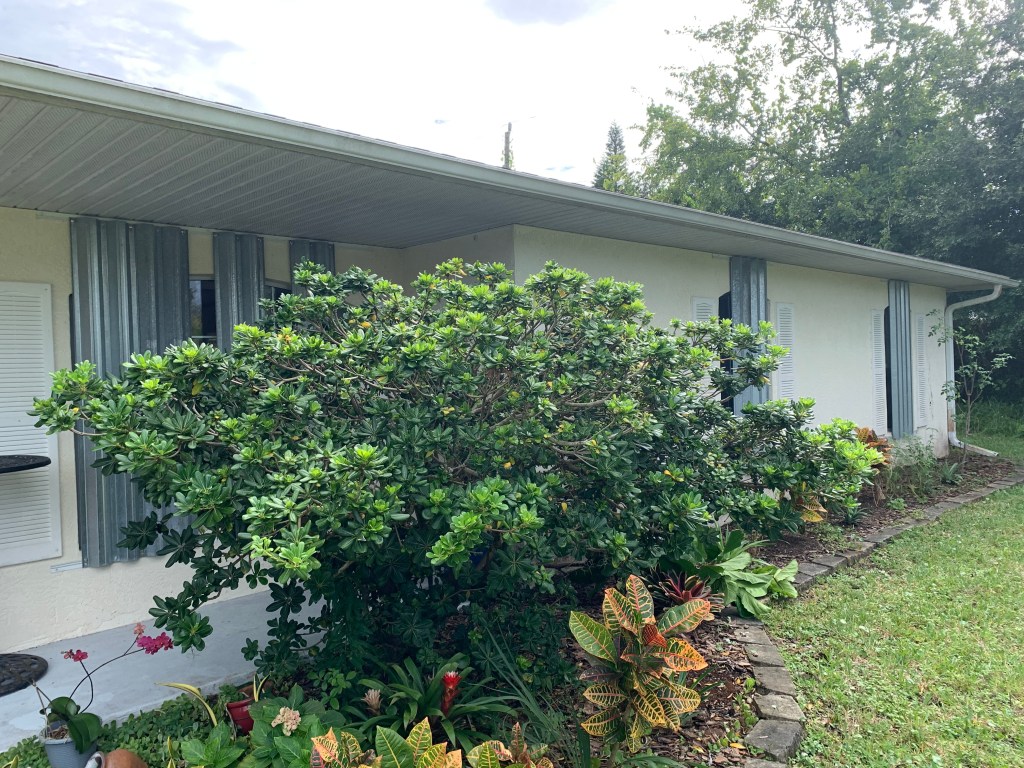
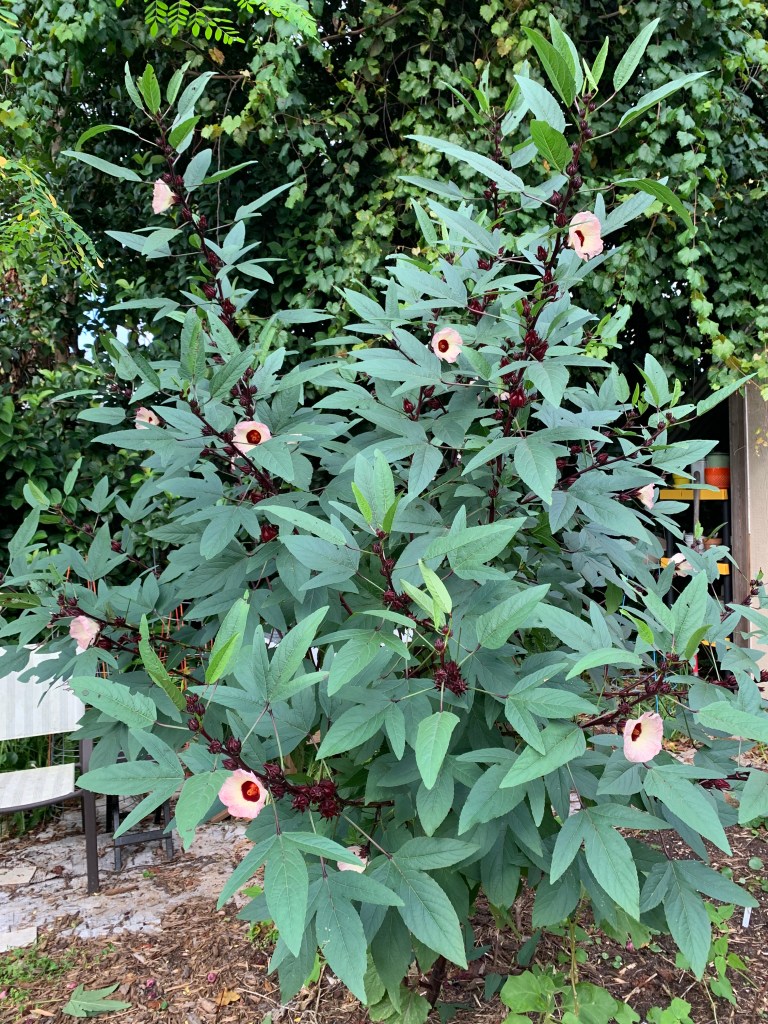
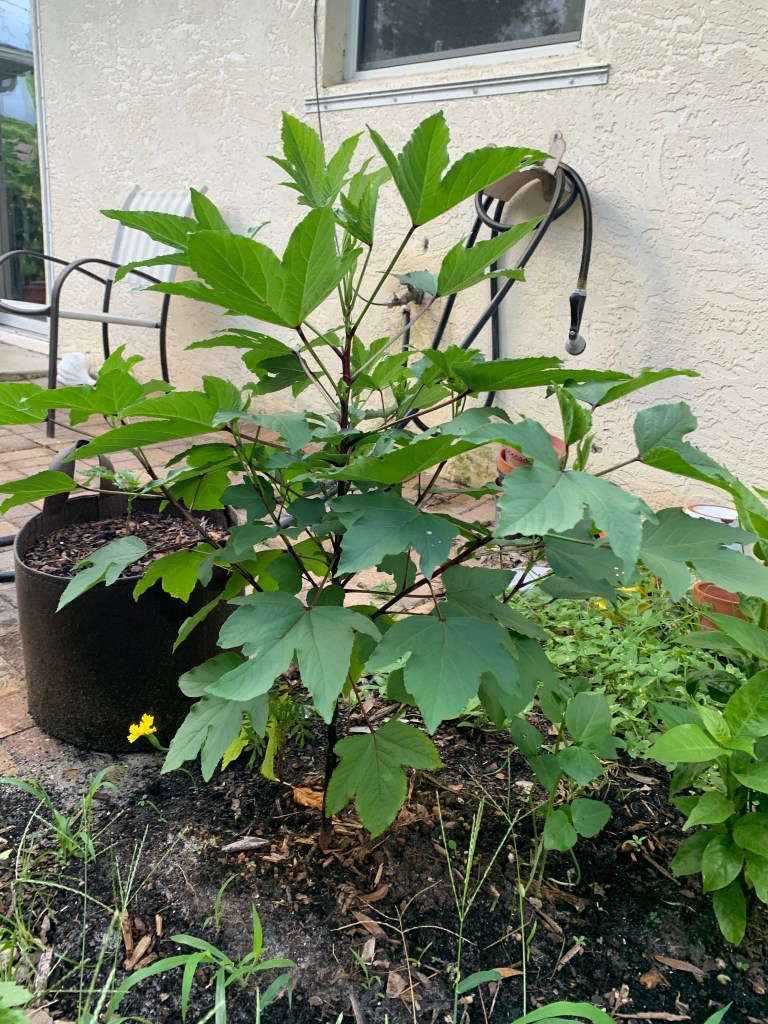
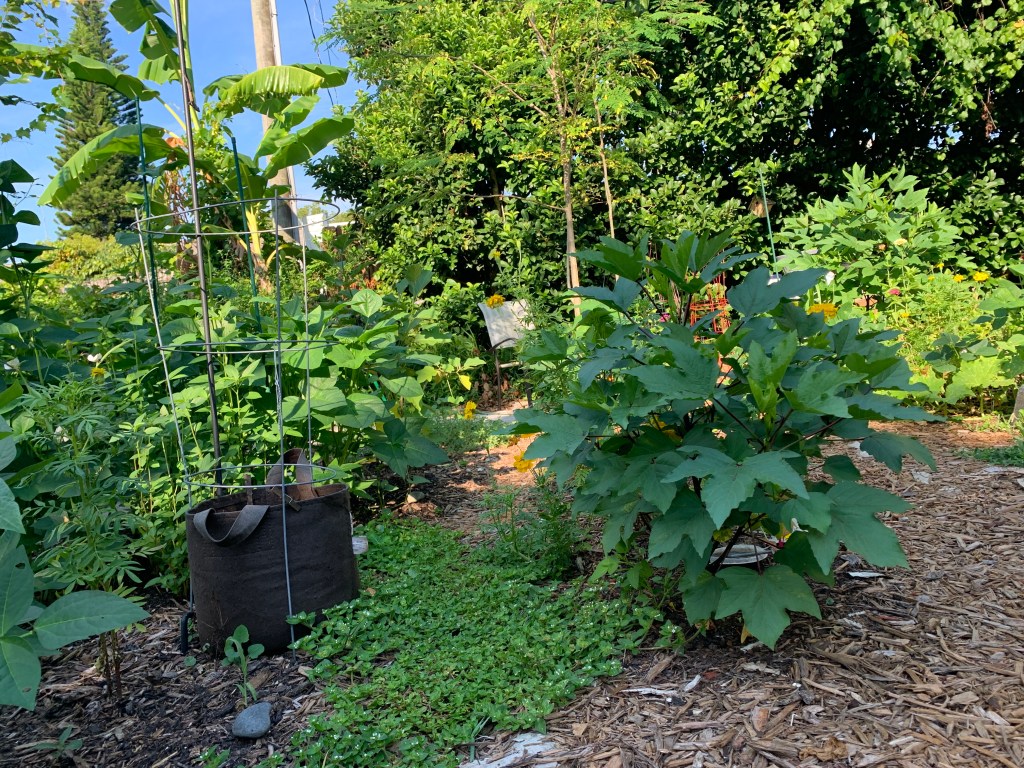
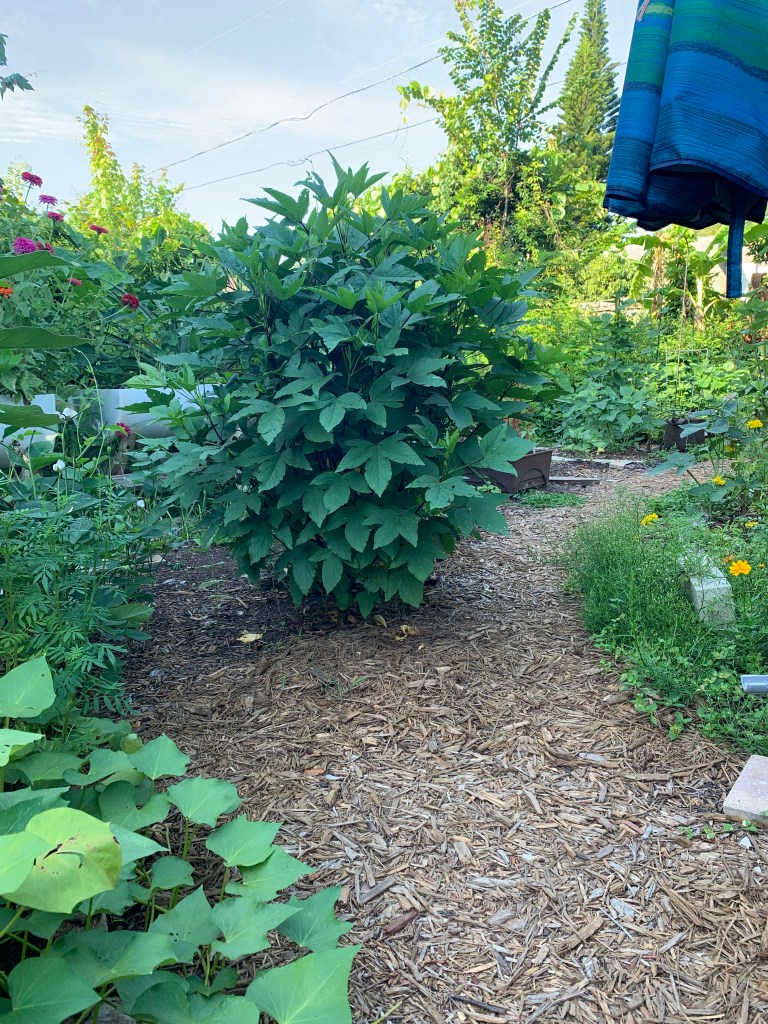
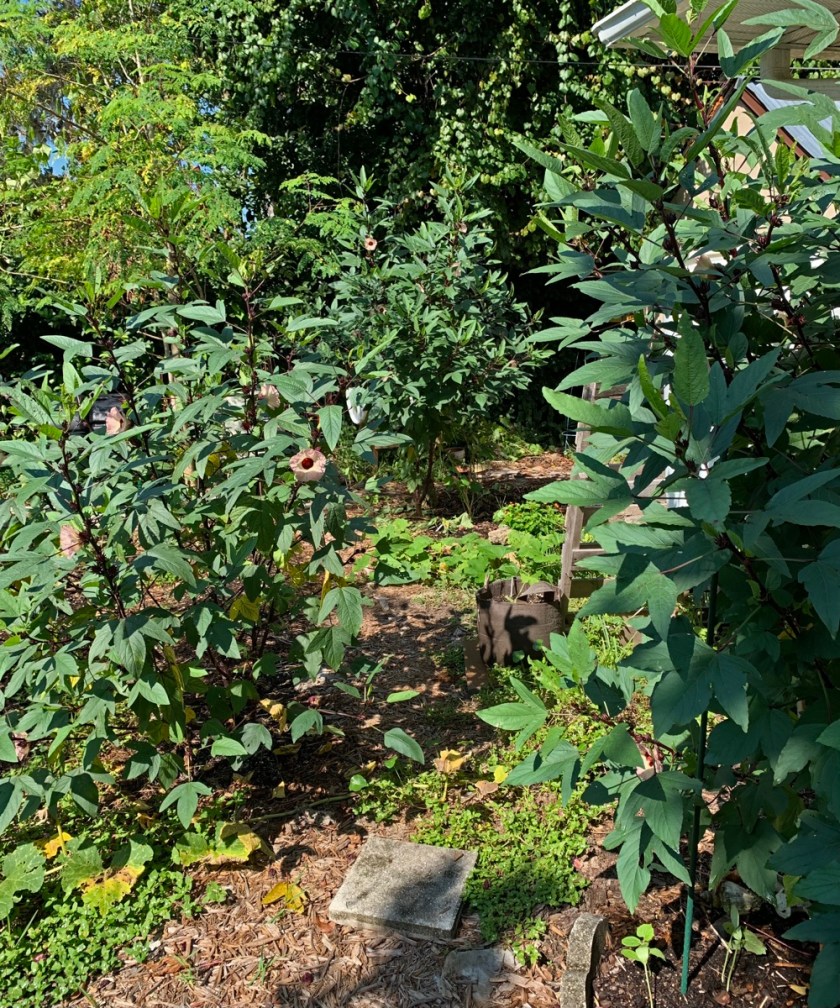
Pathway blocked by shrubsBeautiful shrub!
Roselle shrubs are huge. In a year they grew taller than me. They took over, blocked sun to parts of the gardens, and made navigating my yard more difficult. I didn’t know, and now I do.
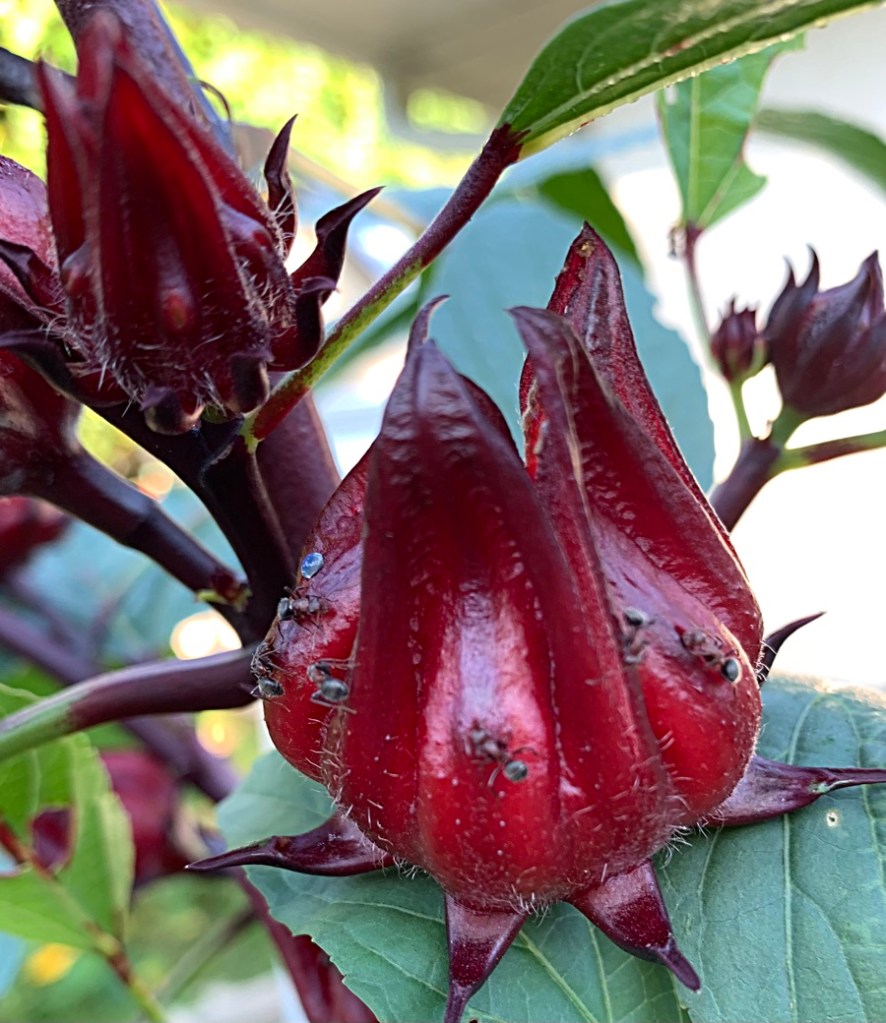
These problems are manageable, and it’s all part of gardening. What I really don’t like about the Roselle is the ants. Once the red calyces began forming, ants were all over them. Maybe I have an excessive amount of ants in my yard, or maybe this is normal, I don’t know. No one warned me of this.
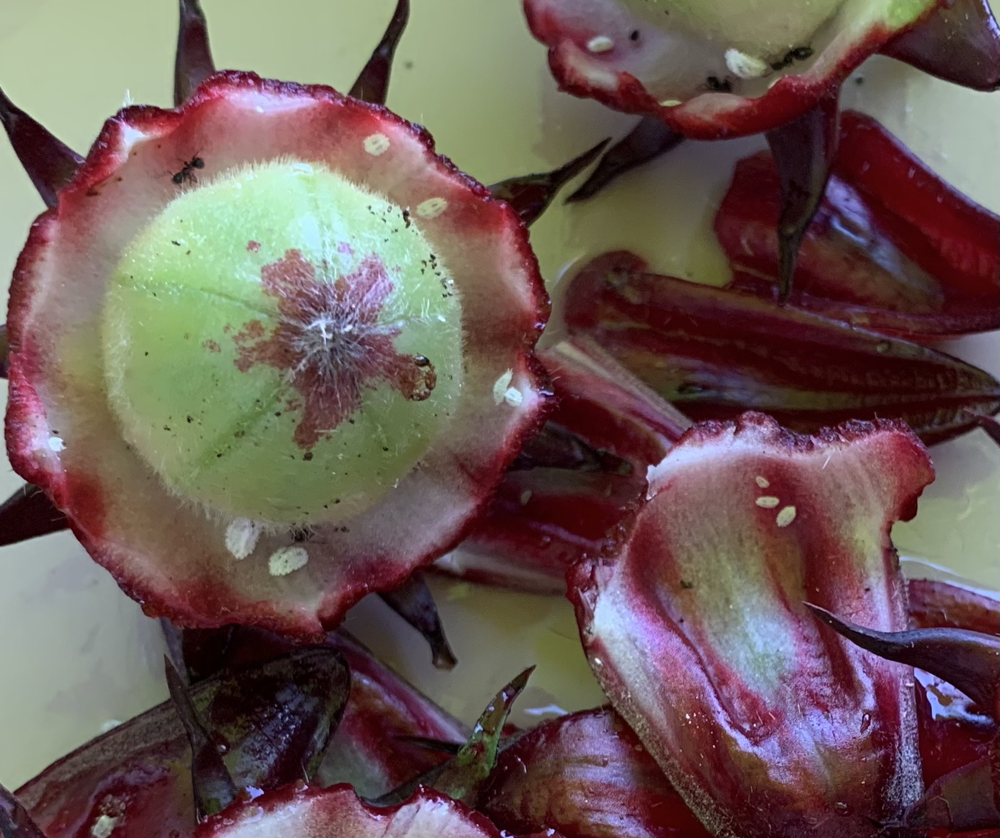
Also, inside each calyx are mealybugs – little white things. It just wasn’t worth the trouble to save these pods.
Covered in antsMealybugs inside
I have rinsed, set outside in the sun, rinsed again. The ants were everywhere. It was so bad, in this last batch of roselle I picked, that I gave up and threw them into the woods. It is possible the mealybugs cause the ants to come. I know ants show up when aphids appear too.
I did get an early set of pods, which had many fewer ants. I managed to clean and freeze those without much problem.
Another thing that is annoying is the flowers that drop become mushy and stick to my shoes. They make a mess. I’m certainly not a neat freak, but it feels like dog poop stuck to my crocs.
If I had lots of land, I would grow Roselle in a big area away from the house. They could expand and do their thing without getting in the way. Dropped flowers would be wiped from my shoes before I got back to the house. But this is not the situation I have.
One Roselle Hibiscus plant is enough for me. I’m going to cut them all down except one. Many broke and fell due to Hurricane Helene, so I’m already in the process of removing them. It is possible they will die over the winter anyway.
Solution
It is possible that my yard is not yet balanced with beneficial bugs to clean up this mess. I rarely see ladybugs. Even though I’ve had aphids on a number of plants, the ladybugs don’t stick around.
I read somewhere that it might take a few years to bring the beneficials to a garden, so I’m hopeful things will improve over time.
Hurricane Helene is bearing down on the west coast of Florida. Although I live on the east coast, we get wind and rain as the hurricane passes through. The storm could also change directions, and not follow the forecasted path. We all have to be ready.
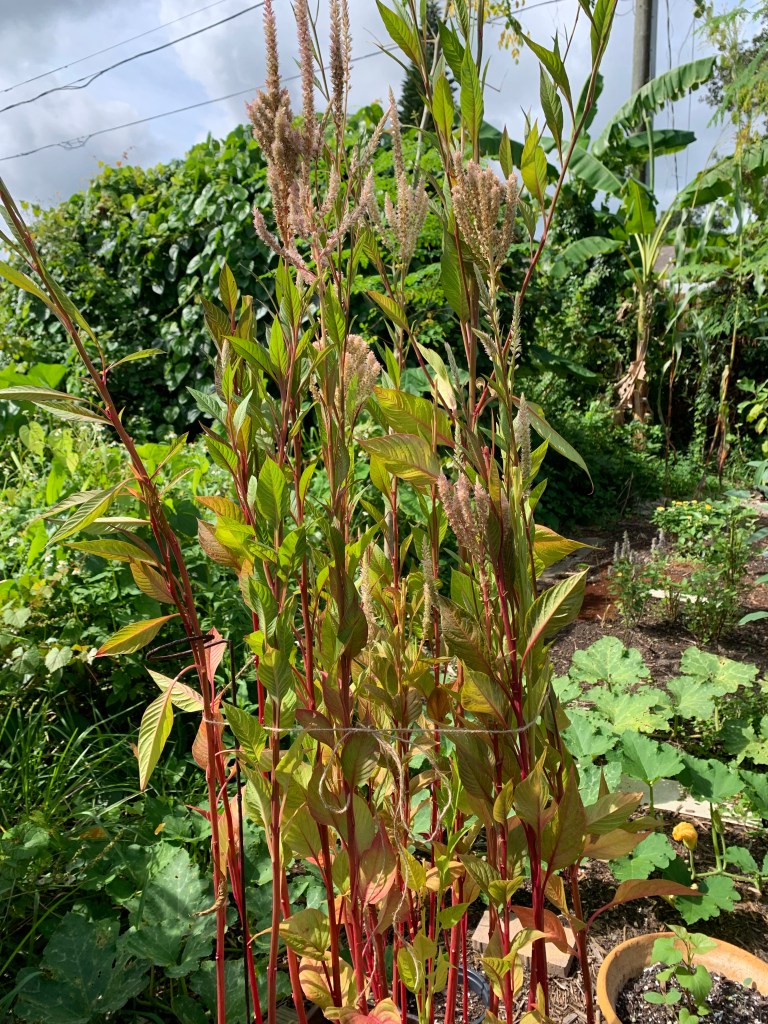
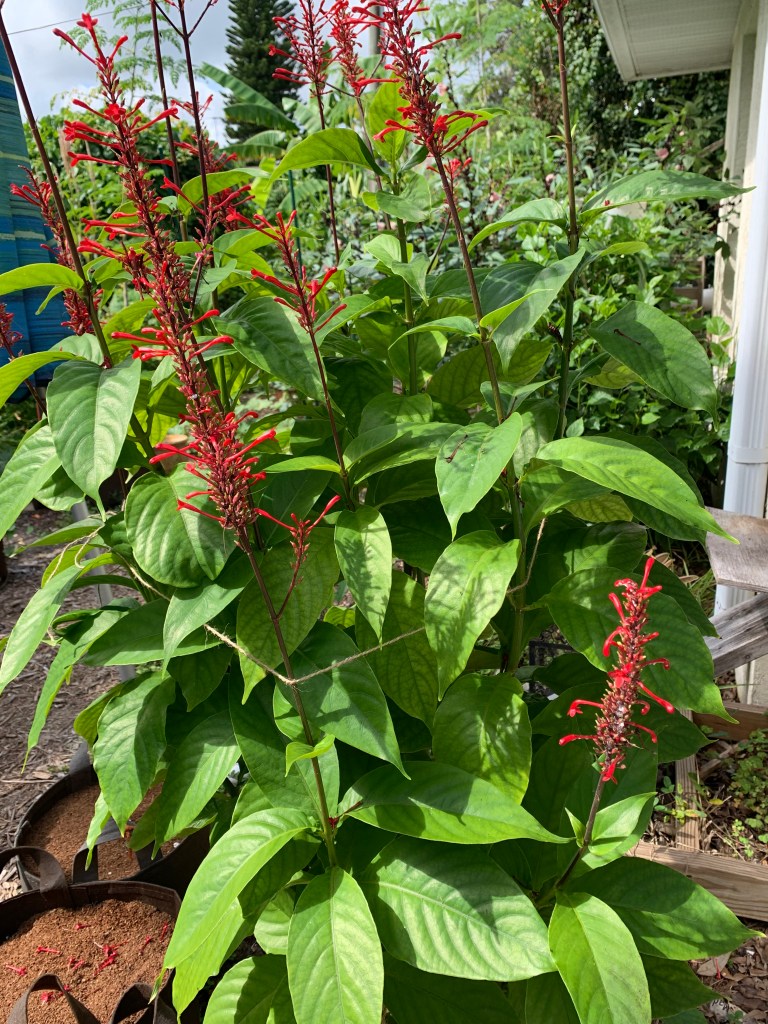
In the garden, all I’ve done is tie up some of the taller plants. This includes the Celosia and Firespike flowering plants. The bell pepper is lanky, so I tied a rope around it as well.
Bell pepper plant
Celosia
I’m not doing much else to prepare for the hurricane. Even when very bad ones are heading our way, they cross over land first (usually) which slows them. Where I live, the biggest problem is possible flooding.
In the garden, I am more worried about the wind. I did some more trimming of the roselle bushes because they are susceptible to damage with branches breaking. I’ve already lost one during a windy storm a few months ago. Since then I have been trimming out the smaller branches.
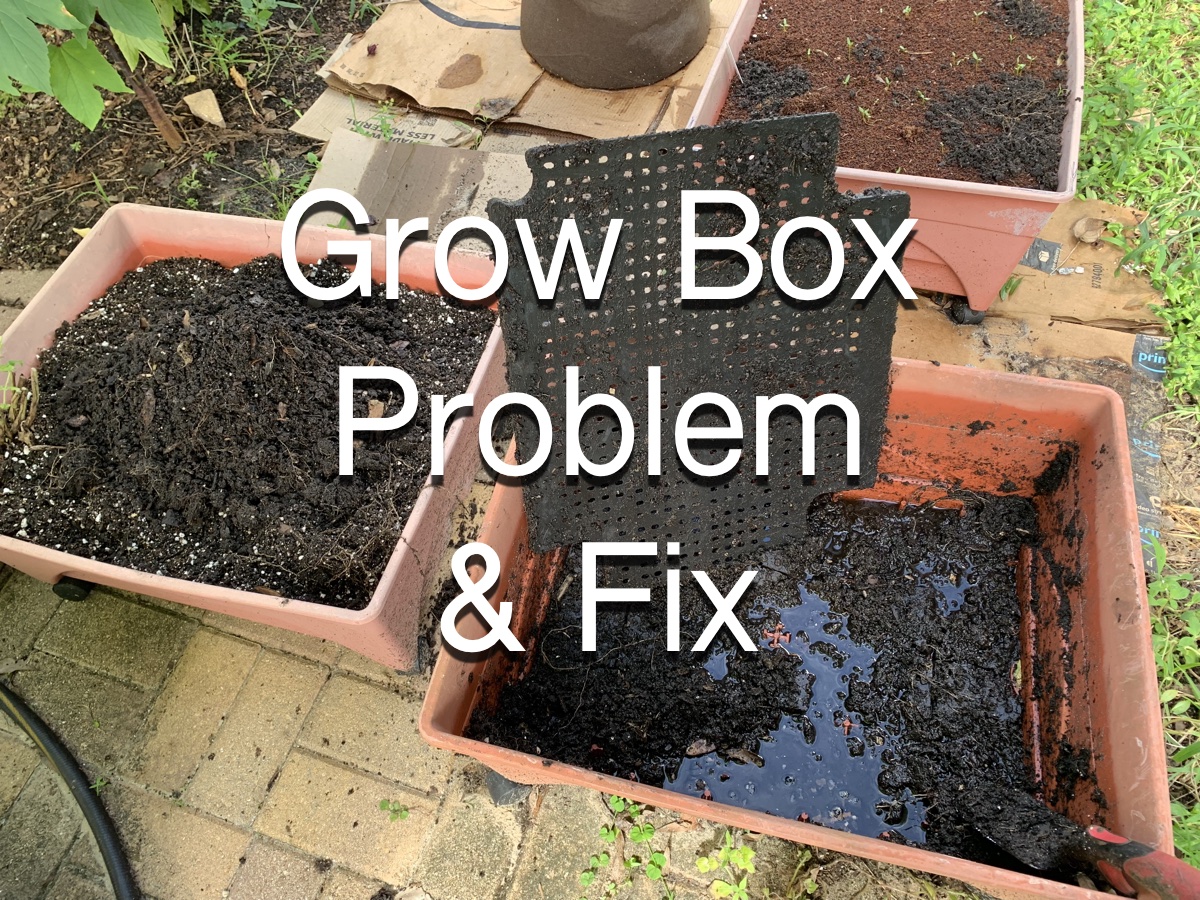
I’ve touched on this topic in my recent posts. My garden grow boxes need re-filling, but first the drainage problem must be solved.
As I tackled the recent box I got some photos to better explain the problem. This is box number four or five in my line up. I have a few boxes left to fix. These are old boxes that I’ve had for a few years. Some are older than others, but they all need drainage issues addressed.
Grow box with watering tube in place
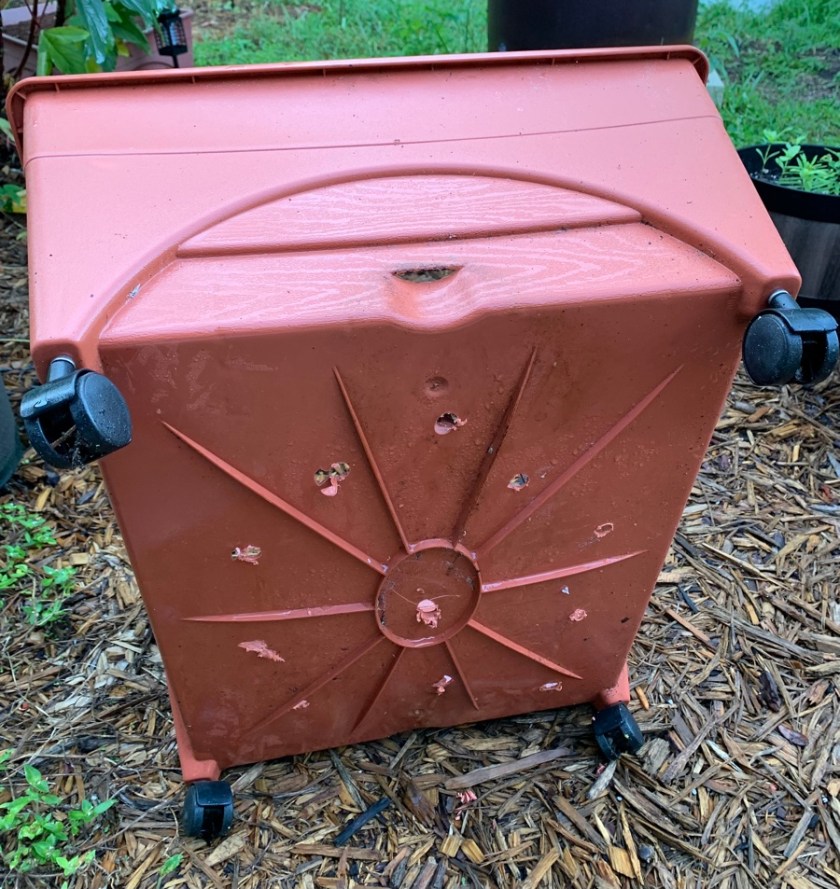
Grow Box System
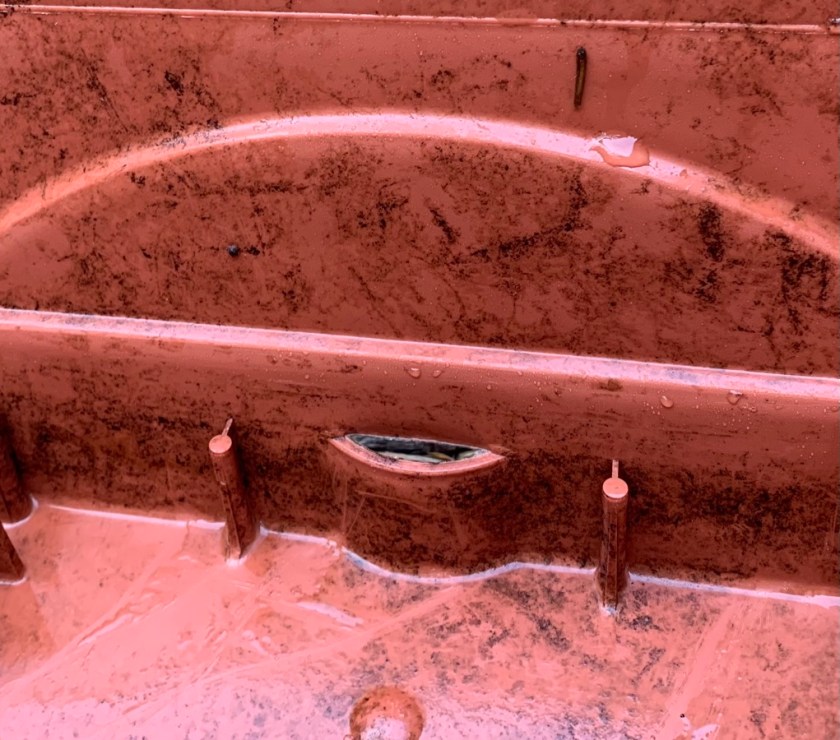
The way this grow box is supposed to work, to my understanding, is that water collects in the bottom, while the dirt stays in the top. A plastic tube sticks up out of the dirt and that is how water is added. The roots of the plants pull water from the bottom, up through the dirt. A wide drain hole is located on each side of the bottom for water overflow. (See the box explanation on Amazon paid link – this is not my box, but very similar.)
This is a self-watering system, where you pour water in through the tube and the plants use it as needed. There will never be too much water because the excess comes out through the side drains. This only works for plants with roots long enough to reach the water reservoir!
Drain hole (one on each side)
This box is a nice idea for gardeners who buy potted plants and add them to the box. Seeds and small plants will need to be watered from the top, which is how I have used these boxes. I grow most everything from seed.
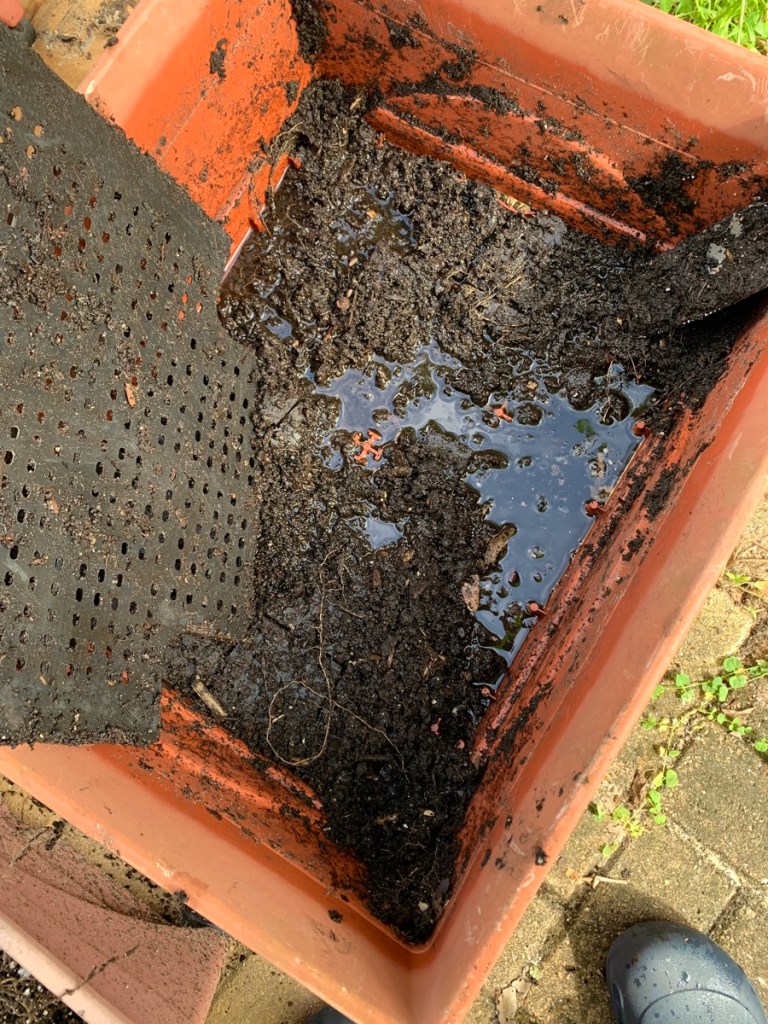
Dirt tends to sift down through the holes over time. Once enough dirt has clogged the water basin, there is no drainage. The plant’s roots are sitting in mud and that means plant death.
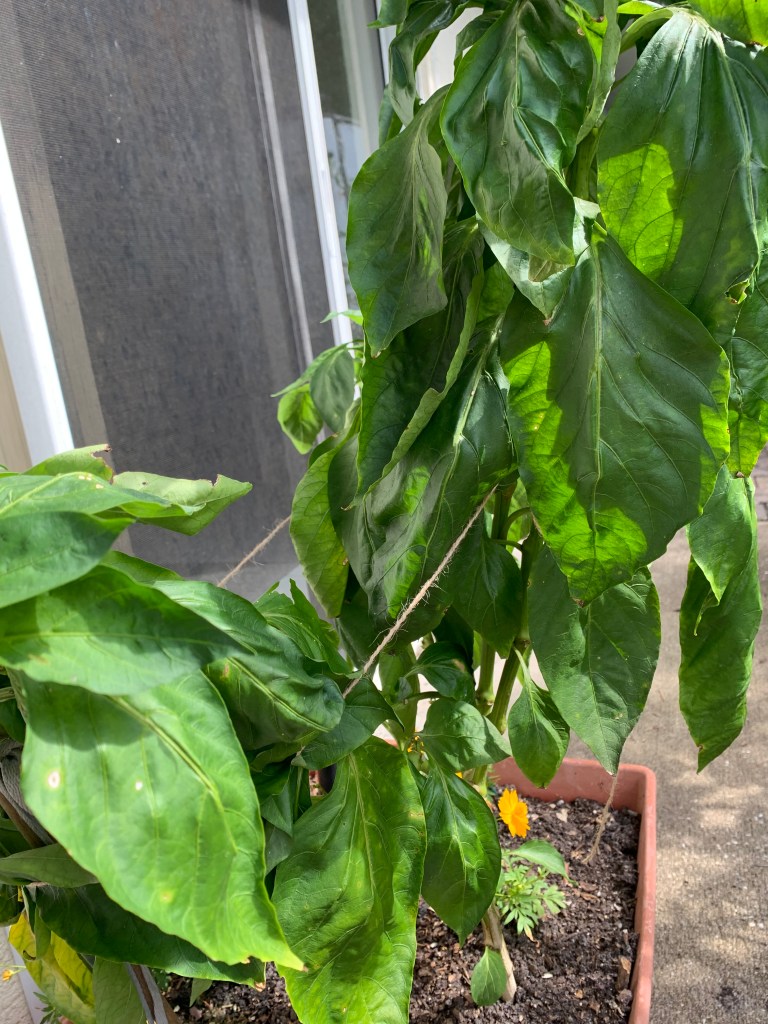
Plant Death
The sudden decline and death of a seemingly healthy plant brought this problem to my attention.
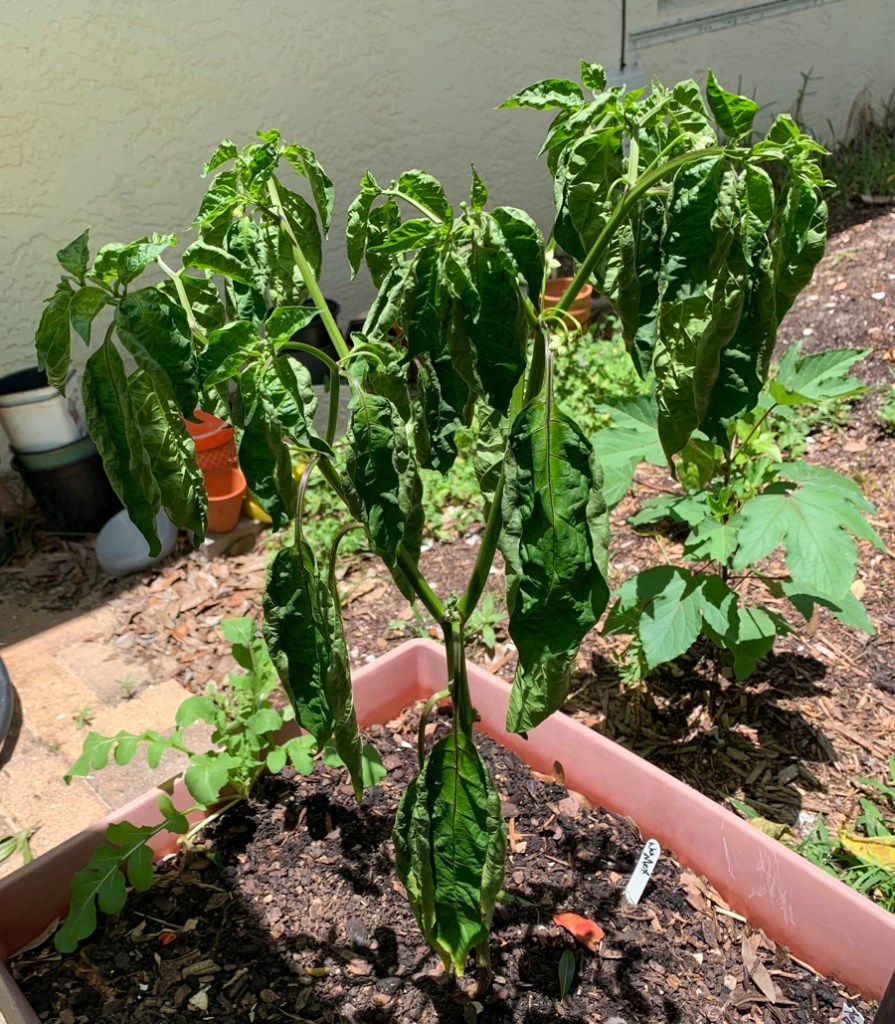
A gorgeous, Nu Mex pepper plant was growing in one of my boxes and it looked great. Suddenly, it began to wilt and ended up dying. As I pulled it out, I realized the dirt was soggy! The water had not been draining. It was the beginning of my grow box overhaul undertaking.
Nu Mex pepper plant in a grow box with bad drainage. It didn’t make it. Very sad.
I’ve been waiting for the plants in these boxes to either die off, or look bad enough to remove. Then, I dig out the old dirt and fix the box problem.
The Fix
Unless I take the time to remove all the dirt each growing season to check for this problem, the set up itself needs to be changed. Only time will tell if my “fix” is working.
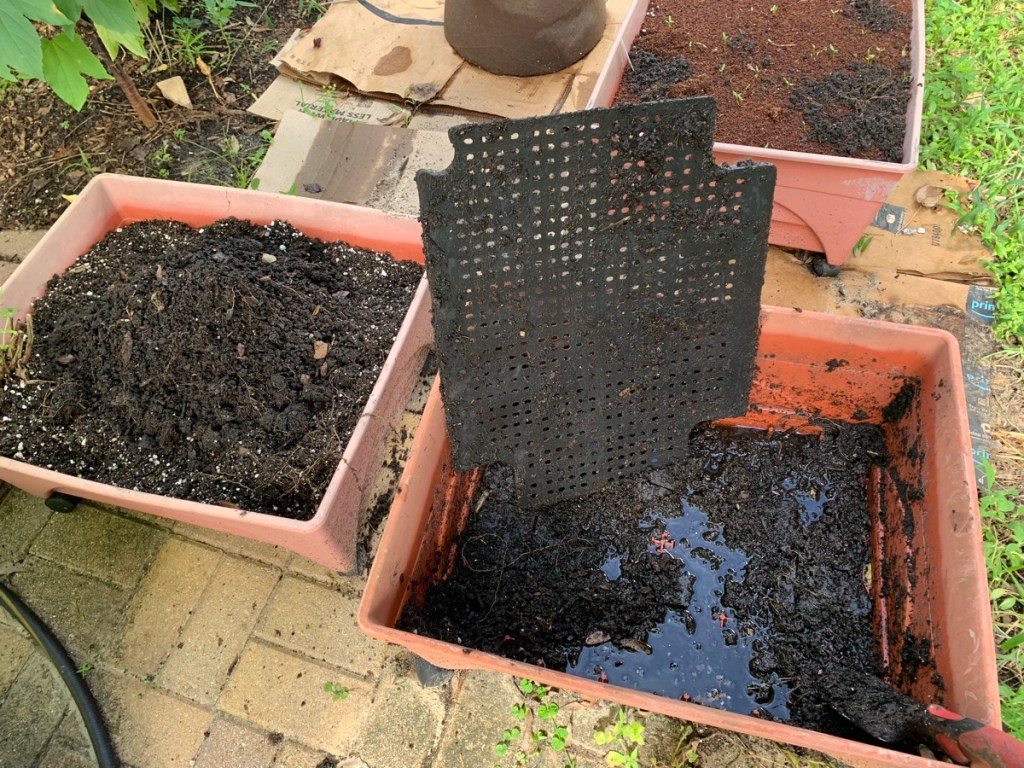
Using a trowel I dig out the dirt from the problem box and add it to a pail or fabric bag. I’ll re-use the dirt, with some amendments added.
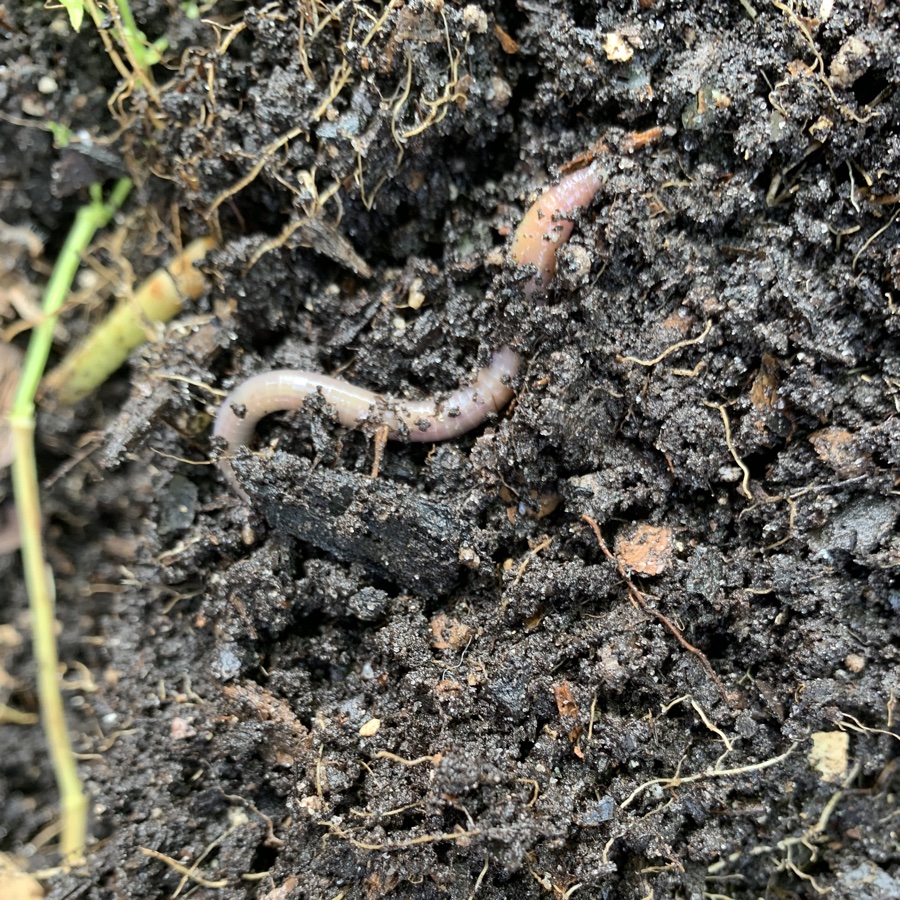
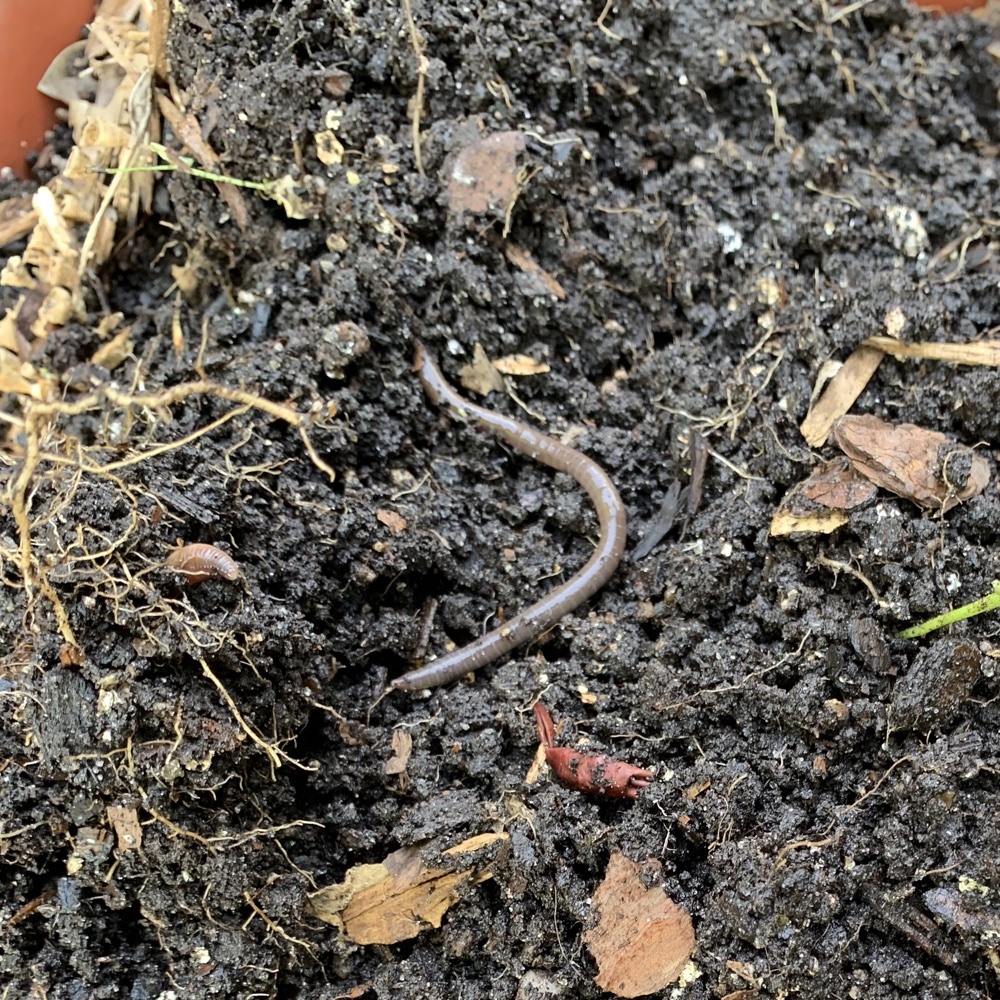
I found some lovely earthworms in this one. The dirt itself was crumbly and nice – thanks to the worm colony. Once I dug down to the panel with the holes, everything beneath it was mud. This was smelly, gross muck. As I dug through it carefully, I pulled out more worms. The worms were saved, and there were so many of them I added some to other pots and compost areas.
Grow box re-doWorm love
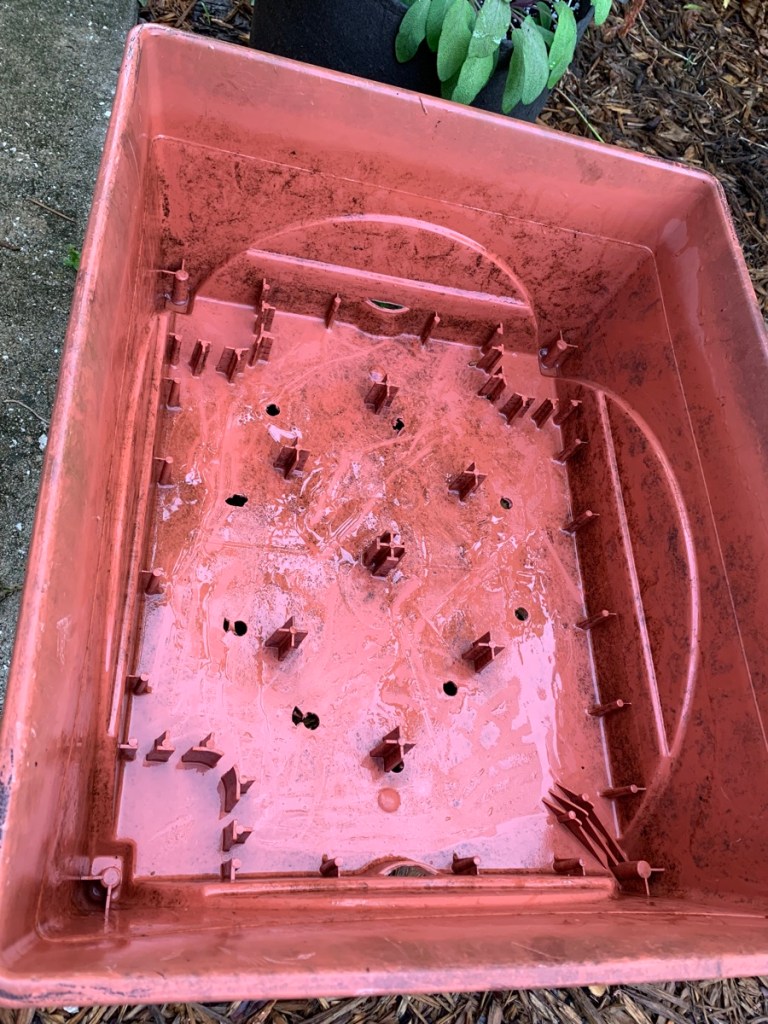
After the digging, the mud gets rinsed out. My son drills holes in the bottom of the box and it’s ready to re-fill.
Drilled holes added to the bottom of the box. This box is old and becoming brittle so we didn’t drill quite so many holes.
Box emptied and rinsed
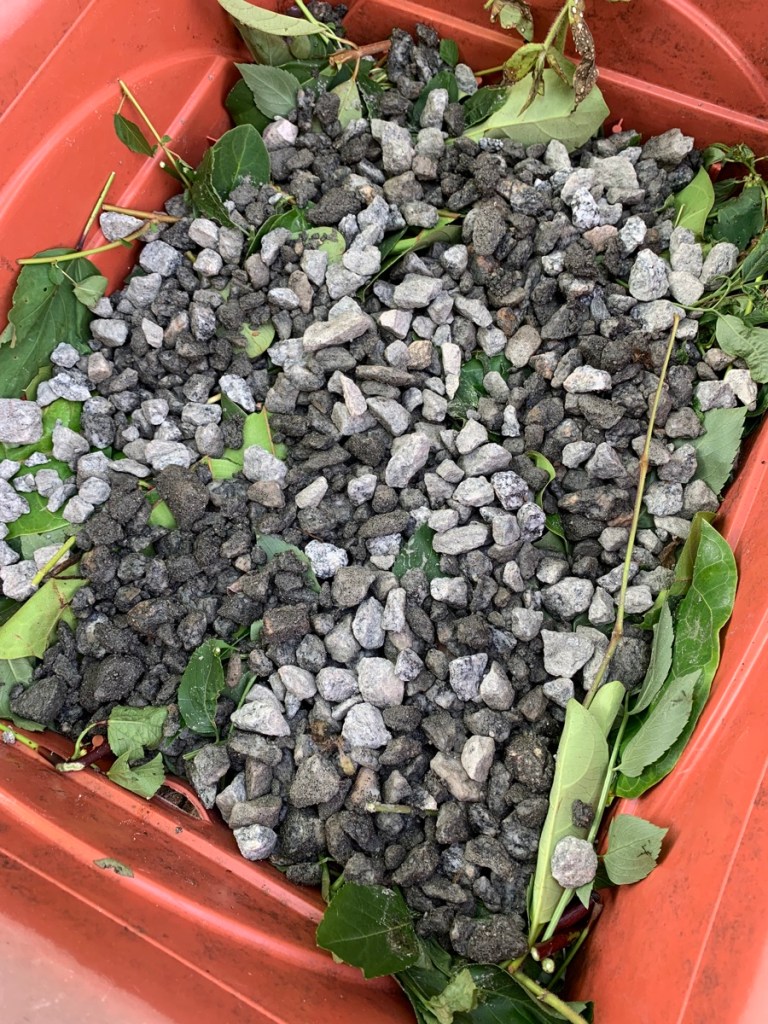
Before I can re-fill this box, I need to add something to the bottom for drainage. Dirt alone will end up clogging the holes. I don’t want another drainage problem!
Drainage cuttings and stones
Ideally, I would have mulch for the bottom. I don’t have any, so I used cuttings from some of my garden plants. The granite stones were purchased a while ago from the local yard shop.
It’s good to keep stones of some kind around because they make good bottom-of-pot drainage in any situation. Because there are no rocks or stones to dig up here in Florida, I have to buy them.
The original dirt from the box (except for the mud) gets added back in. Perlite (paid link) is added to keep the dirt crumbly and draining well. I like to add Bone Meal (Amazon paid link) too for future root development. Eventually the cuttings in the bottom will decompose.
Coco coir is something I use to spread over the top of the planting space for seed development. This is a new experiment of mine. I’m thinking the looseness of the coir will be better seed starting.
Coco coir layer over dirt for seed starting
I have planted beet seeds in this box. It might be too early for them (too hot) but the box is ready for growing anything with a shallow root system.
After my first year of growing Roselle hibiscus, I have learned a lot. The shrubs have grown fast and become too large for my small yard.
The Roselle hibiscus plant gives us the calyces that make beautiful, red colored tea. I’ve been drinking hibiscus tea for a while now, but never knew exactly what it was made from. Now, I am growing the plant that makes this tea!
Tea is made from the Roselle hibiscus which is NOT the same as the decorative, flowering hibiscus plant.
Over the winter months of 2023, I planted Roselle seeds in small pots and kept them indoors. The plants sprouted and some of them grew, but none of them thrived. As soon as the chance of frost overnight was gone, I transplanted the seedlings into the ground.
Now, it is summer of 2024, and I have big, bushy Hibiscus plants everywhere! Honestly, I have 9 plants, but the yard is small, and they are taking over.
Bushy roselle hibiscus – lost it to the wind in a storm
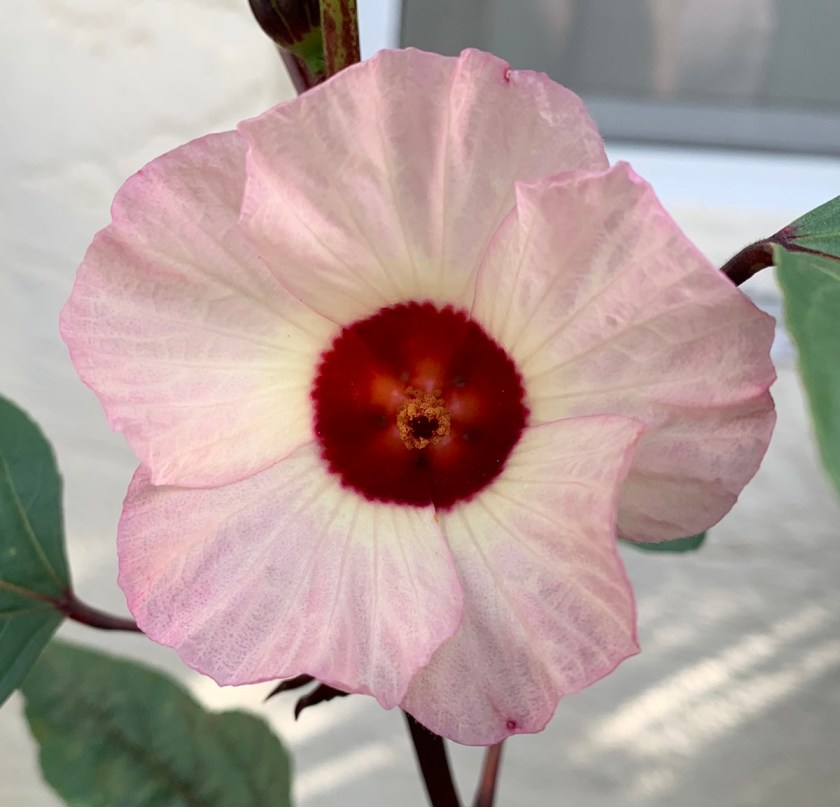
This type of hibiscus has open flowers (see below) that leave behind seed pods wrapped in red leaves, called calyces. The red leaves, when peeled off, can be boiled in water to make tea.
Roselle calycesRoselle hibiscus flower
When my Roselle began to grow, they gave me a few pods. After that, I had to wait until Fall to get more.
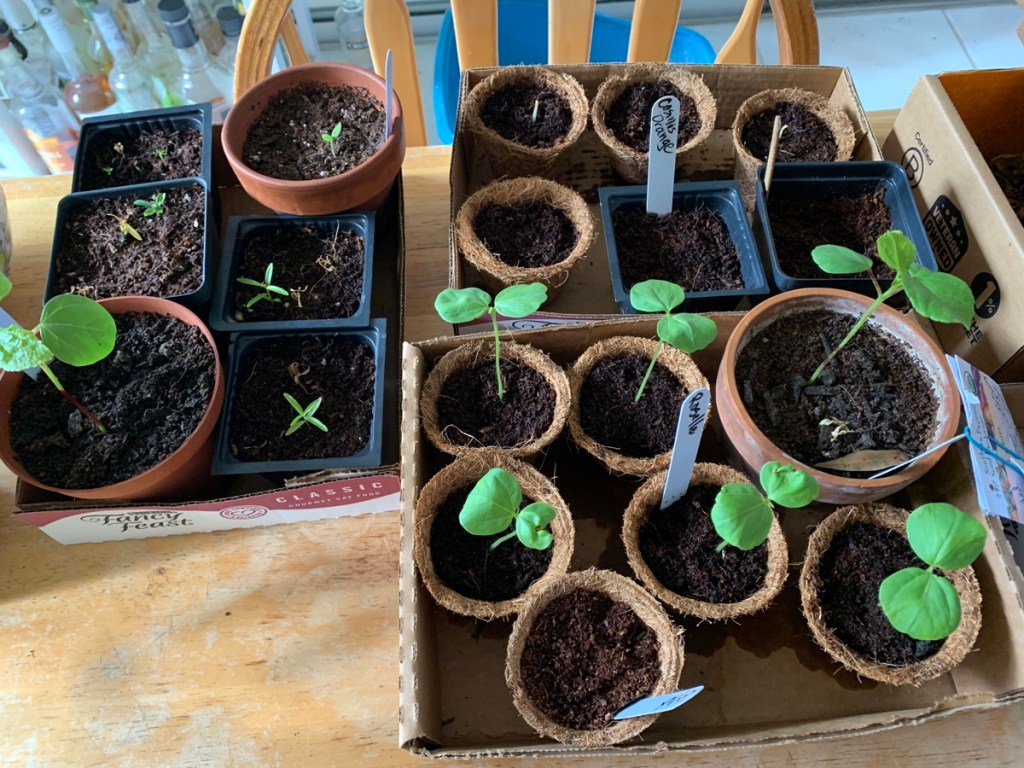
Starting Roselle From Seeds
These Roselles began in pots, grown from seeds I bought at SESE (Southern Exposure Seed Exchange). The plants are about nine months old now and they al look very nice. Some are smaller than others but the one that is in the walkway is just beautiful! (That is the one that died from the storm.)
Roselle seedlingsRoselleRoselle growing
Growing Roselle is Easy
The plants will get large, both tall and wide. (I’m in Zone 9B) They are growing with and without lots of sun. The plants in the sun are bushier. They survive drought, are not bothered by the heat, and have no bug problems. After they bloom (September for me), collect the seed pods to make tea, or other things.
A warning: We had a windy storm during the summer and this (my bushiest) Roselle plant split right down to the ground. The tree died. I went ahead and trimmed all the remaining hibiscus to be sure wind could easily get through the stems.
Heading Into Fall
If you are looking for a little shrub that is easy to grow, and grows FAST, get yourself some Roselle seeds.
These shrubs have taken over my yard. I had NO idea what they would do when I planted them back in Spring. Now, many of the plants are taller than me – guessing 7 feet or so in height. It has been about 11 months since I began them from seeds indoors.By the way, don’t bother with that. Put the seeds in the ground. It was tough dealing with them in small pots.
The Roselle have become too large for my small backyard garden.
It is September and the Roselle’s are now blooming. I’ve gone through and trimmed out some of the smaller branches because they are blocking the sun from other plants. Once the flowers stop, and I collect the calyces, I will be cutting some of these plants down. I have a feeling they won’t do well through the winter anyway. I hate to cut down a good plant, but they are seriously in the way.
My yard is too small for these plants. Now, I know how easy it is to grow Roselle, and how big they become. I’ll be smarter about choosing the right spaces for them to grow.
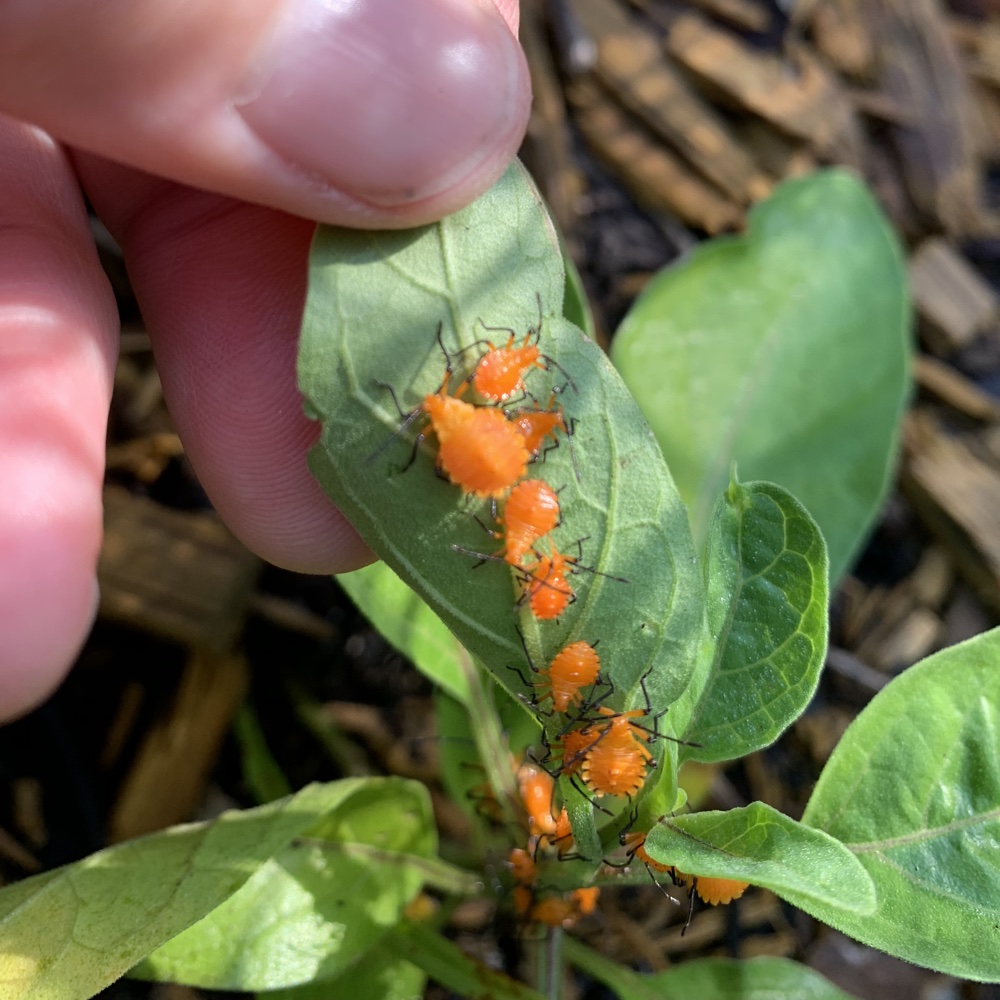
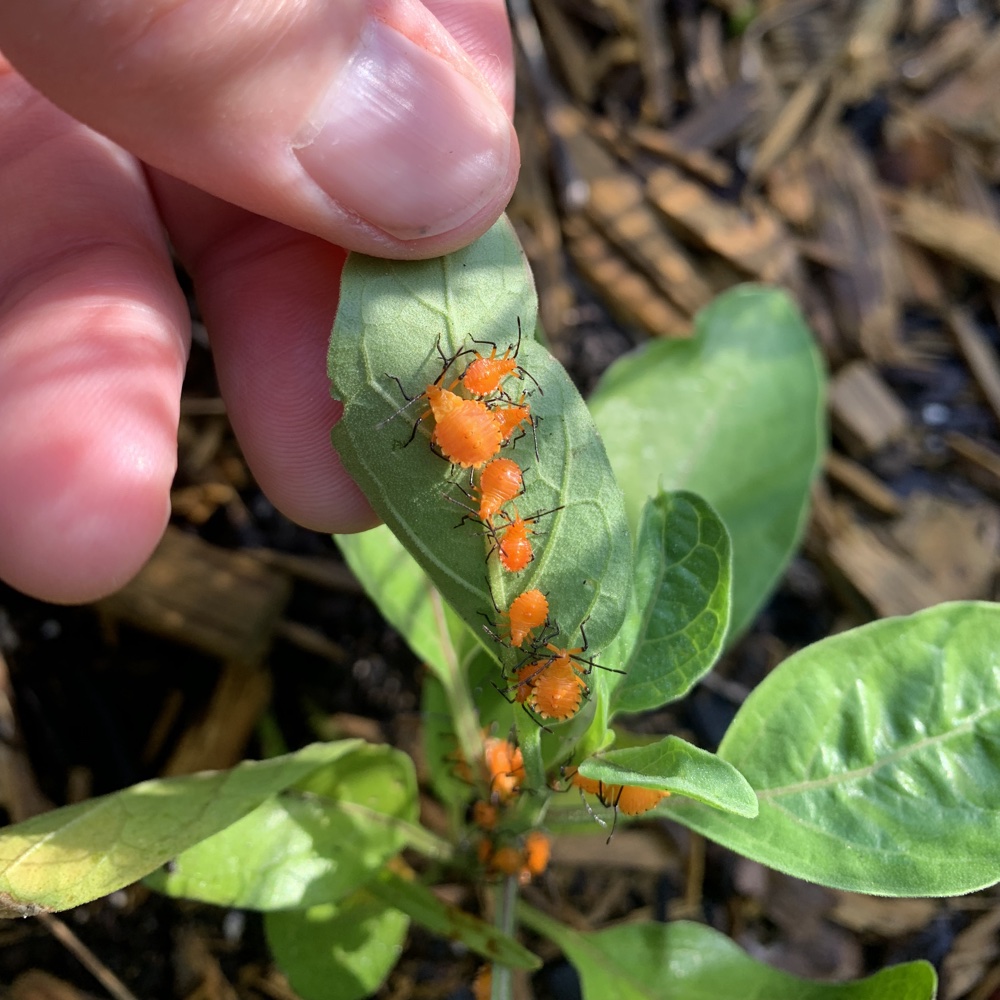
After beginning this post, I realized I was wrong about being able to identify this bug. It is not the leaf-footed bug, but I’m not sure what it is. The nymphs are bright orange and my best guess it is some type of stink bug.
Well, I thought I had identified this bug at last. Now, I don’t think so. I’ve found them occasionally on the ground near Walter’s ground cherry plants. At the time, the ground cherry was covered in tiny, bright orange nymphs.
The nymphs don’t seem to eat the ground cherry, but just gather all over it.
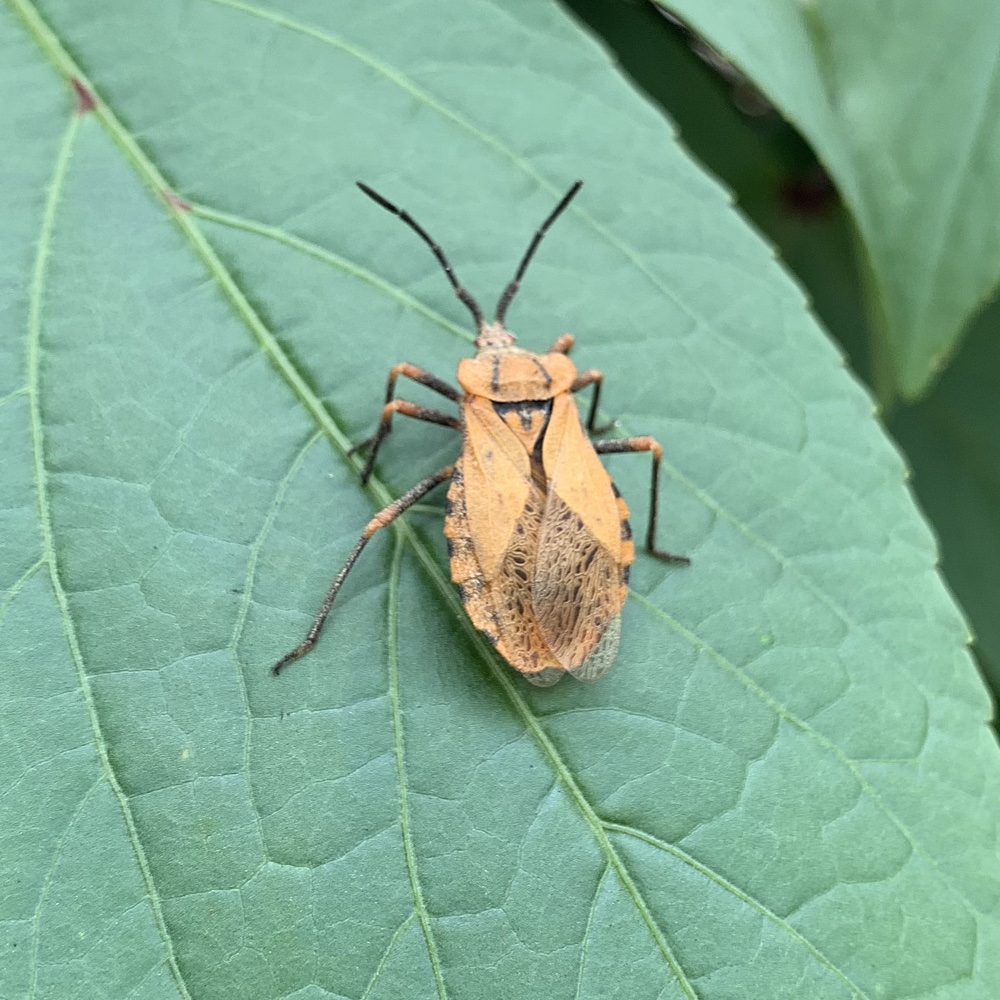
Leaf-footed plant bugOn the Roselle hibisus
Here is an image of the Leaf-footed bug, which I thought it was at first. But the leaf-footed bug has wide “leaves” on its hind legs. The bug in my photos does not.
Is it some kind of stink bug? I’m still baffled. Other than seeing all those orange babies, I really never see this type of bug in the garden. The nymphs of the assassin bug are also orange, but have long legs. So, is this another type of assassin bug?
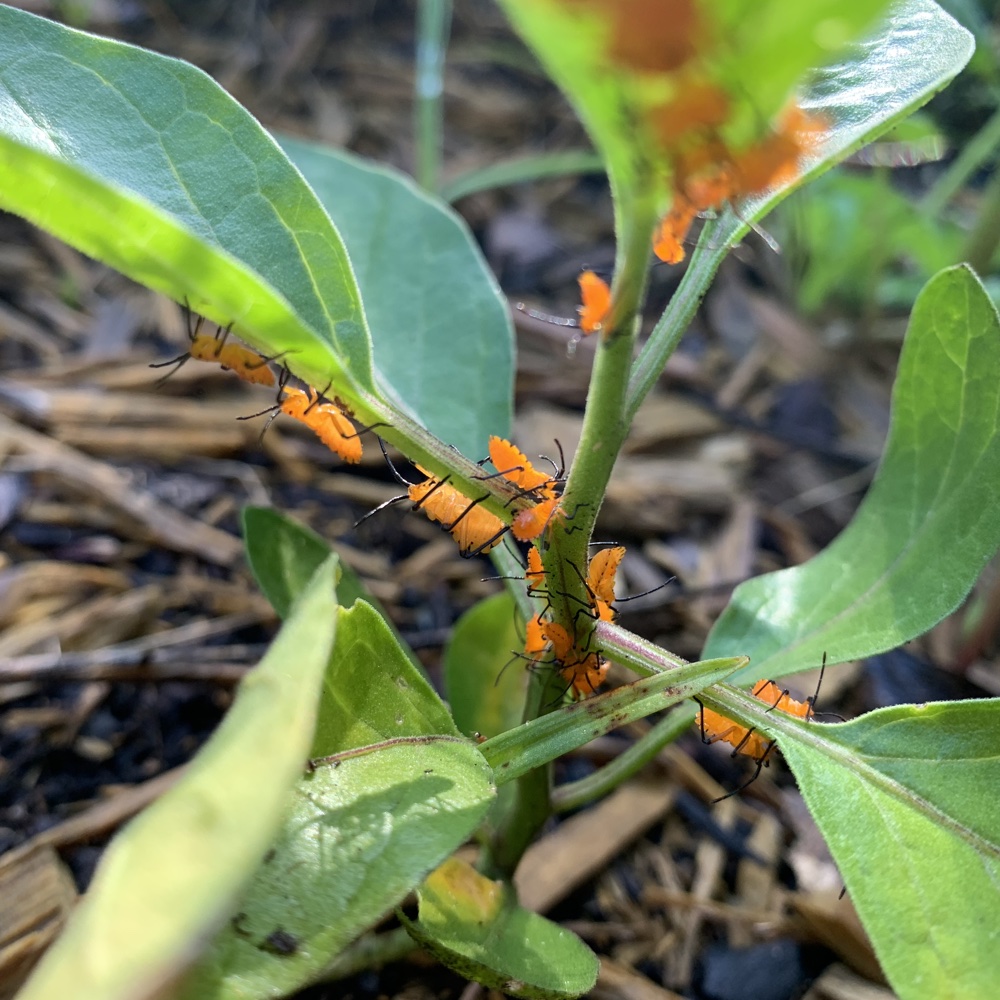
I’m quite sure the above photo is an adult and the bottom (nymphs) is the same bug. As you can see the little ones are very bright orange. The legs are orange at the top, and black the rest of the way. The back end is rounded and has tiny lines around the edge. This matches the lines seen around the body of the adult. It resembles the stink bug.
Nymphs on Walter’s ground cherry plant.August photo, 2023
I’m still unable to find any photos online that look like these orange bugs. I’m tired of looking. Hopefully one of my readers will know and be kind enough to leave a comment. I’d love to know if it is a beneficial.