Planting Potatoes in a Container Garden

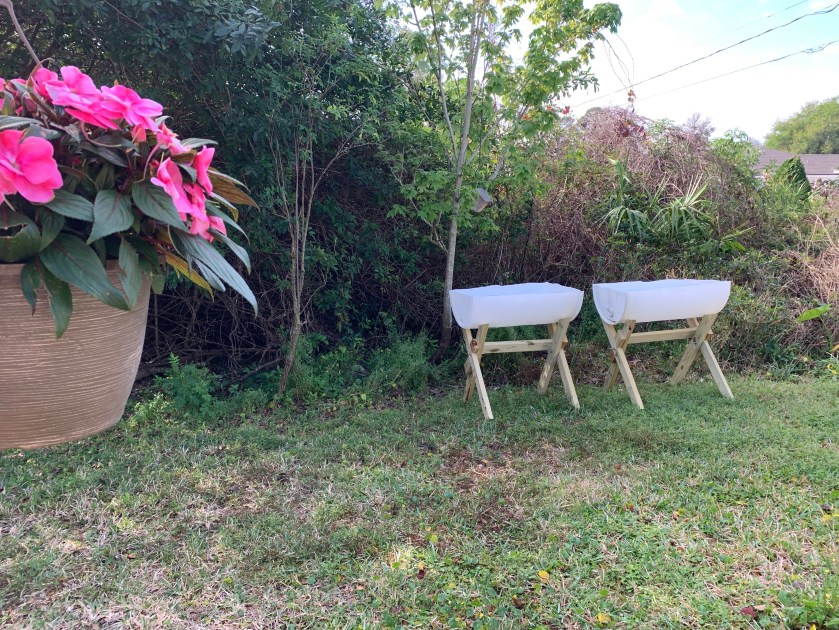
My son had collected a couple of big white barrels to use for rainwater catching from the roof. He cut one in half crosswise and built stands for both halves to create raised garden beds for growing potatoes.

I’ve grown potatoes a few times, and fresh dug potatoes are delicious. Now, I have no yard space to grow them, so they will go into the containers.

homemade DIY barrel raised garden beds

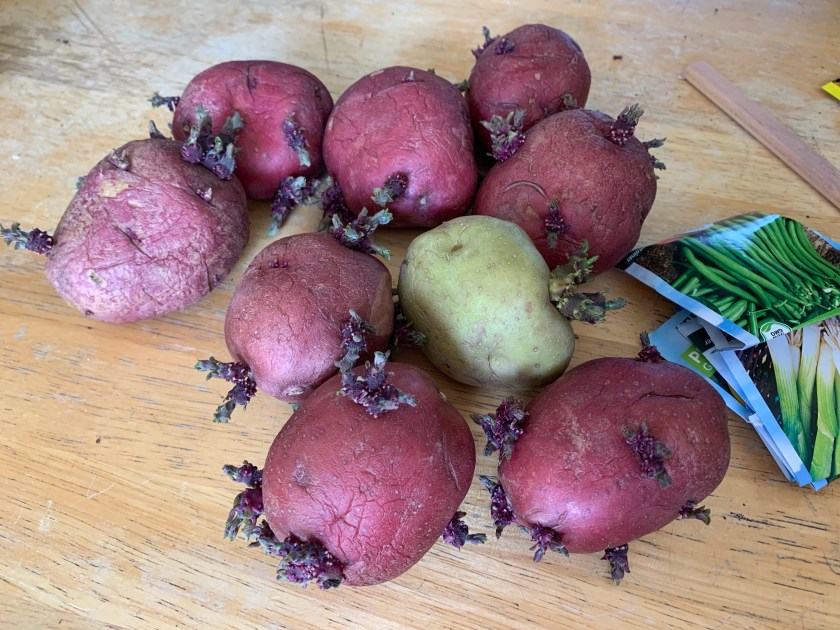
The potatoes I used were simply old red (and one white) potatoes from the kitchen that had developed growth from their eyes.

I know that most information about planting potatoes says to buy special seed potatoes, but I never have. The reason for buying seed potatoes is to prevent disease, which is a good reason. I already had the sprouted potatoes so I used them. Also, orders are for pounds of potatoes – which I don’t have room for.

Read this page at Microveggie for ideas on where to buy seed potatoes.

The potatoes from the grocery store usually sprout on their own if left long enough, but I’d love to begin with the good, disease free ones, and keep planting from there. Don’t ever use the green parts of potatoes for anything – planting or eating!

March Potato Planting

I’m in Florida, and March is the time to get serious about planting a garden. This year I grew seeds in eggshells and purchased new grow boxes for the vegetables.

red and white potatoes with eyes

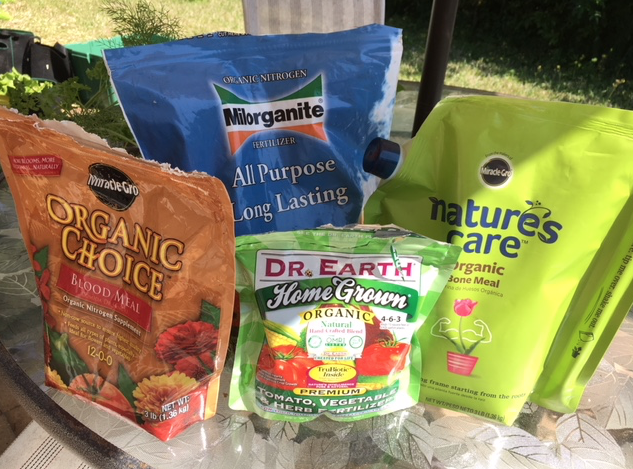
Beginning of March: After adding bags of organic garden dirt to the barrel beds, I mixed in some leaves to loosen the soil, bone meal (good for developing good roots) and blood meal. I add the “meals” this because I use these amendments in all my gardens each spring. Otherwise, no fertilizer needs to be added to potatoes while they are growing.

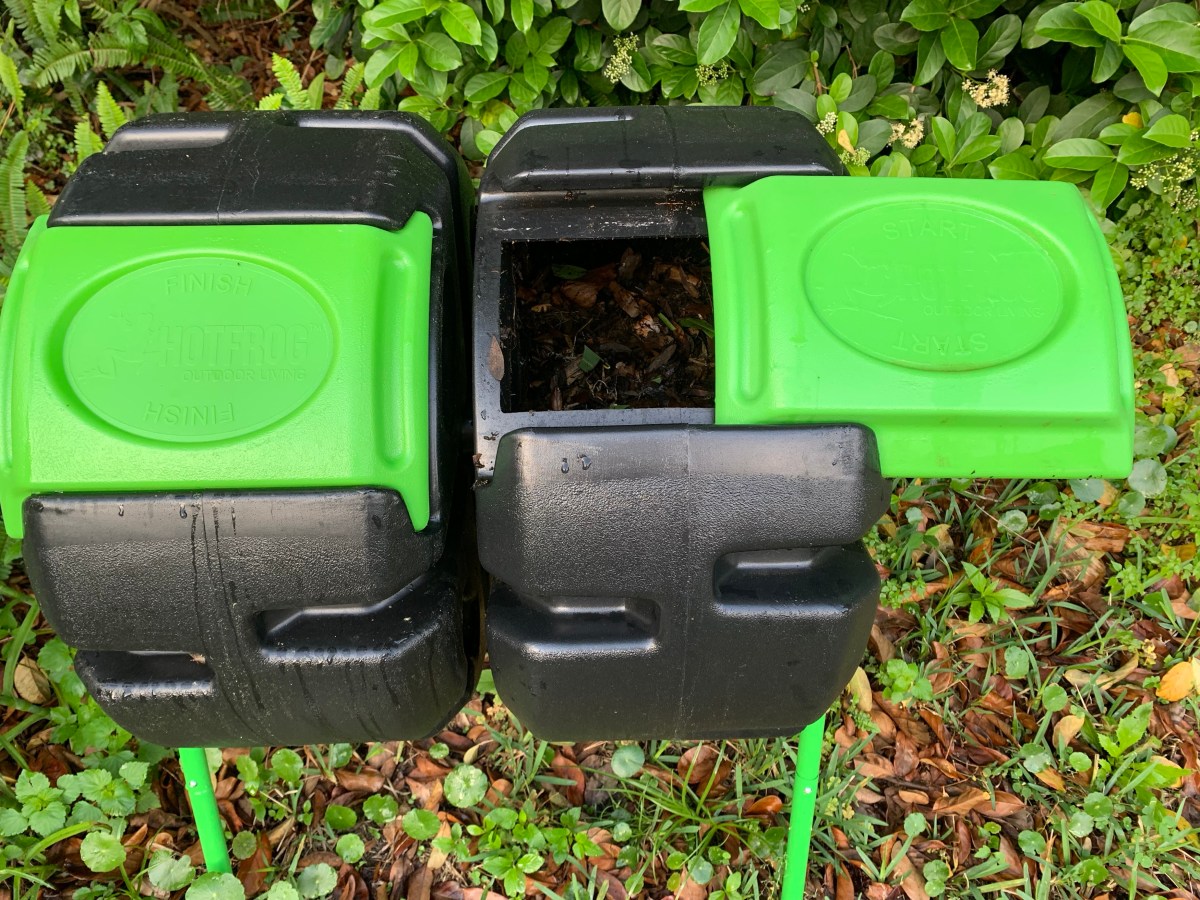
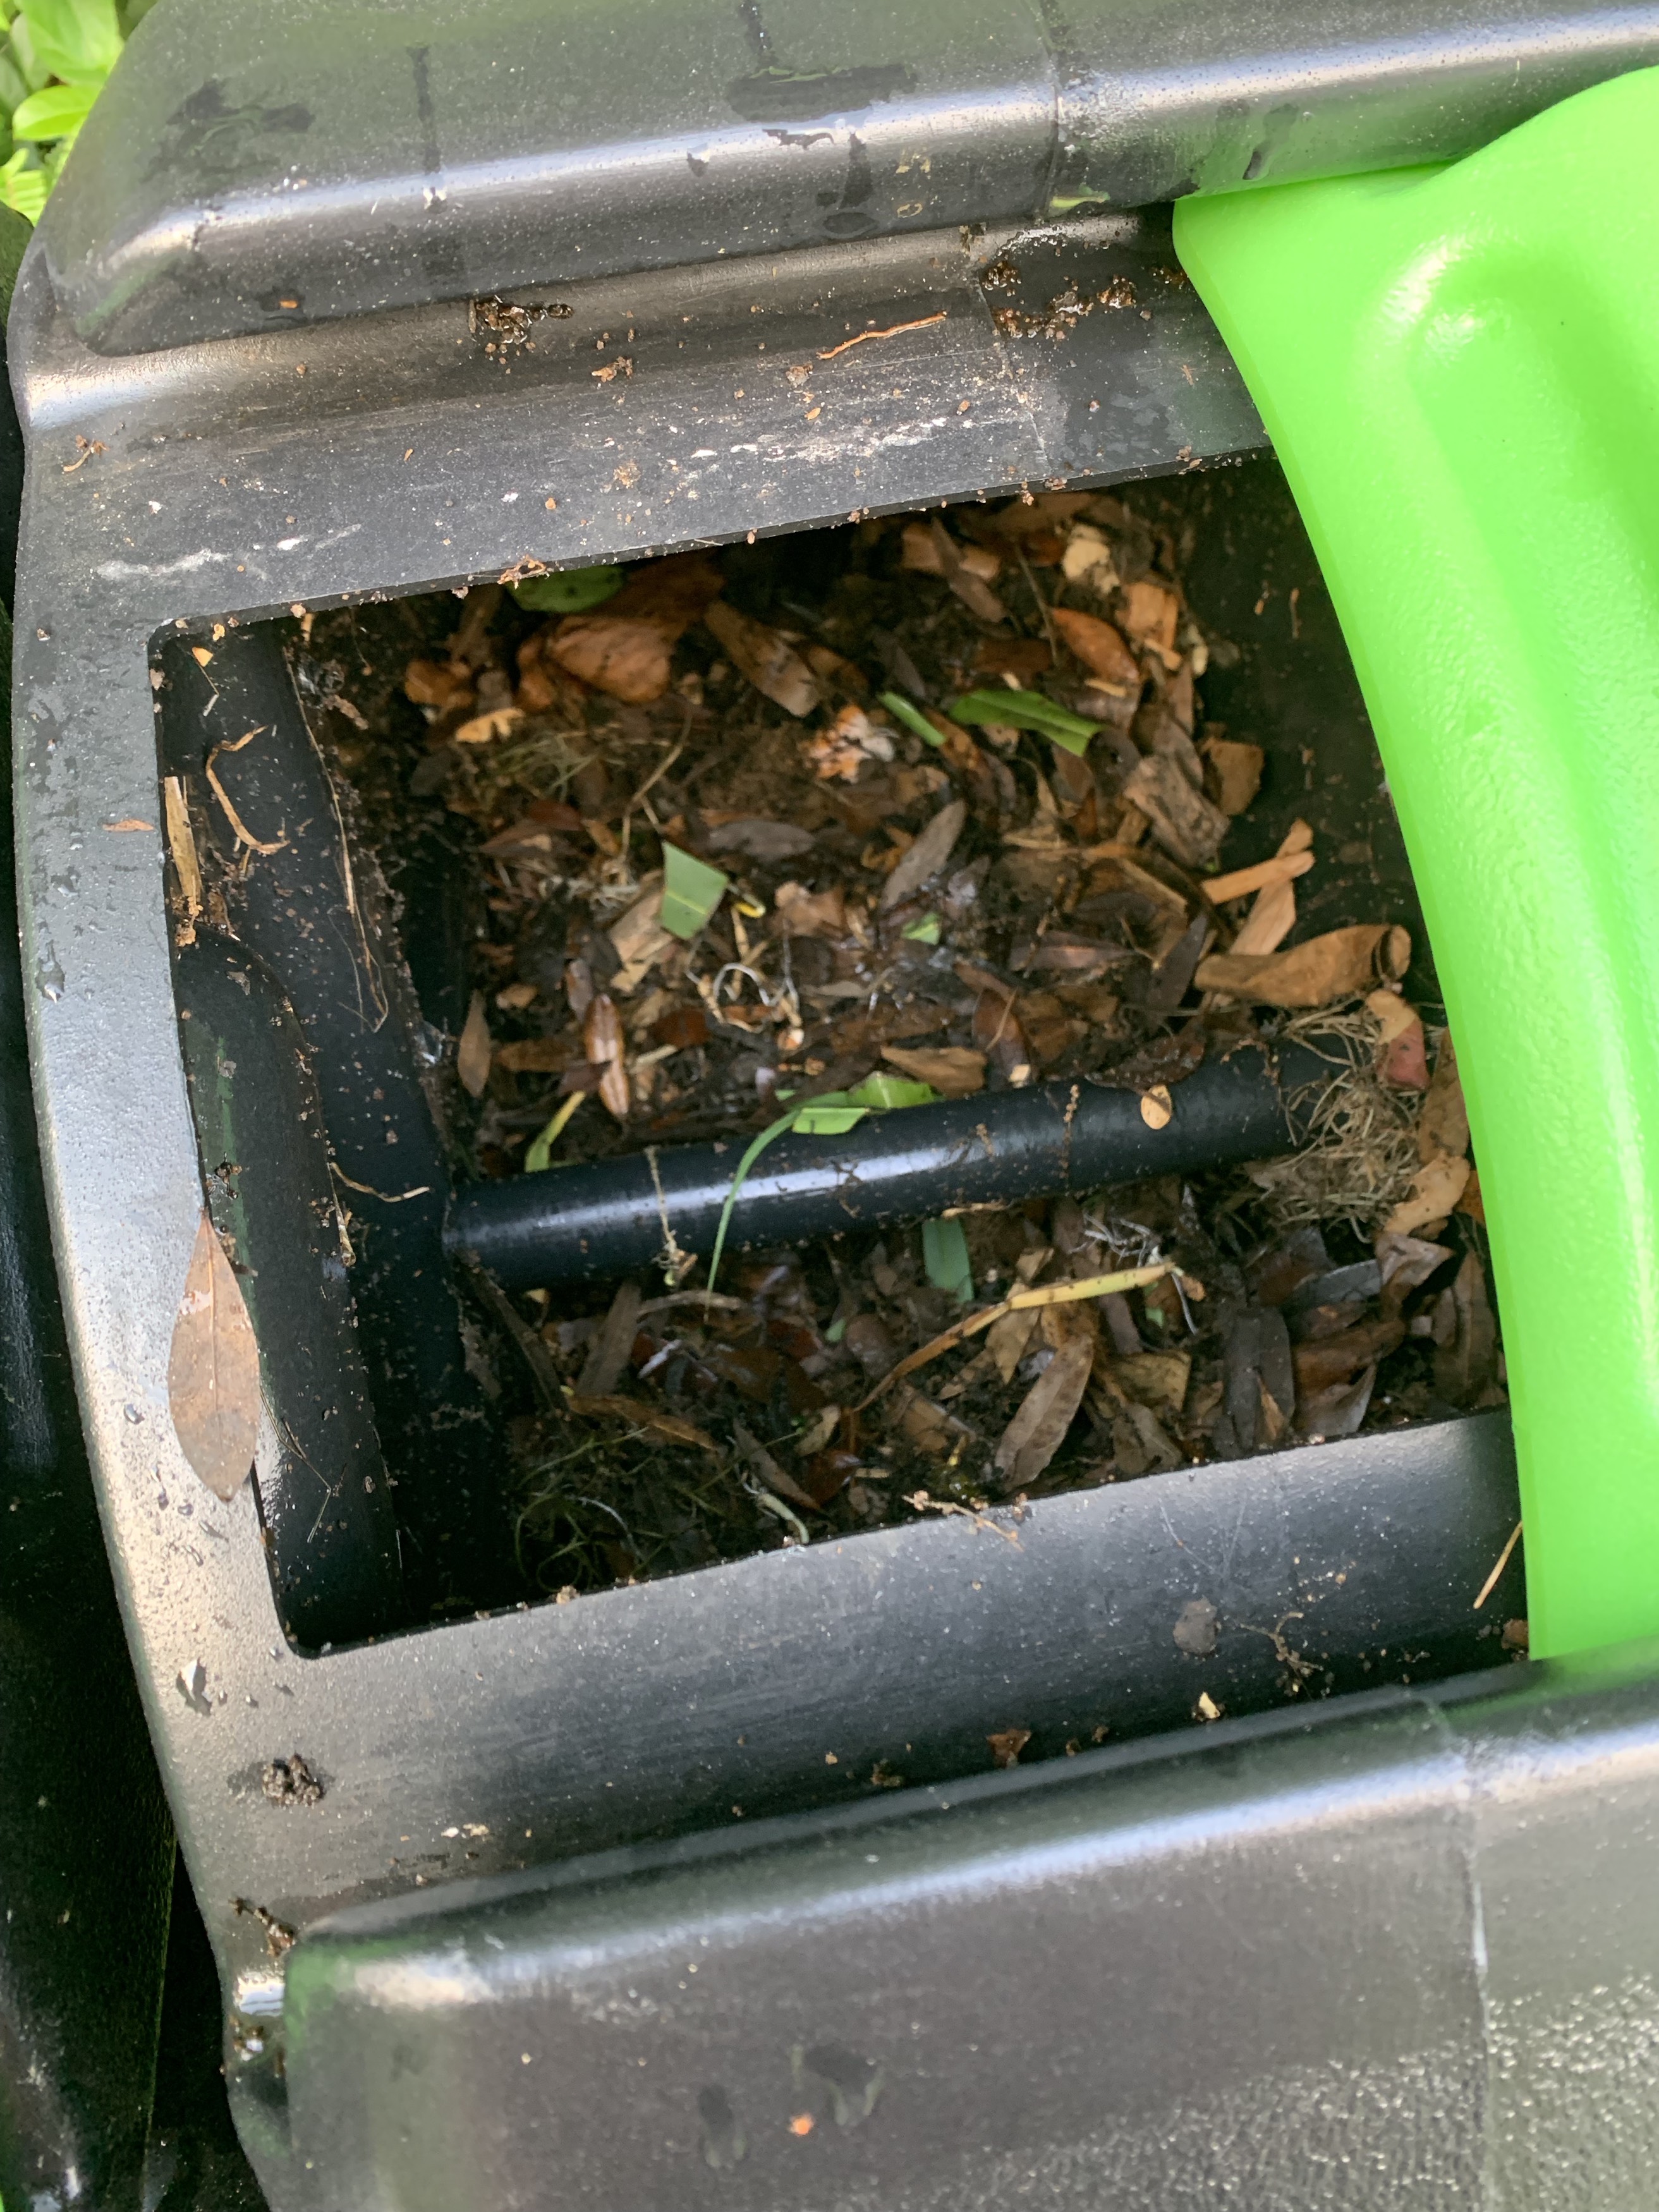
Compost would be nice to add, but presently I am in the middle of making my own compost using the Hot Frog Composter. It might be ready for Fall planting.

planting potatoes in raised container beds

Potatoes should be cut with only a couple of eyes in each piece. Plant each cut piece with eyes facing upward and cover with a couple of inches of dirt.

I put five cut pieces into each bed. This is probably too many. Also, the barrel beds are really too shallow, but I have no other place to grow potatoes. I will see what happens.

Potatoes in soil

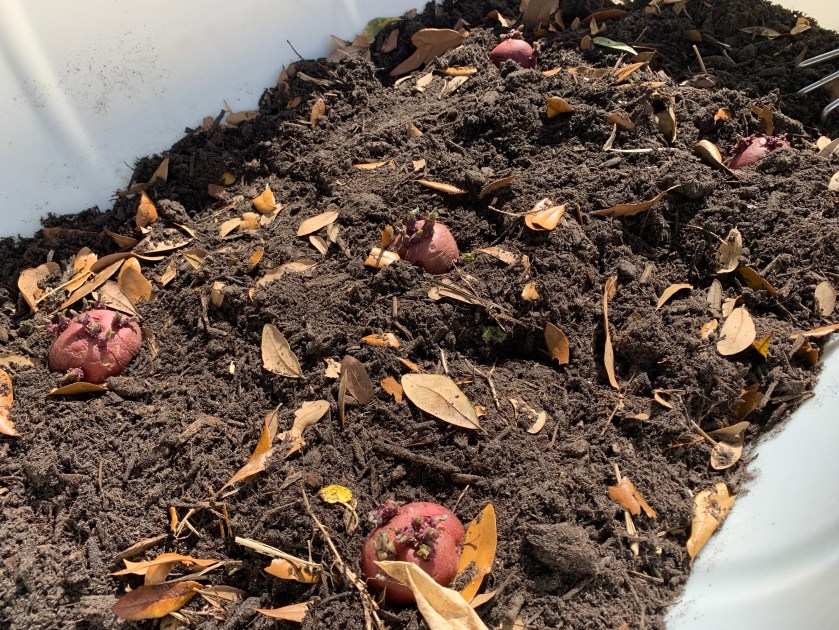
We had a lot of rain for a few days after they were planted. My son had drilled holes in the bottom of the barrels for drainage. After a week or so the green leaves began to show. (Leaves are poisonous, so keep pets and kids away.)

potato plant
Potato plant
potato plants in grow box
Potatoes

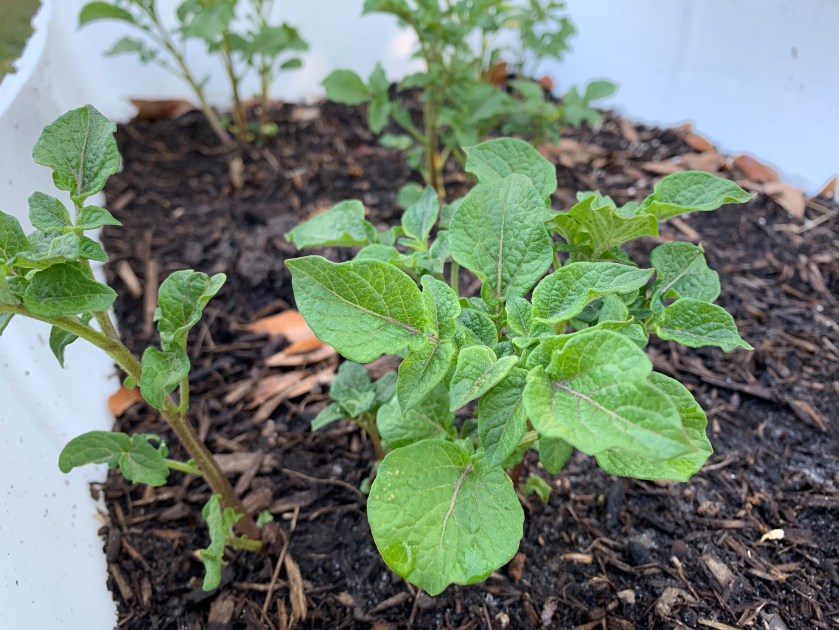
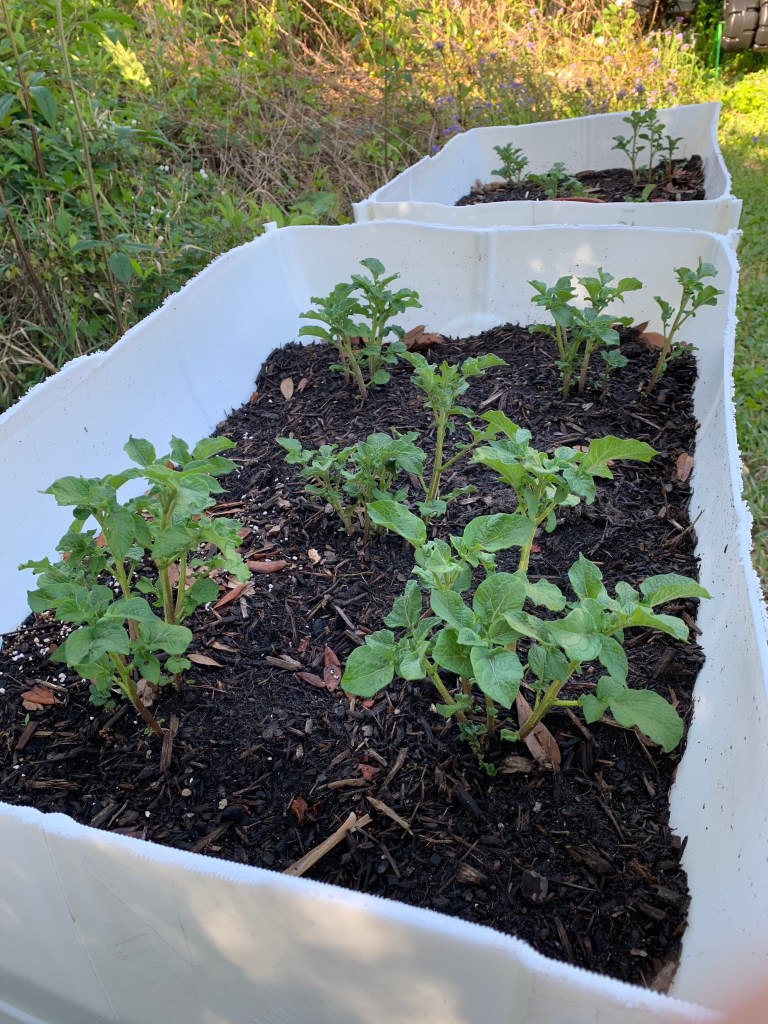
As the green stems grow and get tall enough, I am adding more dirt. The potatoes will grow off tubers under the soil. The more dirt for them to spread out, the better. Unfortunately I don’t have much land for growing potatoes in the ground.

Building up the soil around the greenery

Potatoes grow well with green beans planted nearby. This is what my gardening book advises. If your garden is in the ground, and you have space, maybe do this.

When Are Potatoes Ready to Dig?

Once the tops – those green parts – die back, the potatoes need to be dug up. How long does it take? In general, three months, give or take.

It is possible to gently dig around the plants before this to pull up small potatoes for eating. After the plants have been growing for a couple of months, it is possible to carefully dig around and find a couple of small potatoes to eat. In a small household, like where I live, this is a good idea so I won’t end up with all the potatoes being ready at once.

In the ground, I would use a pitchfork and carefully lift the soil around each top. They can really branch out, so dig around.

Because they are in the barrel, I’ll choose a time when the soil is dry (hopefully) and dig with a hand shovel and gloves.

When all the potatoes are pulled out of the dirt. Let them sit in the sun to dry a bit. DO NOT RINSE THEM… just brush the dirt off. Often gardeners will say to cure them, which toughens the skin for storing. If your harvest is large, see what to do here at “How to Harvest and Store Potatoes”.

Potato tops can go into the compost pile. Leaves of potato plants are poisonous if eaten, but can go into the compost to be broken down. Only do this if the plant shows no sign of disease. Read more about composting questionable poisonous plants.

I will follow up with more information about my potato garden as the season progresses.

More Gardening News

Bought a Hot Frog Tumbling Composter

Recently I purchased a Hot Frog tumbling composter, which has two spinning bins. We struggled a bit putting this thing together, but in the end it’s pretty nice. I’ll update progress as time goes on, but here is my experience so far.

Hot Frog composting bin on stand in the yard.

A Serious Gardener Needs Good Dirt

This year I am getting into gardening more seriously. I dislike where I live, but I am determined to make the most of it. The backyard has been mostly neglected since my wood-sided raised bed began to crumble. The price of wood is too high to re-build it, and by now it is packed down and full of roots and unusable. It has become a place for weeds to grow.

My yard is small. Digging a garden is hard work, and Florida “dirt” is made up of sand. I’ve opted for buying, and building, raised beds. This also helps a lot with invading weeds, grass and roots. But buying all of this is not cheap, and I also struggle with finding decent, affordable dirt.

Early Spring is a good time to begin Florida vegetable gardening. This year I started some organic seeds in little eggshells and then transplanted them to grow boxes. I shelled out money for the boxes, dirt and seeds. Getting started is not cheap, but once the planters and dirt is purchased, it gets better.

Gardens in grow boxes in Florida backyard
Growing eggplant, peppers, onions and tomatoes in grow boxes on the patio.

This is where making my own compost comes in. I can stop buying soil and amend gardens with organic compost material. I plan to save seeds from the organic plants I’m already growing.

I know the basics of creating a compost pile, because I made my own compost in New Hampshire, but now I am in Florida and it’s different. How different? I’ll let you know. The Hot Frog is purchased (link below), put together, and filling up with vegetable scraps, leaves, and yard stuff. I’ve never used something like this to make compost. It’s pretty cool… so far. I have one side about half full and give it a spin often.

Hot Frog Directions Are Lacking

After I ordered my Hot Frog by FCMP Outdoor and like the fact that it is made in Canada and not China. (this is an affiliate link to Amazon. If you purchase through this link I could earn a small amount.)

The two big wheel-like bins come in a big box with a mess of green metal piping that needs to be put together to make the stand. The directions are mostly non-existent. A little diagram is included. On our first attempt the thing was crooked. Something was wrong. That happy face / sad face thing on the paper told us why. It was kinda weird, but fixed the problem.

It took both of us to hold the barrels and feed the long pole through the middle and connect it to the legs. So, you may need some help putting it together.

Poles used as the composter stand

Once it was together the correct way, and the big bins were added, I dragged the whole unit out to the backyard myself. It’s not very heavy when empty.

The sun is changing location, but I want the composter to be mostly in the shade. I fear that direct sunlight in this climate will burn everything up inside. I can pull it back further when summer hits so it will mostly be shaded. I plan to keep an eye on the inside temperature. It is easy to move – that is a plus.

Presently, it is sitting in the back corner of the yard where the banana trees and big shrubs grow at the edge of my property.

Hot Frog dual turning composter

What I Like About Hot Frog

This Hot Frog composter has two separate sides. This is good for starting a batch of compost in a small area. Once that side is full (how full?) I will begin to add material to the other side.

The green sliding doors are marked “Start” and “Finish” which doesn’t really make sense, but it keeps the two separate. So, I began with the “Start” side and added oak leaves and dried banana leaves along with bunches of vegetable scraps. Each day I usually add a little bit more.

One complaint that I read in a review was that water can get in, and drips out, of the unit. I can see how dripping could occur with the holes in the side. However, compost is not supposed to be wet. My unit is on the grass so dripping is not an issue, but I don’t want the compost to become soggy.

As for how water gets in, I suspect through those same holes. In my photo below you might be able to see the little flies coming out of the hole. So far, it’s my only issue – the tiny flies. Apparently they are harmless.

Why You Should Consider Composting

If you are already an organic gardener, you should consider composting your own materials. Don’t over think it. Learn the basics (what to add) and you will find it to be quite easy to do. Add natural ingredients, and nothing from the yard if you don’t know what it is. You don’t want to add some kind of poisonous plant to the compost bin.

Since I’ve become a more healthy eater, I have a lot more vegetable scraps. Instead of throwing them out, I currently put them on top of the soil in my grow boxes. It’s sort of a quick composting attempt, and better than simply throwing good scraps into the trash. Old lettuce leaves scattered over the dirt can help hold moisture in.

Sometimes vegetable bits can help keep raccoons and critters away also – (think prickly cucumber stems and stinky onions). But each time I would do this, I would also think about doing compost the correct way.

I have all the elements needed to create good compost. Grass, leaves and vegetable matter is really all it takes. Most everyone has those things. Once the compost is ready, it can be added to vegetable gardens and will add extra nutrients to the soil and hopefully attract earthworms.

This sustainable way of growing crops and flowers helps the environment and your own health.

Florida’s Unqiue Compost Material

March is Fall here in Florida. The oak trees lose their leaves and catkins (long brown things) everywhere. I’ve been adding them to my composter along with vegetable bits.

After the cold of winter (don’t laugh) we also have dead banana leaves, which I cut up with scissors and also added to the bin.

Spanish moss can be added to the compost pile. It is also useful when potting plants. Stick some in the bottom of the pot for drainage.

Compost Organic, No Chemicals Allowed

The big problem in Florida is that many people spray their lawns with chemicals to kill the bugs. Florida is a buggy place. It used to be a jungle swampland. Now, people who want to live in paradise do not want bugs destroying their idea of an ideal place to live. Lawn service companies are constantly spraying lawns.

If your yard is full of chemicals, you can not add lawn clippings, leaves and garden matter to the compost bin. Chemicals will kill the good bacteria and things that are needed to create soil from compost matter. Not only that, the chemicals will end up in your garden, feeding your plants, or killing them.

I believe in letting nature take care of things in the garden. But, once again, here in Florida, that may not be as natural as you think. Our ecology is already being threatened by invasive frog and lizard species. I’m guessing this will play a role in organic gardening here.

Below is my photo of a big brown anole, or Cuban anole (lizard). Read more about the native green, and invasive brown, anoles. South Florida is not the only place with invaders.

Brown lizard

Check out this massive list of non-native reptiles at the Florida Fish and Wildlife site. There are no photos, but what a long list!

Creating a Front Garden

Last winter and into spring, I decided to begin creating a front garden space to plant new perennials. When one older lady is doing this work herself, it takes time. I wanted to prepare the bed by killing the grass and weeds and adding some “good” dirt.

I bought the border bricks, which I put around a few other little gardens in the yard, and my son helped me move the bricks. I bought a load of dirt from a local landscape center and put that on top of my saved newspaper.

new garden
Getting the ground ready for a new garden

In New Hampshire this newspaper trick worked pretty well. Paper plus a layer of dirt kills the stuff underneath. I used to do it so it could sit over winter. But Florida growth is a different beast. For one thing it never really stops growing. There is no ice and snow to make it dormant. The newspaper and cardboard did help but some grass and lots of dollar weed came right up through everything.

Also grass here is not the slightest like northern grass. This grass is in vine form and it’s tough stuff. You don’t want to have to dig it up.

front garden area
The weeds are thriving

A strange tall weed began to grow and I let it. I still have no idea what it was. Once it got big, it had a few pretty little yellow flowers. Eventually the whole thing died and I pulled it out. Weeds can be interesting and beautiful.

Yellow flowers on tall weed
This weed had pretty little golden yellow flowers

All in all the work I did to remove the grass worked pretty well, but I still had a lot of stuff to pull up. The dollar weed is under control. The older part of the garden, as you can see below, is full of plants. My hydrangea looks pretty bad, but it’s alive. The blooming New Guinea impatiens are some of my favorites as they last a long time and brighten the yard for months. The red bromeliad was a Christmas gift from a friend.

Front garden with extension
Front garden Spring 2020

The new garden area, in the back on the photo above, contains only two crotons which I began from cuttings, and a spiky agave plant- at least I think that is what it is. I got it from a neighbor and haven’t been able to find a spot to plant it. Finally it’s “roots” were breaking the pot apart, so I stuck it here. But it will be in the way of the sprinkler head, so it might have to go. These things get huge!

Agave plant
New croton plant
The baby crotons are doing okay

My plan for this time of year was to buy some new plants for the front garden. I hadn’t decided for sure what plants, but a trip to Pells Nursery would have helped me decide. Now that everything is closed, thanks to the Coronavirus, and we have to stay home, I can’t very well shop for plants. So… change of plans.

I’m currently planning to plant some vegetable seeds I have saved in this empty garden space.

Simple Bread and Butter Pickles Made From Garden Cucumbers

Cucumber on the vine

Now that the cucumbers are growing in my Florida garden, I was reminded of a simple bread and butter pickles recipe I found a few years ago. No canning was involved. Fortunately I was able to find my printed copy.  (Recipe Link Below)

I don’t do canning, but I love bread and butter pickles made with fresh from the garden cucumbers. These pickles are stored in mason jars (or any jar) but there is no boiling required. Slice and mix the six ingredients (and add some of your own) and store in the fridge.

Include sliced onion and green pepper for flavor. Garlic cloves and hot pepper slices may work as well. Other herbs could be added to change the flavor, like fennel and dill.

And by the way, you don’t need to use a specific type of cucumber.  I am growing two types, and I can’t remember what they are, but as you can see in my photo below, one type is very long!

The shorter, regular looking cukes taste better, but when making pickles it doesn’t matter.  There are many other ways to use fresh cucumbers from the garden.

Cucumbers and onion

The recipe calls for 7 cups of sliced cucumbers, so wait until you have a bunch to use up. Cukes don’t last long once they are picked, so plan to make pickles the day you pick the cucumbers.
A mandolin slicer makes all that slicing go fast.

Note:  One thing I changed in the recipe was the amount of sugar. The recipe calls for 2 cups, and I reduced that amount to 1 cup.  I also added a few slices of hot red pepper and fennel sprigs.

Spoon the mix into clean mason jars. Divide up the remaining liquid into the jars, cover and put in fridge for 5 days. Then begin eating!  They will be good for months.

mason jars
Clean mason jars

The full recipe can be found here: Mamaw’s Refrigerator Bread and Butter Pickles.

How to Find Truly Organic Fertilizers, Bags of Soil, and Amendments

USDA organic seal
The USDA organic seal on carrot seeds package.

When shopping for food I always look for the USDA organic seal, like the one on this package of carrot seeds. Food, and products like seeds used to grow food, will contain the green organic label, but the fertilizer used to grow them will not.

Apparently garden fertilizer and bags of soil require different symbols to identify which are truly organic. The word “organic” alone means nothing when it comes to buying products you need to grow your own food.

It seems odd to me that we can easily pick up USDA certified seeds to plant, but it is not nearly as simple to find certified organic soil and fertilizer used to grow them.

Why The Word “Organic” is Not Enough

As I was writing a previous post about building up the dirt in my raised bed, I went looking at my bags of fertilizer. Sometimes I link to products I have bought in case readers are looking for the same type of thing. The one I checked was my bag of Milorganite.

DO NOT BUY MILORGANITE, especially if you are an organic gardener! And personally I will never go near the stuff again.  Once you look closely at the bag you may feel the same way.

Although this bag (my photos) contains the wording “organic nitrogen” (at the top on the front) and “eco friendly” (little yellow sign), when you look at the bottom of the back there is a “warning” sign (that exclamation point). Most of the labeling on the back of the bag is a bit scary.   Such warnings are:  Do not breath it in, wash immediately after touching, and do not apply before a heavy rain or near water drains. Yikes… I didn’t want this stuff anywhere near my vegetable garden, or in my yard for that matter!

So why did I buy this stuff in the first place?  For one thing the word “organic” at the top fooled me.   Apparently only the nitrogen is organic.  I really have no idea what that means, but the product is only 5% nitrogen.  The packaging is enticing with all their good wording choices and big photos.  Someone knows how to market.

But, once I looked closer at the bag, I thought something was wrong. Organic is good and natural, so why a warning? Because companies can use good-looking wording like “organic” and “natural” and “eco friendly” which all may mean nothing.

This got me wondering (and worrying) about the other organic-labeled products I have been using in my yard.  Are they really organic?

Inspecting Labels on My Purchased “Organic” Products

Here’s what I found when I looked at the products I use in my garden. From the soil we choose, to the fertilizers and amendments, everything must be truly organic if we want our vegetables and fruits to be organic.

This post about Identifying Organic Fertilizers at the Organic Its Worth It site was an eye-opener for me.

organic fertilizer
Which organic fertilizer is really organic?

So I inspected my bags further, looking for the symbols telling me that my products were truly considered okay for organic gardening.

Dr. Earth and Miracle-Gro Pass the Organic Labeling Test

Fortunately the soil and fertilizer I have been using are real organic products.

YES!  The Dr. Earth fertilizer contains three seals. One is OMRI Listed, and the other two are CDFA and MycoApply. Those two are so tiny I could barely read them, but they mean good stuff. Unfortunately not enough people understand these terms. OMRI (Organic Materials Review Institute) is the big one to look for. OMRI is a place where products must be certified useable in organic gardening. Once a product is approved, they can use the OMRI seal. This is what we have to look for when choosing fertilizers, soil, and amendments for the yard and garden.


The Dr. Earth website explains what the CDFA and MycoApply labels mean on their products.   The company is working to create good fertilizers which help the earth.  I was impressed with the earth-friendly info at their site.  No phony advertising here.

YES!  Recently I bought eight bags of Nature’s Care (by Miracle Gro) garden soil ($7.97 a bag at Home Depot) and was pleased to see the OMRI label at the bottom of the bags. I also use their bone meal which has the same label.

Also the Miracle-Gro Organic Choice Blood Meal (shown in my photo, but used up before I checked the packaging) is listed as organic at the OMRI site.  Use the site to search for products you have or plan to buy.

The OMRI site explains (read the “what is organic?” section) that the word “organic” is not regulated for fertilizer and non-food items. This allows companies to use the word when it is not necessarily true.  As I mentioned above, why?  Does this make sense to anyone?

Although I will now read labels and look first for that OMRI seal, as the writer the Organic It’s Worth It site mentioned, other wording can take the place of that seal.  I suppose not every truly organic company contains the seal of approval – I don’t know.  Be sure to look for certain wording on the labels of products. If the company claims that the product “meets the requirements for organic production” the product should be fine.

For this reason, I suggest shopping local for such products.  Label reading is easier than buying online.  At Amazon, when I searched for OMRI certified fertilizer I only found a few with the label.  Even though I may link to products on the Amazon site, I would rather check locally for these types of products. Often local shops will sell for less. Also, you can more easily read labels and purchase exactly what you see.

If you choose to buy online, here are some OMRI listed organic fertilizers found at Amazon:

Nature’s Care Organic BONE Meal – Bone meal supplies phosphorus for strong roots.

Nature’s Care Organic BLOOD Meal – Blood meal supplies nitrogen for green foliage.

The Dr. Earth store at Amazon

Burpee Citrus Fruit Fertilizer

Garden Fungus Begins as a White Pod and Then Gets Weird

As I have been gardening I keep noticing these weird, puffy white balls under the soil in my raised garden bed. As I dig them up I throw them into the yard.

Yesterday I found another one. I just set the round slushy blob on top of the dirt and left it. Today this is how it looked.  Pretty gross.  There is some slimy thing at the top, and the whole thing smelled bad.

weird smelly fungus
Columned Stinkhorn

The round white balls are around 1-2 inches and have little white roots at one end. They are soft and squishy, and I had no idea what these weird things were.

When I noticed those bizarre orange things sticking up from it, I had to investigate further and find out what it was.  When searching for white “puffballs” mostly the puffball mushrooms show up. Then I came across this post at East Tennessee Wildflowers site which showed the exact same thing.  Now I had a name for it.

So now I know it is a Columned Stinkhorn (Clathrus columnatus) and according to Wikipedia it is commonly found in mulch.  It also mentions that it is edible… gag… who could eat this nasty thing?

Since I live in Florida, home to nasty creatures and all types of weirdness, I was afraid it would be an egg that lots of hideous things would crawl out of.  I guess I am relieved to know it’s only a smelly orange fungus.