Filling the yard with blooming plants to feed the bees and butterflies can take time. Even though I don’t have many, the insects come.
My focus has been on growing vegetables in the yard, but now I am focused on adding blooming plants.
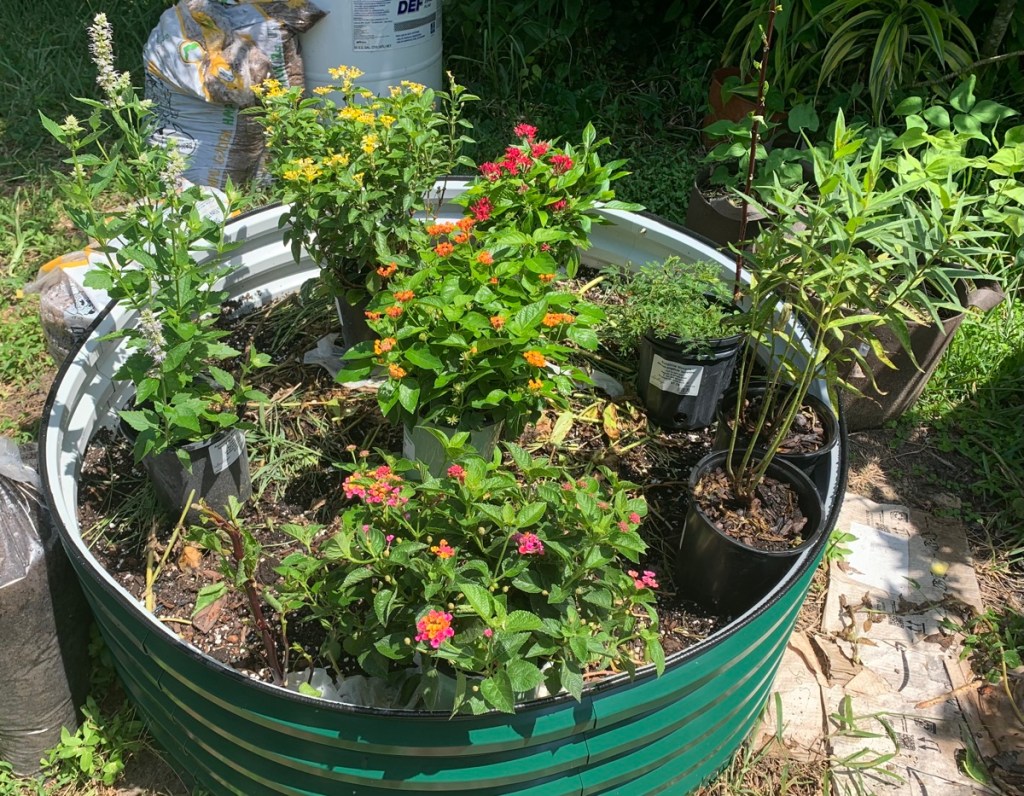
I still don’t have a car, so getting out is tough. My son took me to a local nursery and I used a gift card (from Christmas – it’s September!) to buy some flowers.
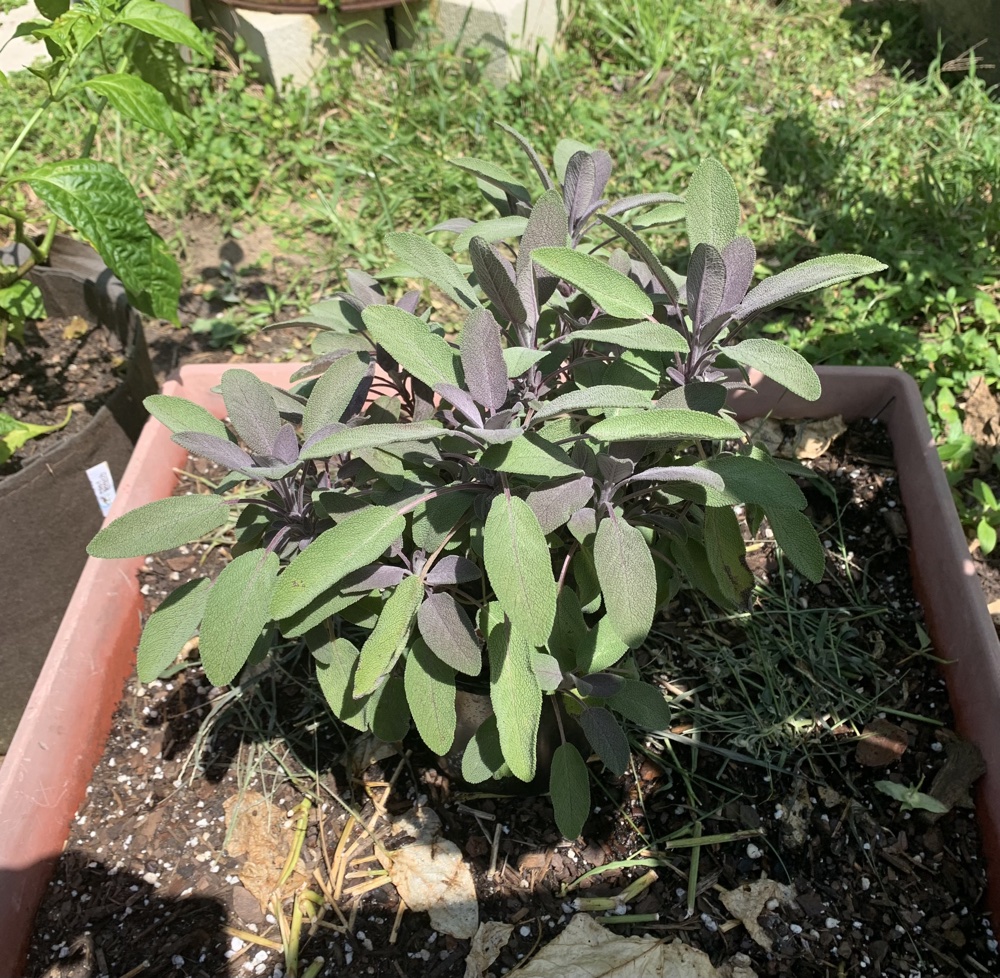
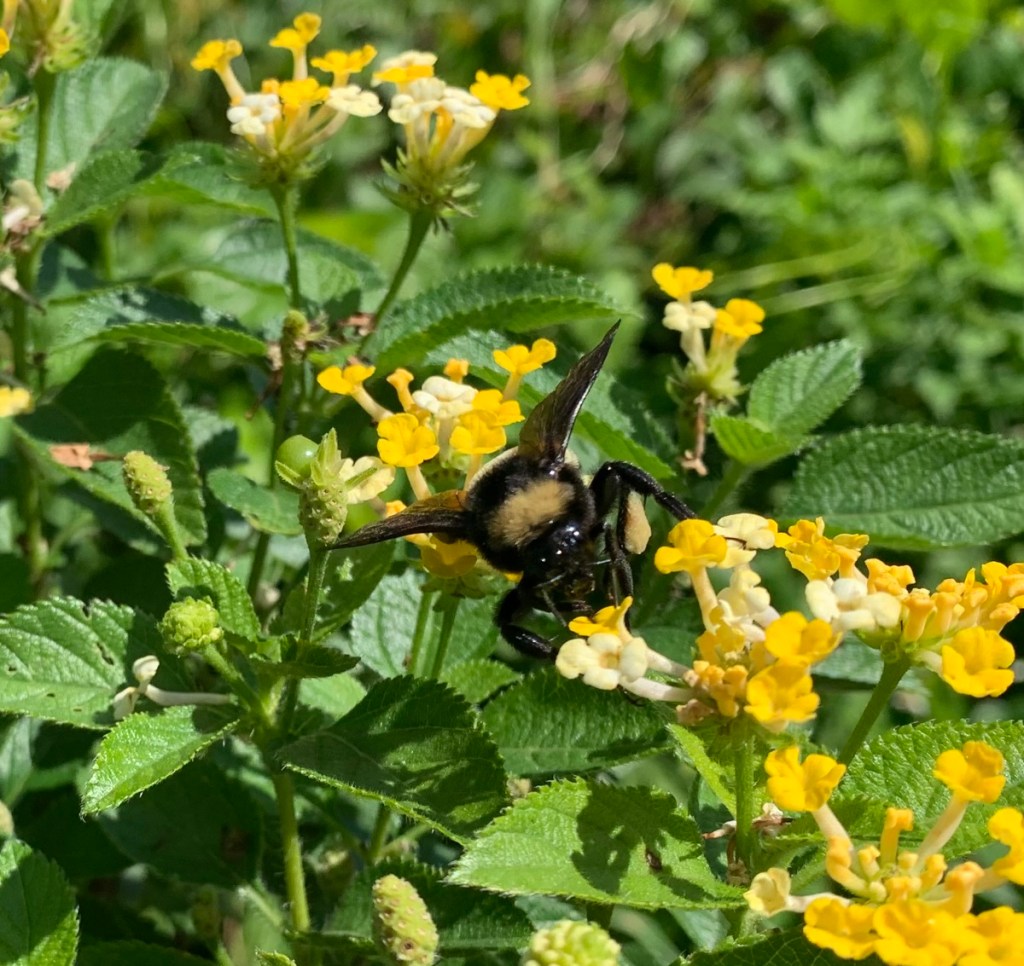
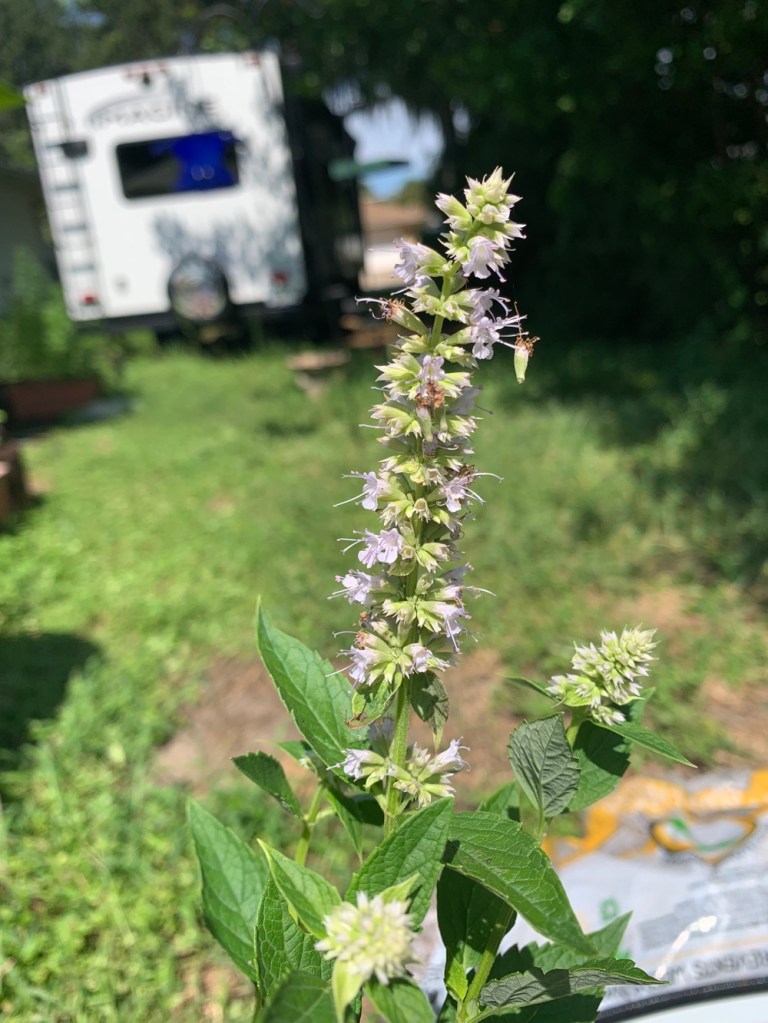
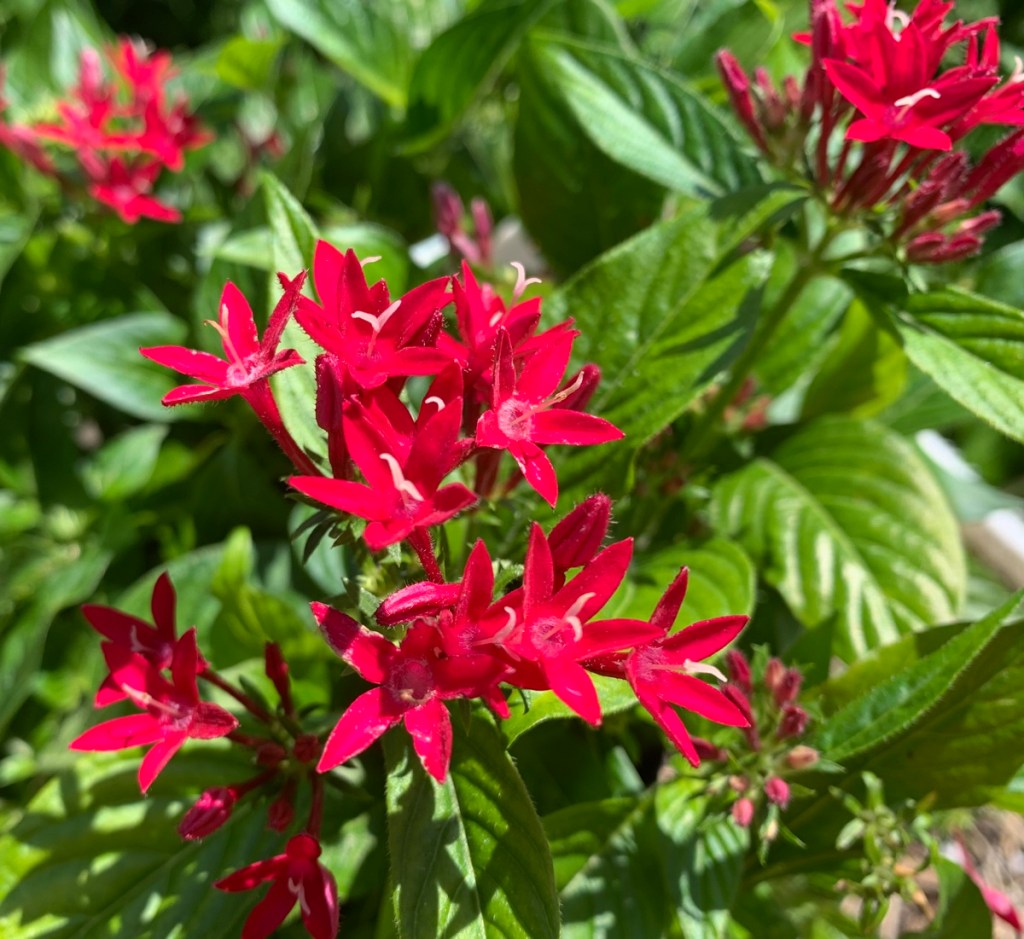
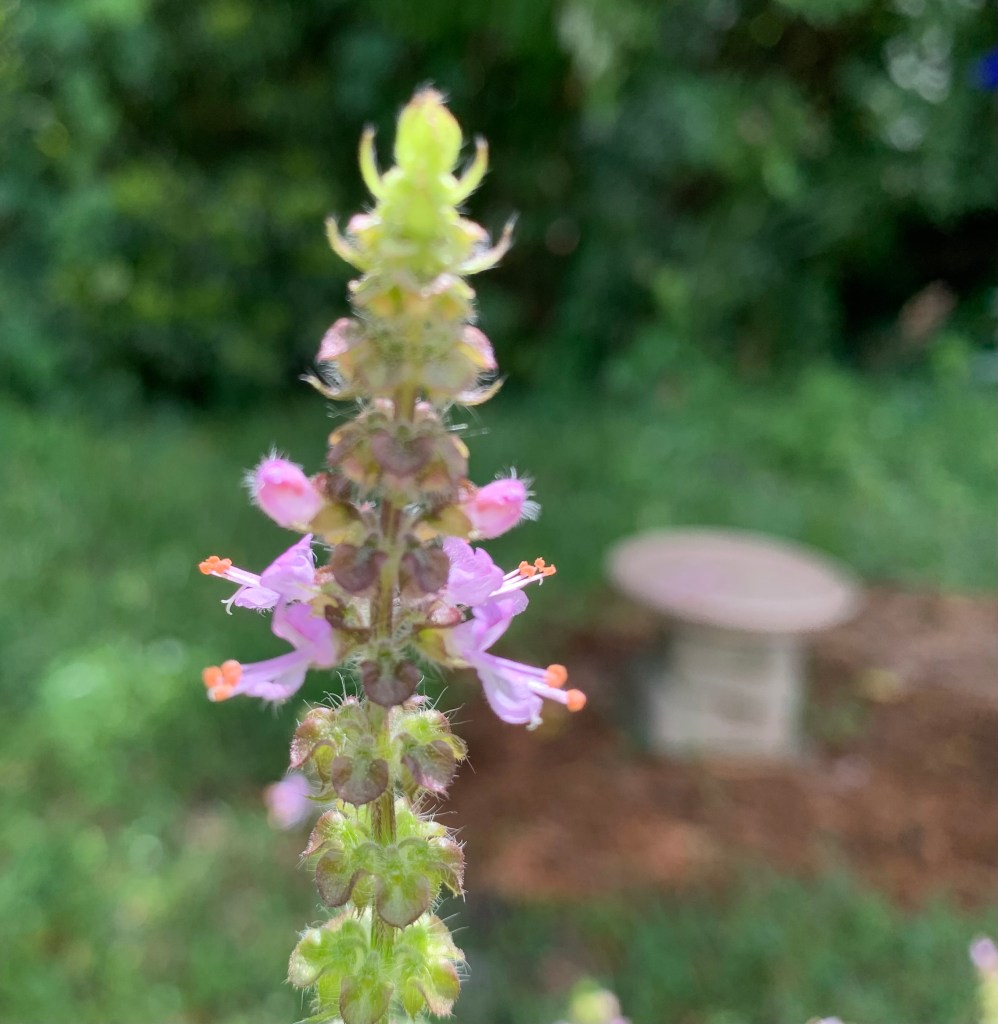
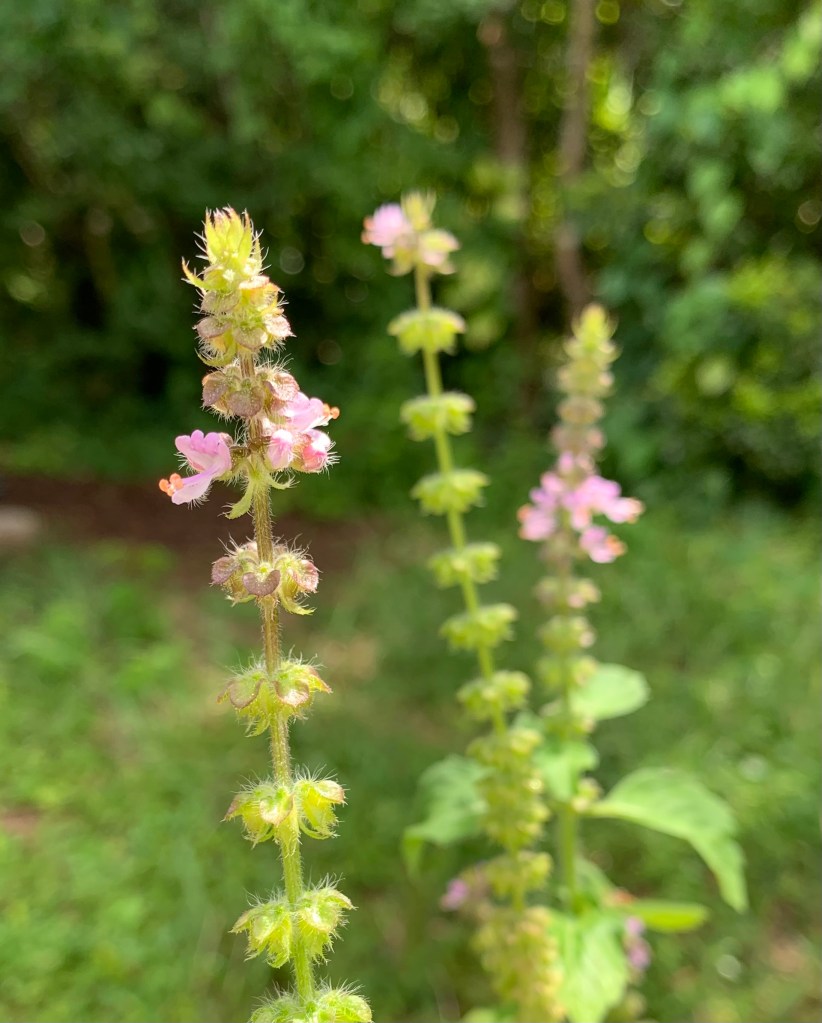
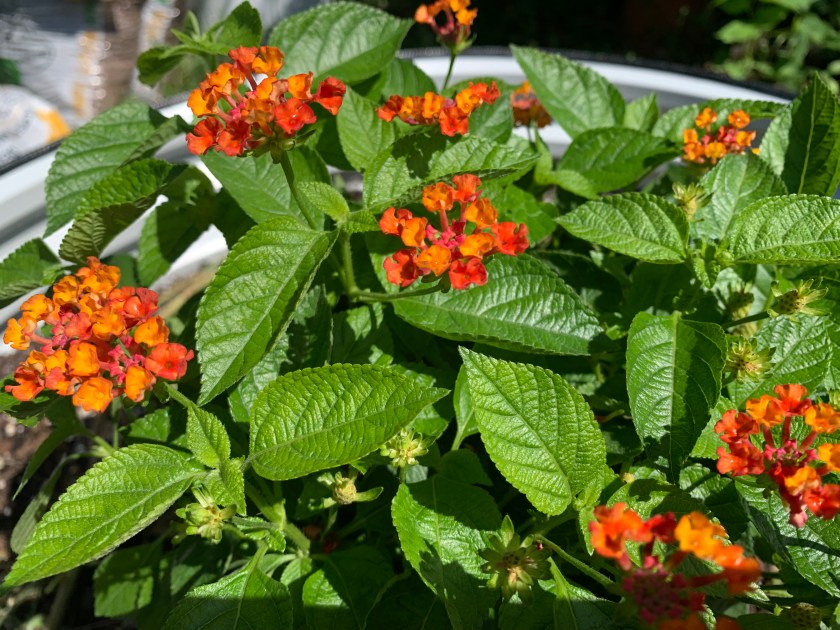
Purple SageBee on LantanaBlue AgastacheNew flower haulRed pentas
I gravitate to the bee covered flowering pots at the nursery, but once the plants are home, it’s a wait for my bees and butterflies to find the flowers.
I chose red, orange, yellow and “blue” flowers. The bumblebees like small yellow flowers and tall spikes. They come every day to my Holy Basil (Tulsi) which has very tiny flowers (pictures below). However, some also like the big open pumpkin flowers. It’s best to have a variety.
Tulsi basil flowers – this basil grew all summer, which is impressiveHoly Basil (Tulsi) grown from seed
The Following Morning
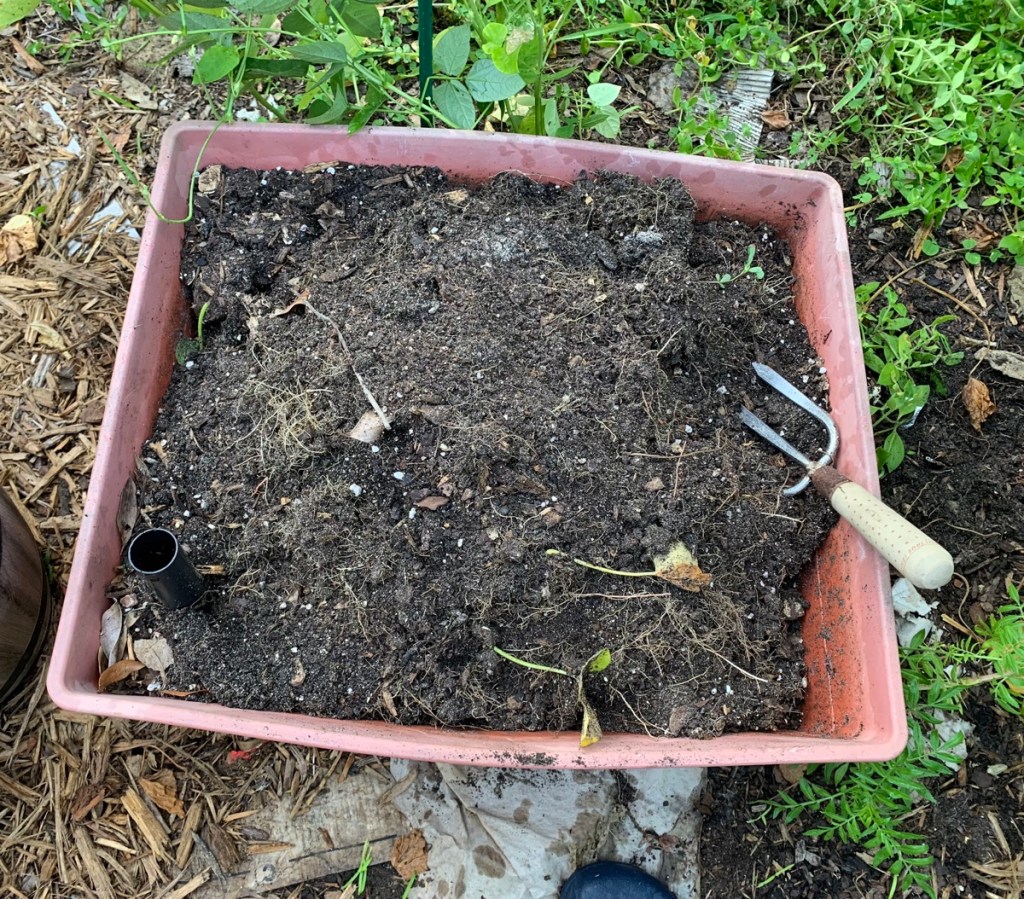
I get out into the garden as early as possible because of the heat. My goal this morning was to get the Vegega bed filled with dirt. I always scout out the gardens in the morning. When I went to the back area, I discovered that both recently planted plants- were torn completely up out of the ground!!!!!
The blue Agastache and yellow lantana were lying on the ground with their roots exposed! The big planting holes were empty. (I was too mad to take pictures.)
Red orange lantana plant
Re-planting and Moving On
The good news is that both re-planted plants are now doing fine. The yellow lantana has not bloomed again, but I’m sure it will. I had made the mistake of adding fish bone meal into the potting holes. I’m betting the raccoons smelled it, and dug to find the “fish”. The plants were simply in the way. Lesson learned.
Gardening means dealing with pests of all kinds. For me, the Raccoons cause the most trouble. They are often destructive without purpose – as far as I can tell. They steal tomatoes and rip holes in them, but don’t consume them! They pull peppers off the plants, and dig up seedlings. Last year they stole one of my watermelons off the vine.
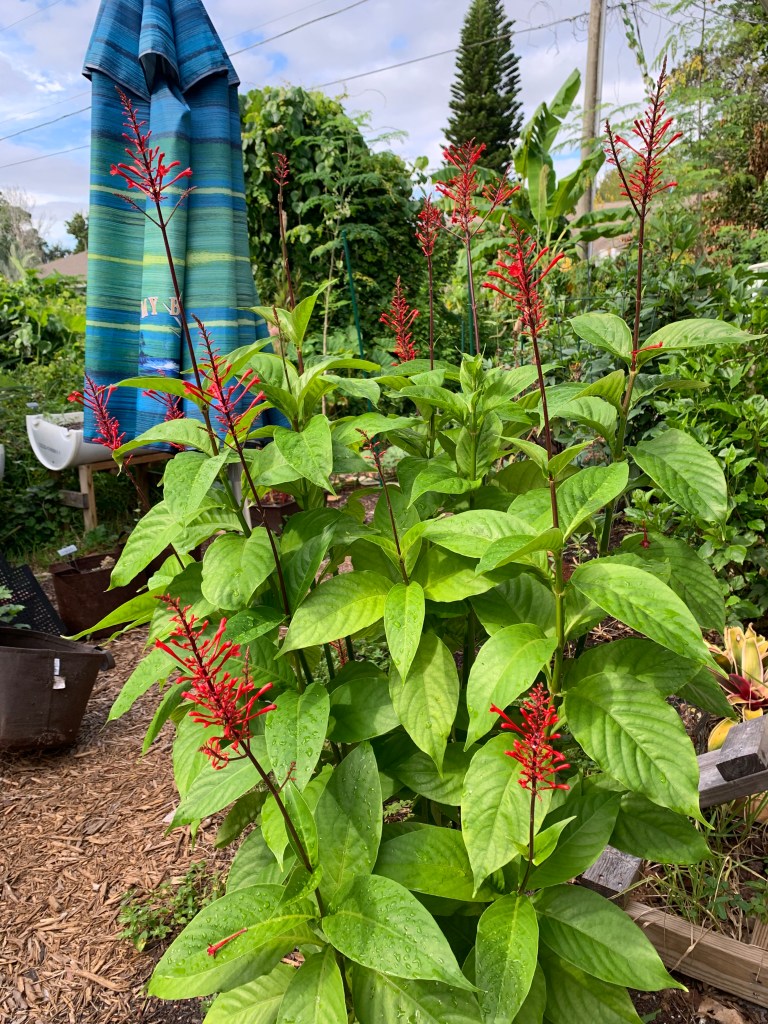
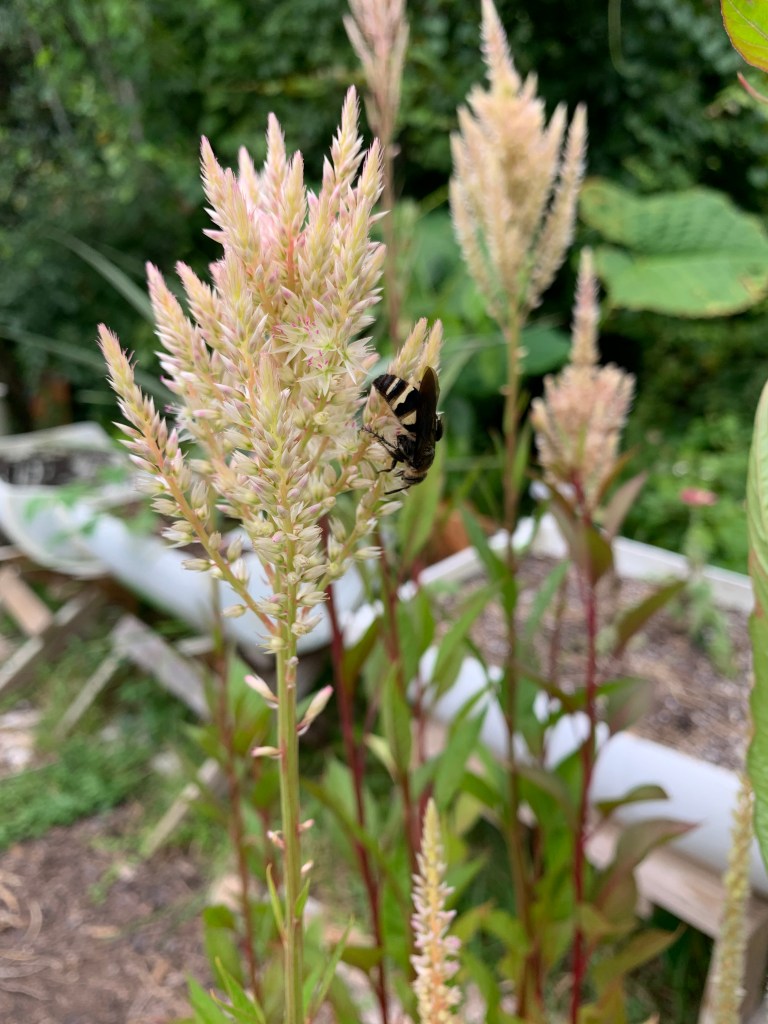
In the meantime, here’s what else is blooming in the yard:
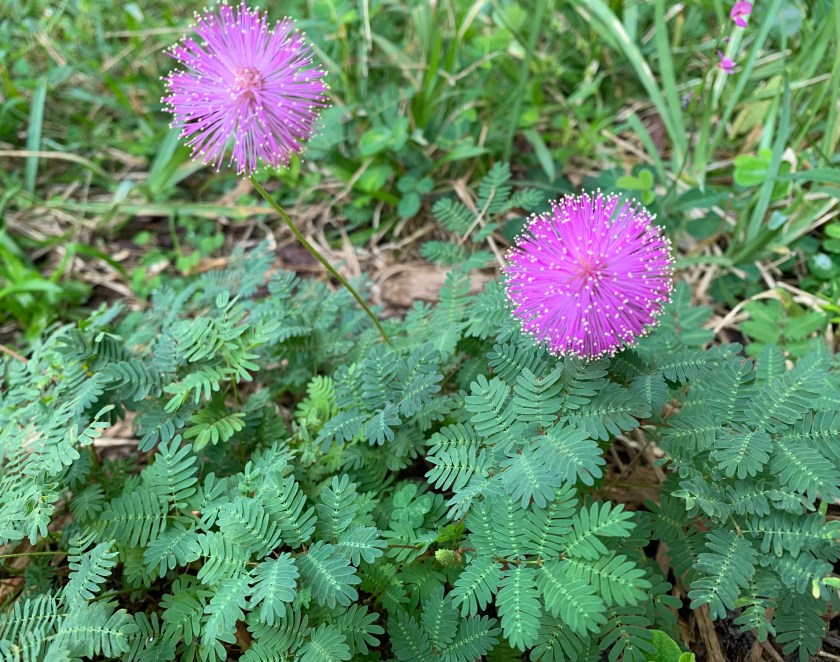
Sunshine Mimosa – Love it!
Spiderwort – weed that insects love (foggy photo because of the humidity)
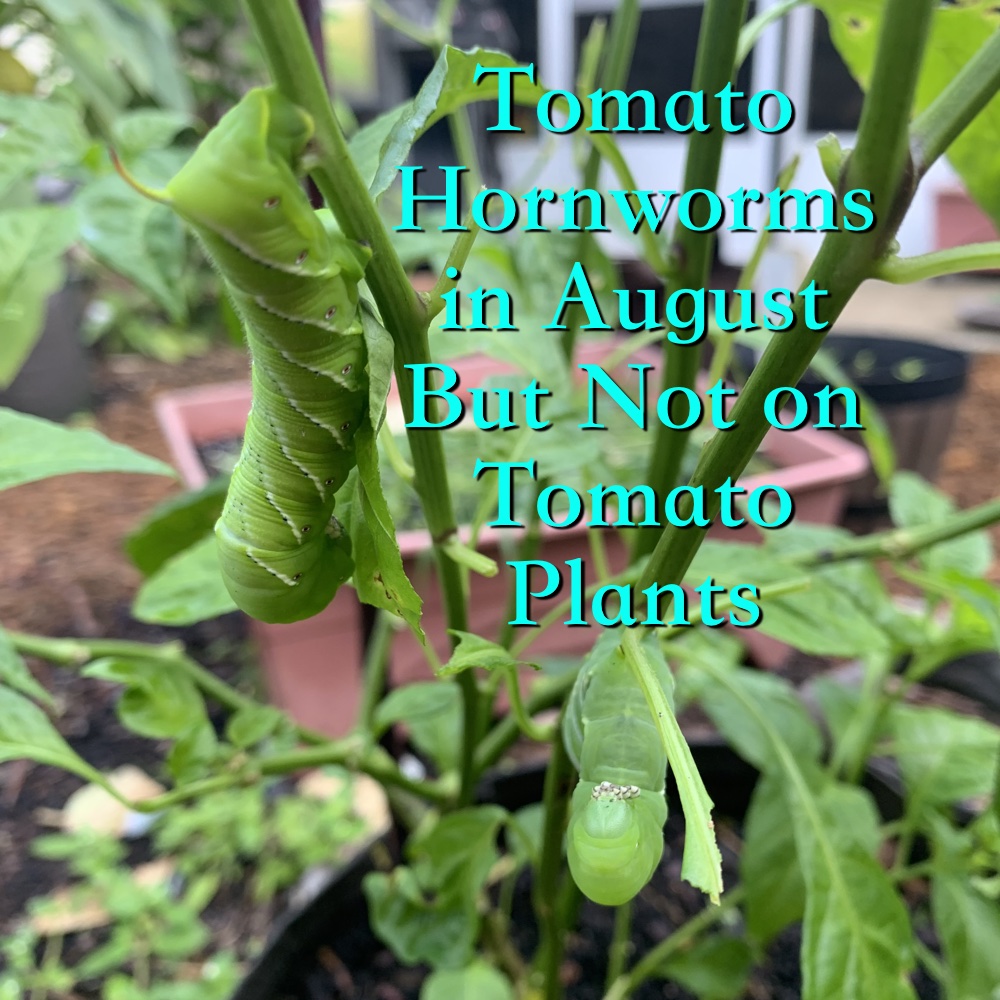
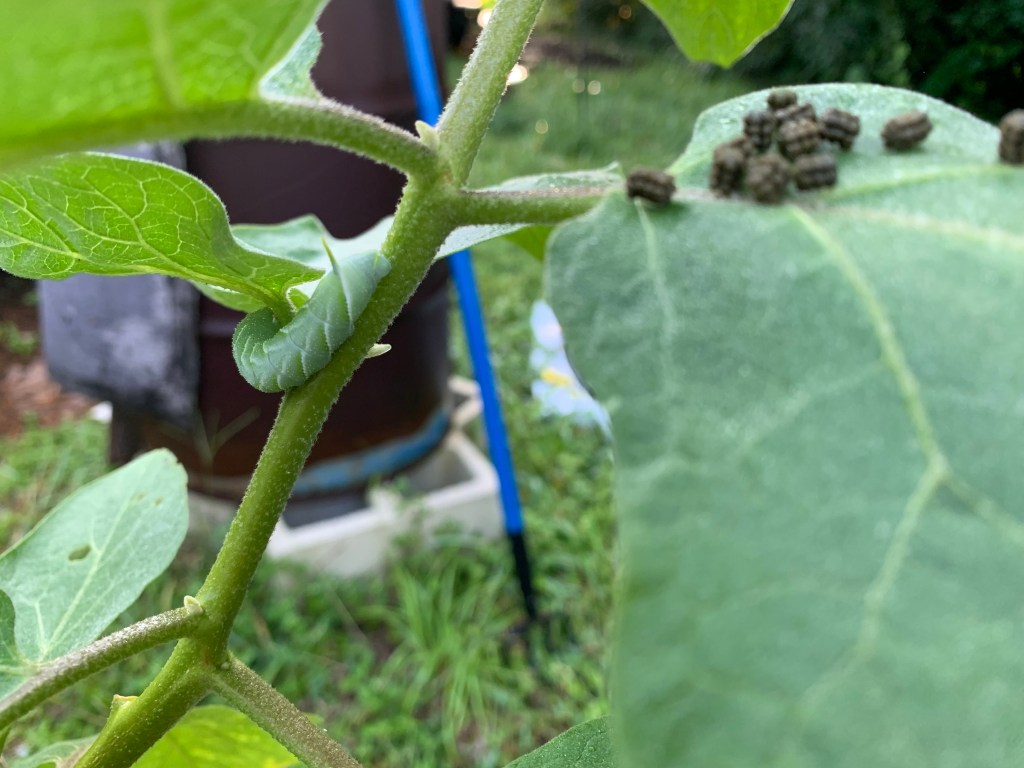
It is August and hornworms are showing up in my Florida garden. There are no tomato plants, but they also like the eggplant and peppers. Eventually the birds find the worms and have a nice feast.
Over the past few days, I’ve found tomato hornworms in the garden. Not on tomato plants – I can’t seem to grow those, and especially not in August – but they are happily eating eggplant and Aji Dulce pepper leaves.
Hornworms love all the nightshades it seems. I found three hungry caterpillars on the eggplant, but by the next day they were gone. I didn’t see what got them, but my best guess would be cardinals.
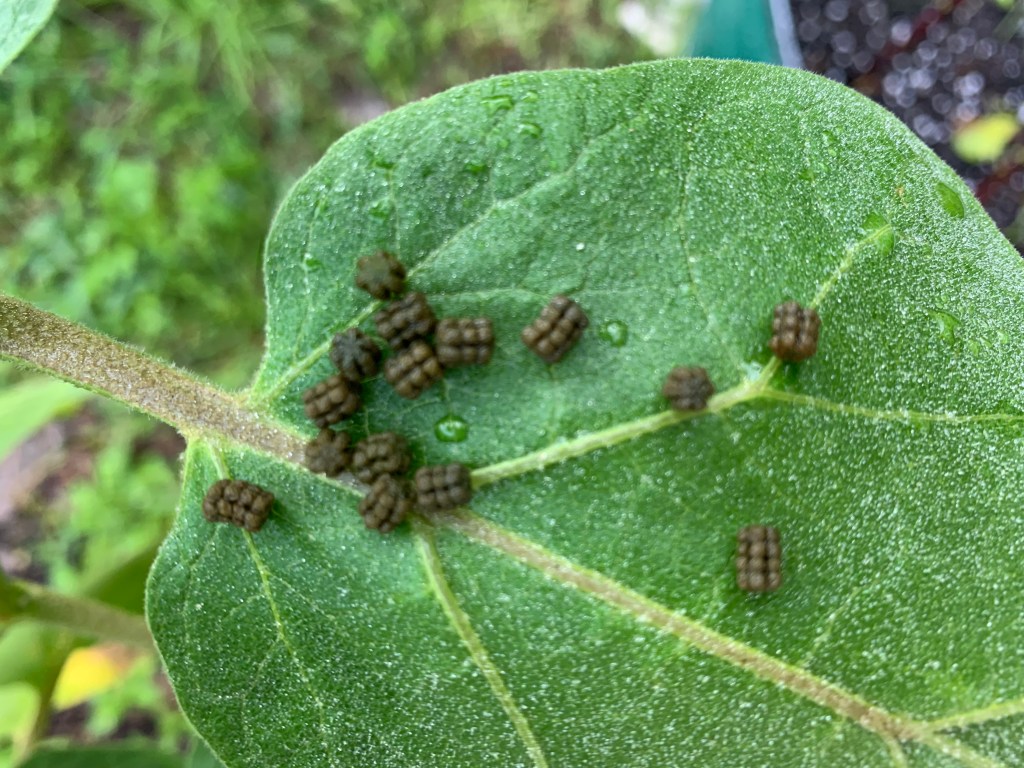
Hornworms are hard to miss. From their big brown turds all over the leaves (eggplant), to the bare stems, they leave proof of their presence. Their green bodies are the only thing that help them to blend in, but they are good size once you see these signs.
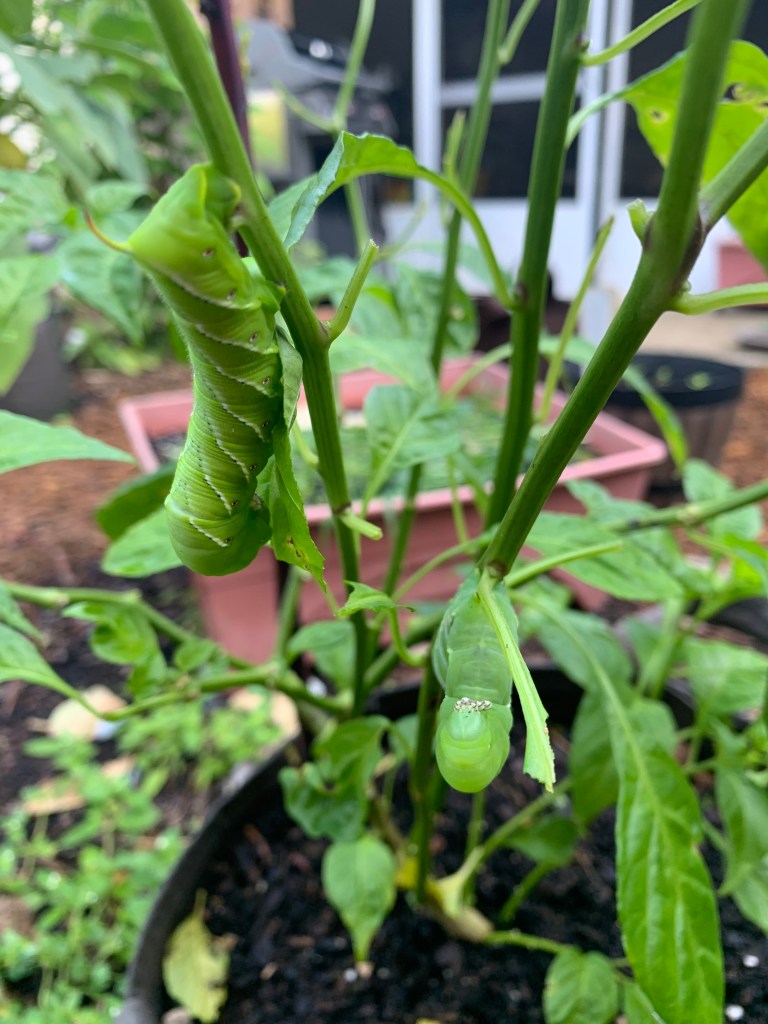
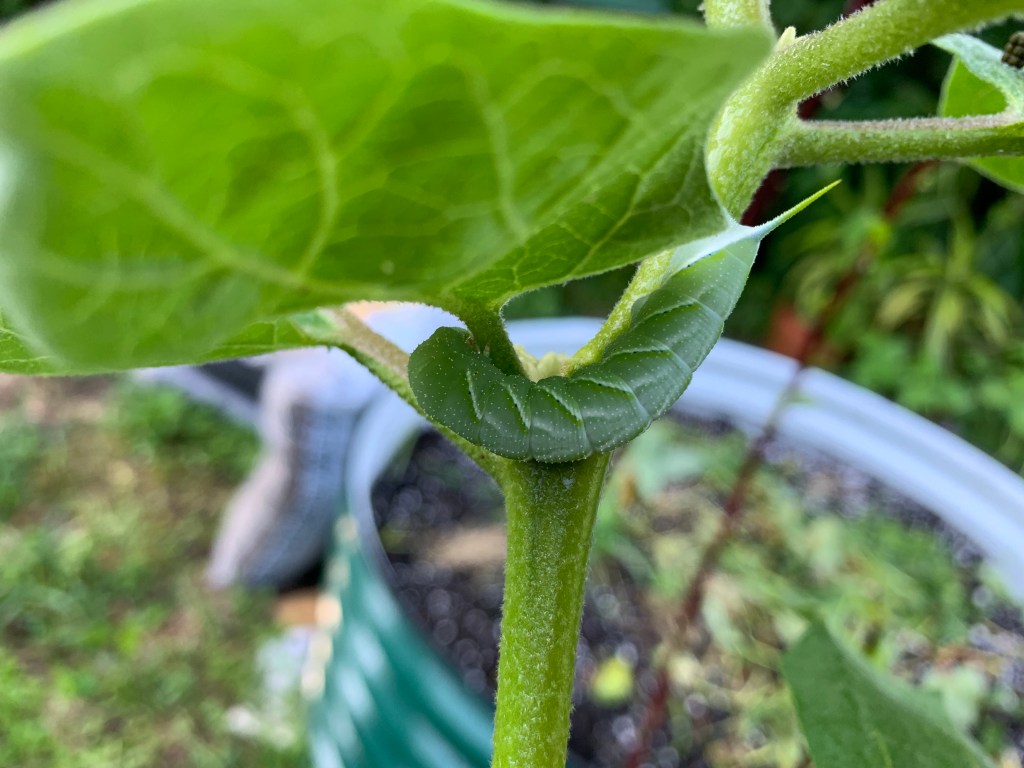
Now, I have two more hornworms on the Aji Dulce pepper plant. I have only three nice pepper plants left, and now this one has lost a bunch of leaves to chewing.
The plant was somewhat sheltered among the Roselleso I dragged it out into the open. I’m hoping this way the cardinals will see the worms easier and have a nice meal.
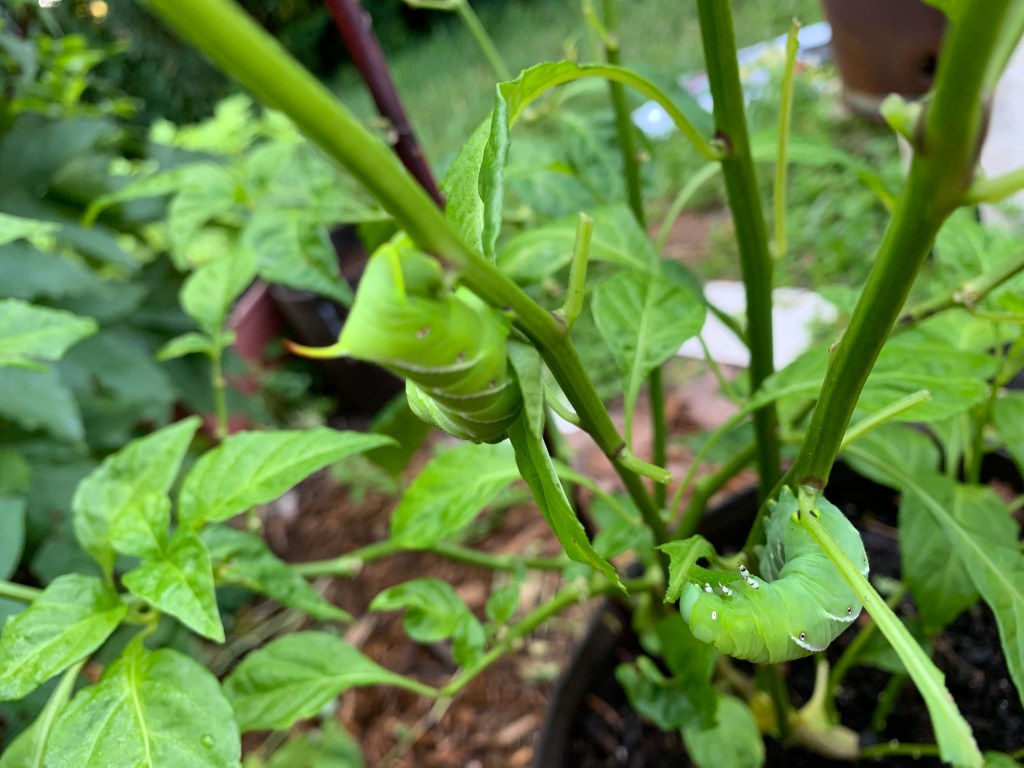
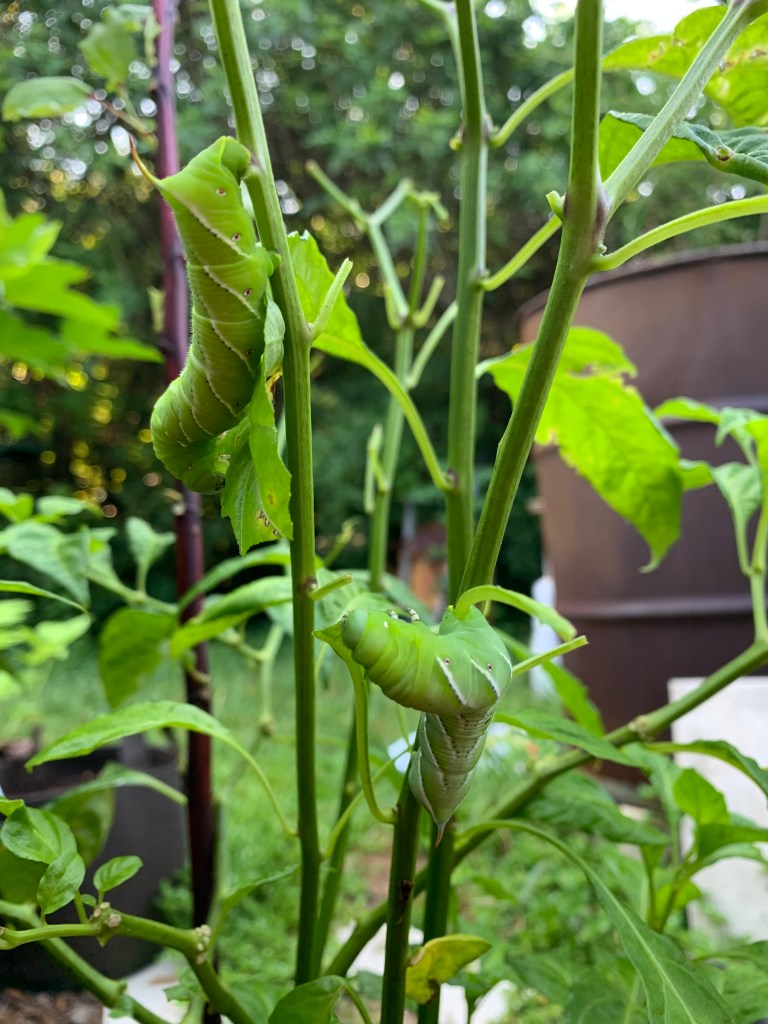
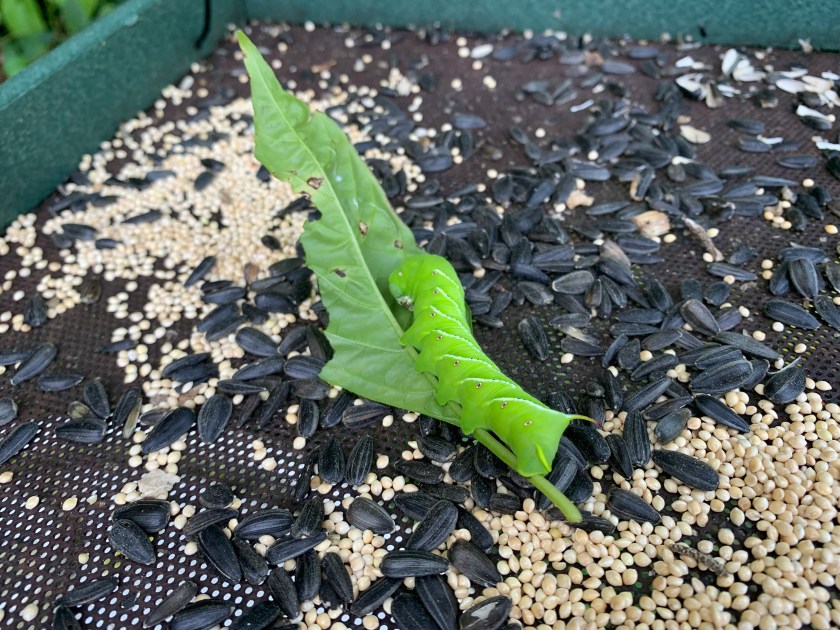
I checked the plant a few hours later and found only one worm left. He was hiding under a leaf. I decided to put him, along with his leaf, into the tray feeder. He won’t last long.
In my yard, caterpillars of all kinds become food for the birds, eventually. It’s a matter of deciding how much of the plant I am willing to lose before that happens. Nothing gets past the keen eyes of the cardinals, and they come in groups of 5 or 6 every day. However, I believe a blue jay ate this worm off the tray feeder.
I’d love to have enough plants to shelter hornworms and allow them to turn into the beautiful sphinx moth. Instead, I have to let nature take its course, maybe with a little help, to save my plant.
Next time you want to get rid of a hornworm, consider letting it become a bird’s meal. Where I live, I can feed the birds year round. Sunflower seeds bring birds to the yard, who will then naturally look for food in the garden. Tray feeders (paid link) are perfect for depositing unwanted grubs and worms.
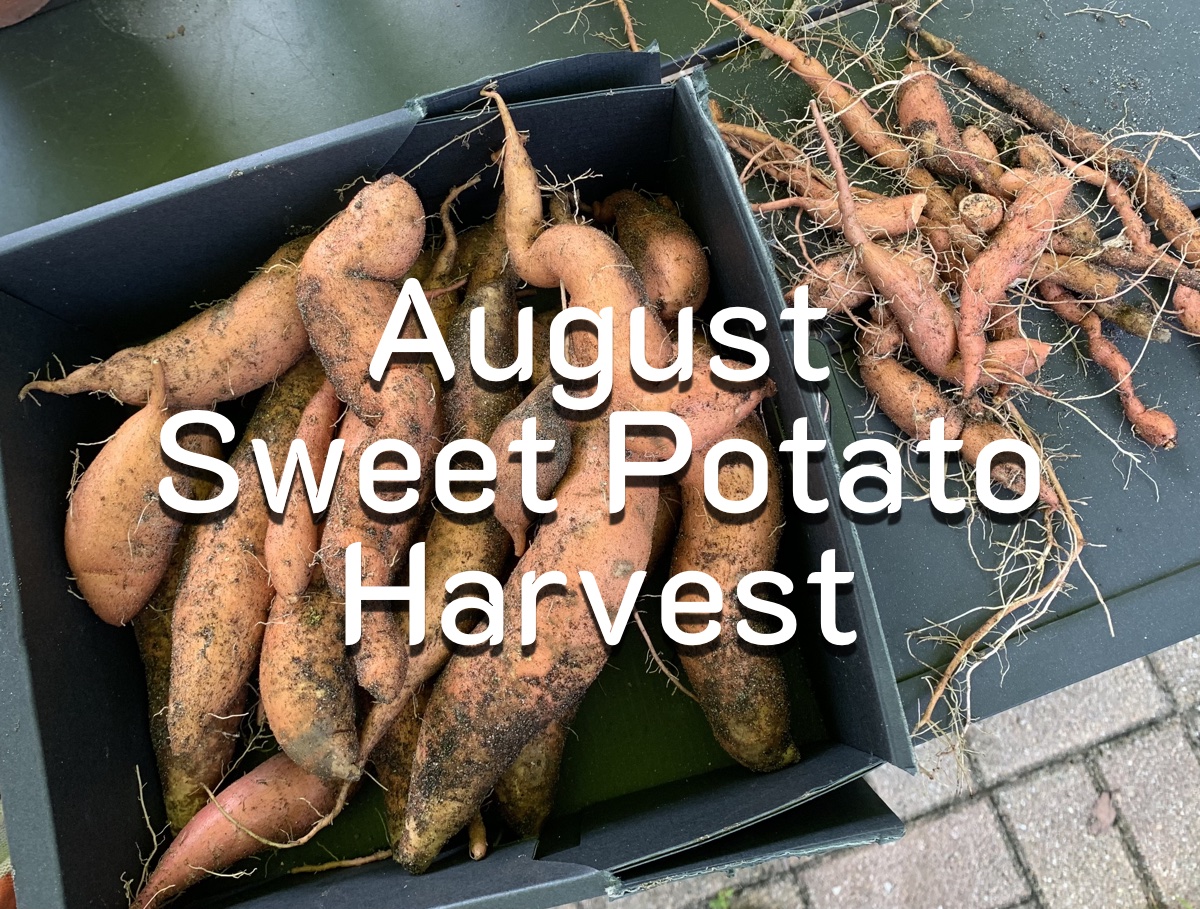
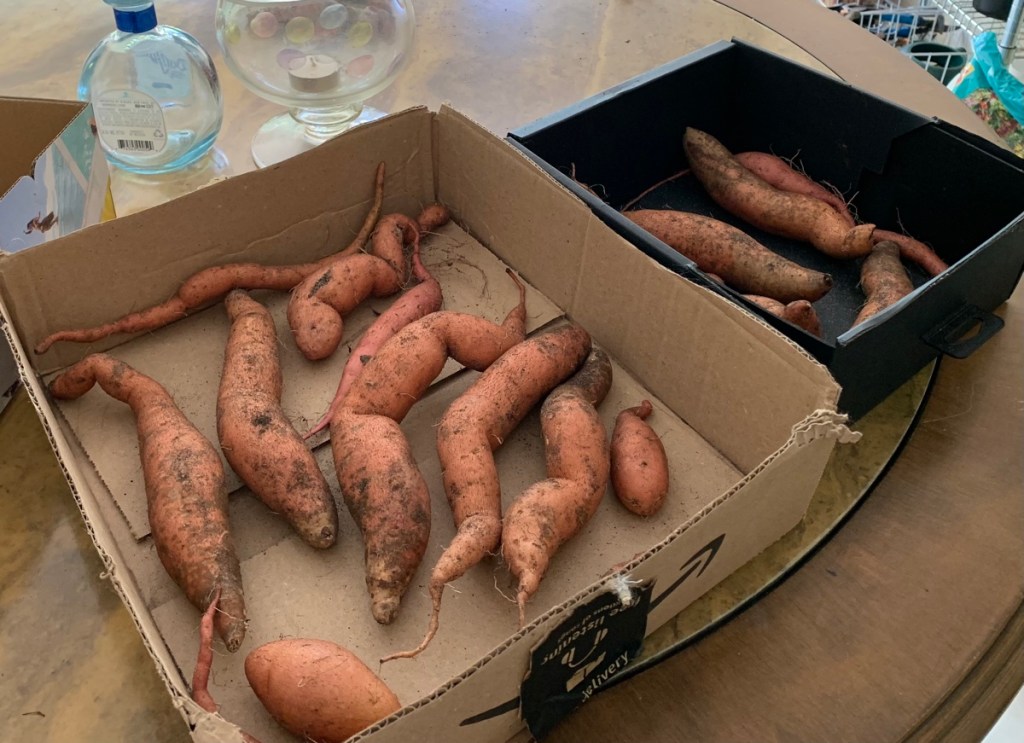
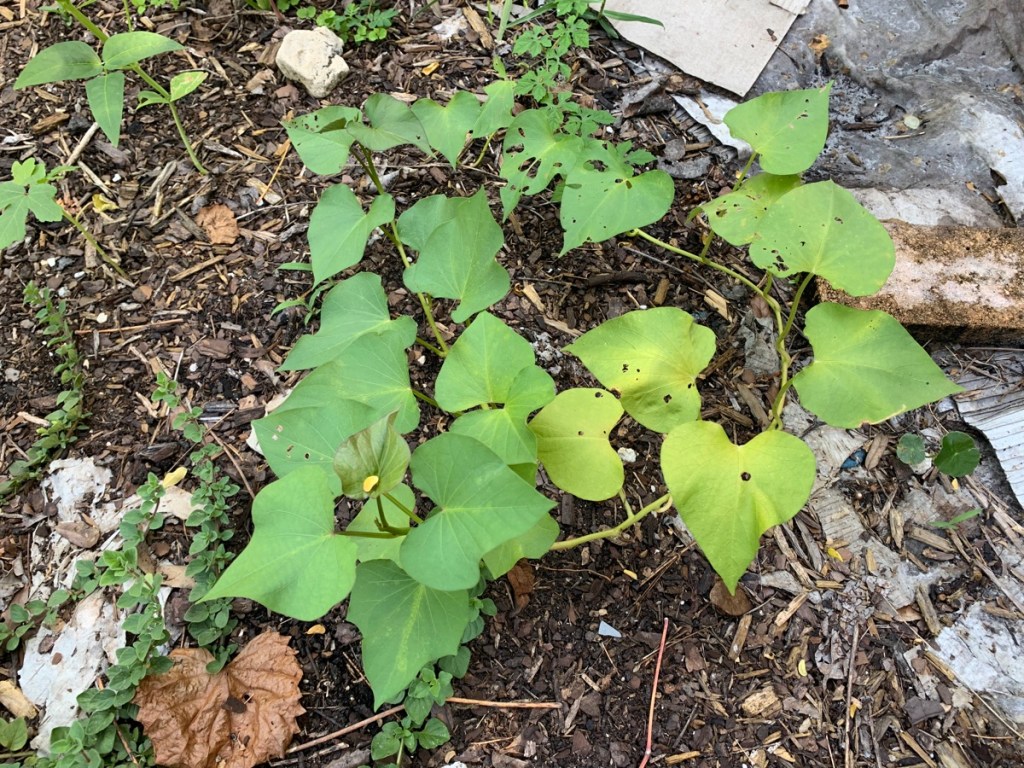
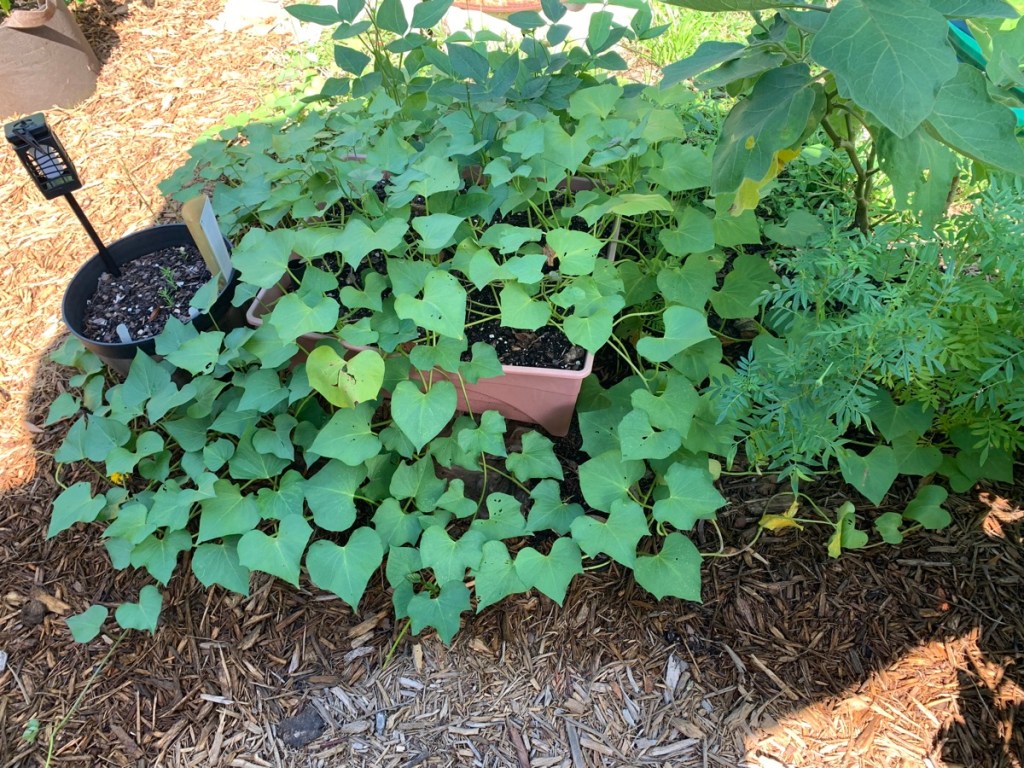
My sweet potato plant was ready to dig and I got a funny-looking, but excellent harvest.
Sweet potato slips were ordered and planted in my Florida yard this past April. I’ve read that they should be ready in 90 to 100 days. It’s August, and time to check for a crop.
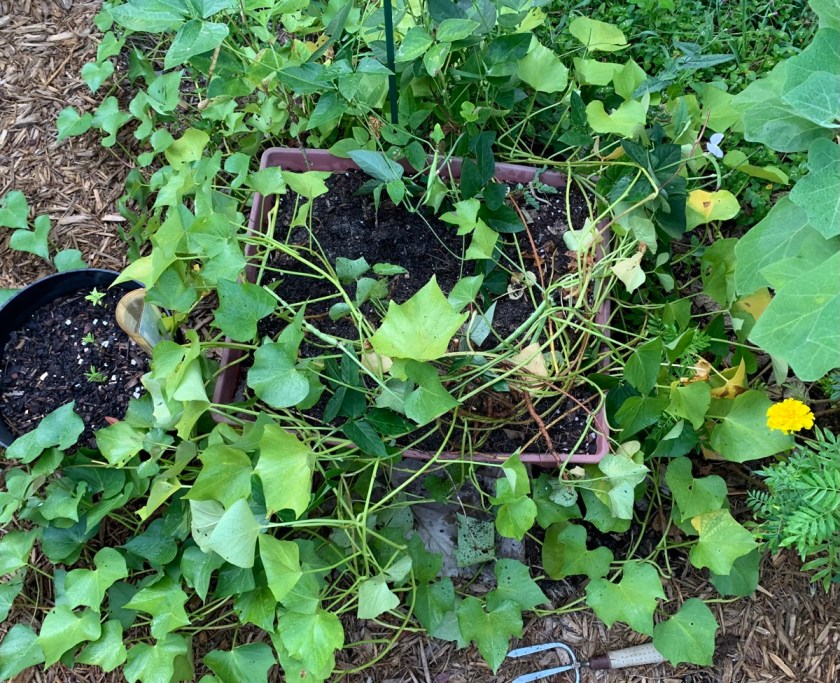
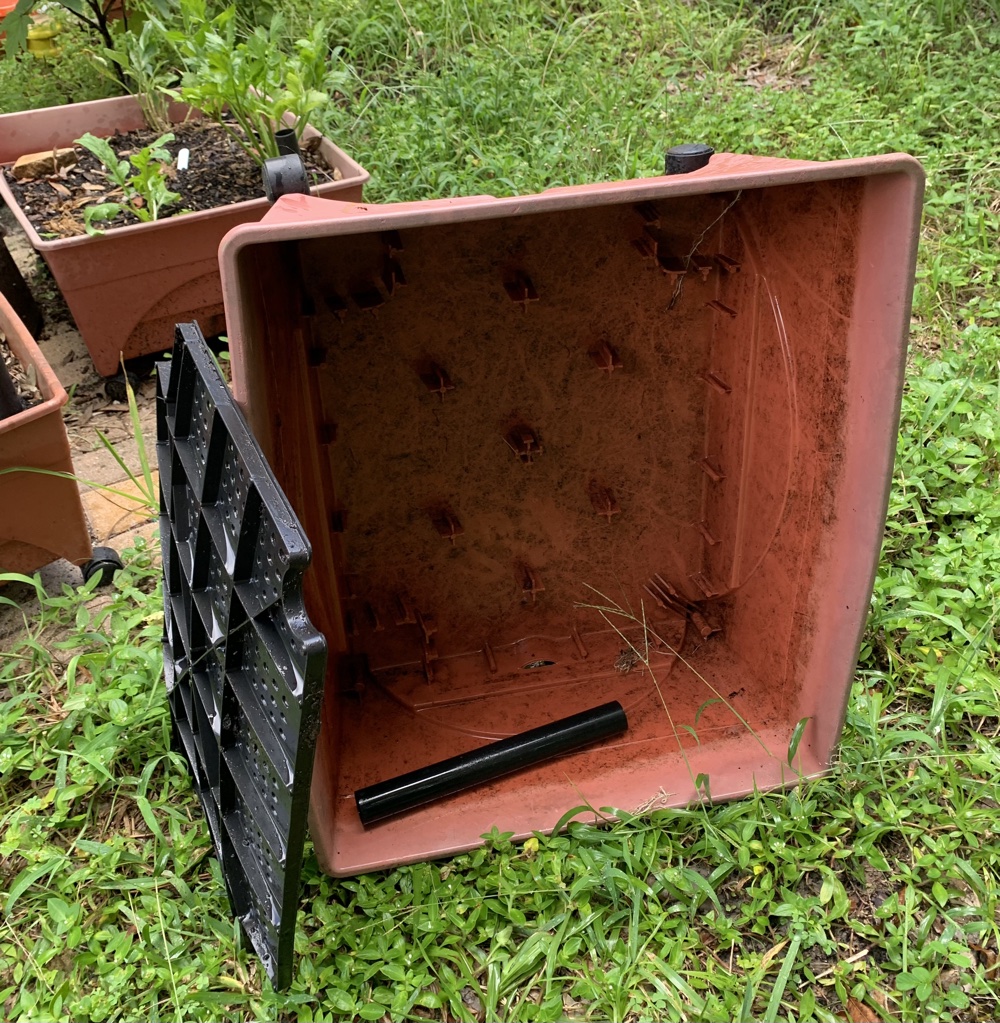
One of the 12 slips, received back in April, was planted in a grow box. That plant did great! It had many vines sprawling everywhere all around the ground. I was able to eat the leaves in my salads as well. None of the other sweet potato plants, planted in the ground at the same time, look this nice.
Grow box – 1 slip planted
Grow box with sweet potato plant
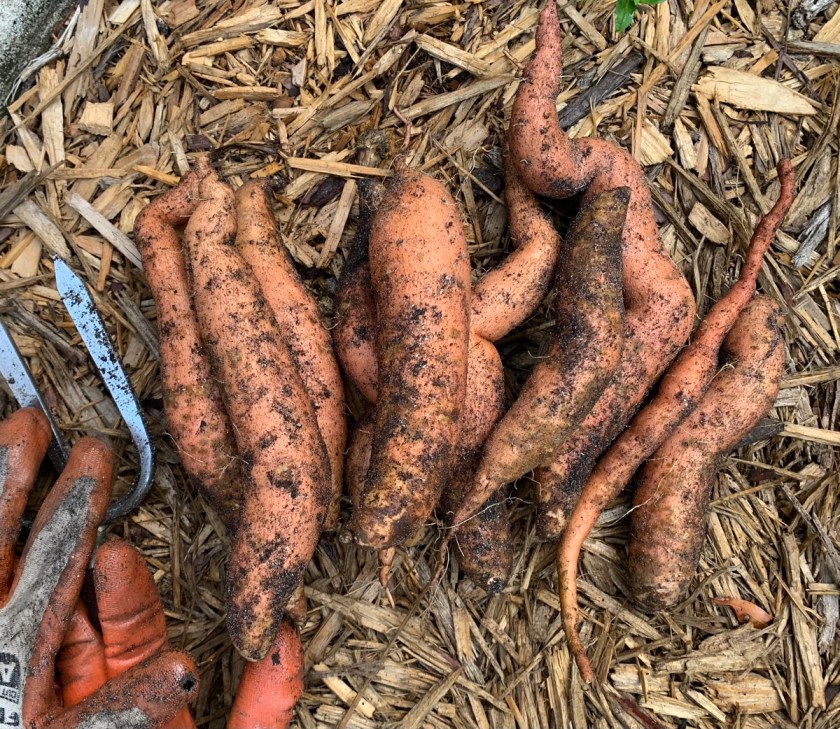
Today, August 2, and it’s been over 100 days. I decided to dig and see if the potatoes were ready. The sweet potatoes (Beauregard variety) I harvested are not huge, but slim and long. I think they will be delicious!
The crooked ones formed because of the box. They were a bit packed in. This was not the ideal location to grow, but I’m happy with the amount that grew.
Sweet potato harvest!
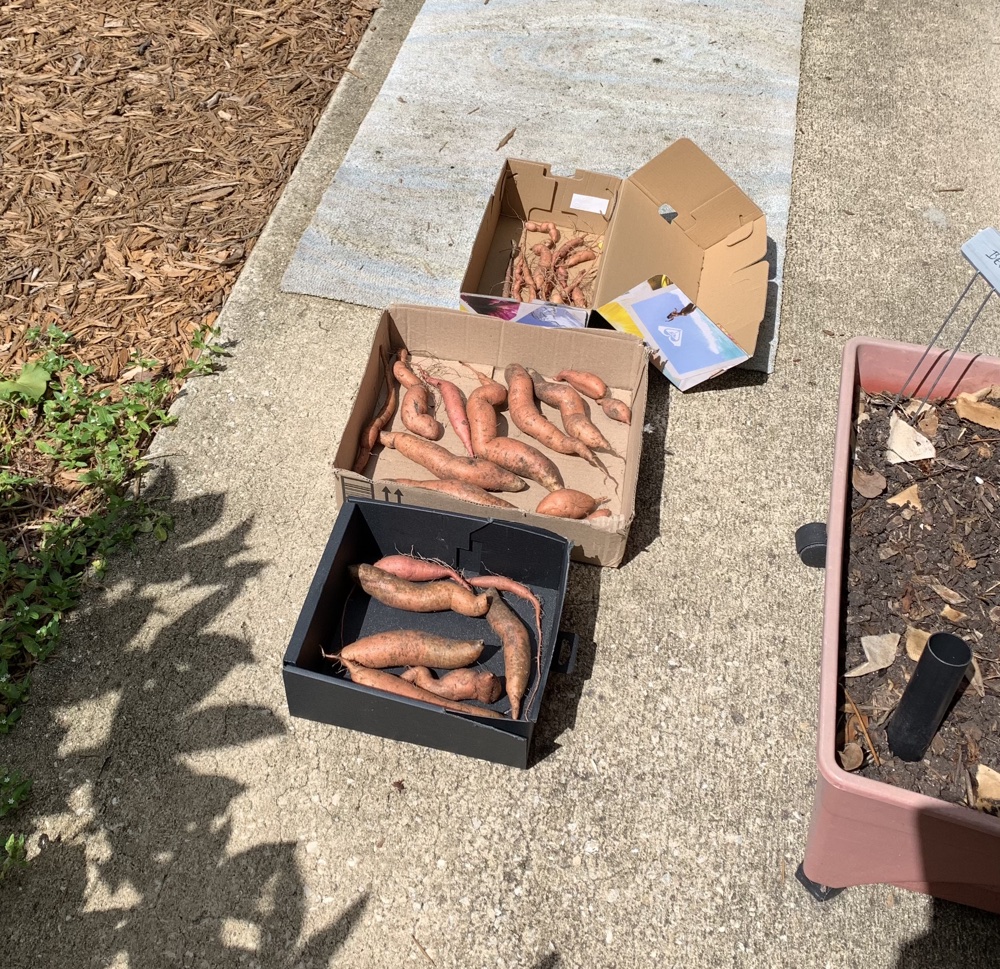
The Dig
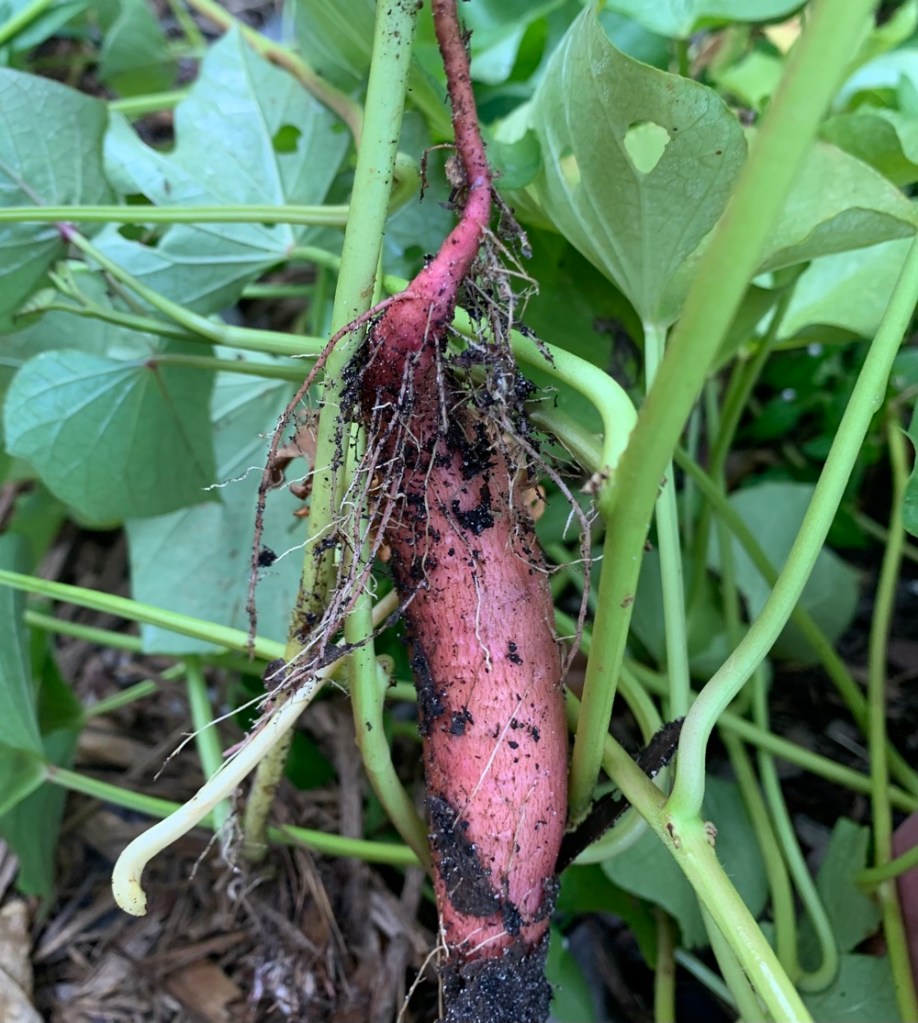
It is exciting to have a harvest that comes from underground. Gardeners are unable to really see what is growing until it’s time to dig.
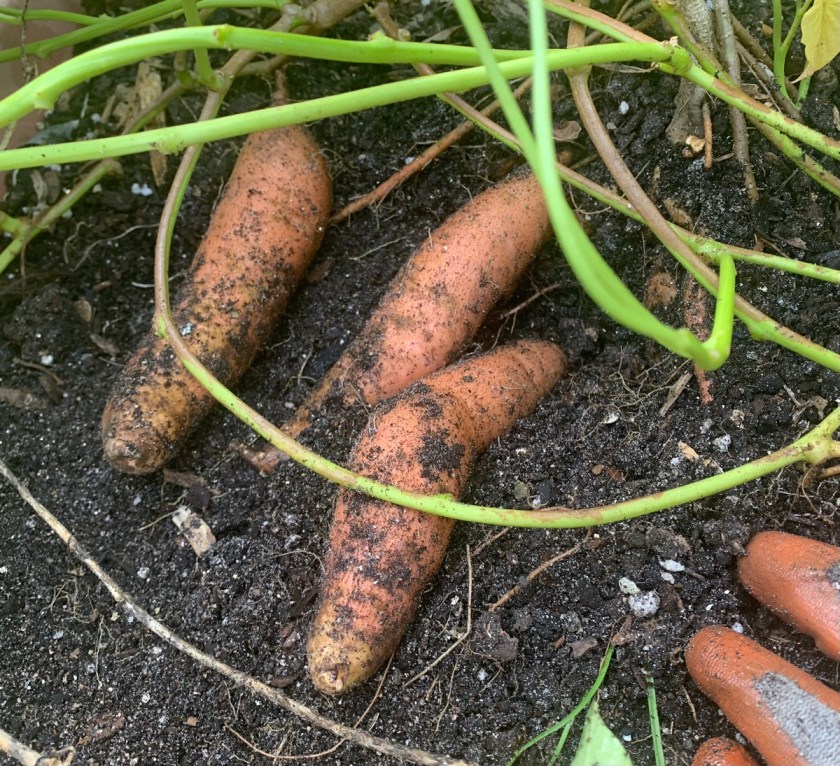
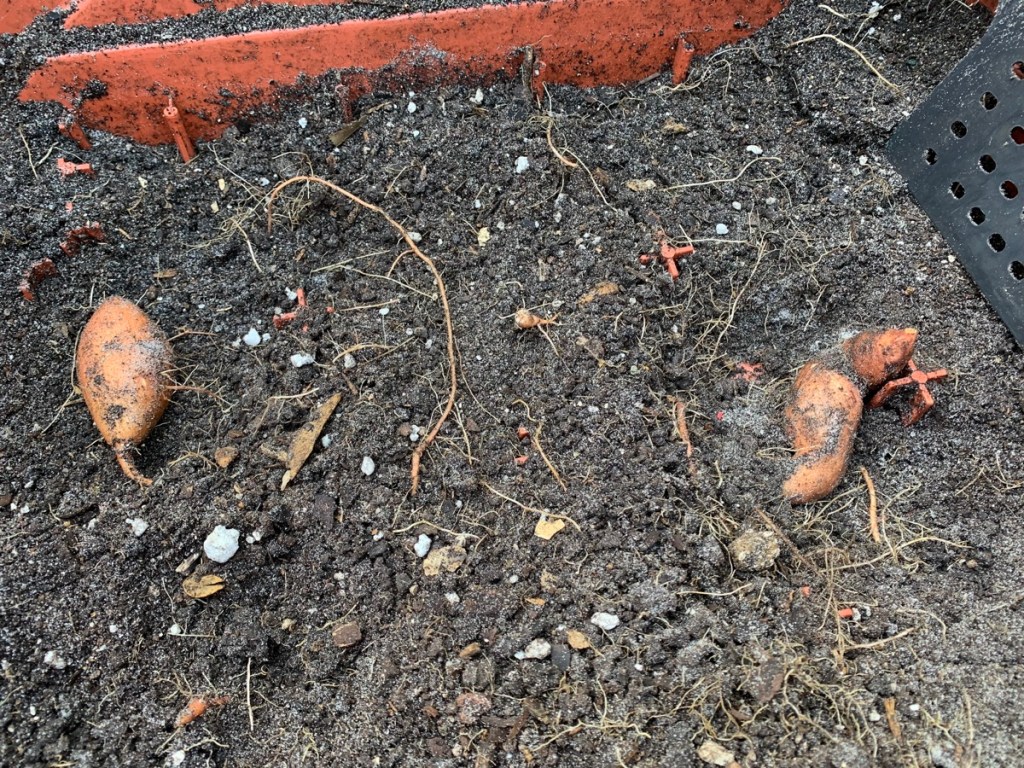
I loosened the soil and reached in with my hands and found the biggest potatoes just under where the slip was planted.
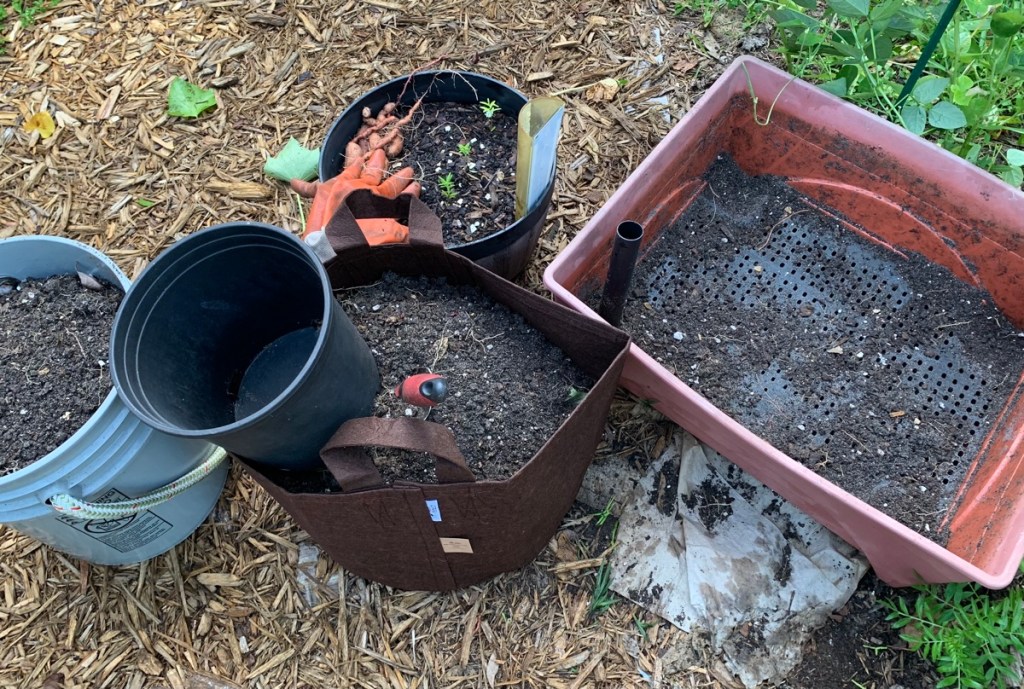
PulledMore potatoes beneath the drain matDirt moved to pail and fabric bagRinsed box
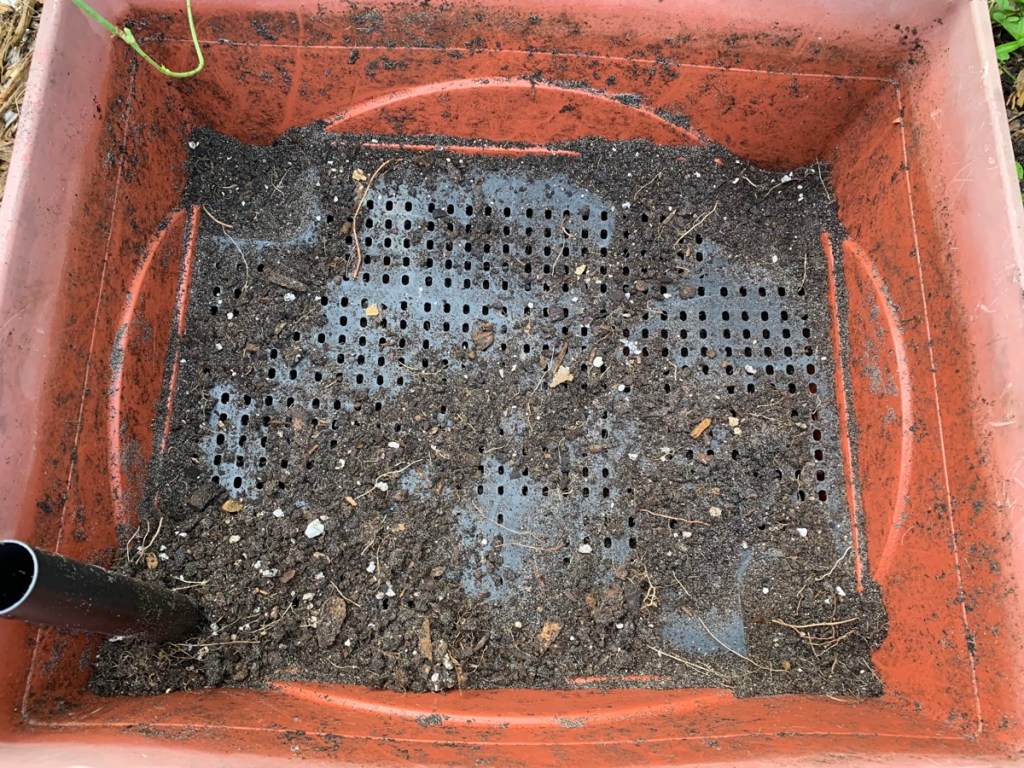
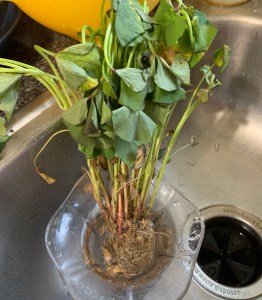
The grow box was emptied of dirt, which was full of roots – and more sweet potatoes! When I pulled up the black drain piece, I found three more potatoes at the bottom.
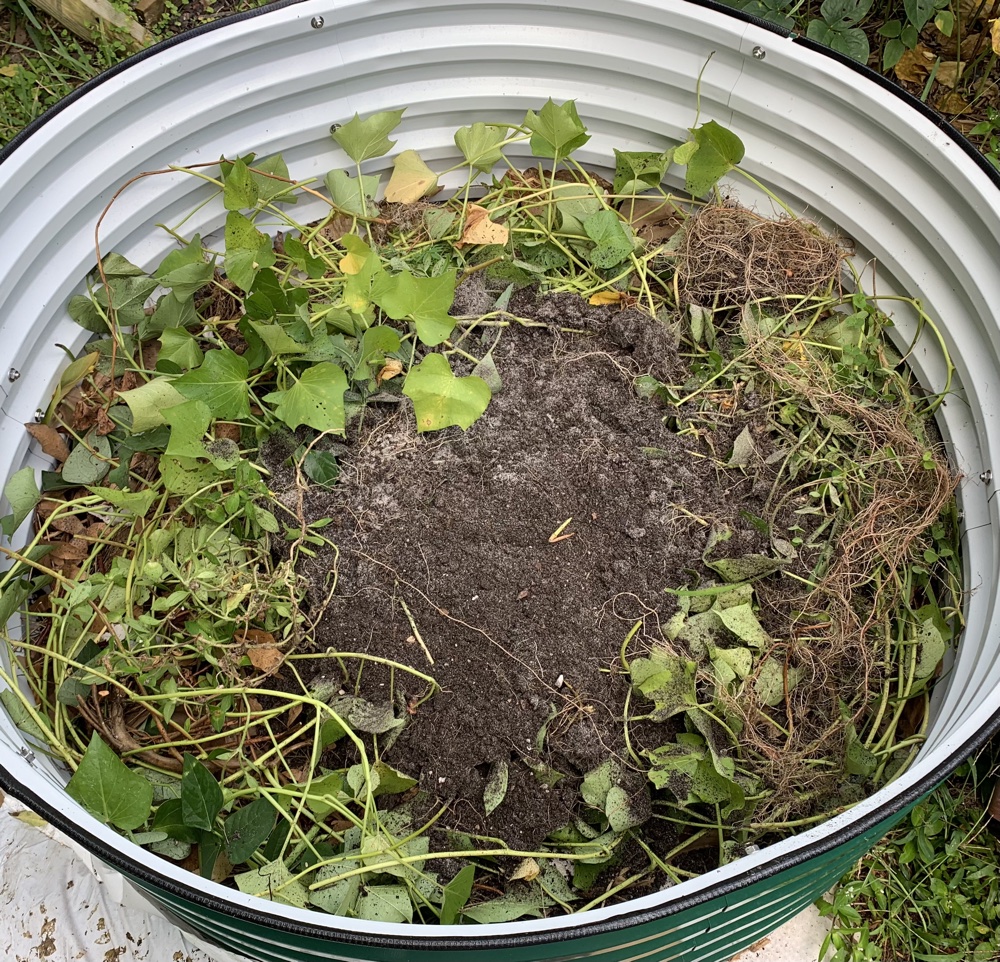
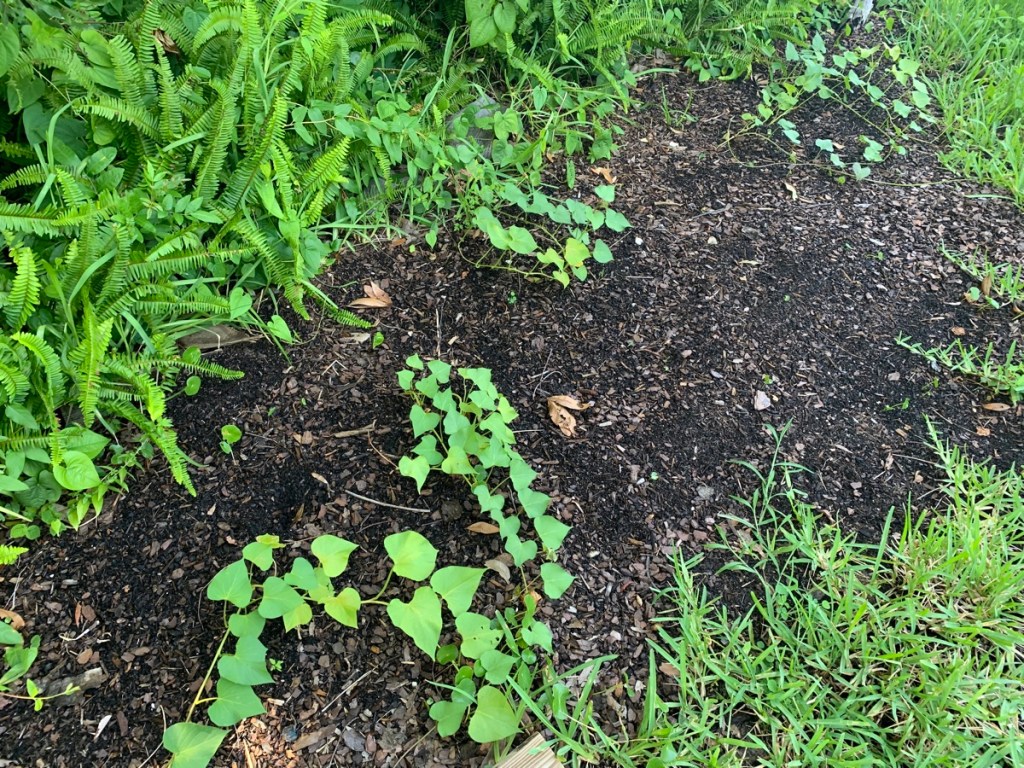
While pulling up the vines, many had rooted in the ground. I found a few more small potatoes while doing that. I’m emptying the box to create a better system for drainage. It also needs new dirt and amendments for whatever is planted next.
All the vines went into my Vegega raised bed. I’m using it as a compost pile until I can get some dirt. All these nice vines will help fill it.
Ground root sweet potatoFilling Vegega bed
Buying Sweet Potato Slips to Plant
Sweet potatoes grow from slips, which are little plants that are set into the ground. Nurseries grow them and ship them out when it’s time to plant in your location.
This past year I ordered from Annies Heirloom Seeds. I did not know when the plants would arrive. Minimum order was 12 slips, which I really didn’t have space for. Of course with my luck, they arrived right before I left for vacation for 2 weeks! I had company and then I flew north. I barely had time to get them into the ground, and a few I didn’t.
It was hot and rain-free while I was away – of course – and I couldn’t care for the little seedlings like I should have. Currently, I have only 7 more plants growing. They need longer to form the potatoes, so I’ll check them later in the season.
I plan to buy my sweet potato slips from SESE in December, which is when pre-ordering begins. I like that I can get only 6 slips instead of the 12 (minimum) at Annies. They ship to various locations when it’s time to plant and ship from mid-May to June. I plan to have some good beds or ground areas ready by then. This next year, I will be ready!
Curing Sweet Potatoes
I had to search for info on curing the potatoes and found it at Southern Exposure Seed Exchange. They have a page full of information, if you are wondering about how to care for slips, plant, grow, harvest and cure sweet potatoes.
They need heat, and they grow very well here in Florida, so northerners probably can’t grow them. I’d like to know.
To Cure: Let dry outside, shake off excess dirt (don’t rinse or damage the skin), and place in a humid environment (no problem there!) for 7-10 days. For long term storage, keep in a cool area away from light. Click the link above for full page of information.
Curing on the porchSun for less than 30 mins
I look forward to eating these potatoes. The garden is not giving me many crops in this heat, so finally having food is awesome!
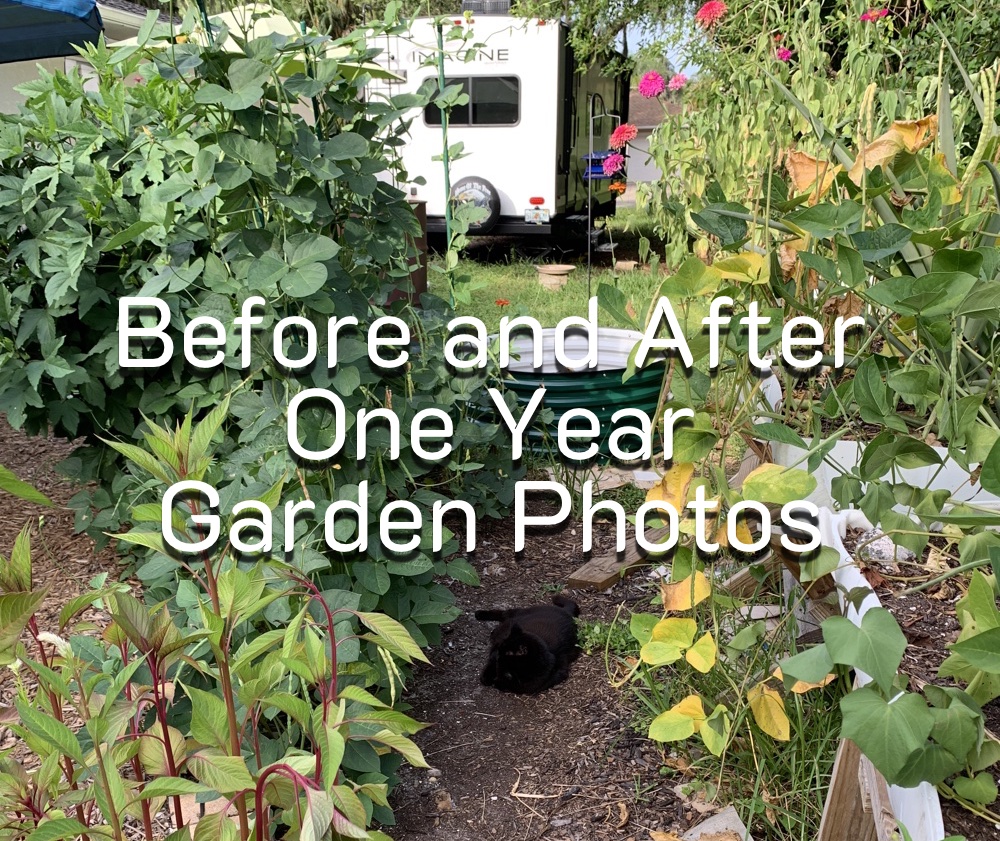
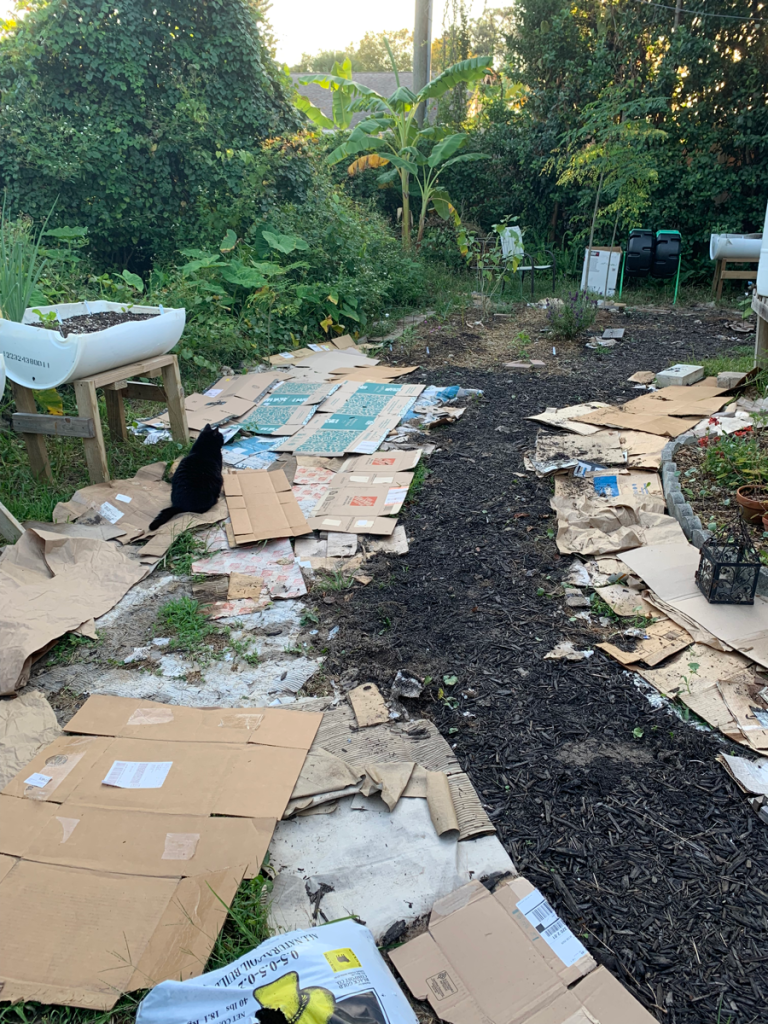
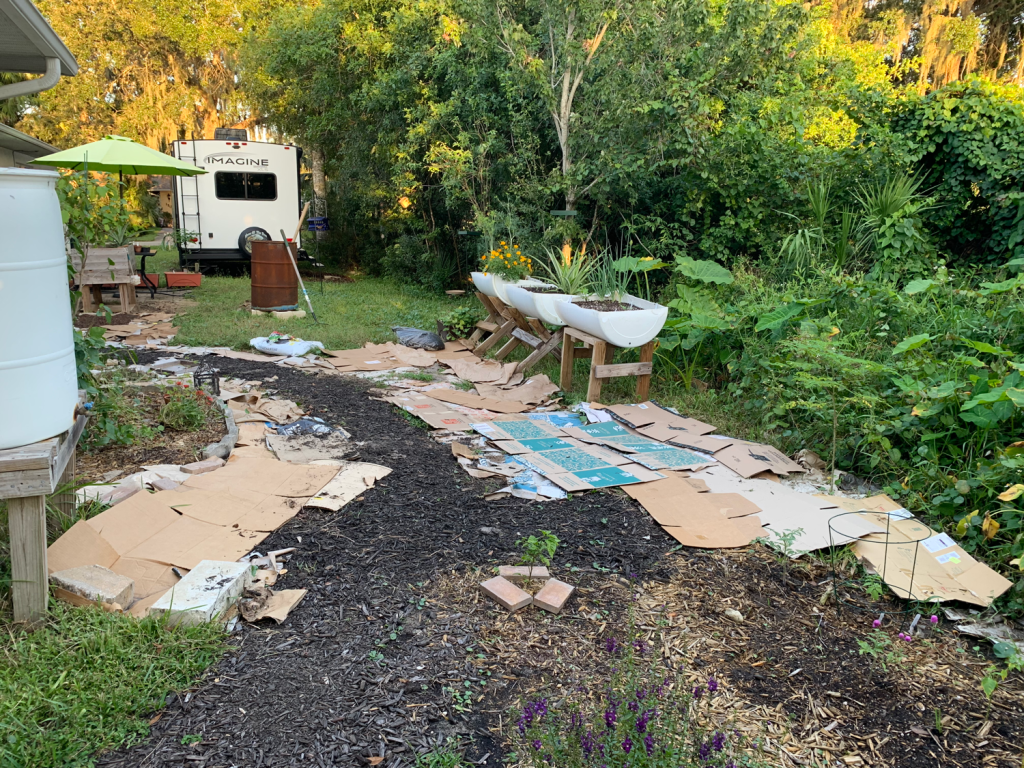
In the beginning of 2023 my plan was to create a small vegetable garden space in what little bit of yard I have. I’ve been blogging about some of my journey, and this page has photos of the before and after. A lot has been accomplished in a year.
When I came across these old photos from last year I thought it would be fun to show the difference.
Before…. and …..After
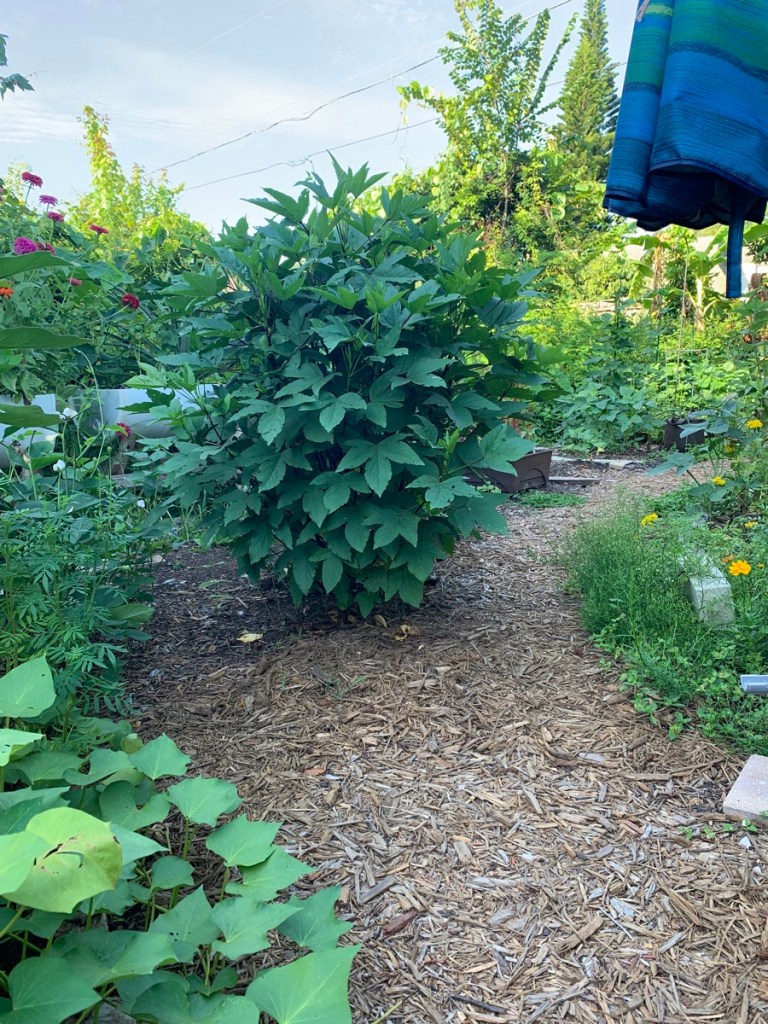
2023 Planning future vegetable gardens2024 Path to the back – Roselle bush
For much of the past year I have been working to create dirt spaces and pathways. Occasionally I have also grown some veggies! I can work outside year round, which is beneficial, although there is little rest.
The Roselle hibiscus bushes have grown like crazy. They were grown from seeds planted in Fall. The Moringa tree has also grown after slowing down for the winter months.
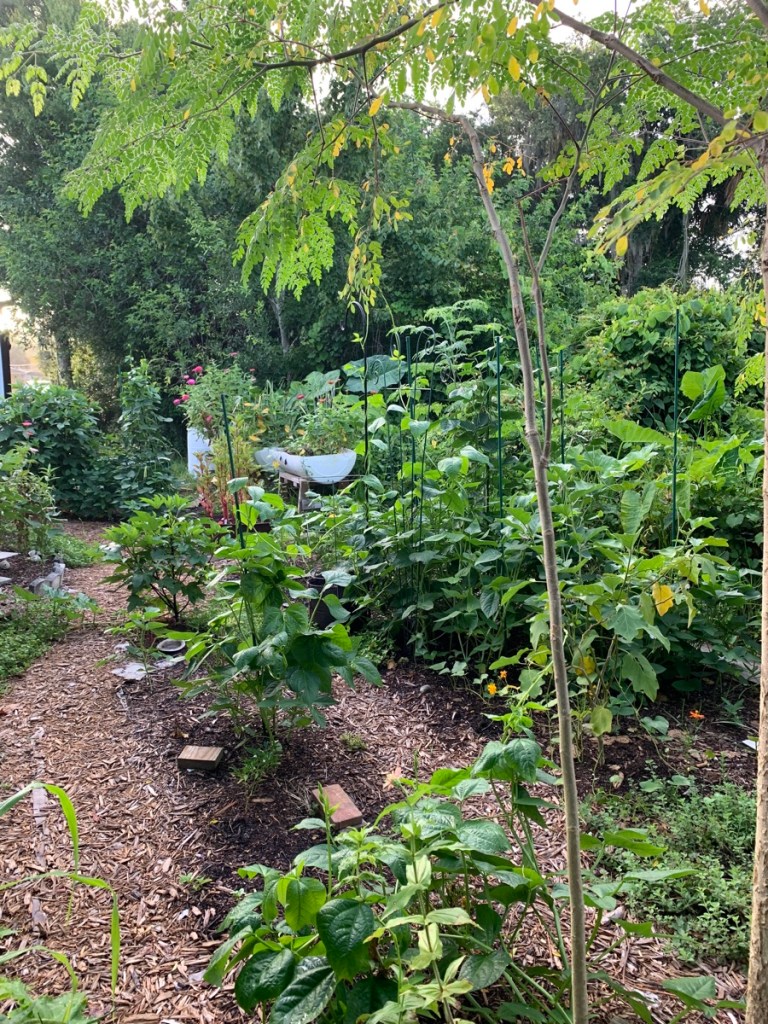
2023 Expanding gardens2024 Summer greenery
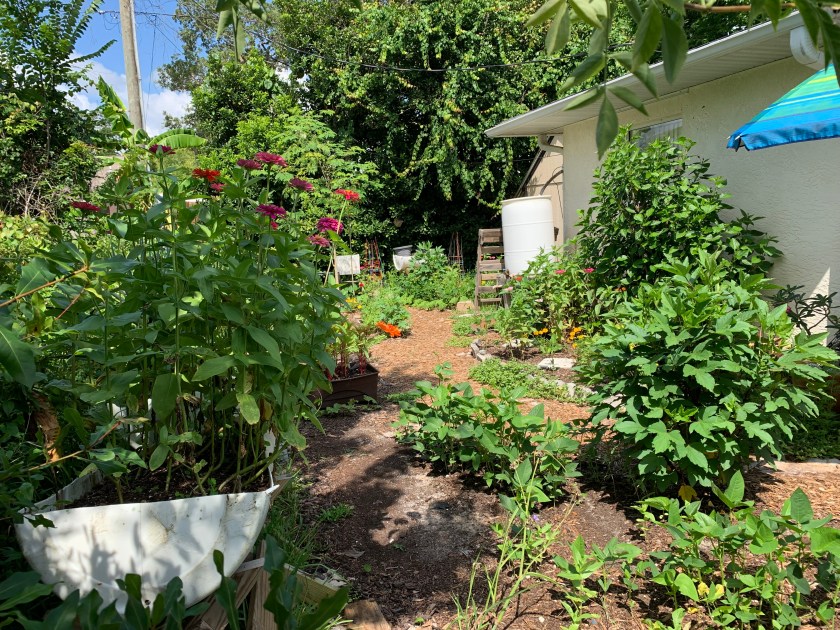
Before I had a chance to finish writing this page, the garden has filled in even more. Some plants really enjoy the extreme Florida heat and humidity.
It is now July, so this photo is after about 1.5 years of gardening.
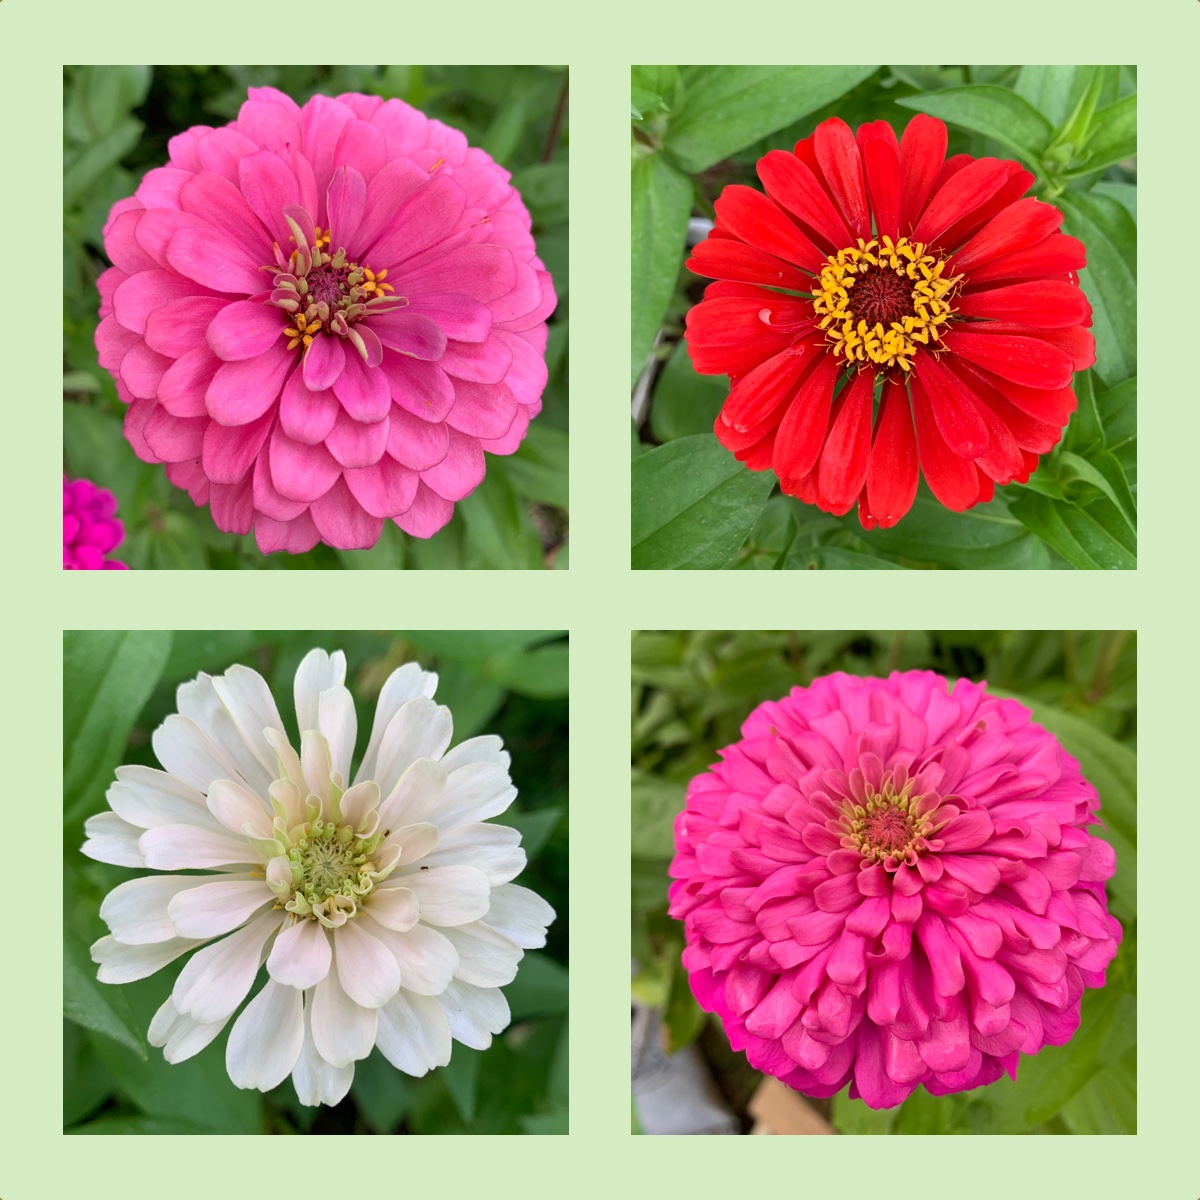
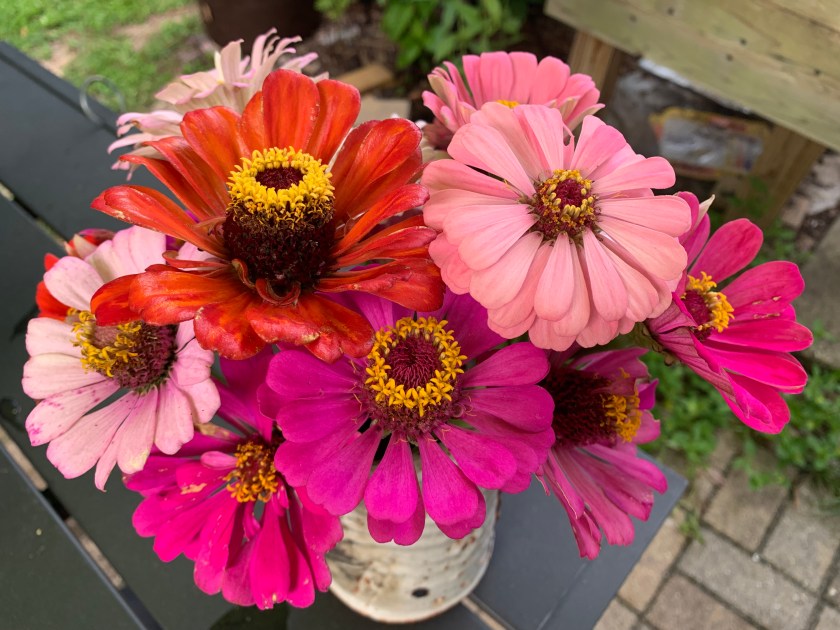
I’ve really been touting the benefits of zinnias recently and I can’t seem to stop!
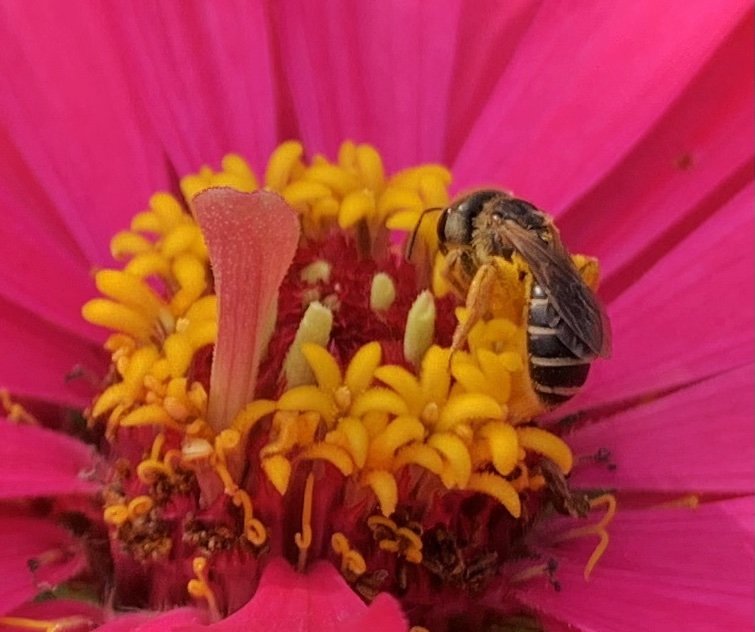
Bee in center of hot pink Zinnia
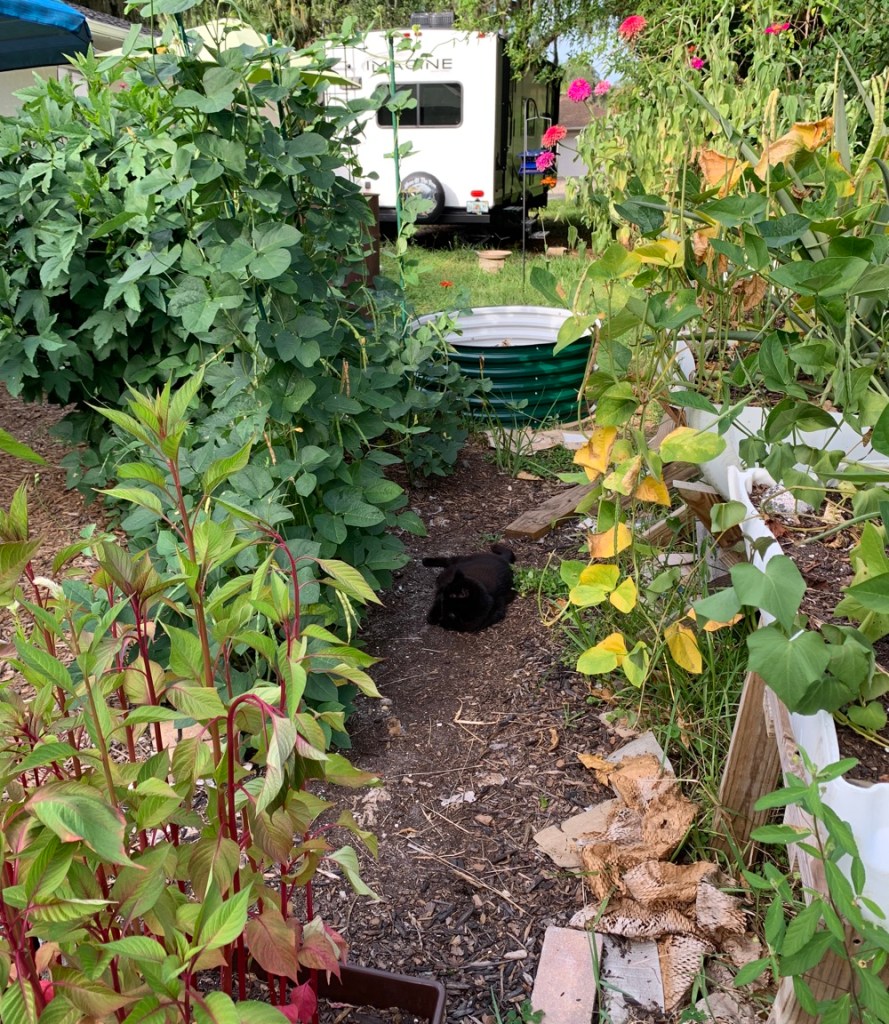
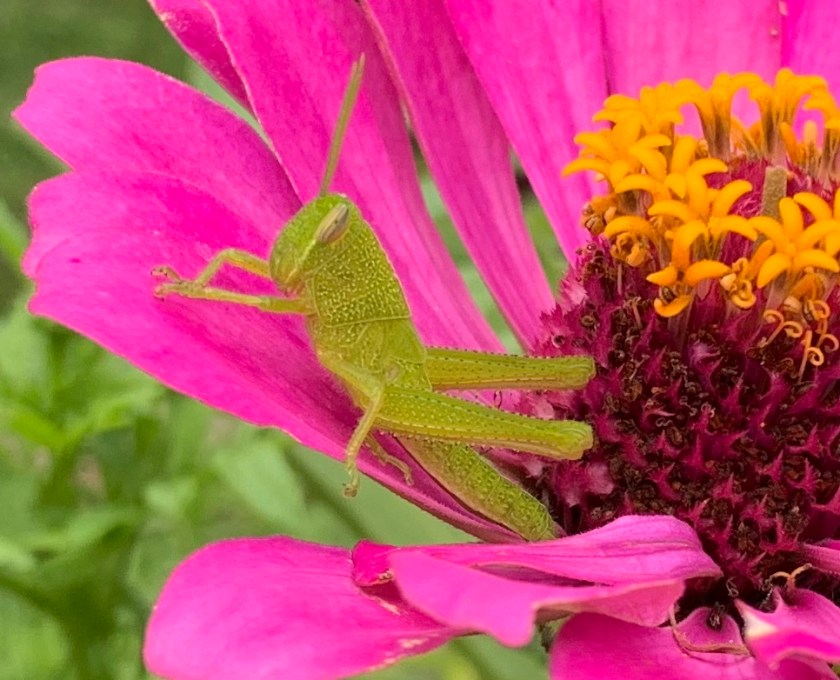
Each morning I check on the garden. The iPhone is in my pocket because usually there is something to photograph.
Sometimes the little armadillo waddles through the garden, or maybe a turtle will come up out of the woods. And there is always activity around the zinnias.
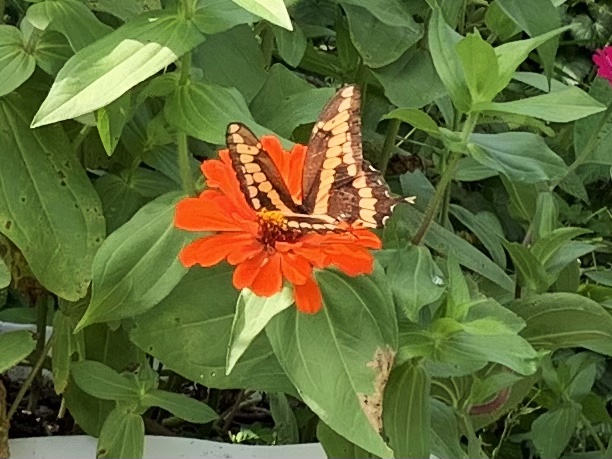
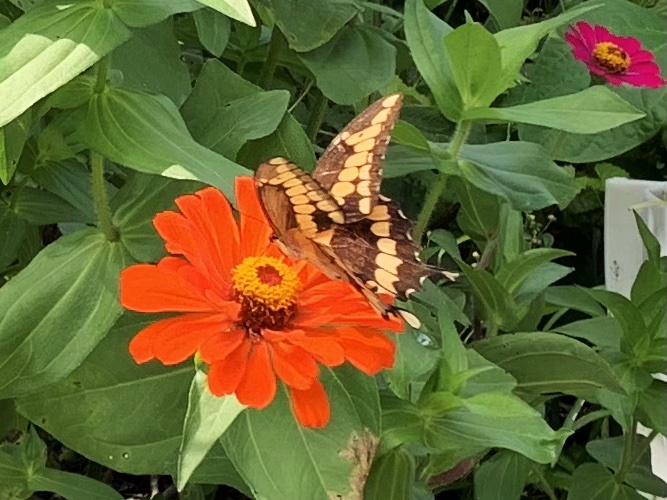
One afternoon I watched the amazing Giant Swallowtail butterfly wander from one zinnia patch to the next. I tried to get some decent photos but he was continuously flying and wouldn’t let me get too close. That orange zinnia was his favorite.
A magnificent butterflyGiant Swallowtail
The photos don’t do him justice. This is a butterfly that is larger than most I see, but his wings are also floppy, for lack of a better word.
I found this video which will show you the swallowtail flying (very beginning of video), which is exactly what I saw, but couldn’t capture. This woman goes on to mention a bunch of plants that will attract them. The wild lime tree sounds perfect, if only I had a decent size yard.
Check out this video by a woman in Alabama who raises Giant Swallowtails when she finds them on her citrus trees. I’m not sure why she doesn’t just let them live on the tree, but I guess some people enjoy raising them. Her garden is stunning! I need some citrus trees.
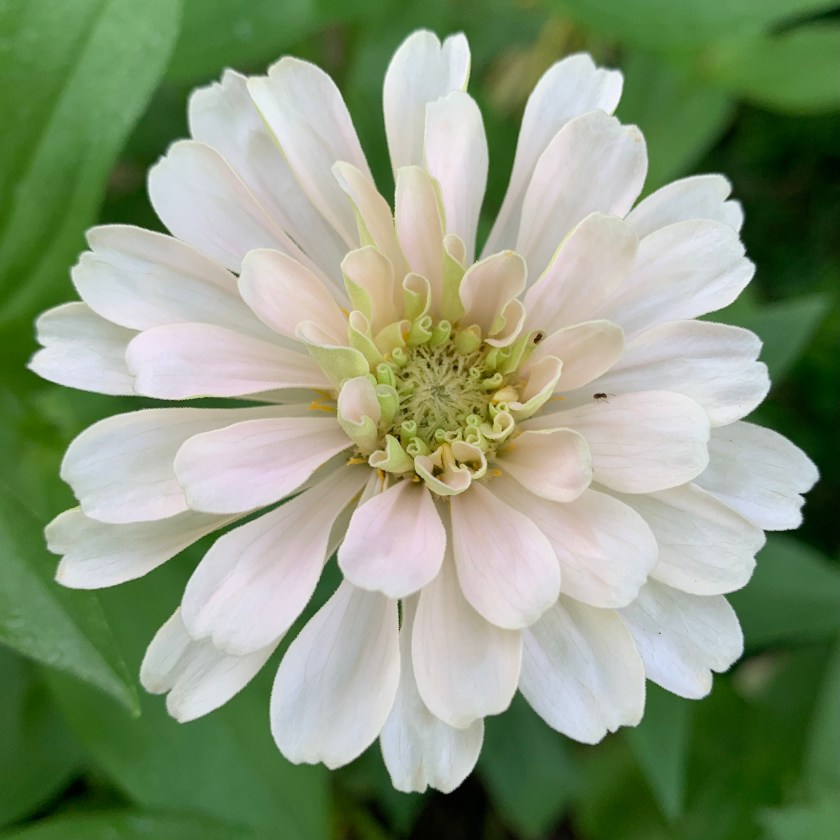
White zinnia, or very pale pink
The brightly colored zinnias are the ones that attract everything, but now I have a whitish zinnia! It is lovely.
Each day, very early or very late (it’s July in Florida!), I sit for a bit in the garden and just observe. It’s when I see a hummingbird flitting over the zinnia patch and drinking!
The flower and vegetable garden at the side / back of my house is very small. I can sit in one spot and see most of it.
I hope you can find time in your busy life to sit still and observe what is happening in your yard. If nothing is happening, maybe consider hanging a bird feeder, or planting some flowers. Currently, there is a blue jay family that comes for seed and water each day. The babies are noisy.
I don’t like where I live, but I’ve made it more tolerable by creating this space that is alive with nature.
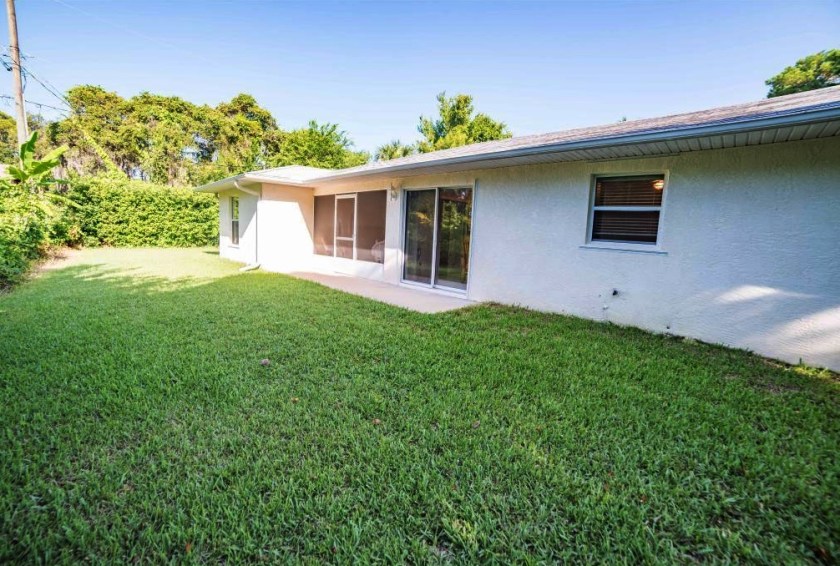
My Yard Before the Gardens! Boring…
Below is a photo of how this area looked when we moved in! Some people like this nice, neat, grass look, but I find it depressing and certainly boring!
I’m sure the grass was sprayed regularly for bugs, like most people do around here. Nothing interesting at all was growing on this lot. Only the banana trees in the back corner gave this space any interest. And I think they came from the people behind us.
House backyard in 2016
Dead Zinnia Bouquet
As the zinnias get old, I pick them and bring them in. These fading zinnias will go into my seed saving box once they look completely horrible. They are no longer perfect, but I can enjoy them nonetheless. I leave the flowers growing outside for as along as possible for the butterflies and bees. I only cut them when there are plenty more blooms to feed the bugs.
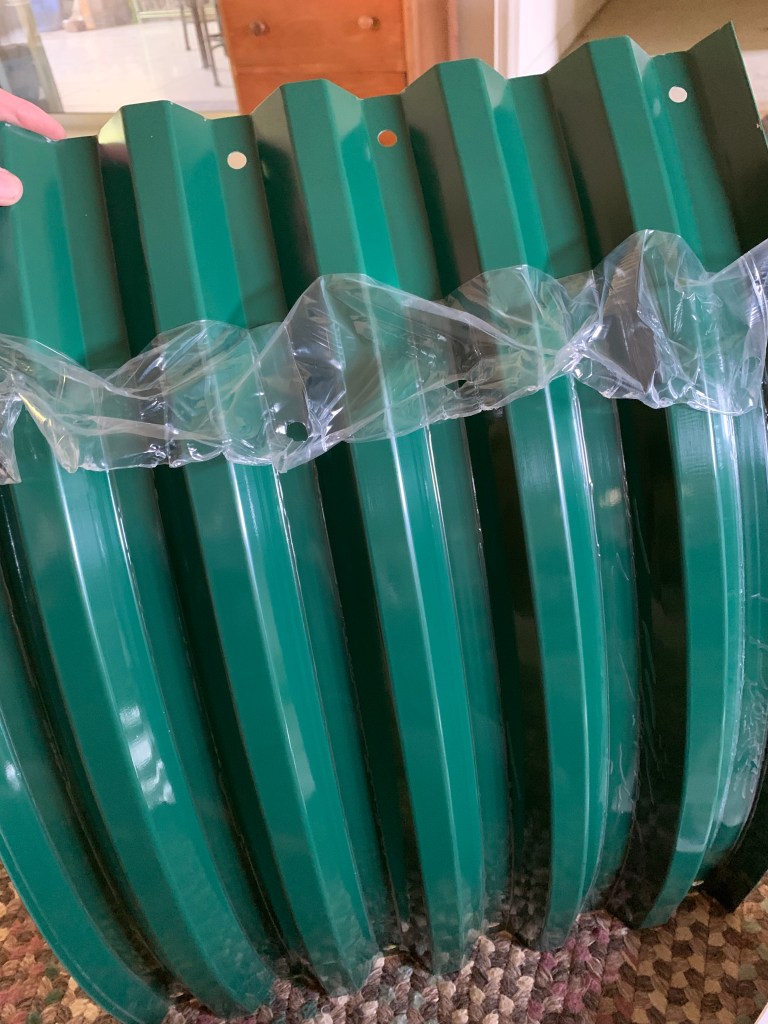
I’ve wanted a permanent (not made from wood that rots), large raised garden bed for a while. Raised garden vegetables are easier to manage than in the ground planting. I have better luck in a bed usually. This metal, round Vegega bed seems perfect.
Every time I have searched for metal raised beds, they have seemed way too expensive for me to buy. A few hundred dollars for one bed is way out of my budget. I had no idea of the quality either, until I found a review of the Vegega brand.
At Wild Floridian, I found a nice video review, and she offered a discount code to use for buyers. Her video convinced me to look into this brand further. See the review Vegega bed video by Wild Floridian where she has had the bed for a year and compares it to another type she had problems with (not named).
When I browsed the Vegega site, I liked the bed shape options. They offer sets that can be shaped as you wish once the product arrives – called 9-in-one, 10-in-one. Some of the pretty light colors were not available when I shopped, so I chose dark green.
My yard is small, and I was not sure where I’d put my bed. The round shape seemed perfect and I chose the 17 inch depth. This is a perfect depth to grow all kinds of vegetables including the ones with longer root systems like tomatoes, watermelon, and pumpkin. At this point, I have no idea what will be planted in this bed, but I will not be restricted by depth.
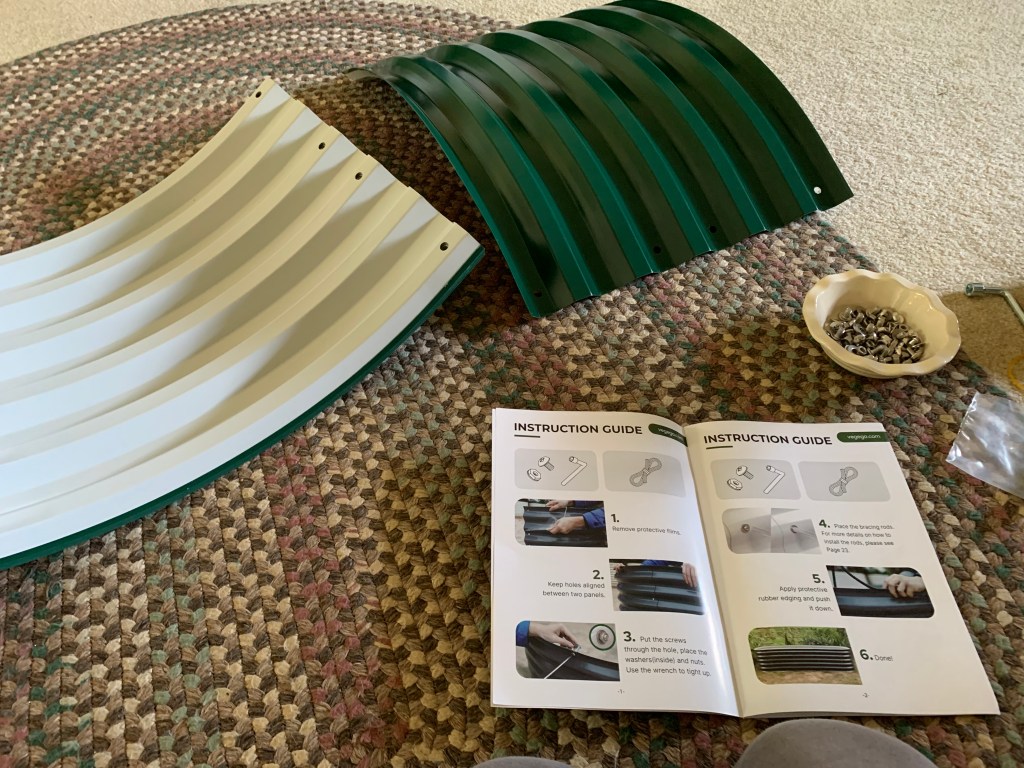
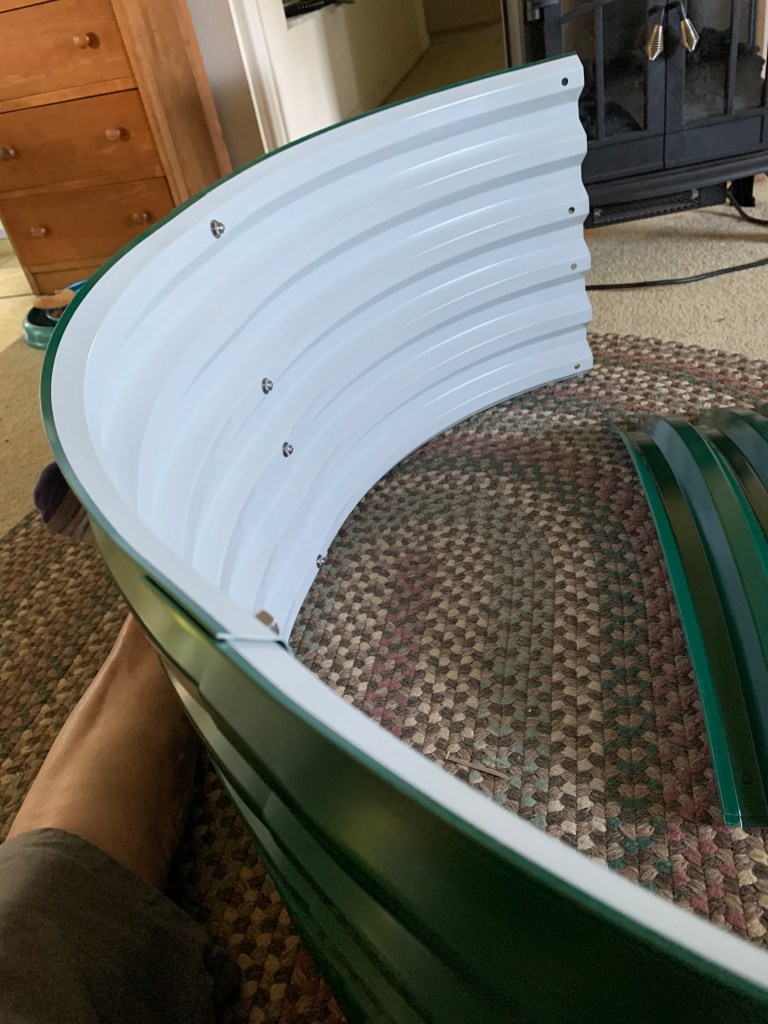
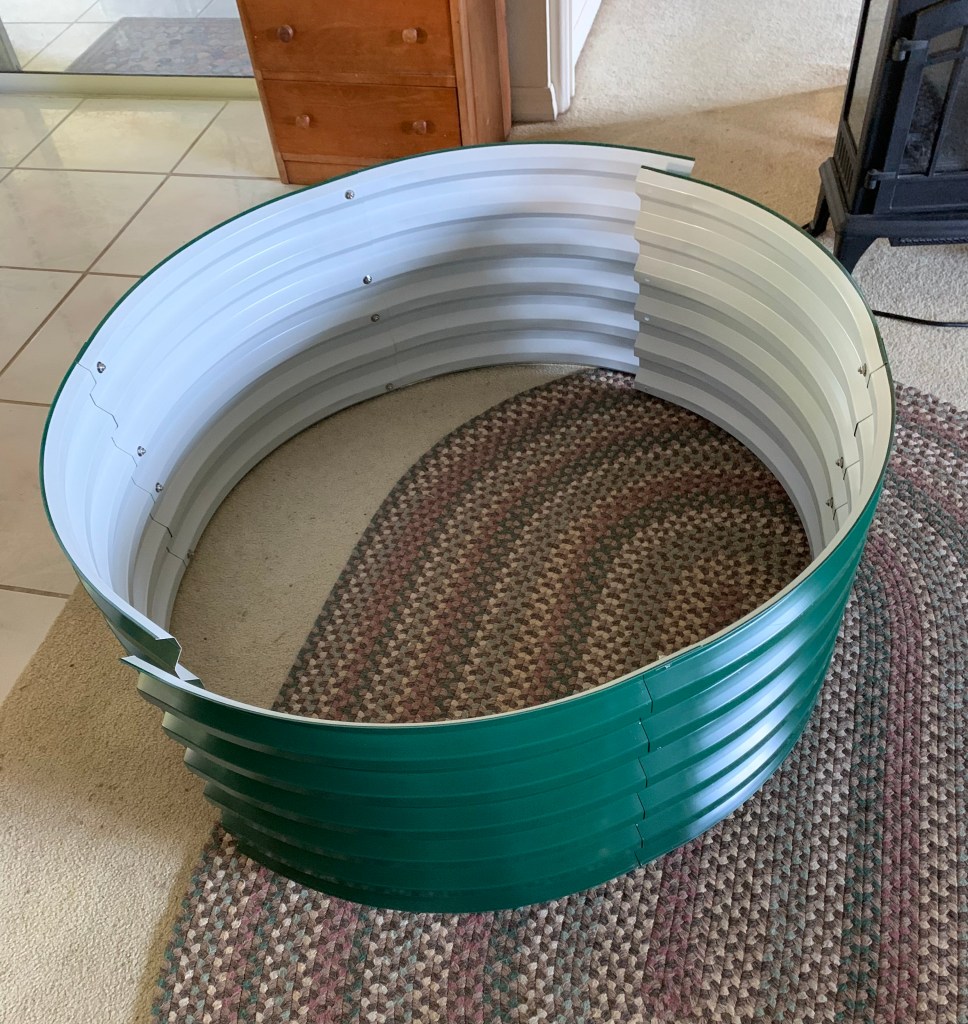
Putting The Vegega Bed Together
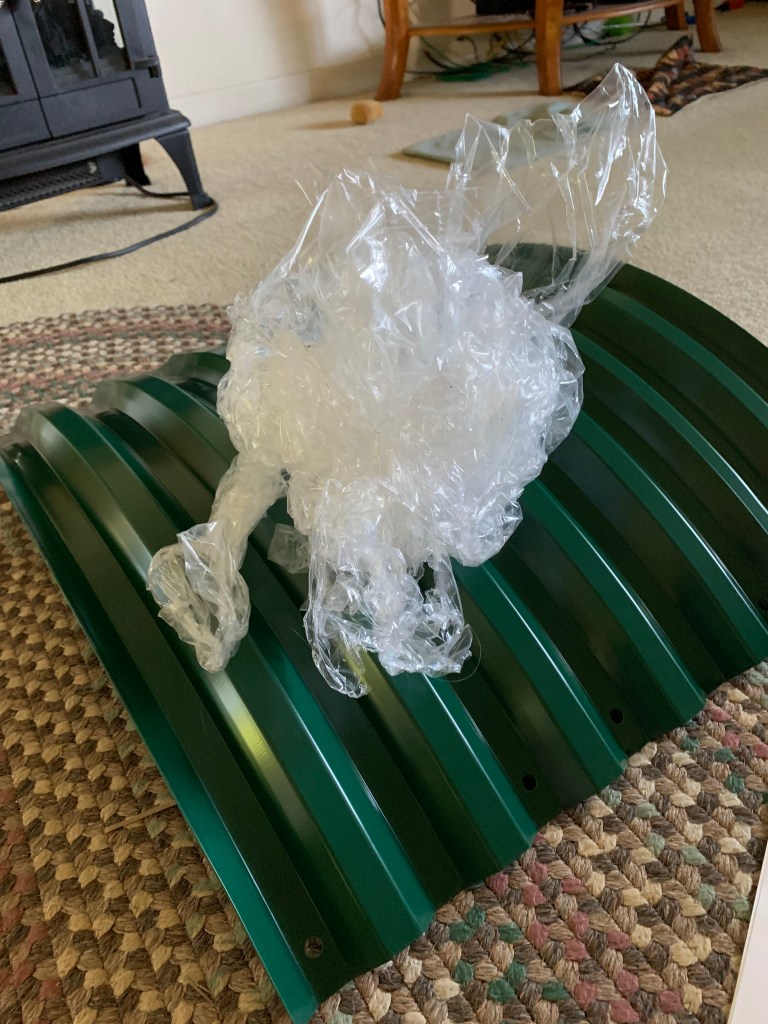
Assembly of the garden bed was fairly easy. I did it by myself in the house (it’s hot here). I think I spent the most time removing the film that covers each section! Screwing the pieces together was very easy. I decided to complete each half of the circle so I could move it outside in two sections to complete the assembly.
Remove filmGood directionsAll film removed!Indoor assembly completeNew bed for the garden
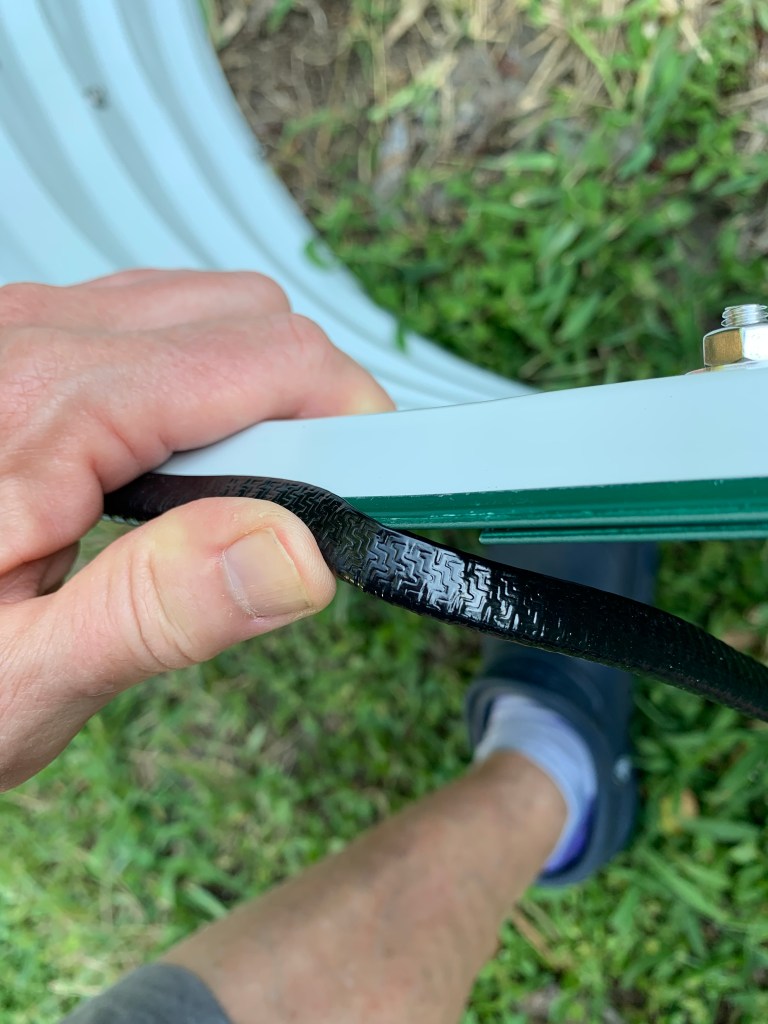
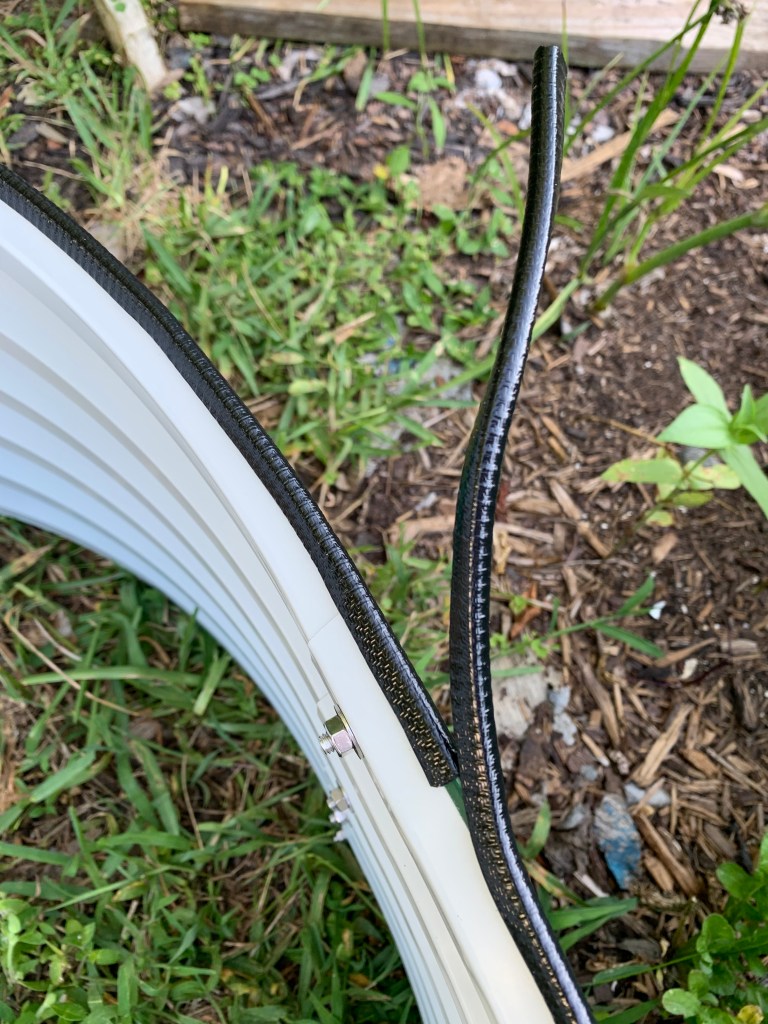
Once the sides are all screwed together, a rubber strip is added to the top. This also was very easy to do, with plenty left over.
Adding the rubberPlenty!
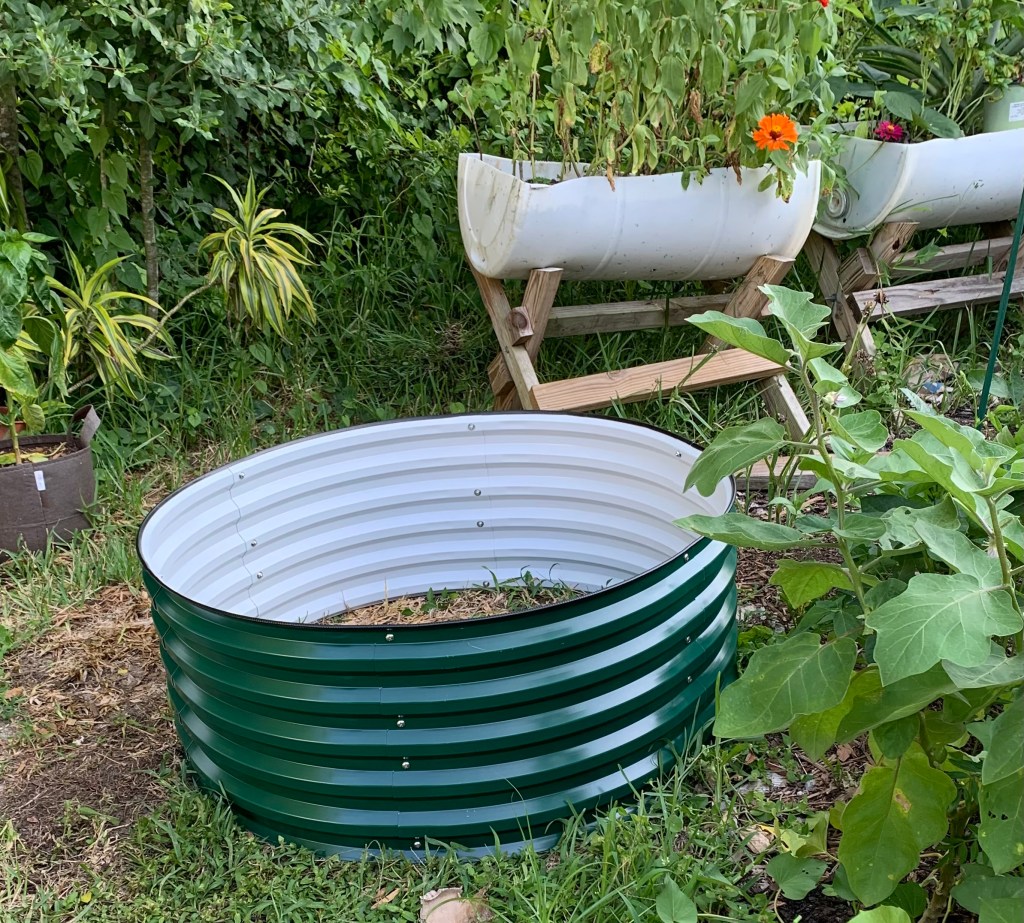
How I Am Filling My Raised Bed
I’ve read all about various ways to fill a garden bed. This is part of the expense, but it’s worth it to create a good environment for the vegetables to grow. I’m not in a hurry, as I won’t be using this bed for a few months.
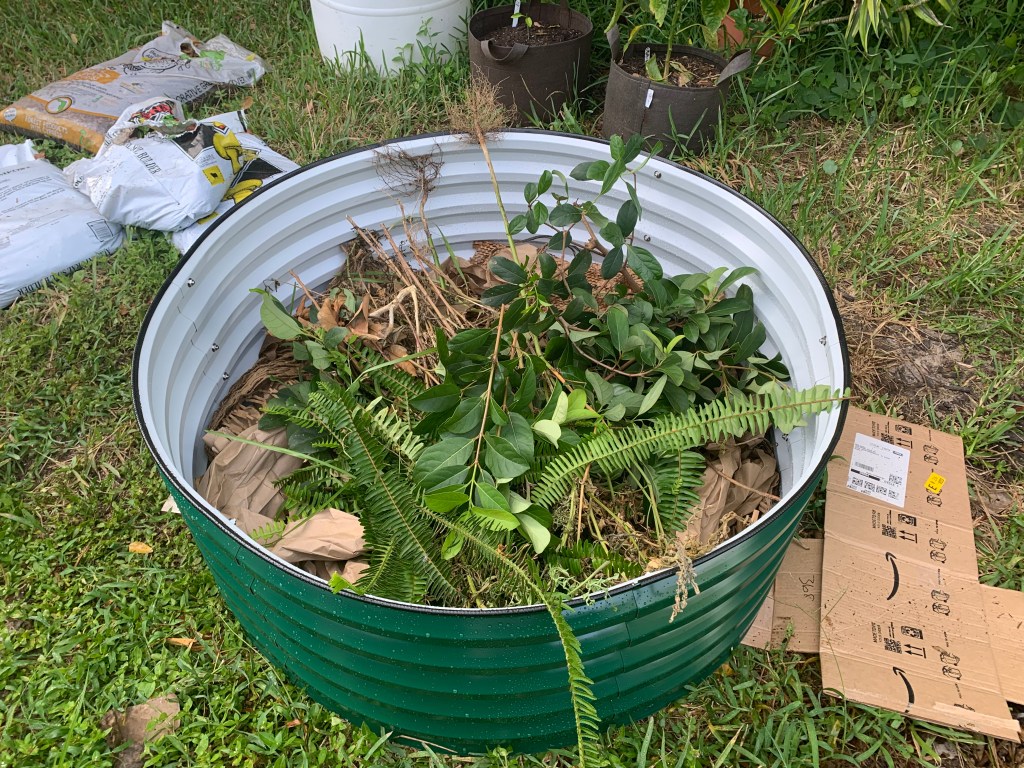
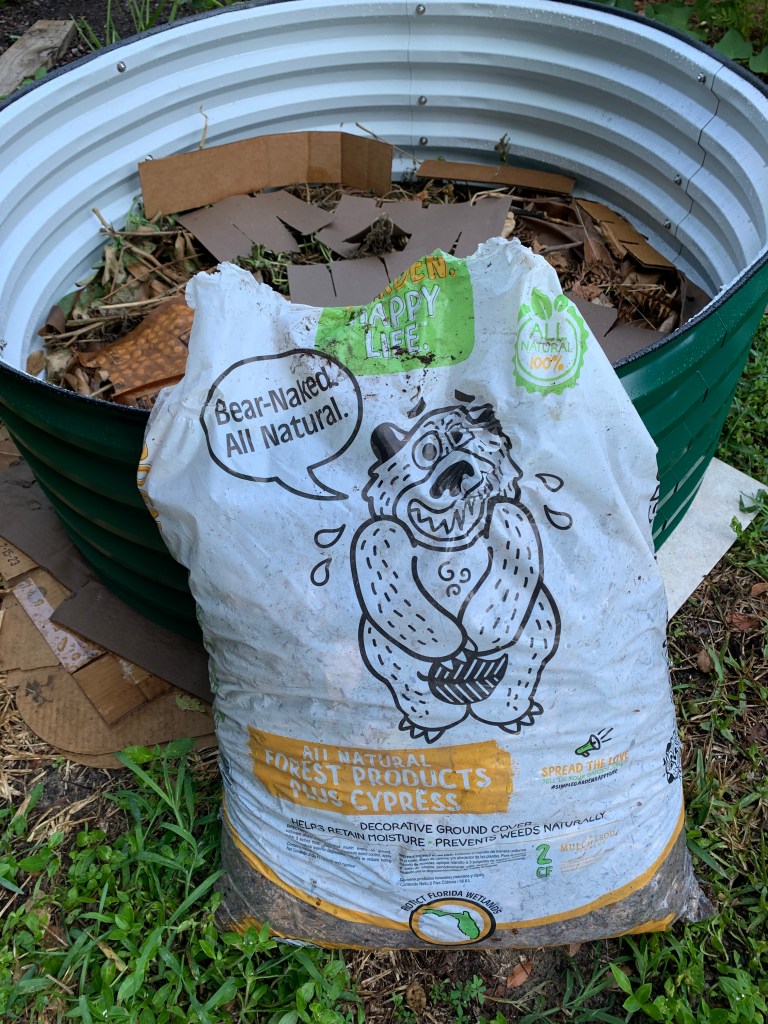
I have cardboard, so I am using it to level the bed. I also have added packaging paper, along with cuttings from the shrubs, and mulch to begin the fill.
Adding mulch
Don’t try to make your raised bed into a restrictive “container”. Leave the bottom open just in case roots want to expand. Also, think about water drainage. Everything I am adding here will eventually break down. Soon, the greenery will turn brown and decomposition will happen. All of this will become a layer of nutrients at the bottom of the bed.
As my marigolds die, I will cut them off and add them here. The same with any other flowers. I’m growing cowpeas now, and some of those plants may end up as a layer.
*FYI: I read someplace that using rocks in the bottom for drainage may not be a good idea, especially if you want to move the bed later on. The rocks will have become part of the earth and will be difficult to move / remove.
My Reason For Wanting a Raised Bed
I want raised beds because it’s easier to add and keep nutrients in the soil. Whenever I compare similar plants that are in the ground, to the ones in the bed, the bed / grow box plants are always doing better.
As an example, I bought and planted sweet potato slips just before my trip north. One slip went into a grow box (center) and others were planted randomly around the yard in the ground. The grow box sweet potato is going crazy with vines all over the place – even though that box is really not nearly deep enough. All the other sweet potatoes are much smaller. We’ll see in a few months if I get actual potatoes to compare.
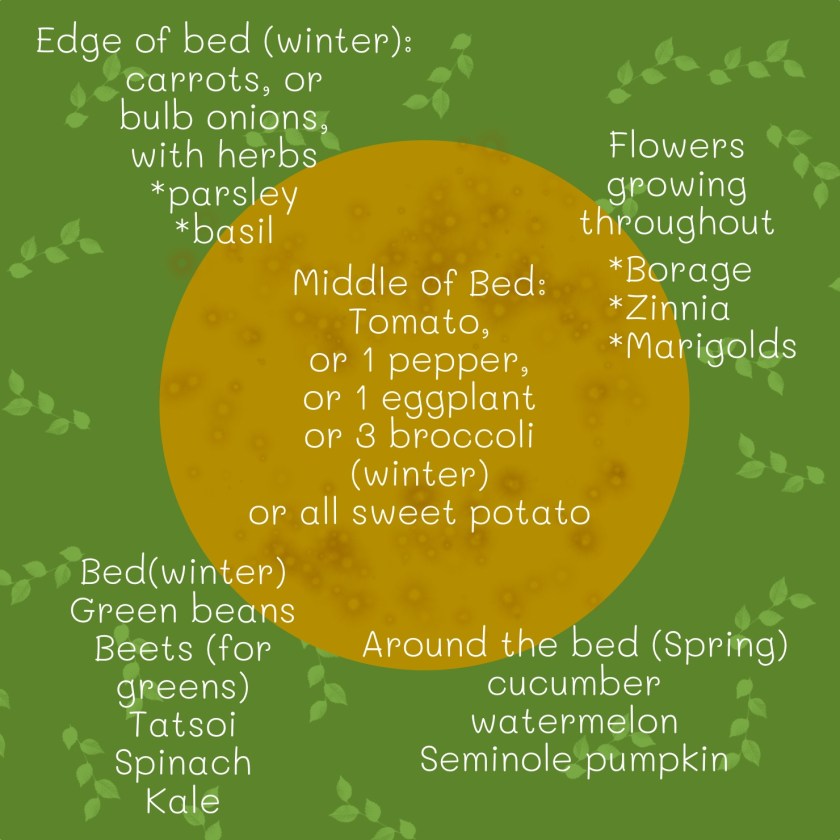
When considering what I have grown successfully (for the most part) I created this diagram with ideas for what to plant in my new, round raised garden bed.
That big circumference is perfect for root crops near the edge. I’m thinking carrots and bulb onions (garlic for you northerners). Both onions and carrots take months to mature. Putting them in as a border – out of the way – leaves space for bigger crops in the middle. I’m thinking of planting broccoli here this winter.
Planting ideas
Eventually I will be adding garden soil along with perlite for good drainage. Before I plant, I will mix in some other amendments such as bone meal. More to come about planting in this new space. I’m already thinking about buying one more bed in a rectangle shape.