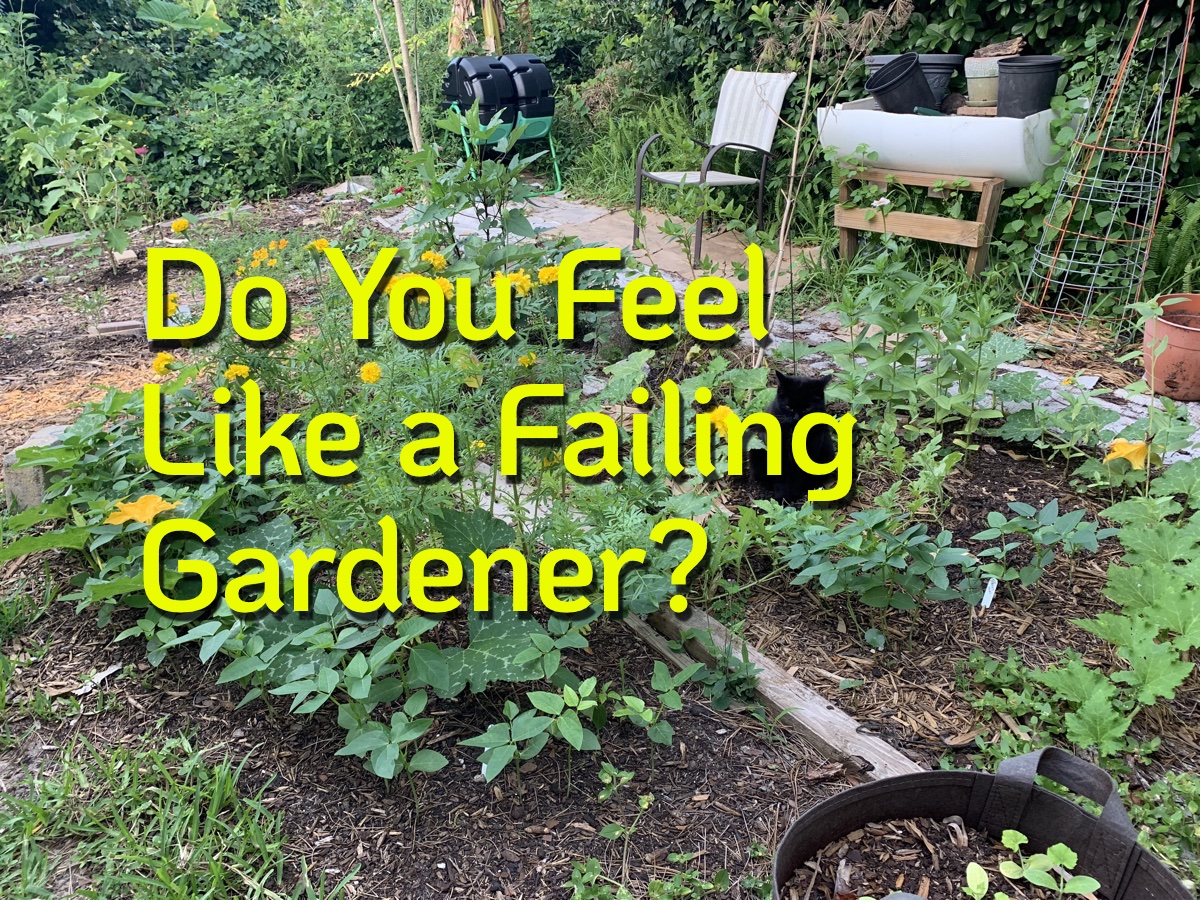
It is sometimes difficult not to feel like a failure when it comes to gardening. When we have high hopes, but the crops simply won’t grow, what then? Chin up, we are all on the journey together.
Summer is the time when gardeners like to brag about their gardens. Pictures are everywhere, on all social media sites, of gorgeous flowers, spacious and manicured backyards, fruit trees, lovely vegetables, perfect plants, and so on. It’s enough to be quite depressing.
If, like me, you sometimes feel like you are failing miserably at gardening, I’m here to remind you that most gardeners don’t share their failures! Every yard has some FAIL moments. And most importantly, we don’t all have the same advantages.
Problems With Peppers
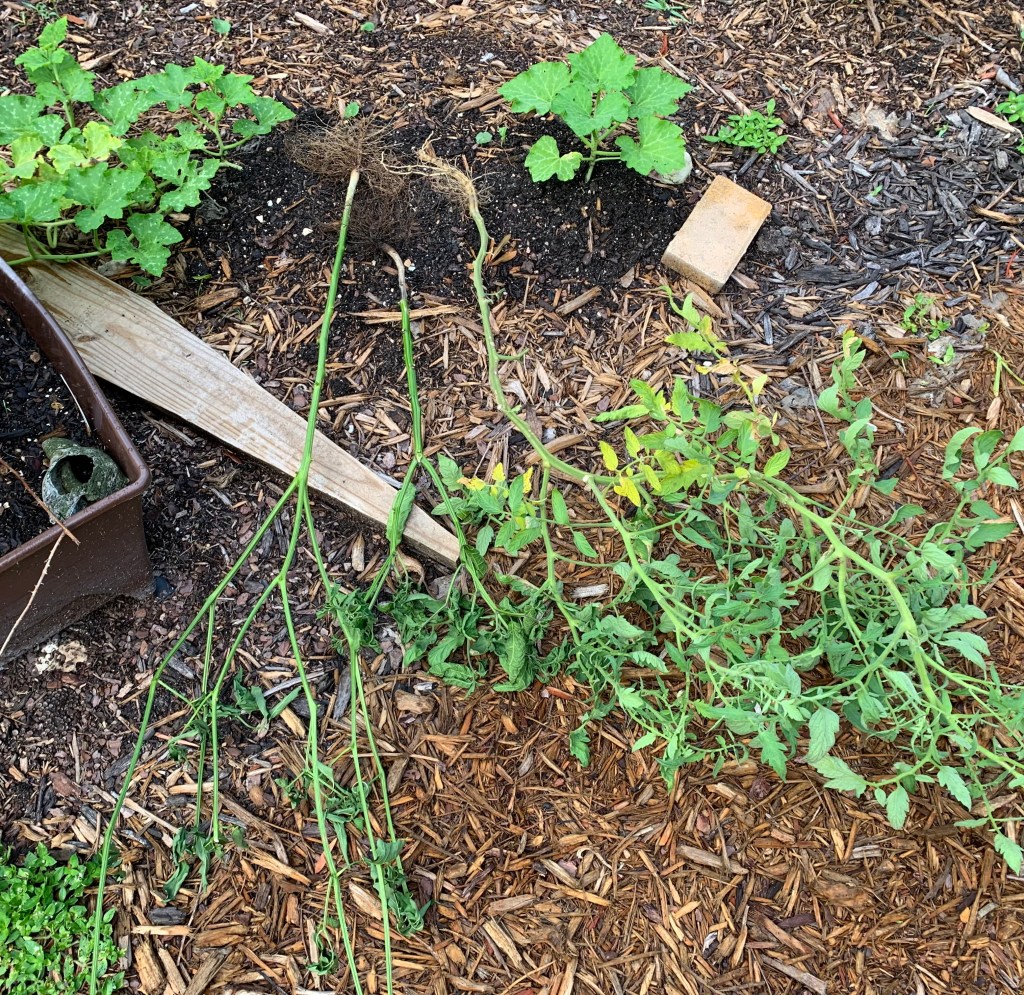
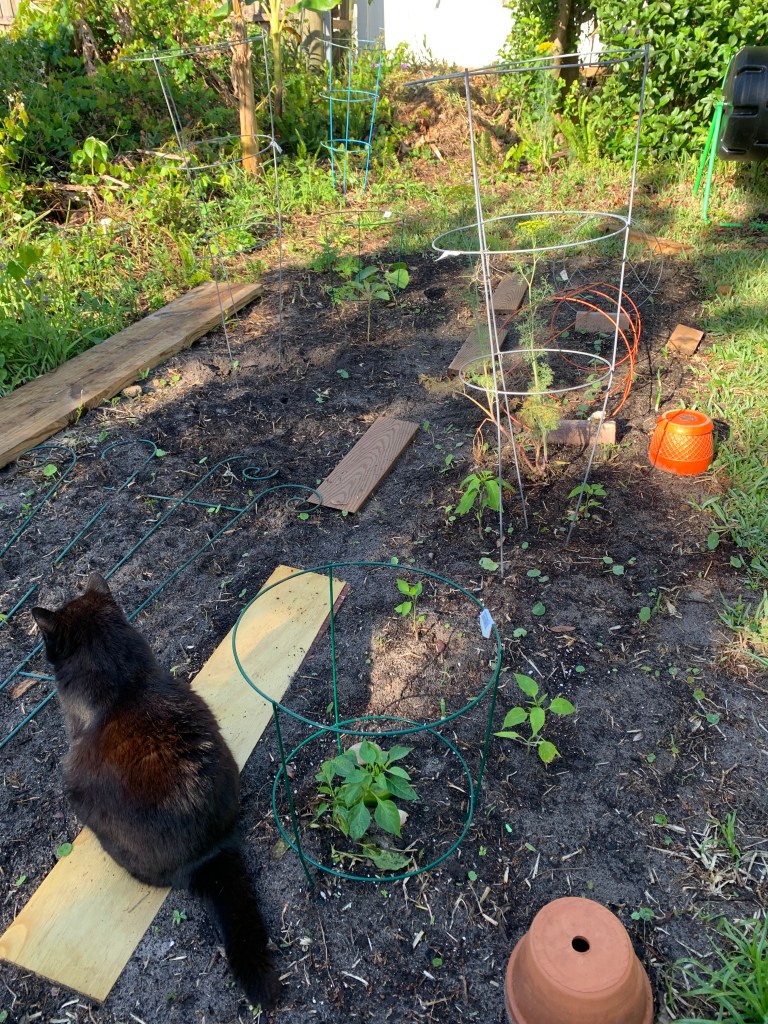
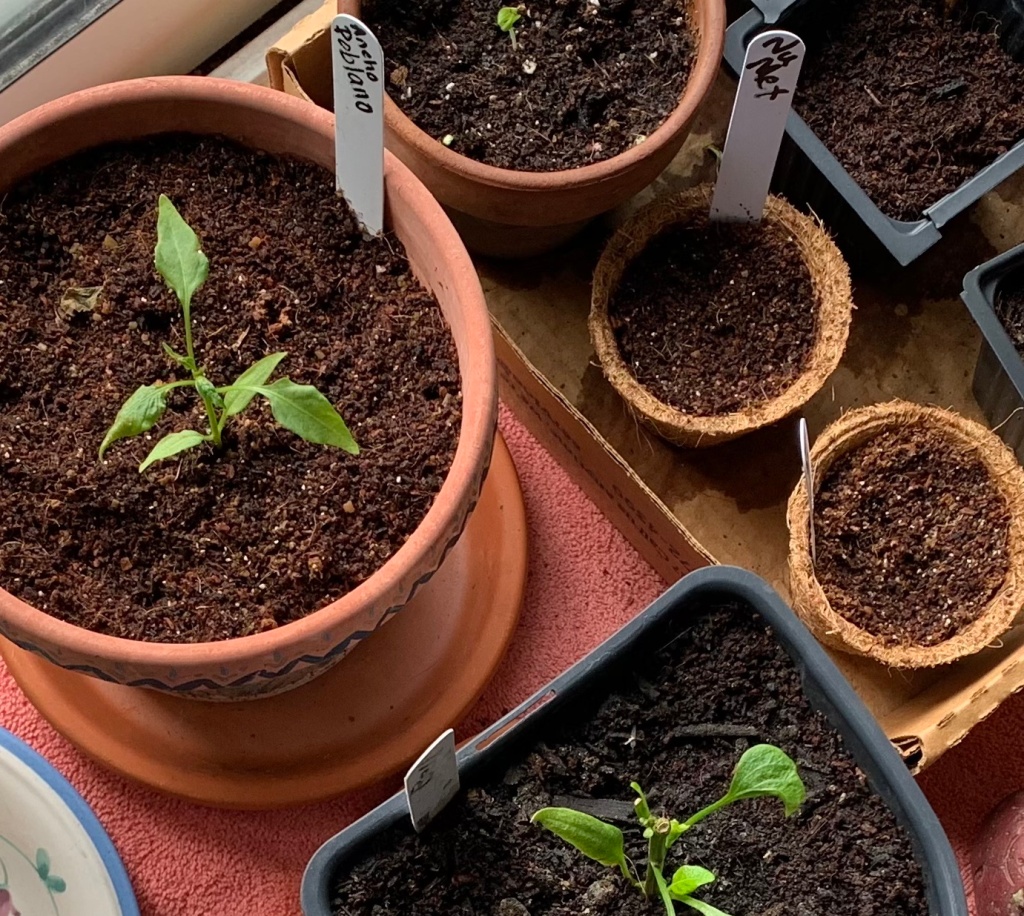
As soon as I wrote a blog page about how happy I was with my pepper plants, they promptly began to die. No kidding. I pulled up my last Ancho poblano plant the other morning. One of the Nu Mex has also bit the dust, due to being stuck in a pot without correct drainage.
The two remaining green tomatoes on my last tomato plant refused to turn red, so I pulled that plant up too. Tomatoes don’t do well in Florida in summer. It was time to re-use the pot and get it ready to grow something else.
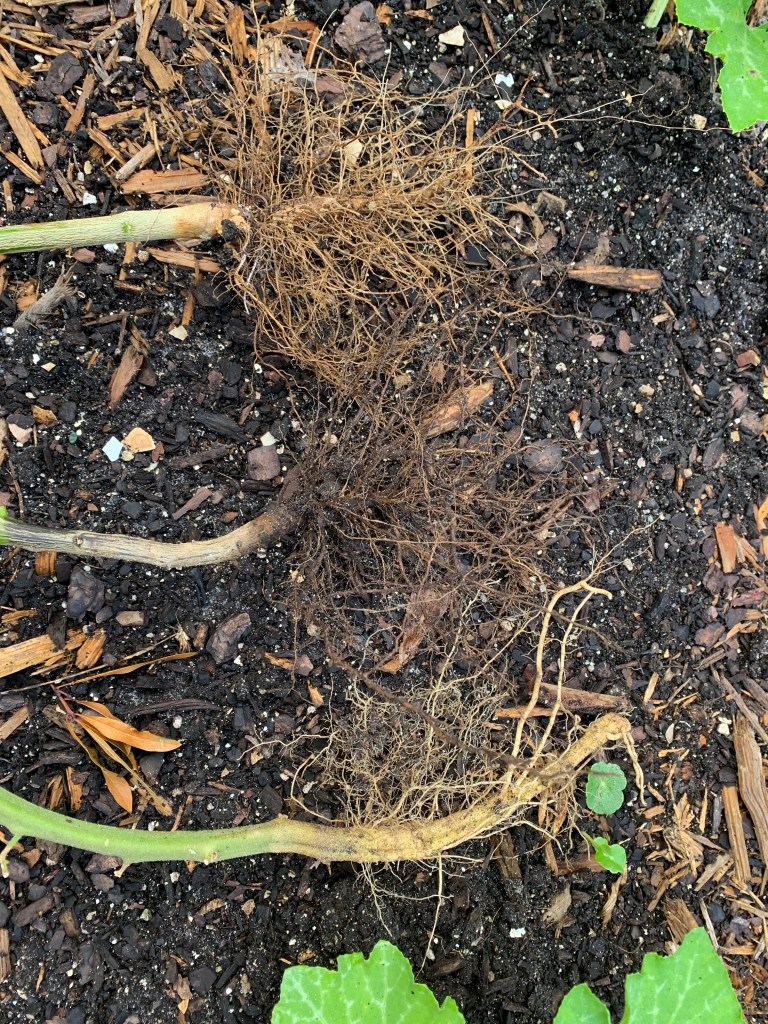
Dead pepper plants (and tomato)pepper roots
Let’s see, what else is currently failing in my garden? The Seminole pumpkin plants are doing almost nothing. Two of them have long vines, but not a single pumpkin. Are they growing too late into the season?
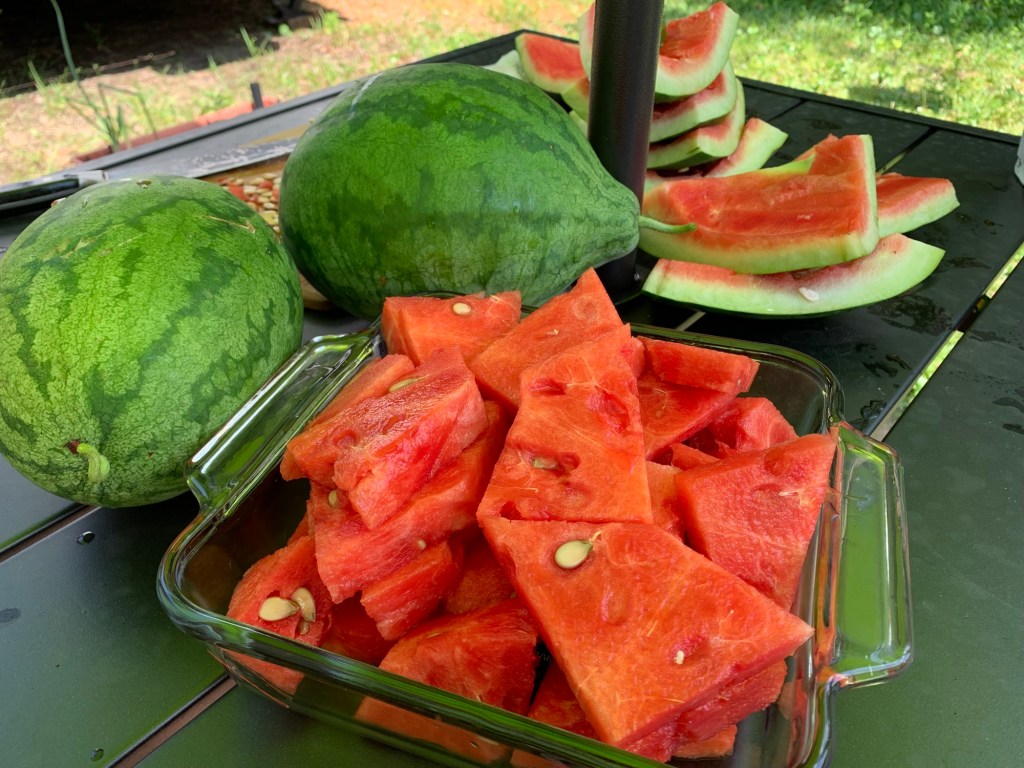
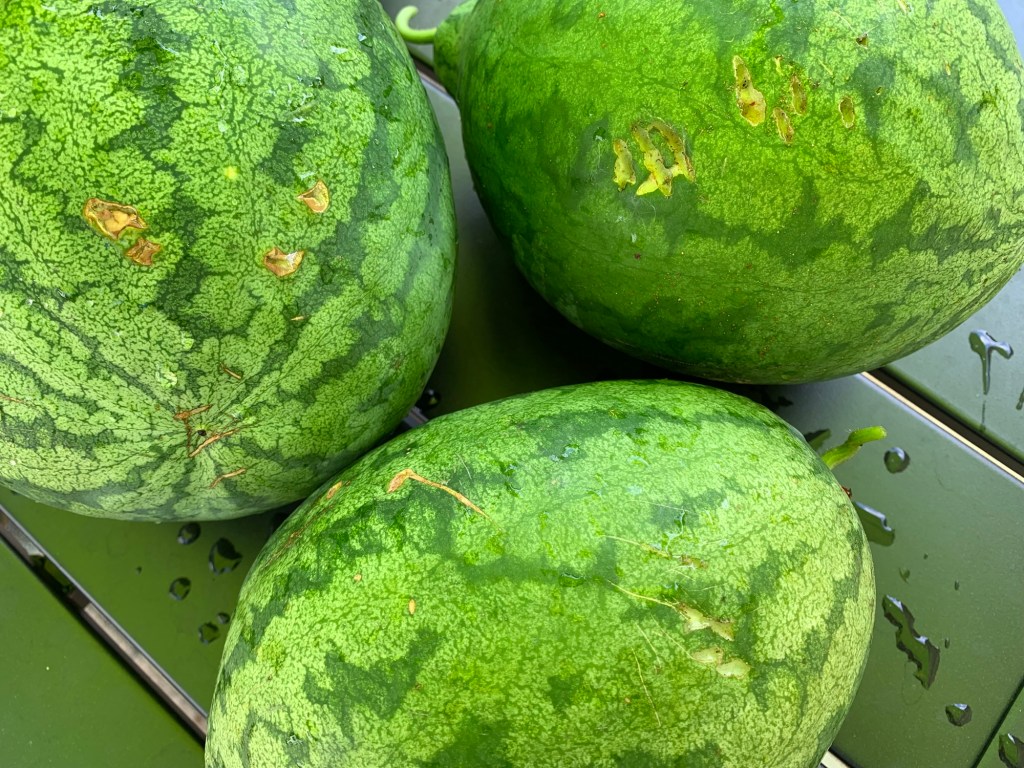
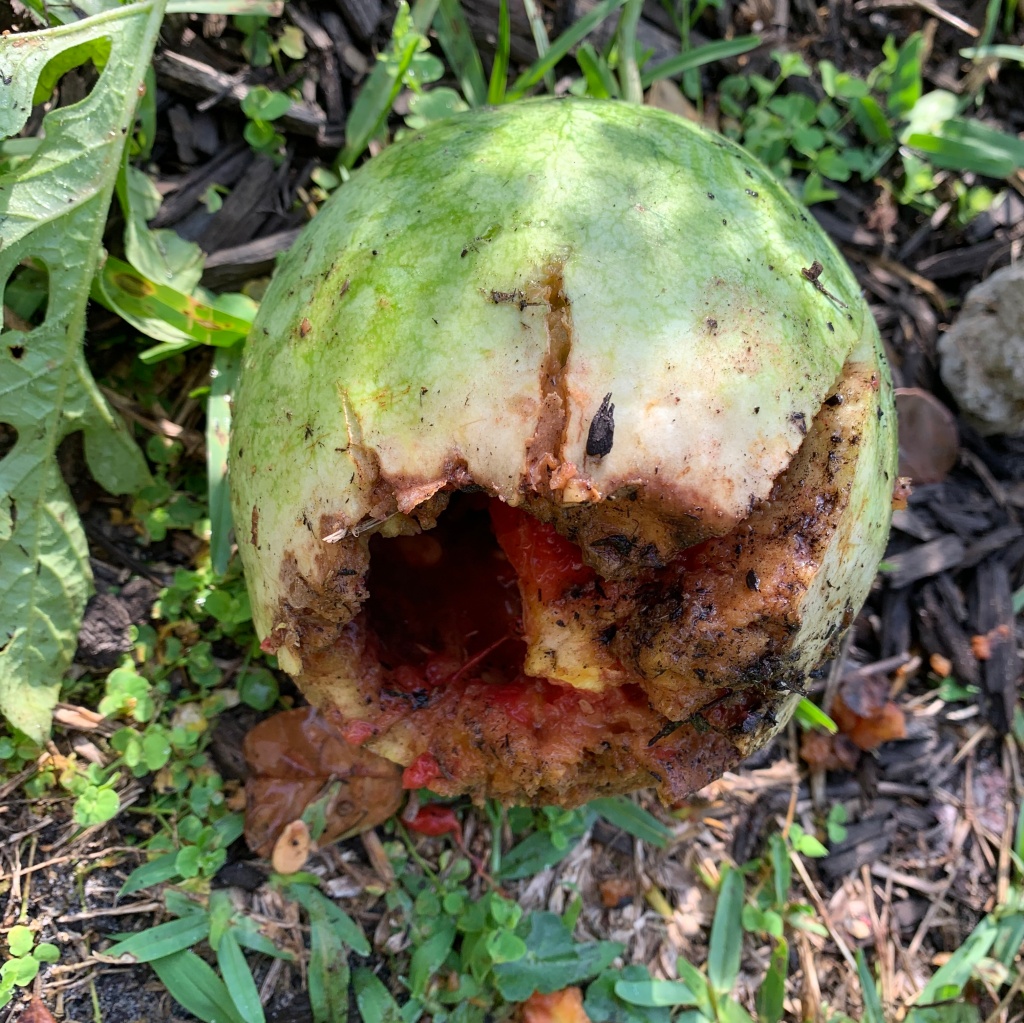
None of the watermelon plants look decent, and last year I ate three nice, delicious, watermelons!
Last Year…
What happened this time? I think I planted too late and then I was gone for 2 weeks. We’ve had a drought too.
2023 watermelon
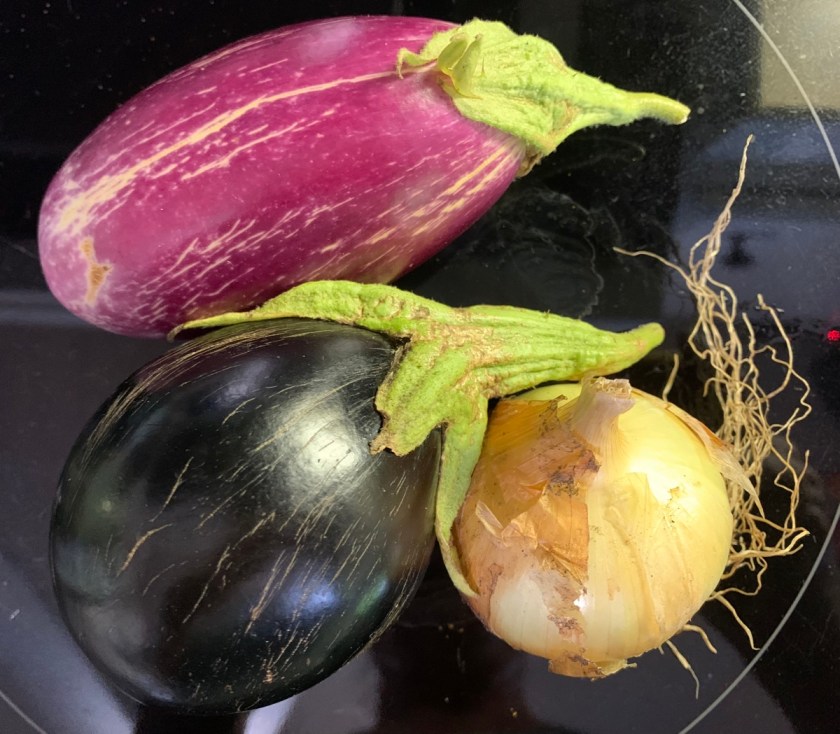
I had counted on doing a better job of growing all these things in my second year of gardening. I pictured a stash of pumpkins to last me until next season, and enough watermelon to share with the neighbors. Instead, I have nothing to eat from the garden but basil, some onions, and a few small eggplant.
Rosita and purple eggplant, and onion from the garden
I kind of feel like a miserable failure. And looking at videos from other Florida gardeners is not helpful. Their crops are bountiful. Their plants look fabulous. Their gardens are organized, and producing, and the raised beds are filled with great compost.
I look at my failing crops and wonder how much more money I have to spend to get to the point where I have some good dirt for growing. But, I don’t garden to save money. I garden to have food from my yard.
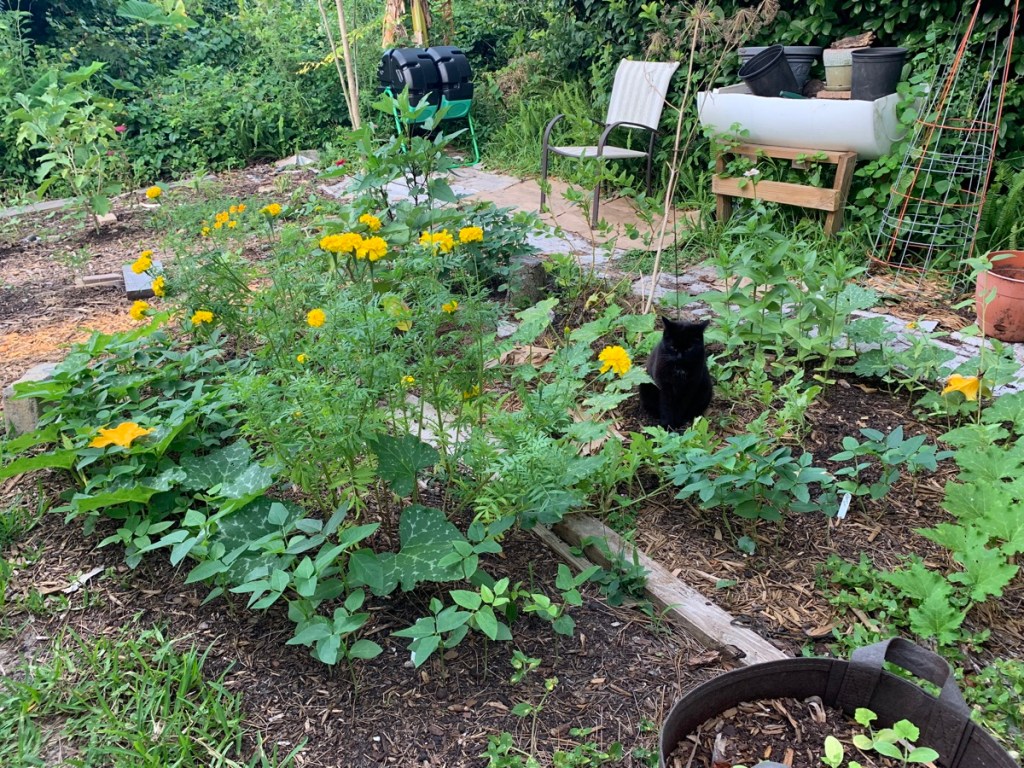
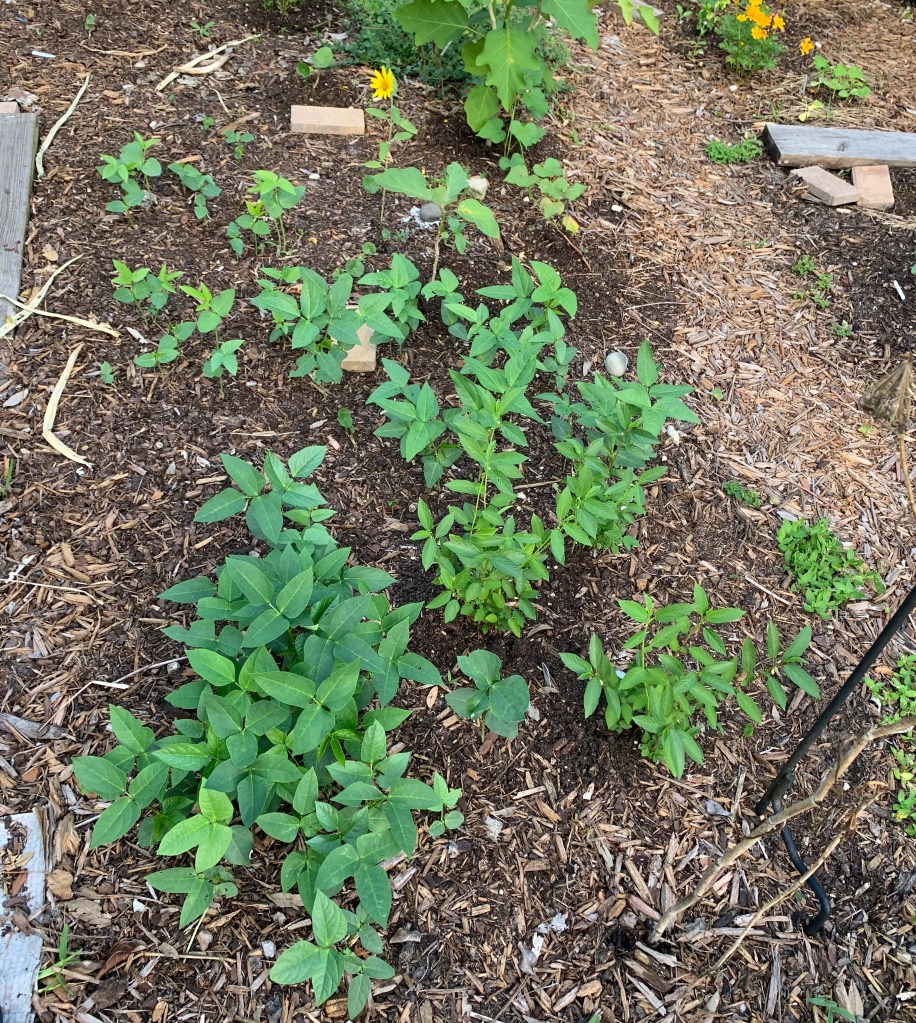
Right now I have a lot of “cowpeas” in the ground. They are (mostly) growing nicely. This will supposedly help my soil by adding nitrogen.
Cowpeas among veggiescowpeas
If you feel like me, that your yard is working against you, try looking on the bright side. All that stuff that is not growing can help build the compost pile!
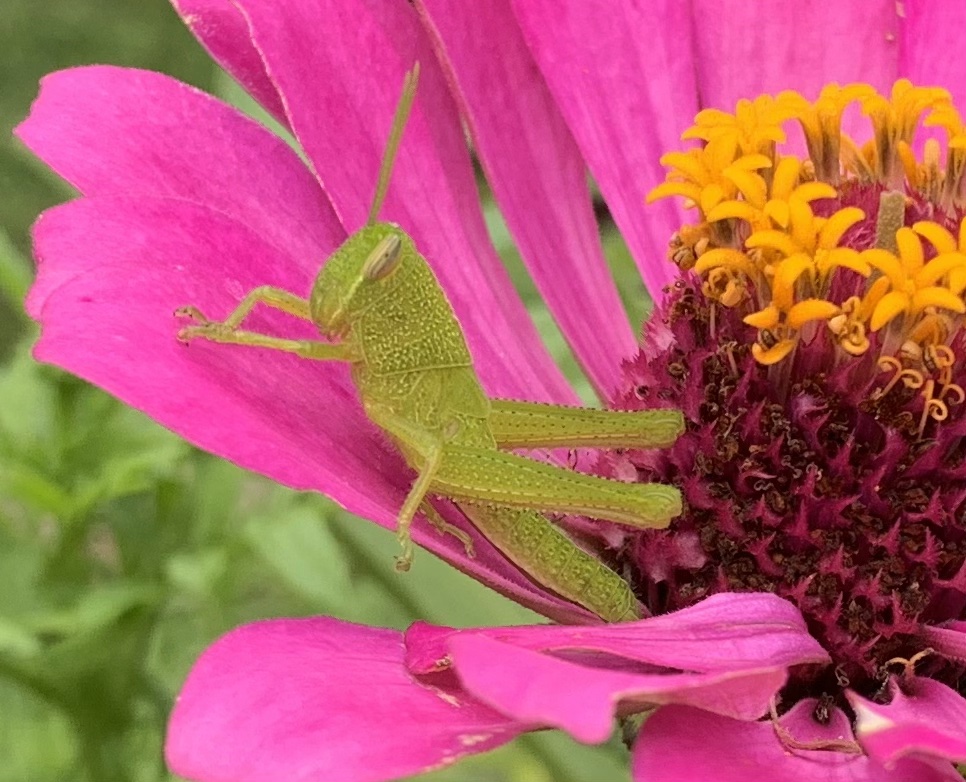
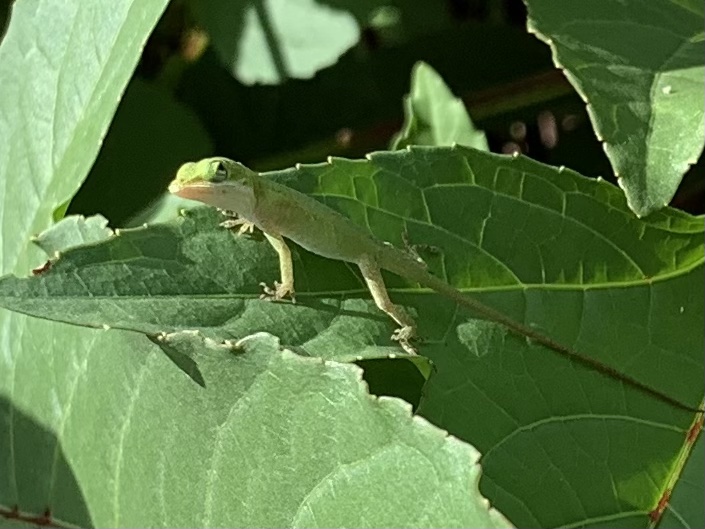
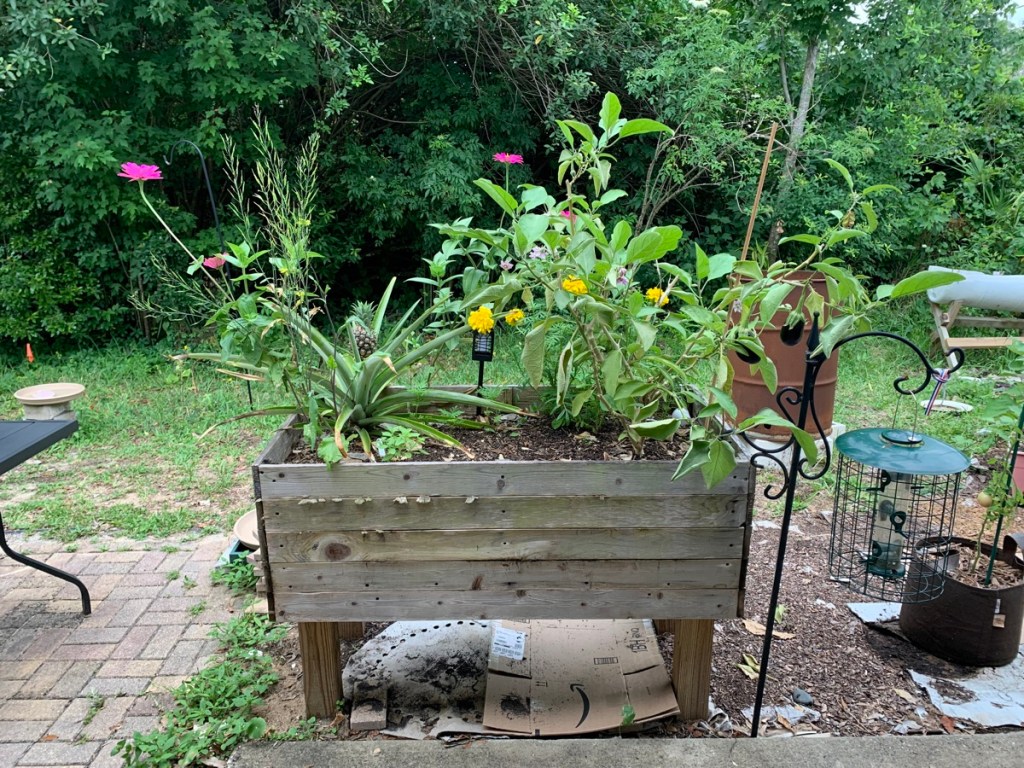
What is doing well in the yard? My flowers, specifically the Zinnias, are beautiful. My pineapple is growing. I see more butterflies, bees and hummingbirds than ever before.
When I get to see the little creatures that are enjoying the plants that came up from seeds I planted, I remember that I am on the right track.
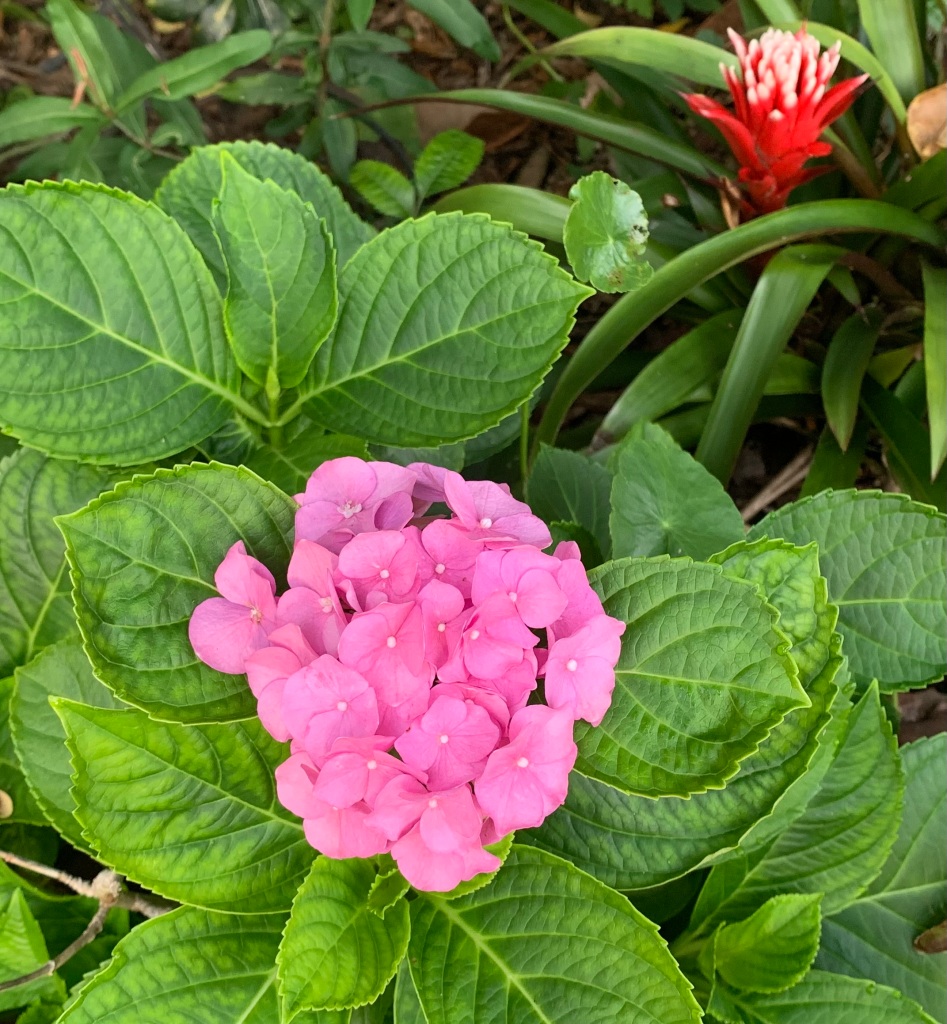
My little hydrangea shrub is blooming with one pink flower.
A quick little post to share a photo. My hydrangea is blooming and has one pink flower. I’ve mostly neglected this entire garden because I’ve focused on growing vegetables.
This garden is by the front door and is a bit overrun with dollar weed and other things. I haven’t done a thing here – no fertilizer, very little weeding, and occasional watering from the sprinkler system.
The bromeliad is also blooming, and it always reminds me of the friend who gifted it to me. 🙂
The sandy soil is alkaline in my yard so my hydrangeas will always be pink. This shrub had purple-blue flowers when I bought it – back in March, 2019. If I chose to add an acid fertilizer the flowers might become blue again. But, I don’t really care. I am happy the plant is still doing well after a few years, although it is not very large.
If you are wondering if hydrangeas will grow here in Florida, my answer would be yes. This plant is five years old now. It gets shade all day long.
Here I have a photo of my Fall garden. It is hard to tell what is growing, and honestly not much in the way of food just yet. The seeds have all been planted except for Kale and dill. I will also grow more green beans along the way when I find space. (I’m already…
My Florida vegetable garden journey began in 2021. Here’s what I’ve accomplished in the past three years.
Once I chose to go into the backyard, and begin seriously growing vegetables, I realized I had a lot to learn. I also needed a lot more space.
Summer 2021
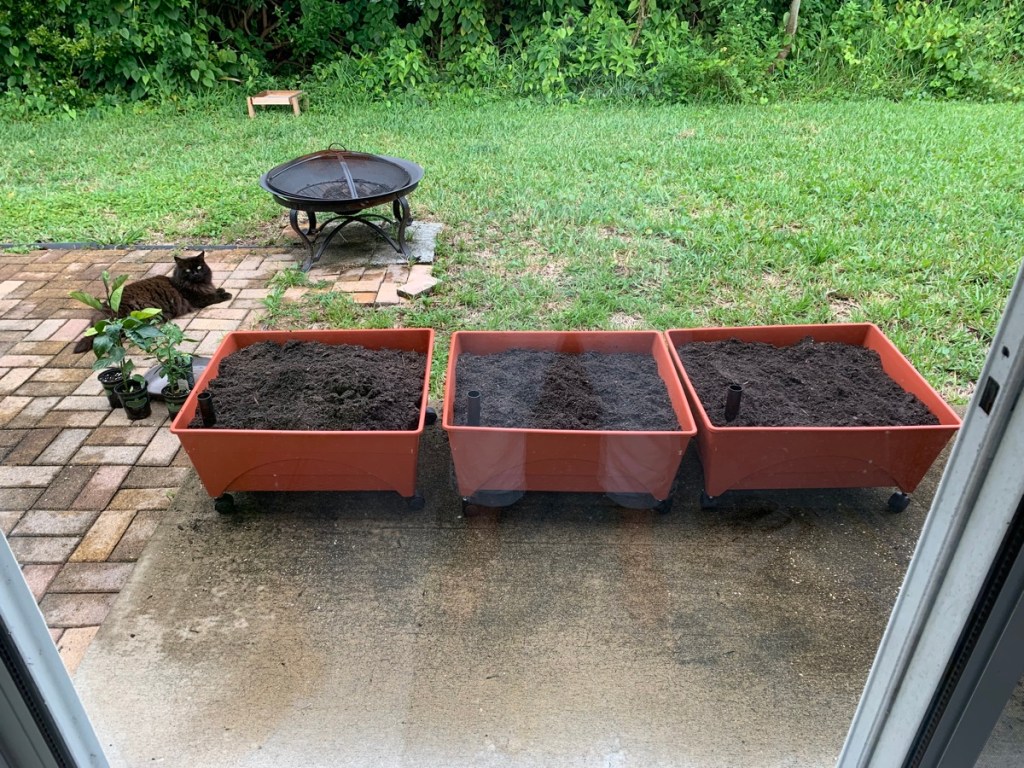
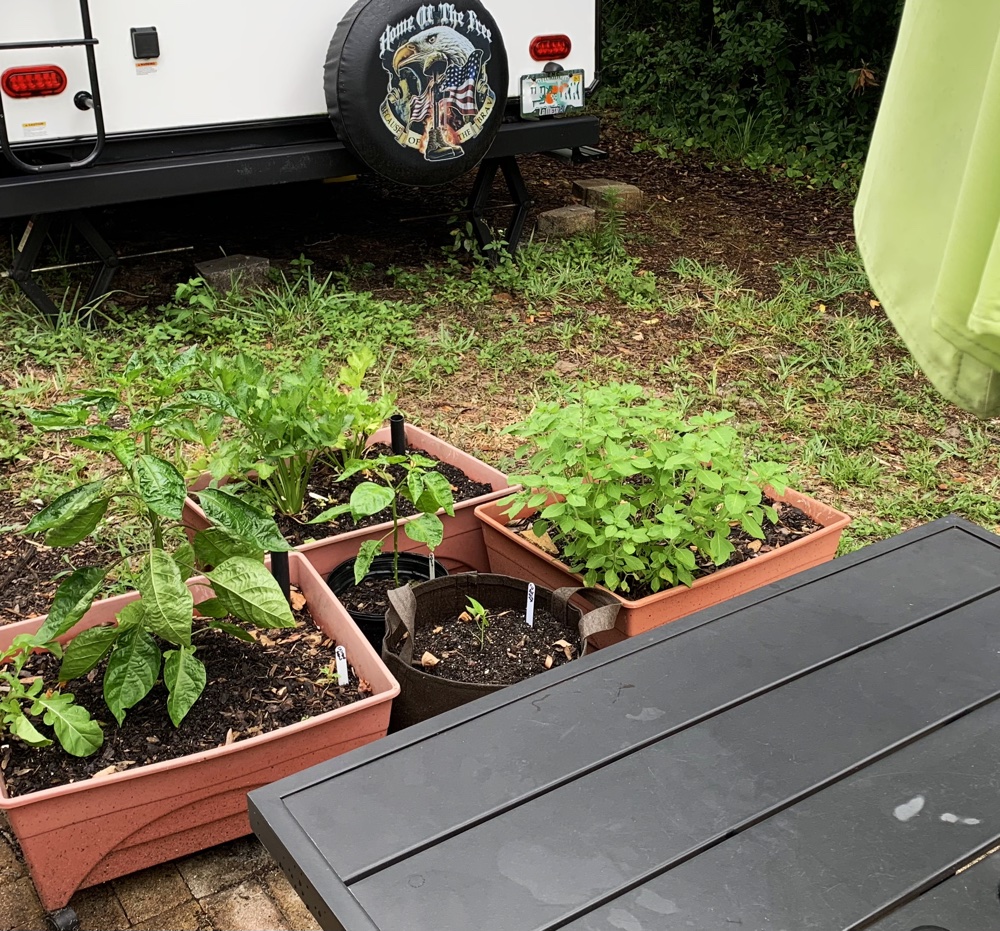
I learned to garden in New England. When I moved back to Florida I hoped to be able to grow some vegetables at least. In the summer of 2021 I purchased three, red-orange grow boxes and put them on the back patio.
These boxes have a tube in the corner and watering is supposed to be done through the tube. The idea is to pour water into the tube and water the roots. I also water from the top.
Garden grow boxesNew grow boxesTomato, pepper and eggplant
I bought my boxes at Home Depot and they are similar to this style available at Amazon: Emsco Group Bountiful Harvest Raised Grow Box (paid link). They have rolling castors so moving the box on a patio is pretty easy.
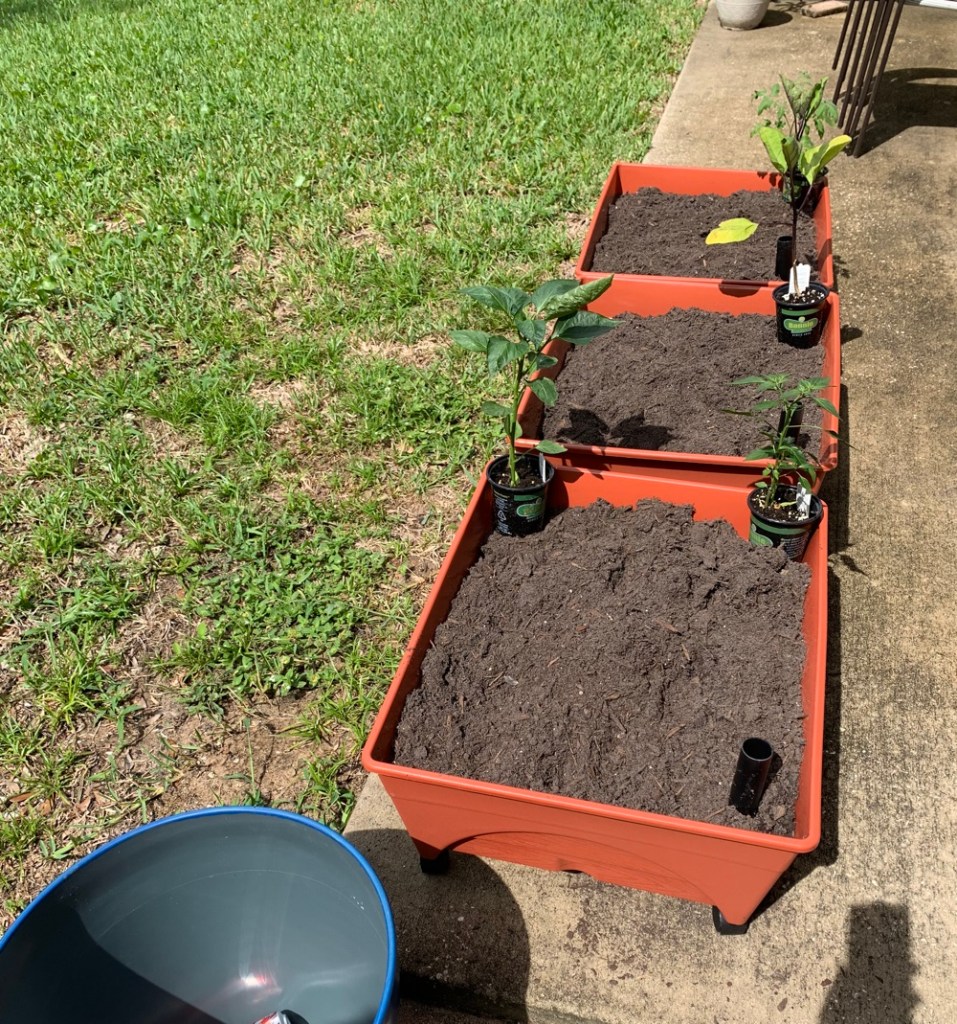
Grow Box as Seed Nursery
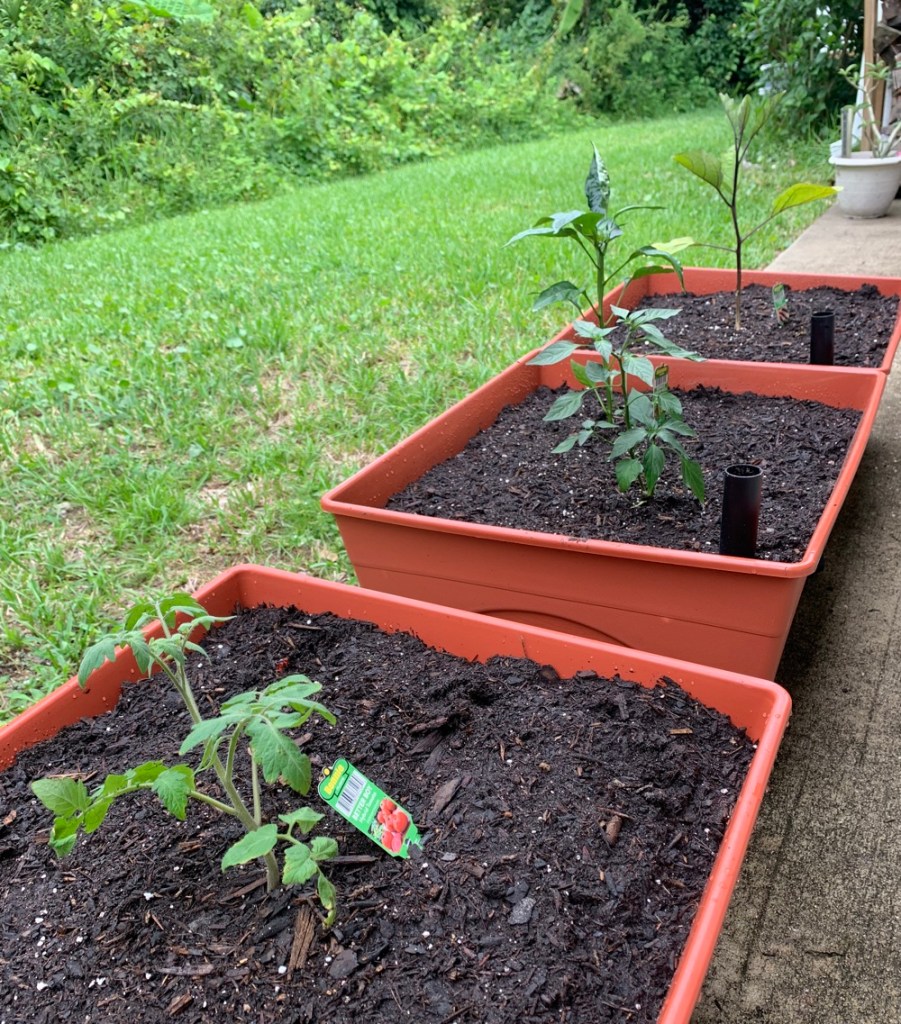
One issue I have with these grow boxes is that they are not very deep. The lower area of the pot is reserved for water to accumulate, so they are more shallow than they appear. These pots are perfect for starting seeds. Once the seedlings are big enough, they can be transplanted to bigger pots, or into the ground.
These grow boxes work well, but they do have a flaw. Because there are holes, dirt can be washed down into the bottom area which should be for water only. Once that fills up, and the box can’t drain, roots become soggy and plants die. This happened to my NuMex pepper plant.
NuMex in troubleGrow boxes have a flaw
To avoid the problem of dirt sifting down into the bottom, I clean all dirt out of the box, remove the panel with the holes, and drill holes in the box bottom. A layer of mulch and stones will work for drainage. Now the box is more like a big plastic pot.
Spring 2022
I actually grew a few peppers in 2021. I was so stunned to find that peppers (and other things, like eggplant) would continue to live for years here! Eventually they don’t do very well, but I knew this climate was going to be a challenge.
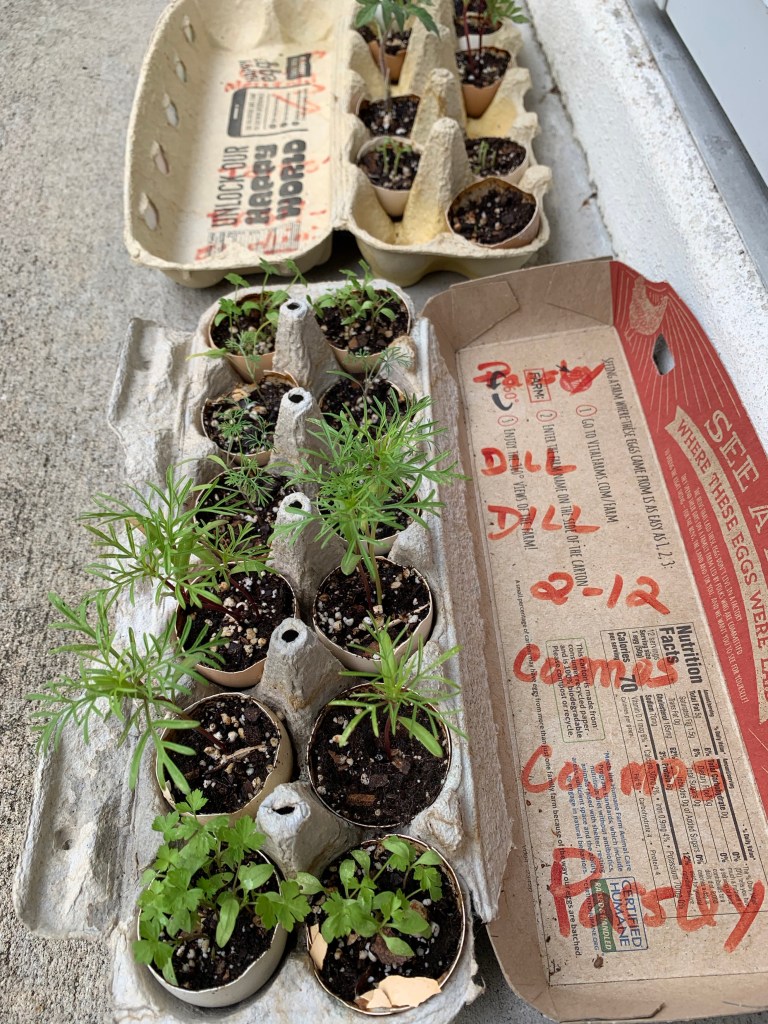
In 2022 I tried starting seeds in egg shells. It was a fail. Not worth the effort. In fact, starting seeds in small pots is not easy, and frankly, a waste of time.
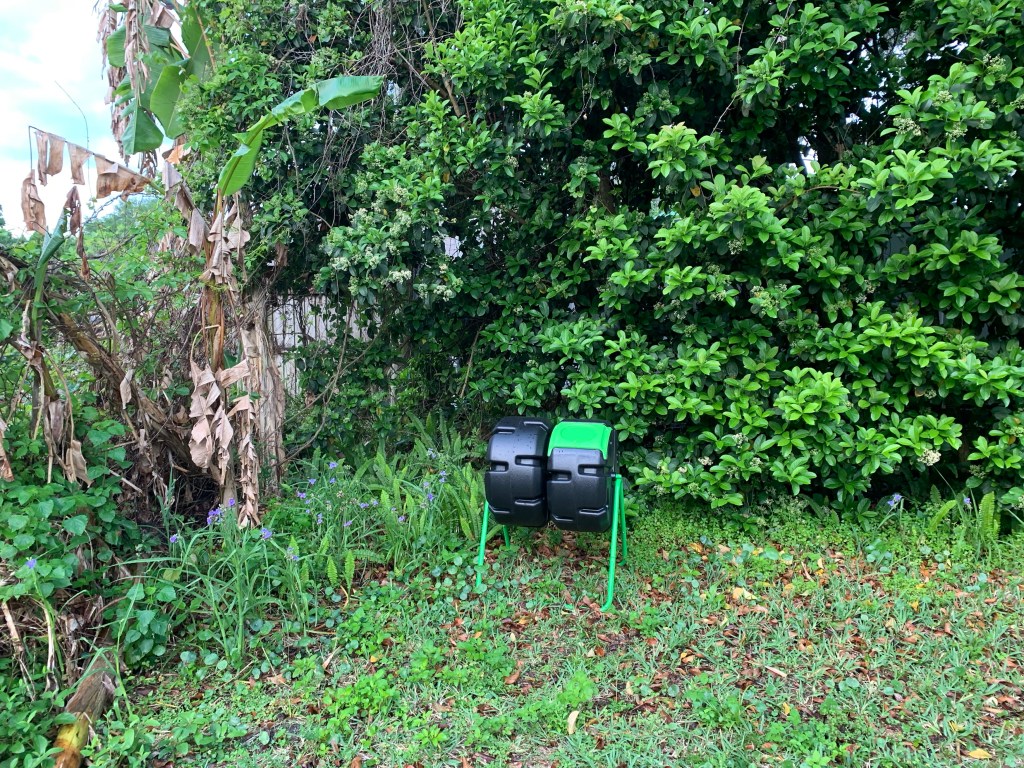
This was the year I began to compost. I bought the Hot Frog composter (which I am still using).
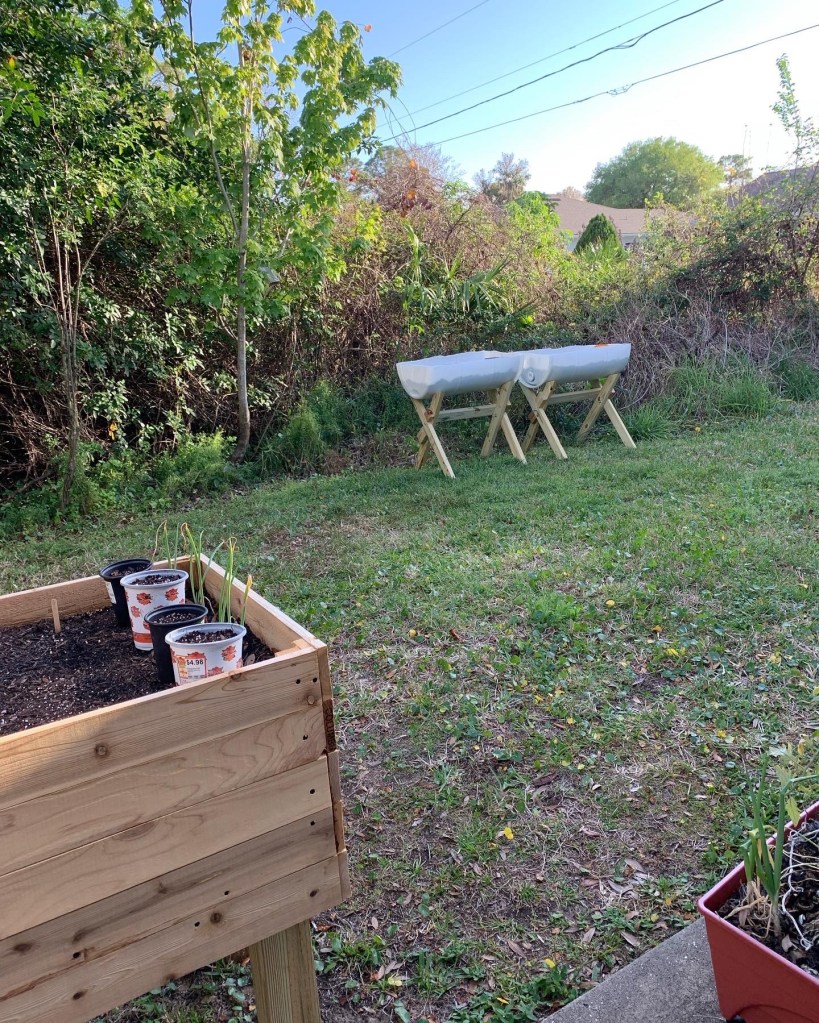
My son built a few raised beds from wood and white barrels he got from work. I still had nothing growing in the ground.
I now have a garden back here.Not worth the effort.New raised beds in 2022
First in-ground Garden Area, 2023
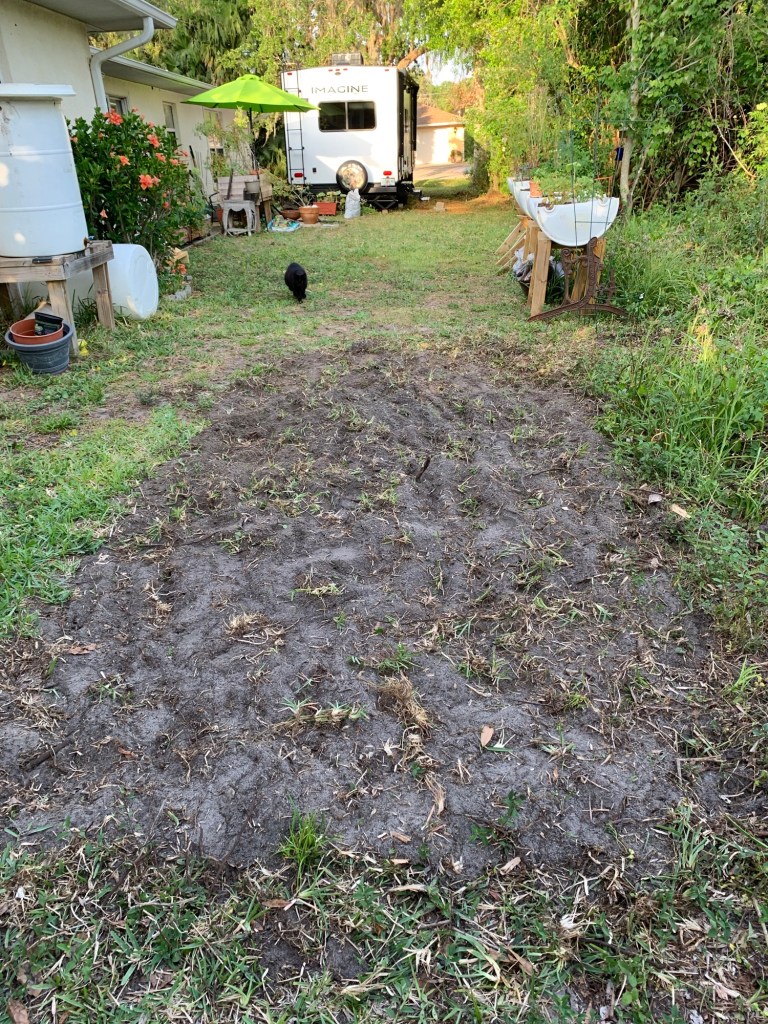
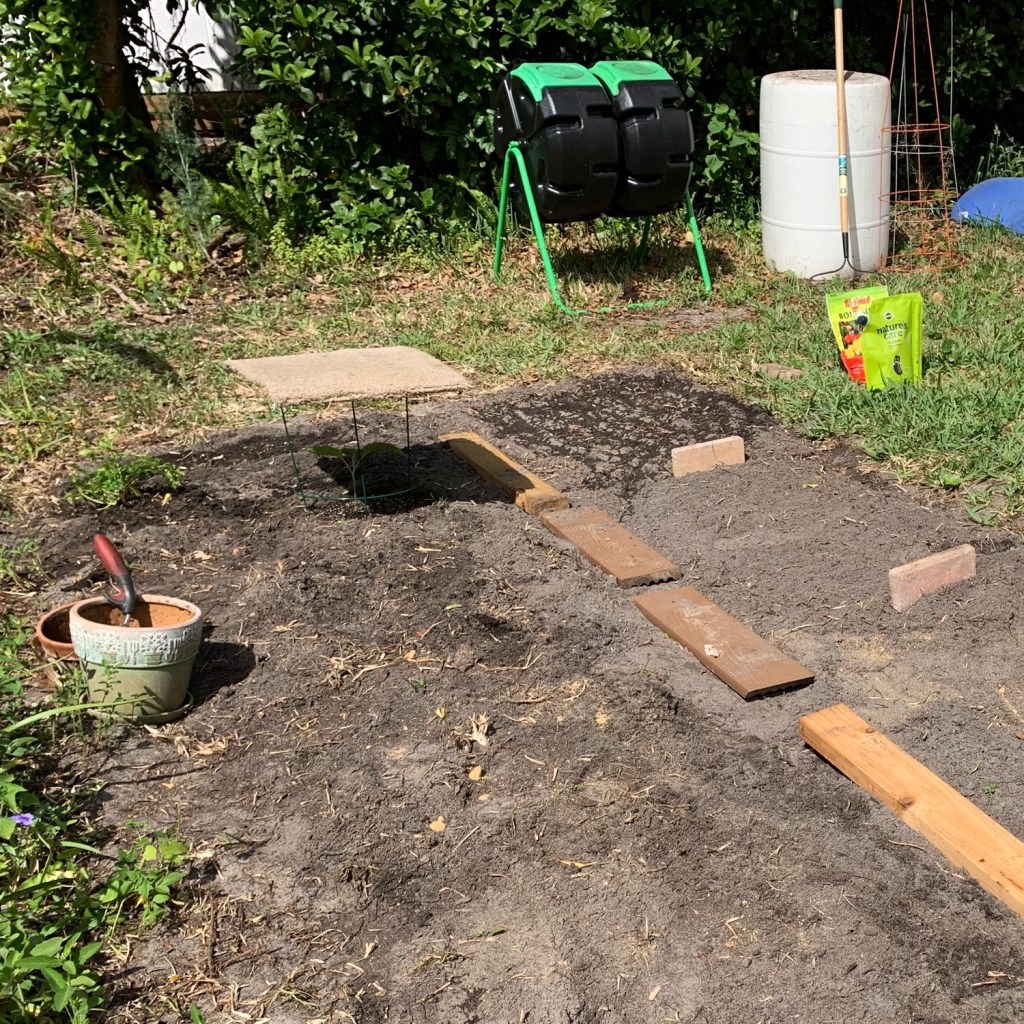
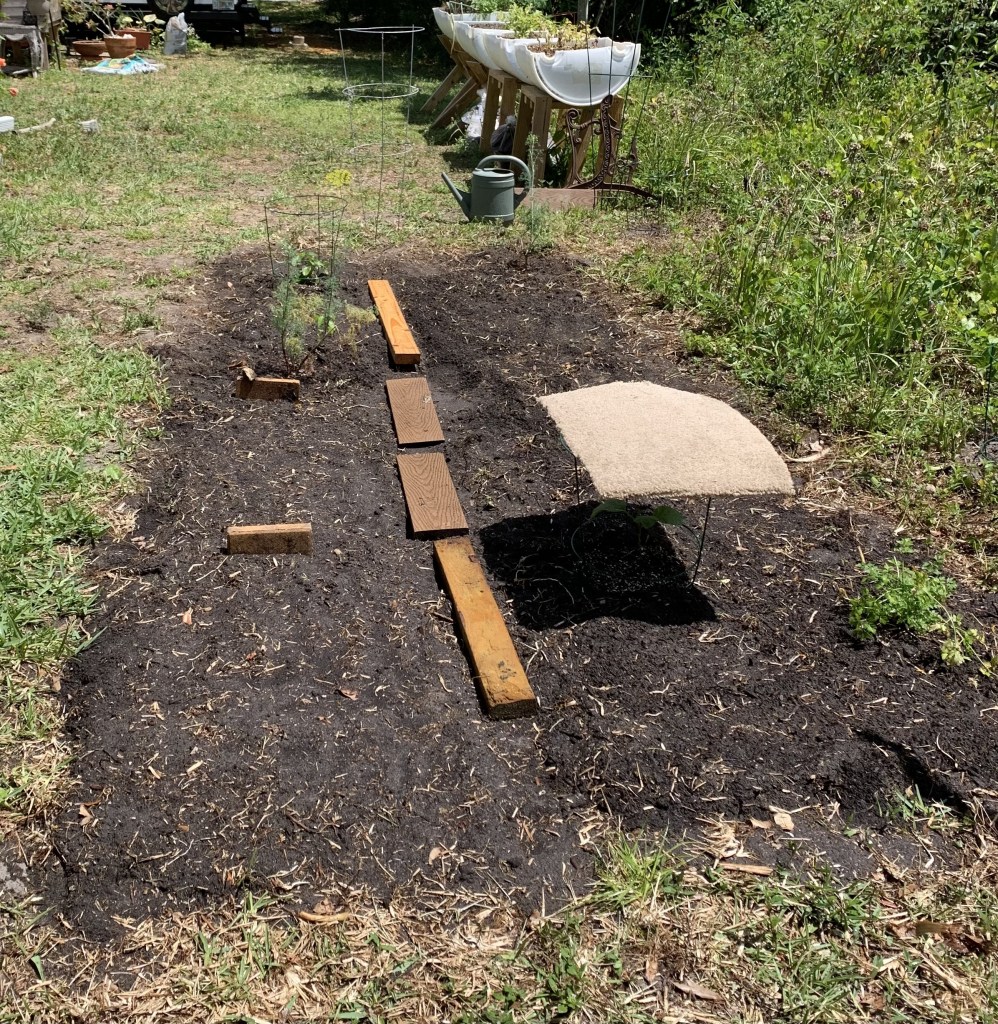
March of 2023 was when I decided to till the lawn and create some in-ground gardens for vegetables. I bought a rototiller and made a little area of dirt. After that, I began to use cardboard to kill the grass and create more gardens.
Cardboard takes longer, but it keeps all the good grass and topsoil undisturbed. It simply dies from being covered and becomes part of the soil.
To plant over cardboard that is not completely decomposed, use a hand fork and chop the cardboard and earth. Add amendments, and plant.
First garden space
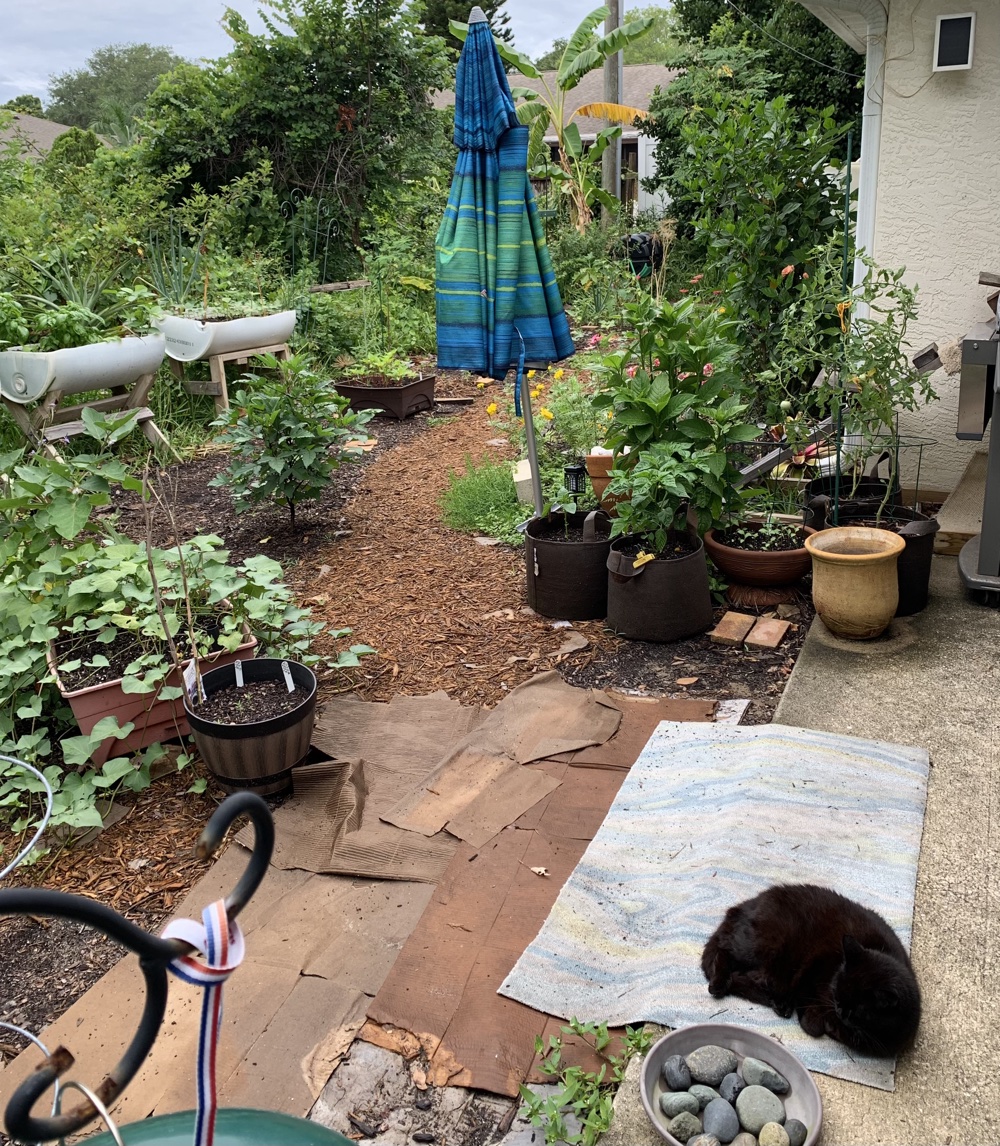
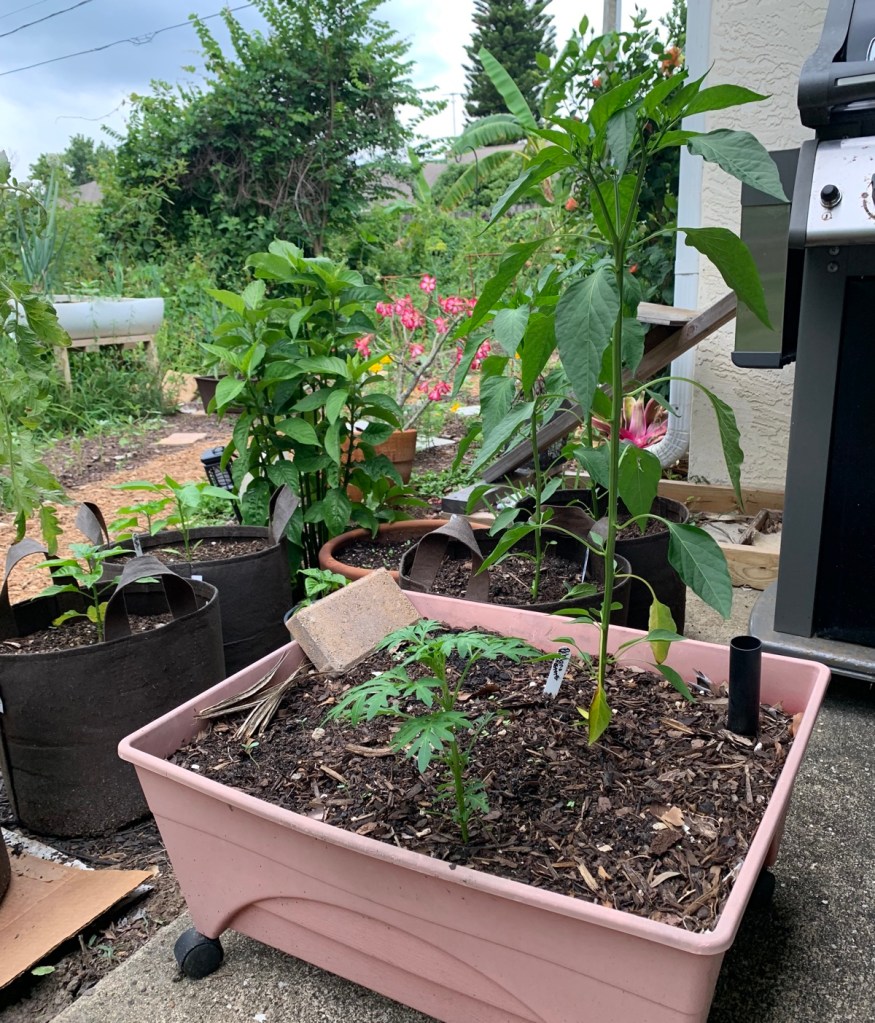
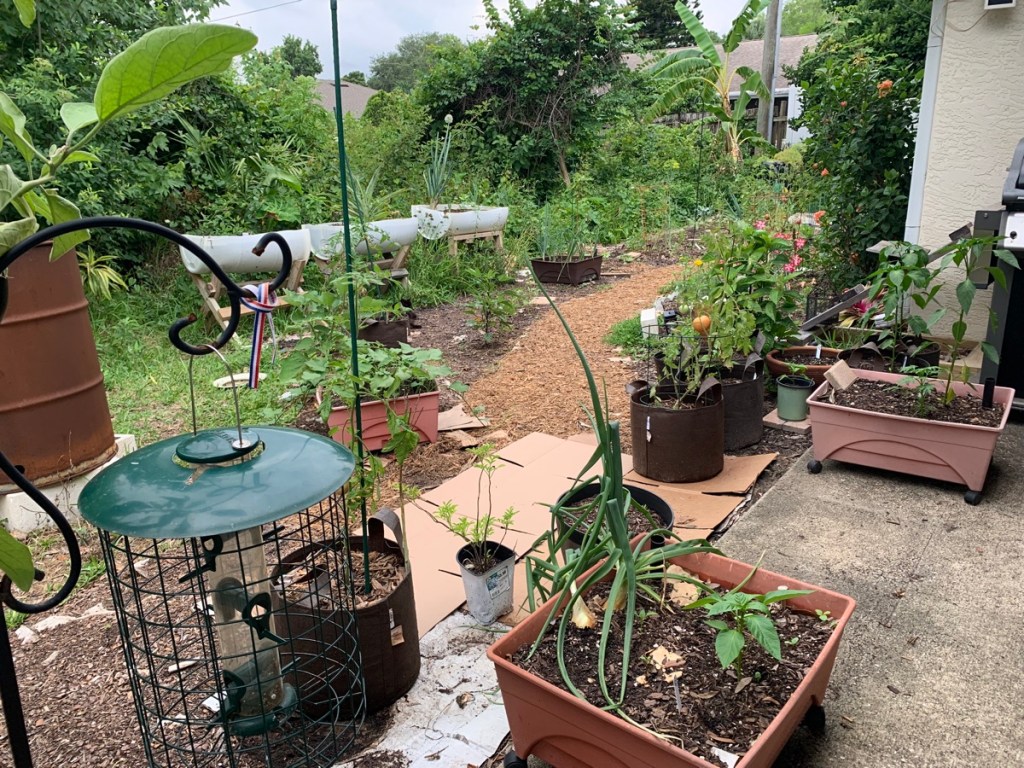
Summer 2024
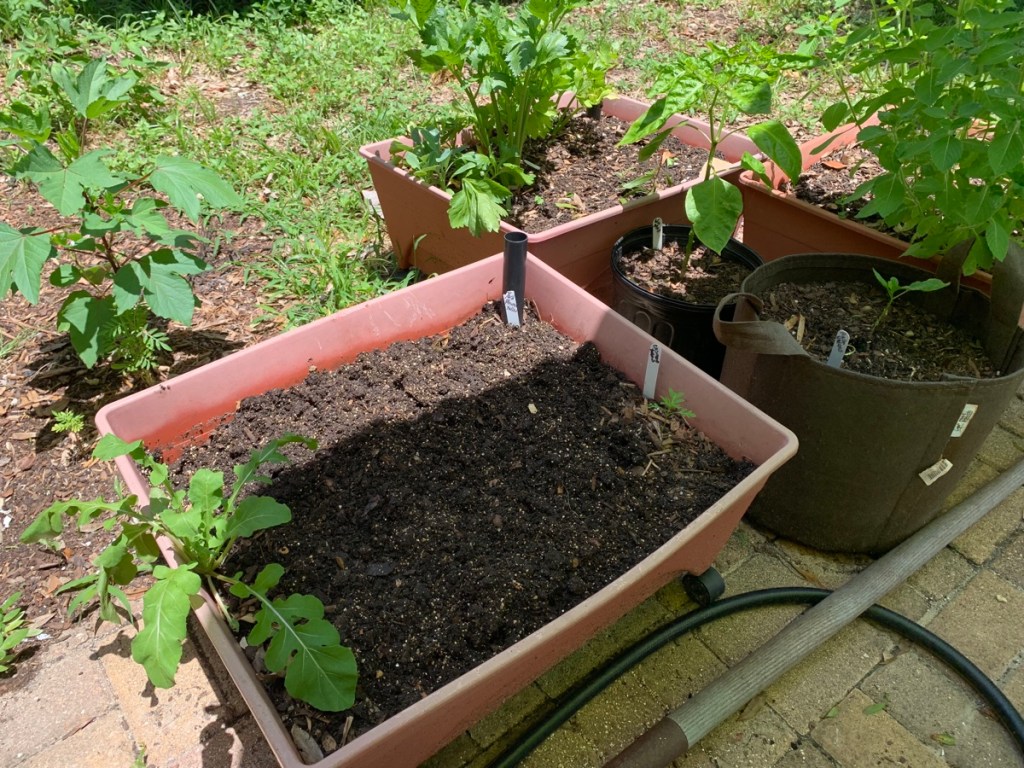
I still use the red grow boxes, although they have faded to pink over the years. These grow boxes are best for growing vegetables that have shallow roots. I now have seven boxes. They are perfect for growing onions, half-long carrots, and greens. I use them as seed starters too.
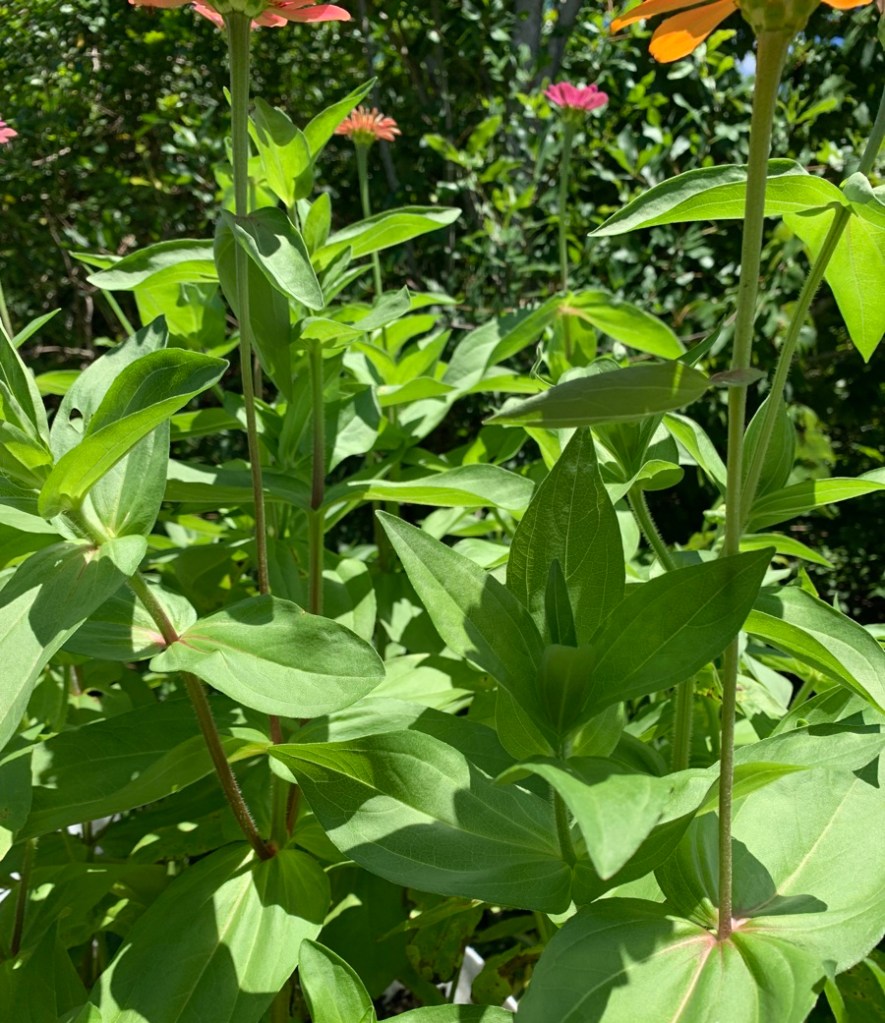
Wood raised bedFaded boxMay 2024June morning in the garden
Now, I am beginning to feel pretty confident about which crops to grow. I’m still in the experimental stage with some things. Gardening is an ongoing learning adventure!
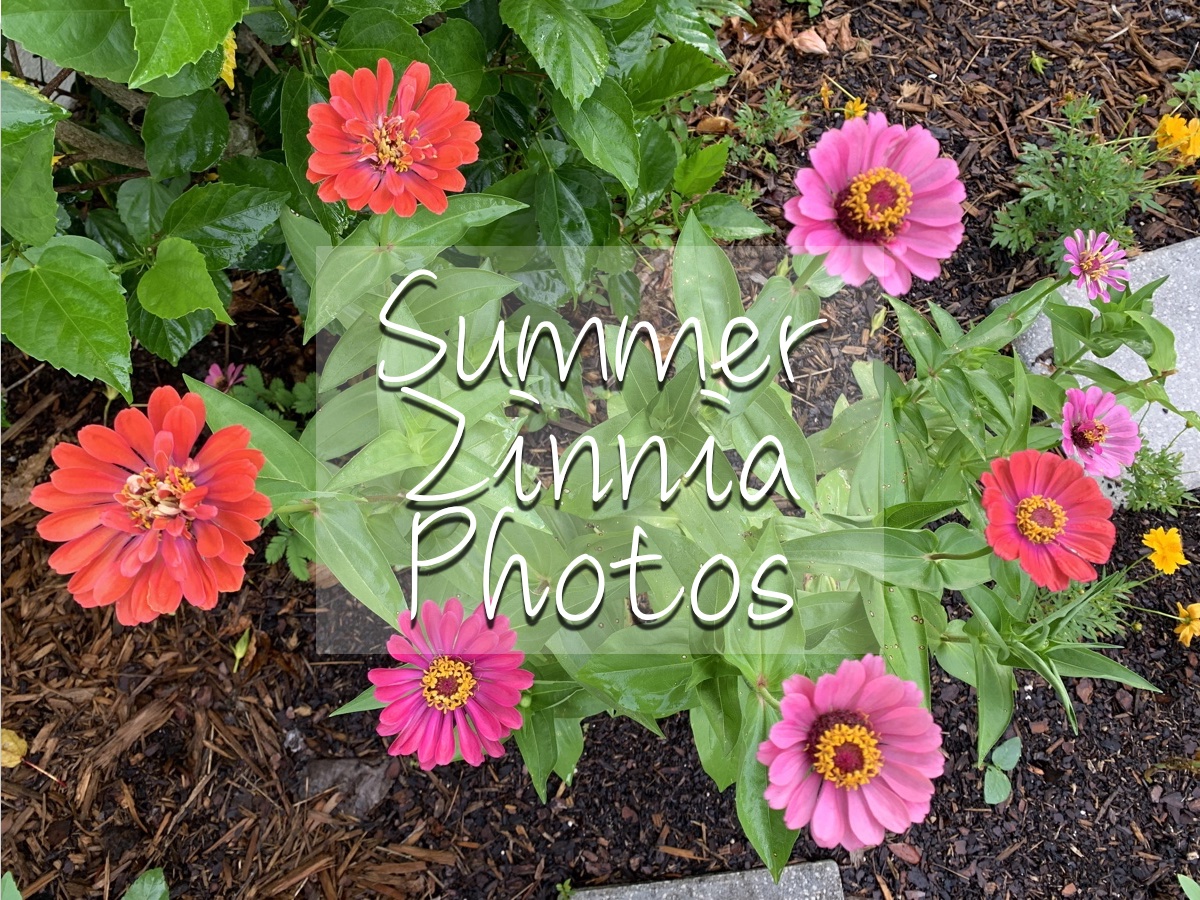
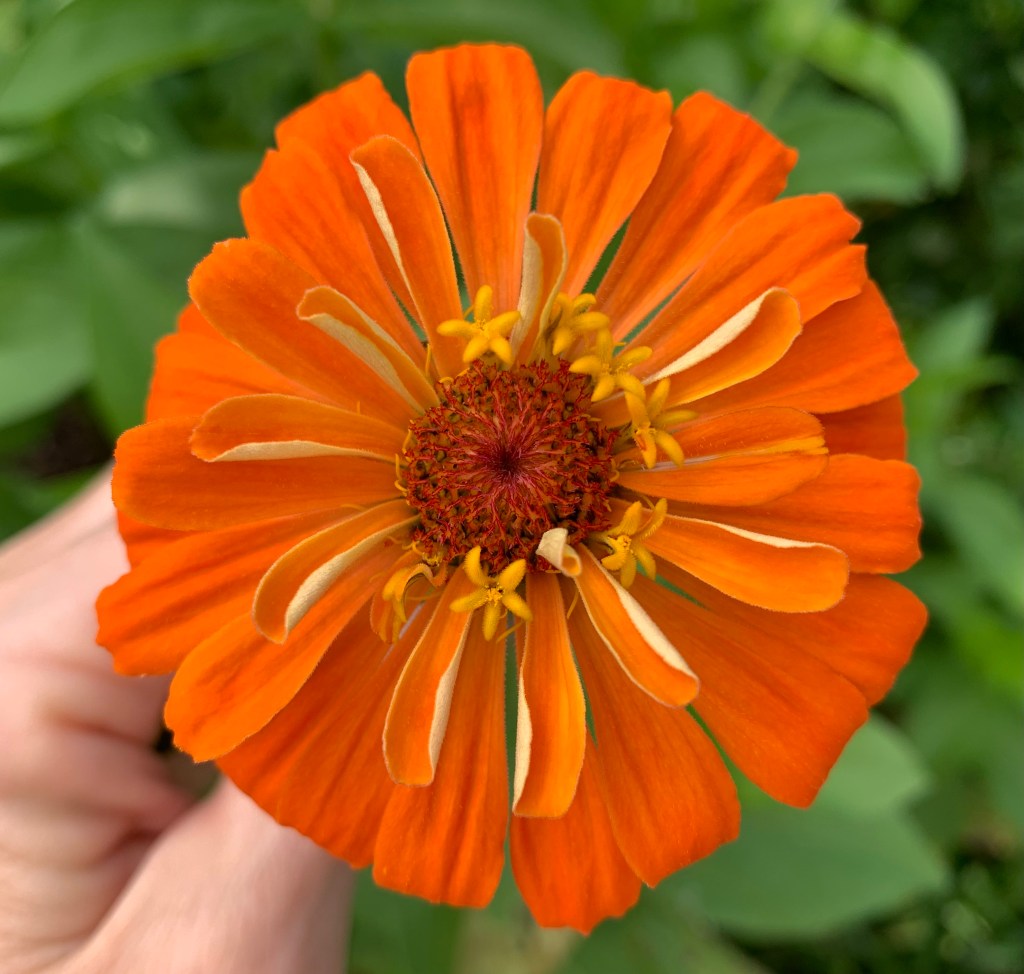
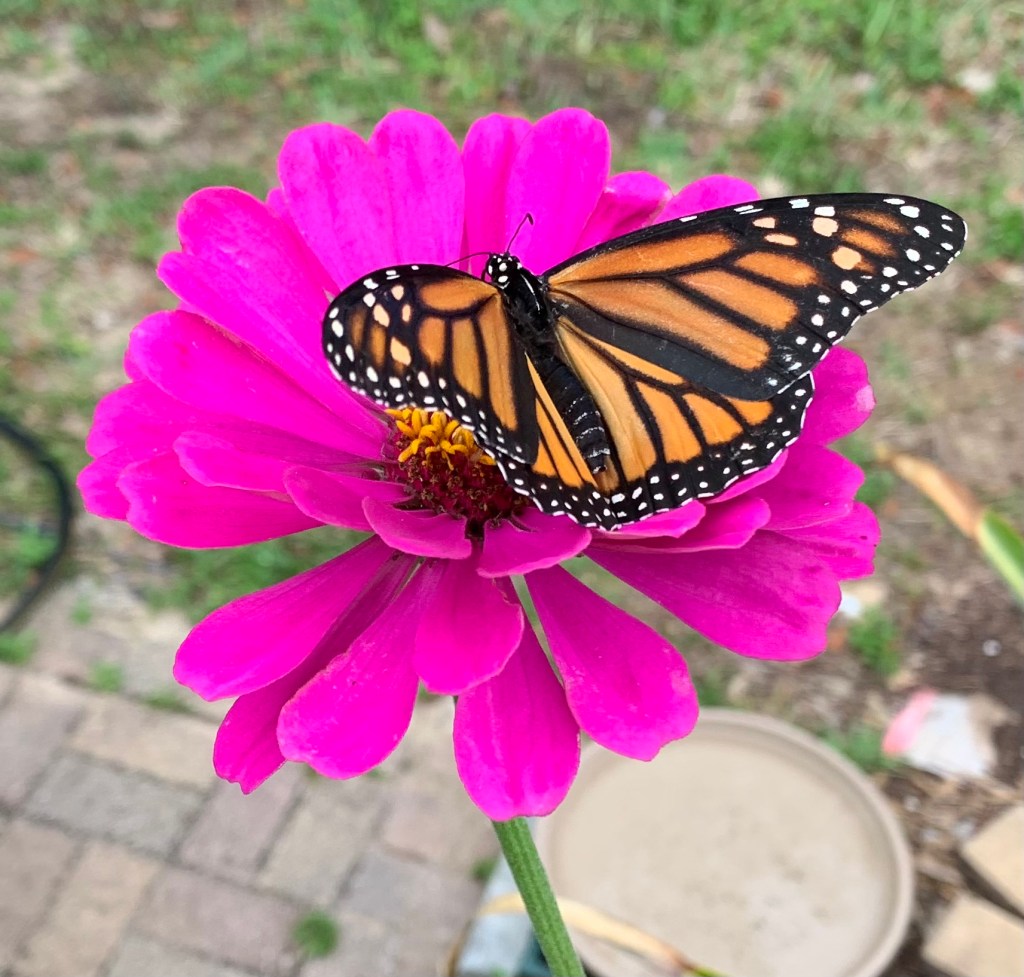
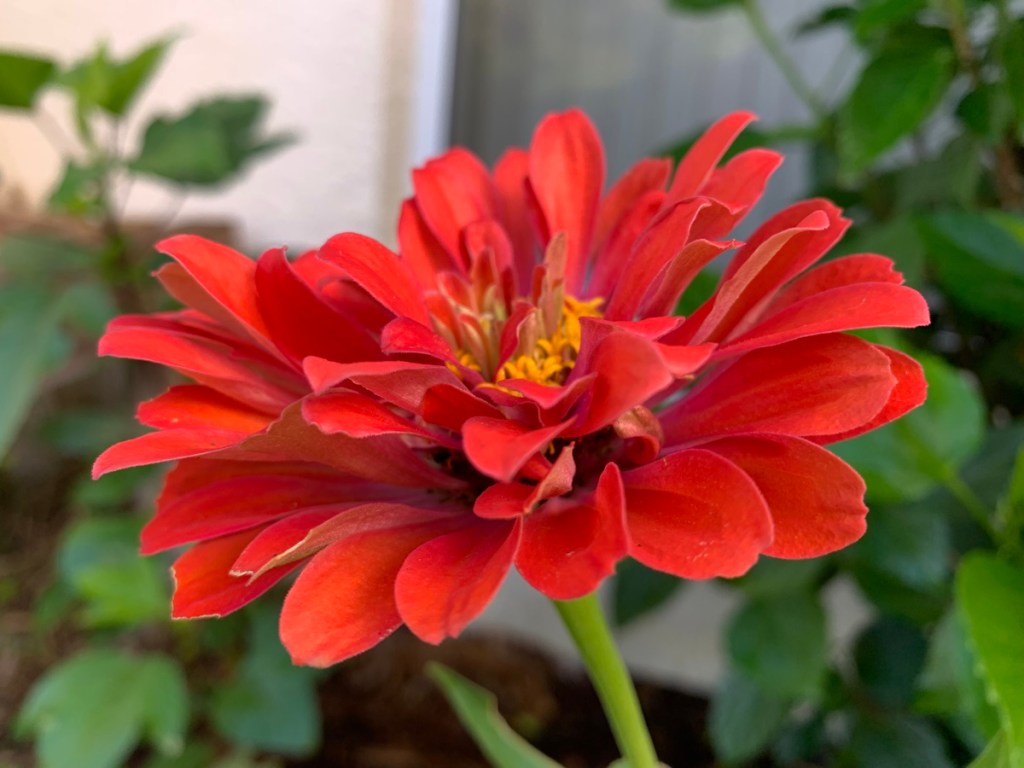
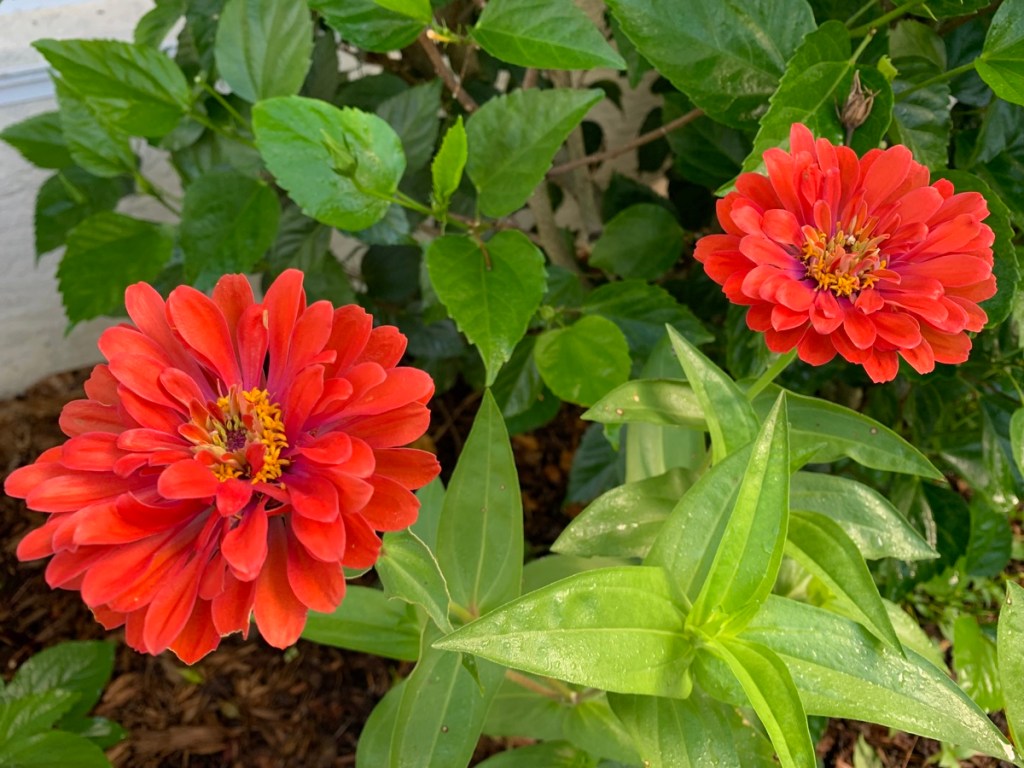
Zinnias are some of the brightest flowers that can be added to the garden. Bees and butterflies use them for food, and even a place to sleep. The flowers are long lasting and the seeds are easy to save.
Last year (2023) I grew zinnias for the first time. I’m not sure why I never grew them before in Florida, but I’ll always grow them from now on.
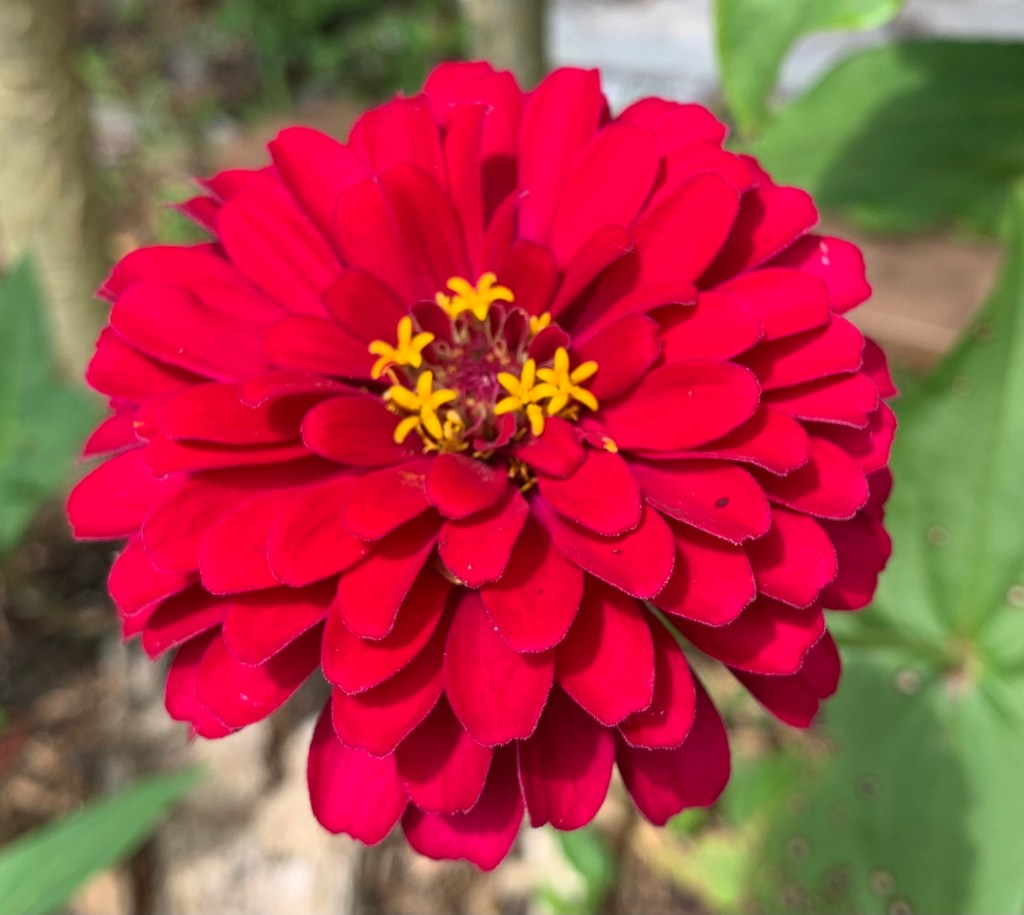
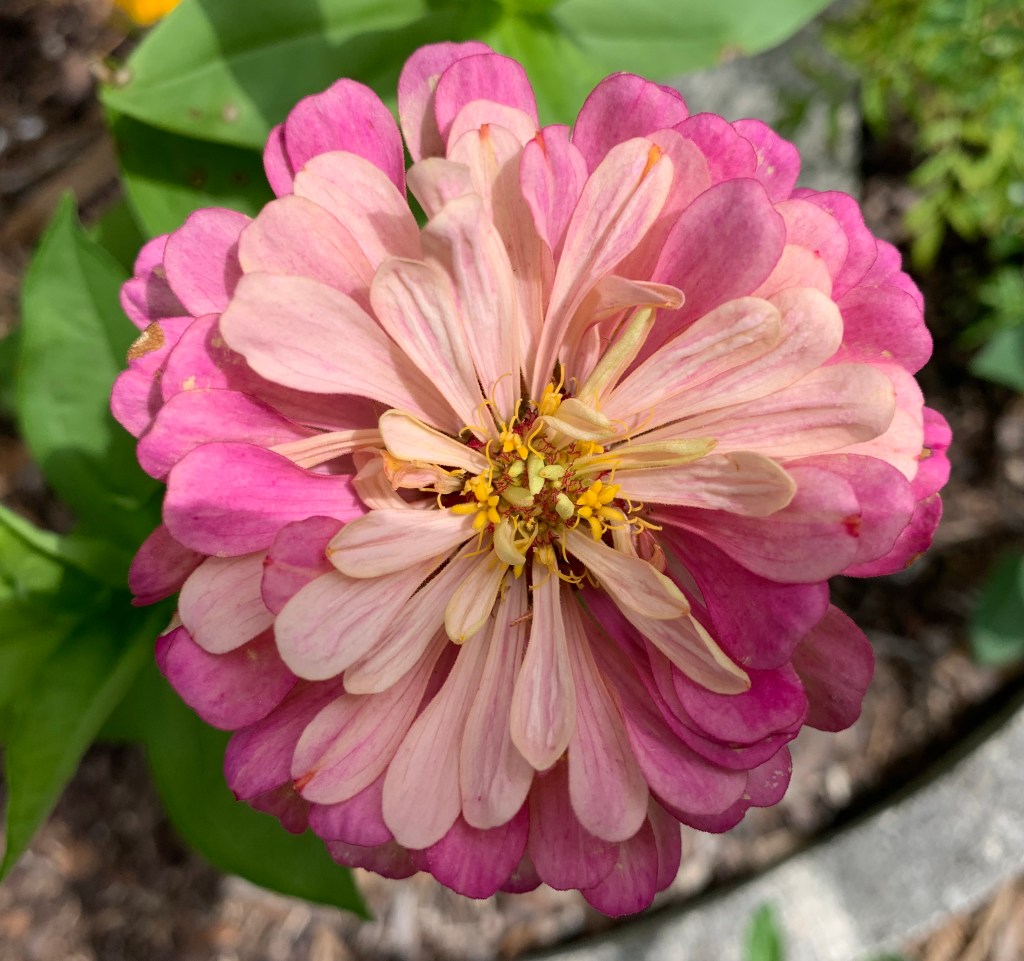
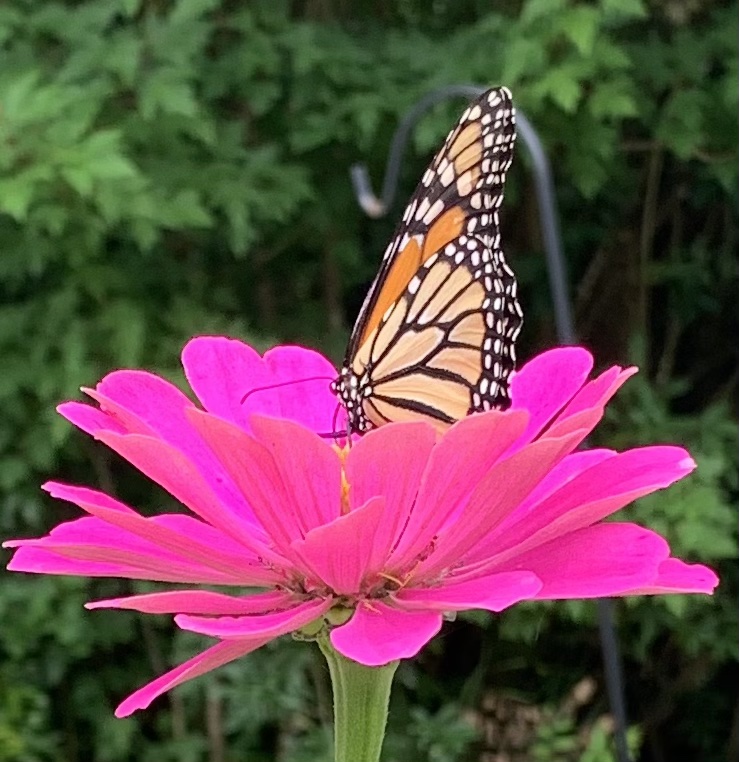
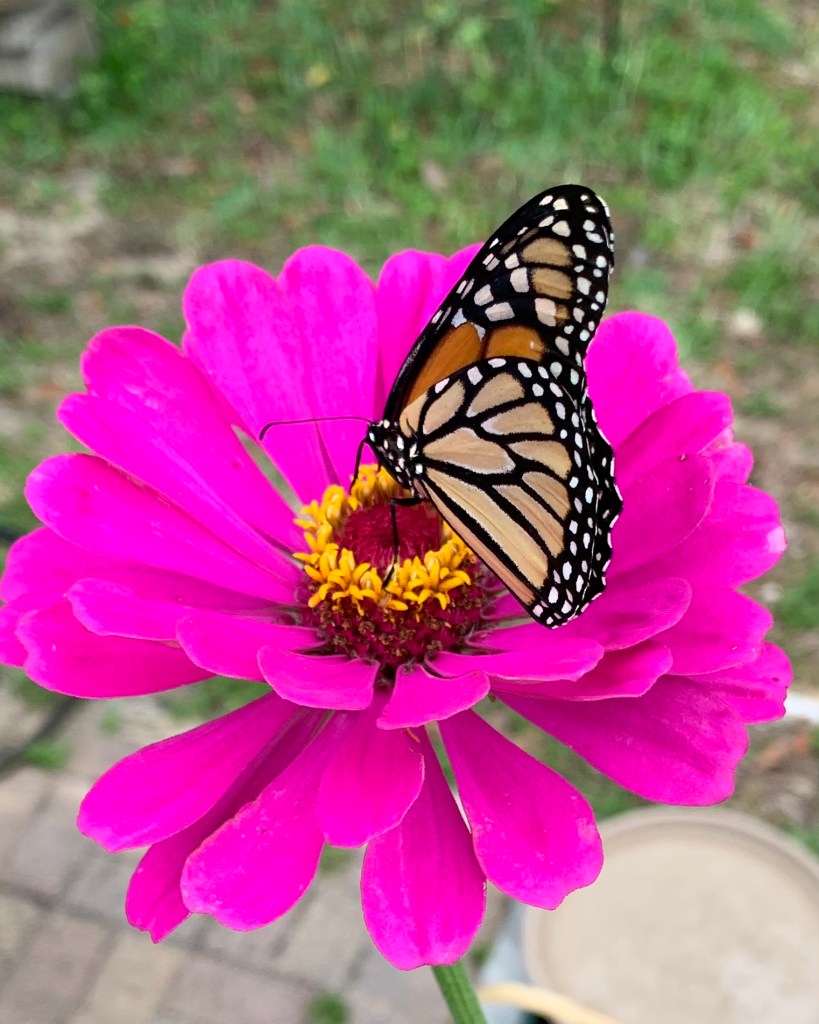
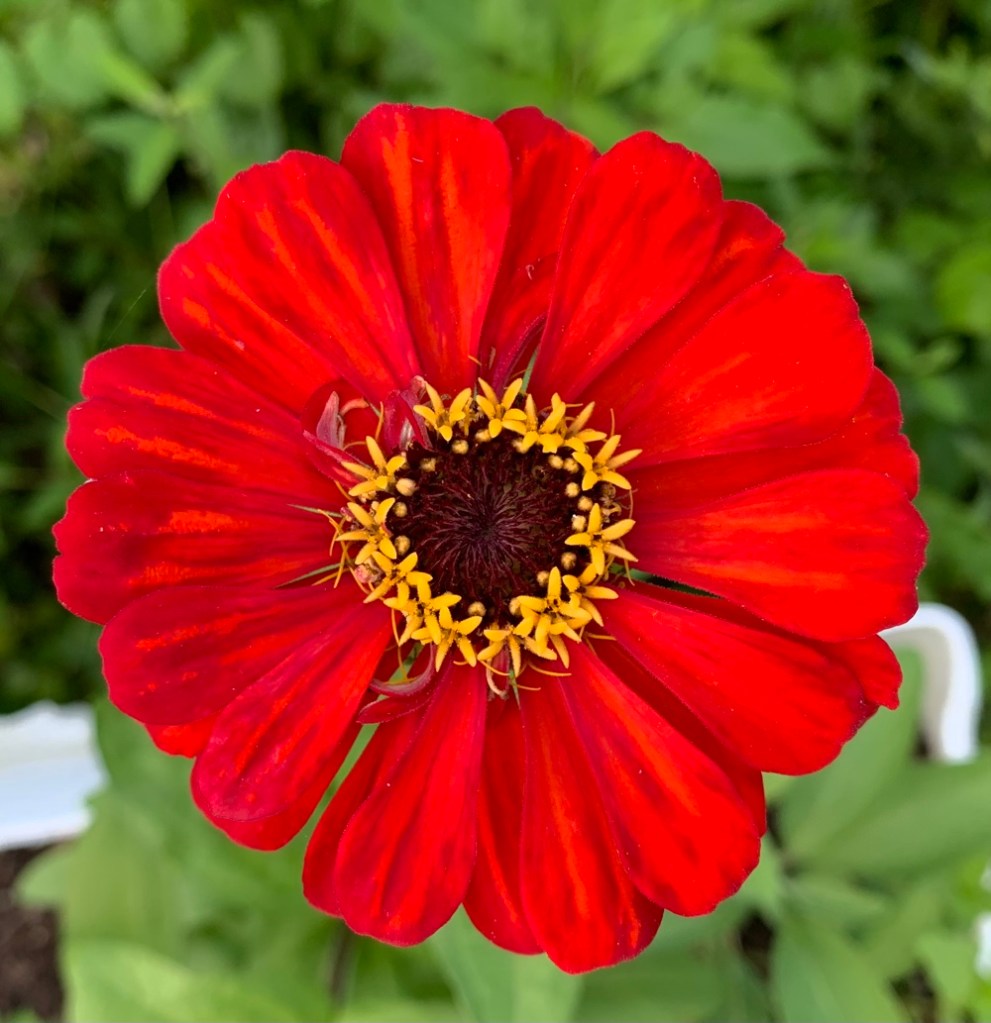
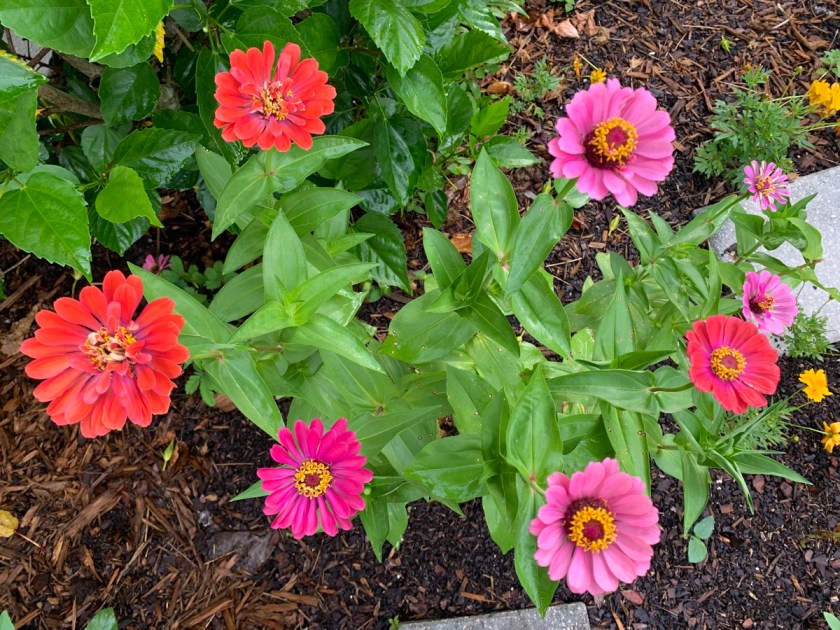
Look at the colors! The reds are so bright, and the orange is so true. The hot pinks are incredible, and the butterfly thinks so too! I think it is a Monarch.
Floret zinnia
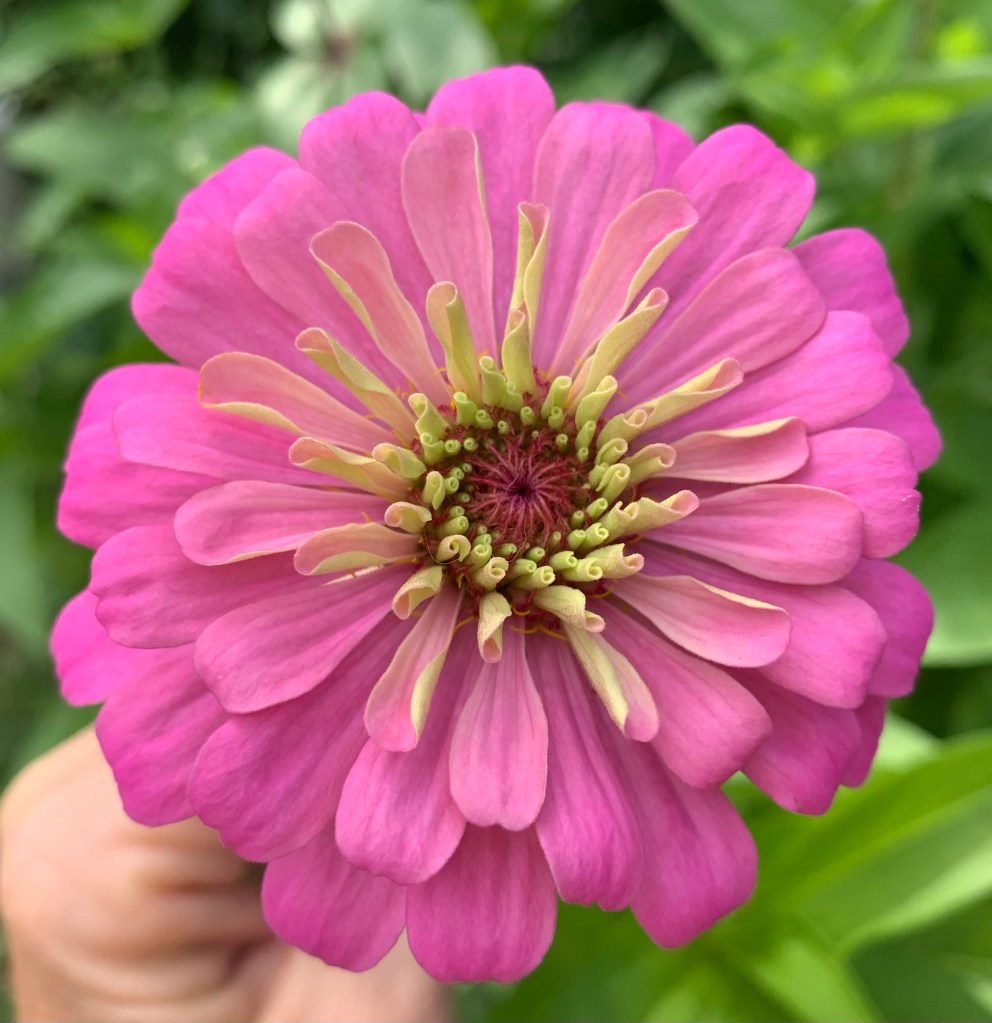
The bees and butterflies especially love the Zinnias with those yellow centers. It’s where they eat and gather pollen.
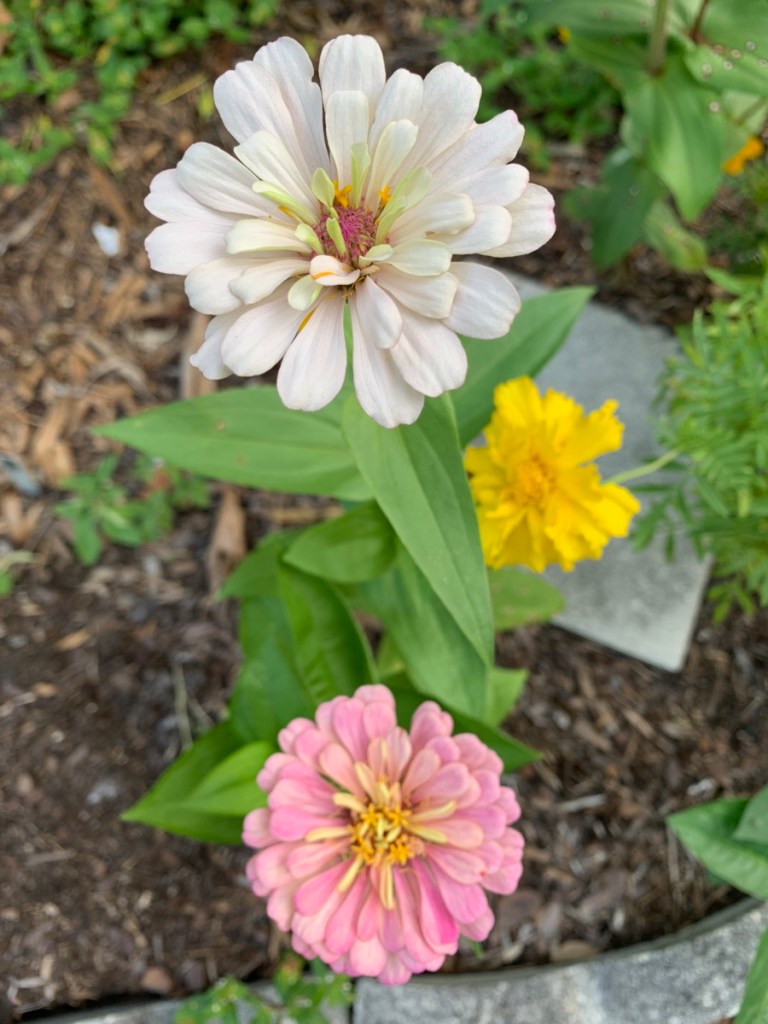
A Zinnia flower will change day by day as the petals open and the center grows. They are quite long lasting also.
Floret ZinniasSo red…Fluffy orange
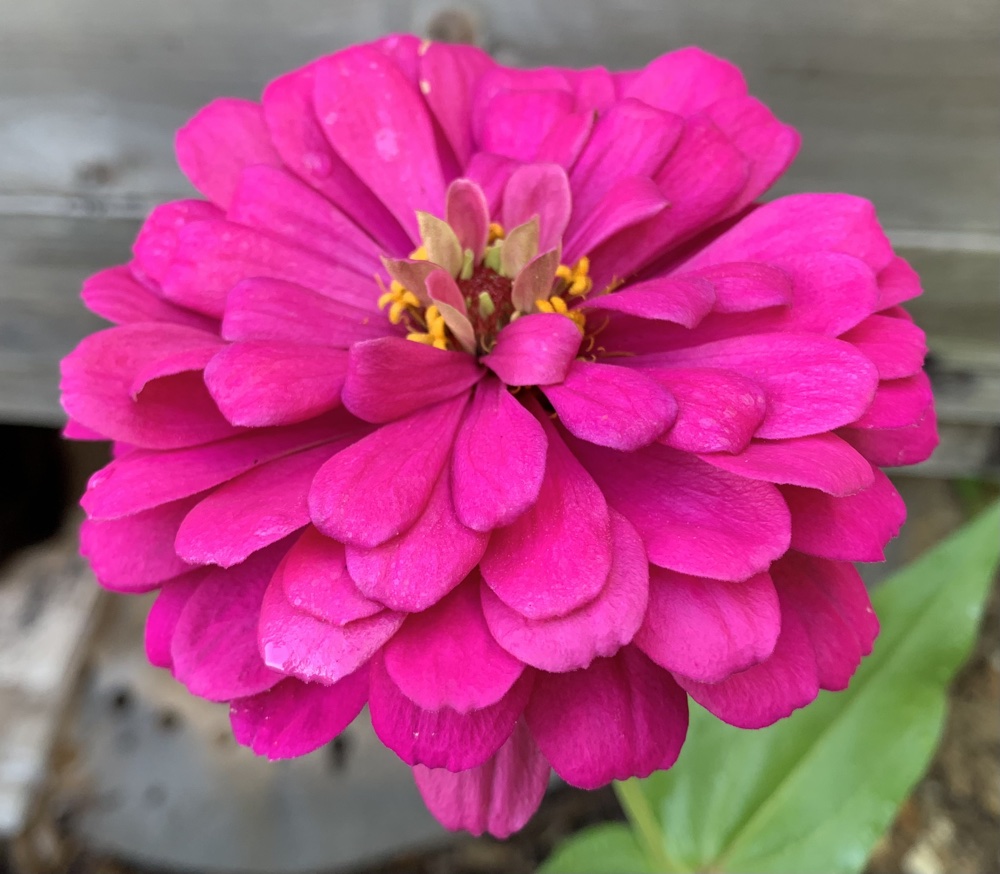
I’m partial to the flowers with lots of petals that create layers. Sometimes I find a bee nestled inside those petals. What a fun place to sleep.
Save the Seeds
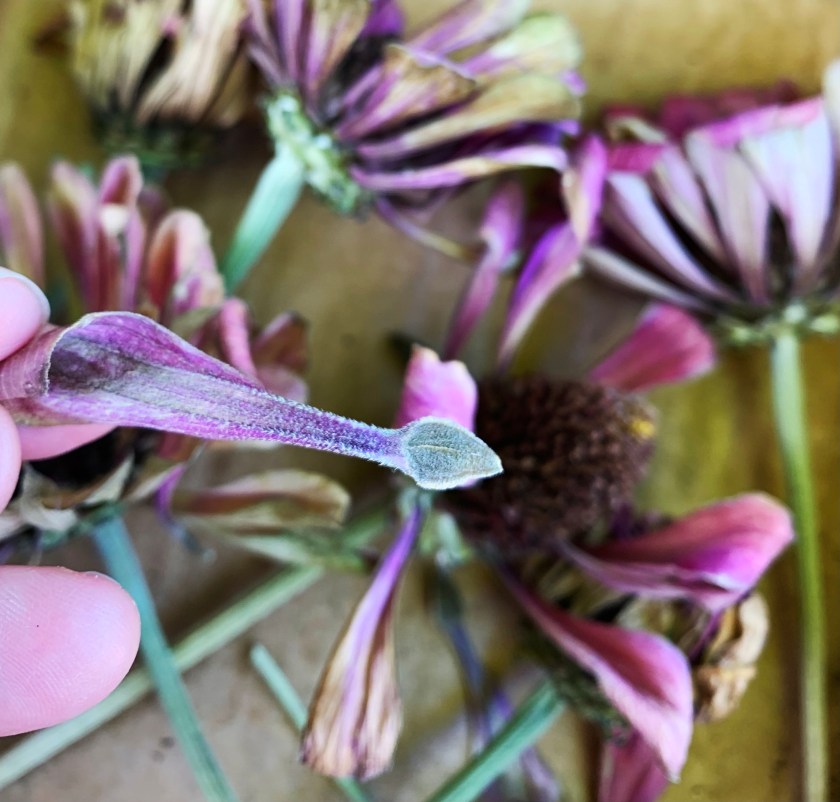
Zinnias are direct sow, so put the big seeds right into the dirt. Saving Zinnia seeds is also easy. Each petal has a seed at the end. I cut off the flower heads when they seem to be gone by and drying out, and place them into a box to dry further. I will be writing a separate post about saving the seeds, but that is pretty much it.
Zinnia seed
I leave the flowers whole, but usually they become so dry that the petals fall out. Sometimes I can still see the color of the original flower. Every photo you see on this page (except the Florets) came from seeds I saved from last year’s flowers.
I also read at the UF/IFAS extension that the flowers with few rows of petals should be tossed! What? Why? I disagree.
I’m wondering if I should take off the petal before planting the seed? Will they grow better and faster? I always leave the petal on.
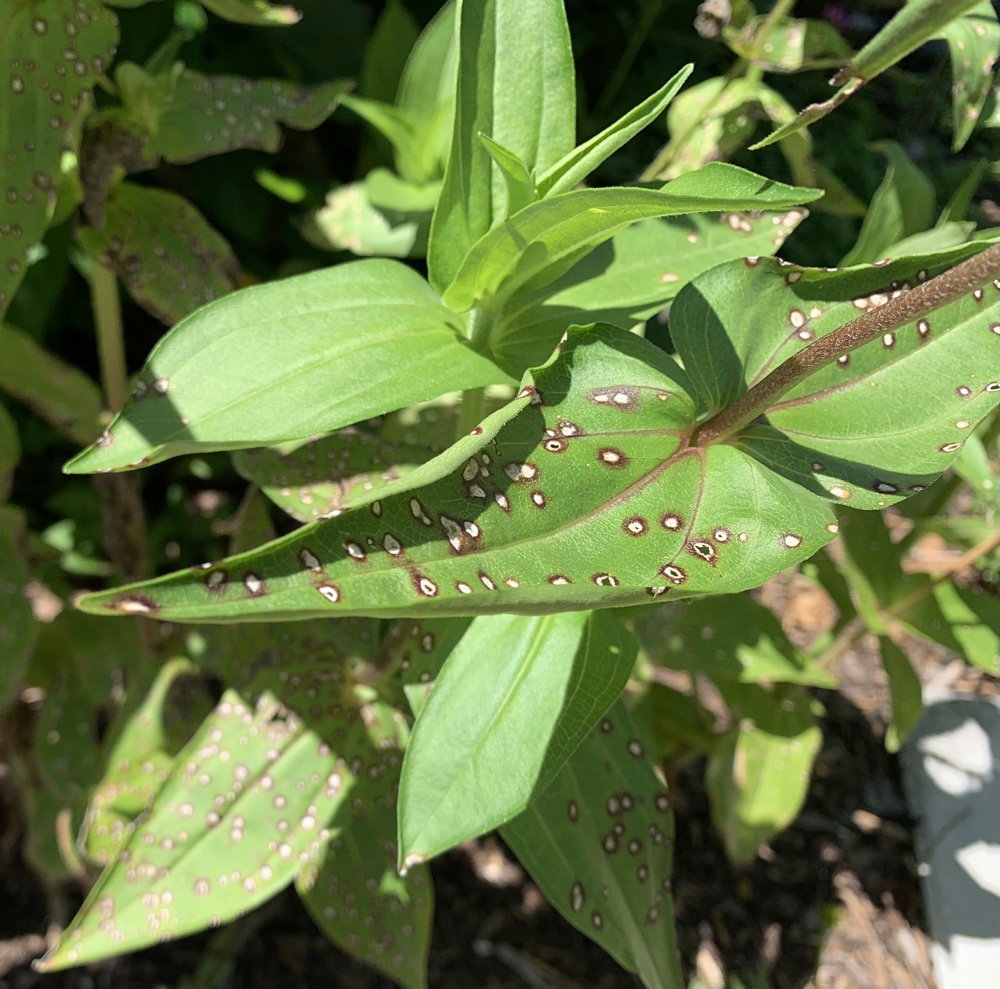
Zinnia Disease
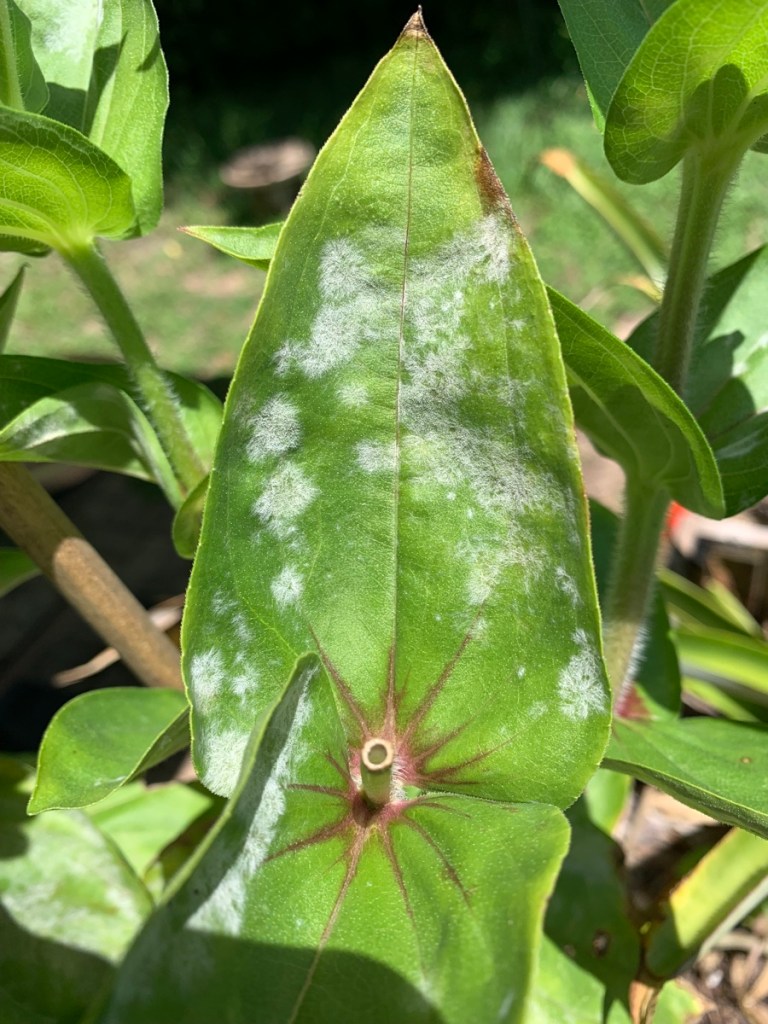
This year I learned that Zinnias can get a spotted leaf disease called bacterial leaf spot. And sure enough, most of mine had it. They can also get powdery mildew on the leaves. (Pegplant’s page lists some varieties that are mildew resistant.)
One way to help prevent both problems, is to give them space to grow. Air flow helps, but I live in a very humid place, so I’m not sure these things can be avoided. Overhead watering is a no-no for these flowers also.
powdery mildewLeaf spotPerfect leaves
Zinnia Varieties Less Susceptible to Disease
I can’t remember where I saw this information, but I wrote it down. This list is the varieties of Zinnia that supposedly are less susceptible to disease. The Southern Exposure Seed Exchange has the Marylandica variety (also called Zahara), but it’s currently out of stock. It has small, white, daisy-like flowers.
angustifolia
marylandica
crystal
star (bright?)
profusion
The varieties to avoid, for disease, are “elegans” and “heageana“, which seem to be the most likely available! I think all of mine are Zinnia elegans.
I found some Zinnia marylandica seeds at a shop on Etsy and will give them a try.
I hope you are having a wonderful summer. If you love to grow Zinnias, I’d love to hear about them.
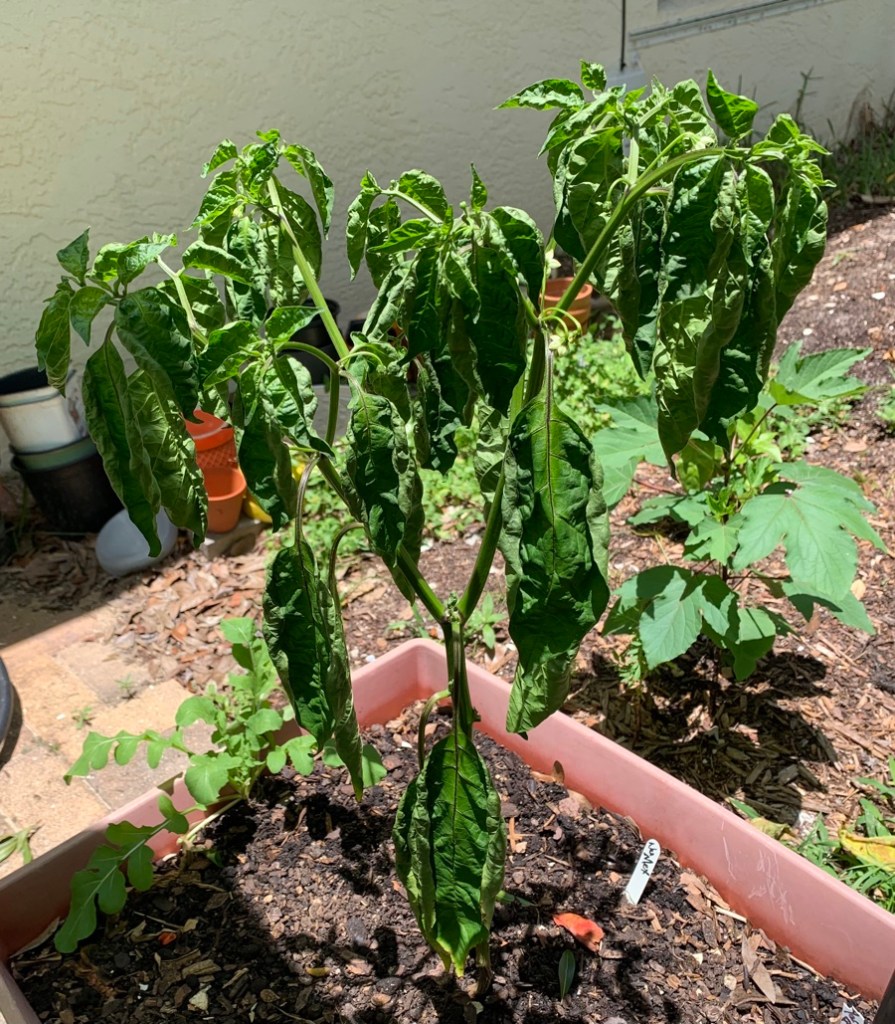
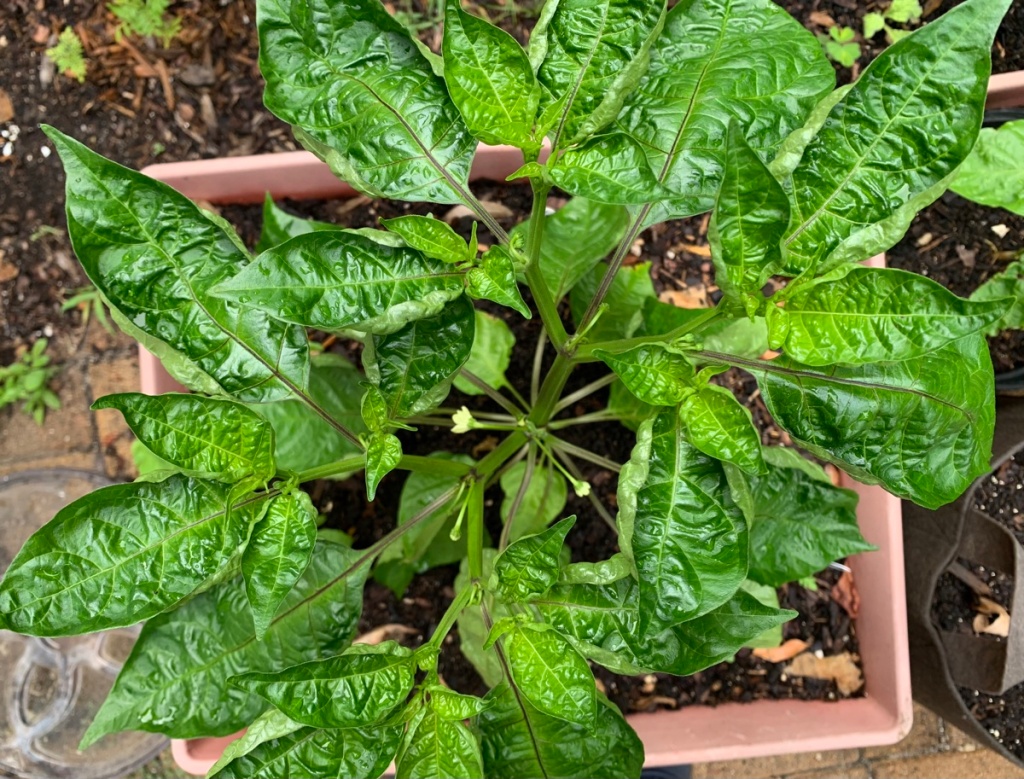
This year I am growing the Suave Nu Mex peppers, which are not going to be hot peppers. They should be orange in color and not red like the hot ones. After starting from seed, I have two plants growing and doing well.
Peppers, of all kinds, would be fabulous to have growing in my backyard. I use onions daily, and I would use peppers too, if I had them. This year I am growing the orange Suave Nu Mex peppers for the first time. (Not the hot ones.)
Pepper plants are tough to grow. I had trouble growing them when I lived in New Hampshire, because they would just be starting to have nice looking peppers, and the season would be over. They were purchased as seedlings, but the the short summer was a downfall. Now, in Florida, I have a long season, but the peppers were still not easy for me to grow.
DiseaseWinter pepper seedlingsPepper plants with disease
I began my peppers from seeds, in small pots. I tried to keep them going over the winter months, but they didn’t do well. Most of the seedlings ended up dying. Then, the older plants got some sort of disease.
Because my seedlings were have such troubles, I waited for Spring (Feb.) to plant the Nu Mex seeds outside in one of the grow boxes. I waited to see what would grow, and ended up with 2 plants. Yup, only two.
It is now June, and I have one Nu Mex still growing in the box where it began. The other has been transplanted to a plastic pot. Eventually, I will re-plant it somewhere.
Smaller plant
Florida Gardening Conditions
Hot, heat, sun, blazing high temps.
Too much drenching rain, OR not enough rain (we just have over 2 months with NO rain in my area! Temps are reaching over 100.
Gardens need sun, but it’s too much for some plants. Must supply shade.
Humidity… lots of it.
My dilemma is that the boxes are great for starting plants from seed outdoors. But, those boxes are not very deep. They are better for shallow rooted crops. A Nu Mex can be 4 feet tall, and I’m sure it has an extensive root system. It really needs to be in the ground.
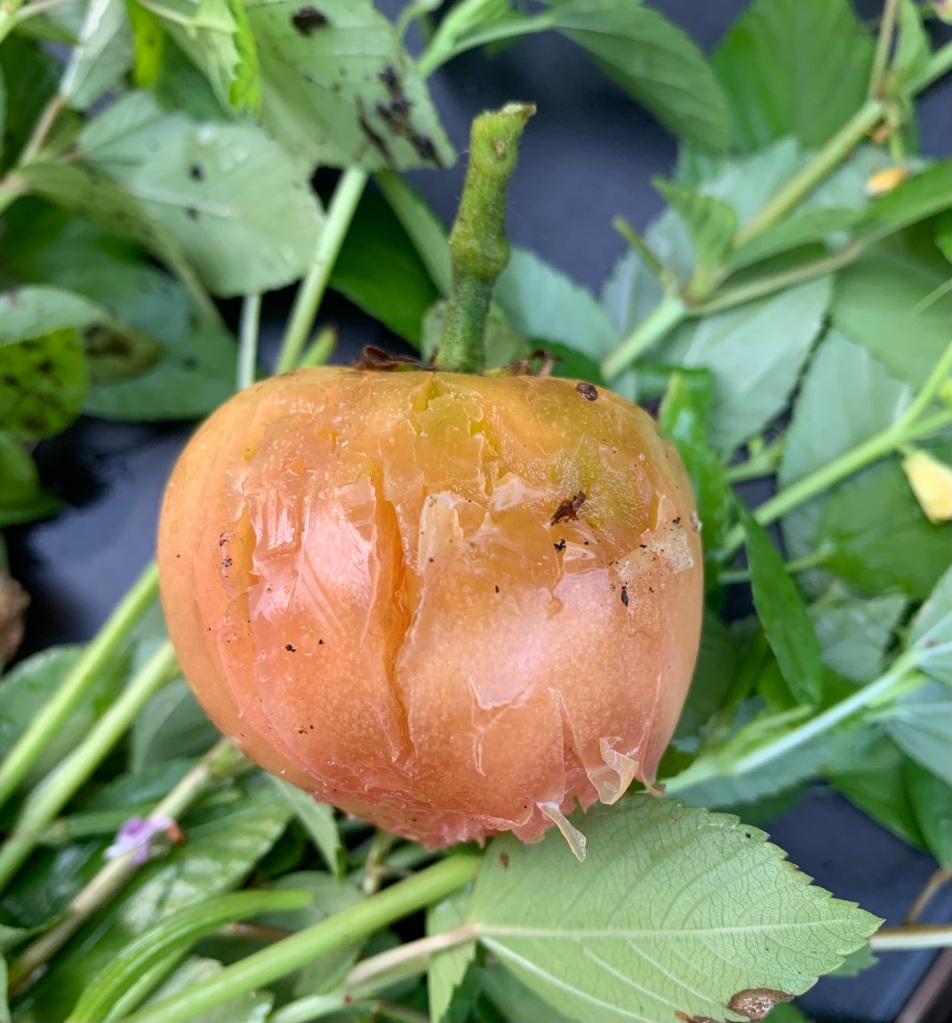
Anything growing in the ground in my yard, is open to raccoons harvesting my produce. They will rip the peppers right off the plant, as they do with tomatoes, eggplant, watermelon, and whatever else is in their line of sight. It’s a conundrum.
Raccoon got the tomatoWatermelon disaster
About the Suave Nu Mex Variety
The Suave Nu Mex (orange) peppers will look like habanero peppers, but won’t be hot like those. It means I can use them in meals without worrying about the heat. At least this is the hope!
Watch this video by Elise Pickett of The Urban Harvest, where she discusses which peppers to grow in Florida and how to care for them.
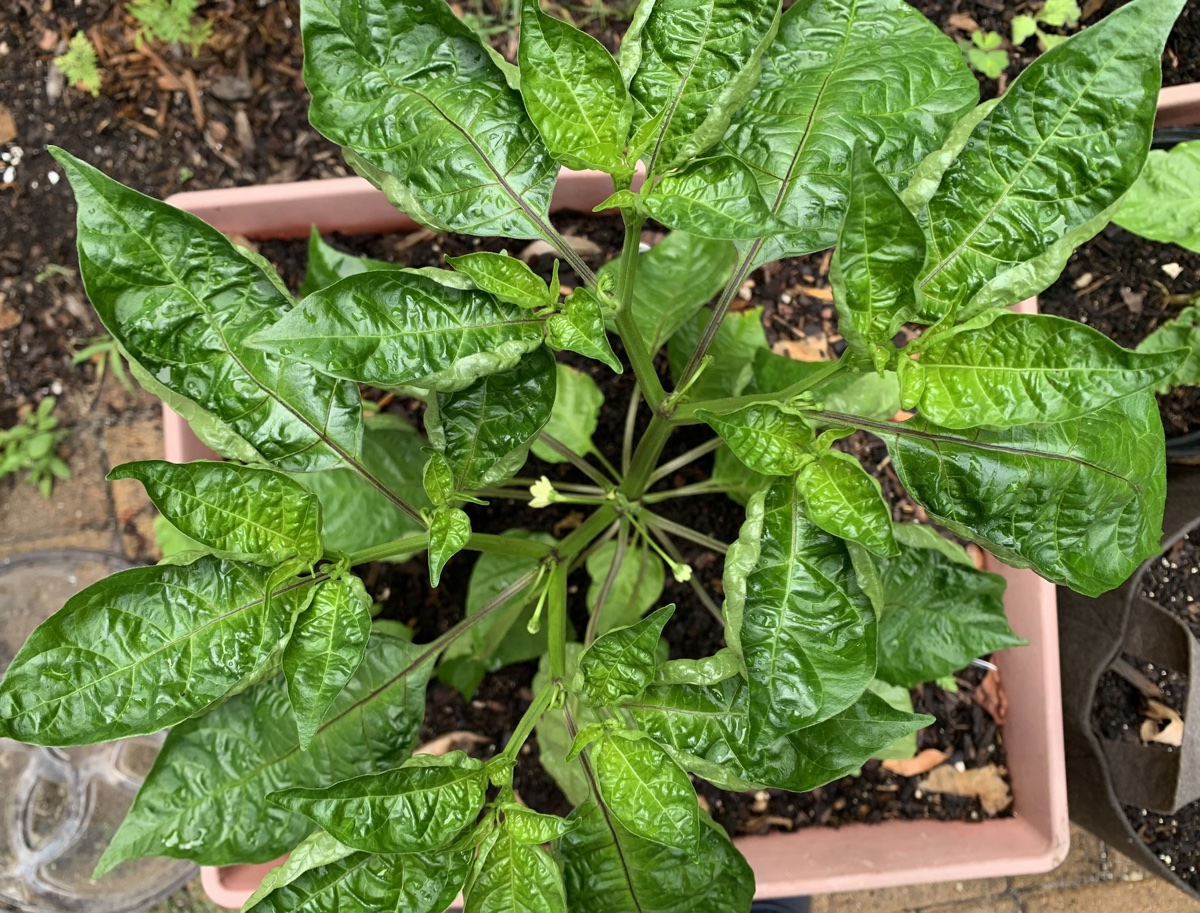
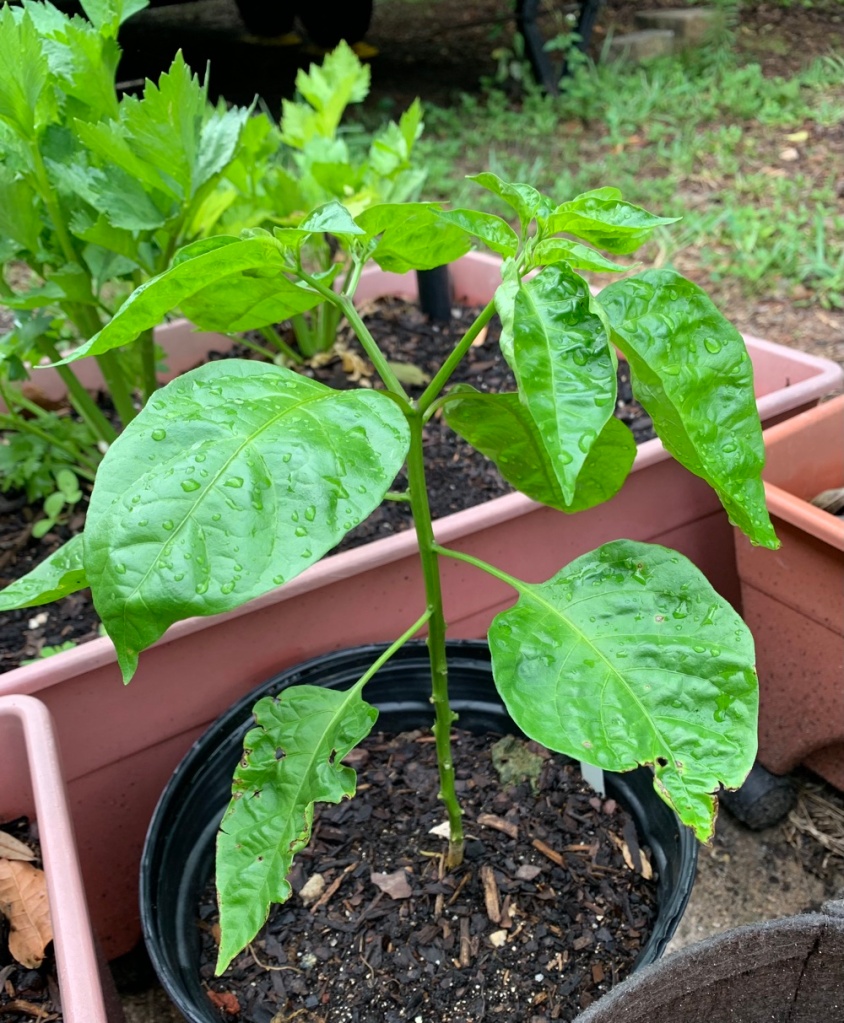
Nu Mex leaves
The leaves on the Nu Mex peppers are curled on the edges. I’m not sure if this is a characteristic of the variety, or if it’s a signal that something is wrong. The plants both look healthy, and the larger one has flowers. These plants are about four months old.
The Secret is to Give the Peppers Some Shade
The peppers that grew well from seed looked nice, but I was worried about how much water to give them. The sun is so hot, and it dries the ground pretty fast. But I don’t want to overwater either.
After a month of growing my pepper seedlings, one thing I discovered is to give them shade early in the day. They were getting a lot of sun until later in the afternoon, but it was too much.
Other Peppers Growing Well
After struggling to get my pepper plants past the seedling stage, I now have these types growing in my little backyard. I wrote a page about them here.
4 Carolina Wonder Bell pepper plants
2 Suave Nu Mex, orange, not hot variety (this page)
2 Aji Dulce spice pepper / seasoning peppers
1 Ancho poblano (2 have already died, so fingers crossed)
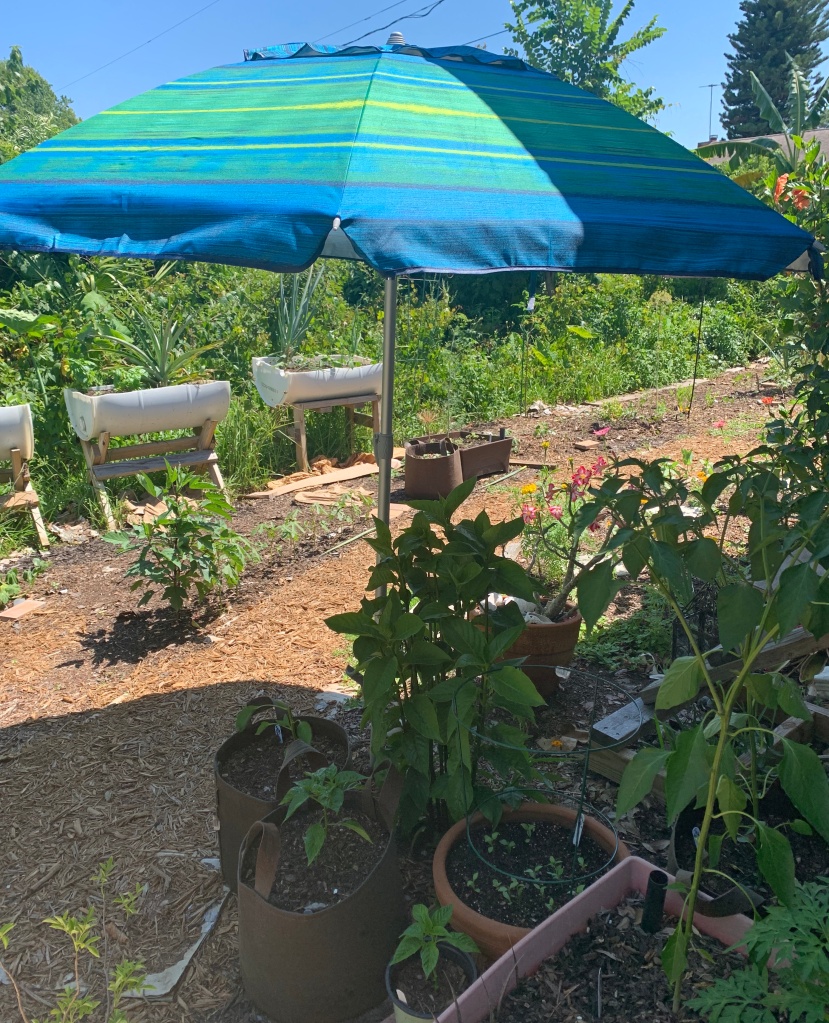
Using Umbrellas For Shade in the Garden
I have set up my beach umbrella next to the fire spike – which droops in the sun every day. I’ve arranged some peppers in bags around the bottom and try to remember to open up the umbrella by noon.
Both Nu Mex plants are near my table umbrella, which I put up to block the afternoon sun. All the pepper plants have begun to do much better now that they have less direct sun.
Beach umbrella is up for shadeNu Mex – will get afternoon shade when I open that umbrella
Epsom Salt and Fertilizer
In Ellise’s video (link provided up this page), she talks about adding Epsom salt (paid link) to her pepper plants. About once a month, sprinkle a little around the plants. I have been doing this with all my peppers.
Don’t fertilize too much either or they will grow like mad, but not produce. Once they begin to grow little peppers, they may need more fertilizer. Some places say to fertilize once a month. I’m still in the learning stages and I’m not good at keeping track of when I fertilize what plants.
Umbrella Suggestions
If you want to use a stand alone (beach umbrella) to shade portions of the yard, be sure to get one that screws into the ground. Mine has the screw part attached at the bottom, with fold out handles to screw it in. The top of the umbrella comes completely out, which is nice if it gets super windy. Also the height is adjustable, and it tilts.
The one I bought (back in 2017) is similar to this one on Amazon (this is a paid link), but I’m not sure the quality is the same. The one I have is currently unavailable.
The plastic screw anchor is easy to put into the sandy ground, or take it out to move. Umbrella anchors can be purchased separately, and then you could find a cheap umbrella to use with it. The problem I see with that set up, is the wind. If the umbrella sets into the anchor, it could come out and blow away.
Another option for shade is to buy a shade cloth. I’ve never used one, but they are big and need to be anchored somehow and tied somewhere. This works best if you have a big area to cover.
If you have an aphid infestation, check regularly for ladybug eggs, larvae and pupa on the plants.
I believe in not being too quick to clean up the garden. It is June, and my old, aphid-filled dill plants are now full of ladybug larvae! This is why I leave plants up after they have grown, bloomed and begun to die.
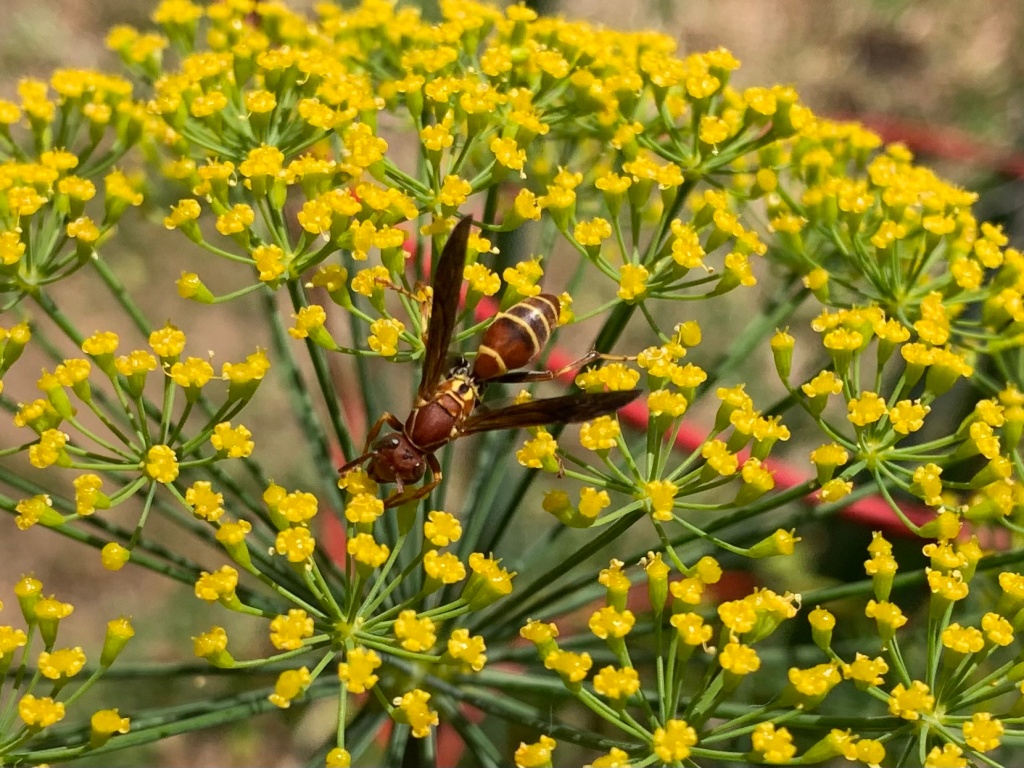
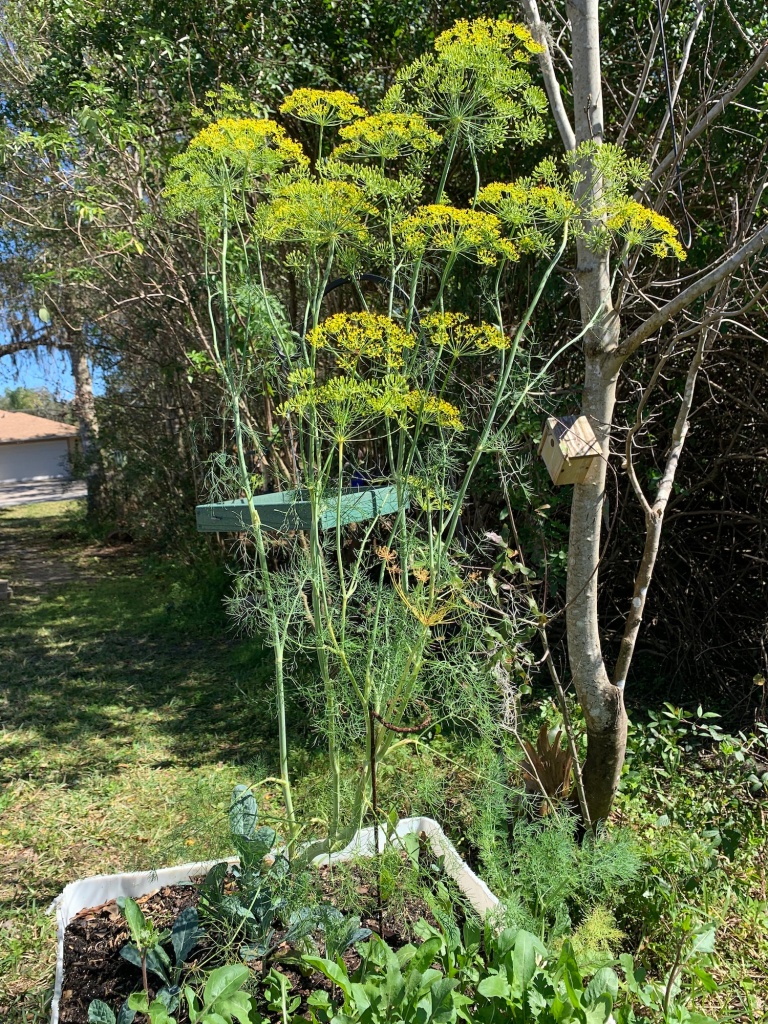
Dill is one of the great herbs to grow in the garden. Some of my plants have come up on their own. When I see them growing I just leave them. The flowers are gorgeous and feed bees and butterflies. The seeds are easy to gather and save, and black swallowtail butterflies lay eggs here.
Dill flower
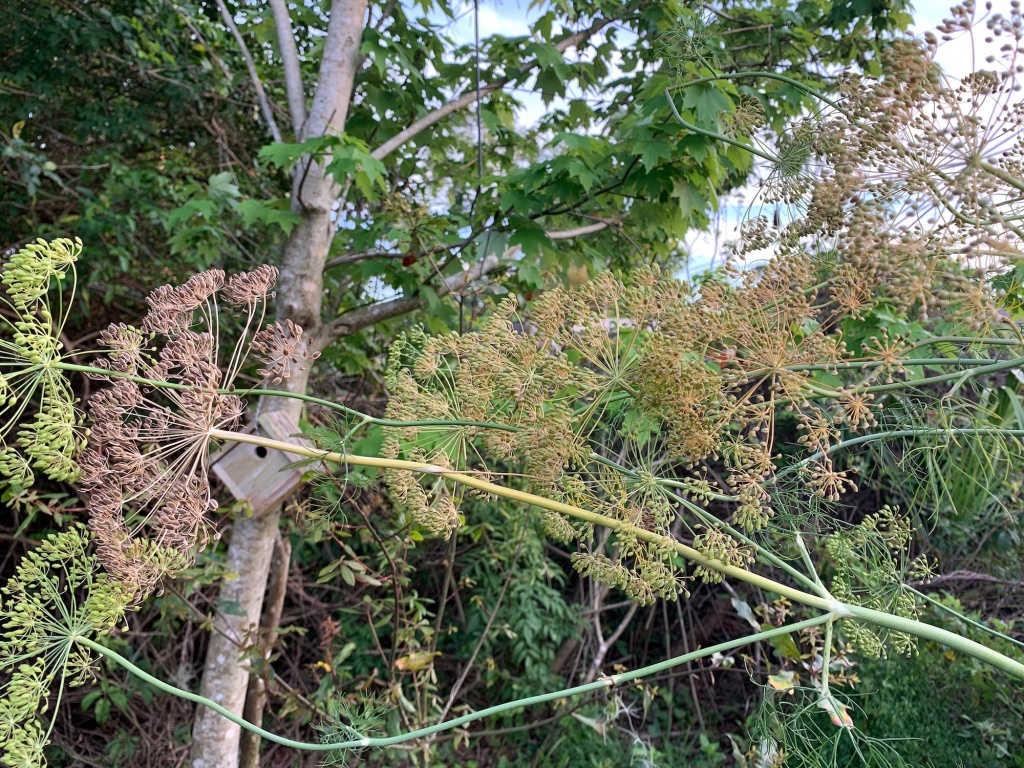
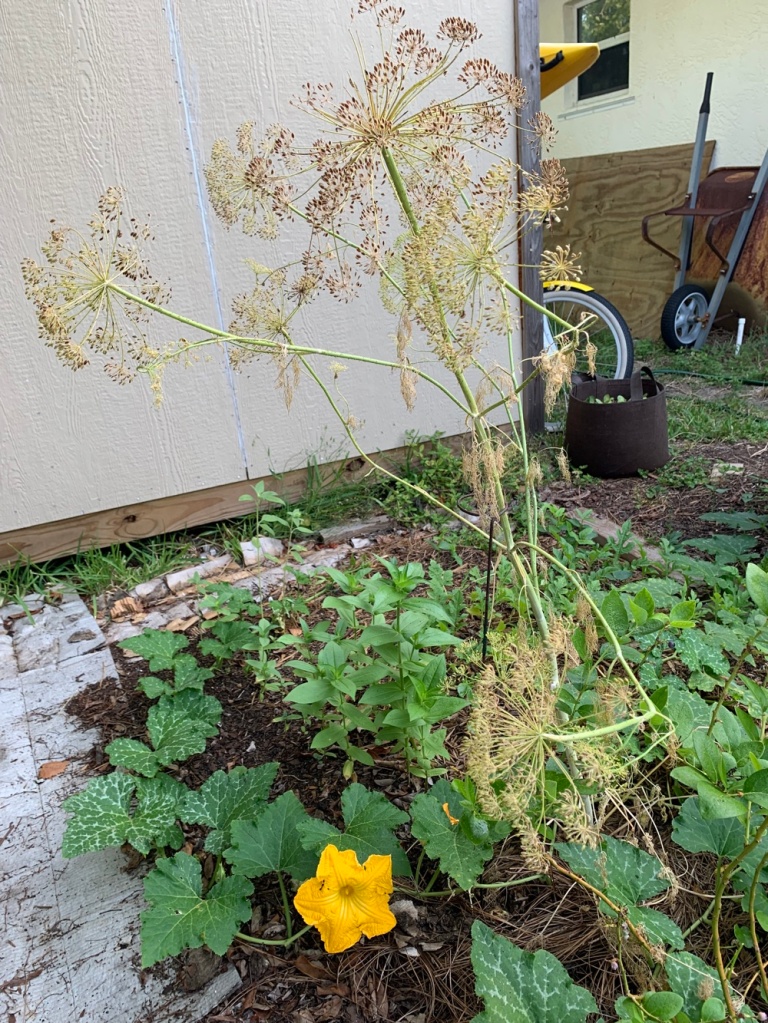
Dill does not like the extreme Florida summer heat and the plants are done flowering by June. The seeds have formed, and I did cut one big head off to save the seeds for next Spring. The rest, are still on the plants, which now look pretty awful.
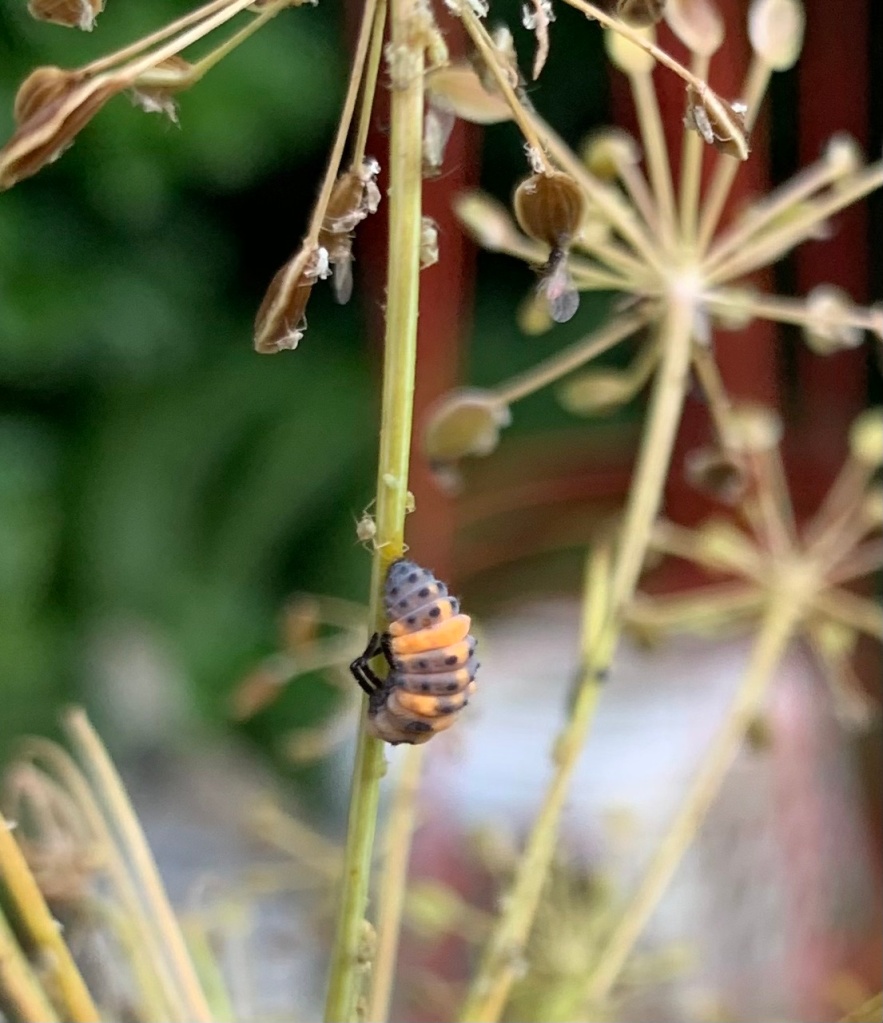
Aphids have found the old dill plant and it is covered in them! But there are also many ladybug larvae and even a ladybug or two.
Aphids and larvaeOld dill is full of aphids, which ladybugs love!
The day I saw all this larvae, I counted 15 little guys crawling around. They are tiny, and hard to see in the mess of aphids, so there might be even more.
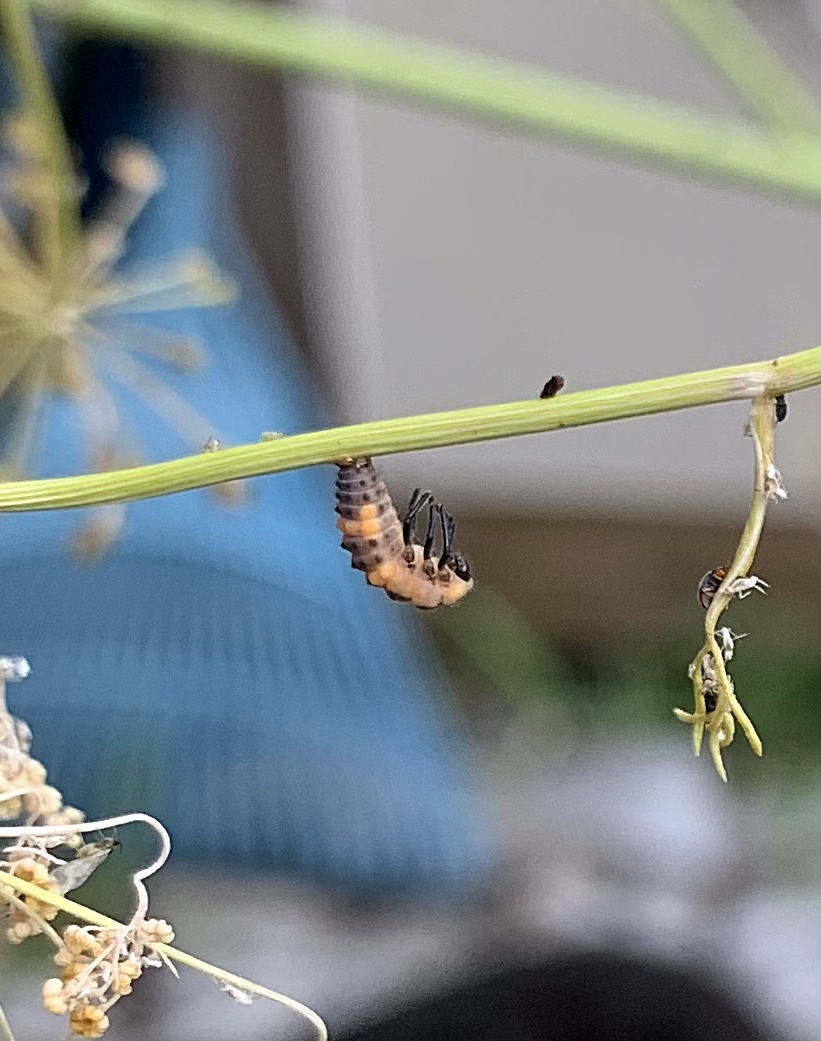
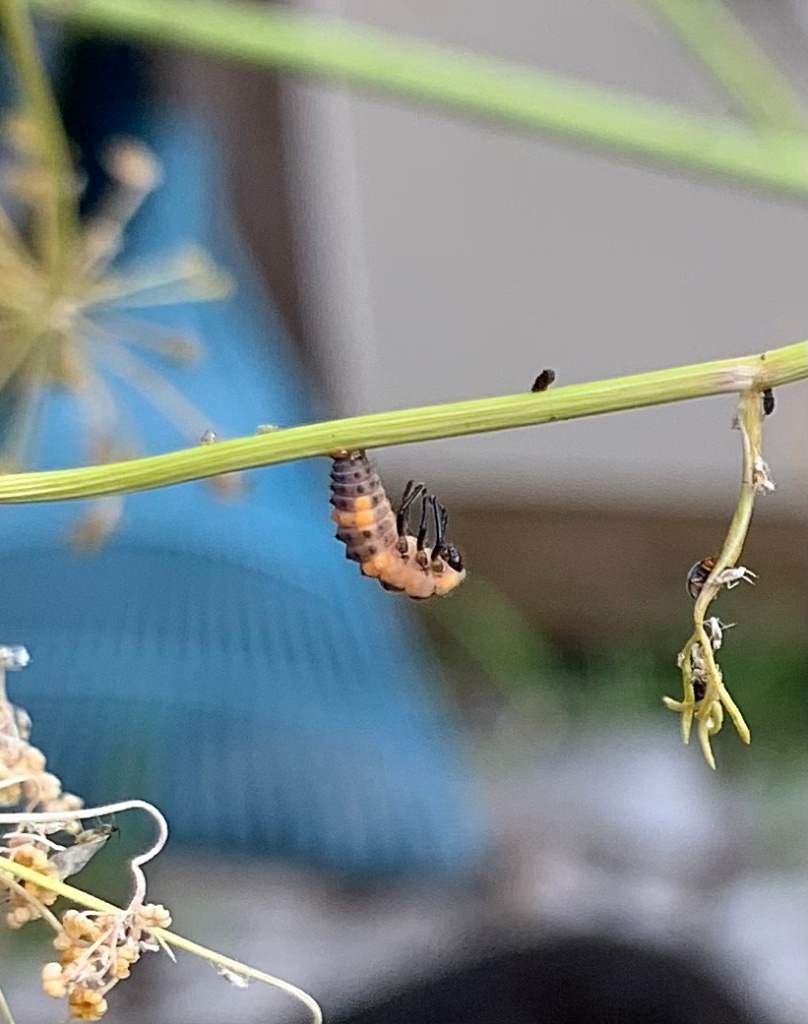
The next day I realized they were beginning to attach and hang – going into the pupa stage.
Becoming pupaNext dayLarvae to pupa
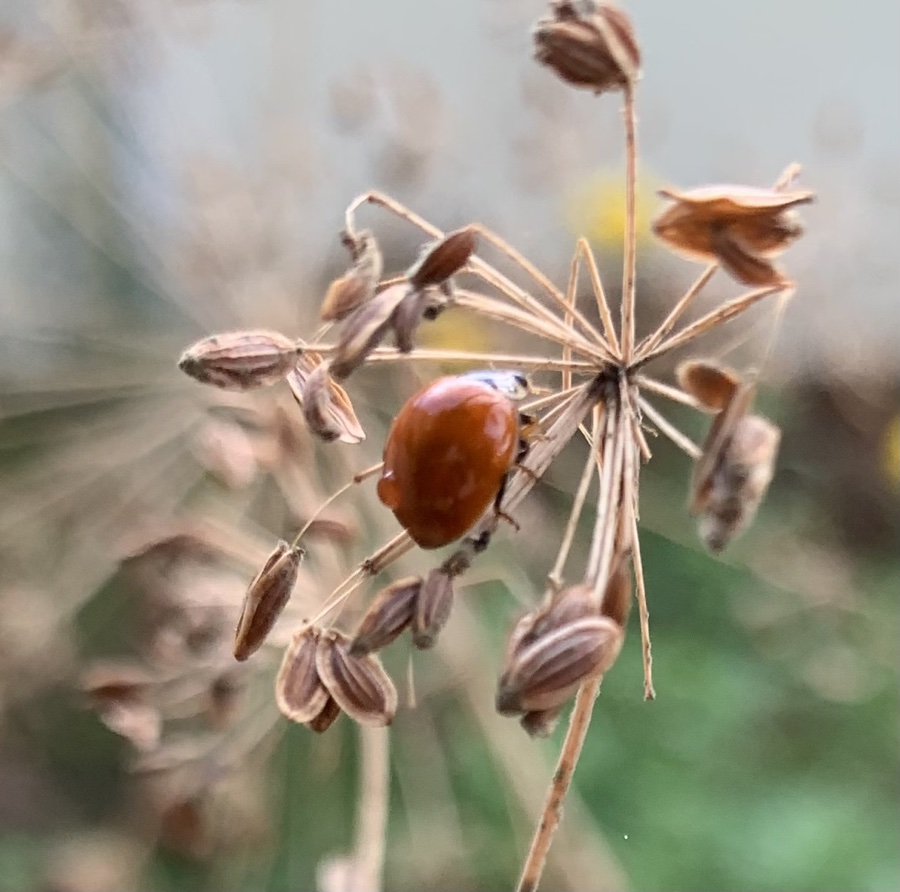
A few days later the new ladybugs were crawling all over the dried dill stalks.
Newly hatched ladybug exploring the dried dill seeds
Ladybugs on the Hon Tsai Flowering Broccoli
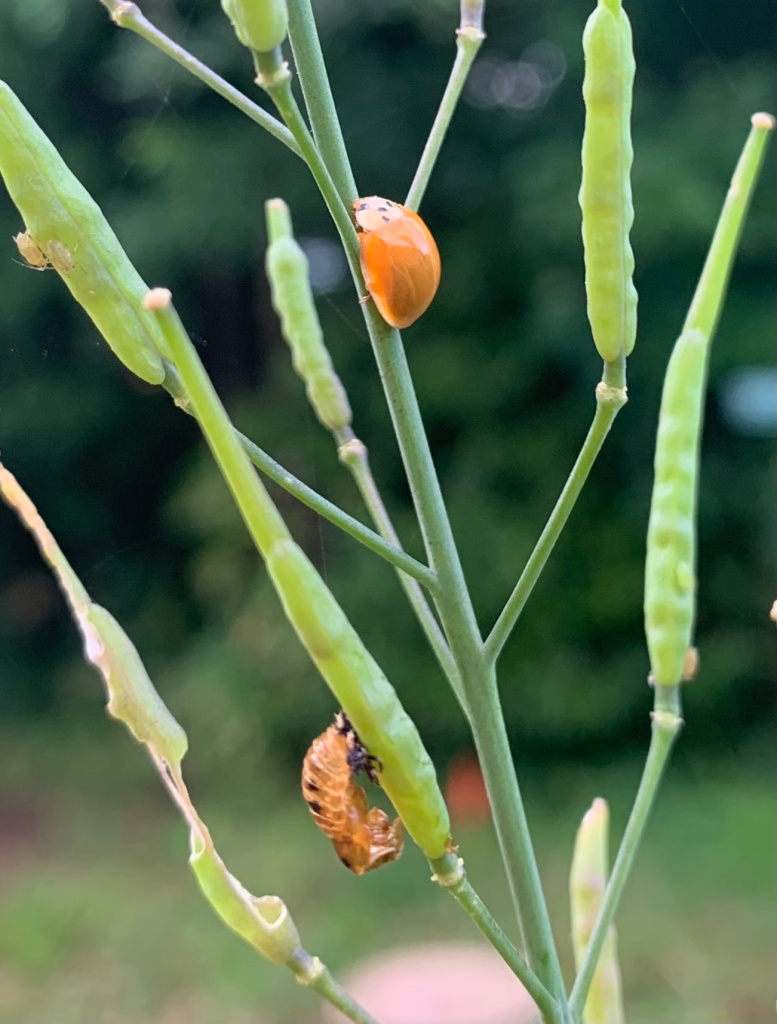
Just a few weeks before the dill ladybugs were noticed, I had watched ladybugs come out of their pupa stage on my Hon Tsai flowering broccoli plant. It was setting seeds, and had some aphids at the top. This was a random plant that grew late in the season.
Ladybugs feed on aphids, so they lay eggs where the “babies” aka larvae, will be able to get food.
Just out of the pupaThe spotted one
Four ladybugs hatched from their “shells” which were attached to the seed stems of this plant. Three ladybugs were solid orange, and one had loads of black spots.
Newly hatched ladybug!
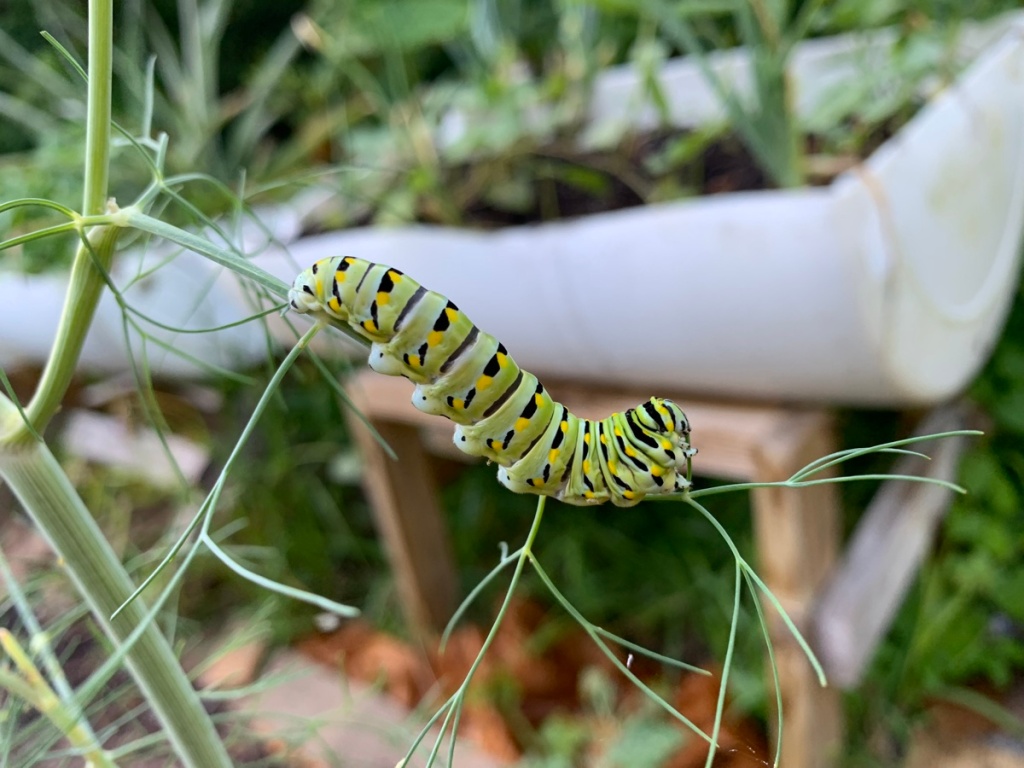
Dill is Feeding the Caterpillars
Even though the dill plants have mostly died and are drying up, I have found two caterpillars on one of them.
There is not much left for them to eat. I’m very surprised that the cardinals have not picked them off by now. I check on the beauties every day, but I have big doubts that they will reach pupa stage.
*Update: the next day one caterpillar was gone and the day after the other one was gone too. I suspect birds needed a meal.
This guy is so pretty, he almost looks fake.
This is a reminder to look closely at what is happening in the garden. Before you decide to rip out that old plant, consider what creatures might need it for shelter, eggs, or food.