Pruning The Rubber Plant and Taking Cuttings to Propagate

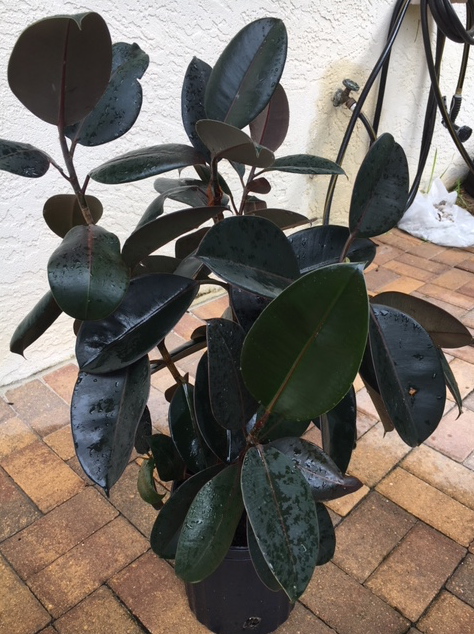
Rubber Trees are something you see a lot of here in Florida. They are tropical plants and don’t like the cold.  They work well as house plants, but I’ve seen them growing outdoors here and can become quite large.  They are susceptible to scorching sun which damages the leaves, and don’t like extreme cold.

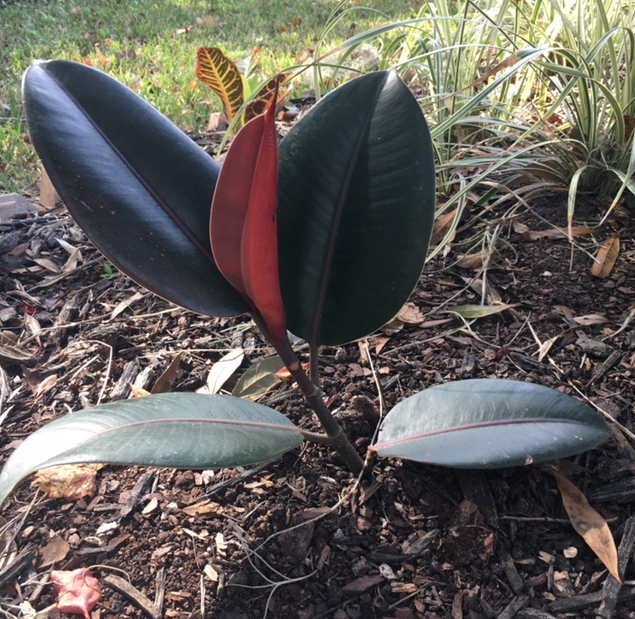
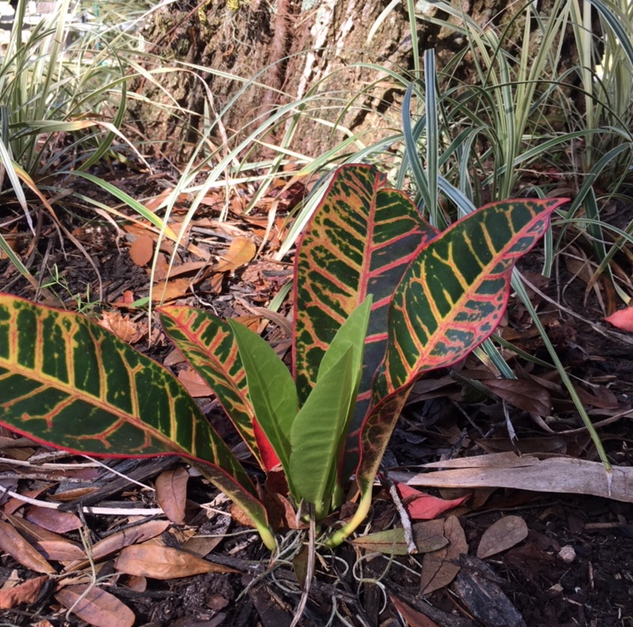
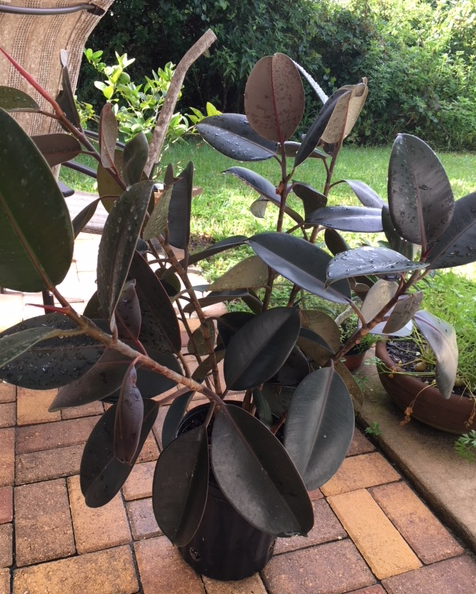
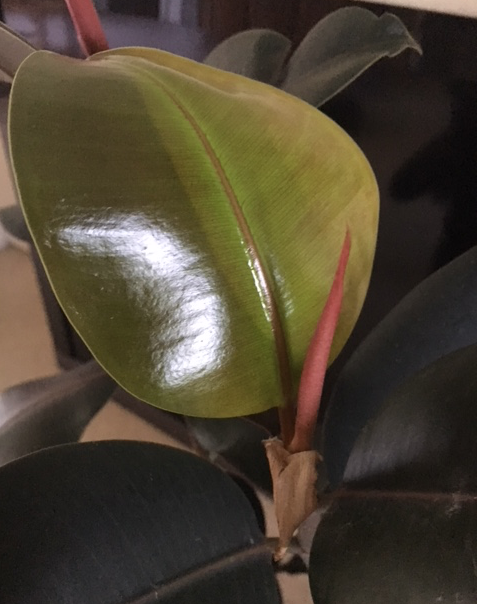
I love the uniqueness of this tree with it’s thick, rubbery leaves which are dark green to purple in color.  A reddish spike appears when a new leaf grows.  These plants are hardy, but keep them out of the hot sun or the leaves will burn.

To keep a nice shape, the rubber tree will need pruning. To give it a good “bath” I take it outside and spray dust off the leaves. I can also give the dirt lots of water and some fertilizer.   It’s possible to do that year round here.

I noticed the plant had a lot of new growth making the stems quite long. I’ve never pruned a rubber plant, but decided to give it a try.

Rubber tree in need of pruning

I ended up cutting back two stems to even up the shape a bit. If possible, I try to root cuttings (propagate) I take of large plants like this. When I searched online for info I got the general “use rooting compound” advice. I’ve never had luck using rooting compound. So I decided to do it my way.

rubber tree after pruning

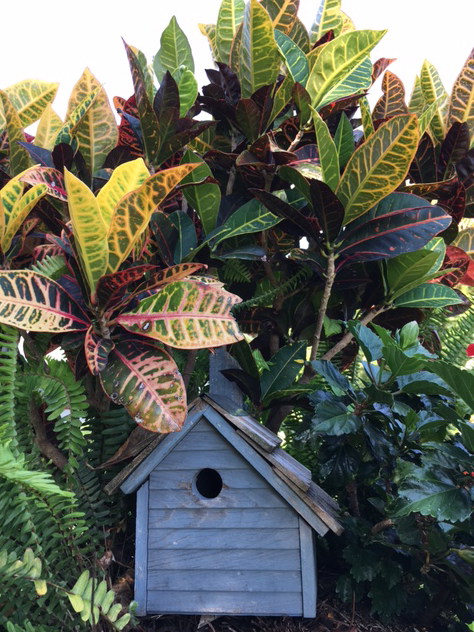
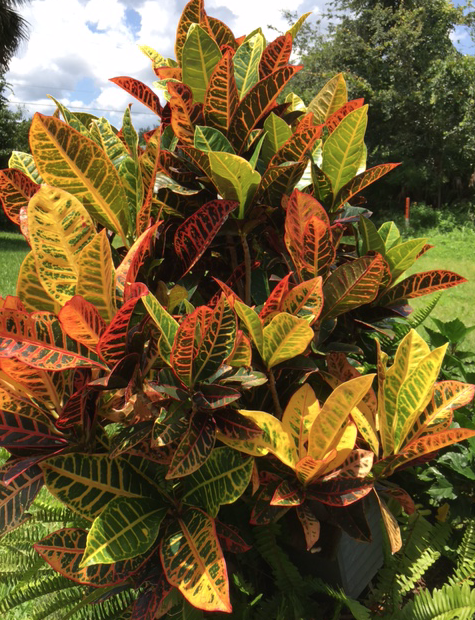
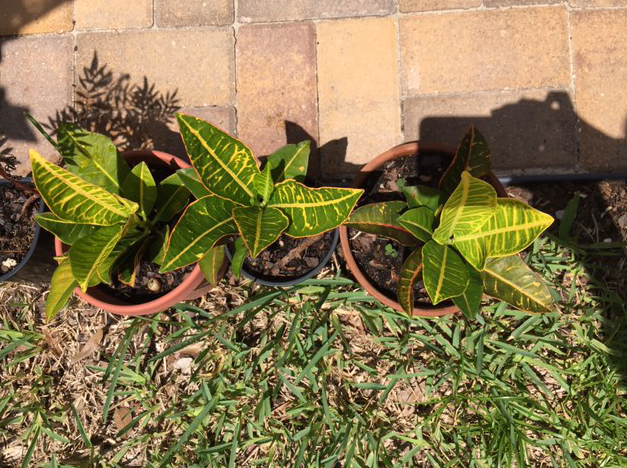
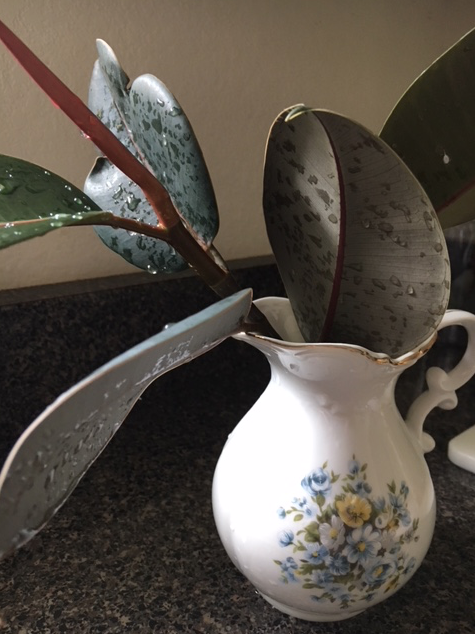
My favorite way to create new plants from cuttings is to simply put the cuttings in water and wait for roots to develop.  The water must be changed often – I do it every day.  I’ve had good luck propagating crotons this way, but it doesn’t work for every plant. I’ve never tried to root rubber plant cuttings, so this was an experiment.

rubber plant cuttings in vase


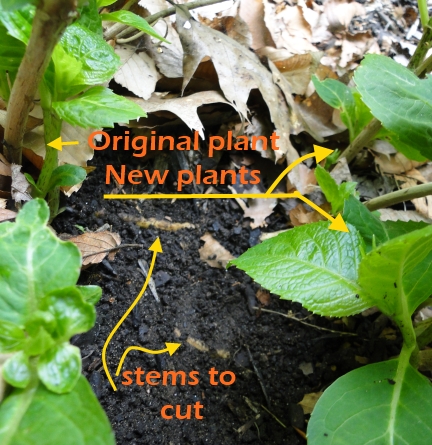
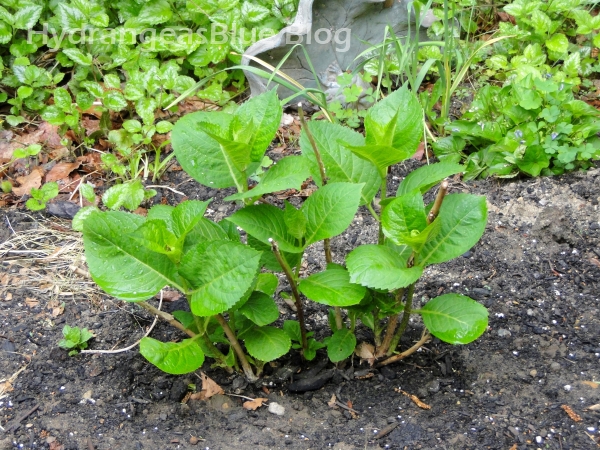
The rubber plant has white sap in the stems which is sticky, which is similar to what you see in hydrangea stems. The hydrangea stems can close up due to this white sap and make the cuttings wilt. (Read more about cutting hydrangeas.)

I kept an eye on the rubber plant cuttings and saw no drooping or signs of distress in the vase.

After a while – probably close to 2 weeks – I saw roots developing on one of the stems.

rooted cutting rubber tree
After a few weeks in water – roots!

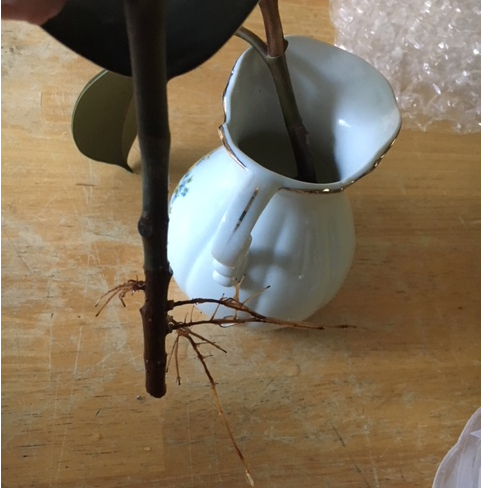
I will be potting this soon. The other stem has not begun to send off roots, and I’m not sure it will. But I’ll wait a bit longer to see. (It never did and I gave up.)

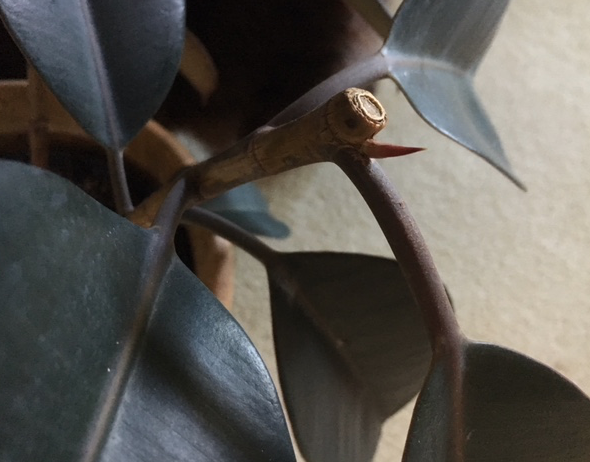
The main plant is sending off little shoots near the site of the cutting.  I only see one shoot, so whoever the cut is made is where the new growth will take place – at the next leaf on the stem.  Keep that in mind when making the cut.

new growth rubber tree
New growth from the stem that was cut.

A new leaf unfurls in a pretty green color. It will eventually turn dark like the older leaves. My next chore will be to re-pot into something bigger. First, I may take a few more cuttings to further shape the tree.

new leaf rubber tree
Pretty new leaf emerging.

If the plant is too large to take outside and wash, use a damp cloth and clean the leaves every now and then. Be sure to fertilize it occasionally as well. I like to use organic fish emulsion diluted in water.

Planting the Rooted Rubber Tree Cutting

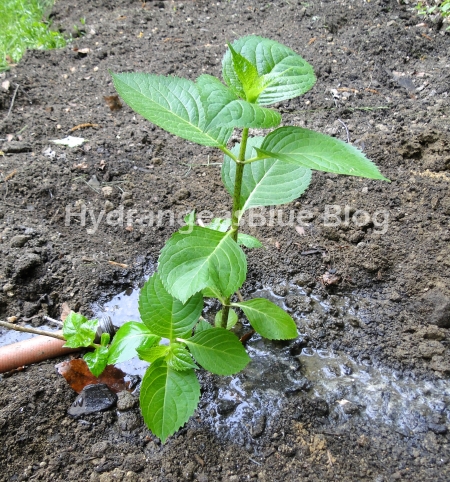
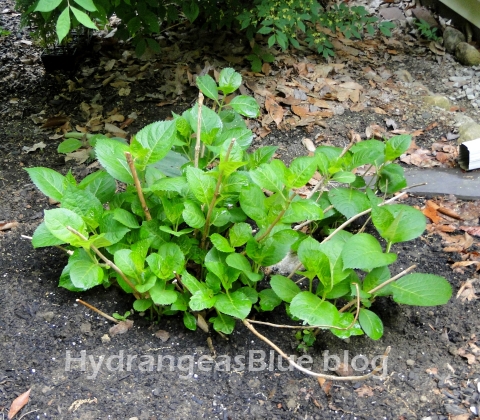
I planted the rooted cutting in my front yard under an Oak tree (see photo below).  So far it is doing well without much attention from me.  

Having plants beneath a tree help give it shade (obviously) but also keep it protected from wind and cold.  Plants that grow near other plants can survive cold overnight temperatures better, and being in the shade means less watering.

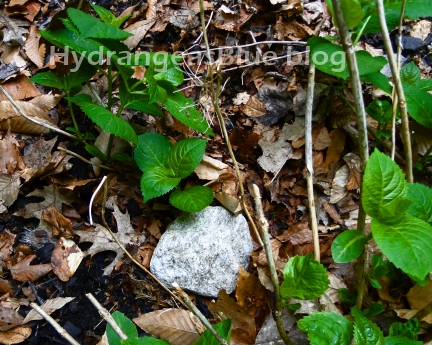
When the temperature will be close to, or below, freezing I will cover this little plant with a towel overnight.  It’s was 38 degrees the other night, and the rubber tree baby looks fine and I did not cover it.

For those who don’t know, when you cover plants over night be sure to remove the cover in the morning!  Leaving them covered is not good.

Rubber plant cutting still doing well outside

Advertisement

Starting New Crotons From Old Plants

It’s easy to start new croton plants from cuttings.

Finding plants that will propagate easily has always been a goal of mine. Starting new crotons from old plants is easy. In fact it’s easier than propagating most things I’ve tried.  Cut the stem, put cuttings in water and wait a few weeks.  More detailed explanation below.

It is possible to propagate hydrangeas, but that takes time. It’s worth it, because in the end you have a new, lovely hydrangea bush. In fact my baby hydrangeas grew quite large before I had to move.

But back to the crotons. These plants love sun and heat and can live through a draught. The wilted leaves come back after getting some water. Crotons like well-drained soil, and the sandy soil of Florida helps this plant to love it outdoors. It can even survive the cold nights we sometimes get here in Central Florida.

This first photo below was taken over the winter months, when the leaves are duller in color with more green and dark purple colors.  Or maybe this one just needed better care.

crotons and birdhouse
Winter Croton

In this second photo, you can see that this plant’s leaves have turned stunning red, orange, yellow and pink from the bright Florida summer sun.  I’ve also given it fertilizer and cleaned out the pot a bit.  It was full of ferns.

croton
Summer Croton

So, to propagate this croton, I waited until Spring when it began to grow some new leaves. Then I cut off the top of a longer stem, also making the stem long enough to drink from a vase of water. Remove the lower leaves of that cutting, and put it in water.

croton
Bright Orange Leaves of the Croton

You will want the stem to not be touching the bottom of the vase, so find one that leaves it hanging. The new roots will grow out of the bottom of the cut stem.
Wait a few weeks and the roots will emerge. Be sure to change the water in the vase daily! Once you see roots, it won’t be long before they are long enough and you can plant the new croton in a pot or the ground.  Don’t plant until the roots are at least an inch long.

propagated croton plants
Three New Croton Plants

These are my three new croton plants. Their leaves are not as bright because I took the cuttings before the mother plant’s leaves turned so pretty. But once these new plants are in the ground, in a sunny location, they will turn just as bright.

As you can see below, the baby croton is turning color.  I need to fertilize these plants for better result, but even without much attention, crotons will grow beautifully.

croton

New Free Hydrangeas – Propagating My Blushing Bride

how to propagate hydrangeas
The Blushing Bride after 2 new plants were dug

Last summer I had noticed that my ‘blushing bride’ hydrangea had low-lying branches which were taking root. I had successfully propagated a hydrangea before – started a new bush from an existing one – by digging up a rooted stem and transplanting it.

There is all kinds of info about taking and rooting leaf cuttings to begin a hydrangea plant, but the ground root layering method will give you a larger plant with a stronger root system. And you have an instant new shrub.

Click my link above to see my story about doing this in the past, or follow along here on my blog, and I’ll explain what I did this time – with pictures!

This method of gaining a new, free plant for your yard (or to give to a friend) works with the macrophylla variety of hydrangeas which tend to have branches that grow close to the ground. In my yard I grow the blue endless summer and the white blushing bride which are this type. Their flowers are rounded and the color of the flower can be changed according to the soil conditions.

Once you find those low lying branches and find one that is rooted to the dirt, tug gently to see if it’s rooted well. If it comes right up, put it back (cover it with lots of dirt) and add a weight (like a rock) to hold the root down into the soil. I leave those to dig up at a later time.

rooting hydrangeas
The rock will hold the stem in place until the roots get larger and stronger.

The offshoots that I dig up are well rooted and look like little hydrangea plants all on their own. It is easiest to do this in Spring before all the leaves have come out and make it difficult to see around the base of the shrub. As I searched around the base of my original plant, I found one well-rooted shoot by itself, and two that were so close together that I kept them as one plant.

Clip the stem(s) that run under the dirt from the original plant to the new one. Dig around and down under the new plant as best that you can and put it in it’s new home. It helps to know where you will put it, and get that area ready before you dig up the new one! Do you know how to plant hydrangeas?

picture tutorial to propagate hydrangeas by root layering
Find the stems to cut and remove the new little plants from the original.

As with all newly planted shrubs, give it plenty of water and watch it each day to make sure it’s doing well. Lots of sun will make this type of hydrangea wilt, but after watering it should bounce back.

I now have two new ‘Blushing Bride’ plants (see my pics below), and best of all they cost me nothing but a little time!

baby hydrangea bush
New plant #1
propagated hydrangea plant
New hydrangea plant #2

One of these new plants is blooming with three flowers in just one years time. Read this post about the new Blushing Bride plant.

Propagating Hydangrangeas Could Be Easier Than You Think

blue flowers
Create another shrub easily.

Most people think of starting a new hydrangea plant from a cutting, but I am talking about propagating by root or ground layering here – and it’s especially easy if it’s been done for you by mother nature.

My new yard has no hydrangeas, except for the tiny ones I planted this fall. But the duplex I rented for three years had a large, beautiful bush right outside my front window.

As I was weeding around it one spring I found a low hanging branch that had rooted itself into the dirt. I dug it up (with permission from the landlady) and replanted it near the front steps.

The following year she had another little hydrangea shrub to decorate her yard – for free! All it took was digging and watering.  It’s an easy, and super cheap, way to increase the beauty of your landscape.  And you’ll know exactly what you are getting!

Read the full story with photos by clicking here.  And check those low lying branches this Spring – it’s coming.

%d bloggers like this: