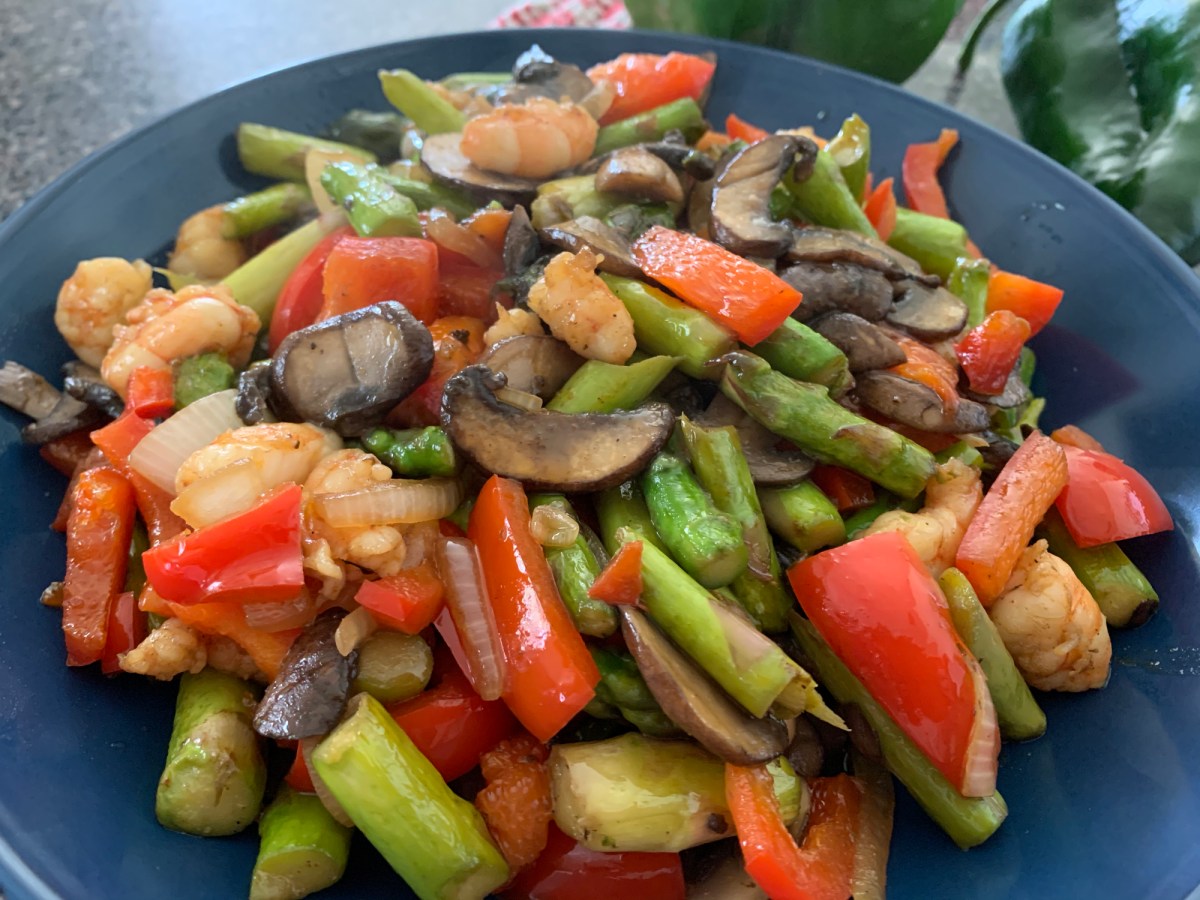
This delicious and healthy meal is very simple to make. Chopping and preparing takes the longest. Break the tough ends of the asparagus, and break stalks into bite-size pieces. Wash and slice mushrooms. Slice peppers and onions. I cut my shrimp into small pieces.
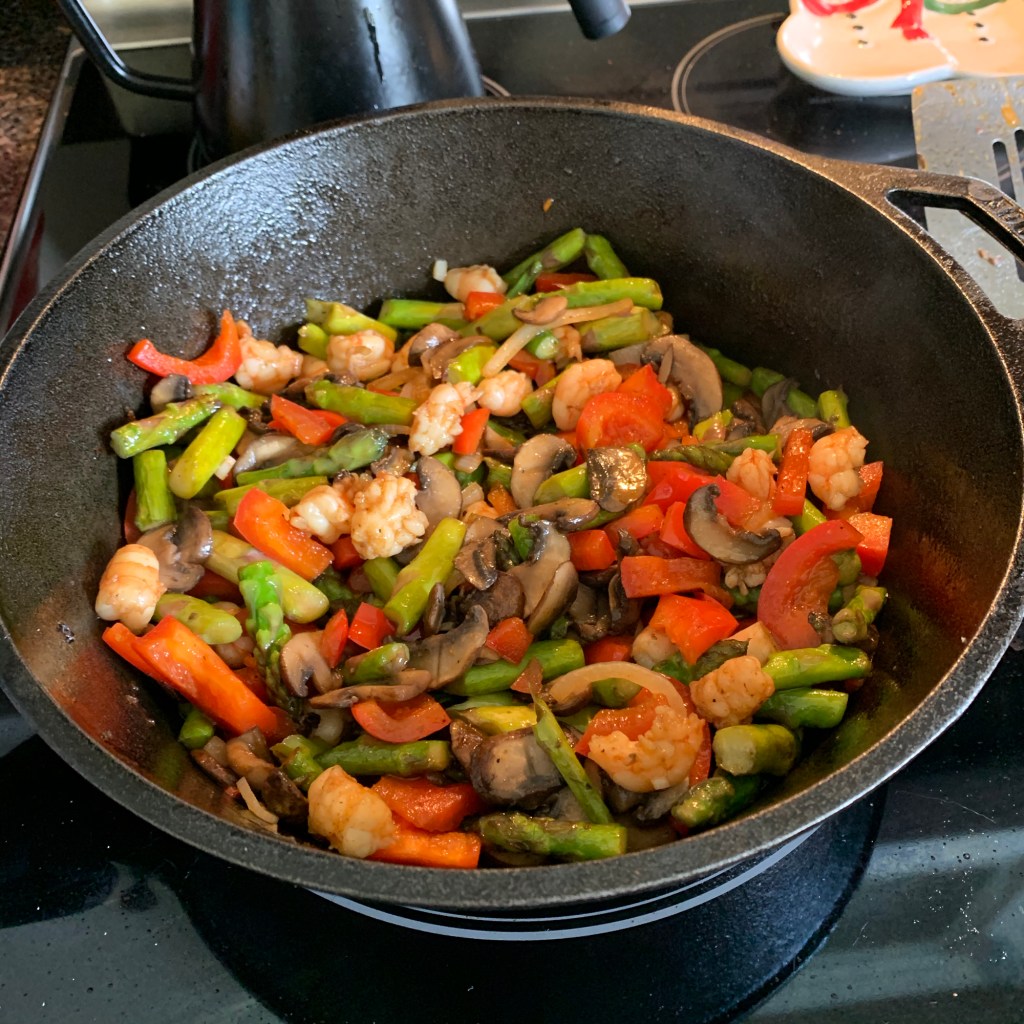
Cooked a box of brown mushrooms first, in a cast iron. (I used my favorite cast iron with the high sides). Remove and set aside. Cook broken up asparagus in ghee for a few minutes, until it’s still crunchy.
Remove asparagus and add sliced red pepper, onion, and after a minute or so, chopped (bite size) shrimp. Cook a couple minutes until shrimp is turning pink.
Add all ingredients back into the pot, heat off, and stir in Tamari. Stir well and remove to a dish. Serve with something else like spaghetti squash or noodles, or eat plain. It’s really good!
Stir in the Tamari last, and it’s done!
I never, well almost never, add salt while cooking. The Tamari is a form of soy sauce, and I buy low sodium. That adds the salt at at the end. The vegetables in my meal are crunchy, and I cook them separately so none will be mushy.
Use any vegetables on hand. When I go shopping I buy whatever looks freshest and good, then I decide what to do with it all. This recipe would work with chicken, or beef as well.
Any leftover veggies in the kitchen, that are going out of date, can be used to make broth. Add chicken bones, or beef if you have it, or simply make a vegetable broth. Freeze the broth to use in chili, soup or other dishes.
Shrimp cooks very quickly and can get tough if you over-cook it. We caught this shrimp ourselves and froze it. Since we’ve had it a while, I know we need to use it up.
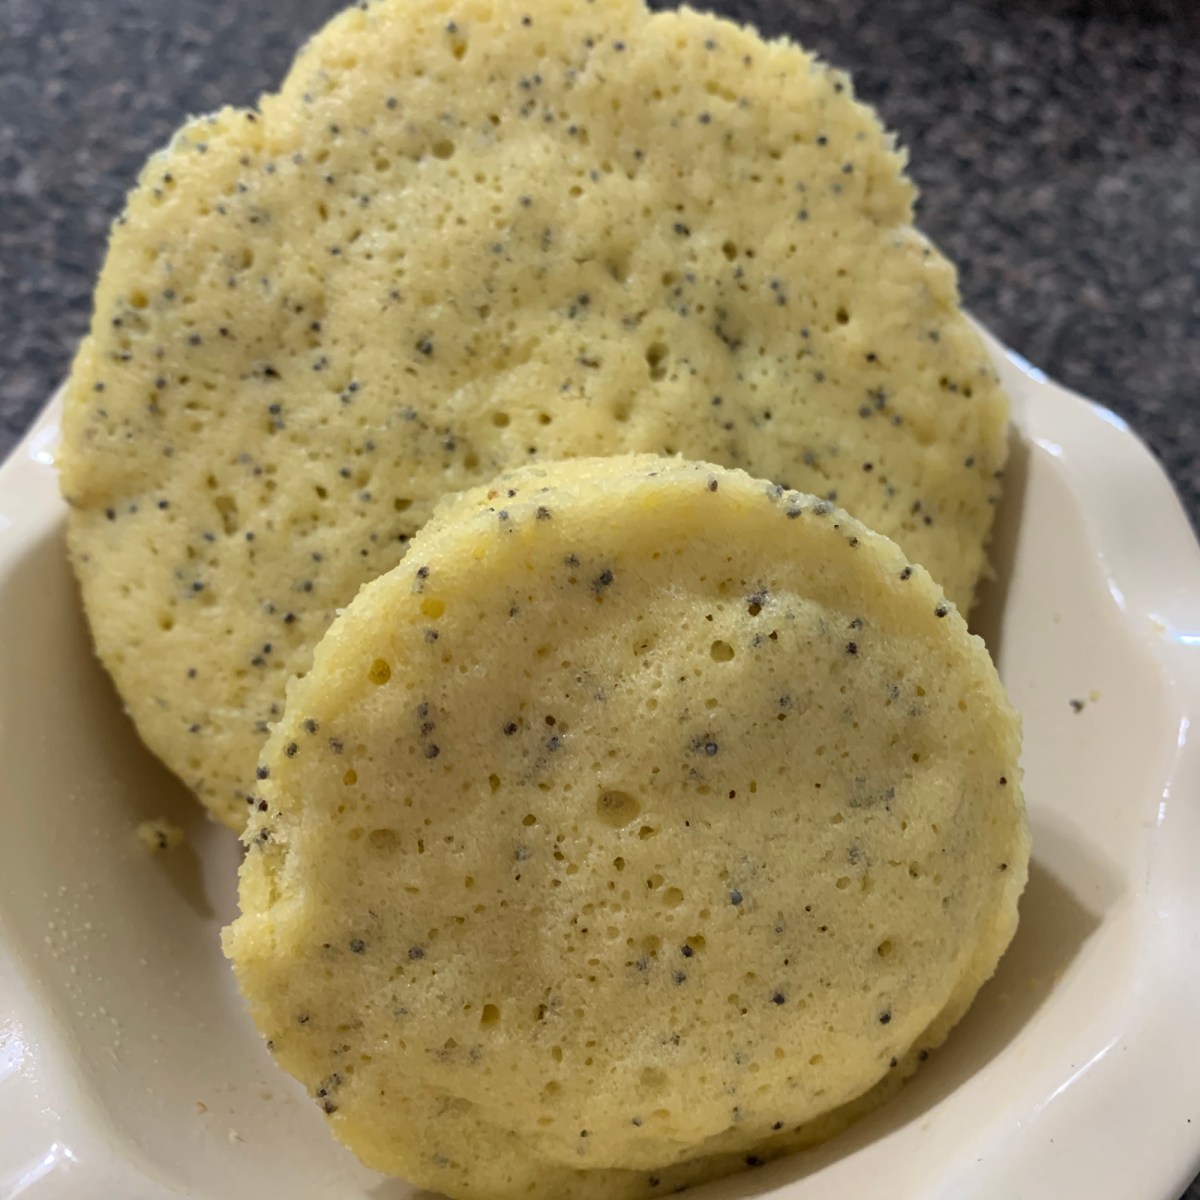
I love this quick Keto bread because it is very fast to make, and it is not bad as far as taste goes. My first attempt was okay. It’s cooked in the microwave, so blah… but then you must toast it and add butter. In fact, when you mix this recipe up, add some poppy seeds, any other Keto-friendly item, it’s pretty good.
Fast and easy little “breads”
Find the full recipe just about anywhere online. That’s right, I’m not even sure whose recipe this is because it is EVERYWHERE. Eating on a dime is the place I first discovered this recipe, so that is the one I will link to. It’s not my recipe, but you can see the easy mixing directions at the link.
If you have ever tried to come up with a replacement for real, normal bread, you will quickly realize there is no substitute. All Keto, and gluten-free bread is simply not bread as we know it, in my opinion. But, this little batch of very quick bread / muffin will fill the gap. It’s not bad.
The recipe at the site I found says to make it in one dish and bake in the microwave for 90 seconds. I made mine in two little ramekins and baked each one for 45 seconds. I slice one of them in half and toast to eat with my breakfast. The other I save in the fridge for the following day.
My breakfast
Above is one of my favorite breakfast omelets. I first sauté spinach in butter and remove from the pan (this would work with kale, peppers, onions, etc.) and remove it once cooked.
Then I break one (or two) egg(s) into the pan and scramble a bit to make a flat layer. Then I sprinkle with crumbled goat cheese (or any cheese) and top with the spinach. Fold over the ends of the egg to make a “roll” and flip to finish heating.
For the quick Keto bread you will need almond flour (which is the only ingredient you may not have), 1 egg, butter, baking powder, and a pinch of salt. You will need a dish to bake it in, and a microwave. See the link above for directions and amounts.
If I am craving bread or toast, I have a good substitute. There are other Keto breads I plan to try as soon as I have all the ingredients.
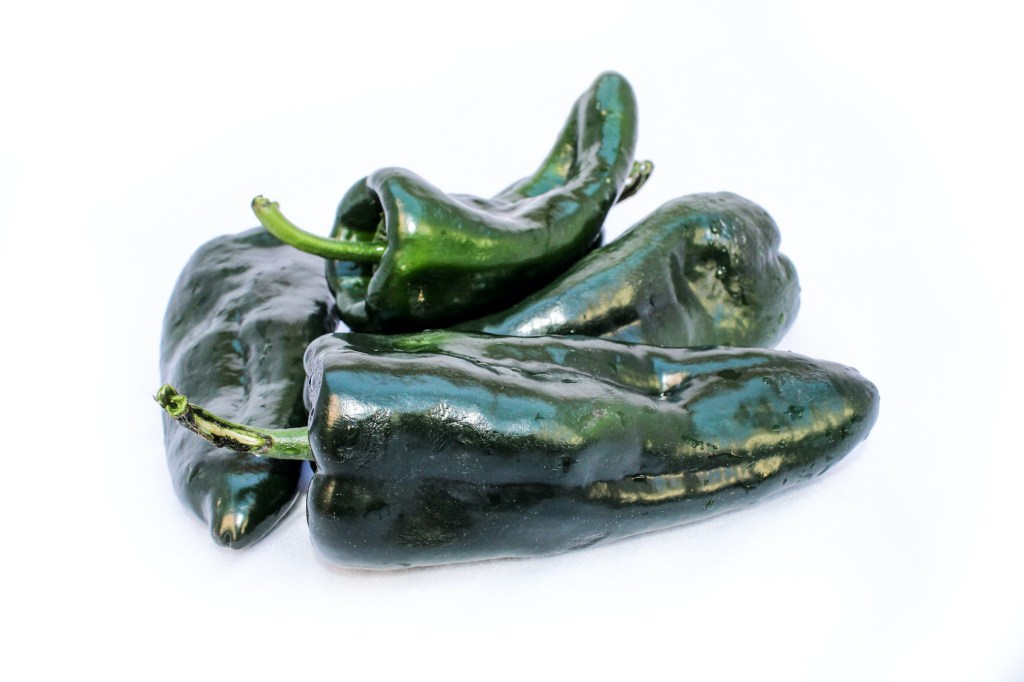
I’m writing this recipe down so I can remember how to make it again. It began with the idea to make stuffed poblano peppers, but I decided to layer them in a casserole dish. These are not hot peppers. They are flavorful and relatively cheap to buy.
Poblano peppers add flavor without heat
I seldom follow a recipe exactly, but the beef and peppers sounded good, so I began there. I bought Florida grown peppers and used ground beef from the local meat market. I also decided to add leftover stew beef (from cooking my broth) along with mushrooms, onions and garlic.
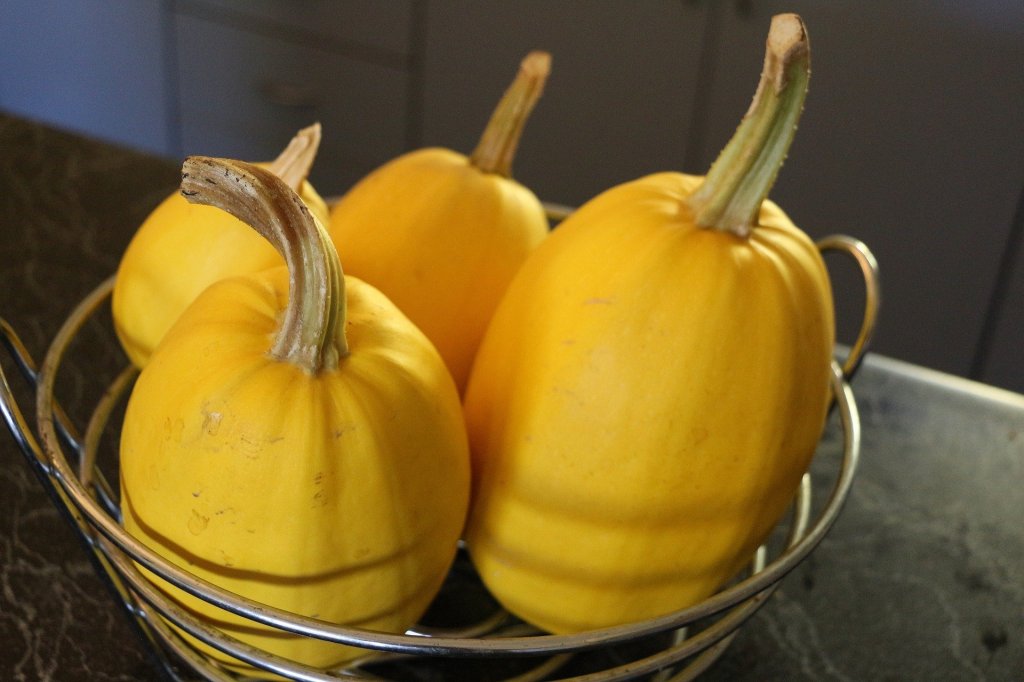
I’d cooked a spaghetti squash the day before and figured the two would work together. No pasta for me, and not for anyone on a Keto diet plan. But this meal would be delicious served over pasta as well.
Spaghetti squash
Making the Meal
Slice poblanos in half and remove seeds. Roast both sides of the peppers in oiled / ghee pan – cast iron. (It may not be necessary to roast the peppers, but I did it.) Place in the bottom of a rectangular casserole dish. The peppers added a wonderful flavor to this dish, so don’t skip them.
Cook ground beef and add chopped onion and garlic when the meat is nearly cooked. After cooking, remove meat and create a layer over the peppers.
Slice a whole container of mushrooms and cook with more onions and some garlic. When done, stir in one can of organic tomato sauce. Add a spoonful of sugar (coconut sugar next time?) to cut the acidity. Dash of spices, such as parsley, basil and oregano. Scoop this out and layer over the meat in the casserole dish.
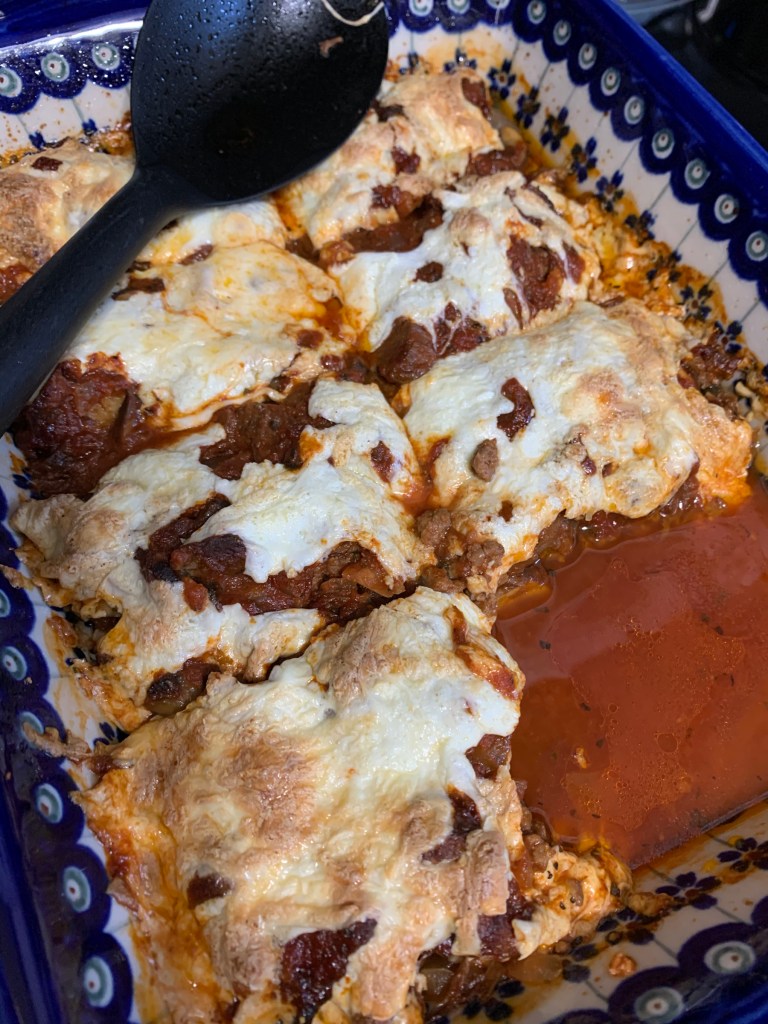
Shred mozzarella cheese and sprinkle over the top. Bake (covered for part of the time – my cheese dried out) at 350 for 20- 30 minutes until bubbly.
Carbs in this meal, approximately
I estimate that there are approximately 46 grams of carbs in this entire casserole, which means a portion (1/8 of the dish) would contain around 6 grams total. Plus add in a cup of squash = 16 grams or so per serving. I could be off a little bit, but you get the general idea. This is a Keto friendly meal.
Ground beef – no carbs, 19 g protein
Mushrooms – yes, good for Keto
Poblano Peppers – 1 net gram in one pepper
Onions -have some carbs, 14 g in one onion – I used only a few slices
Garlic – 1 clove, .9 grams
Tomato sauce – Organic, 6 g in 1/4 cup
Mozzarella cheese – 1 gram or less per serving size
Spaghetti squash – 8-10 g, 1 cup
This had excellent flavor
Because I am following a time restricted eating program, I only eat two meals a day. This one would be around a total of 22 grams of carbs. If I eat well at breakfast, I can stay under the 50 grams or less recommended for a Keto diet plan.
Photo credit for the squash and peppers goes to Pixabay.
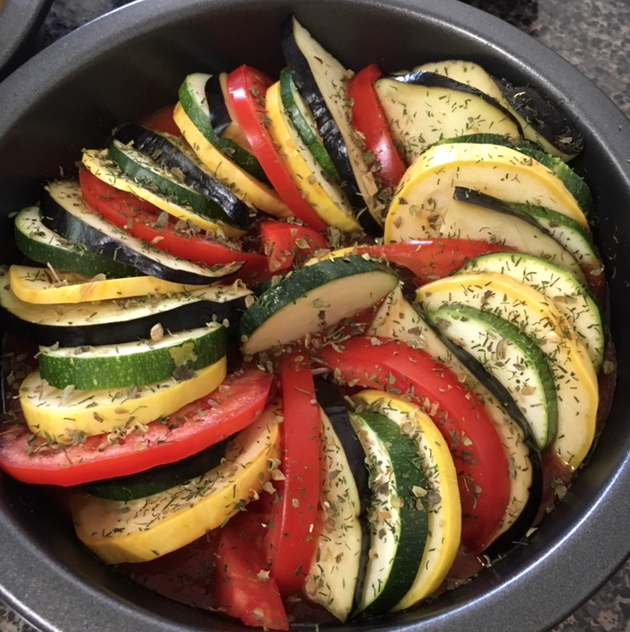
Although it seems like you will be slicing and layering forever, this recipe does not take many vegetables at all so slicing was minimal. I used 2 very small summer squash, 1.5 small zucchini, 2 medium size tomatoes, and half (or less) of a large eggplant. I thought about digging out my mandarin slicer, but I really didn’t need it.
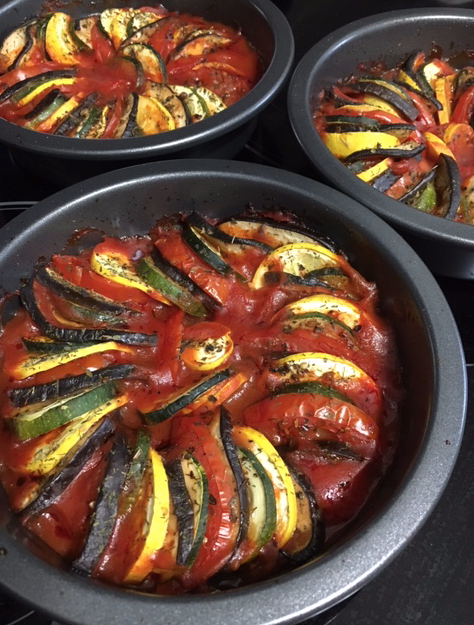
Most cooks used a large pan of some sort to create this dish. I decided to use three small round pans (about 6 inches across) because I am the only one who will eat it and I can freeze one of the servings.
What is Ratatouille?
The word “ratatouille” brings to mind that Disney cartoon about the mouse in the French kitchen helping a new young chef learn to cook. The dish for which the movie is named, is made of vegetables, usually the type that are harvested at around the same time in summer. This could mean all sorts of vegetables were used, and way back when, they probably used whatever was in abundance in the backyard garden.
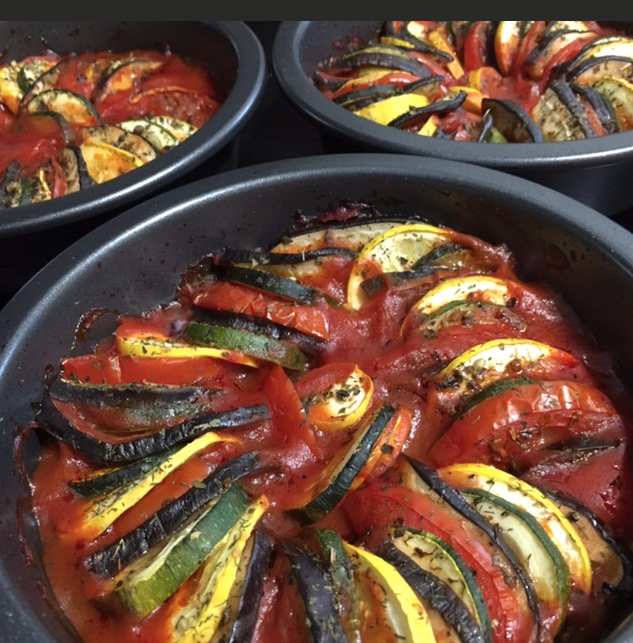
I don’t know about the old original ratatouille recipes, but these days you see the dish as sliced and layered colorful vegetables. Because of this, all the various veggie flavors mingle while they bake. I was very happy with the outcome and ate it with some leftover noodles.
I sprinkled spices on before covering and baking
My own homemade sauce is my favorite, but this time I used store bought, low sodium, organic spaghetti sauce to save time. One medium size jar worked well to divide up between three small pans. I did sprinkle a little sugar on top of the sauce because the store bought sauce was not sweet enough for my taste.
I oiled the pans, then divided the sauce into each of the three pans. The sliced vegetables were layered on a plate (a few at a time) and then plunked into the pan. Once the pans were full, I tucked the remaining slices into the center and to fill in around the edge.
Vegetables to Use
The eggplant I bought was huge, so I cut each slice into fourths for layering. First I salted the slices and let them sit in my colander for about 20 minutes. This gets the bitterness out. Rinse the salt off before using. A Japanese eggplant, which is long and skinny, would probably work better.
I used 2 small yellow squash and only 1 and 1/2 zucchini. Since I only had small tomatoes, but not Roma, I cut the slices (from 2 small tomatoes) in half. The large eggplant slices I cut into fourths but only used about half the large eggplant.
Other vegetables that would work are thinly sliced bell pepper and onion.
Topping the Veggies
The original recipe I found said to add the herbs and oil after baking, but I sprinkled herbs over my slices before I covered them with foil to bake. It didn’t make sense to me to add all that nice flavor later on. Once the food was baked, I added nothing except a tiny bit of salt (because I add no salt when baking).
My Baking Time Was Reduced For the Smaller Size Pans
I used three small, round baking pans and baked them at 375 for 30 minutes, not 40. (They are covered with foil for the first baking sequence.) Once they were uncovered I baked them for an additional 10-15, which is less time than the 20 minutes suggested. My pans were small, so that makes sense. Just watch your baking time if you use smaller dishes.
Ready to cover and bake.
If you have a garden and can grow all these vegetables, your meal will be super cheap, and fresher than most. No wonder peasants were known for creating this dish! I wonder if they waited all year looking forward to tasting the first Ratatouille of summer?
I’ve seen some Ratatouille recipes baked in cast iron, but with the acidic tomatoes and sauce, I would use something other than cast iron. This recipe would work nicely in a pretty covered casserole dish. Or individual serving dishes / small cake pans like I used.
What to Serve With Your Ratatouille
Ideas for serving and eating the finished vegetable dish.
Serve over rice or noodles as a vegetarian dish.
Cook ground beef to combine with the tomato sauce to use as the base.
Make garlic bread (softened butter, minced garlic, parmesan cheese mixed and spread on bread and broiled to golden brown). Bread and ratatouille would make a perfect meal!
Serve Ratatouille as a side dish to any type of meat / fish, or in addition to a salad or other vegetable.
It’s awesome with macaroni and cheese! I liked it so much that the second time I made this recipe I put mac and cheese in the bottom of the pans, then the sauce, and vegetable layer.
Bon Appetit
Ever since I found Ingrid’s Produce just down the street I have been a veggie cooking fool. Over the weekend I made a scrumptious tomato soup with fresh ingredients.
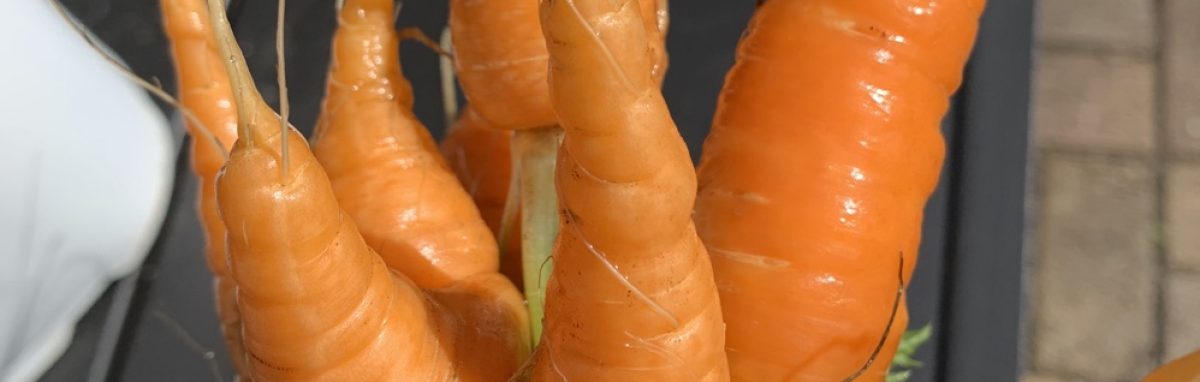
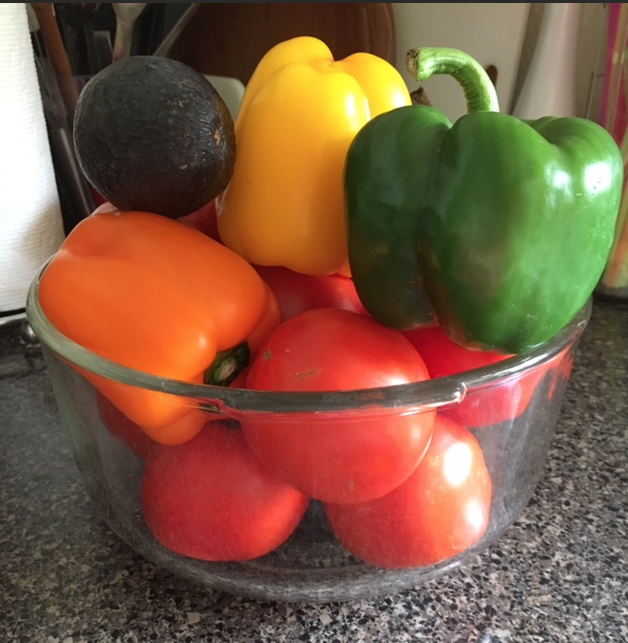
Fresh vegetables are difficult to find, or have been for me. You may think that a sunny, hot place like Florida would be full of wonderful produce, but that is not the case. Apparently it is too sunny and too hot. I’ve tried to garden here without luck. So the local Florida growers who are able to supply beautiful peppers and tomatoes like the ones in my photo here, make me feel grateful. Now that I have found some luscious produce, I will make homemade tomato soup from scratch.
Searching For a Tomato Soup Recipe
If you have ever searched online for any type of recipe you know how overwhelming it can be to find a good version. Food blogs are popular and in many cases copies of other food blogs. In other words the writer has never made the food themselves. Food photos are available for free and to buy, so anyone who wants to can pretend to be a foodie. There is money in the advertising and if you notice, most food blogs have many ads and popups everywhere. For this reason I have been wading through blogs featuring tomato soup recipes to find what I want.
My soup will be made entirely from fresh ingredients, as opposed to canned, and all I need to know is what basic additions to make to the obvious one.
Here’s a list of the ingredients I will be using:
Fresh, delicious tomatoes (thank you Ingrid’s Produce)
bell peppers (yellow orange red and green)
chopped onion
garlic, finely chopped – about 6 cloves
vegetable broth (my own from the freezer)
basil, parsley (from my garden)
celery
heavy cream
sugar (cuts down the acidity of the tomatoes)
Putting it All Together
My plan was to roast the peppers on the grill and remove the skins. That didn’t work out too well because they didn’t blacken enough and the skin didn’t come off. Today I will roast them in the oven and try again. This worked, and I peeled the skin and chopped the pepper pieces to add to the vegetables in the pot.
Broiling the peppers to remove the skins
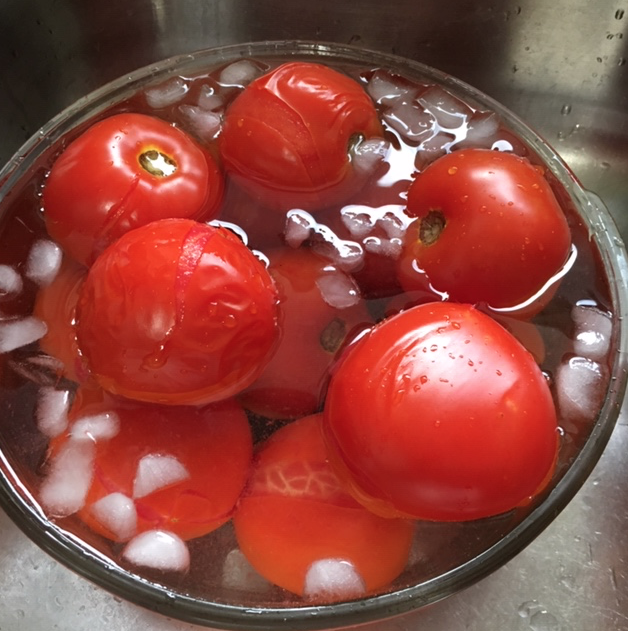
The 12 tomatoes will be blanched in boiling water and then the skin will be removed.
While the water heats to boiling, cut “X” marks in the bottom of each tomato. I read somewhere to do this and it greatly helps when peeling off the skin!
Boiling water to blanch the tomatoes
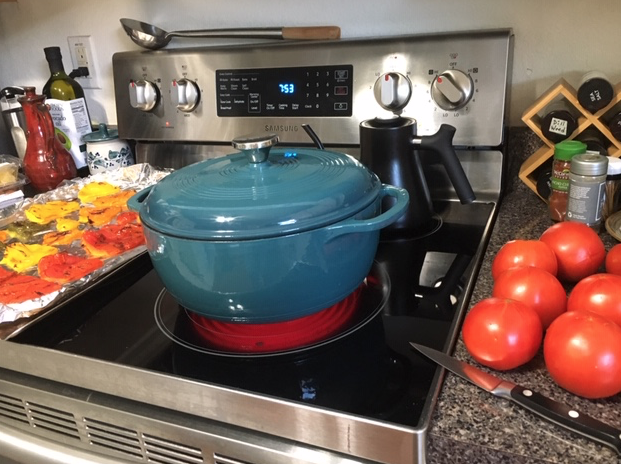
Use a big pot, like a dutch oven like mine, and bring the water to a full boil. Use a slotted spoon or some large scoop to put the tomatoes into the boiling water. They only need to be in the water for 30 seconds to a minute – seriously… Get them out when they look wizzled. I did all my tomatoes at once, but I should have done 6 at a time.
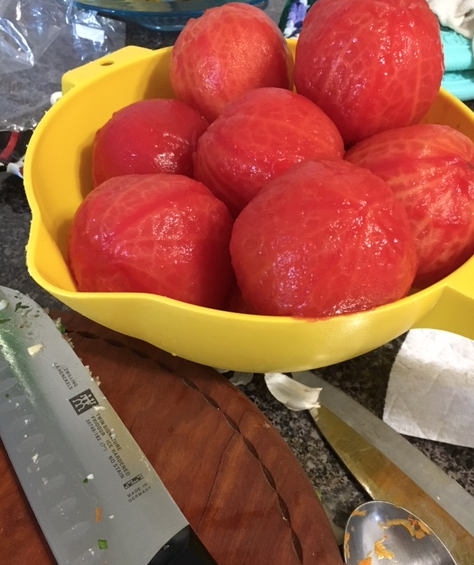
Be sure the ice water is ready so the tomatoes can go directly in when they come out of the boiling water. I needed a bigger bowl for this! All my tomatoes barely fit. As you can see, the skins have split and are ready to be peeled. Start at the bottom where you made that X and they come right off.
Boiled tomatoes need an ice bath
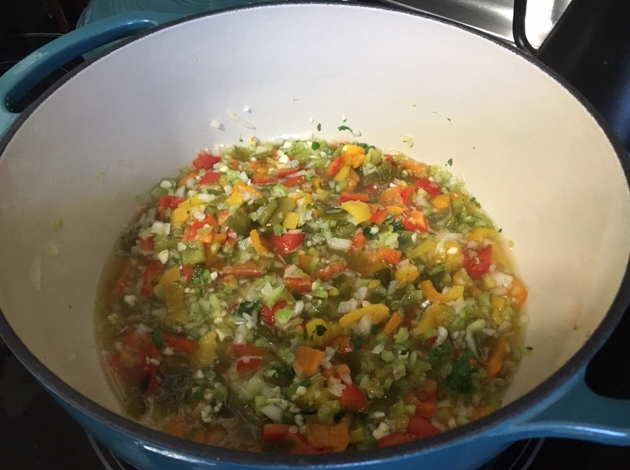
While I waited for the water to come to a boil for the tomatoes I chopped the roasted peppers, celery (3 stalks), whole onion, garlic cloves (around 6), and put them into the broth in my dutch oven. I used my big 6 quart Lodge pot because my LeCreuset pot was too small.
Save Your Own Broth
By the way, the broth I used was saved in my freezer from previously cooked vegetables. Don’t dump that vitamin rich water down the drain when cooking beans, peas, carrots, asparagus, etc., save it in the freezer in a large container and add to it as you boil veggies. It can be used in soup, stew, gravy, chili, and whatever later on.
Finely chopped veggies simmer in broth
While the vegetables and broth simmered, I chopped up the tomatoes. I’m not sure they really needed to be chopped, but I did. I coarsely chopped them and removed the top stem area, and then added them to the other veggies in the pot. At this point I added chopped parsley and basil from my garden and other herbs from my spice rack, including a tiny bit of salt and some black pepper.
Tomato skins are removed and they are ready to chop
I almost forgot the sugar, so added a couple tablespoons to the mix. I always add sugar to homemade tomato sauce and it helps with the flavor. Then I let it simmer for 3-4 hours. I didn’t time it, but I figured the softer the vegetables the better.
I simmered all the veggies for about 3-4 hours.
Cooling, Blending, Straining, and Reheating The Soup
Once I had let the pot of vegetables cook a long while, I turned off the heat and began to cool the food. I used a pyrex measuring cup to scoop out the hot mix and put it into large bowls which I set on a wire cooling rack. Once the soup mixture was cool, I used the measuring cup to pour small amounts into my Oster Blender.
From there I poured the blended soup through my colander which has the perfect size holes! I had no idea how this would work out, but since I had removed the skins from the peppers and tomatoes, all that was left was the tomato seeds. And my yellow colander caught those! So use something with holes large enough for the sauce to easily pass through, but will catch the seeds.
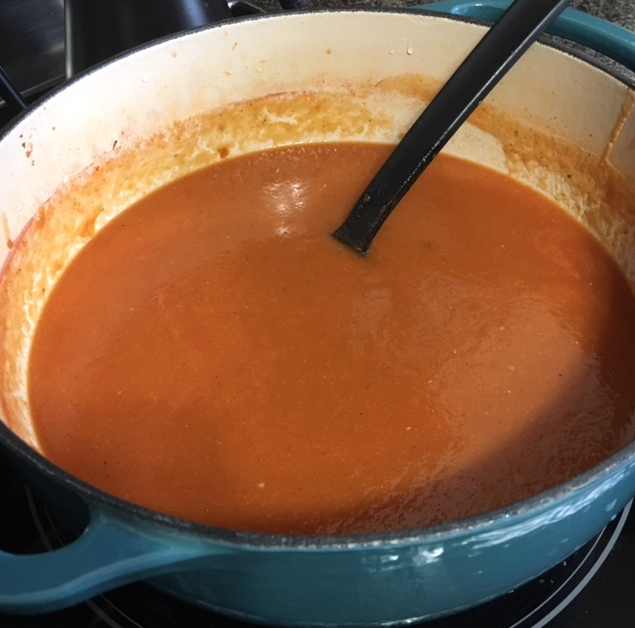
I repeated the process of blending and straining the seeds until all the soup was back in the same dutch oven. I reheated it and then added some heavy cream (this lightens the color of the soup to more orange than red). I didn’t measure, just poured, but probably a half a cup or so. I’m considering using yogurt or Kite Hill non-dairy yogurt next time.
Reheating the soup and adding some heavy cream
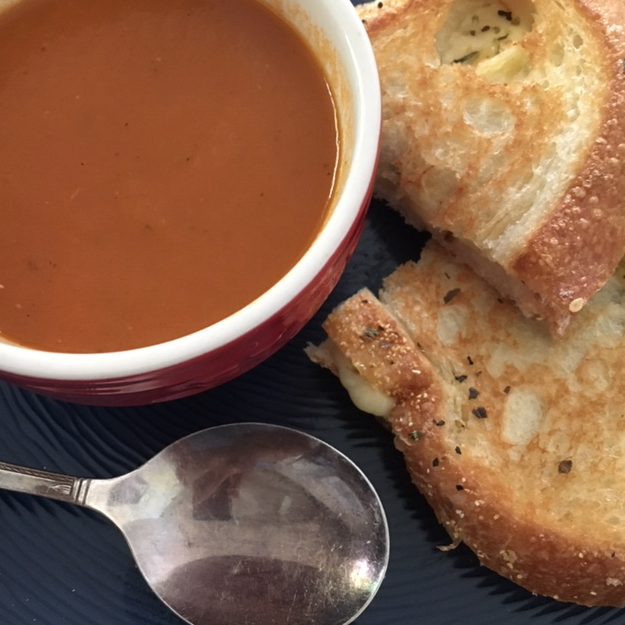
I’m pleased with the taste and I know exactly what is in my homemade soup. Because I am the only one who will eat it, I filled several small freezer containers which I labeled and froze. Grilled cheese and tomato soup for supper tonight! Can’t wait.
Yum… this was my supper!
Making this soup was time consuming. Between chopping all the vegetables and doing the tomatoes then cooling, blending and reheating it took some time. But I love homemade soup and this is worth making again.
Use common sense when looking for “recipes” online. Some tomato soup recipes called for flour or canned tomato paste. Sometimes a few good recipes will give you ideas and when combined, you get a stunning result. I wanted fresh ingredients only, and I believe I have achieved that.
Done and ready to freeze!
Butternut Squash Tomato Soup
When I visited New Hampshire last Fall, the Fiddleheads Café, in Hancock featured butternut squash tomato soup on their menu, which sounded so good! Unfortunately they were out of it the day I wanted some, so I decided that one day I would make my own. Since then I have been searching my local Florida area for good tomatoes to use. Most tomatoes here taste like nothing. Once you eat garden fresh tomatoes it really does spoil you. I gave up on making soup because of that.
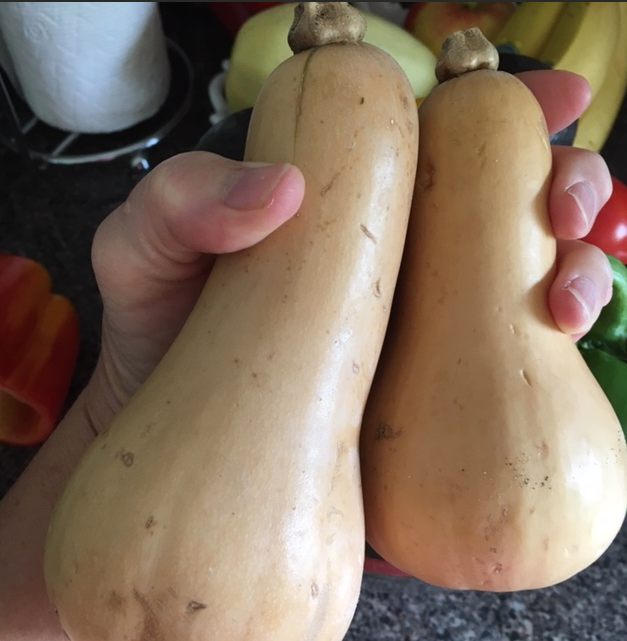
Just the other day I discovered a fresh produce store just down the road from me. And the tomatoes are fresh and tasty! The owner also had little butternut squash, so I bought two. I love the size because I can’t eat a whole, large squash myself. Now I am thinking about adding some to my soup.
I love the small size of this squash
Update on the squash. I baked them both and wasn’t happy with the flavor. They tasted like they needed more time to grow! So maybe that is the case. I ate the squash and did not add it to my soup.
I’m thinking that I could cook some squash (a larger, more tasty one) and simply add it to my already made tomato soup. Why not?
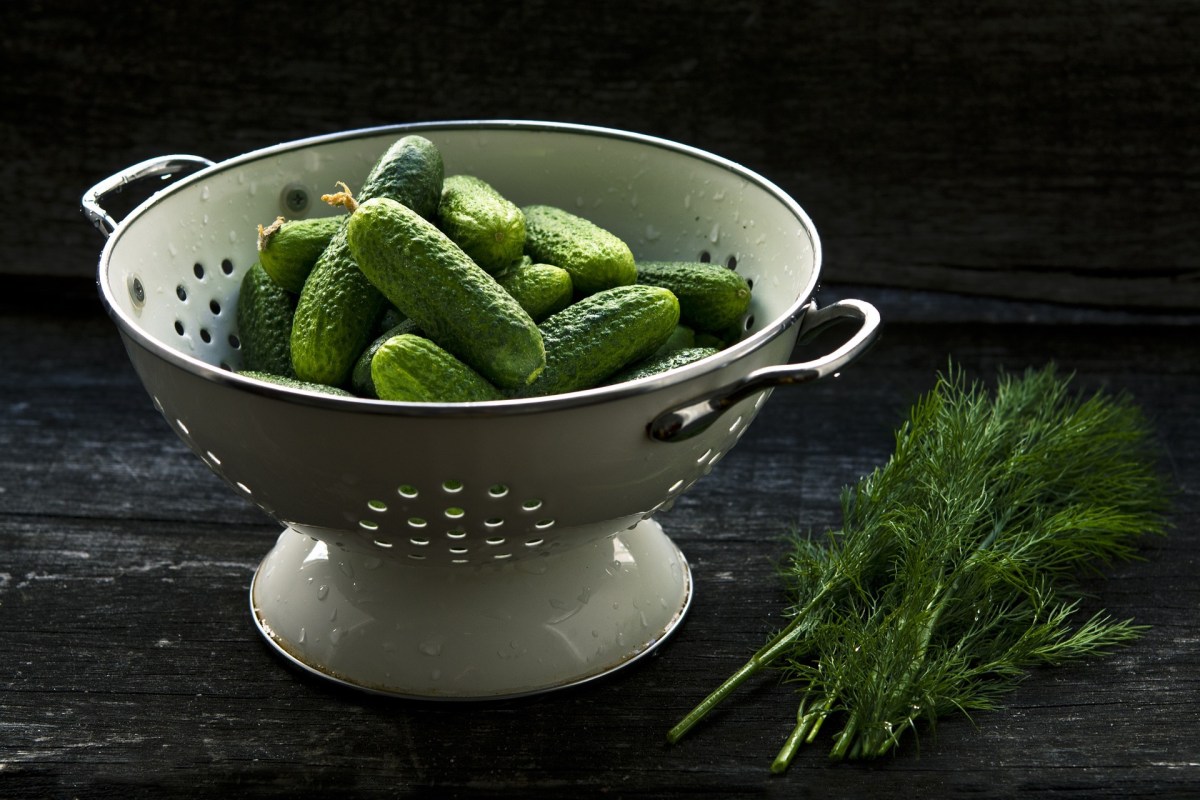
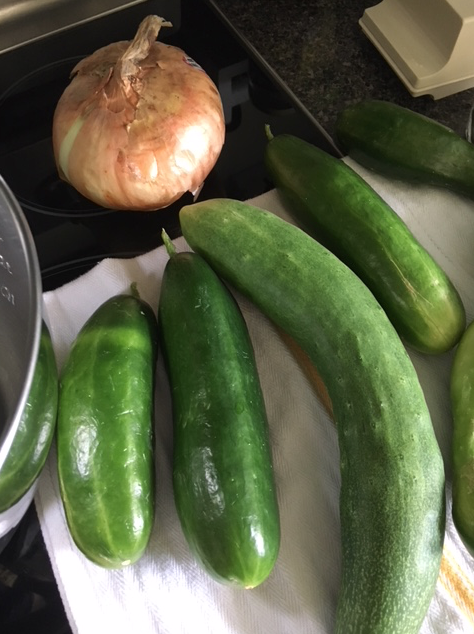
Now that the cucumbers are growing in my Florida garden, I was reminded of a simple bread and butter pickles recipe I found a few years ago. No canning was involved. Fortunately I was able to find my printed copy. (Recipe Link Below)
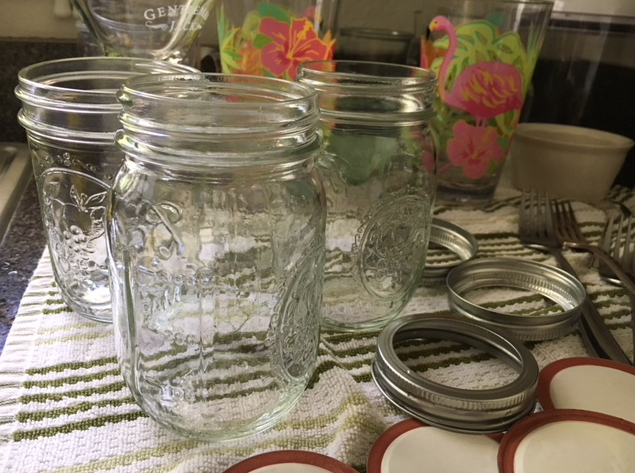
I don’t do canning, but I love bread and butter pickles made with fresh from the garden cucumbers. These pickles are stored in mason jars (or any jar) but there is no boiling required. Slice and mix the six ingredients (and add some of your own) and store in the fridge.
Include sliced onion and green pepper for flavor. Garlic cloves and hot pepper slices may work as well. Other herbs could be added to change the flavor, like fennel and dill.
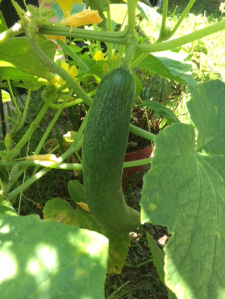
And by the way, you don’t need to use a specific type of cucumber. I am growing two types, and I can’t remember what they are, but as you can see in my photo below, one type is very long!
The shorter, regular looking cukes taste better, but when making pickles it doesn’t matter. There are many other ways to use fresh cucumbers from the garden.
The recipe calls for 7 cups of sliced cucumbers, so wait until you have a bunch to use up. Cukes don’t last long once they are picked, so plan to make pickles the day you pick the cucumbers.
A mandolin slicer makes all that slicing go fast.
A Mandoline slicer makes all this slicing quick work
Note: One thing I changed in the recipe was the amount of sugar. The recipe calls for 2 cups, and I reduced that amount to 1 cup. I also added a few slices of hot red pepper and fennel sprigs.
Spoon the mix into clean mason jars. Divide up the remaining liquid into the jars, cover and put in fridge for 5 days. Then begin eating! They will be good for months.