Growing Suave Nu Mex Peppers

This year I am growing the Suave Nu Mex peppers, which are not going to be hot peppers. They should be orange in color and not red like the hot ones. After starting from seed, I have two plants growing and doing well.

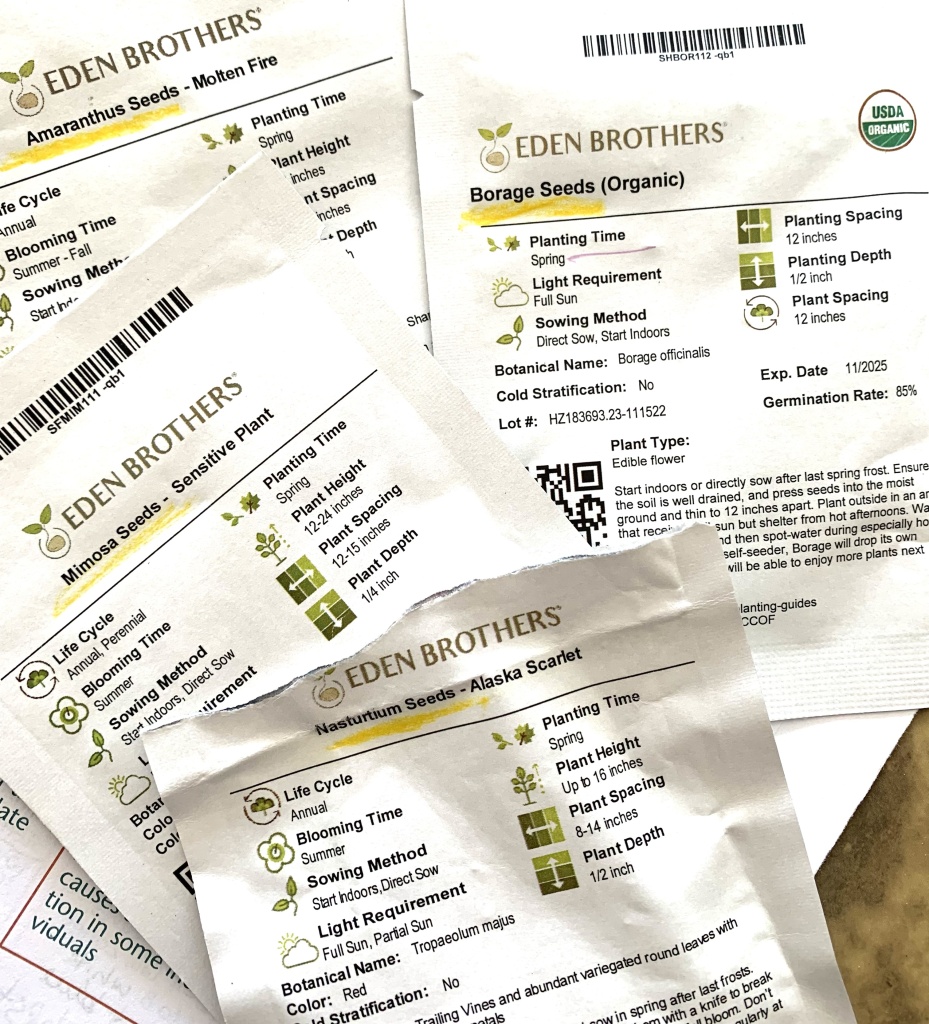
Peppers, of all kinds, would be fabulous to have growing in my backyard. I use onions daily, and I would use peppers too, if I had them. This year I am growing the orange Suave Nu Mex peppers for the first time. (Not the hot ones.)

Pepper plants are tough to grow. I had trouble growing them when I lived in New Hampshire, because they would just be starting to have nice looking peppers, and the season would be over. They were purchased as seedlings, but the the short summer was a downfall. Now, in Florida, I have a long season, but the peppers were still not easy for me to grow.

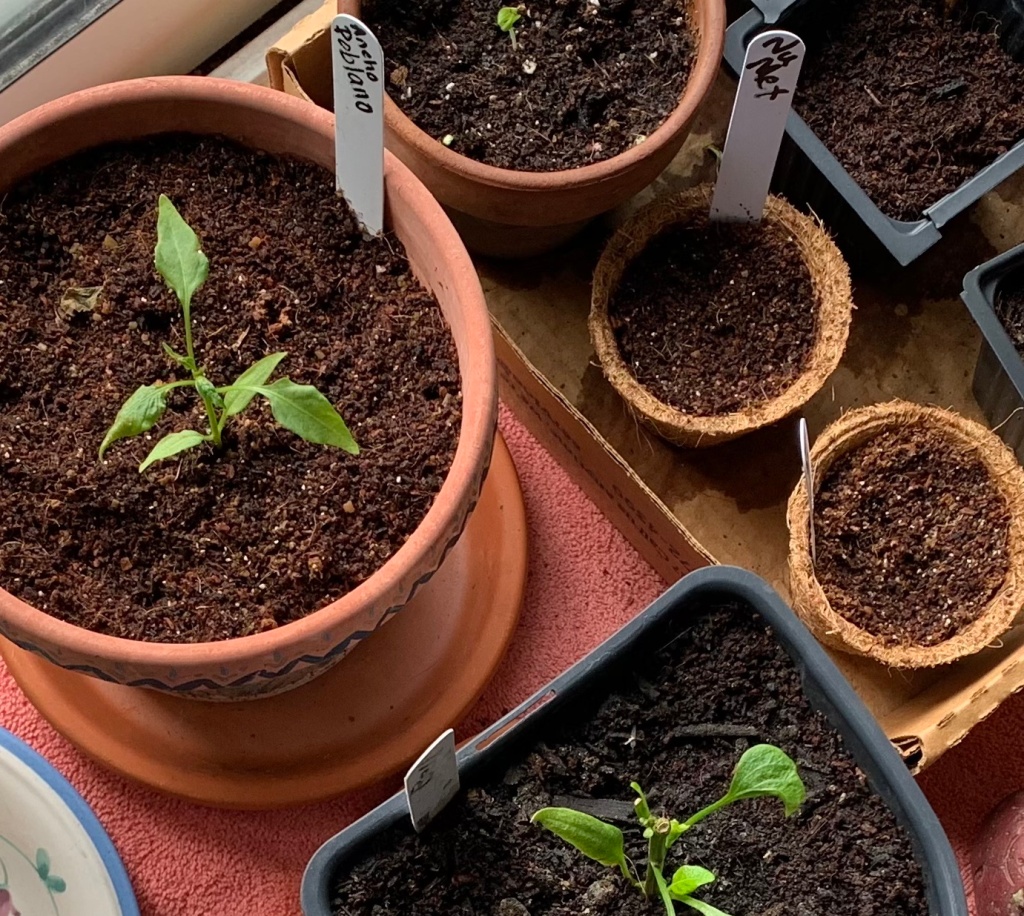
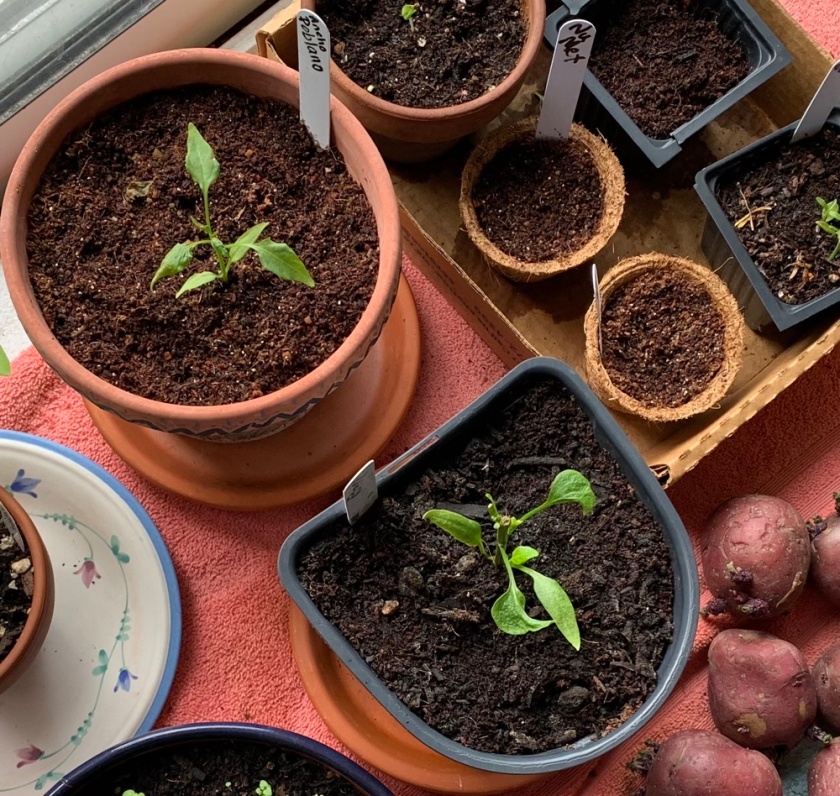
I began my peppers from seeds, in small pots. I tried to keep them going over the winter months, but they didn’t do well. Most of the seedlings ended up dying. Then, the older plants got some sort of disease.

Because my seedlings were have such troubles, I waited for Spring (Feb.) to plant the Nu Mex seeds outside in one of the grow boxes. I waited to see what would grow, and ended up with 2 plants. Yup, only two.

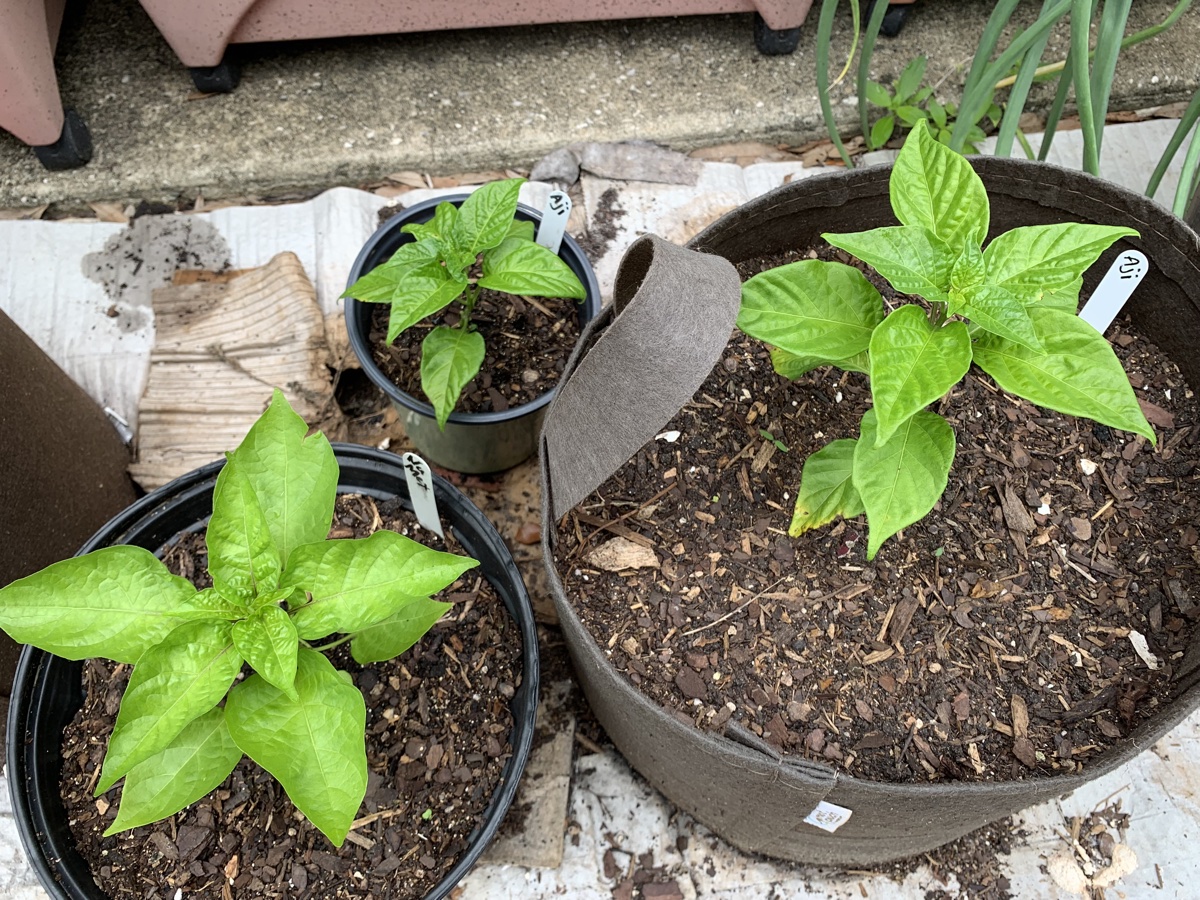
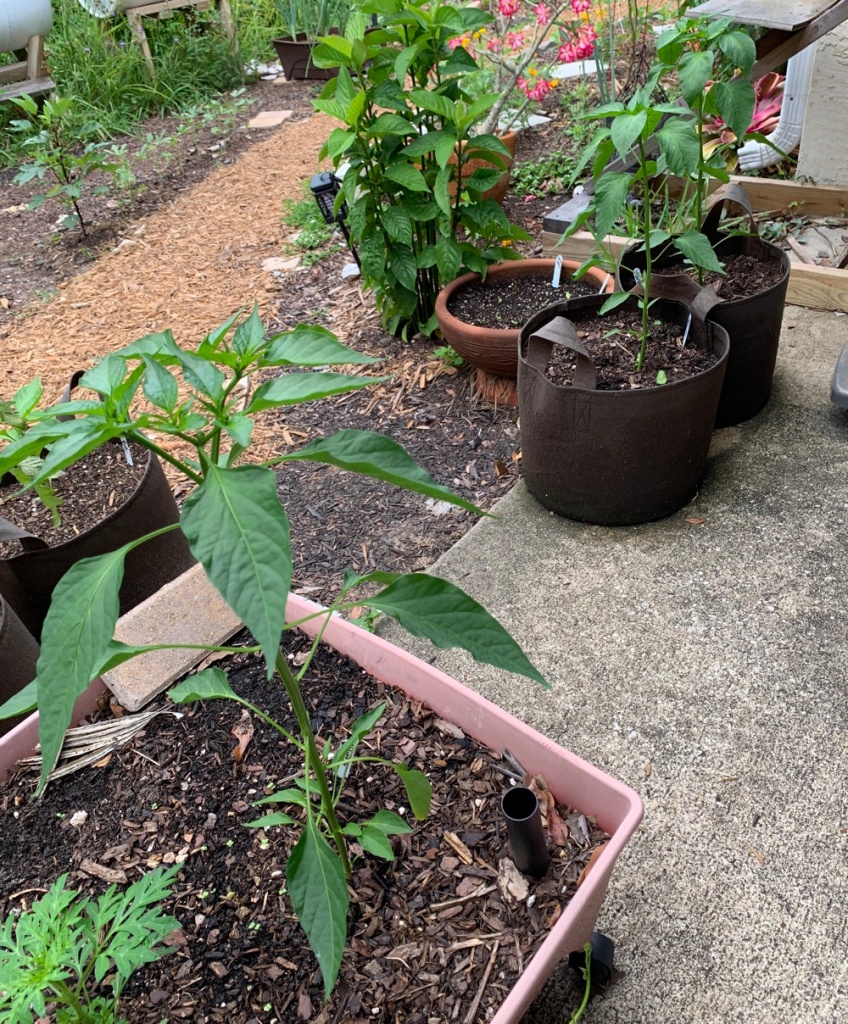
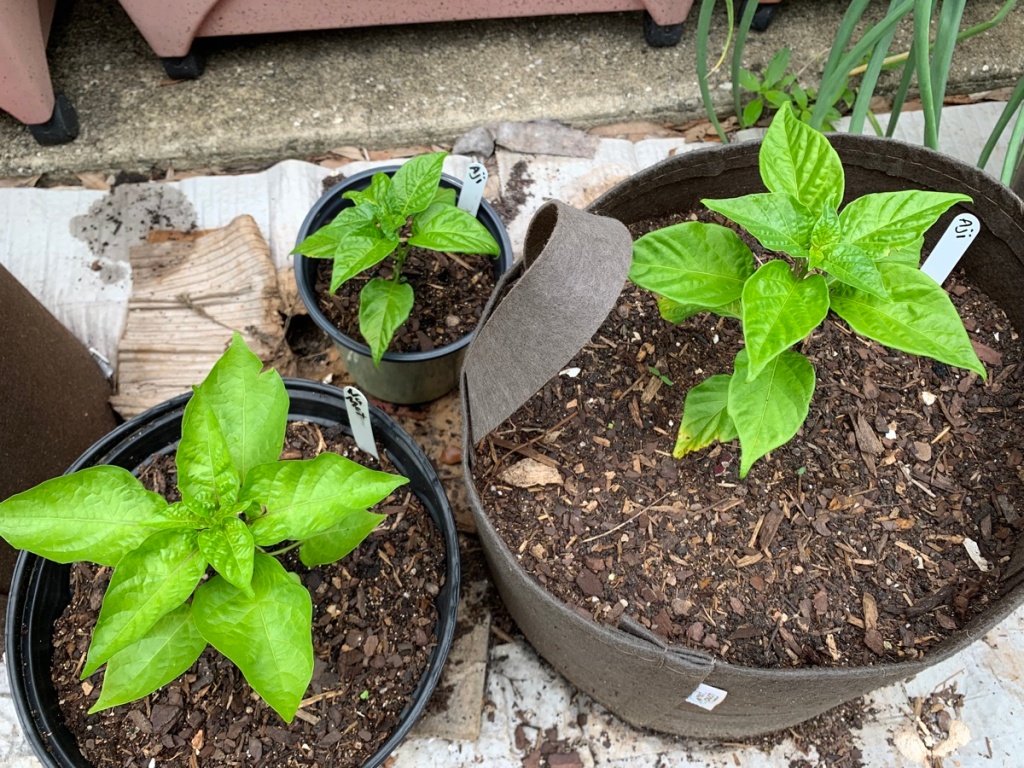
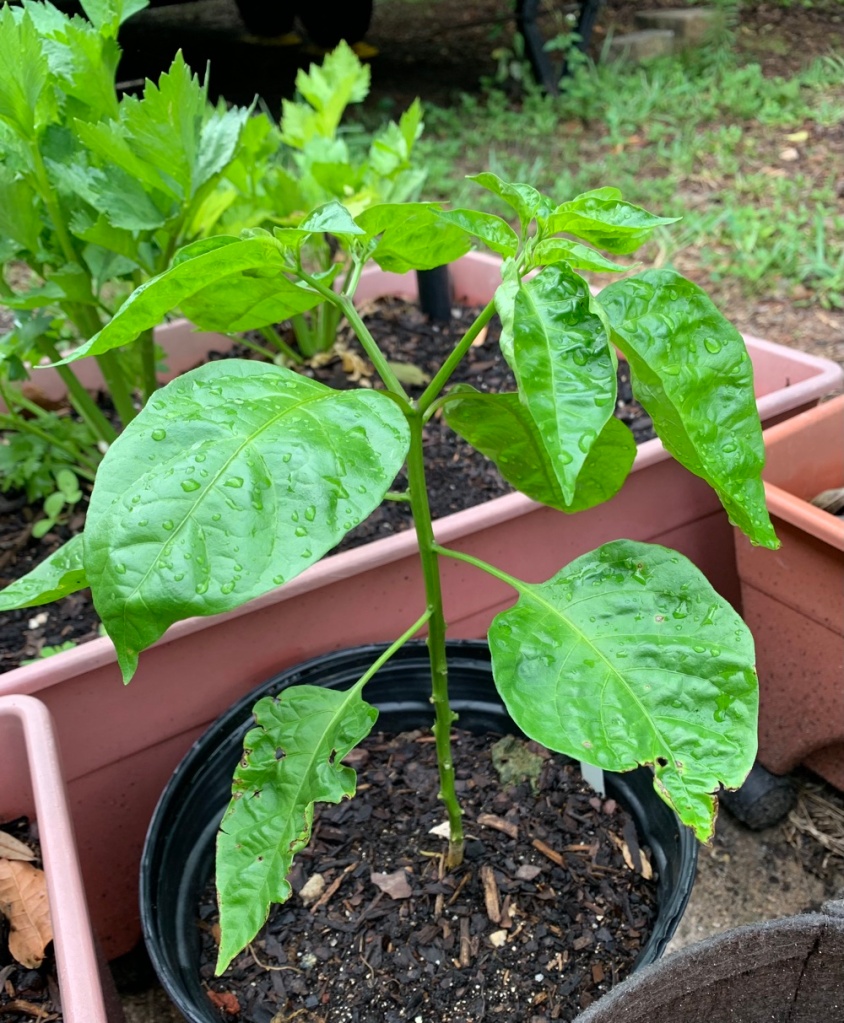
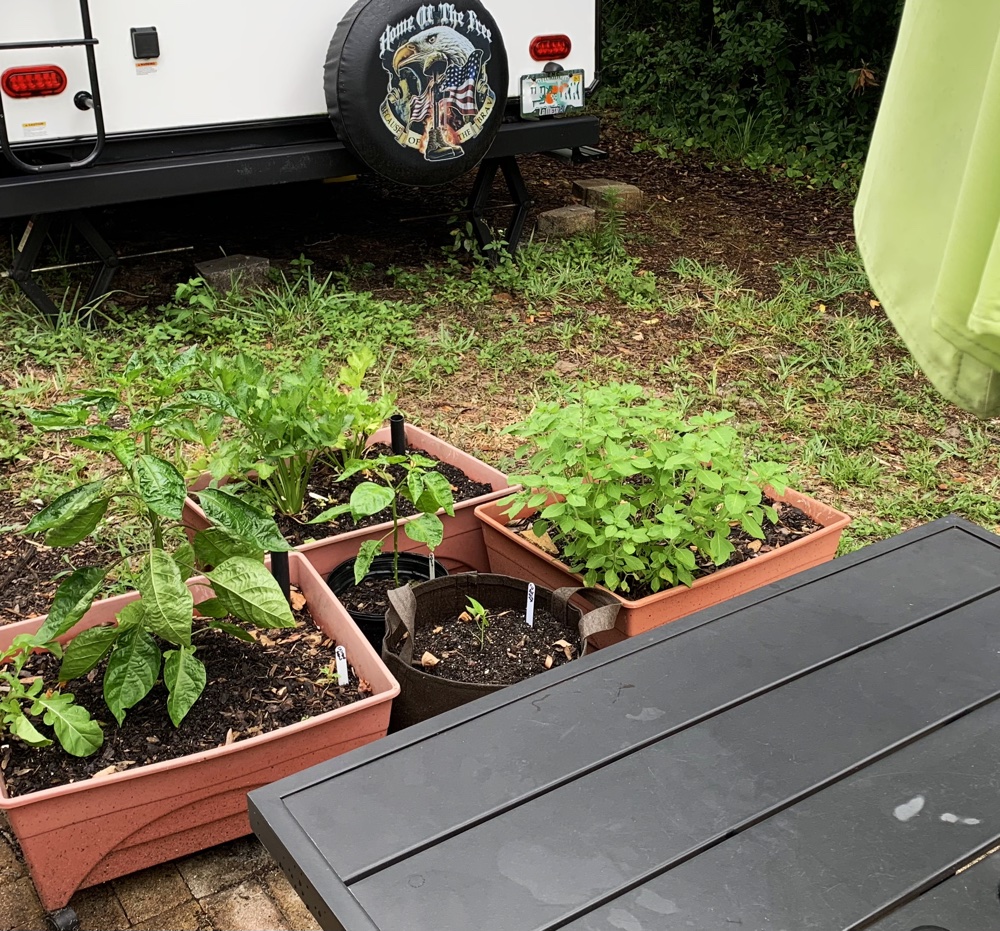
It is now June, and I have one Nu Mex still growing in the box where it began. The other has been transplanted to a plastic pot. Eventually, I will re-plant it somewhere.

Florida Gardening Conditions

  • Hot, heat, sun, blazing high temps.
  • Too much drenching rain, OR not enough rain (we just have over 2 months with NO rain in my area! Temps are reaching over 100.
  • Gardens need sun, but it’s too much for some plants. Must supply shade.
  • Humidity… lots of it.

My dilemma is that the boxes are great for starting plants from seed outdoors. But, those boxes are not very deep. They are better for shallow rooted crops. A Nu Mex can be 4 feet tall, and I’m sure it has an extensive root system. It really needs to be in the ground.

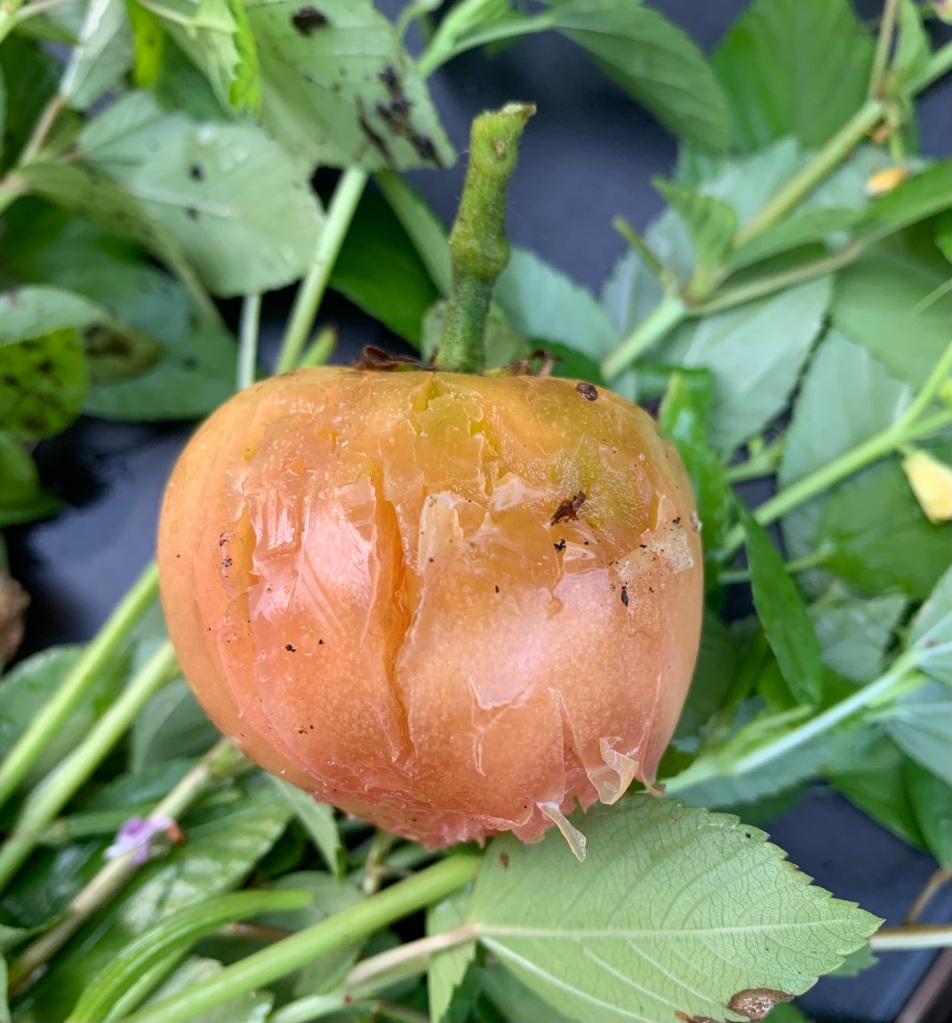
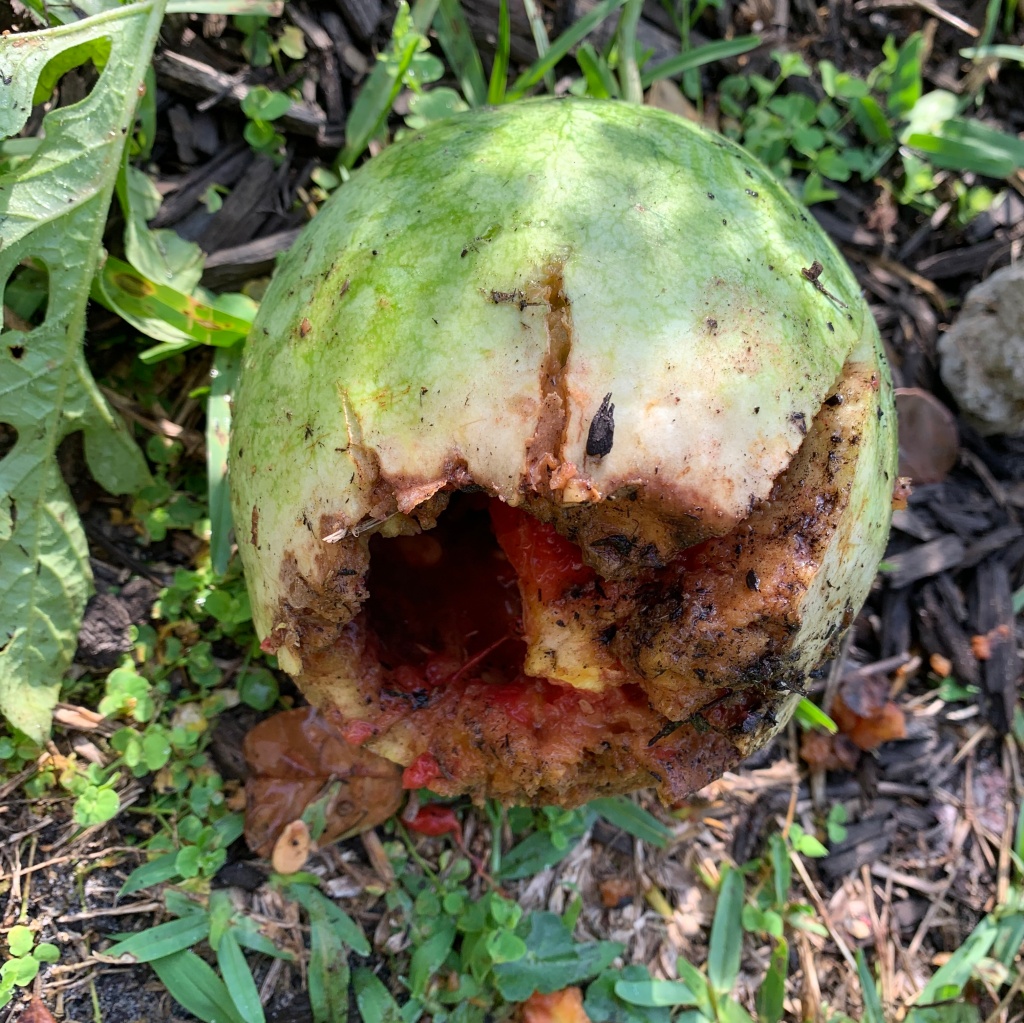
Anything growing in the ground in my yard, is open to raccoons harvesting my produce. They will rip the peppers right off the plant, as they do with tomatoes, eggplant, watermelon, and whatever else is in their line of sight. It’s a conundrum.

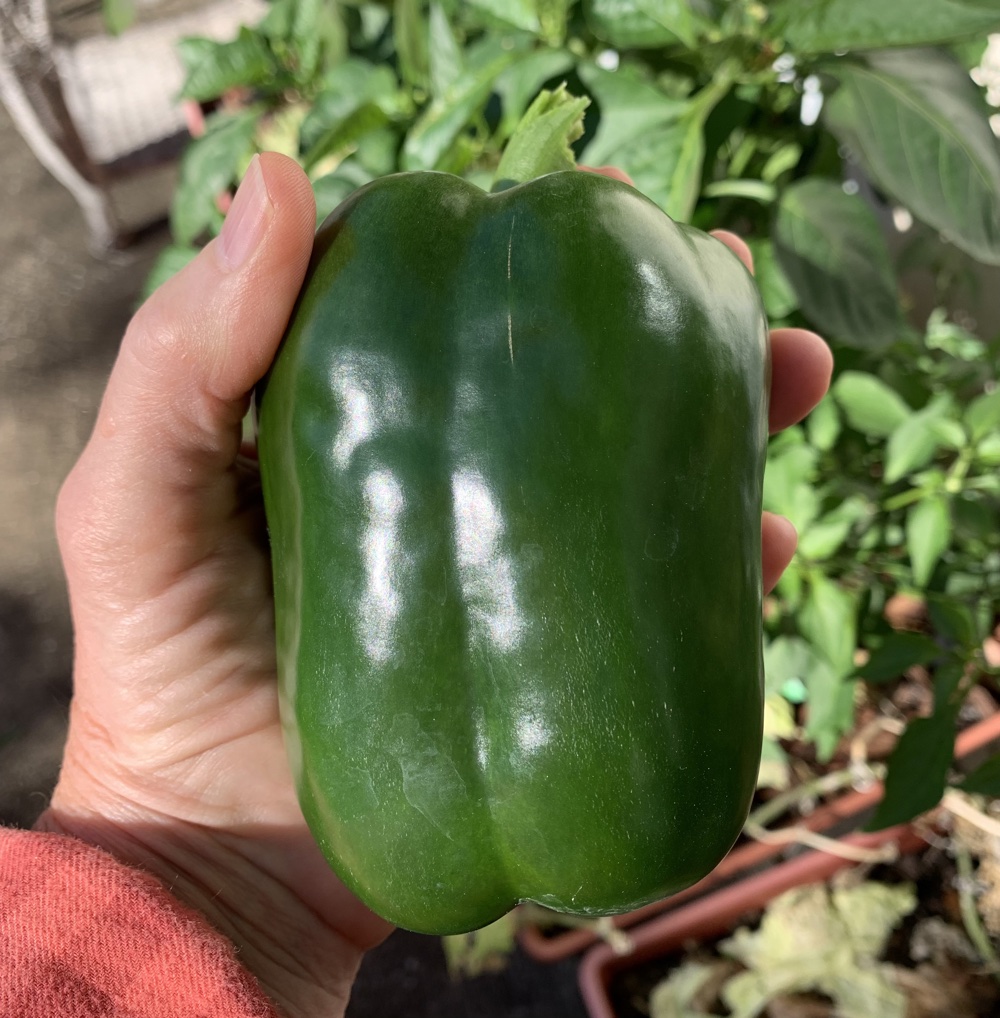
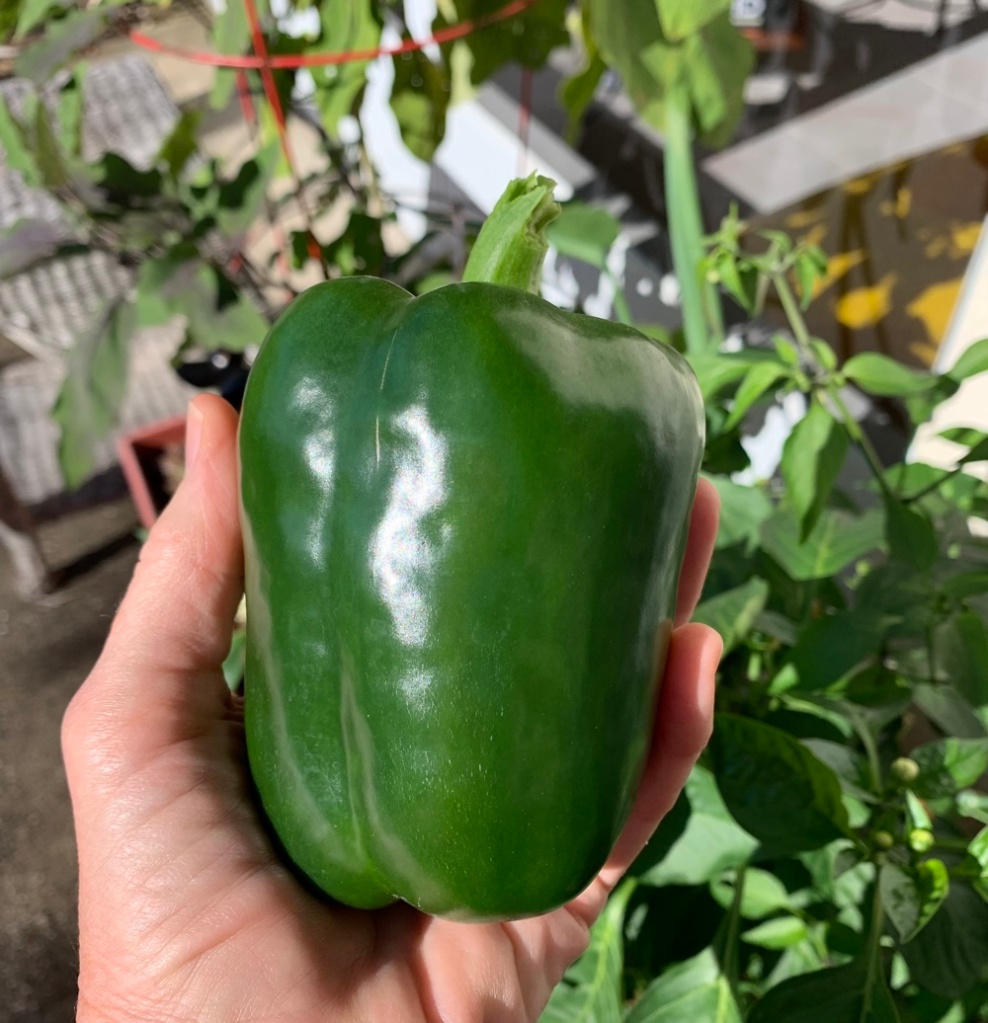
About the Suave Nu Mex Variety

The Suave Nu Mex (orange) peppers will look like habanero peppers, but won’t be hot like those. It means I can use them in meals without worrying about the heat. At least this is the hope!

Watch this video by Elise Pickett of The Urban Harvest, where she discusses which peppers to grow in Florida and how to care for them.

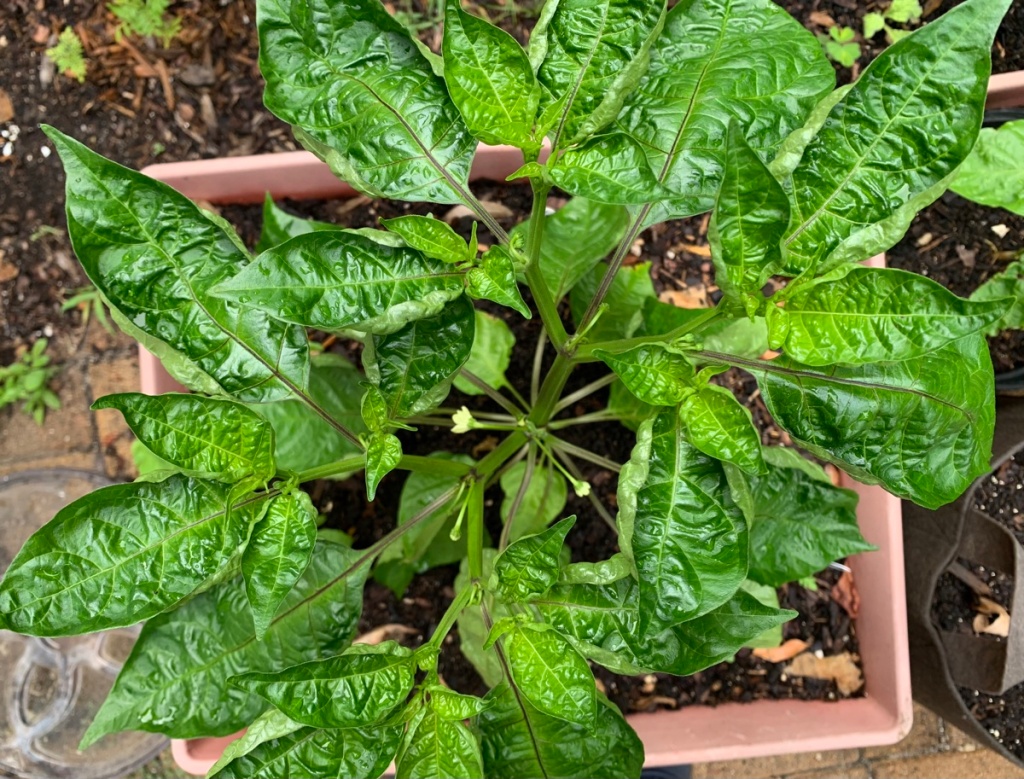
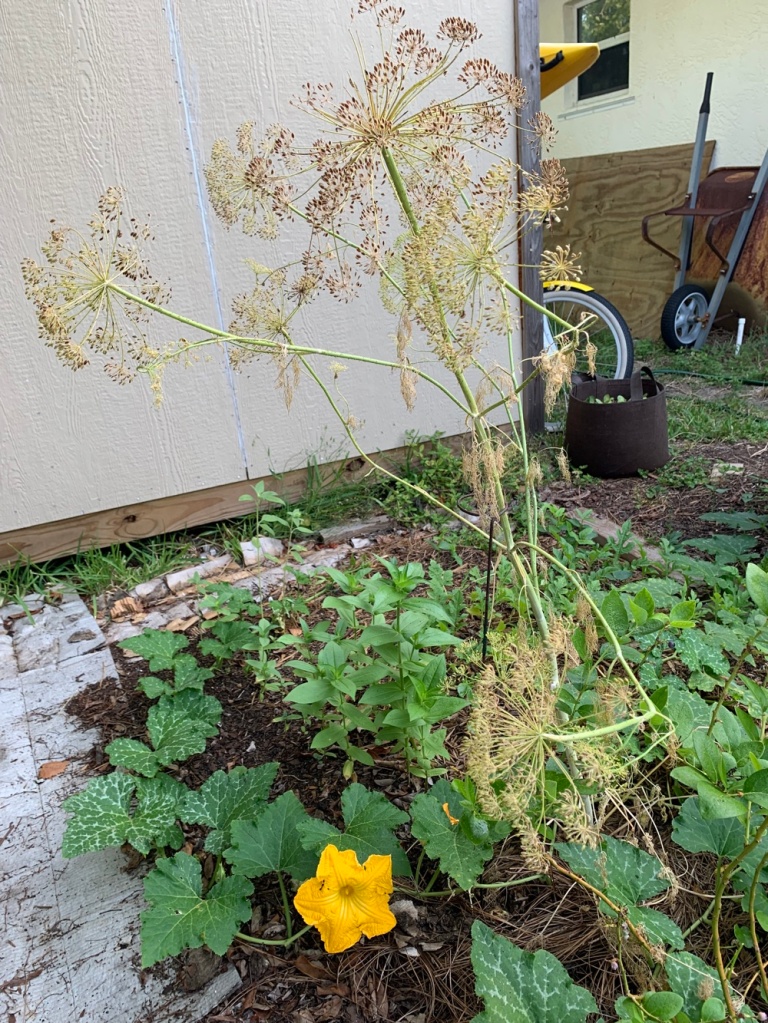
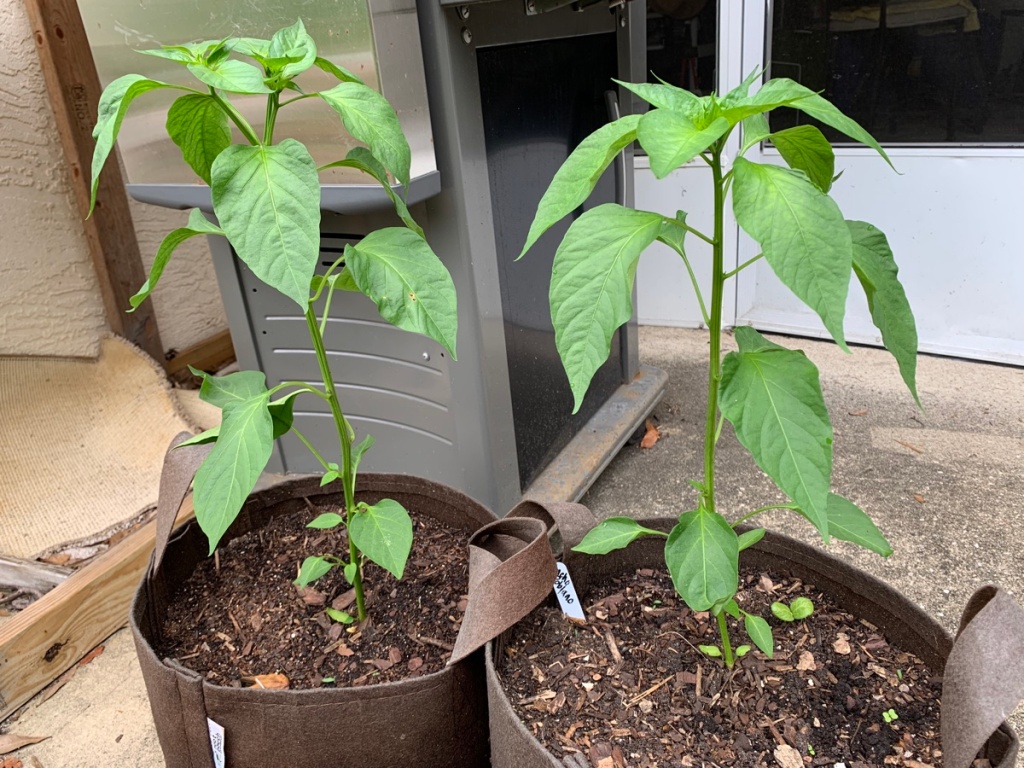
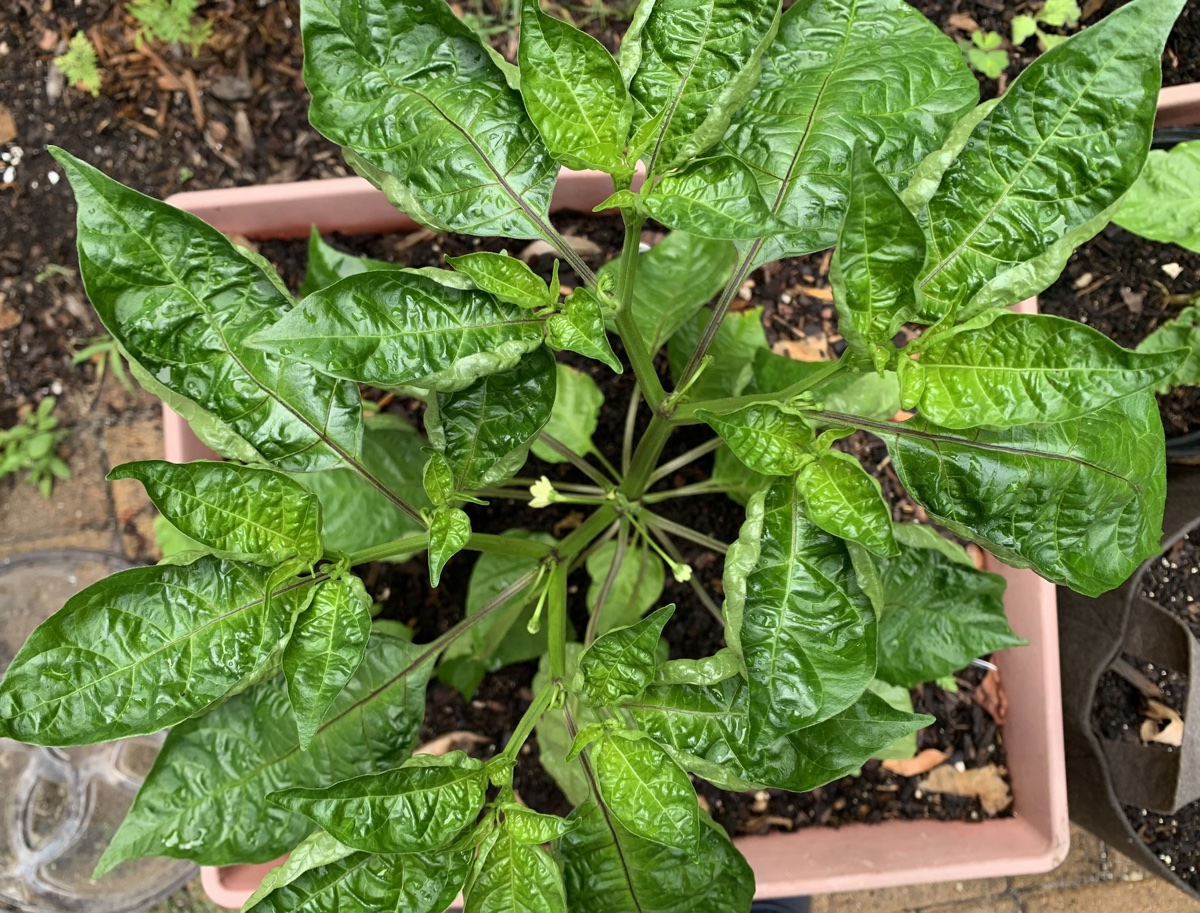
The leaves on the Nu Mex peppers are curled on the edges. I’m not sure if this is a characteristic of the variety, or if it’s a signal that something is wrong. The plants both look healthy, and the larger one has flowers. These plants are about four months old.

The Secret is to Give the Peppers Some Shade

The peppers that grew well from seed looked nice, but I was worried about how much water to give them. The sun is so hot, and it dries the ground pretty fast. But I don’t want to overwater either.

Other Peppers Growing Well

After struggling to get my pepper plants past the seedling stage, I now have these types growing in my little backyard. I wrote a page about them here.

  • 4 Carolina Wonder Bell pepper plants
  • 2 Suave Nu Mex, orange, not hot variety (this page)
  • 2 Aji Dulce spice pepper / seasoning peppers
  • 1 Ancho poblano (2 have already died, so fingers crossed)

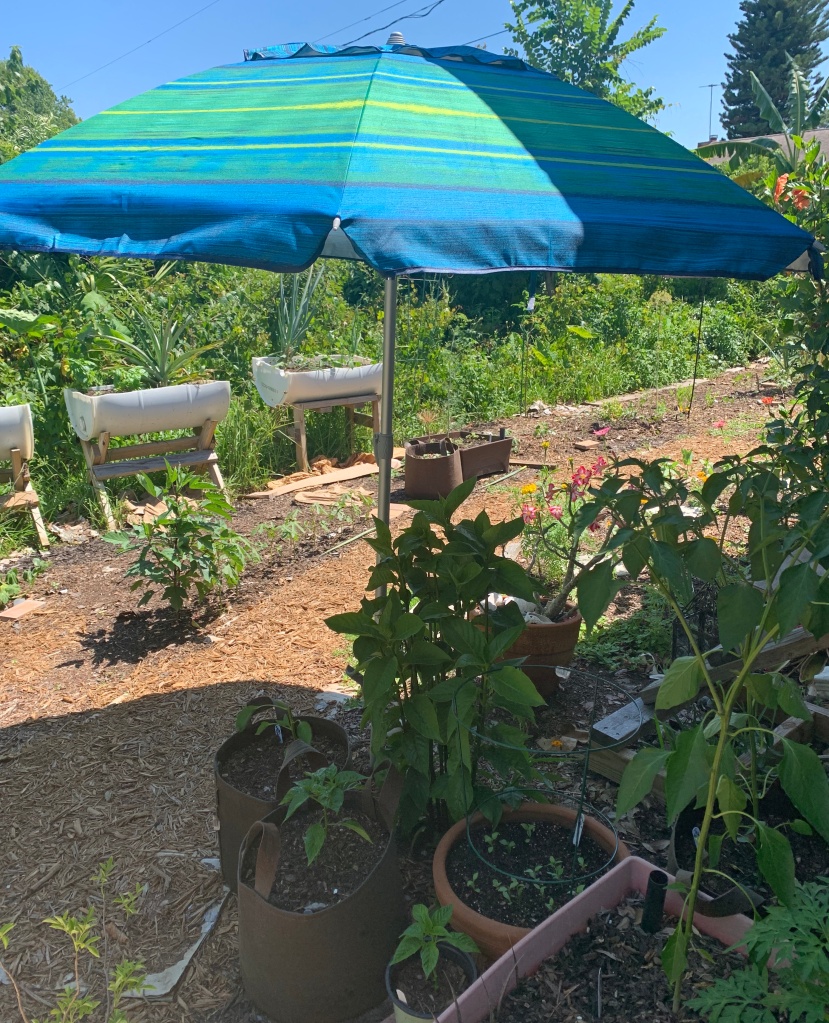
Using Umbrellas For Shade in the Garden

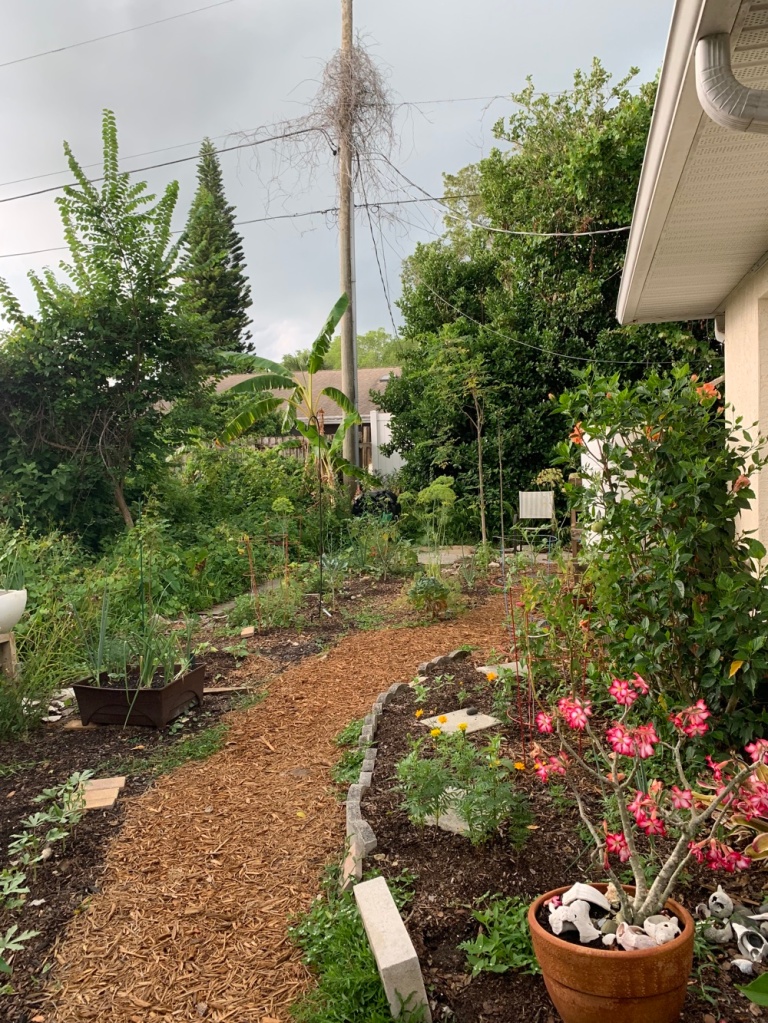
I have set up my beach umbrella next to the fire spike – which droops in the sun every day. I’ve arranged some peppers in bags around the bottom and try to remember to open up the umbrella by noon.

Both Nu Mex plants are near my table umbrella, which I put up to block the afternoon sun. All the pepper plants have begun to do much better now that they have less direct sun.

Epsom Salt and Fertilizer

In Ellise’s video (link provided up this page), she talks about adding Epsom salt (paid link) to her pepper plants. About once a month, sprinkle a little around the plants. I have been doing this with all my peppers.

Don’t fertilize too much either or they will grow like mad, but not produce. Once they begin to grow little peppers, they may need more fertilizer. Some places say to fertilize once a month. I’m still in the learning stages and I’m not good at keeping track of when I fertilize what plants.

Umbrella Suggestions

If you want to use a stand alone (beach umbrella) to shade portions of the yard, be sure to get one that screws into the ground. Mine has the screw part attached at the bottom, with fold out handles to screw it in. The top of the umbrella comes completely out, which is nice if it gets super windy. Also the height is adjustable, and it tilts.

The one I bought (back in 2017) is similar to this one on Amazon (this is a paid link), but I’m not sure the quality is the same. The one I have is currently unavailable.

The plastic screw anchor is easy to put into the sandy ground, or take it out to move. Umbrella anchors can be purchased separately, and then you could find a cheap umbrella to use with it. The problem I see with that set up, is the wind. If the umbrella sets into the anchor, it could come out and blow away.

Another option for shade is to buy a shade cloth. I’ve never used one, but they are big and need to be anchored somehow and tied somewhere. This works best if you have a big area to cover.


More stories for my gardening friends…

Something went wrong. Please refresh the page and/or try again.

This is Why I Leave the Dill Alone

If you have an aphid infestation, check regularly for ladybug eggs, larvae and pupa on the plants.

I believe in not being too quick to clean up the garden. It is June, and my old, aphid-filled dill plants are now full of ladybug larvae! This is why I leave plants up after they have grown, bloomed and begun to die.

Dill is one of the great herbs to grow in the garden. Some of my plants have come up on their own. When I see them growing I just leave them. The flowers are gorgeous and feed bees and butterflies. The seeds are easy to gather and save, and black swallowtail butterflies lay eggs here.

Dill does not like the extreme Florida summer heat and the plants are done flowering by June. The seeds have formed, and I did cut one big head off to save the seeds for next Spring. The rest, are still on the plants, which now look pretty awful.

Aphids have found the old dill plant and it is covered in them! But there are also many ladybug larvae and even a ladybug or two.

The day I saw all this larvae, I counted 15 little guys crawling around. They are tiny, and hard to see in the mess of aphids, so there might be even more.

The next day I realized they were beginning to attach and hang – going into the pupa stage.

A few days later the new ladybugs were crawling all over the dried dill stalks.

Newly hatched ladybug exploring the dried dill seeds

Ladybugs on the Hon Tsai Flowering Broccoli

Just a few weeks before the dill ladybugs were noticed, I had watched ladybugs come out of their pupa stage on my Hon Tsai flowering broccoli plant. It was setting seeds, and had some aphids at the top. This was a random plant that grew late in the season.

Ladybugs feed on aphids, so they lay eggs where the “babies” aka larvae, will be able to get food.

Four ladybugs hatched from their “shells” which were attached to the seed stems of this plant. Three ladybugs were solid orange, and one had loads of black spots.

ladybug just hatched
Newly hatched ladybug!

Dill is Feeding the Caterpillars

Even though the dill plants have mostly died and are drying up, I have found two caterpillars on one of them.

There is not much left for them to eat. I’m very surprised that the cardinals have not picked them off by now. I check on the beauties every day, but I have big doubts that they will reach pupa stage.

*Update: the next day one caterpillar was gone and the day after the other one was gone too. I suspect birds needed a meal.

This is a reminder to look closely at what is happening in the garden. Before you decide to rip out that old plant, consider what creatures might need it for shelter, eggs, or food.

Keep Reading

Mimosa Strigillosa, Sunshine, Powderpuff, and Thornless

Be careful when buying sunshine mimosa as a ground cover. I made the mistake of growing the type that has thorns on the stems!

About a year ago I ordered Mimosa seeds. I did not realize there are different varieties of Mimosa and I got the “Sensitive Plant” or “Shameplant”. It is called Mimosa pudica.

What I wanted was the Sunshine Mimosa I had heard so much about. Plant it in the yard to replace grass and feed the insects. Brighten the landscape with pretty pink, puffy flowers. It does not have thorns.

I made a big mistake when I ordered the wrong seeds. The seeds I grew became plants with thorns on the stems.

The One With Thorns

Once my mimosa seeds began to grow, I was so happy. Then, I noticed thorns on the stems. Because the Sunshine Mimosa is known as an excellent ground cover, I was baffled. No one would walk barefoot on this! Animals would hurt their feet as well. I thought I had been steered wrong.

I gave up on Mimosa.

Recently, I saw a post on Instagram by The Urban Harvest. The post was about alternative ground covers, including Sunshine Mimosa. I left a comment that it has thorns, and was quickly corrected. “Sunshine Mimosa does NOT have thorns”. Any they are correct!

So what the heck did I have? I took this photo of the plant in my yard and discovered that it is a mimosa, but the wrong kind. See those thorns? I will probably rip this one out.

mimosa pudica thorns
the Wrong Mimosa

The Sunshine Mimosa is Mimosa strigillosa, or “Powderpuff” and is thornless – and N O T Mimosa quadrivalvis, or pudica. Be sure to know which type you are getting.

Be careful, because the different varieties look very much alike. They both get pink, puffy flowers and have leaves that close up when touched. Both types sprawl, but the thorny one grows taller.

The huge difference is that one has thorns, and the other can be used to replace your grassy yard with a blooming, soft, ground cover.

Where Can I Get a Sunshine Mimosa?

The trouble I had a year ago was that I wanted this ground cover for my yard. I looked for plants and seeds and found NONE. All I found was mimosa seeds from Eden Brothers and so I bought them, not realizing I’d ordered the incorrect type.

The info in the pink box comes from the Florida Wildflower Foundation website. And, YAY they have a link to a place to buy seeds…. but, guess what? No results.

All my favorite online places don’t have seeds. I get very frustrated when I live in Florida and yet have such trouble buying native plants.

I still can’t find Sunshine Mimosa seeds to buy.

I’ll be ripping up the one that has thorns. I don’t want my cats hurting their feet.

Mimosa plant with thorns
Mimosa with thorns

Garden blogging…

So Happy With My Pepper Plants!

I probably shouldn’t say this out loud, but I am very happy with the way my pepper plants are growing! I have yet to pick a pepper, but my fingers are crossed.

Peppers are a vegetable I would LOVE to have growing in my yard. I like them sweet or hot, and preferably would have both types to choose from. I use peppers quite a bit in my cooking, but currently I have to buy them at the store.

You’d think that in this hot climate peppers would grow like mad. In fact, I’ve had bell pepper plants (photos below) that lasted for a few years. But getting a good plant started, and have it grow lovely peppers, can be a challenge.

I still don’t have a car, so the best way for me to grow peppers is to order seeds. Also, most stores / nurseries around here don’t offer the types of pepper I want to grow. If you can buy seedlings to grow, of a variety that works for our climate, that is the way to go. Seeds take forever to turn into lovely plants.

How I Grow Peppers From Seed Successfully

The way to be successful growing peppers, is to plant seeds outside in grow boxes. Plant lots of seeds because most of them may not grow.

Once the little pepper plants grow big enough, separate them by transplanting so each plant has space to grow big. Make sure all soil is full of good nutrients.

The Ancho poblano pepper plants, shown below, were started from seed in the red (faded to pink) grow box. I left one plant in the box and the other two were each given their own fabric pot. I love the flavor, which is not extremely hot when eaten green. I really hope these pepper plants grow well.

These plants were quite tall when I transplanted them because I had been away for two weeks. Usually I would transplant sooner.

*Update on the poblano: Suddenly the two plants in the grow bags drooped horribly. they ended up dying. I still have the one in the square box.

Aji Dulce and Suave NuMex

The Aji Dulce plants were growing side by side in a small pot. I didn’t know if they would separate well, but both plants are doing great. I think the trick is to let them get a good root system established before separating.

The Nu Mex variety (below) were also growing in a red box. Once they were big enough, I transplanted one to a plastic pot, leaving the other in the red box.

Be sure to mark the plants in some way because pepper plants can look a lot alike. Both of these varieties will have peppers that resemble a habanero, but they don’t have the heat.

Carolina Wonder Bell

As an example of what I do, see the box in the photo below. It contains Carolina Wonder Bell pepper plants. I had two larger plants in this box and transplanted one to a big pot. There are still two tiny seedlings coming along (circled), which I will also transplant when they grow up. The remaining plant will stay in this box to continue to grow.

Carolina Wonder Bell pepper plants

Don’t Bother With Starting Plants in Small Pots

I’ve found that growing peppers from seed can be difficult. The seeds germinate, and the pepper begins to grow and then, just when I think it will be fine, the thing curls up and dies. This was my experience over the “winter” when I planted seeds in little pots.

Plants do best when growing outdoors. Some people may disagree, but I have little luck with starting seeds and caring for seedlings properly. They have proven this to me by getting bugs and dying. Or, they die once they go outside. In fact the only seedlings that are now growing in the yard, and doing very well, are the Roselle hibiscus.

pepper plants grown from seed
Pepper seedlings are not looking good over winter.

In Florida, we have only a few months (central Florida) where a frost, or freeze, happens. December through February are the usual months to worry about. We can also get very warm days in these months. To be sure the little seedlings won’t freeze, planting outside should take place in March.

Grow Peppers For the South

In our hot and humid Florida climate, certain types of pepper do better than others. This year I have planted all three varieties mentioned on this page and they seem to be doing well, so far.

But take into consideration that I sprinkled seeds all over these boxes and ended up with only a couple of good pepper plants from each variety! But, let’s face it, how many pepper plants does one person need? If these all do well, and give me peppers, I will be more than pleased.

More Tips and Tricks For Pepper Success

  • Pepper plants can continue to grow for a few years in zone 9b. I had a bell pepper that remained outside all winter and survived! But if the plant is in a movable pot, or fabric bag (paid link to Amazon), it can come inside during cold spells.
  • Peppers in pots can also be moved into shade if the sun becomes too much in mid-summer. Right now, most of my peppers are in locations that get afternoon shade. (I put up a beach umbrella for them too.)
  • Pots will hold nutrients and fertilizer better than the ground.
  • Pots help keep critters (raccoons and armadillos) from digging up plants.
  • Give them nutrients. Epsom salts (paid link to Amazon) give peppers and tomatoes the magnesium that they need. I also mix bone meal, kelp meal, blood meal, worm castings, vermiculite, compost, and whatever else I have, into the soil.
  • For more information about growing Florida peppers, view this Video by the Urban Harvest.

More stories on the blog…

A Busy Spring Where Gardening Never Stops

Spring is a busy time for me with garden plans and life plans colliding.

In Florida we don’t get a break from the growing season. Something is happening year round in the garden and yard. In a way, this is good. What fails at one time of year can maybe be tried again in a few months. We don’t have to wait an entire year for the growing season to return.

It also means we gardeners stay busy year round, planning and planting. This is only my second year trying to expand and grow here in east, Central Florida.

Plans and Planting and Juggling it All

Every time the first of the year rolls around, I find myself swamped. This was true even before I began to garden.

After cleaning up from the holiday season this year, we had a few camping trips planned. Also, both of my cats had to go to the vet for their annual shots, AND I needed to get new eyeglasses. (Did I mention it is also an expensive time of year?)

Skittle black cat on back
Skittle – Learn to chill like a cat

My high school class reunion (a milestone 50th, wow) was being held in April. I had originally planned to skip it, because it meant traveling to New England. My daughter wanted me to come up to New Hampshire for a visit, so I combined the visit with the reunion. But first, my youngest son came for a visit! Busy, busy.

In between all these life plans, I had to do Spring gardening. I bought mulch, compost, and seed packets. Transplanted crops beginning in February, and did weeding, cardboard layering, digging and watering.

While I was up north for two weeks, we got ZERO rain in the area of Florida where I live! My son was watering, but without good soakings, the ground all dried out. Once I got back home, I spent every morning trying to get water into the ground for my plants.

Finally, almost a week later, we had some much needed rain.

Spring garden and path
Rainclouds bring much needed rain to the area.

For the most part my plants have survived the drought. The hardy zinnias are blooming, caterpillars are eating the dill, and I’m even picking a few ripe blueberries each morning from the one plant in the garden.

The crops that did not do well are cucumbers and spaghetti squash. I needed to get the cukes growing early to miss the moths that arrive in June, or July. Last year I battled the caterpillars that ate up my plants. To solve the problem, plant cucumber before the moths arrive in the area. Now, it’s too late to re-plant. I also tried a new type called “Ashley” but I may never plant them again.

Spaghetti squash was something new I wanted to try. The plants began by looking great. Just before I left on my trip, they began to get powdery mildew. I sprayed the leaves, but by the time I got back most of the plants had died. The drought didn’t help, I’m sure. It is possible that this type of squash won’t do well where I live.

birdhouse lizard
Lizard

It’s good to be back h0me and now I will be gardening regularly once again. I’m trying to keep the watermelon and Seminole pumpkins going. Also, I am growing Egyptian spinach. Will let you know what happens with that.

Happy gardening!

Stories from the backyard…

Bulb Onions Grown Successfully Over a Florida Winter

First try at growing Texas Grano bulb onions in my central Florida backyard is a success!

A grower in Deland, Florida had posted about their success in growing Texas Grano bulb onions here in Florida. I hadn’t thought it was possible to grow onions in zone 9b. Now I have tried it over this past Florida winter, and have had some success. I look forward to growing even more next year.

Growing Texas Grano Onions From Seed

After purchasing seeds online, I went around the yard and planted them in raised bed boxes and in the ground.. I didn’t have high hopes for actually getting real onions from the garden. Truthfully, some are still growing and may not turn into anything. I did get a row that grew big enough to call “onions” and their stems just recently began falling over – signaling their end to growing.

Finding good advice for growing ANYTHING in Florida is difficult. But, you can take advice from growers in other zones. I can’t always do as they do, but things like “when to pull your onions”, is universal.

Watch this quick video, from The Rusted Garden, with advice about growing bulb onions.

Here in Florida I easily grow bunching onions. Those are the ones that do not get big at the bottom and we use the green stems for eating… unless they are left to grow and grow. The white bottom gets large, and they send out a beautiful big white flower which is where the seeds will be.

When I want to grow bunching onions, I buy some at Publix and save the rooted ends. Just stick the ends into dirt and a new bunching onion grows from that. I let them get big in my yard so they will flower, because they have gorgeous, big white flowers. Bees and butterflies love the flowers! Once the flower dries, it is full of seeds.

Bulb onions don’t do this – no flower

Why I Chose to Grow From Seeds

When searching for more about growing onions you will find “starts” and “sets”, but I have tried starts and they did nothing. It was a lot of work, for NO return. This was my experience. I decided to try growing from seeds, and it is the method I prefer, now that I’ve seen good results.

I will plant seeds – directly outdoors – once again this coming Fall. Of course, it takes longer for the onions to grow from seed.

My Onion Harvest

I planted my Texas Grano Onion seeds in October. I am now harvesting them in May. That is a long time – seven months! Not all of them grew, in fact I’d say most did not grow at all, or remain small. I’m waiting to see if the small ones continue to grow.

I purchased the seed packets for Texas Grano onions at SESE (southern exposure seed exchange).

I will admit to not taking good care of my seedlings. My mindset was that they wouldn’t grow anyway, so I pretty much ignored them. Next time, I will be more careful because I know it’s possible to get nice onions from the seeds.

Curing Onions to Save

Once the onions are pulled up, I brushed the dirt off and put them under the umbrella. Now they are on the porch with the fan going. From most articles I’ve read, onions need to cure in a shaded location that is warm with good air flow. What I don’t have is low humidity, but I can’t change that.

Once the tops have dried, I’ll cut them off and bring the onions inside to store and use. A few of the smaller ones I’ve already sliced up to eat! Yummy. What is better than getting food from the backyard?

Texas Grano bulb onion crop
Texas Grano bulb onions grown from seed.

More stories from the garden…