New England native, Florida resident. Blogging about boating, beach-combing, gardening, camping, and knitting. Work for Zazzle as a designer since 2008.
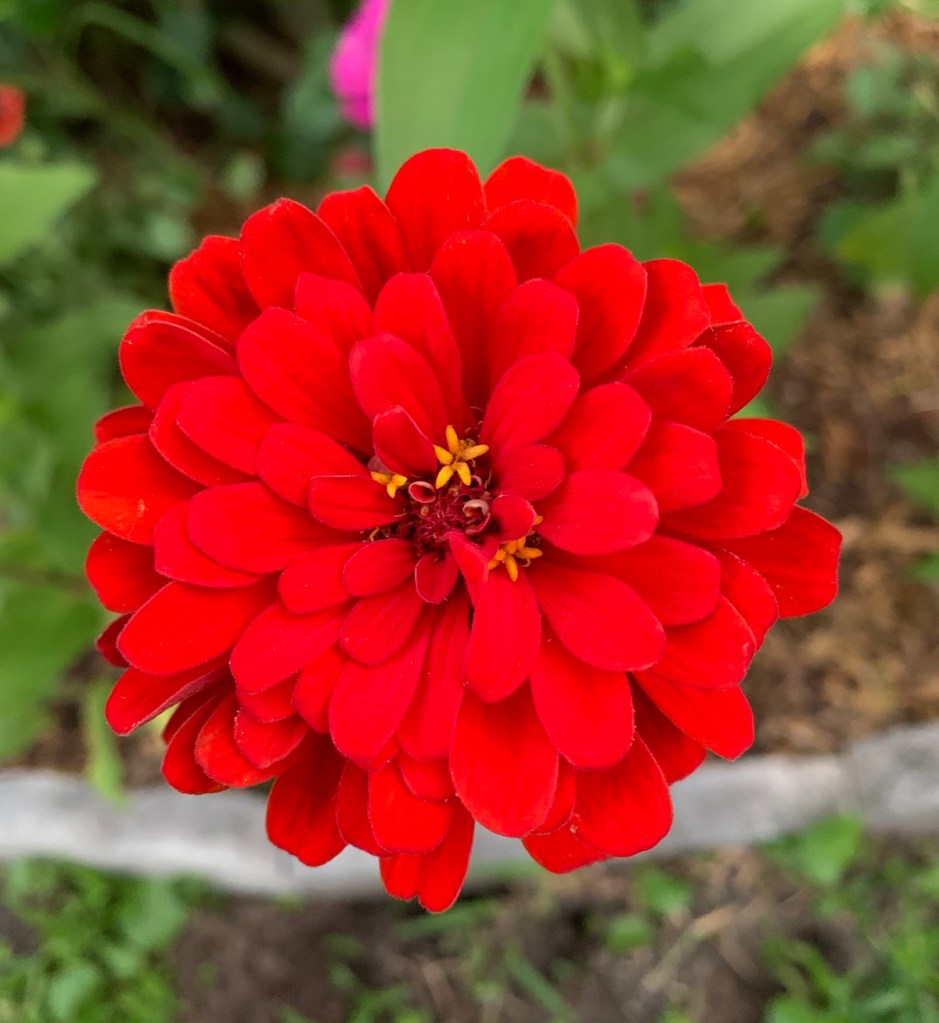
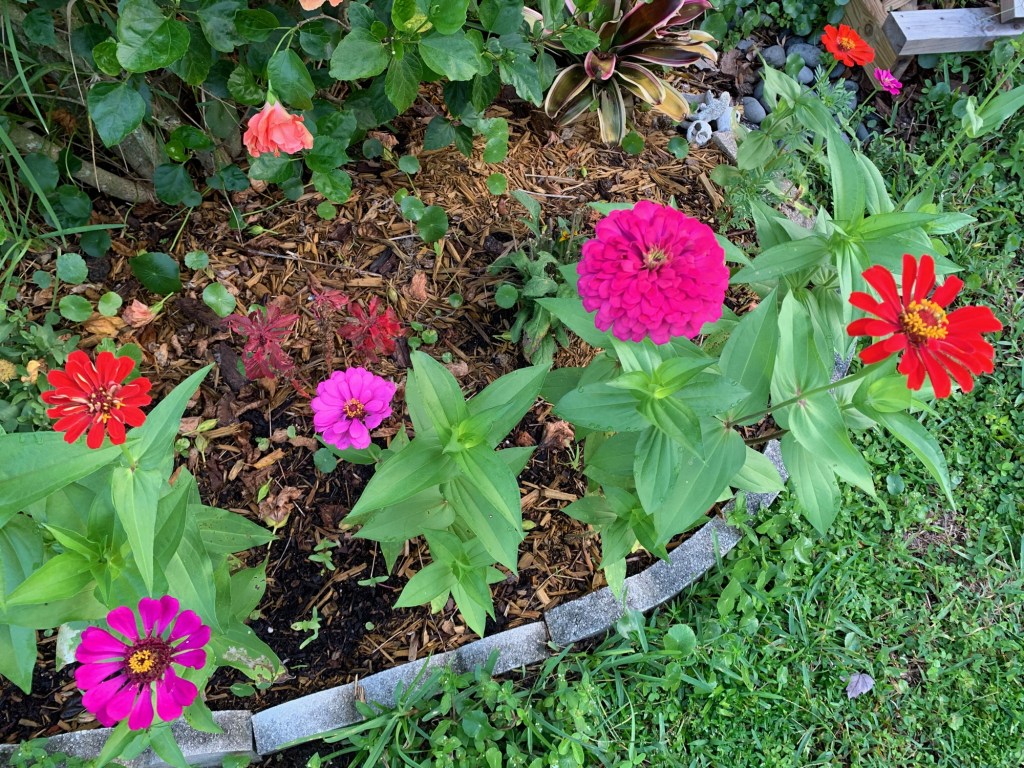
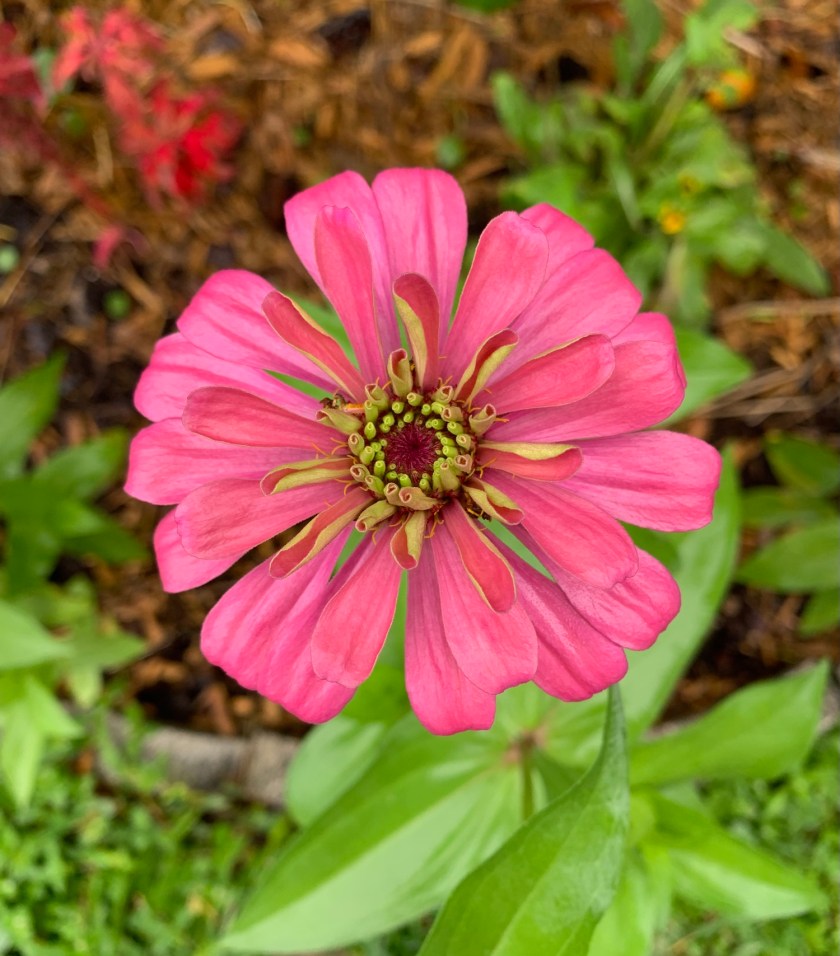
Zinnias are bright and beautiful flowers that also serve as a shelter for honey bees.
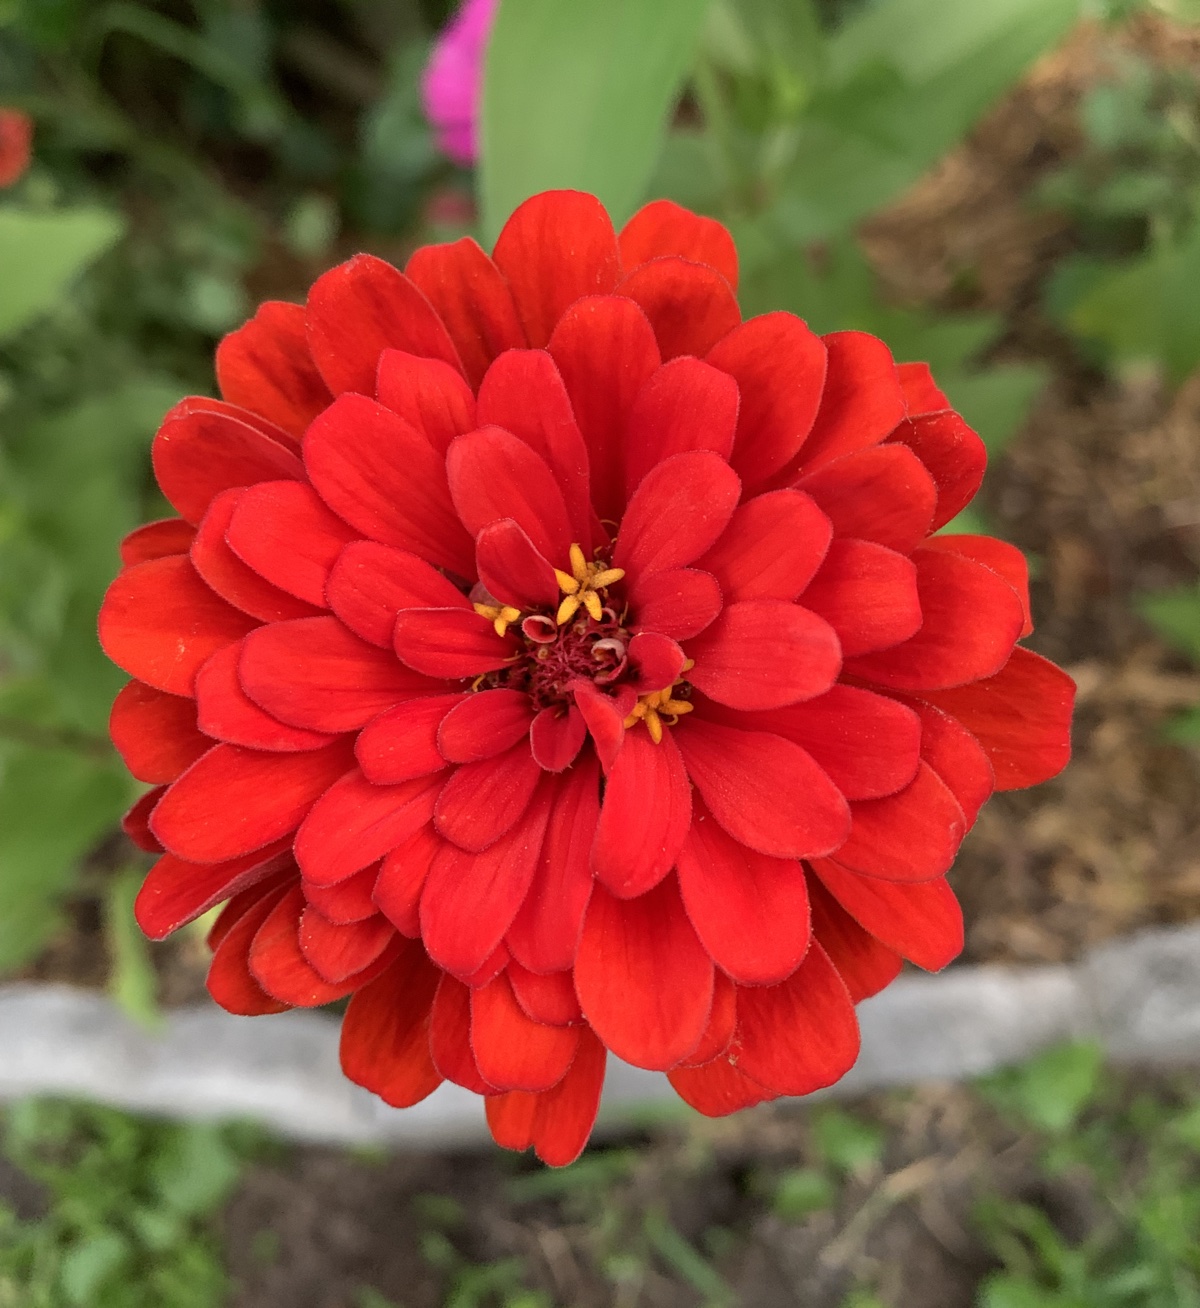
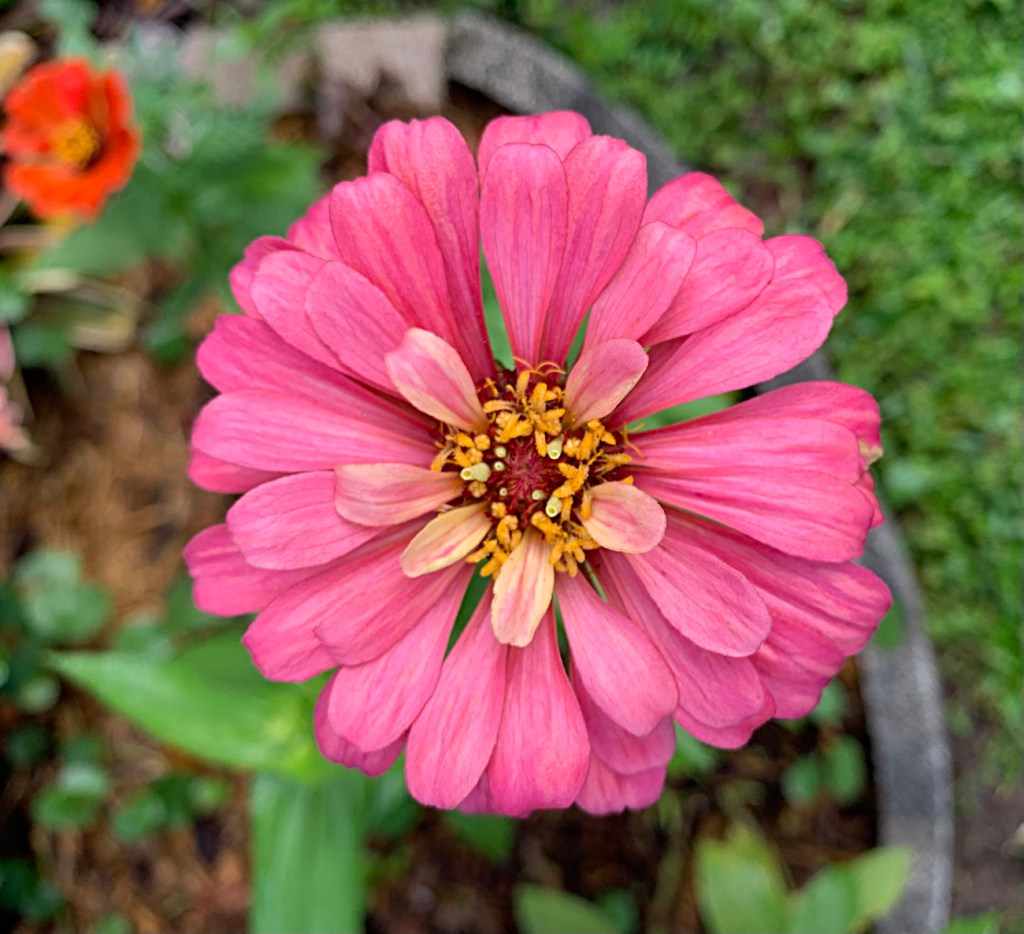
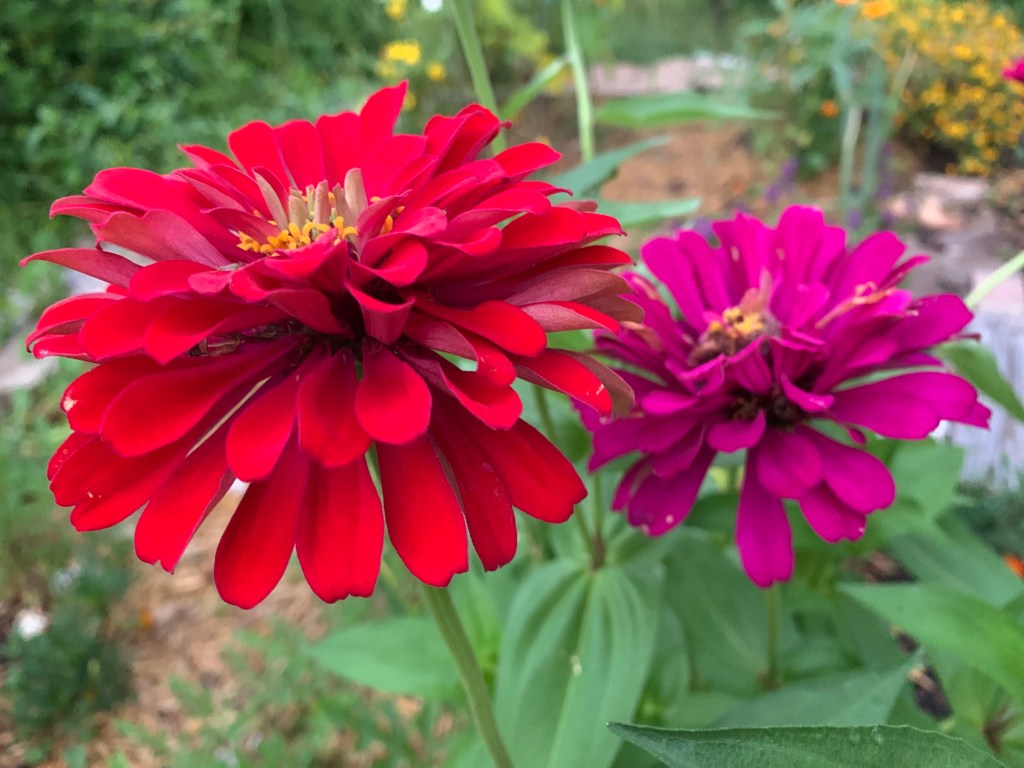
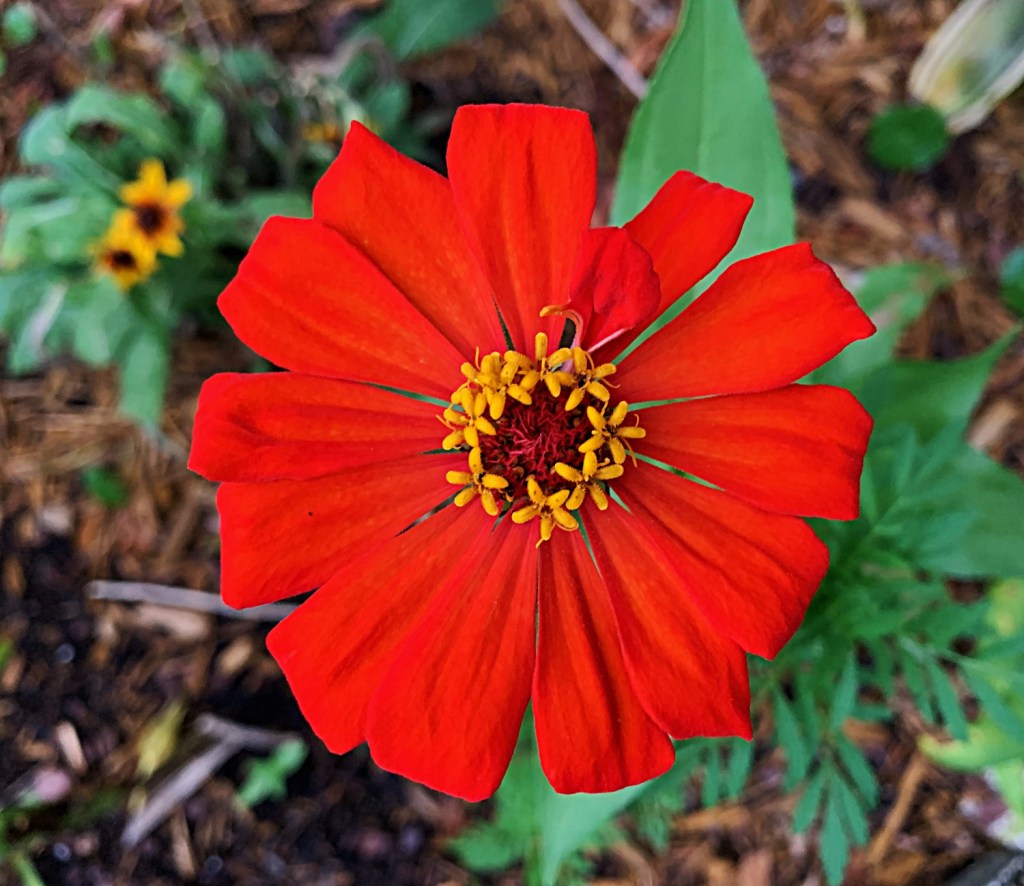
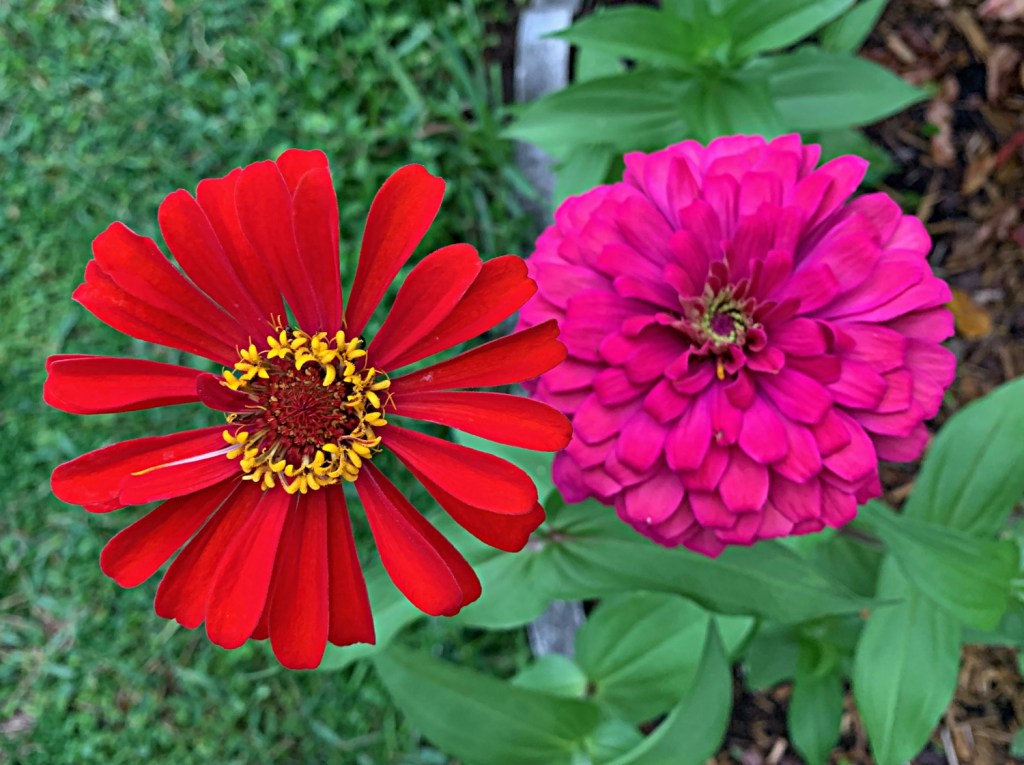
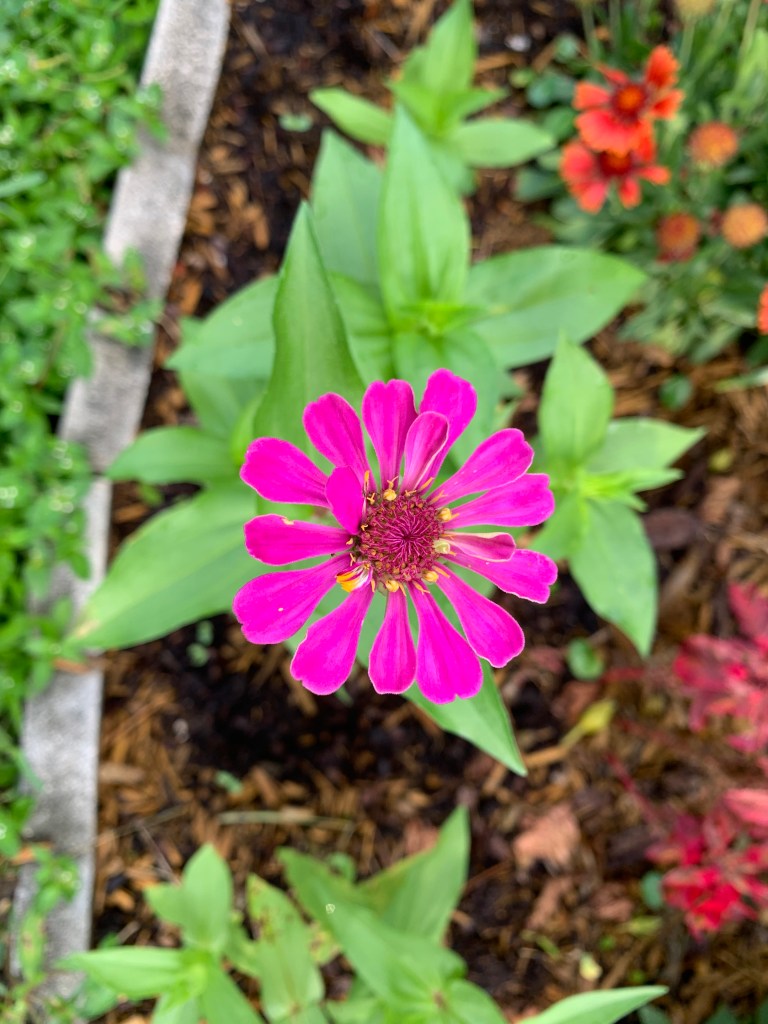
This summer I am growing zinnias from seeds. I’ve come to love seeing the new blooms pop out in this mix. Their colors have been stunningly bright. Some blooms have a more flattened appearance and others are very puffy and full.
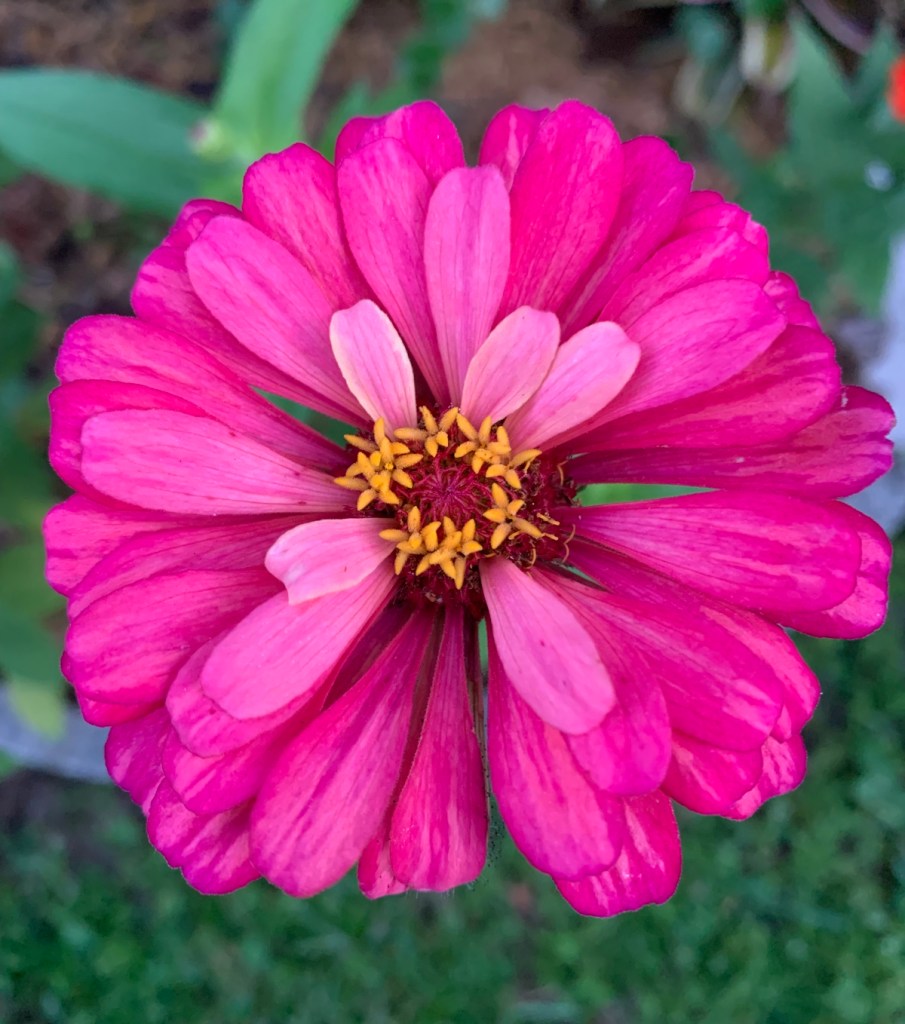
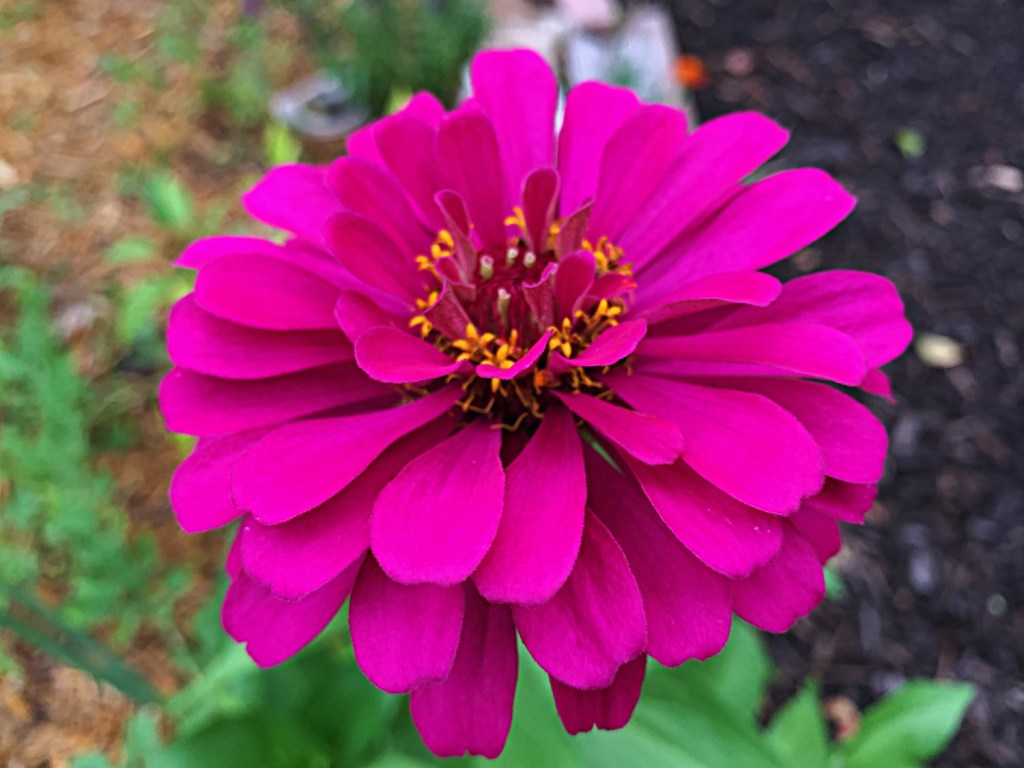
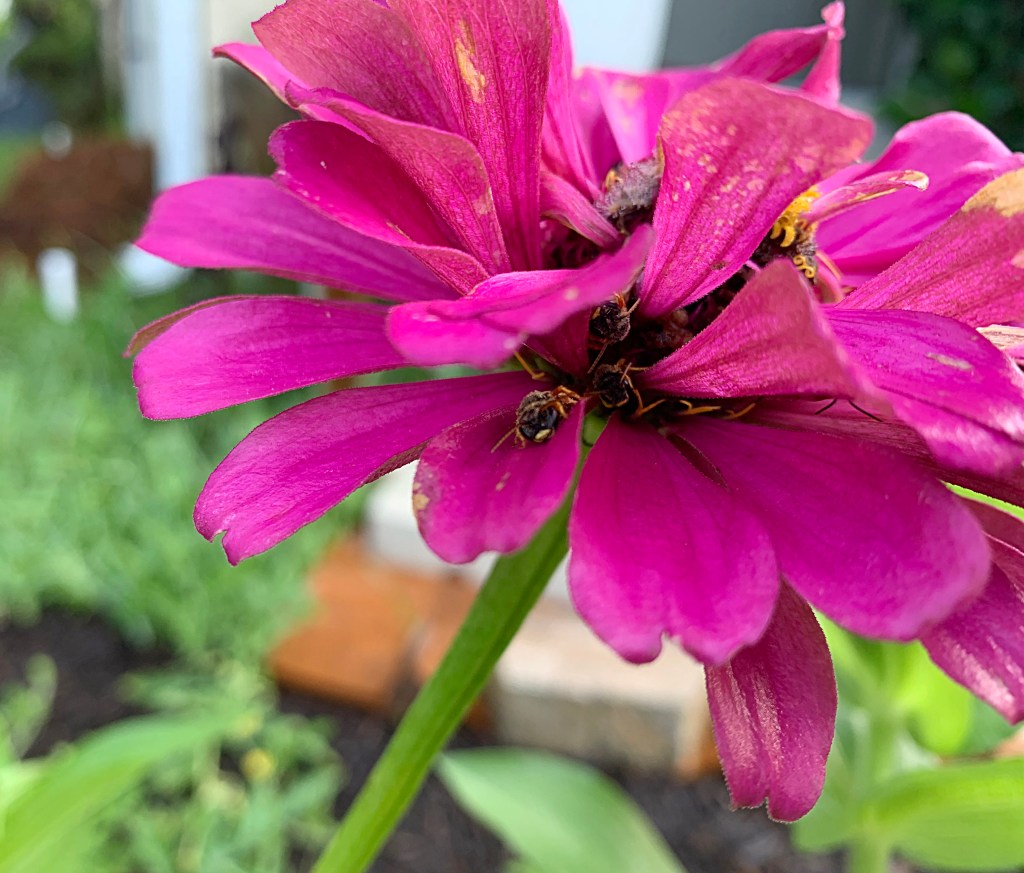
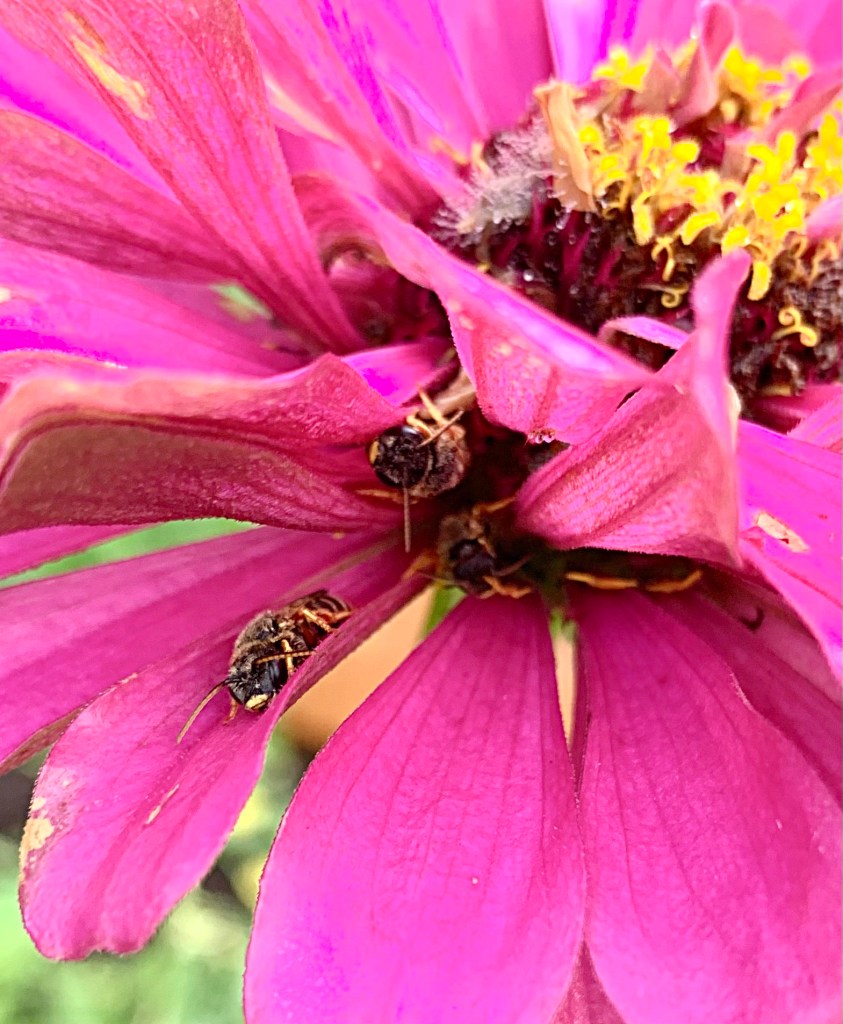
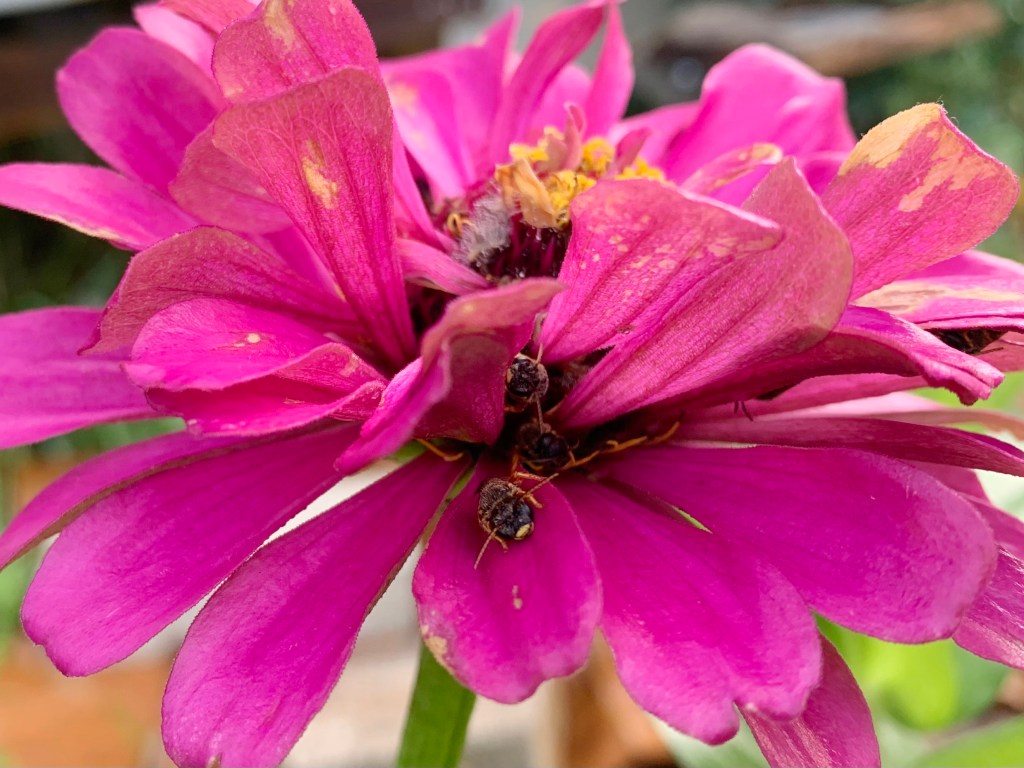
The petals of the zinnia also serve as a shelter for sleeping bees. Each morning I see them tucked among the pink petals of this one flower.
This magenta zinnia, which has a fading bloom, seems to be a favorite for little bees. They look like honey bees, and they crawl way up under the petals toward the center of the flower. I counted four bees, but I believe there were more.
Bees inside the petals
I’ve also caught tiny tree frogs in the petals, but they hop away as soon as I get close.
Zinnias are not the only flowers that make tired bees happy. I’ve seen them within the curl of marigold flowers too. We get accustomed to watching bees gather nectar and usually never think about where they go when they need to rest. Why, a zinnia hotel, of course!
It’s July and gardening in Florida has slowed, but some things are obvious wins and some are fails.
My first time seriously trying to grow vegetables and annuals through a Florida summer. I’ve purchase plants and seeds, and transplanted seedlings. A lot of work has gone into my garden area. Some things have done very well, and others are fails and best to be forgotten!
Some things I am still up in the air about.
First, The Wins
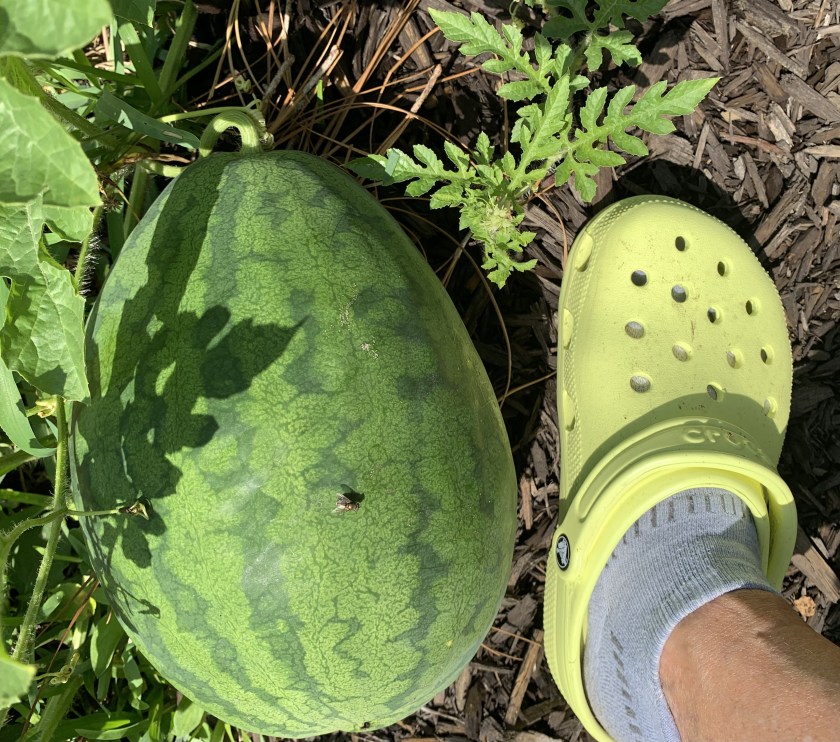
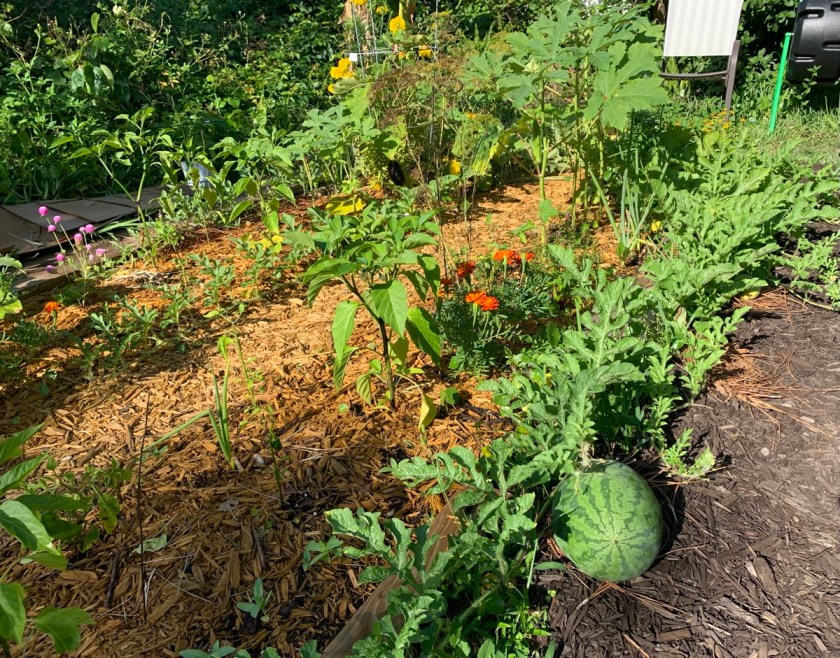
Watermelon is at the top of my list for wins. I have harvested three, edible melons. They grew from direct planting and I would have had four, except that the raccoons got one. The vines had no problems, even though I wished I’d had more space for them. These were Strawberry Watermelons which are good for growing in southern locations.
Watermelon
I picked the melons the end of June, and now, mid-July, I have another tiny melon on one of the old vines. Also, new vines are sprouting from the original, so I’ll see what happens.
Garden watermelon
Eggplant
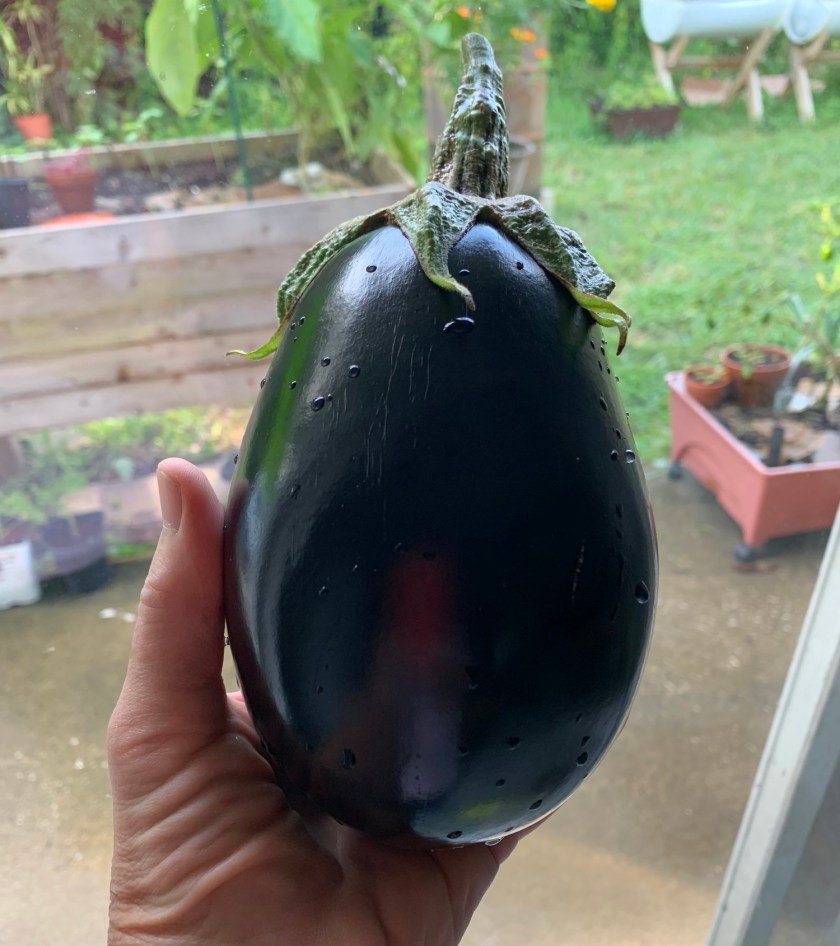
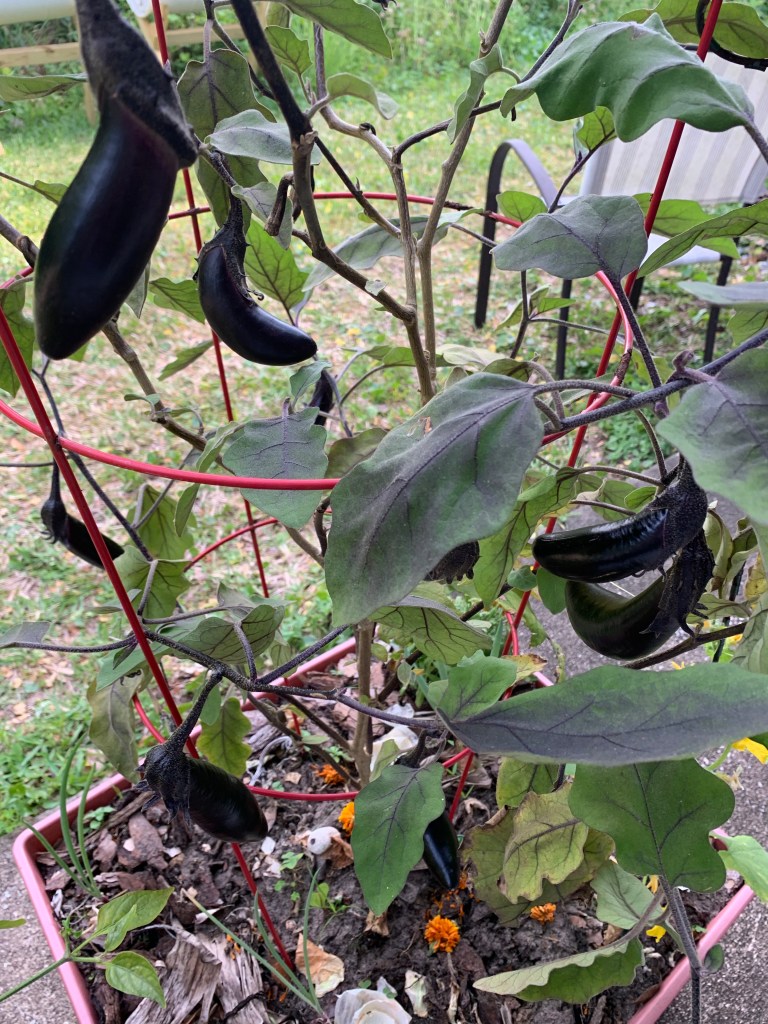
I’ve grown eggplant for a few years now. I had one plant that grew and grew and seldom ever gave me eggplants to eat! Eventually I cut it down. Now I have about five plants growing in various locations and have been eating eggplant regularly.
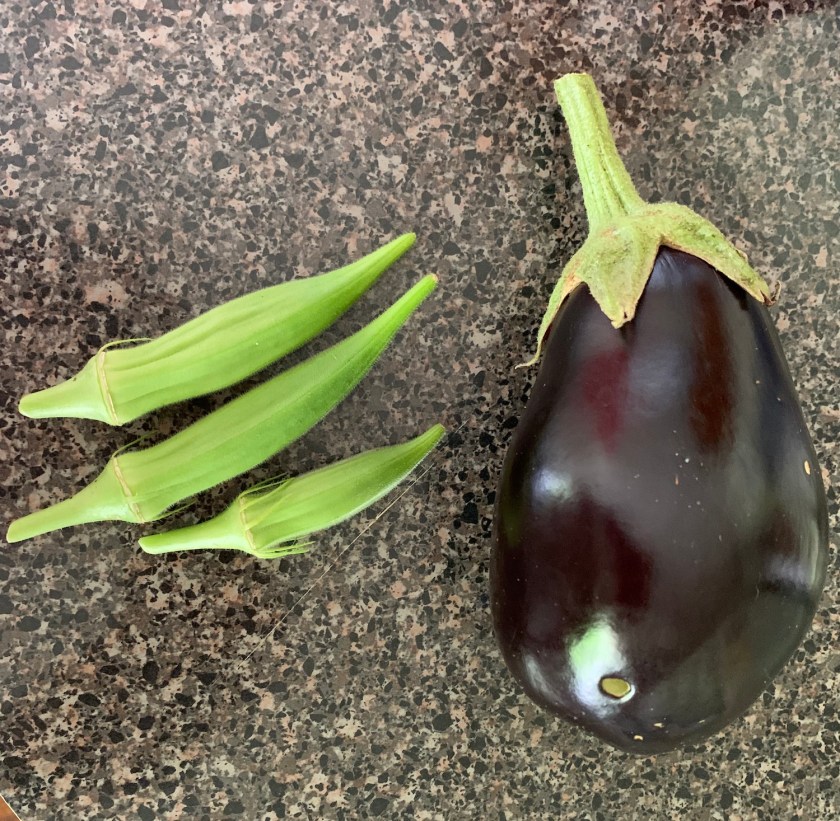
The small, Japanese eggplants are eaten fried in a pan. The larger eggplants are usually baked. *By the end of July, eggplants have pretty much stopped producing.
Eggplants
Okra and eggplant
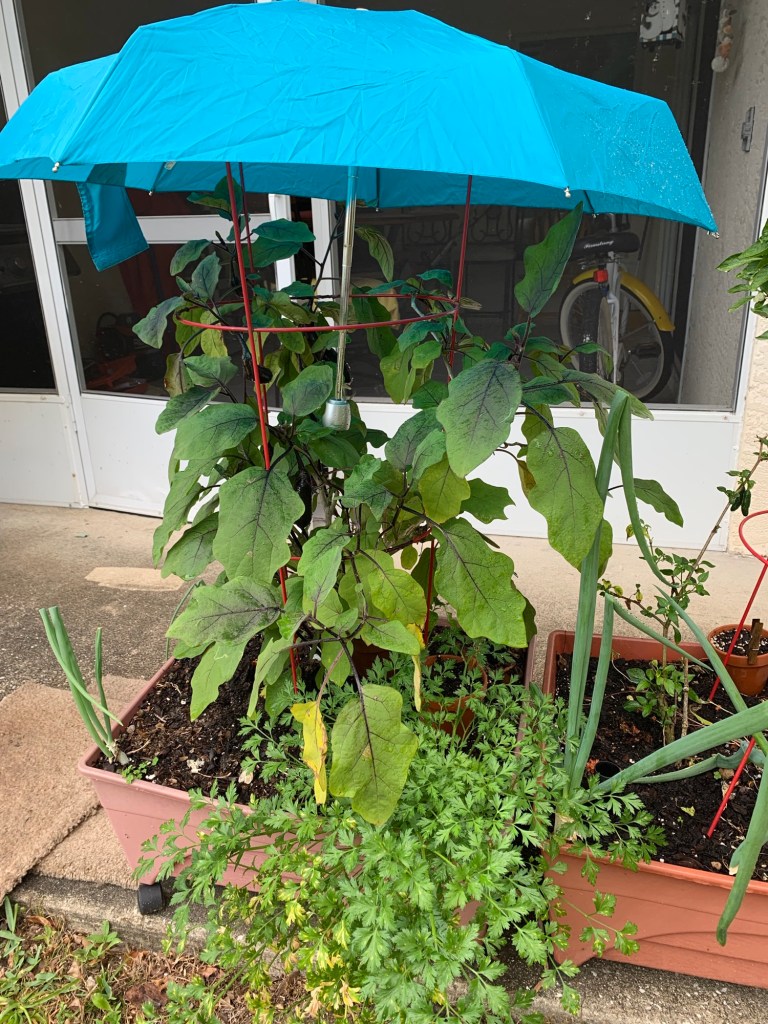
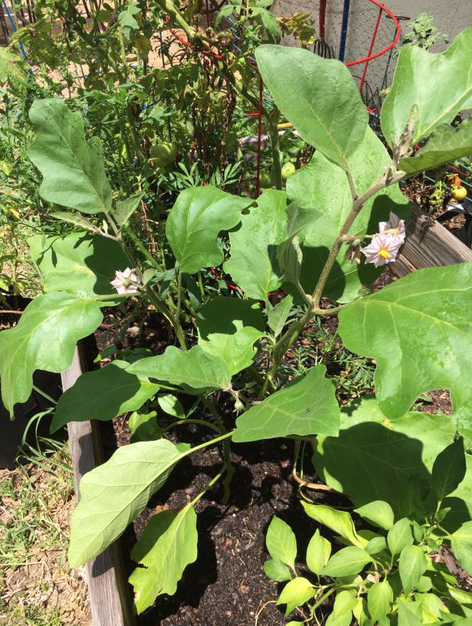
Shade for the eggplant
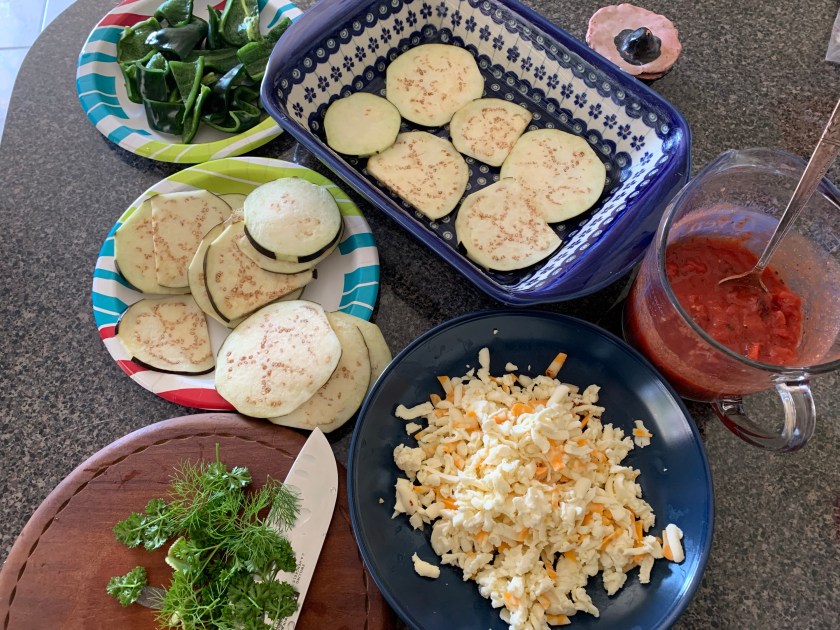
Layering the casserole
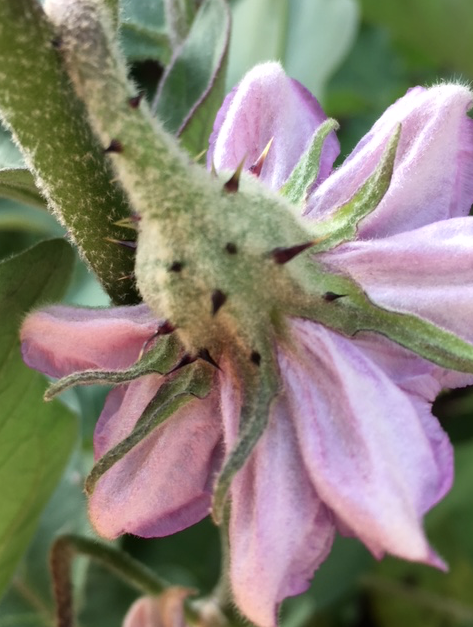
Spikes on eggplant flower
Lady Bug on Eggplant Flower
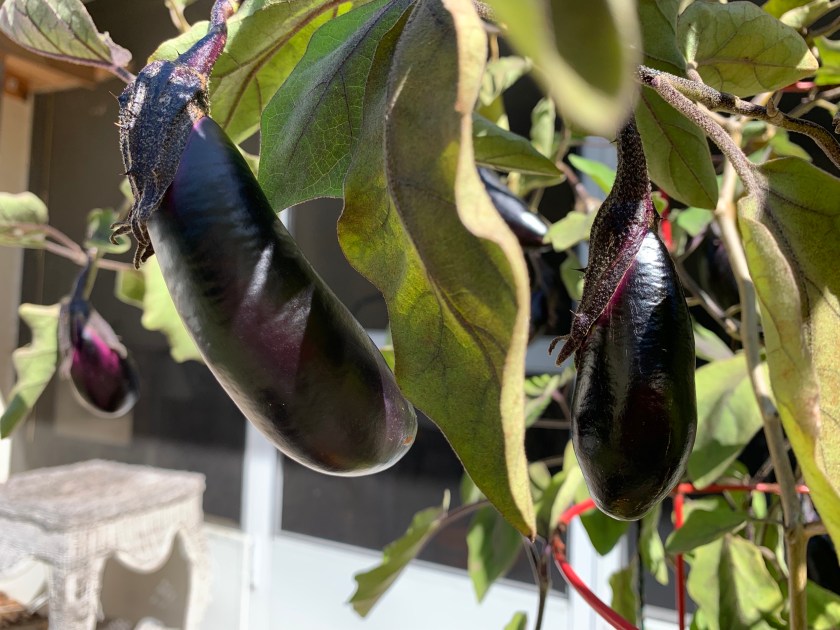
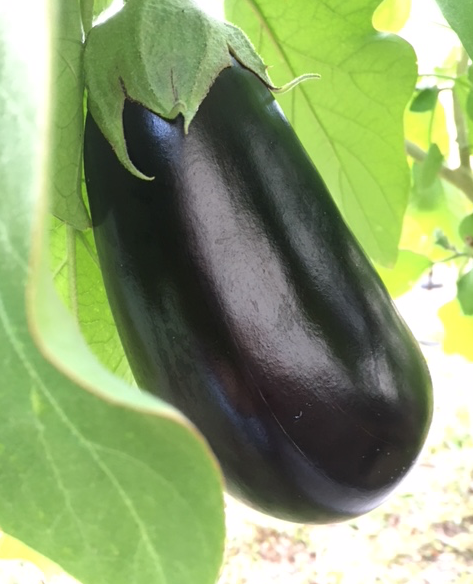
My eggplant!
Eggplant
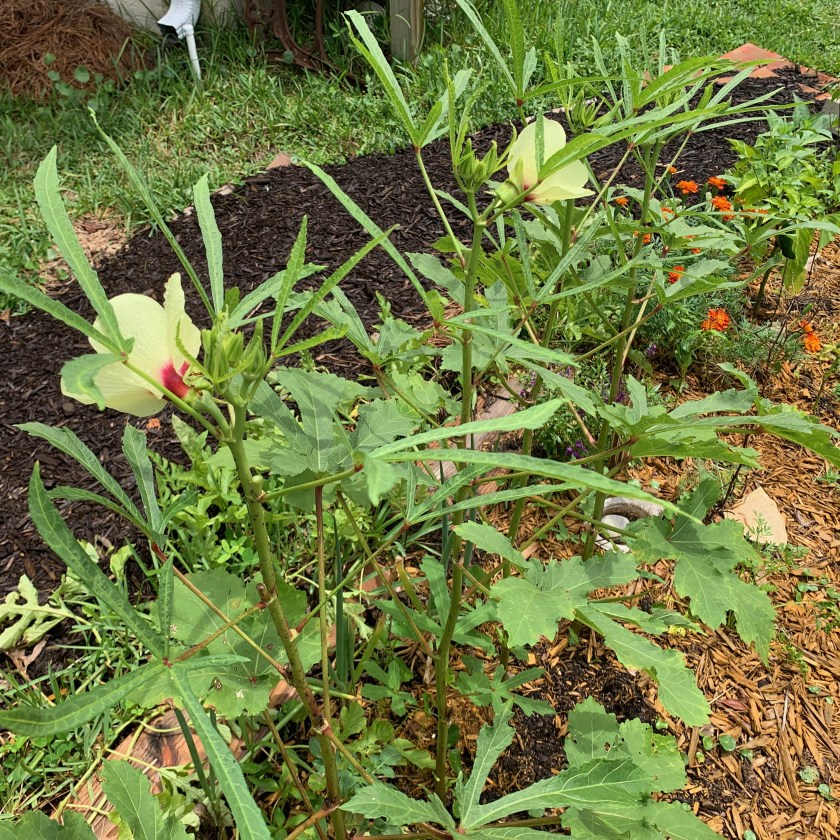
Okra
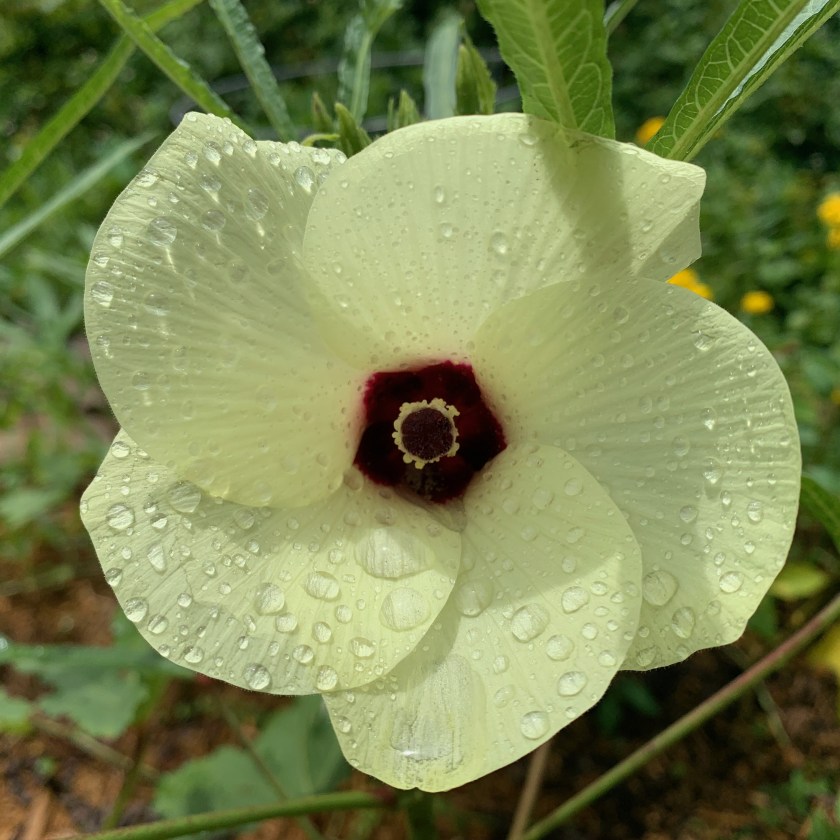
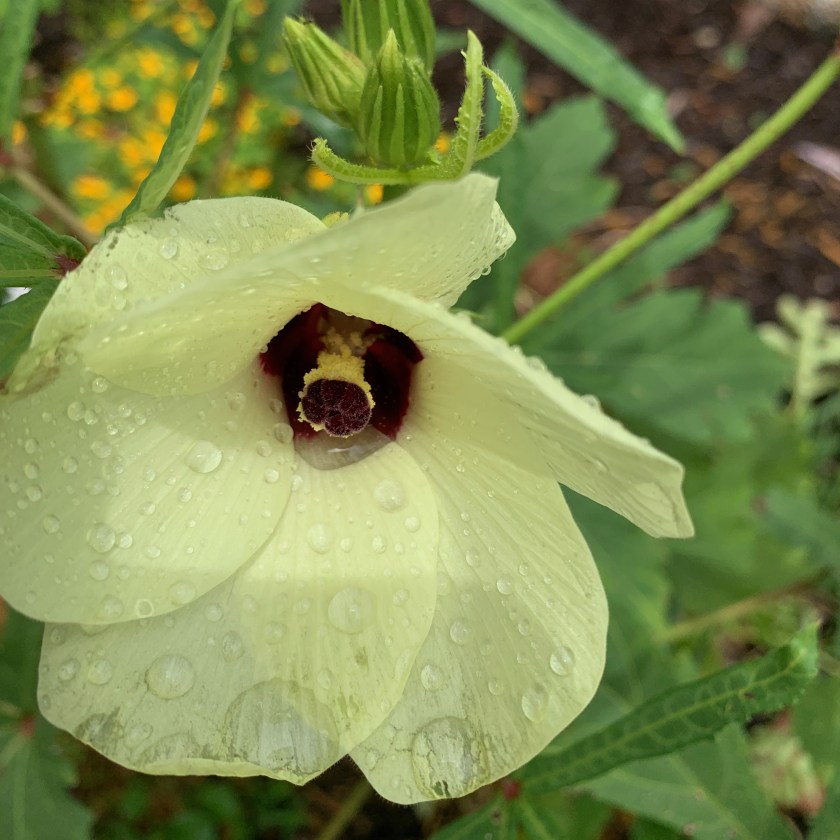
I planted okra seeds into the garden and then thinned them once they began to grow. They grew fast, have had no problems, and are hardy. The flowers are very pretty, but don’t seem to attract butterflies or bees. The problem is, I’ve discovered I don’t really like okra!
I was picking a few okras a day and slicing them to fry and eat with lunch. But the slimy, sticky okra just turns me off.🤮. I want to grow food I like, and I don’t like okra. I’ve begun cutting the plants down to add to the composter. But, I’m letting a few okra pods get big and dry out for seeds. A friend wants them.
Okra plants
Okra flower
Okra and eggplant
Moringa Trees Looking Good
Two Moringa trees grown from seed are planted in the back corner of the garden and look good. I love their lacy leaves.
The Moringa is growing well
Flowering plants – Good and Bad
Zinnia
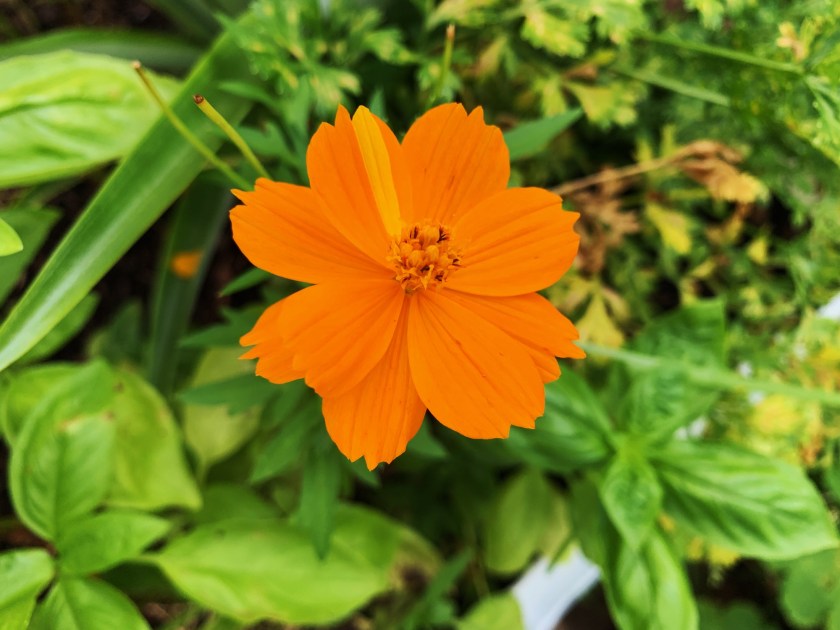
New cosmos from original yellow
New to the yard this year are the yellow cosmos, zinnias, Rudbeckia, Gaillardia, seashell cosmos, nasturtiums, and Amaranth. Marigolds also grew again, and they are always dependable, but *did begin to fall over and split by July.
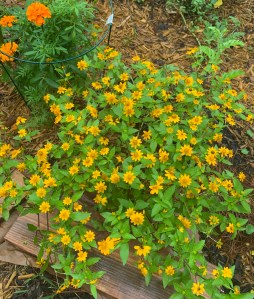
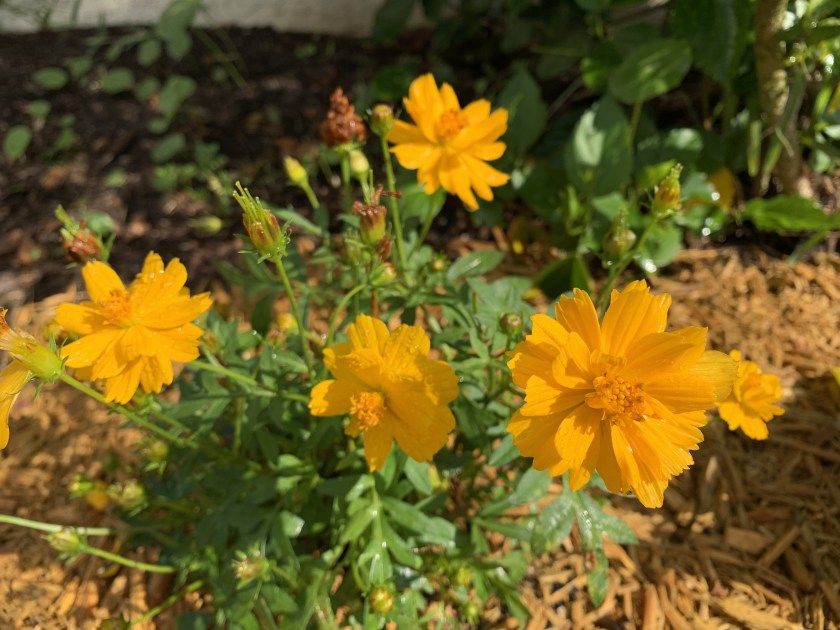
Melapodium
A delightful reader of this blog was kind enough to tell me the name of the yellow-flowering plant above. It is a Melapodium, and it grows well in hot climates.
Of all of these flowers, the Zinnias are an absolute win.
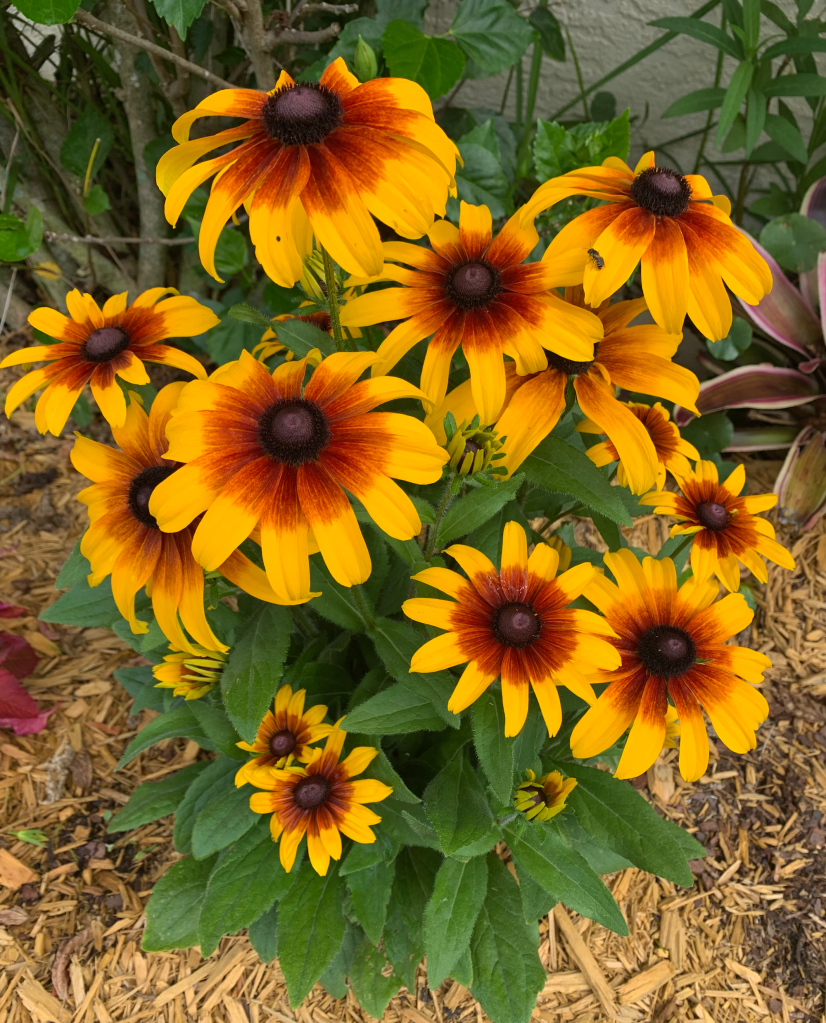
Rudbeckia did great for a while, but the heat brought bugs and I had to cut the plant way down.
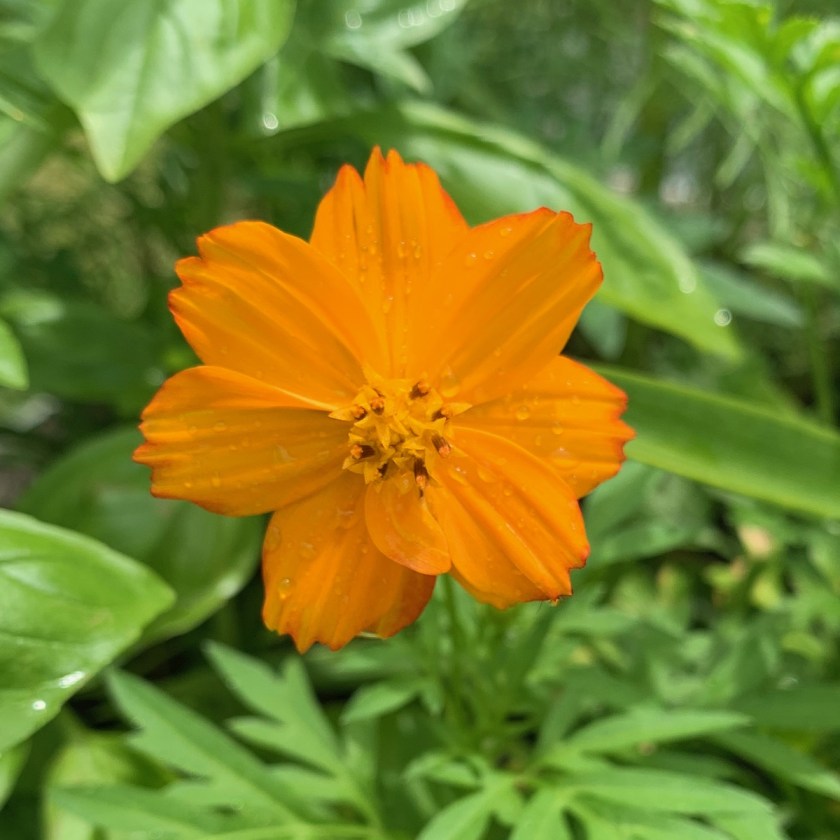
The yellow cosmos, which has very different leaves from the frilly leaved cosmos, didn’t do well, but the seeds I collected from it, and threw into other gardens, grew great! So, maybe the original plant was not in a good spot. Now I have lots of new little plants growing. One of them is producing orange flowers. This flower has a remnant of its original yellow as a stripe on one petal. See the original plant in the slide show below.
Orange flower, from yellow plant seeds
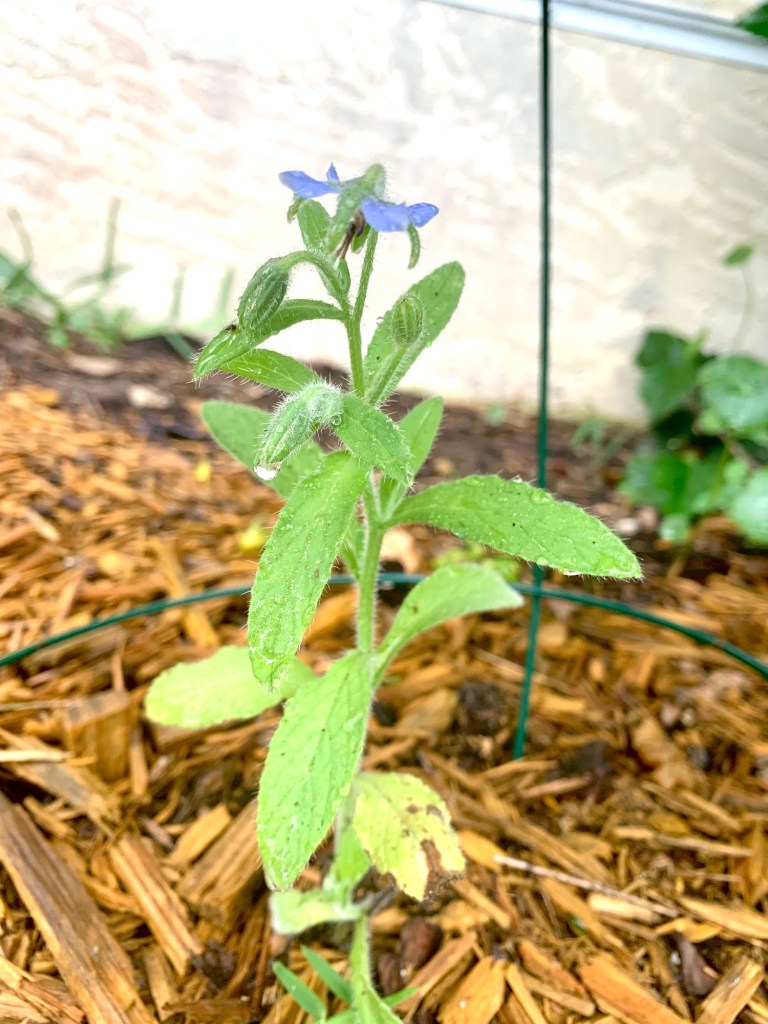
Borage hates the sun and heat, so I have covered it. Nasturtiums did horrible. Amaranth has done nothing, so I’m not sure yet if it’s a win or fail.
Rudbeckia began great, then had to be cut back
Zinnia
Zinnia
Yellow cosmos – original plant
Seed from yellow cosmos
Marigolds doing great
Borage is not happy
Unknown
Now For the Fails
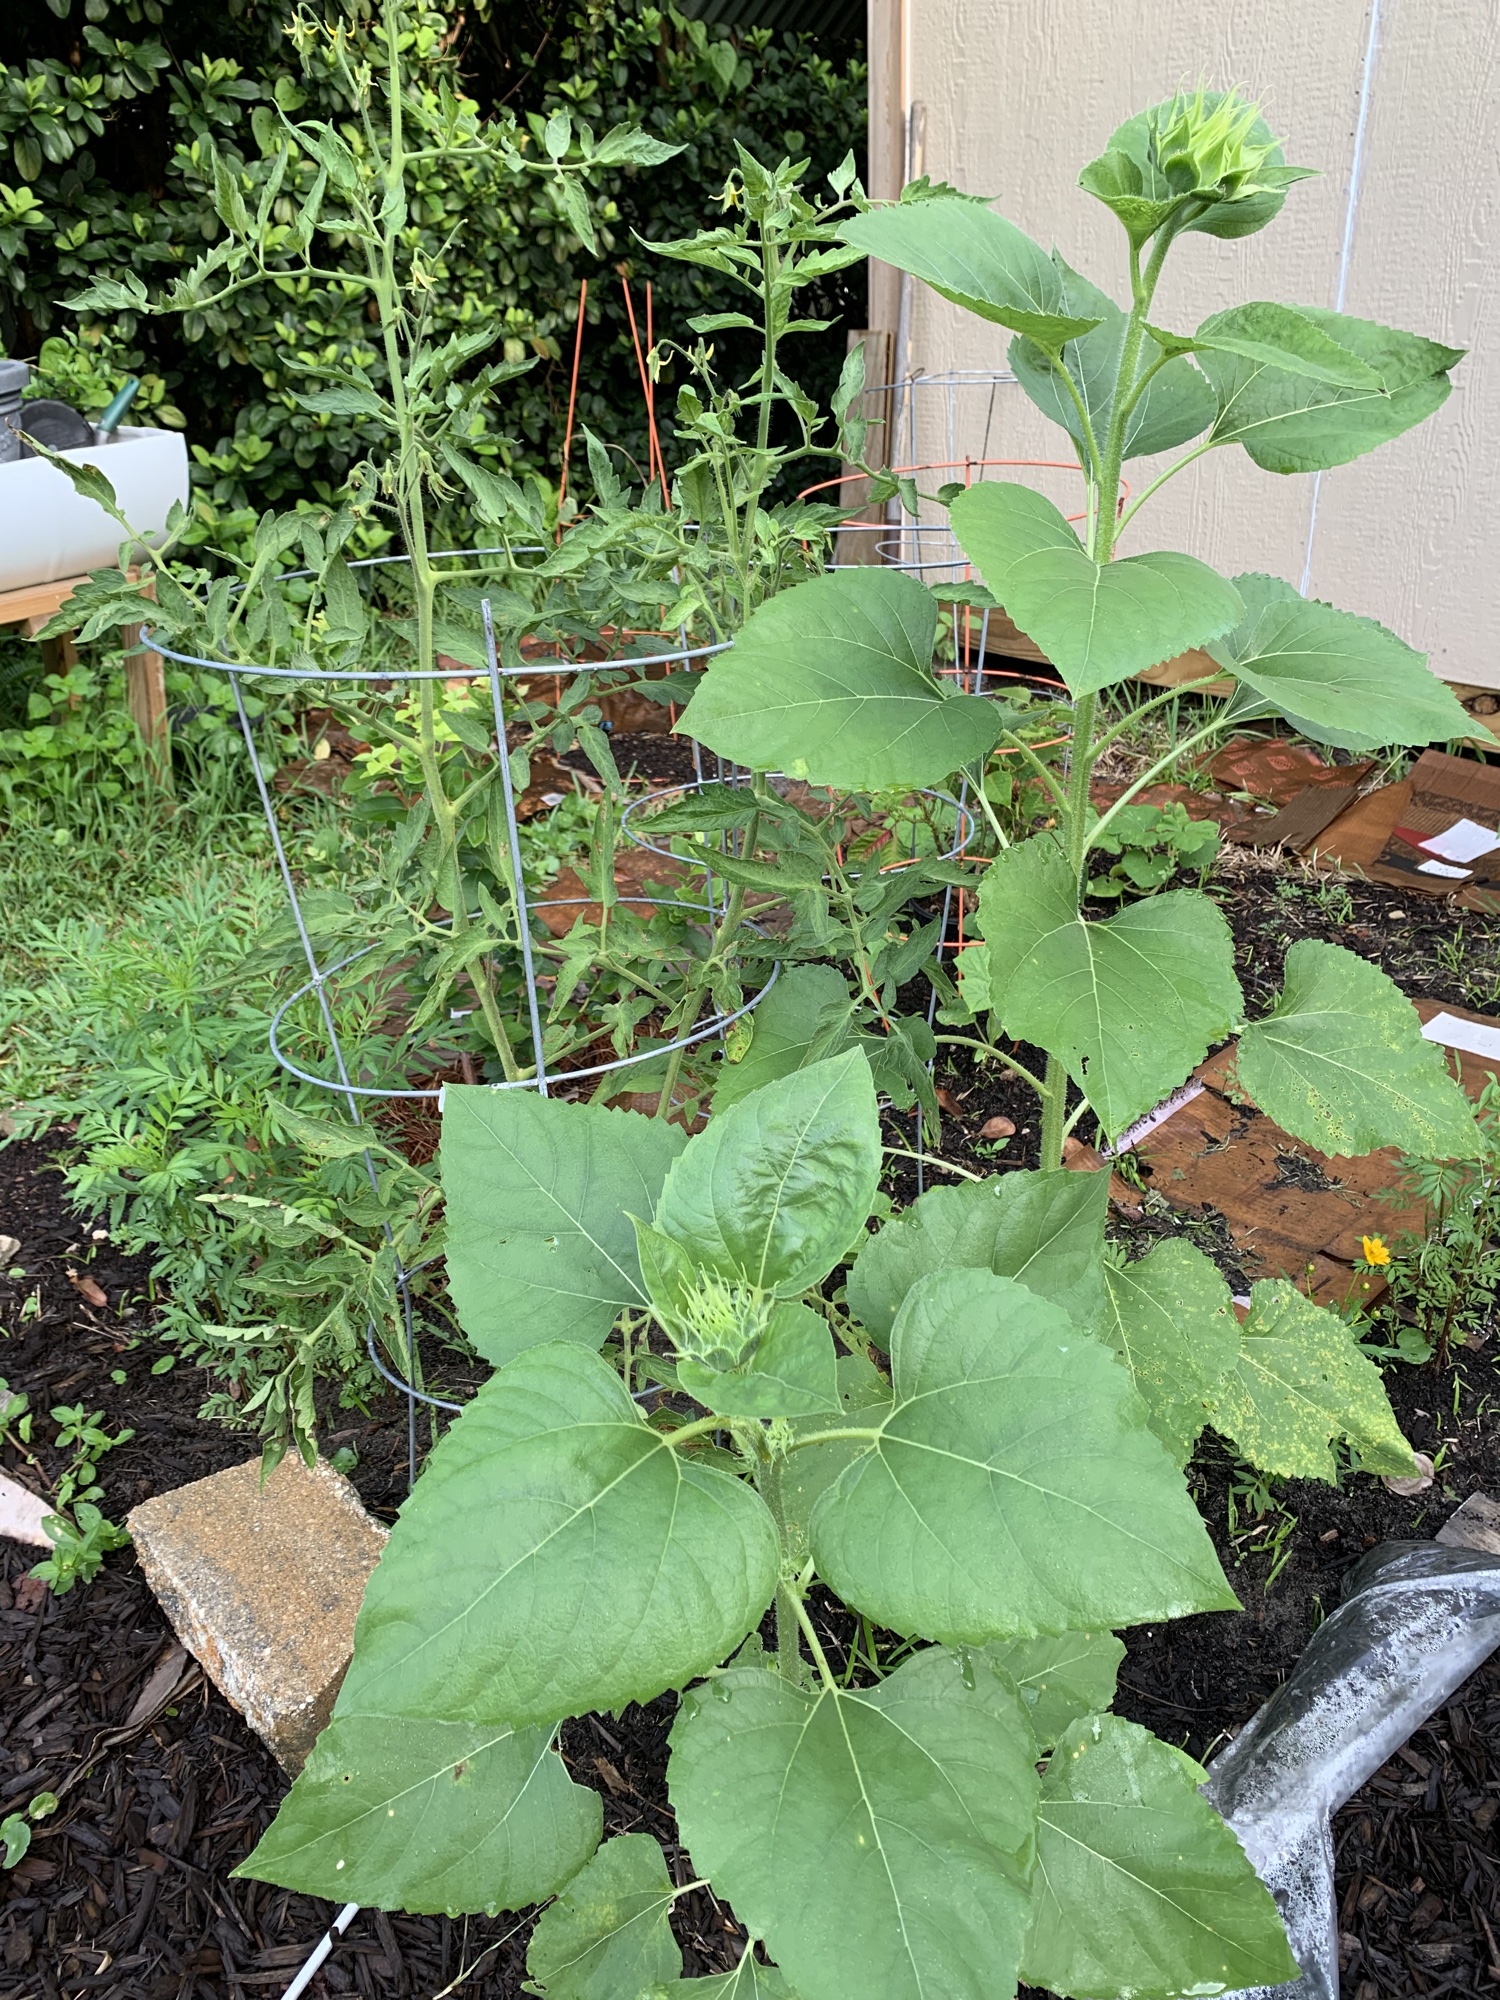
My vegetable fails for summer were tomatoes and Swiss chard. I had grown a bunch of cherry tomatoes, but really wanted big tomatoes. I KNOW they don’t like the extreme heat. But, I had one plant already growing so I planted it. The plant is looking great, but no fruit is forming. I’m going to let it grow and maybe it will get tomatoes in a couple of months.
Here’s the tomato plant behind a couple of sunflowers. Tomatoes are suppose to be planted in February here, I believe. That way they are all done by the time the real heat arrives.
Volunteer sunflowers
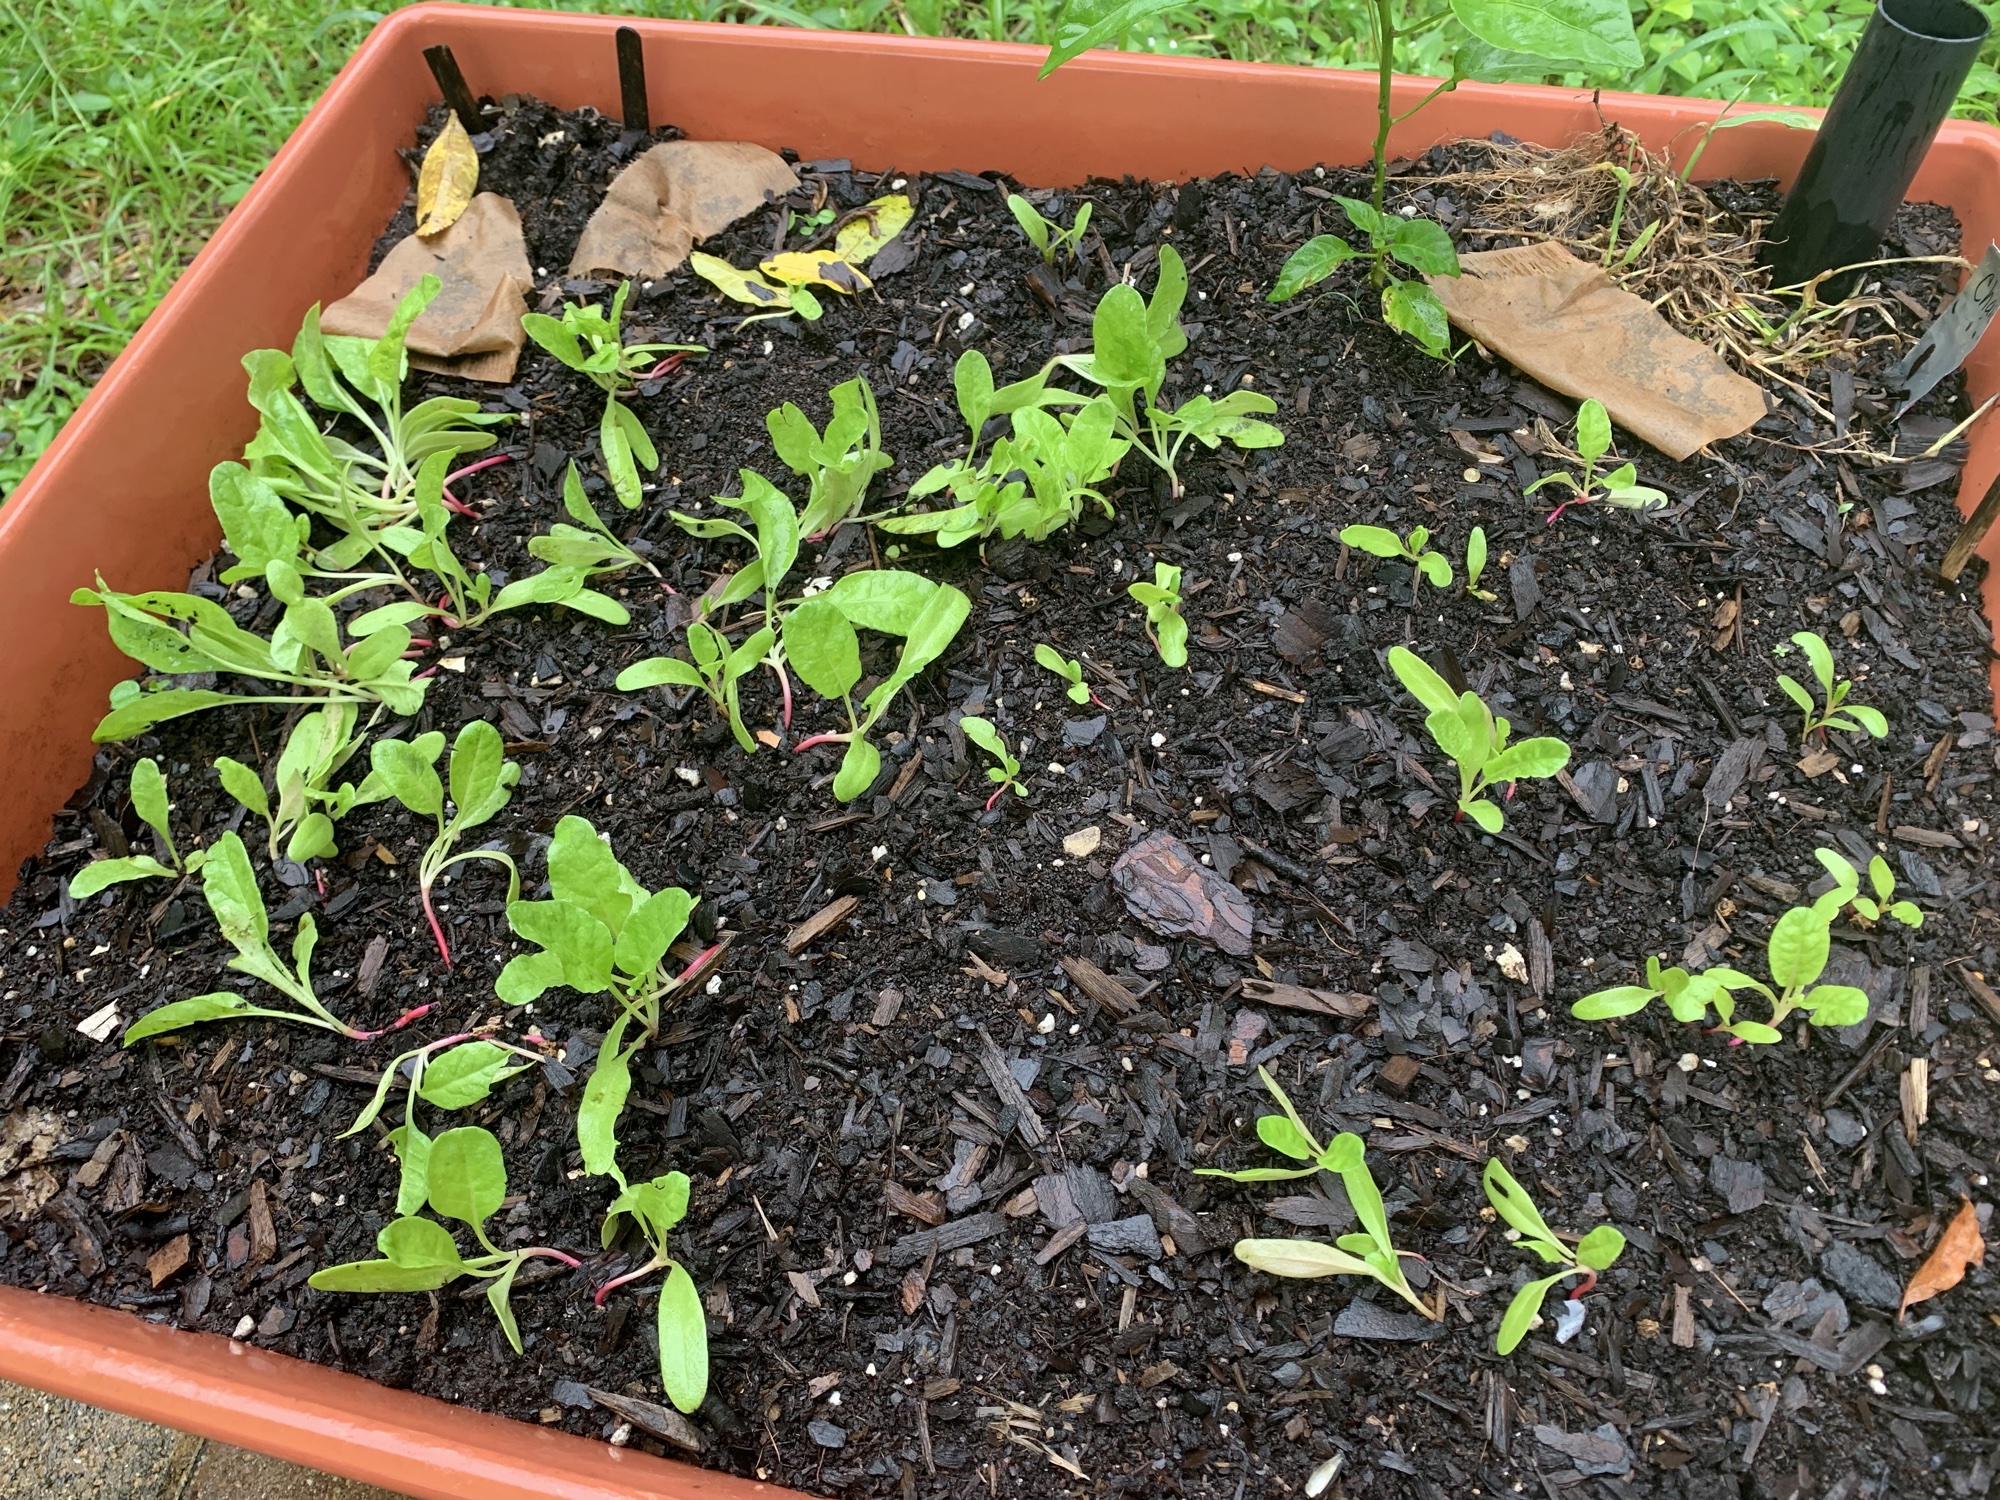
swiss chard
Fordhook chard
I planted Swiss Chard twice, in two different varieties and they fall over and don’t grow.
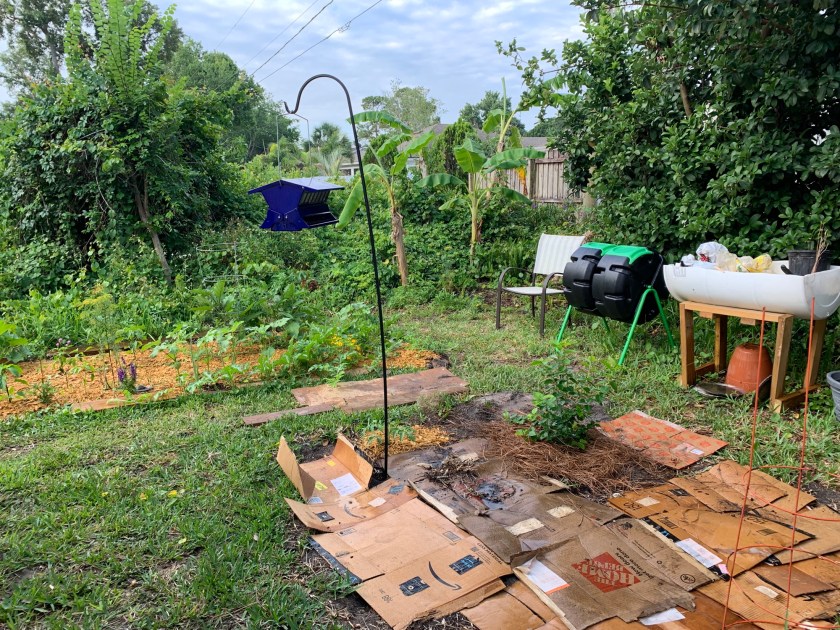
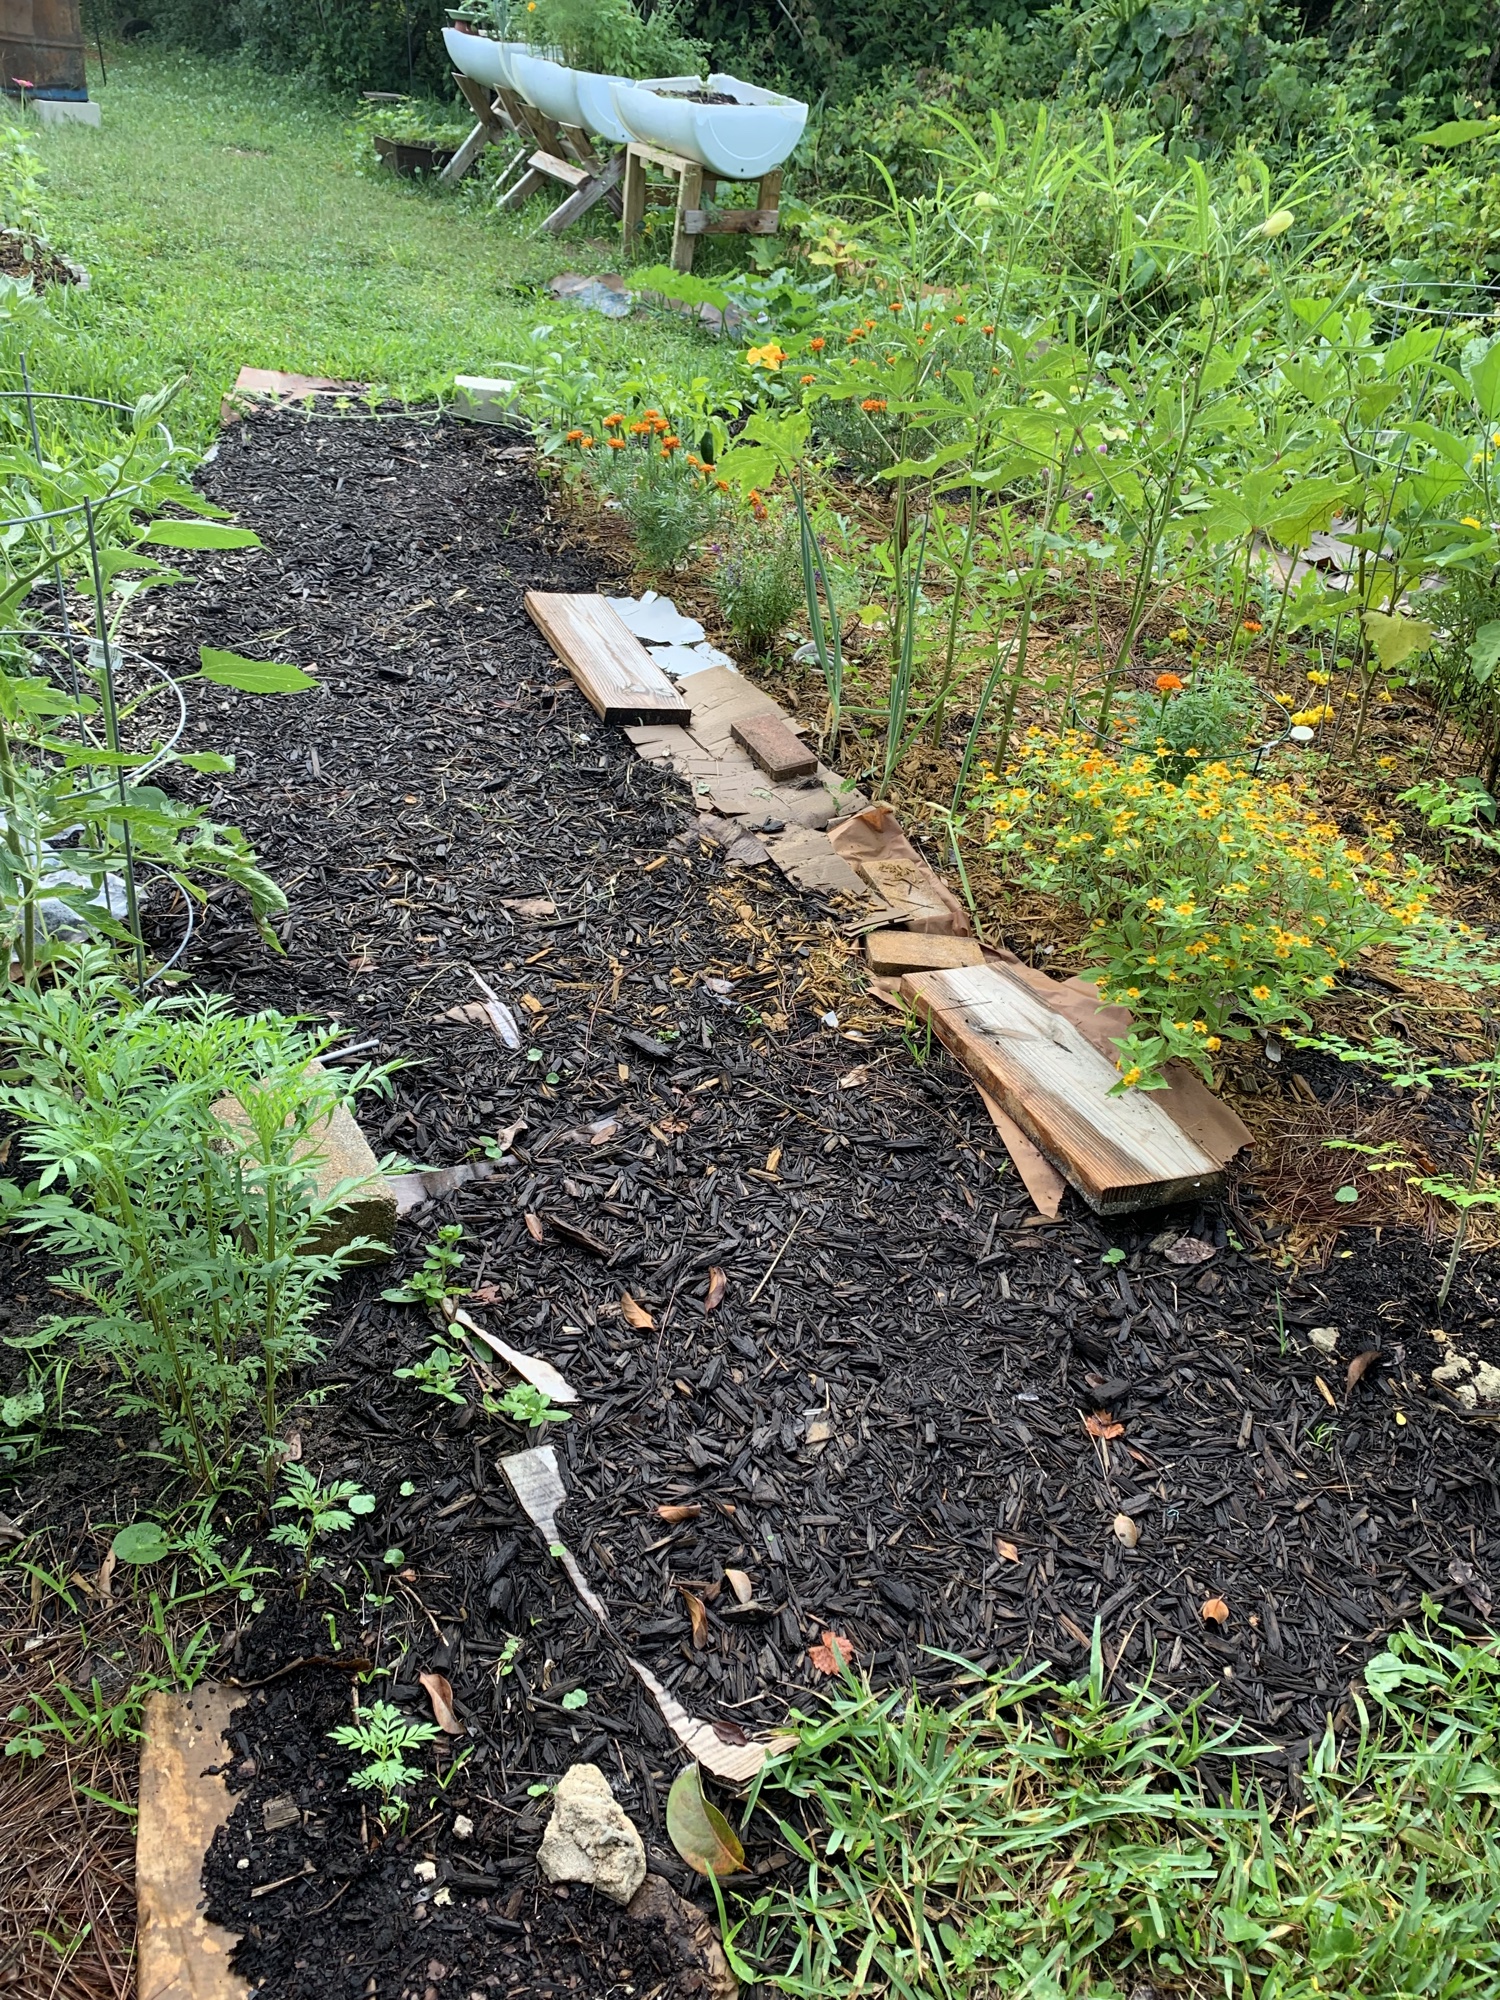
Cardboard boxes and paper get recycled into the yard as I plan out spaces for my flower and vegetable gardens.
It might look messy for a while, but cardboard boxes can be recycled as ground cover in the yard and garden. They serve several purposes in fact.
We get a lot of deliveries coming in cardboard boxes and now that I am planting, they have become useful in the yard. I keep all sizes!
Cardboard keeps the ground cool and weeds from growing
I began using cardboard and newspaper when I gardened in New Hampshire. In order to create a new garden space for the following summer, I would layer paper and cardboard over the garden spot and leave it all winter.
Florida growth is different, and quite difficult to control, especially since it gets to grow year round! In winter it slows down, and many vines die back. But, in summer it’s like some horror movie where the vines grow faster than I can cut them back. And everything here grows by vines and runners.
Soil Protectors
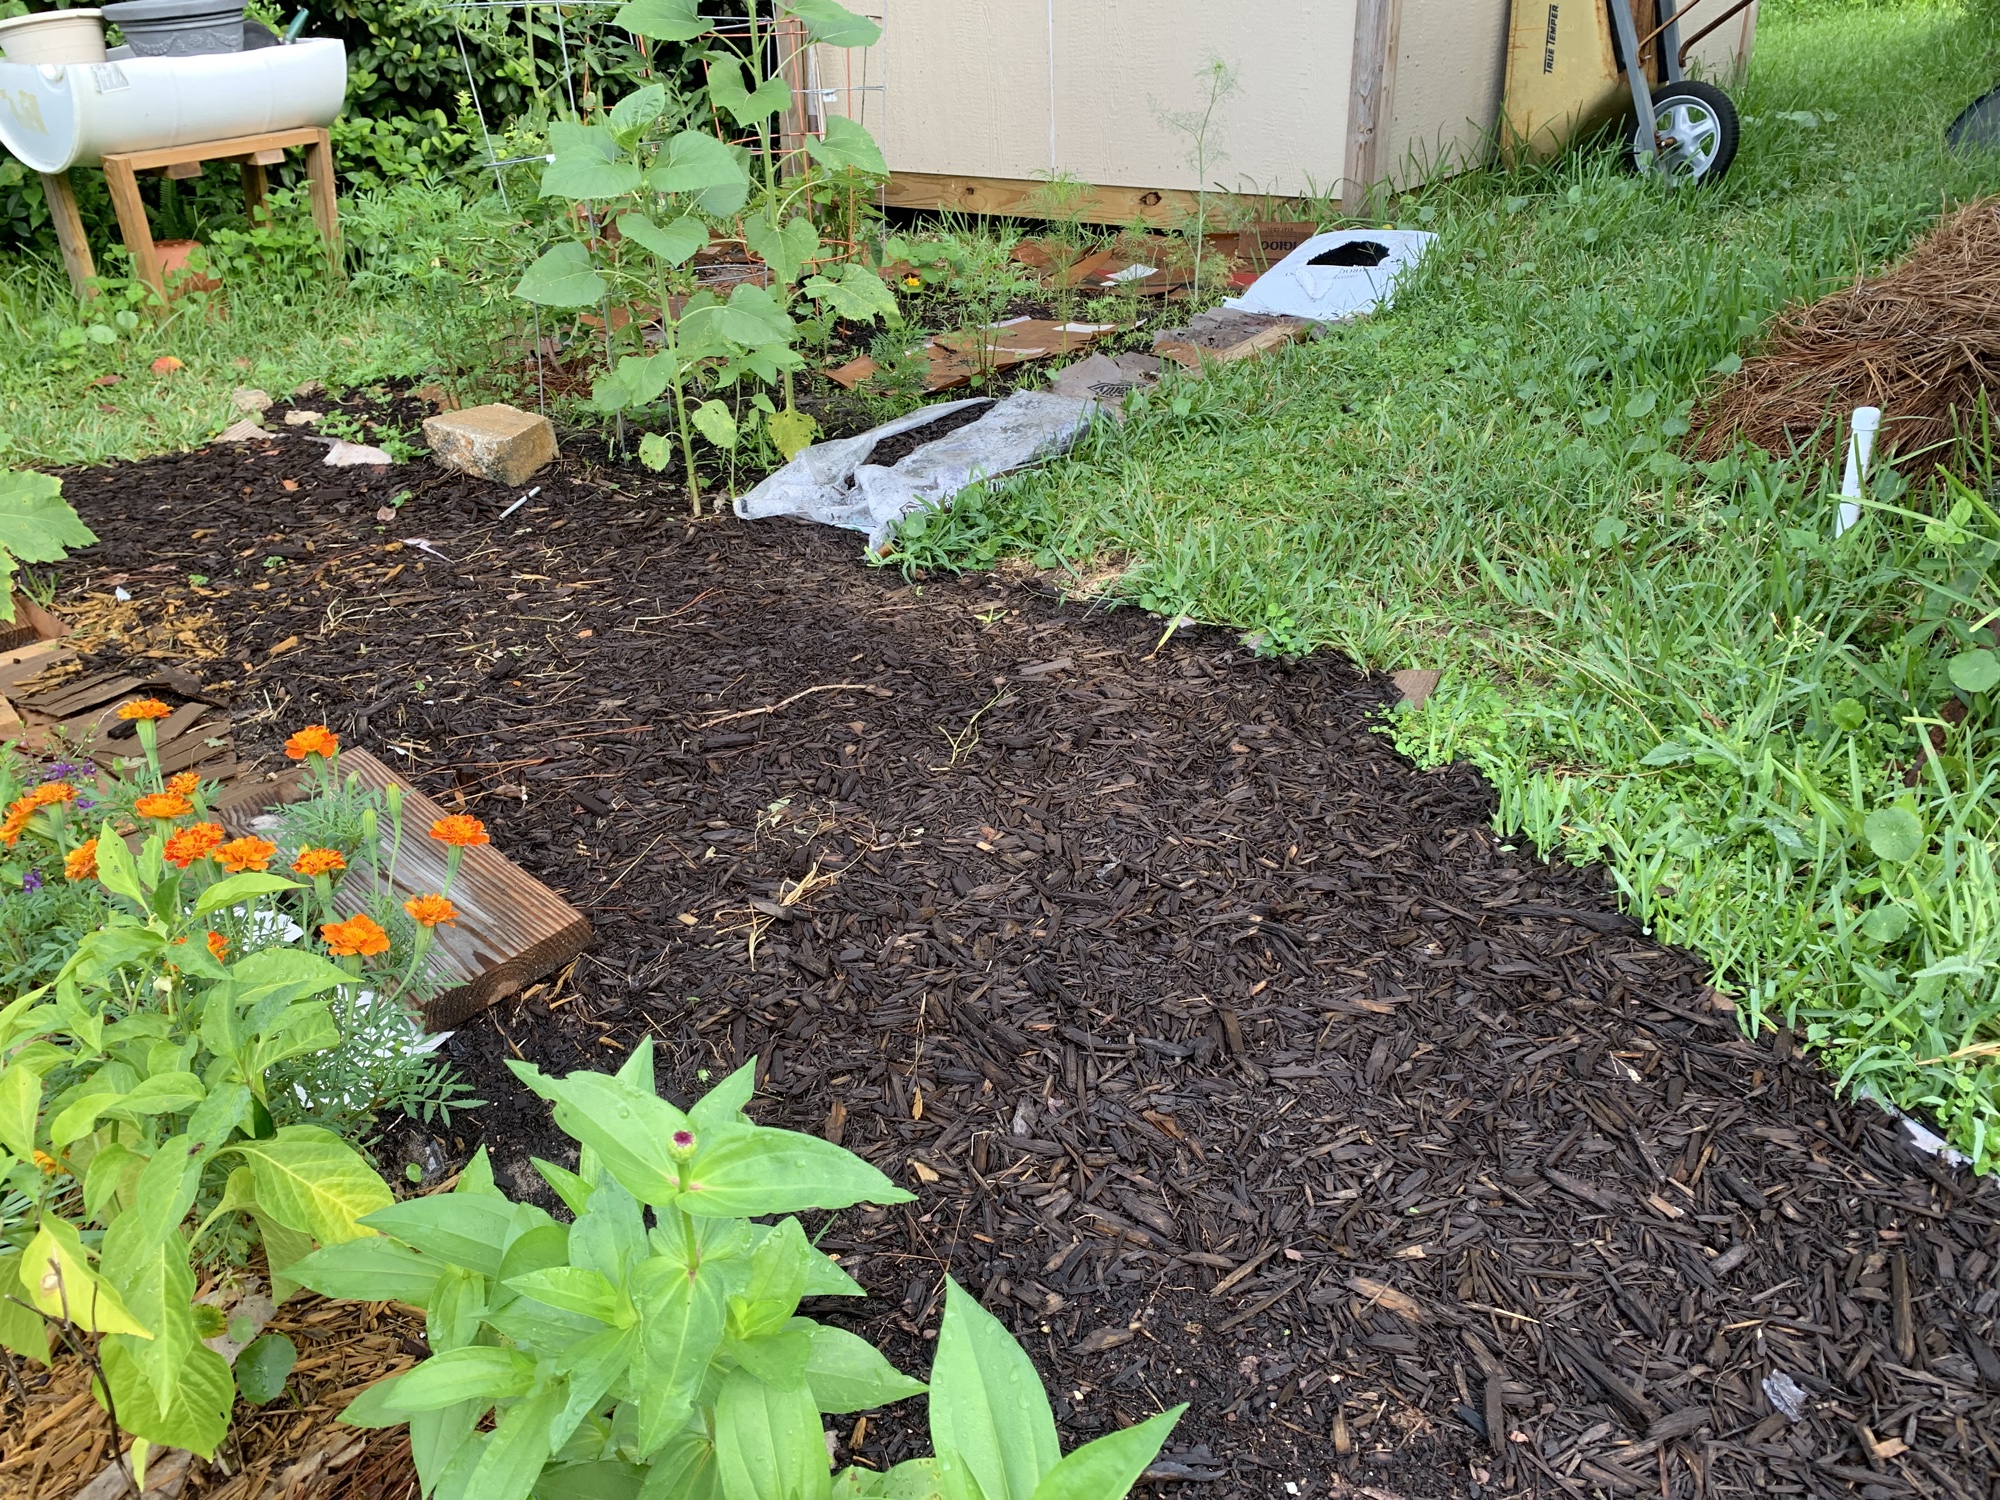
Now that it’s hot, I am using my old boxes to keep this bare garden cool and wet as I plan what to plant.
The cardboard works great to keep weeds from growing. It is also perfect to create quick walkways. It’s helpful to have some mulch or dirt to put on top, but when it’s wet, and not windy outside, it will stay in place.
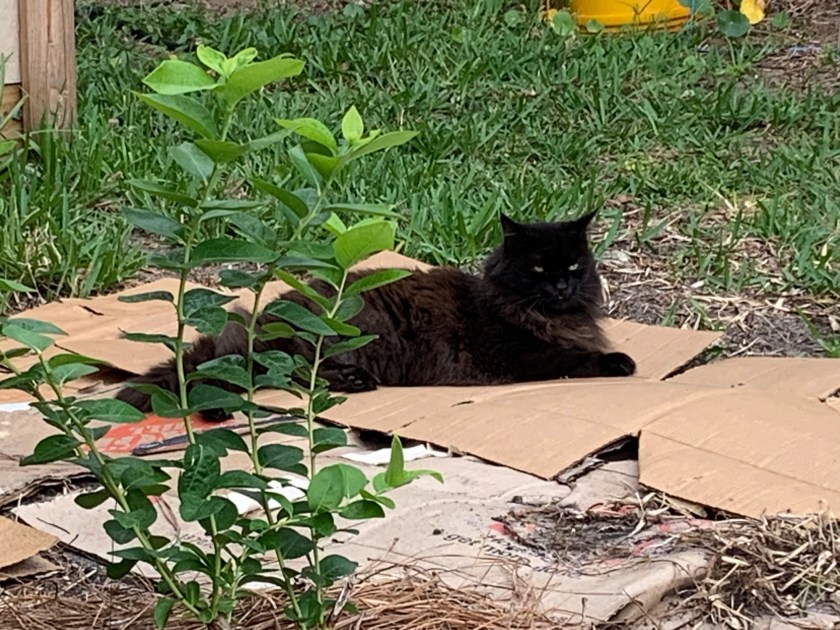
Fontana enjoys this place to rest
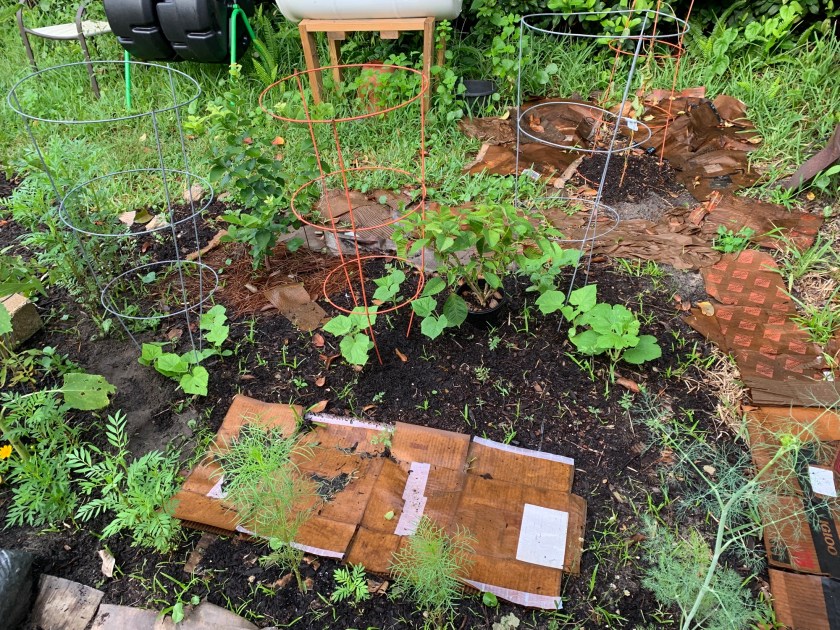
Once the garden area was tilled, I had nothing really to plant. Placing cardboard over the dirt keeps the weeds and grass from filling back in. Fontana likes it too. I’ll be planting here in Fall – oops, I planted here in July. One tomato seedling needed a home, so I planted it here. Also, two sunflowers sprang up on their own! Next I put in some Suyo Long cucumbers, which are supposed to do well in the heat.
Volunteer sunflowers
Summer garden
Outdoor Cat Beds (and Walkway Markers)
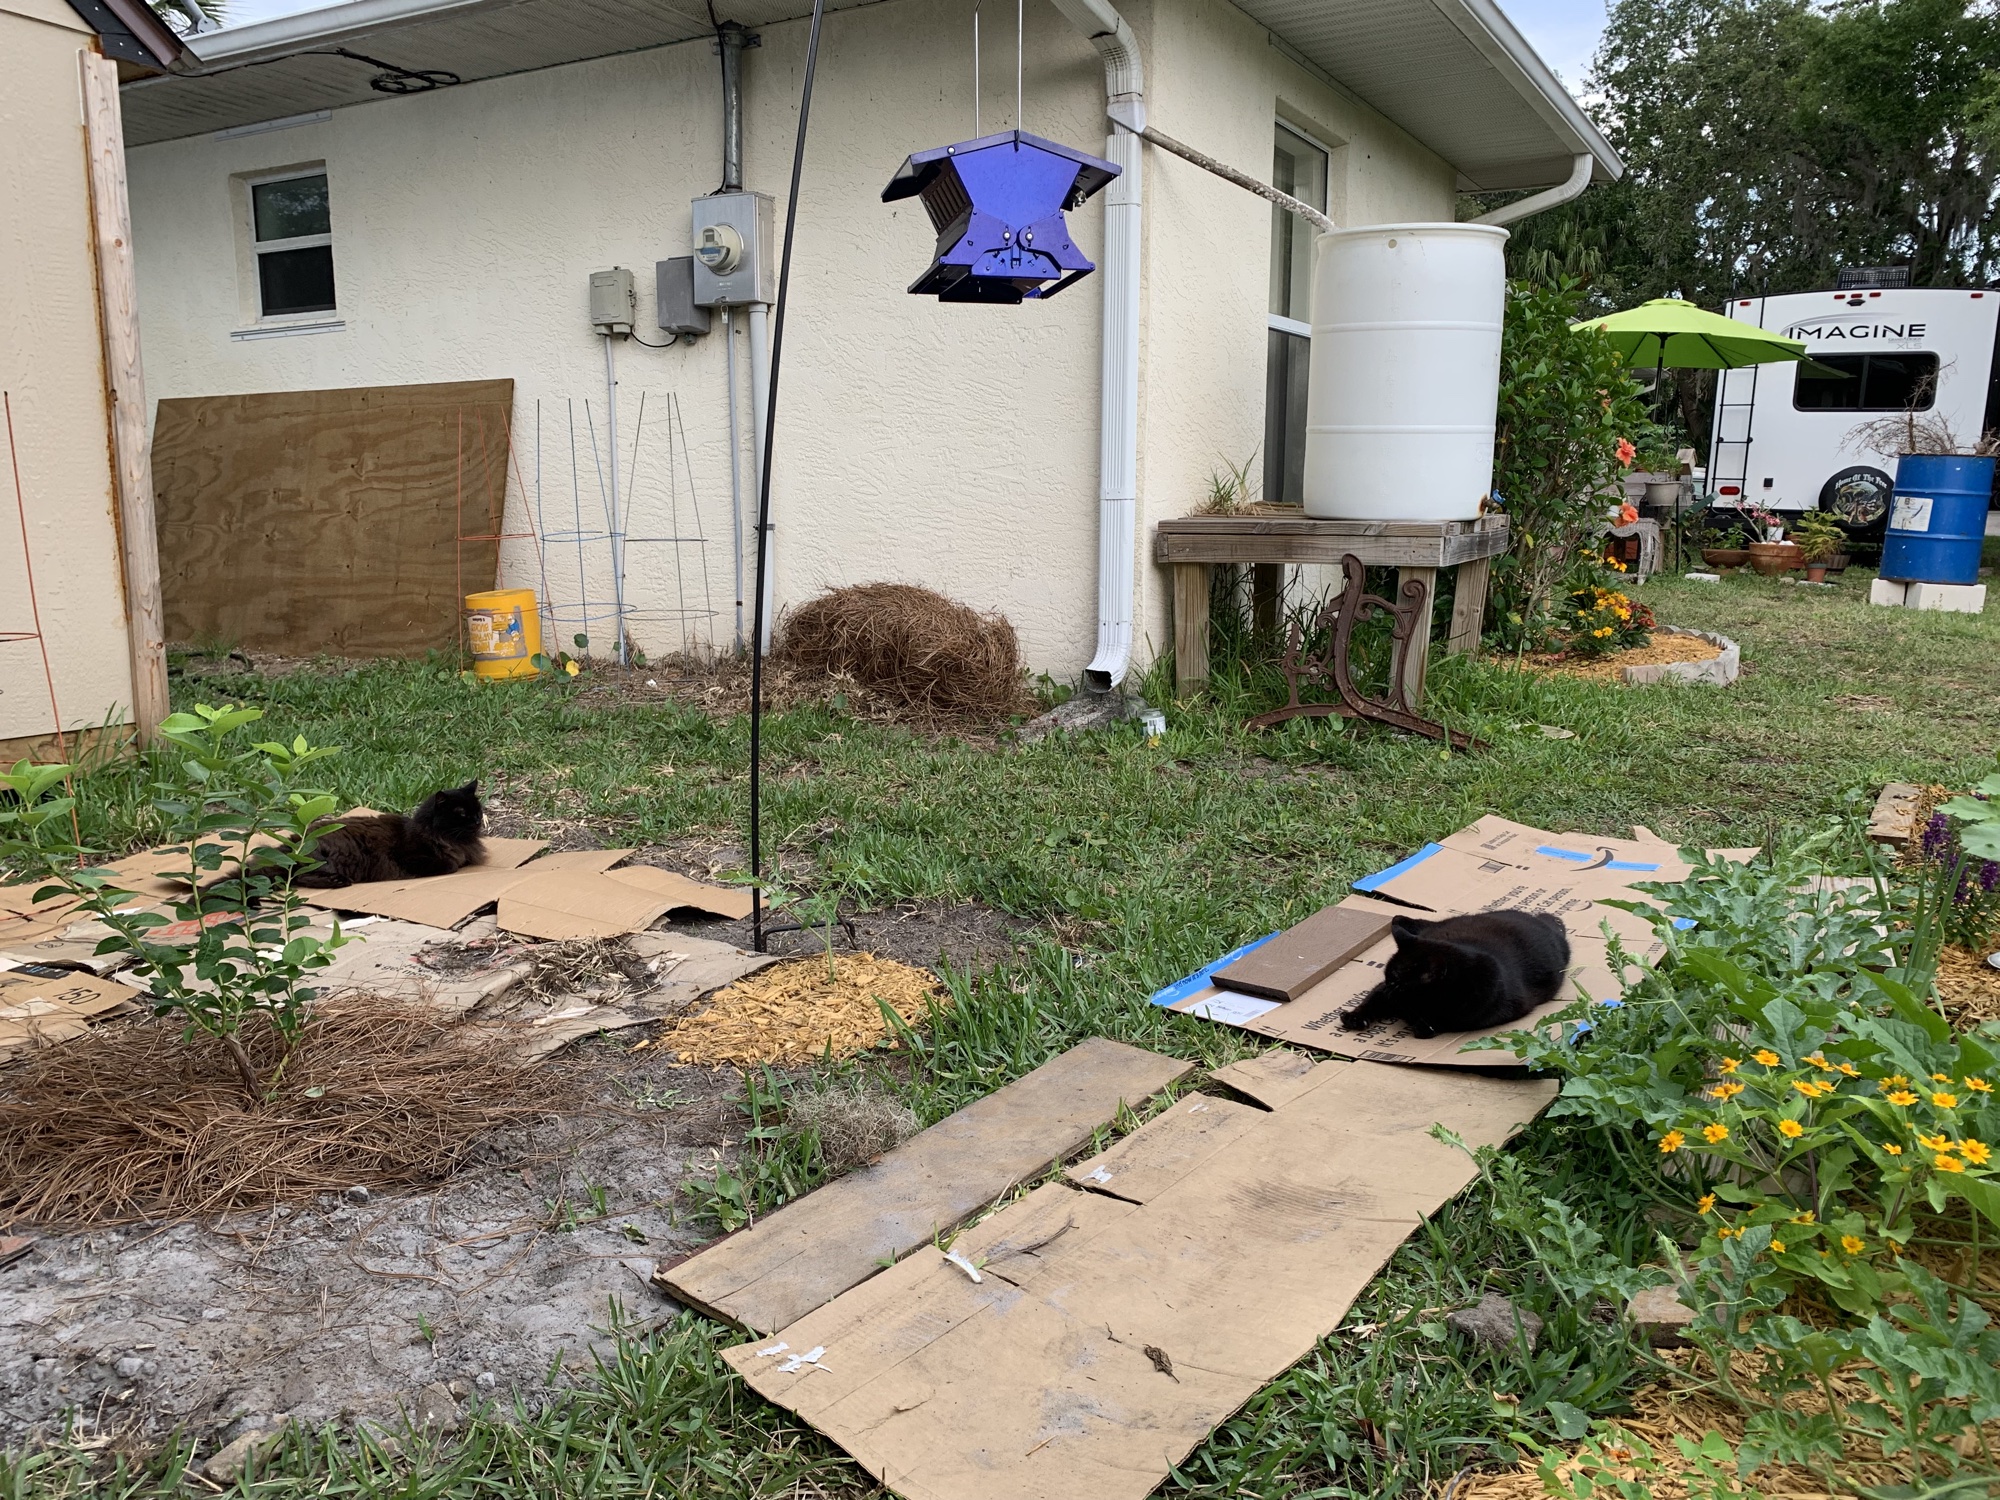
I’ve noticed that here in Florida, placing cardboard on grass won’t kill it. The runners just come out the sides and continue on! The grass here is tough. But by using cardboard and then mulch on top, you can make yourself a pretty nice walkway. Once the yard it covered, this will be much more manageable.
Garden path in the works
New path
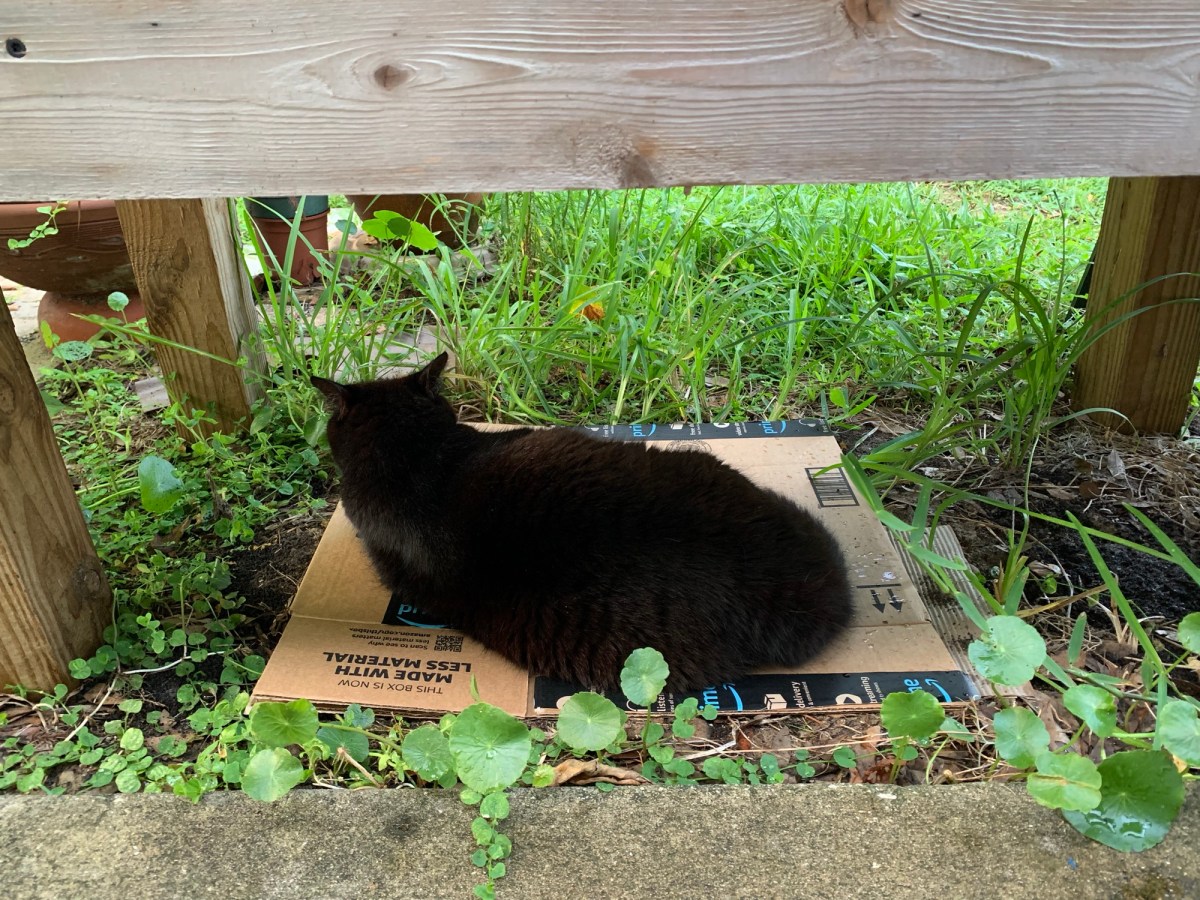
Skittle’s Bed
My black cat Skittle has a favorite, shady outdoor spot. She sleeps under the raised, wooden bed my son built. When the cardboard gets wet and dirty from rain, I just switch it out with a new piece, and use the dirty piece for the garden.
Cardboard cat bed
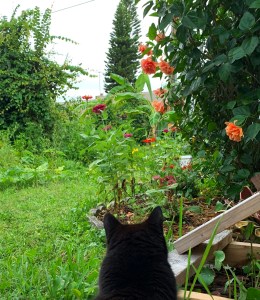
By the way, even though it’s very hot this time of year, my cat loves to be outside. She stays in the yard, ignores the birds, and comes in every so often to cool off and eat. I don’t know how she stands the heat, but she loves it. This is her happy place.
Did you know that earthworms like paper and cardboard?
I find lots of nice, juicy earthworms under Skittle’s bed! They like that cool space too. Sometimes I will move the worms into a garden bed. I do have a lot of worms in each of my raised beds, which I worked at.
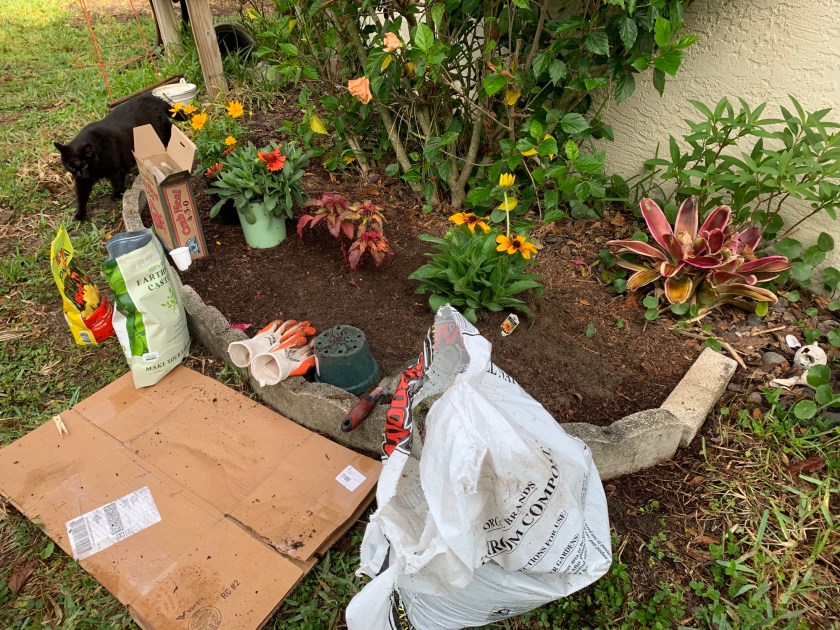
Kneeling Mat For Planting
What is there to say? I kneel on cardboard to plant gardens when there is a good size project to accomplish.
A piece of cardboard for kneeling while planting
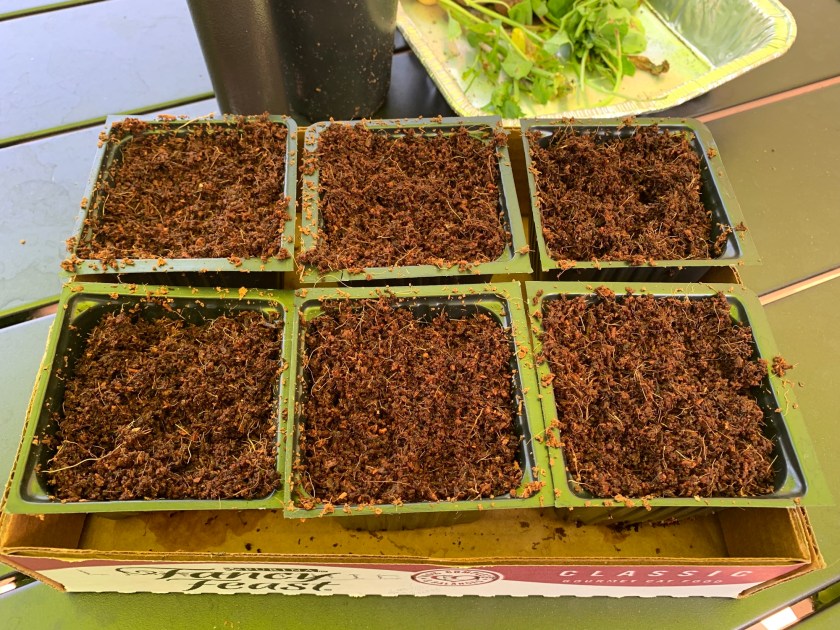
Cardboard Tray For Little Pots
Any time I get these cool little trays made of cardboard, I keep them. They can hold garden things, or be used to move small pots indoors. They won’t work well for pots that need to be watered, but this coconut coir takes a while to dry out.
I also keep some little cardboard boxes in the back of my car. They work well for bringing new plants home from the nursery!
Coconut coir pots for catnip seeds, placed in a cardboard box.
Moving Boxes and Their Many Uses
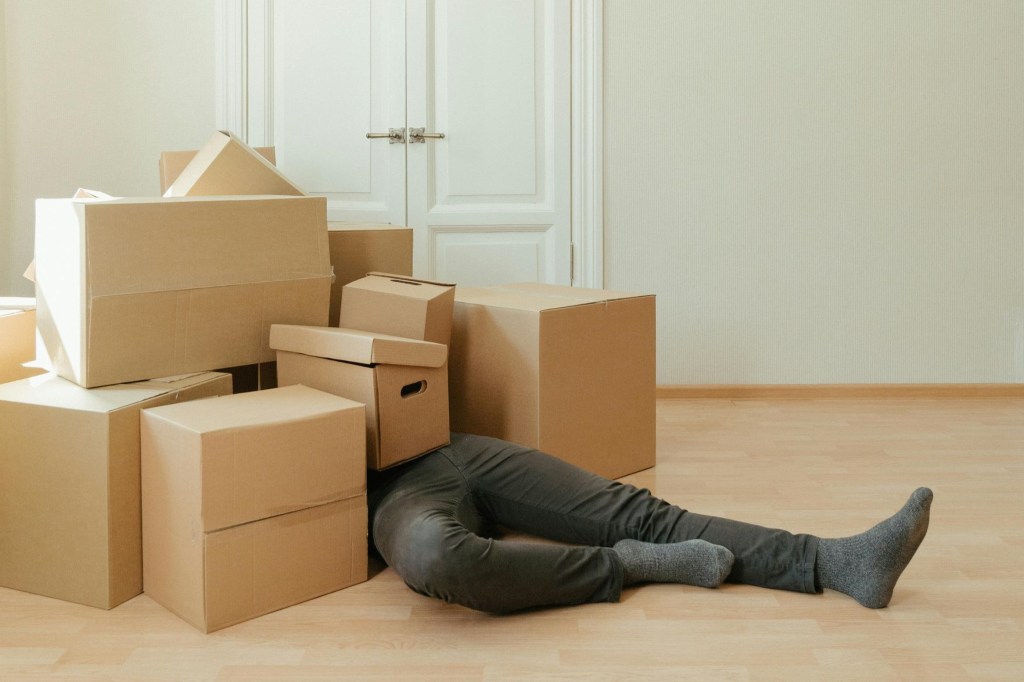
Did you just make a big move? Many Floridians are new to the state. If you have just made the big move, the cardboard boxes may be overwhelming your space.
We’re featured in Rent.’s 10 Ways to Get Rid of Moving Boxes article. Find out what we had to say here!
I managed to grow three watermelons in my Florida backyard this year. Here is how they turned out, and how I figured out when to pick them.
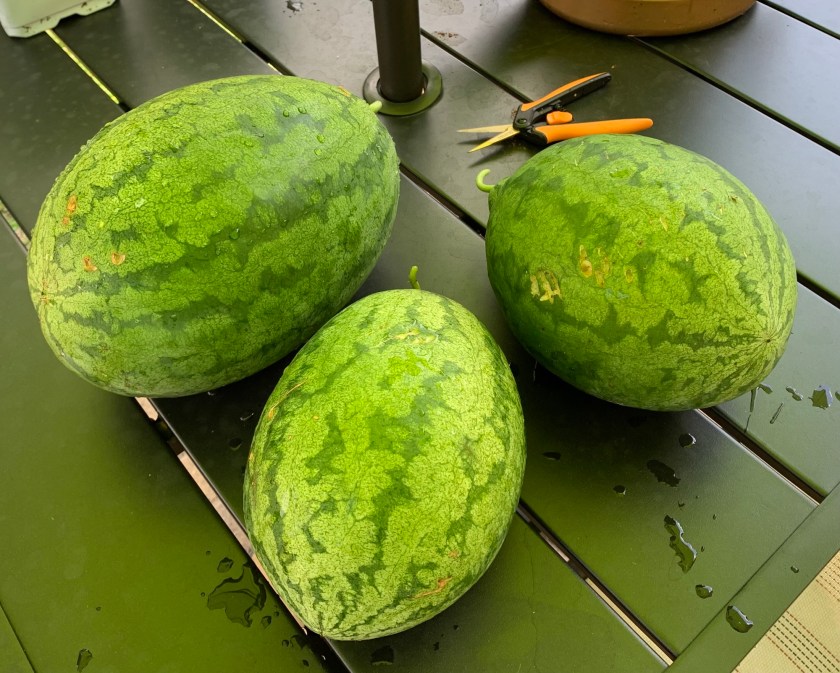
On April 8th I planted watermelon seeds. On June 30th I pick three watermelon from my backyard garden.
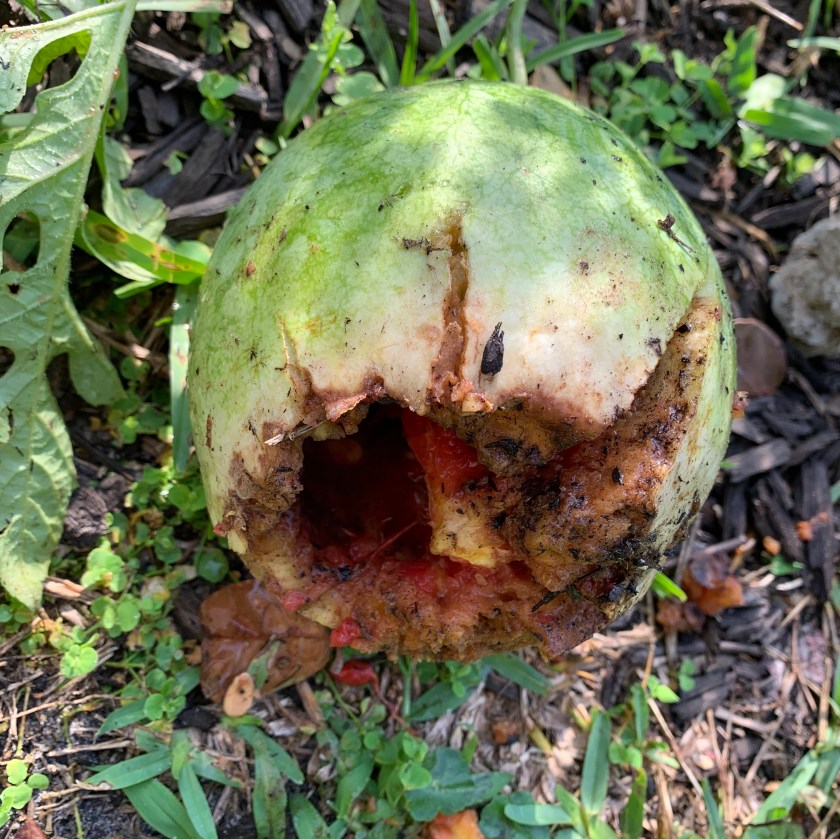
As I do every morning, I walked the yard and inspected the vegetable garden. Usually I have a couple of okra to cut (yuk), but my main inspection goes to the beautiful watermelons growing. I’ve never in my long life be able to grow watermelon. This year I had four beautiful melons growing.
As I came to the garden I saw that one of the watermelon vines was pulled back from its usual spot, and then I saw the chewed melon. It was the smallest of the four melons, and probably the easiest for the raccoons to get into.
Watermelon disaster
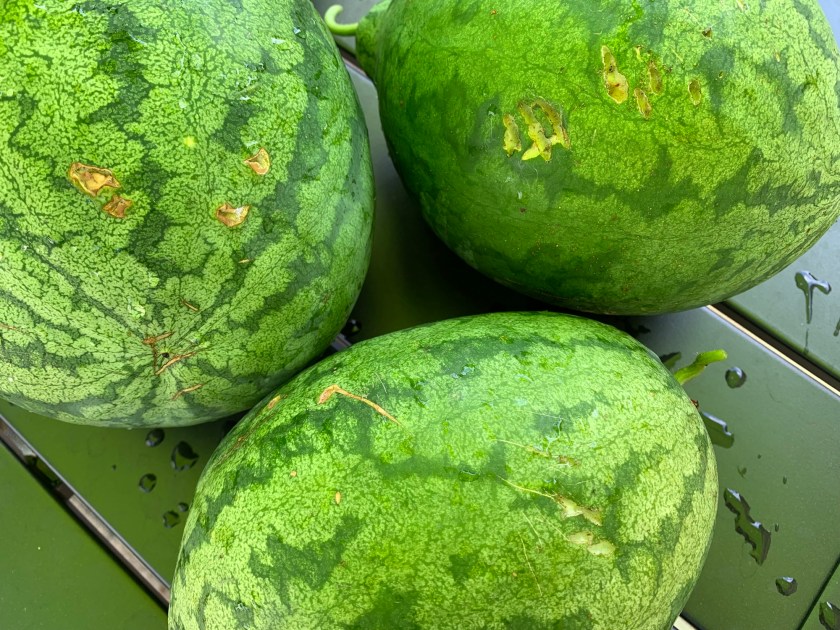
I had three more watermelons which were still okay, but they did show signs of claw marks.
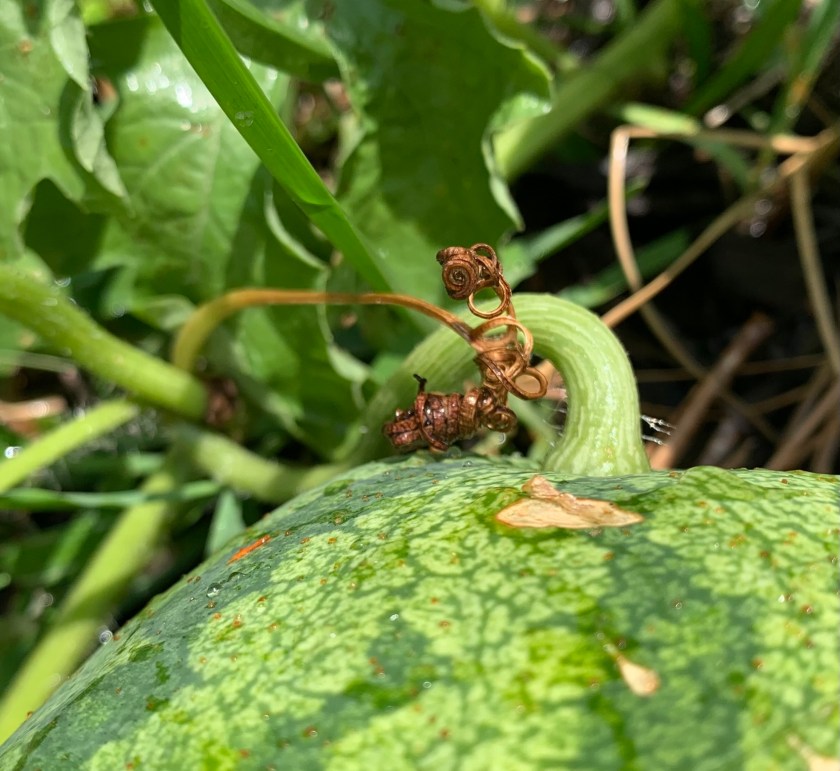
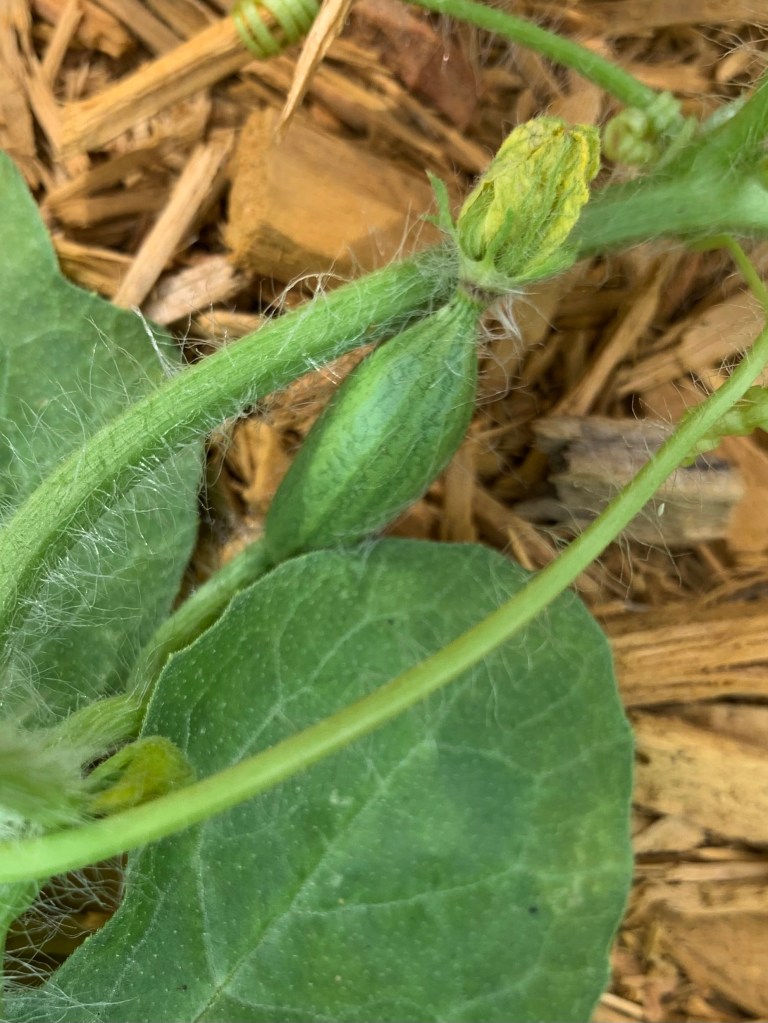
I’d been wondering if I would be able to tell when the watermelons were ready to be picked. The seed packet mentioned a browning of the tendril closest to the melon. I wasn’t sure what that meant, so I watched a video and then realized it was the little, curly thing coming off the vine. Sure enough, the ones nearest all my watermelons were brown. So they were all ready to be picked.
Brown tendril – a sign the melon is ready
Watermelon, From Baby to Being Picked
It took nearly three months, but was worth the wait to have delicious fruit right from the garden! It’s what we gardeners live for.
Baby watermelon
June 14th garden photo
Raccoon markings
June 30th, picked my three watermelon
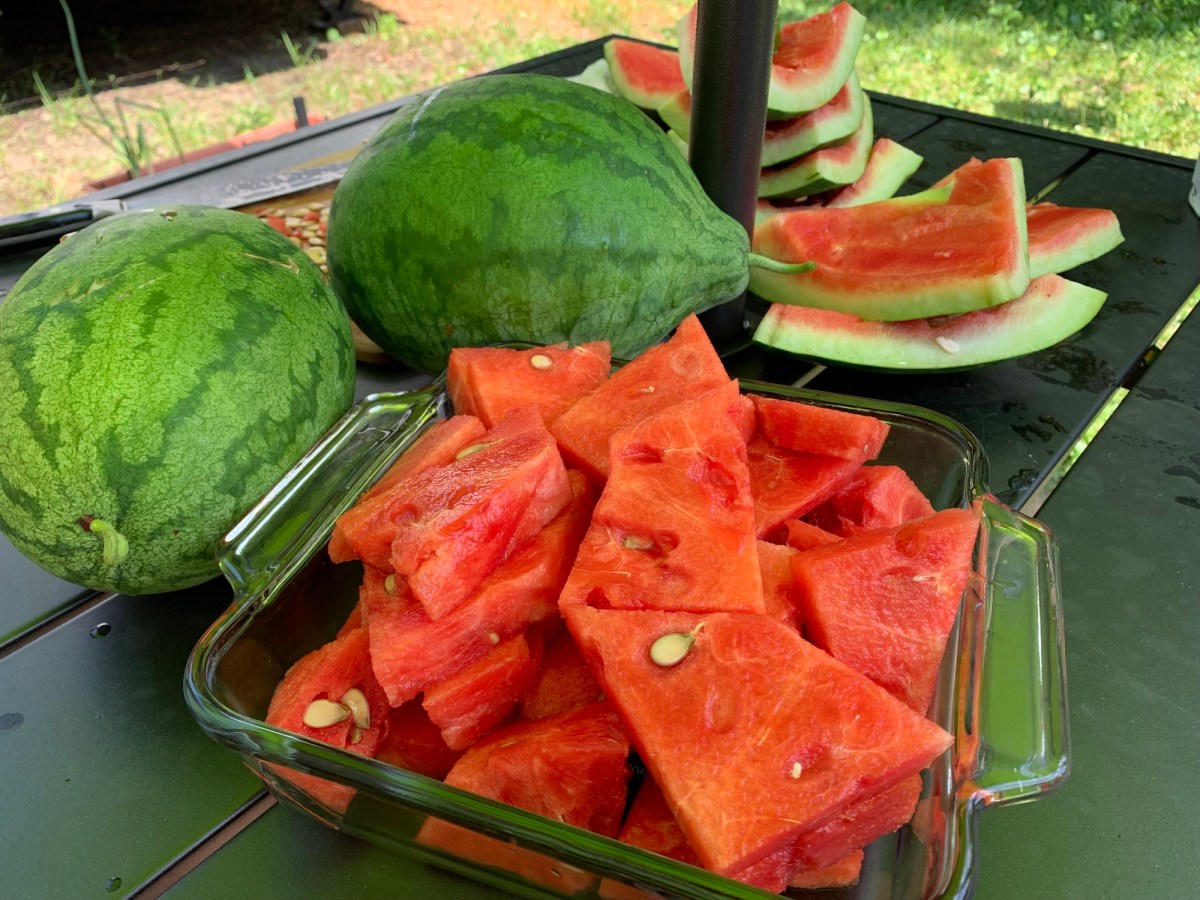
Cutting and Eating
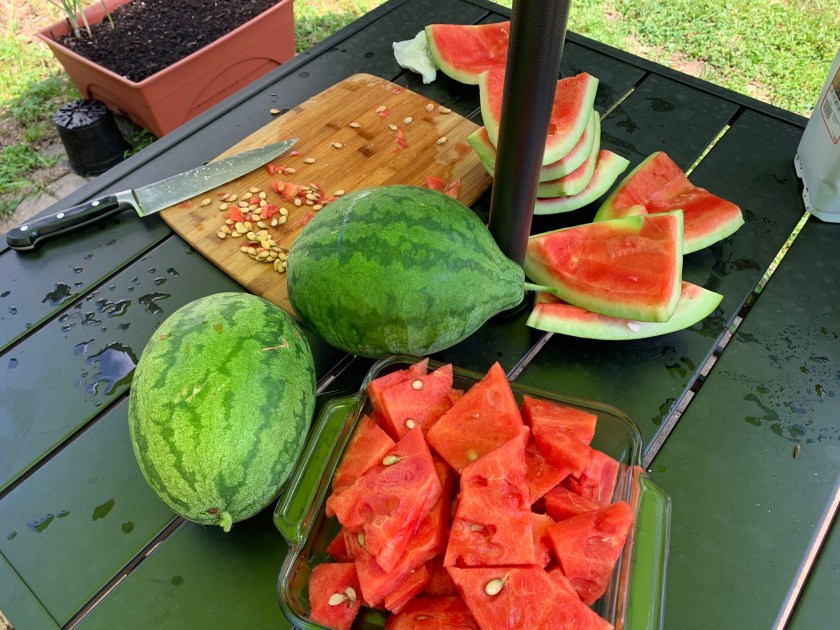
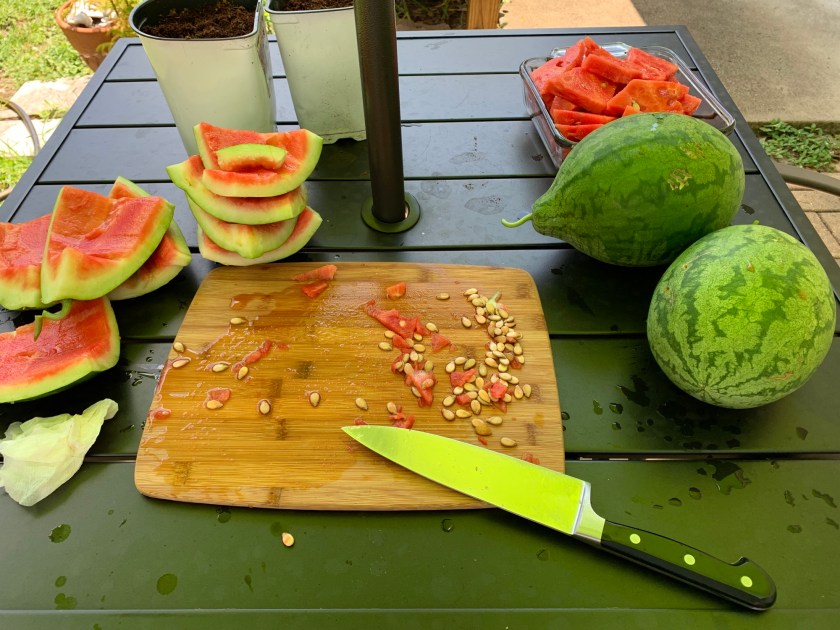
I decided to cut the watermelon outside on the patio table. This mainly comes from my fear of slush pouring out instead of the inside being solid.
Many years ago I worked in the produce section of a grocery store. My job one day was to slice watermelon and package it. As I cut into a big melon, all the insides gushed out all over me and the floor! I never forgot it, and always worry whenever I cut a watermelon.
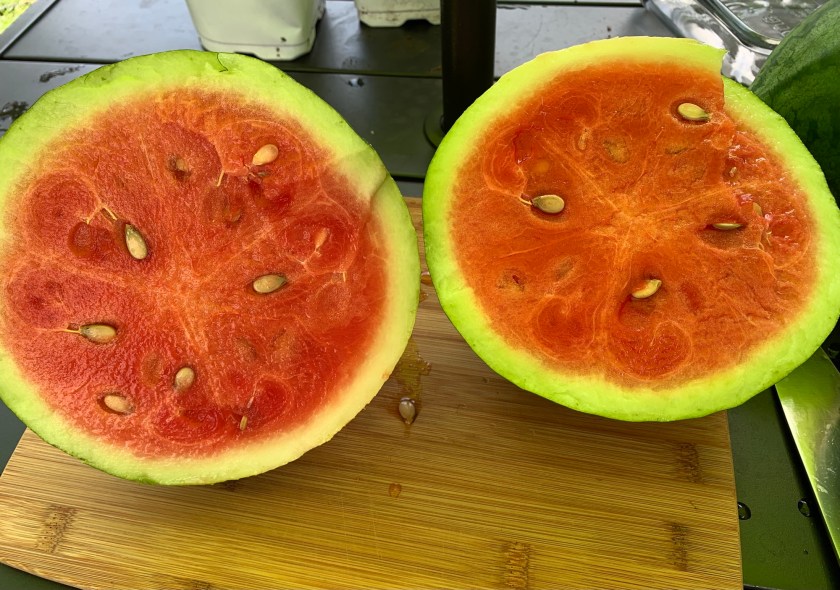
So I did my cutting outdoors, and I was so happy to see the red inside when I first opened the big melon. Then I tasted it, and yum! I’d grown my very first edible watermelons!
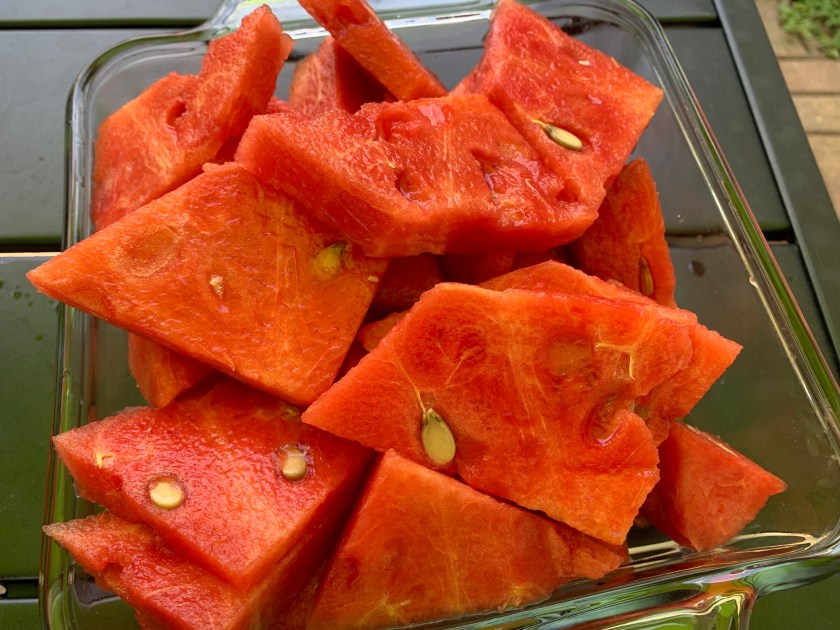
Perfect!
Yum!
I’ve only cut the largest watermelon, but it is delicious. Even if the other two are not good, I am so happy to have had one that is perfect.
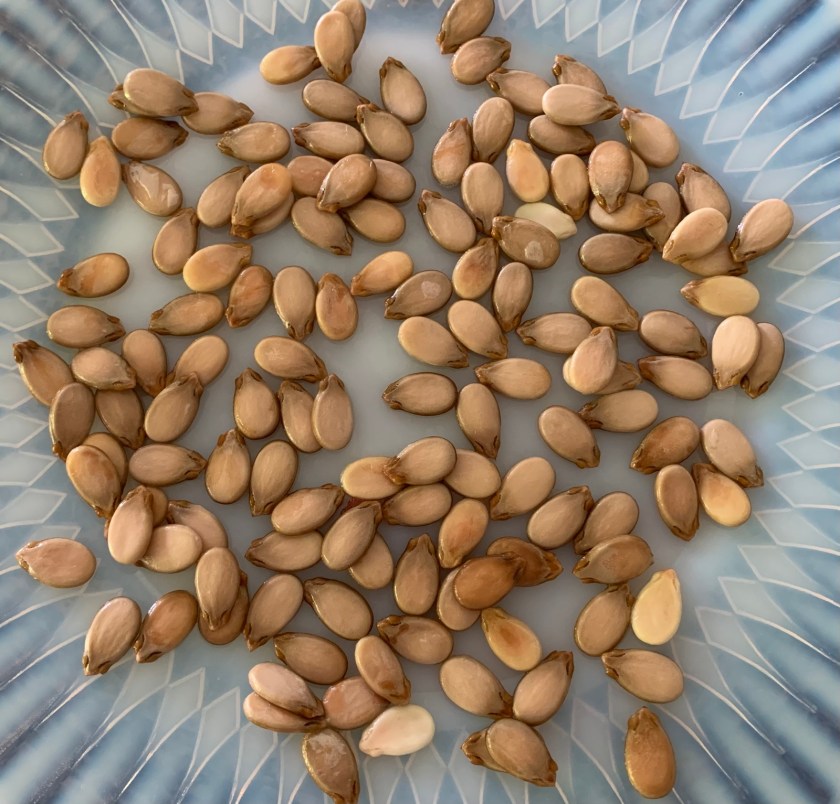
I saved a bunch of those big, white seeds. I may try to grow more before Fall because we have months of heat still ahead of us.
This type is the Strawberry Watermelon and I bought the seeds from Southern Exposure Seed Exchange (the link goes there).
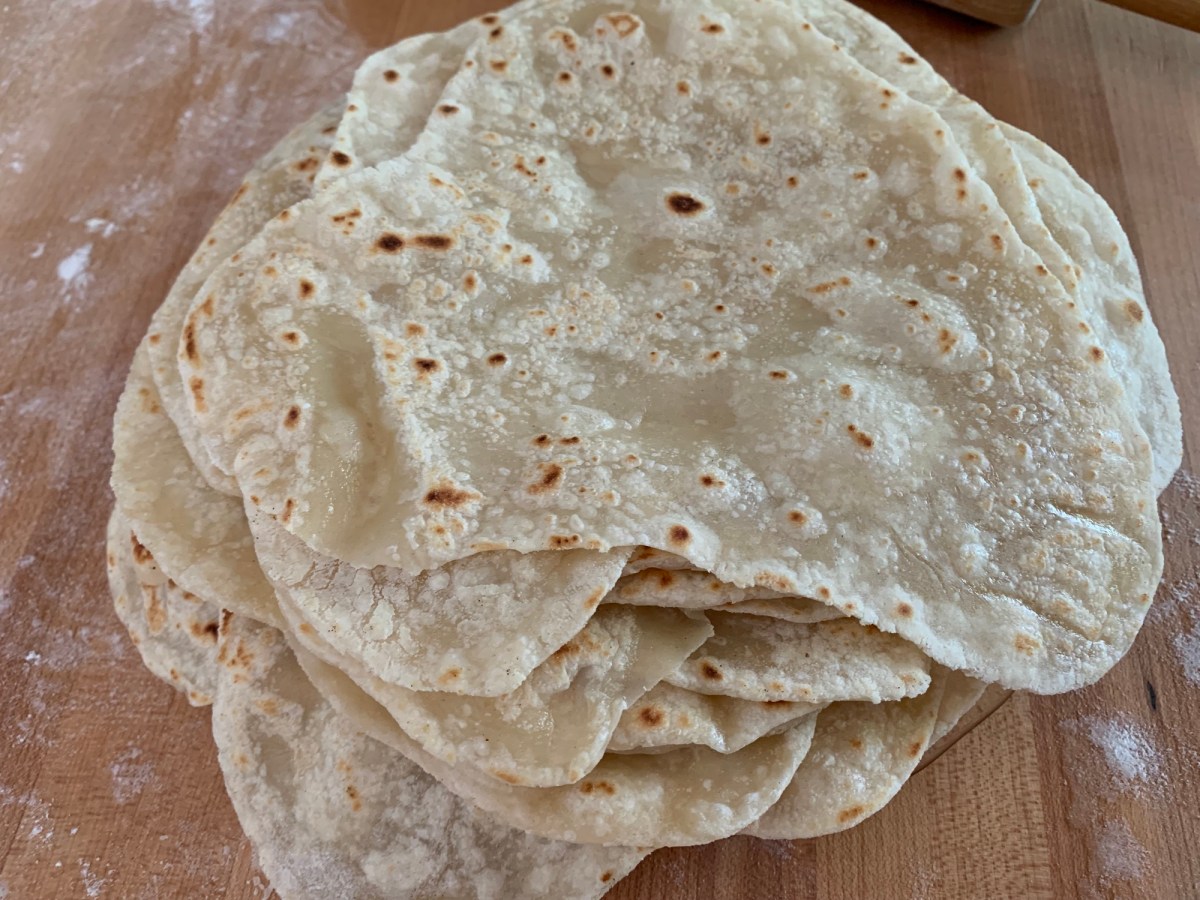
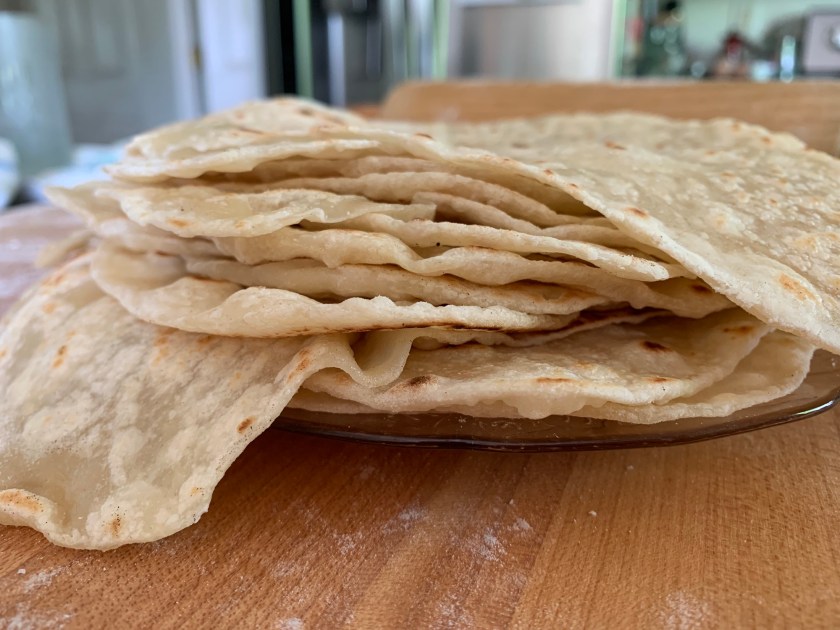
Once you make your own tortillas, you will never eat store bought again. Here’s a rundown on how they are made.
One day I decided to make my own tortillas. I’m not a big bread eater, but I love these tortillas. Store bought anything is usually loaded with extra things I don’t want to eat so I choose to make my own food. Plus, with the garden growing, I like to make quesadillas and use my veggies.
The simple ingredients of flour, salt, baking powder, oil, and water are mixed and then kneaded for a couple of minutes. Find the recipe here that I used, and the list of ingredients. It is loaded with ads, which is typical for recipe pages. I wrote down the ingredients on paper which I refer to each time I make them so I don’t have to go back to that annoying page.
These are easy to make, but they are very time-consuming. Do the first part of mixing and then they get to sit for a while. Rolling and cooking takes the longest. But, they are good. You will never go back to store bought!
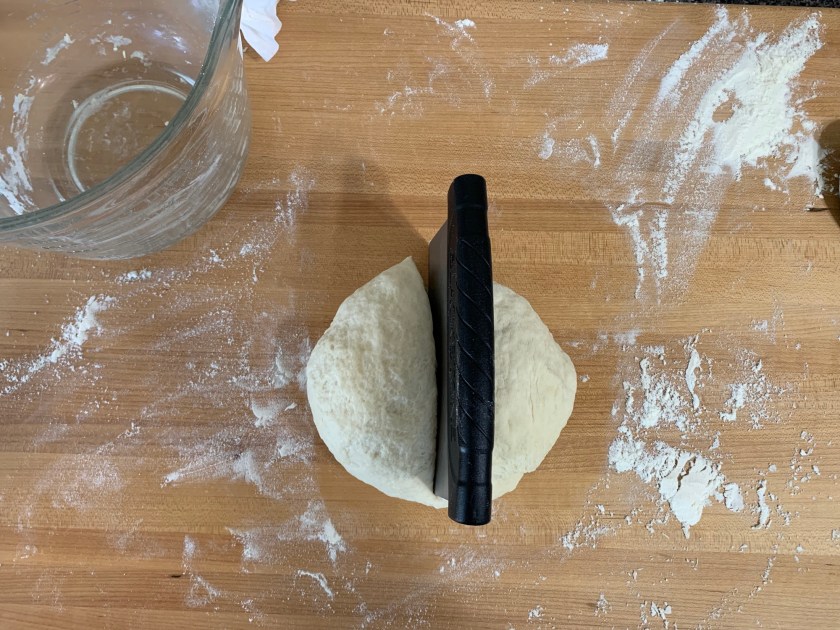
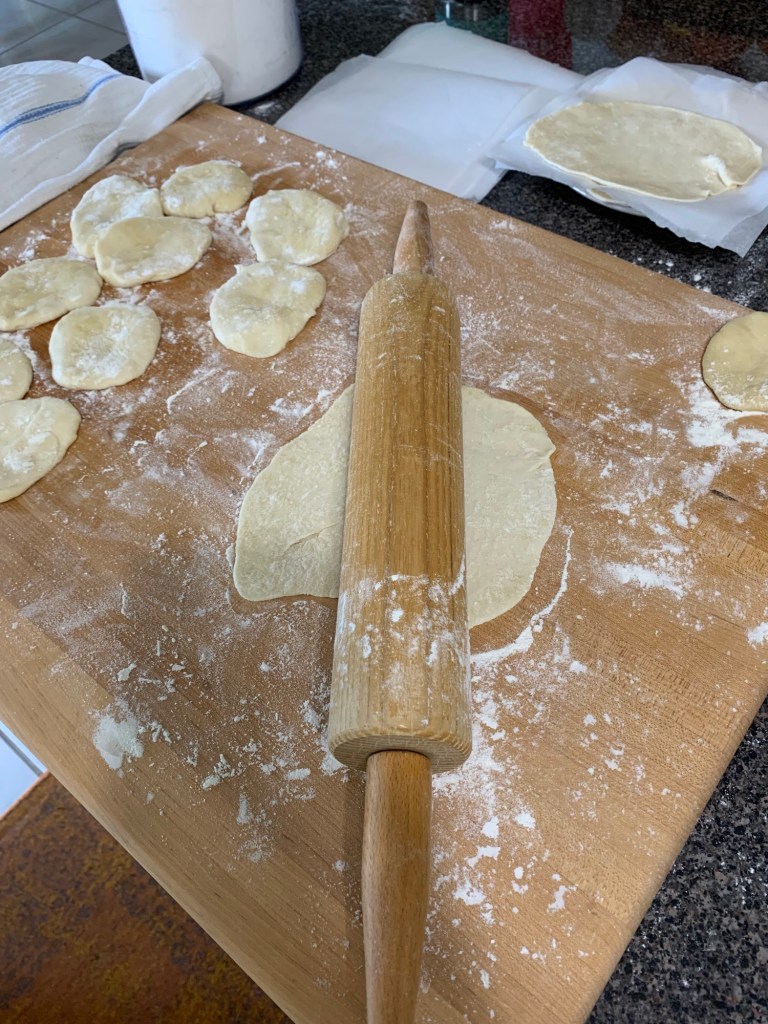
Mix the dough, knead, and divide into 16 pieces.
I have an awesome wooden cutting board which I use for this. And I have a little dough cutter / scraper (Amazon affiliate link) that comes in handy.
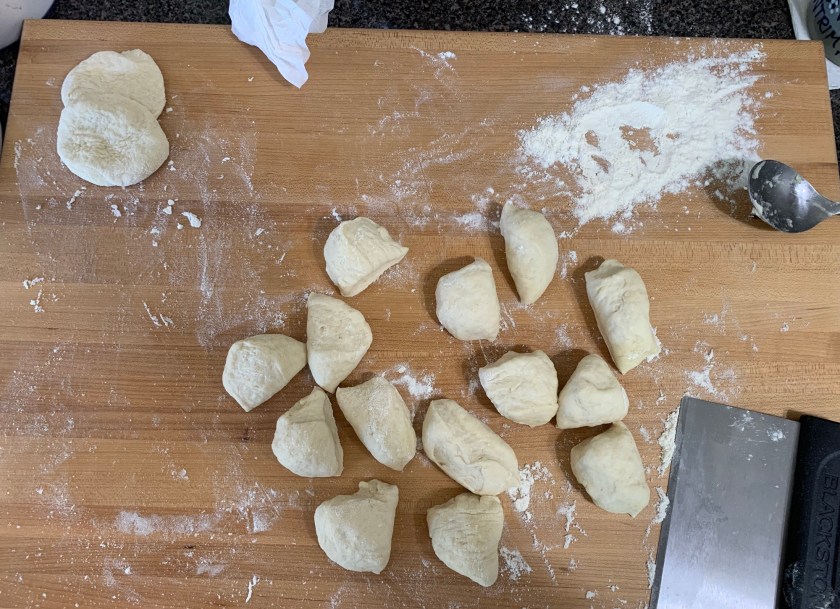
The dough has to be cut into 16 pieces
Dough is cut and ready to make into small round discs.
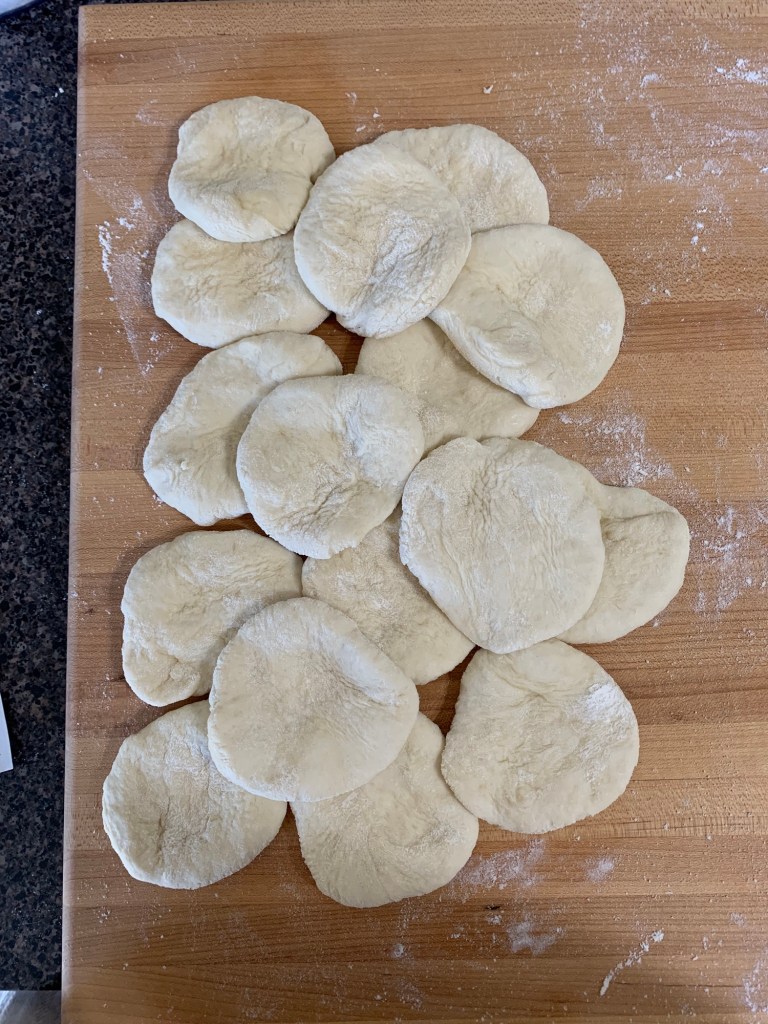
Once flattened, these flat patties will sit covered for about an hour.
Once you have 16 pieces of dough – just keep dividing each section until you have 16 – roll and flatten a bit with your palm. Cover them with a towel and wait a while – up to 2 hours, or as little as 15 minutes.
Roll flat and into a round shape (not easy for me)
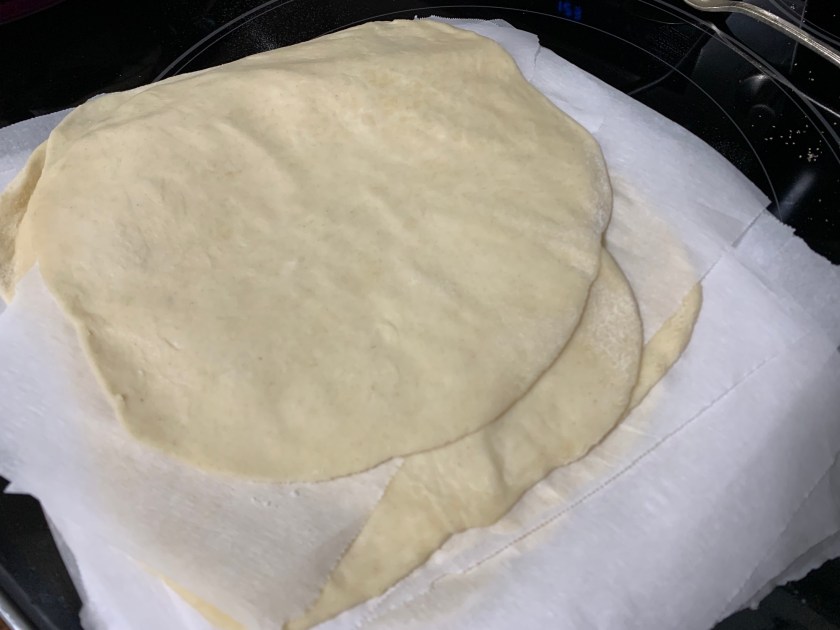
Stack each flattened tortilla with parchment paper between. They will be cooked one at a time so you don’t want them to stick together.
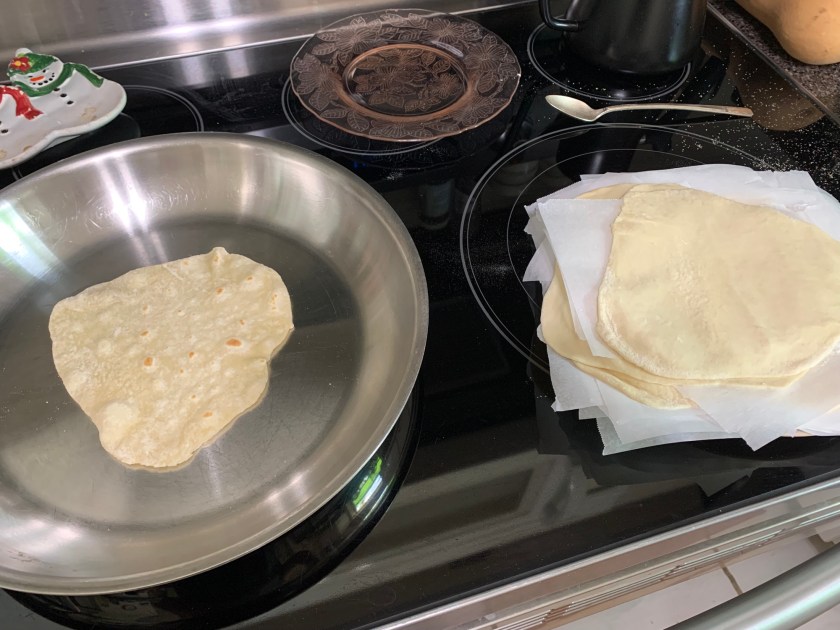
Consider the Pan
The pan type was tough to figure out. The first time I used a small non-stick fry pan and I ruined it! The tortillas are baked for about a minute total in a dry pan – add nothing… no oil. This can make bits of the tortilla stick to the pan and burn on as you continue to cook all 16 tortillas. I couldn’t clean the black bits off the non-stick pan. It was ruined.
Finally I have decided that a plain stainless steel pan works best. When I have some black, burned parts I can clean it with stainless steel cleaner. So, use a pan that you are able to scrub afterwards.
I do use a low heat, but they have to cook… it’s a fine line between cooking and burning, so pay close attention.
Roll each piece of dough very thin
Put parchment paper between the flattened tortillas
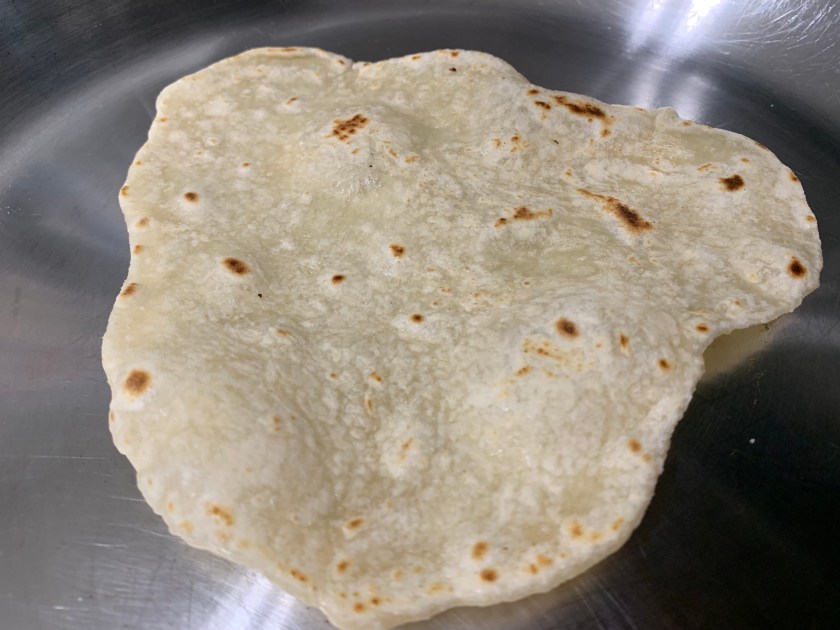
Cook tortillas one at a time
They will bubble up when cooking
Using the Cooked Tortillas
Once all 16 tortillas are made, let them cool and store in the fridge. I usually freeze many of mine to use at a later time. They freeze well.
Cooked and stacked
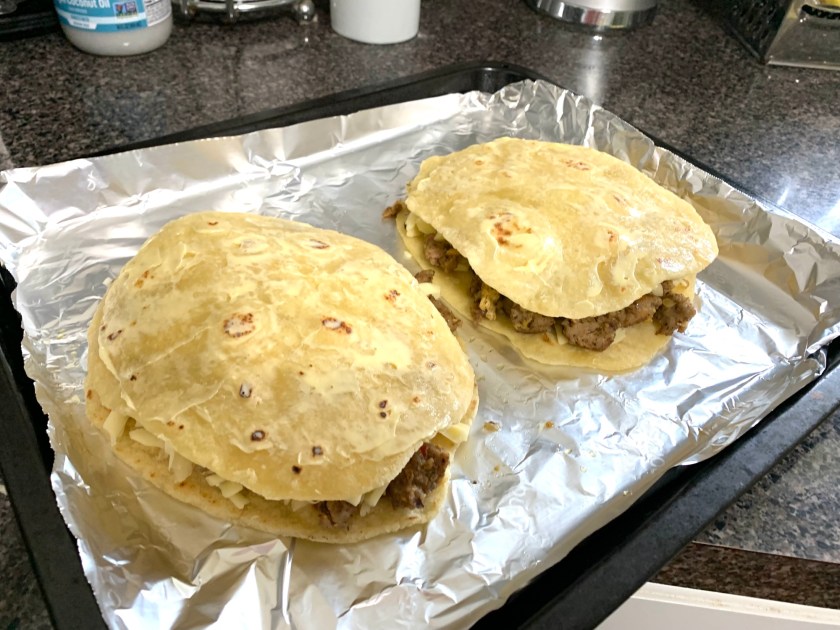
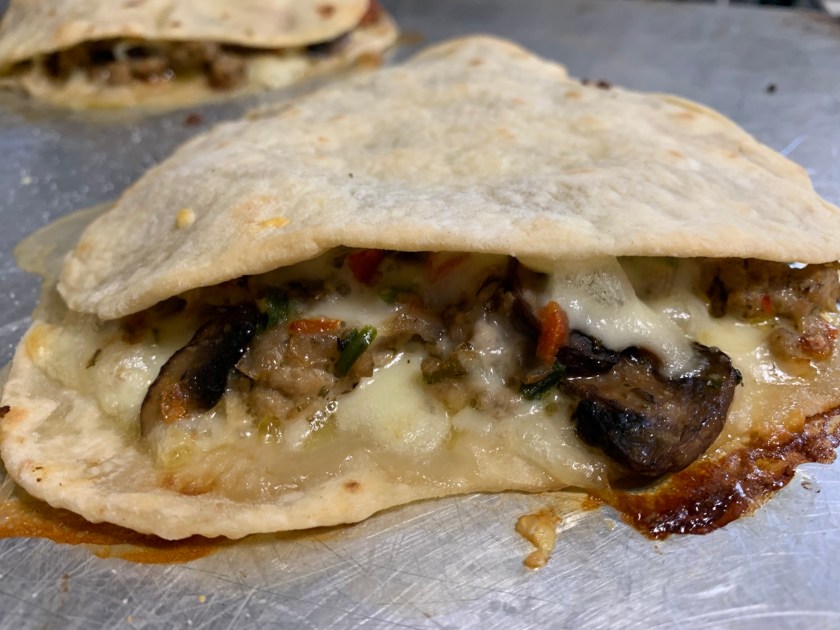
A favorite way to use the tortillas is to make delicious quesadillas. This meal is very simple (once the tortillas are made) and offers many ingredient options.
Homemade tortillas to make quesadillas
Simply butter one side of a tortilla and place it – butter side down – on a pan, foil, or parchment paper. Add cooked meat, cheese, vegetables, or whatever you wish. Butter the top of the other tortilla and place butter side up. Bake at 350 for about 15-20 minutes or until brown and crispy.
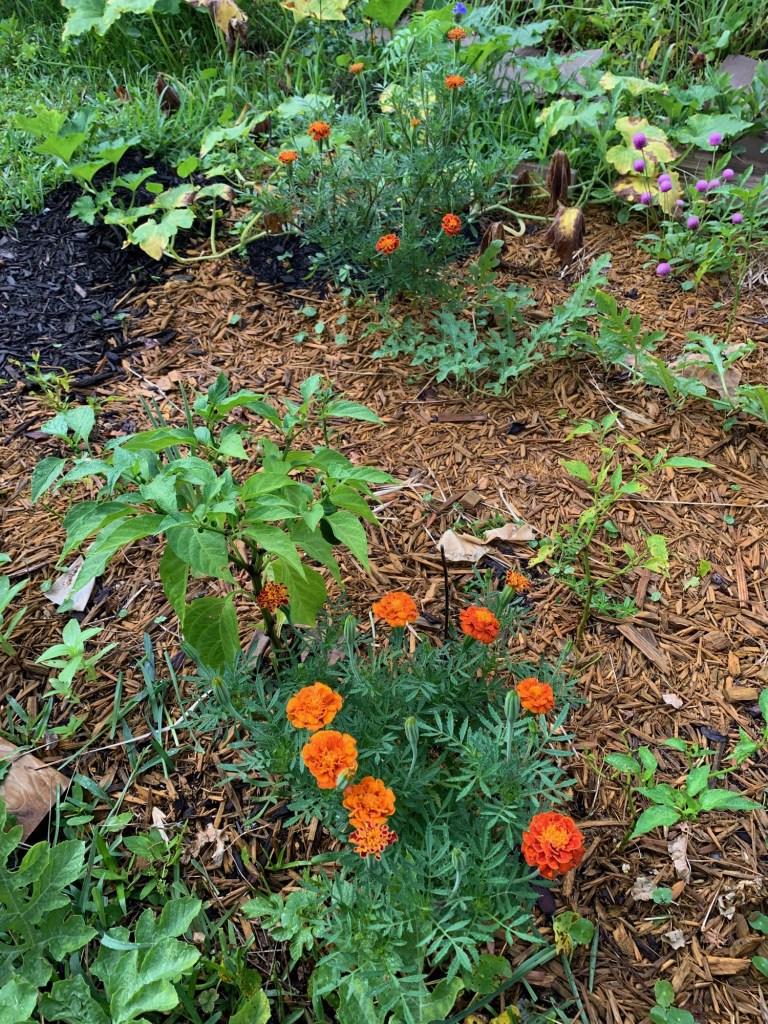
Marigolds are beautiful and easy flowers to grow in a Florida yard and vegetable garden. They may also have some great benefits.
While many flowers I grew in my northern garden can’t be grown here in Florida, the marigold certainly can. The scent of marigolds will repel mosquitoes, which are a bother all the time in my yard. I’m not sure if they work on no-see-ums, but maybe! As my garden space grows, so will my number of marigold plants. They are colorful and so easy to grow.
Marigolds grow among peppers, pumpkin, and watermelon
Marigolds and Nematodes
Marigolds may also help keep nematodes away (maybe not – read on). They do not hinder all types of nematodes, but do help with common root-knot nematodes. My Great Garden Companions book, by Sally Jean Cunningham (Amazon affiliate link), says to turn the entire marigold plant into the earth after the growing season is over.
To Till or Not To Till
My thoughts on cleaning out a garden is to cut off the plant and leave the roots for the earthworms. Disturbing the soil disrupts the ecology of the soil, or so I’ve read. BUT… if you have nematodes, doing this helps them survive! Maybe I just need to find out if I do have nematodes and go from there.
What is a nematode?
Once I began planting my garden I kept hearing about nematodes. I did not know what they were, only that they were damaging to crops. (Apparently there are also good nematodes.)
Nematode damage appears as yellowing and wilting of crops. The little buggers affect the roots in a way that removes the ability of the plant to take up nutrients and water from the soil. When nothing you do helps the plant, maybe it’s some kind of nematode (there are many types).
Don’t look for them with the naked eye because they are microscopic. (Think “monsters inside us”.) This page at the University of Florida gardening site has excellent nematode pictures to show the size of nematodes. It also explains them really well. So well, in fact, that you may be scared off gardening all together!
Reading all this info on nematodes is very disheartening. Florida can have all kinds of nematodes because nematodes love sandy soil.
The UF site says this: French Marigolds – particularly the yellow or gold “Petite French” Tagetes patula varietycan help keep certain nematodes (the root-knot) away. (This info was found in Table 2 in the link above.)
And then… I read this, on the same UF site: Garden Myths: Volume 1 which talks about Marigolds and false beliefs that they can deter nematodes..!!
Holy cow. I guess marigolds can’t hurt, but we can’t see them as the one great answer to destroying nematodes either.
Marigolds and Beneficials
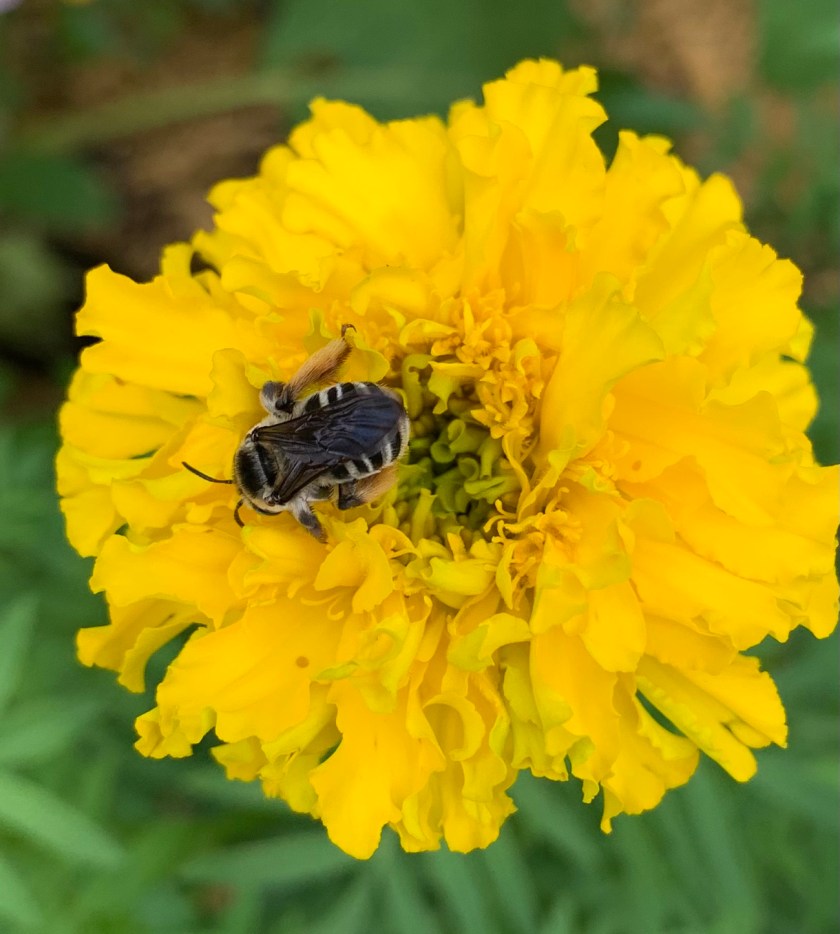
Not only do marigolds repel possible pests in the vegetable garden, and help deter nematodes (we hope), they constantly flower throughout summer – and more seasons here in Florida. That means butterflies and other bugs can enjoy the flowers as sources of food. They are not high on the list for nectar, but I’ve had bees and butterflies on my flowers.
Bee climbing through the marigold
Gulf Fritillary butterfly
I have marigolds growing in some raised beds and among the ground garden veggies. The tall yellow flowers wind their way up through eggplant and help shade the oregano.
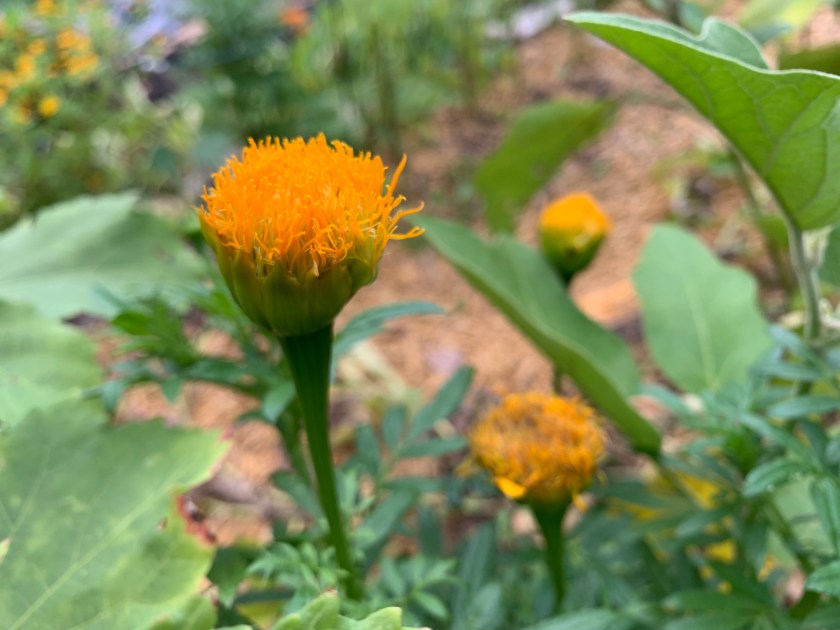
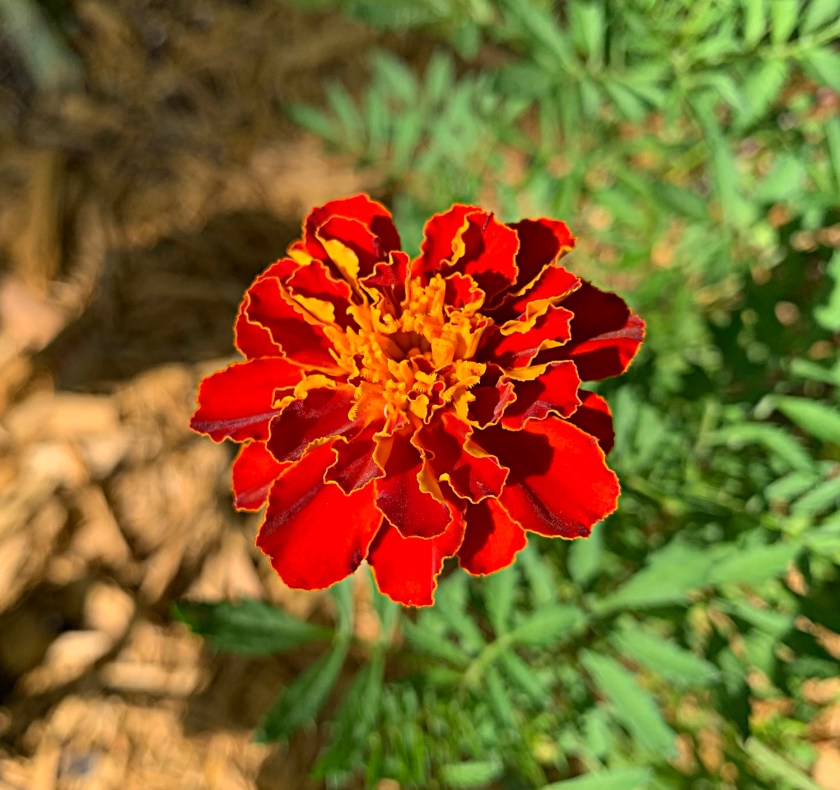
The fluffy orange flowering marigold is so pretty, I will save its seeds and plant many more. Saving marigold seeds is easy. I simply scatter the seeds around the gardens and see what grows. Or, they can be scattered in an empty grow pot and then the seedlings can be transplanted. They do very well when transplanted too.
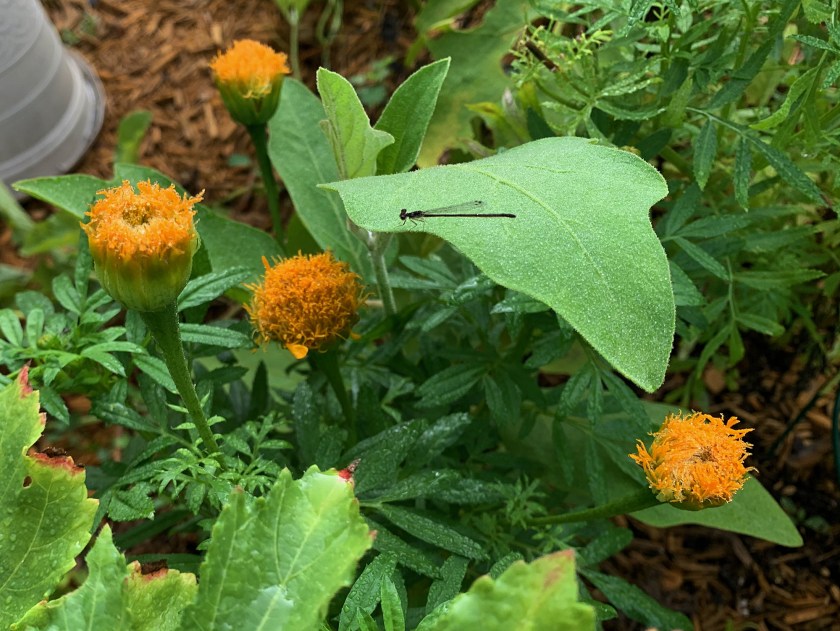
My orange and yellow marigolds
Little damselfly
This frilly gold-orange marigold flower is interesting. I keep waiting for it to “open” but this is all it does. The older flower is now looking like it’s gone by. I hoped it would be more than this. It is different, and I’m not sure what type it is.
Marigolds Can Handle the Heat
Marigolds are wonderful choices for this humid and very hot location. I’ve never had them wilt or seem stressed by the baking sun. The big yellow flowers can get ants, but other than that, no pest problems.
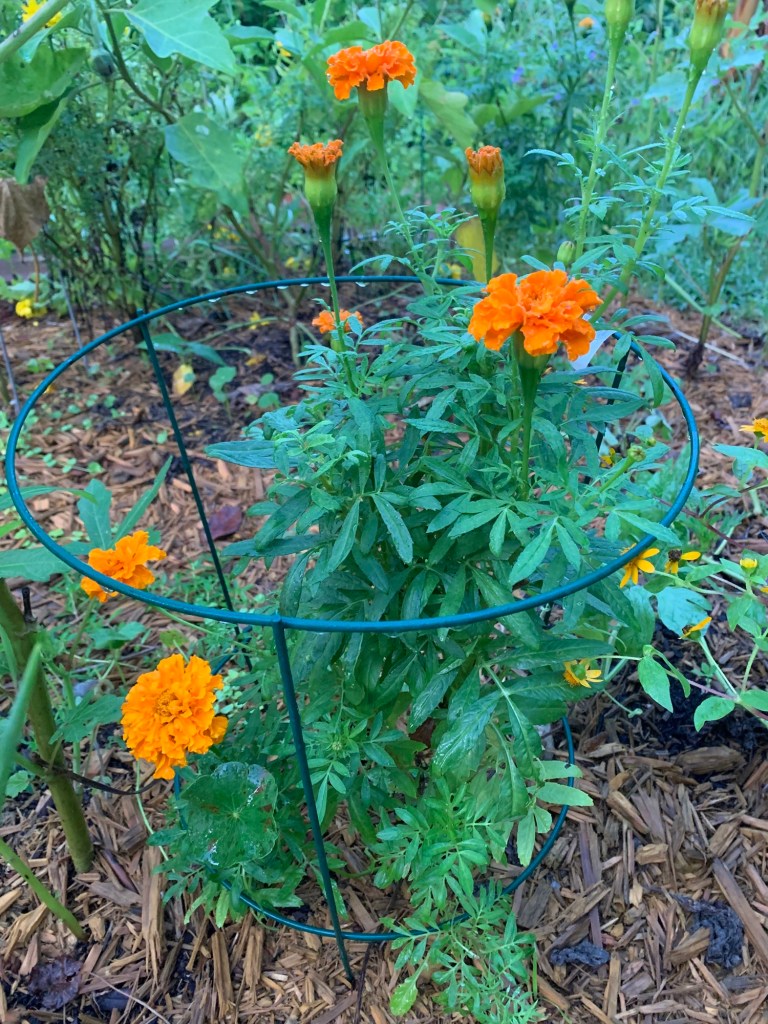
Be Careful of the Rains
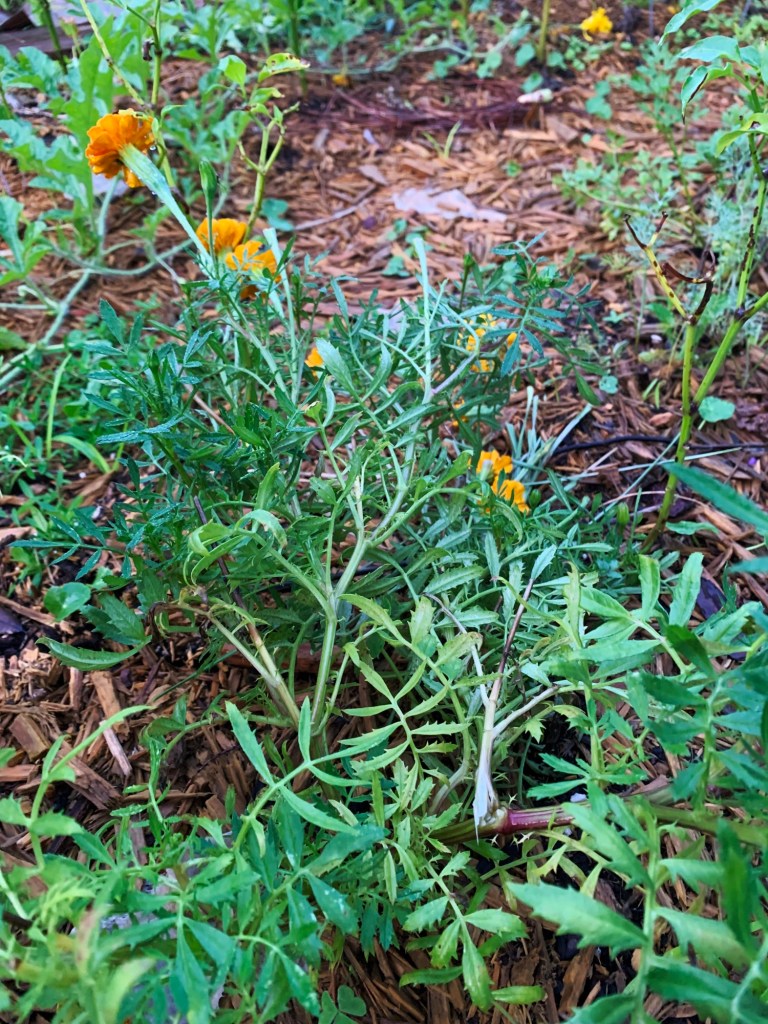
Once we began getting big afternoon storms (July), my marigolds fell over. Big sections of the plants just fell to the ground!
I’d already planned to put cages around the yellow marigolds because of their height, but it seems these orange ones need support as well.
The broken parts are going into the compost. Next year I will buy some short cages, sold near the tall tomato cages at Home Depot, and put them up for all the marigold plants.