It’s the end of August and time to dig my sweet potatoes. I will not grow them in a raised be again, and here’s why.
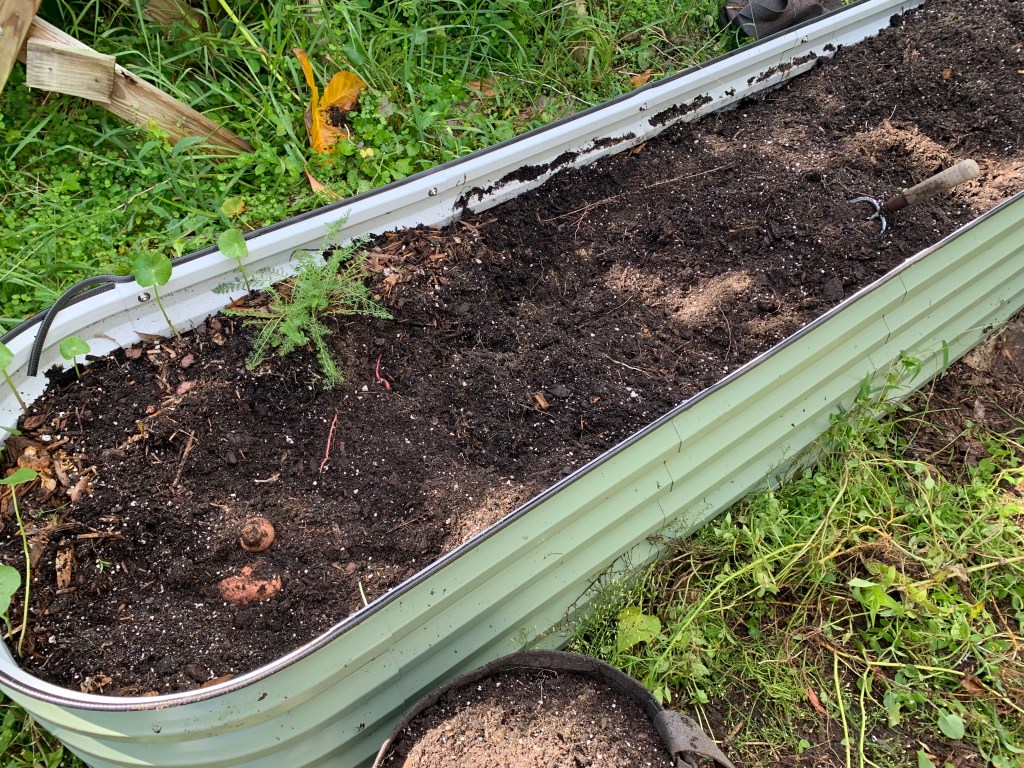
The other day I spent quite a bit of time digging up my sweet potatoes. My bright idea was to use my new, long Vegega garden bed to grow them. I had just filled it with lots of stuff, along with dirt, and it really wasn’t good for growing much. So, I figured why not use it for sweet potatoes?
That was not a bad idea, because I don’t really have ground space for them. But when it came time to dig them, I had to kneel and dig by hand. A pitchfork is generally used to dig potatoes, but in the bed I couldn’t do that. It was a job.
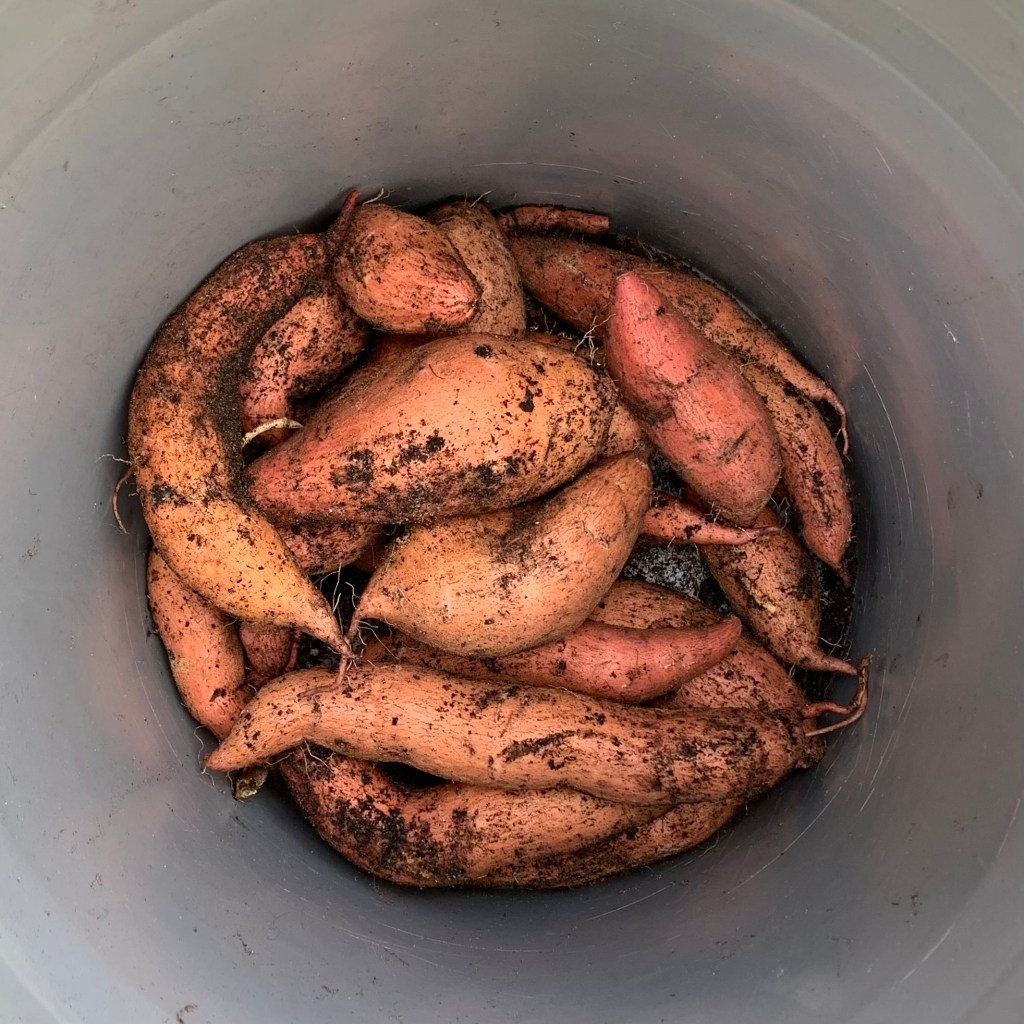
Time to dig (by hand)bucket of potatoesDrying on the porch
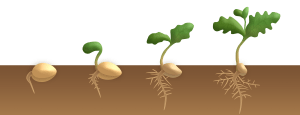
I planted the potatoes back in February. They’ve been growing for 6 months.
I’m hoping that I got all of them and it’s a nice little haul. Plenty of sweet potatoes for me. Now they have to dry in a humid location – no problem there – for about 10 days. This toughens the skin for storage, and sweetens the potatoes.
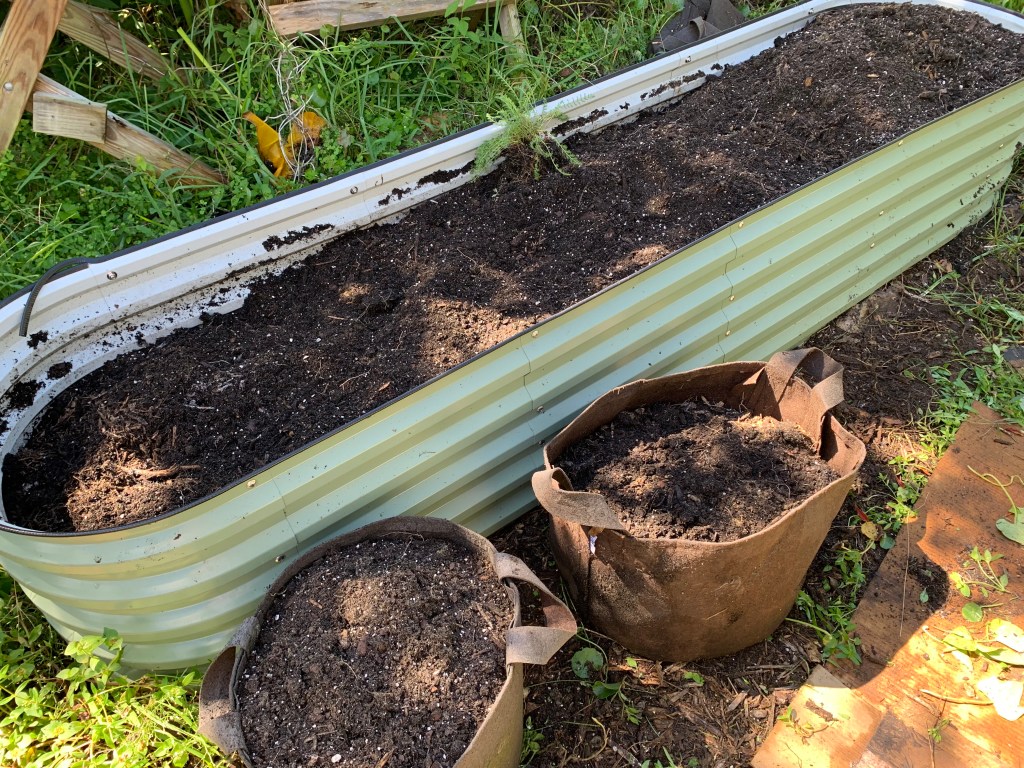
The other problem with sweet potatoes is that they last forever. I mean the ones left behind in the dirt. Even roots will continue to grow and I bet I will see sweet potato vines in this bed for years to come!
Thank you for reading. Here hare more garden stories for you.
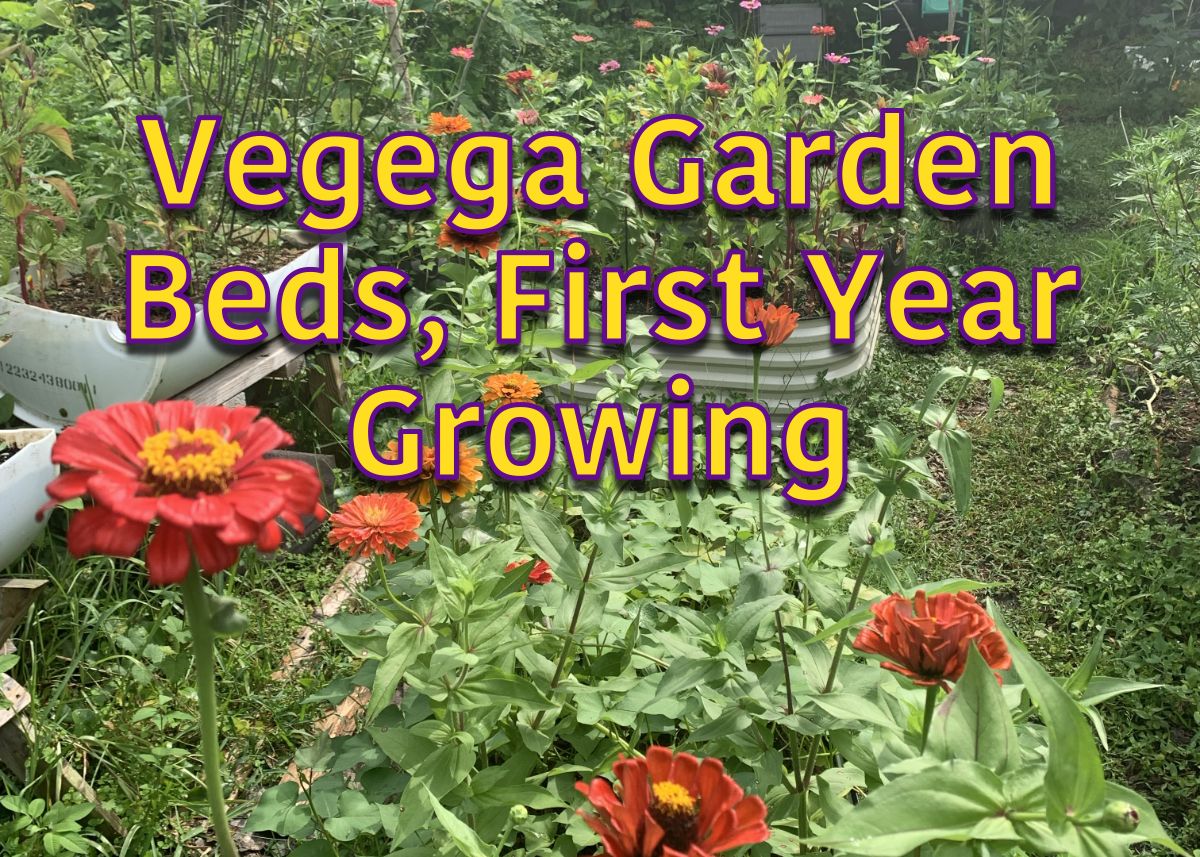
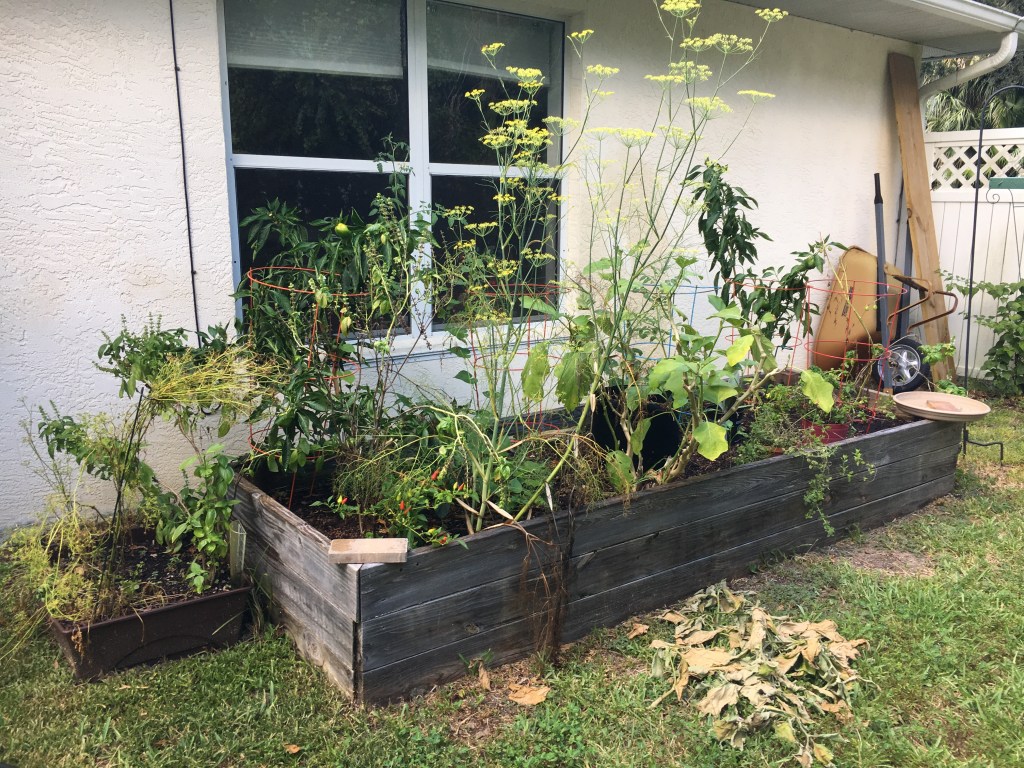
It’s mid-summer and here in my Florida backyard I have mostly flowers growing. I’ve used my three Vegega raised beds to hold some things and some are doing better than others. More amendments for Fall will be needed.
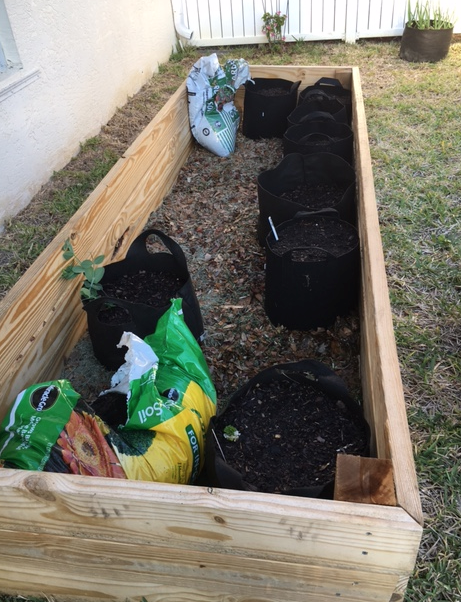
Over the past winter and spring, I set up some new raised beds. I bought the metal beds from Vegega after watching a YouTube video. Another Floridian had purchased from this company and she had lots of good things to say.
I garden on my own, and it took a bit of time to assemble, fill and plant the beds. You can read my post here. I knew that they would need time to “cook” me up some great soil. Branches, leaves and old growth were tossed in along with compost, dirt, mulch and earthworms. I knew the soil would settle and slowly compost. Still, I planted all three beds with some flowers and vegetables to see what happened.
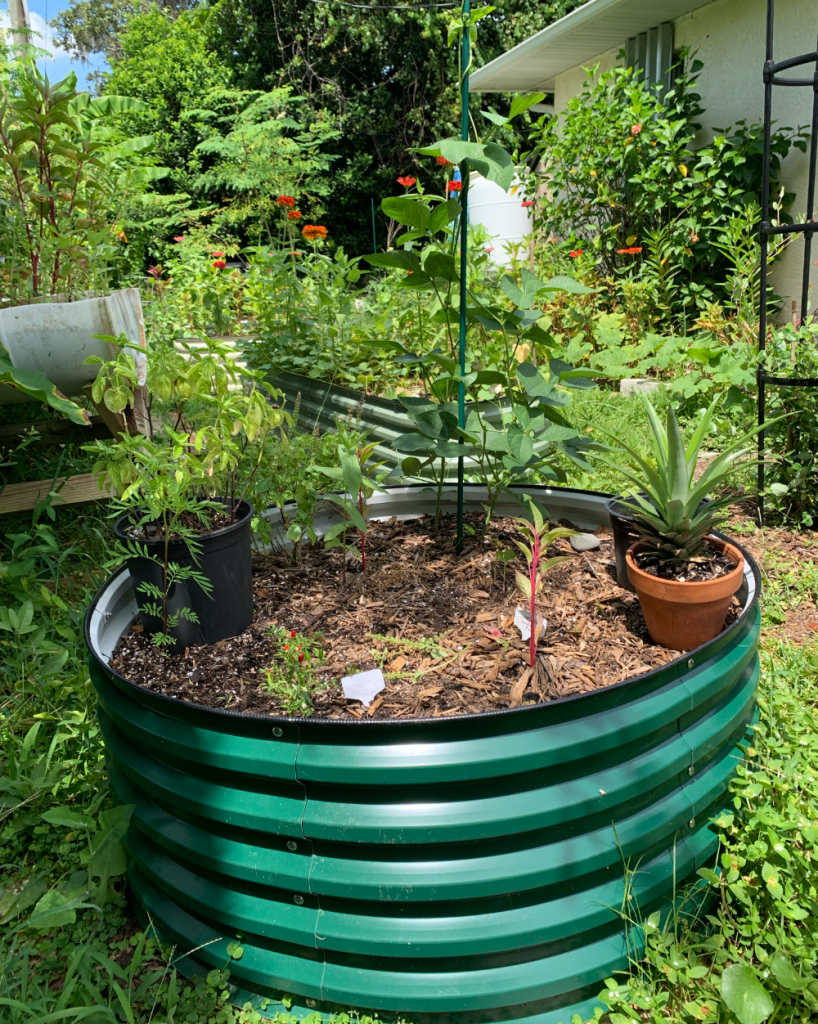
The Round Vegega Raised Bed
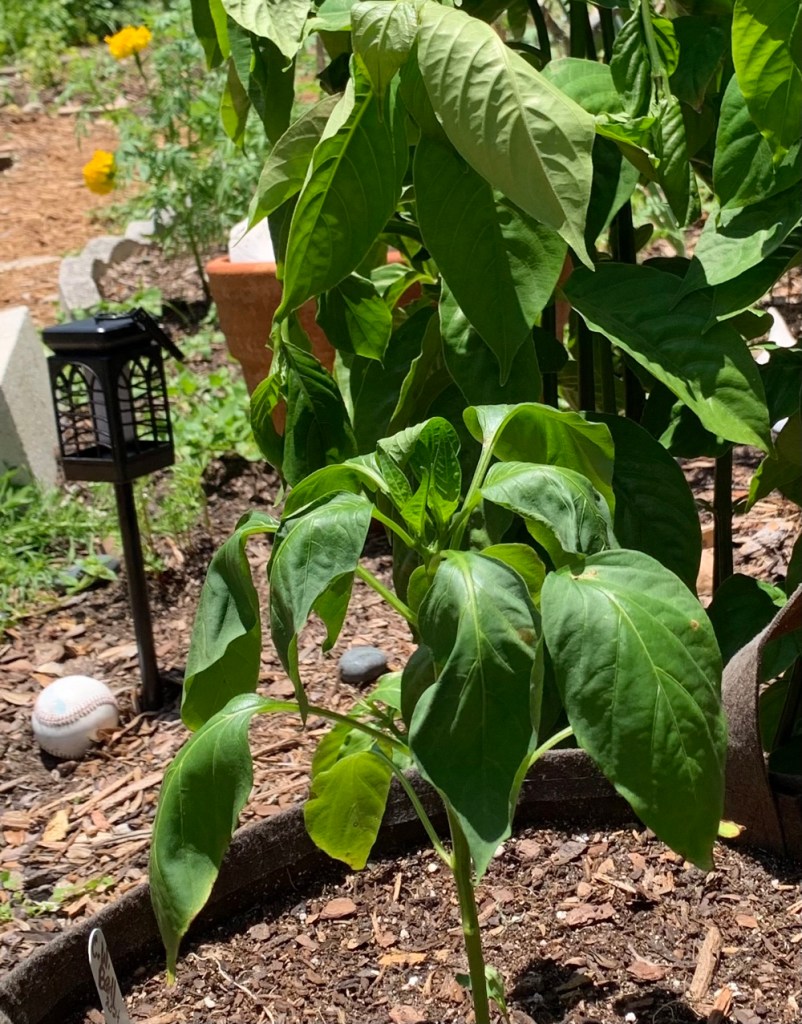
This is my oldest bed. It gets more shade than the others also. I had some lovely Ubatuba pepper plants growing in here, and a cherry tomato. All of them eventually died. I believe it was a lack of good soil and drainage. I plan to add more good soil and amendments as Fall approaches.
Now it is mid-summer and a Tulsi basil is planted along with a few cowpeas (cover crop beans). One Celosia, one marigold, and a small pepper plant are struggling.
An empty, or partially empty raised bed is a good place to set potted plants.
The Long Vegega Raised Bed
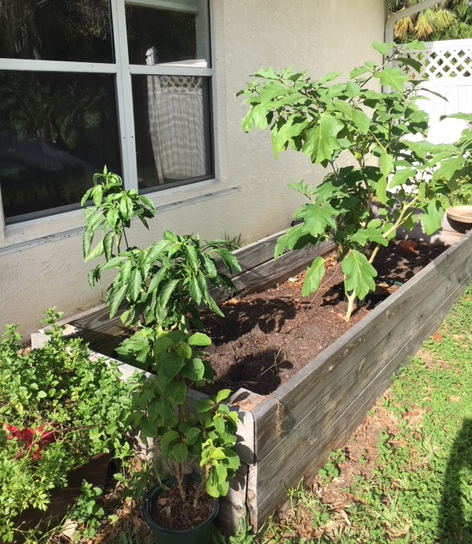
My long, oval bed was the most difficult to set up. I love the shape though. It is full of sweet potatoes (I hope – I see lots of vines) with Zinnias around the edge.
This plant mixing was not a great idea. The sweet potato vines keep trying to wrap around the flowers. By September I will be digging up this bed and getting it ready for Fall planting.
My long oval raised garden bed made of metal, with sweet potatoes and zinnias growing.
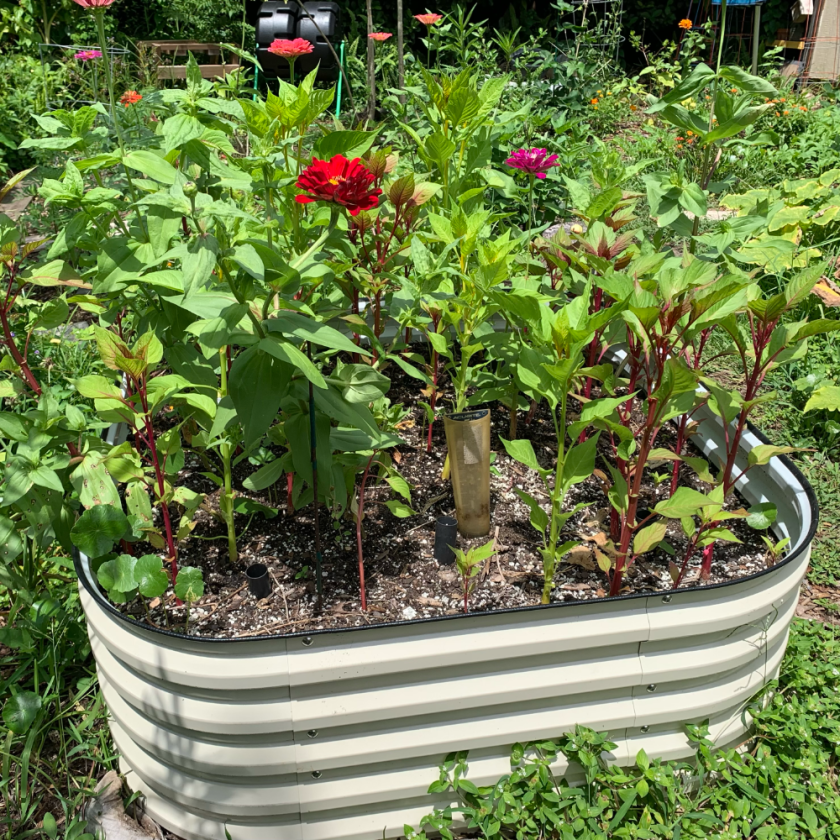
The Square Vegega Raised Bed
The dirt in my square raised bed has sunken quite a lot. Aside from one hot pepper plant, the bed holds flowers. Many Celosia and a few Zinnias are growing nicely. Like all the other beds, I will add compost and more dirt when Fall approaches.
Plans for Fall Growing
While summer is fine for growing flowers, in Fall I want to grow food! Each of these beds will hold fall crops. Between the big beds, the white barrels, and all my smaller grow boxes, I should have plenty of space for vegetables.
First I have to add more compost. My homemade compost is “cooking” and has been all summer. I’ll use it to amend the gardens, but I’ll also have to buy some. I definitely don’t grow my own food to save money! In fact it costs quite a bit, at least to get started. The point is to have very fresh, organic food to eat. You can’t get fresher than stepping out your backdoor and picking a salad for supper!
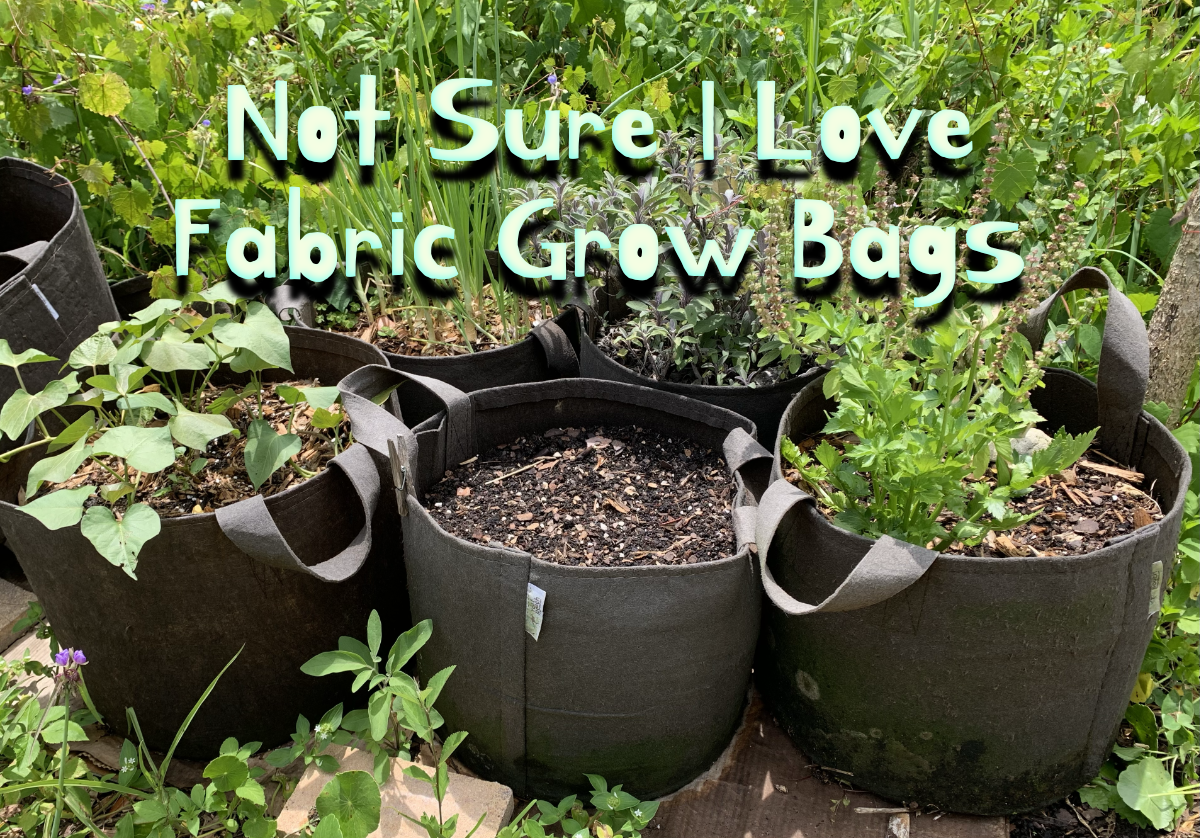
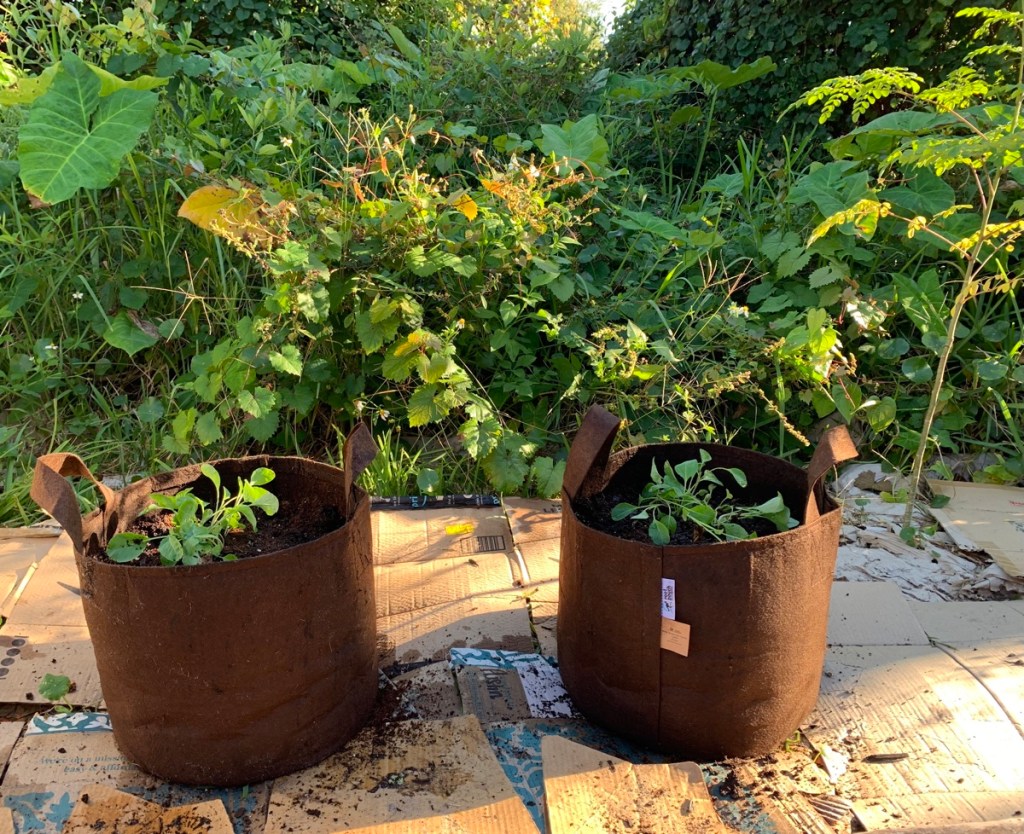
Rethinking my use of fabric grow bags. The Florida climate dries out the plants too fast. Certain shallow root vegetables, grown during winter, might be the answer.
After growing some things over winter and using fabric bags, I am not sure I really love these bags anymore.
I strive to have good dirt for all my seedlings. I mix bags of soil with compost and perlite or vermiculite, and add organic fertilizer, or I use Happy Frog (paid link).
But the fabric bags are dark in color. The Florida sun is blazing hot, even in February. The dark color makes the bags hot, so they dry out quickly. Also, there is little in the way of rain here in winter. The roots are not uniformly watered when the dry areas remain dry. All roots around the edge of the bag will dry out and burn from the sun.
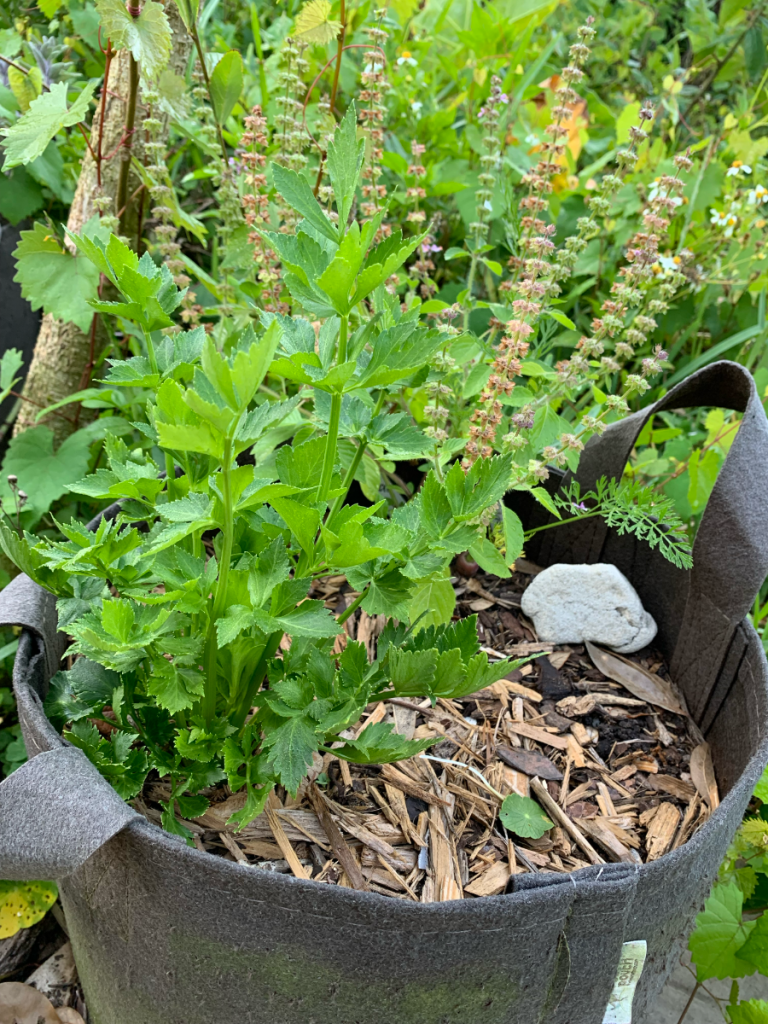
Holy basil and celery
Grow Bags For Northern Summers
I’ve purchased lots of various types and sizes of fabric grow bags in my gardening years. Up north, in New England, I had the really big circumference bags (paid link) along with smaller ones. I never noticed them drying out fast. I think these bags work well for that type of climate.
For anyone who can’t dig a garden, or has very little time for garden maintenance, the bags are perfect.
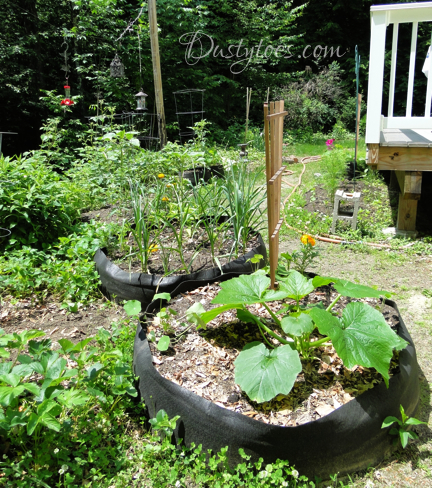
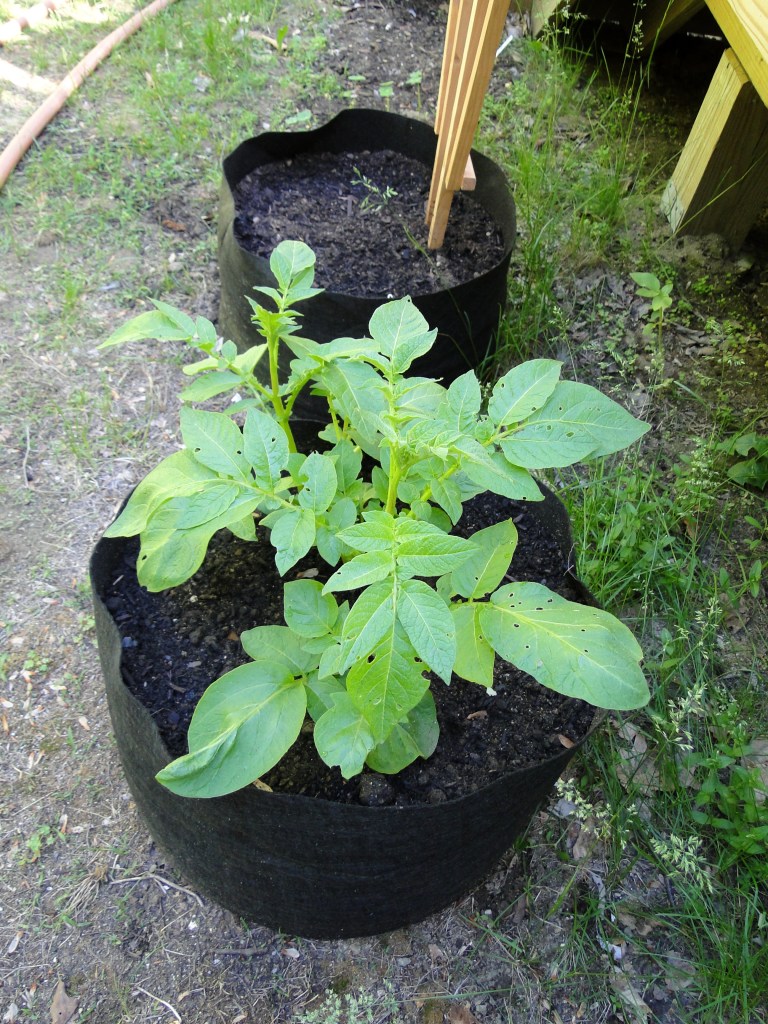
Here are some old photos of my backyard in New Hampshire. I easily grew lots in my grow bags. Growing in Florida is a completely different experience.
Zucchini and Garlic – NHPotato Plant – NH
Florida Gardening With Grow Bags
In Florida, I tried gardening again using fabric bags and didn’t have much luck. At the time, I was still trying to grow northern crops here in the south. You can’t do that. So I failed.
I used a combination of fabric bags and a wooden raised bed. This raised bed eventually rotted away, and now it is a lump of dirt in the side yard. Lately I am adding Vegega metal raised beds to the yard and have three set up.
The wood raised bed fell apart after a couple of years.
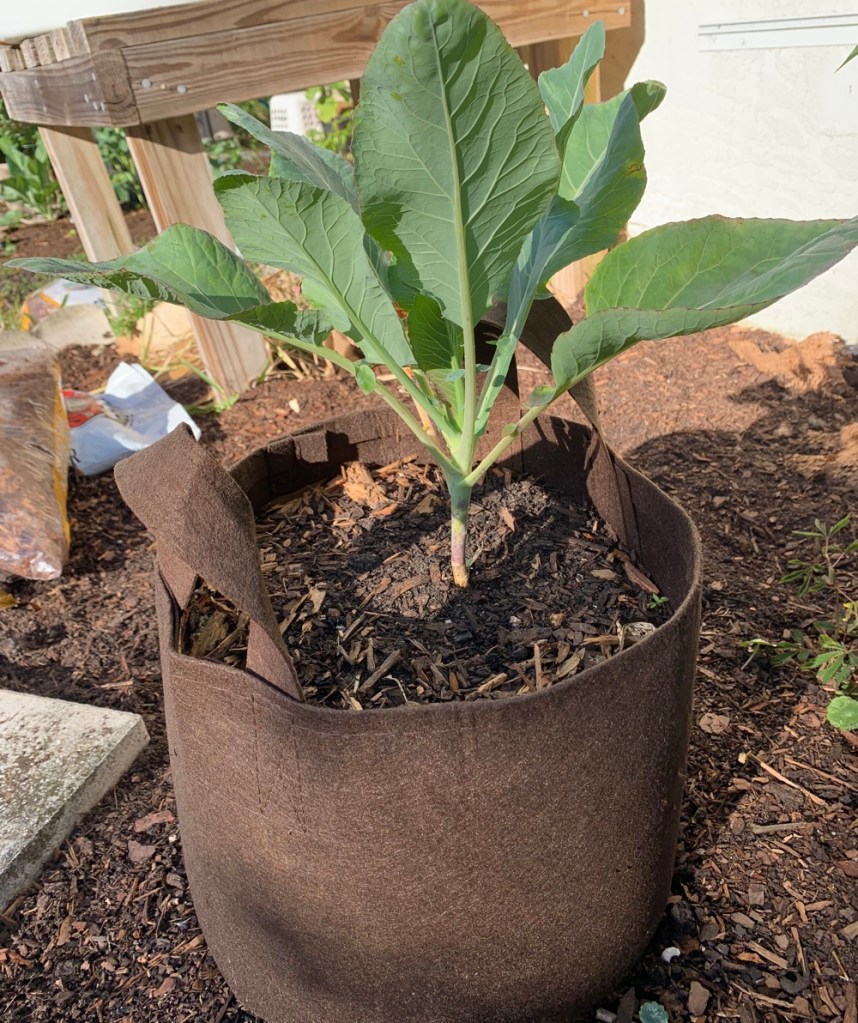
Problems With Using Fabric Bags in Florida
The Florida climate, even in winter, can cause fabric bags to stay too dry. Fabric bags are great for getting air to the roots, but the heat can also get to the roots. The dark colors of the bags work great in the north where soil needs warming. In Florida we really don’t need that.
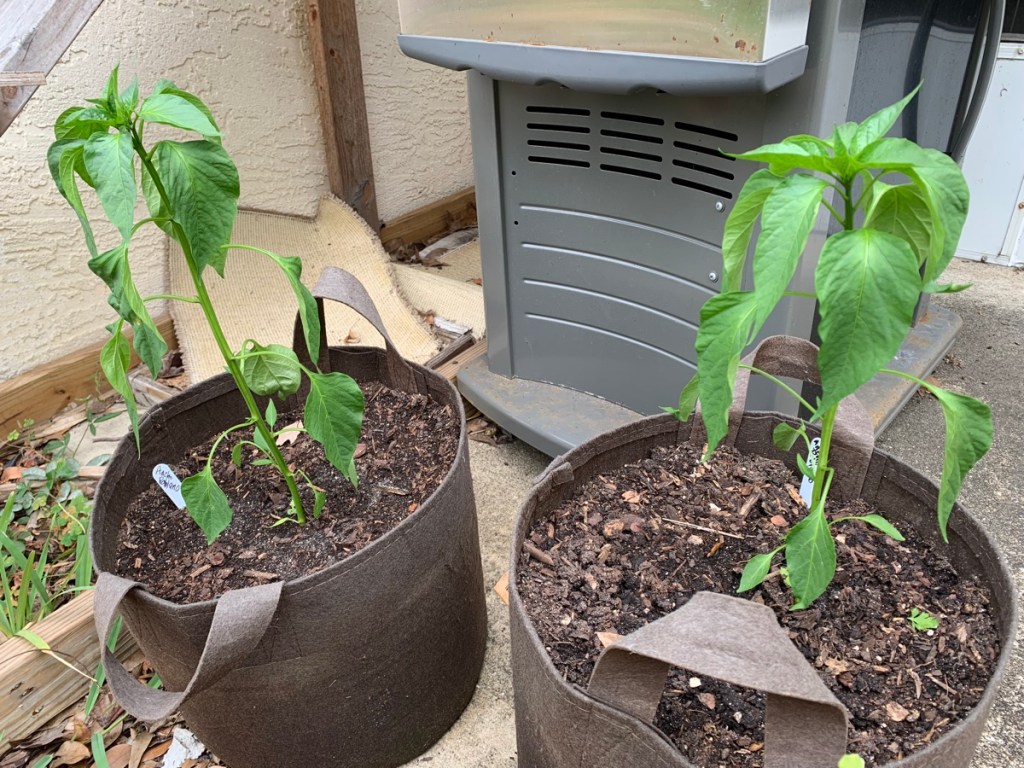
Last year I had some pretty awesome pepper plants growing in fabric bags. They looked great, and then suddenly began to wilt. I was being careful to not overwater, but that was not the problem. I think the peppers were not getting enough water. I didn’t know. I lost them all.
Transplanting peppersAncho poblano transplantsPepper plants wilting in the sun
I had no idea that the peppers were so thirsty. If I had dug my fingers down into the dirt, I might have realized the problem.
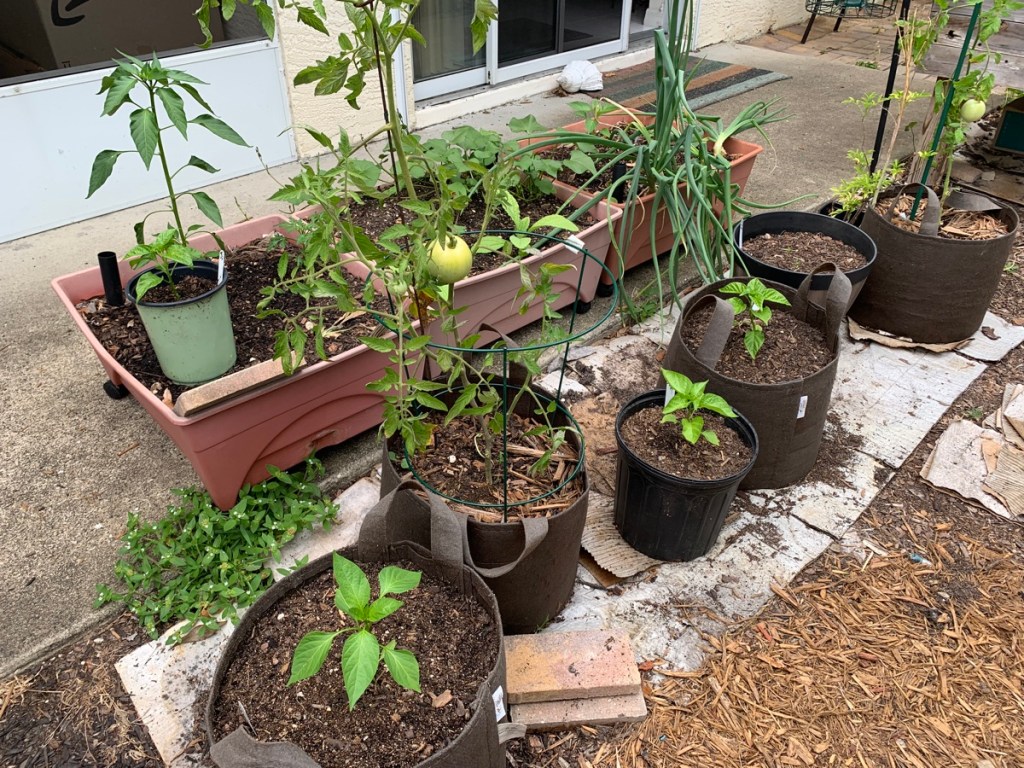
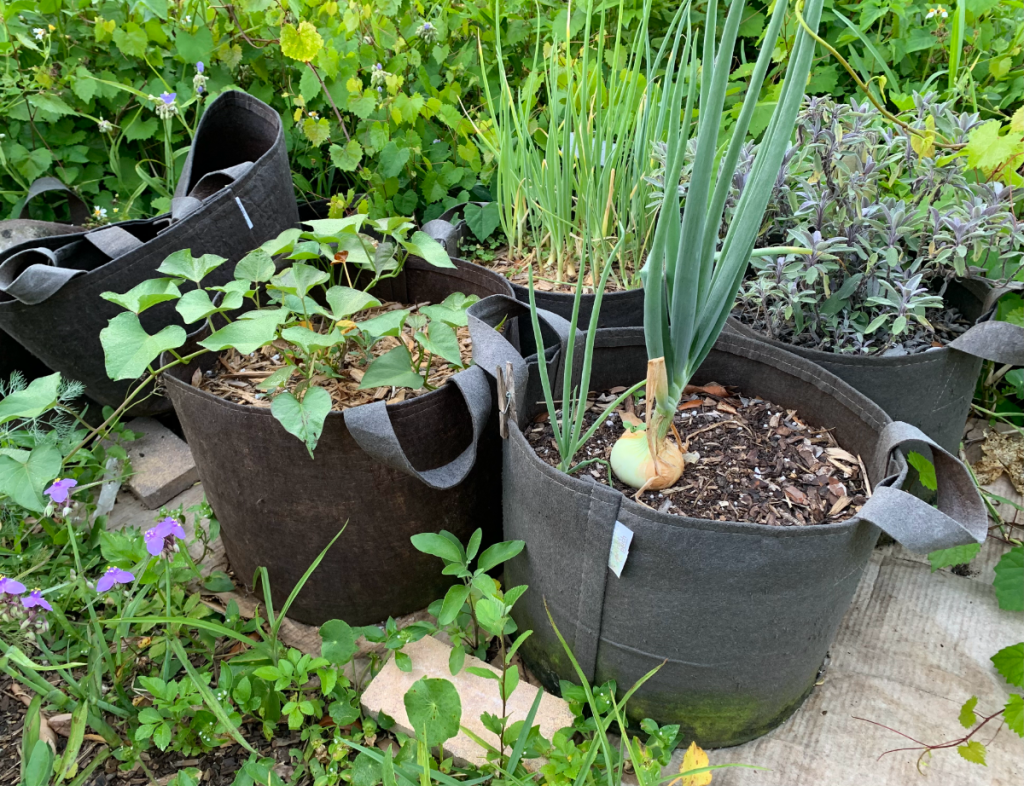
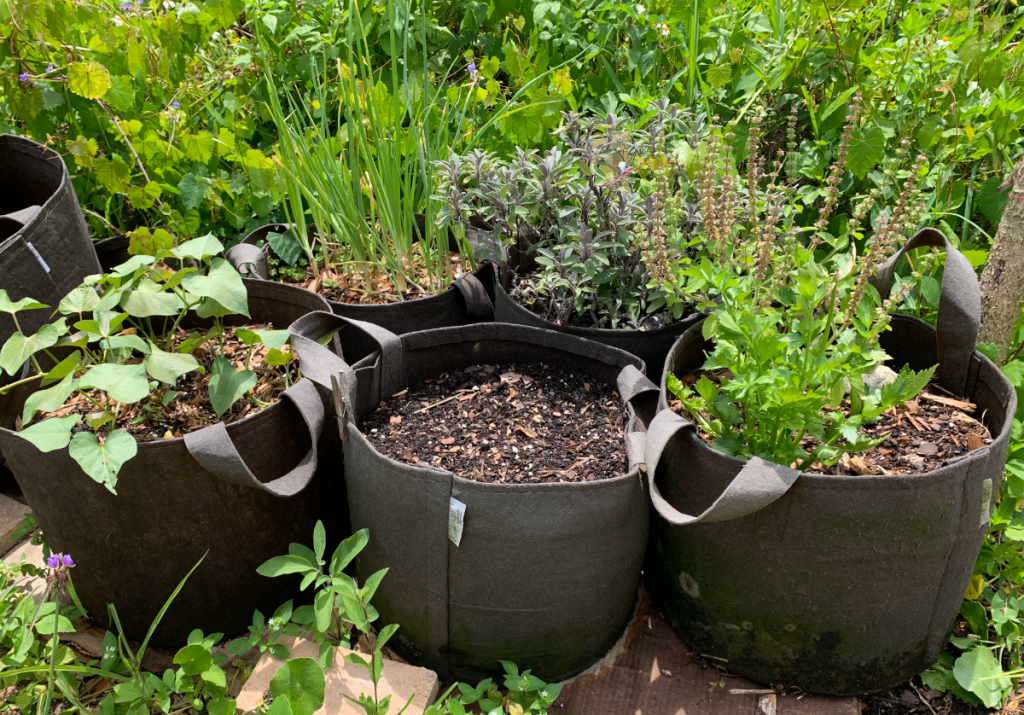
As I go through the filled bags that are currently in my yard – pulling carrots and onions – I am seeing lots of very dry dirt. It seems like I am watering plenty, with water running out the sides and bottom. But in reality, the dirt is very dry.
The Bags are Not a Complete Loss
I will still use my fabric bags, but only for certain vegetables, and only in winter. This is my plan.
Use fabric bags for winter vegetables only.
Grow shallow root vegetables, where roots don’t spread to the edge of the bags. Crops like onions, shallots, 1/2 long carrots, Tatsoi, and arugula come to mind.
Create a section of the yard and place all fabric bags close together. This can minimize sun exposure to the sides, and keep the bags from drying out as easily. I’ve already done that for the remaining potted bags.
Water crops using a soaker type system such as the Haws watering can (paid link) with the brass rose. I have this type of watering can and it is excellent for watering seedlings, or soaking a particular plant. Some other type of soaker system would also work.
Sweet potato, onion, sage and shallotsKeep the bags together & water every day
Advice on Fabric Bag Size
I have 7 and 10 gallon fabric bag sizes. I prefer the 7 gallon (Amazon paid link). It’s faster to fill, and large enough for what I want to grow. Now that I have decided to grow shallow root crops only, shorter bags might have worked better for my needs. But I have plastic box beds for that.
If you are gardening in Florida, choose your bag size wisely. Add good soil, and maybe mix it with coco coir, or something to minimize dry out. Plan to water any plants in the bags DAILY when there is no rain. I don’t think it is possible to overwater crops growing in these bags.
When my daughter gifted me a packet of Dahlia seeds, I had little hope that the plants would grow. I often feel that way about “normal” things trying to grow in this jungle. I live in zone 9b. My daughter was a little bit obsessed with the Floret flower farm. It was (is?) a show…
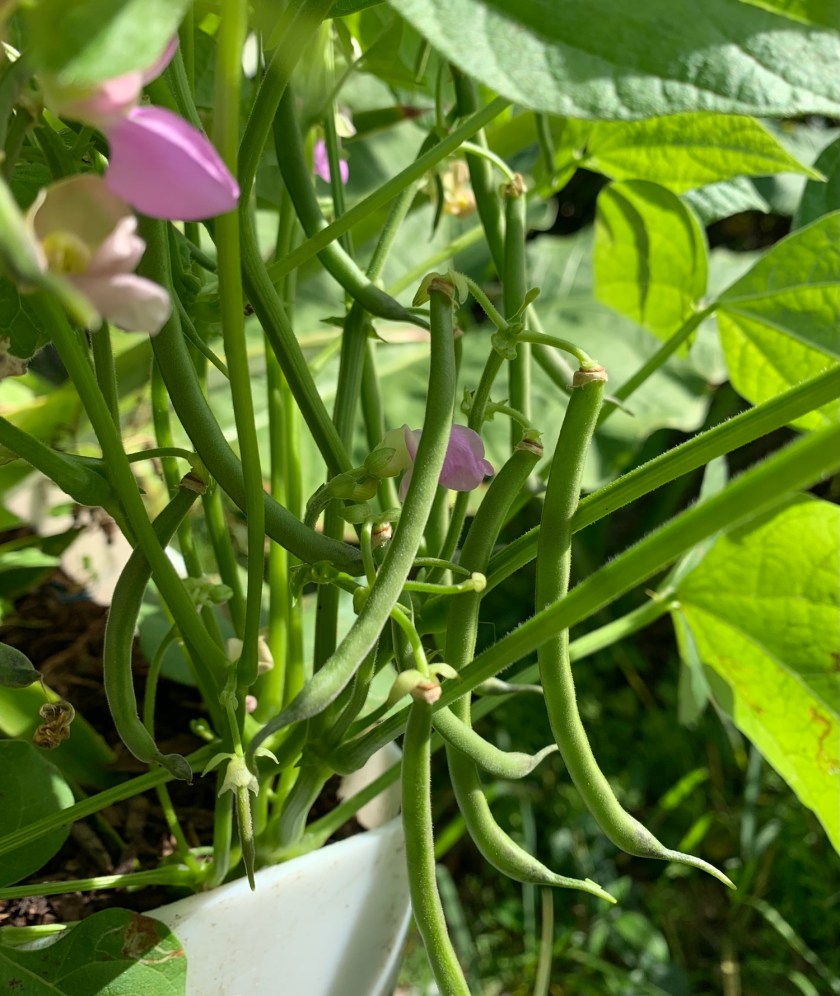
I planted Contender bush beans back on October 16th. Today is December 1st and I have picked my first batch of little green beans!
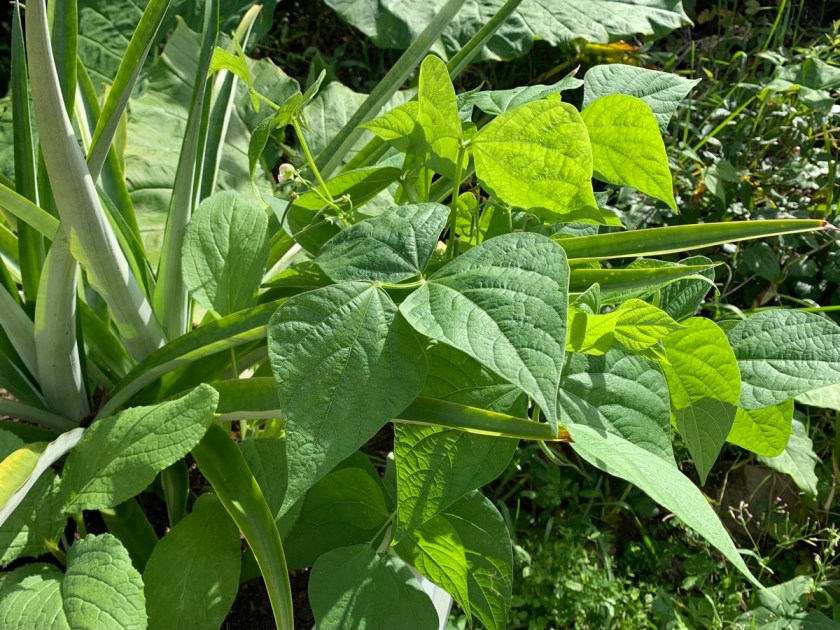
One plant is doing especially well in a raised bed. I planted it next to the pineapple.
One green bean plant is growing next to the double-pineapple plant in a raised bed. This plant is full of beans!
Beans on one plant
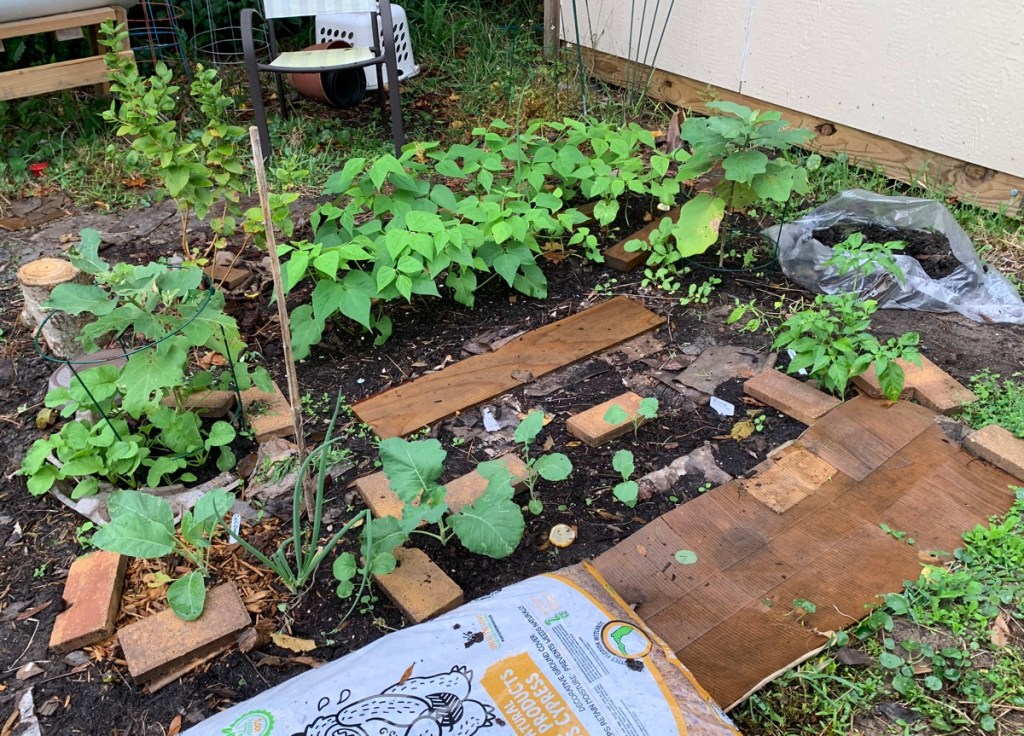
Finding Space For the Bean Plants
Before planting, I soaked the bean seeds overnight, then I read that they don’t really need to soak. I did not have any innoculent so they went straight into the ground. The hardest thing was trying to find space for all the plants in my small yard. Not all garden areas are ready for planting yet.
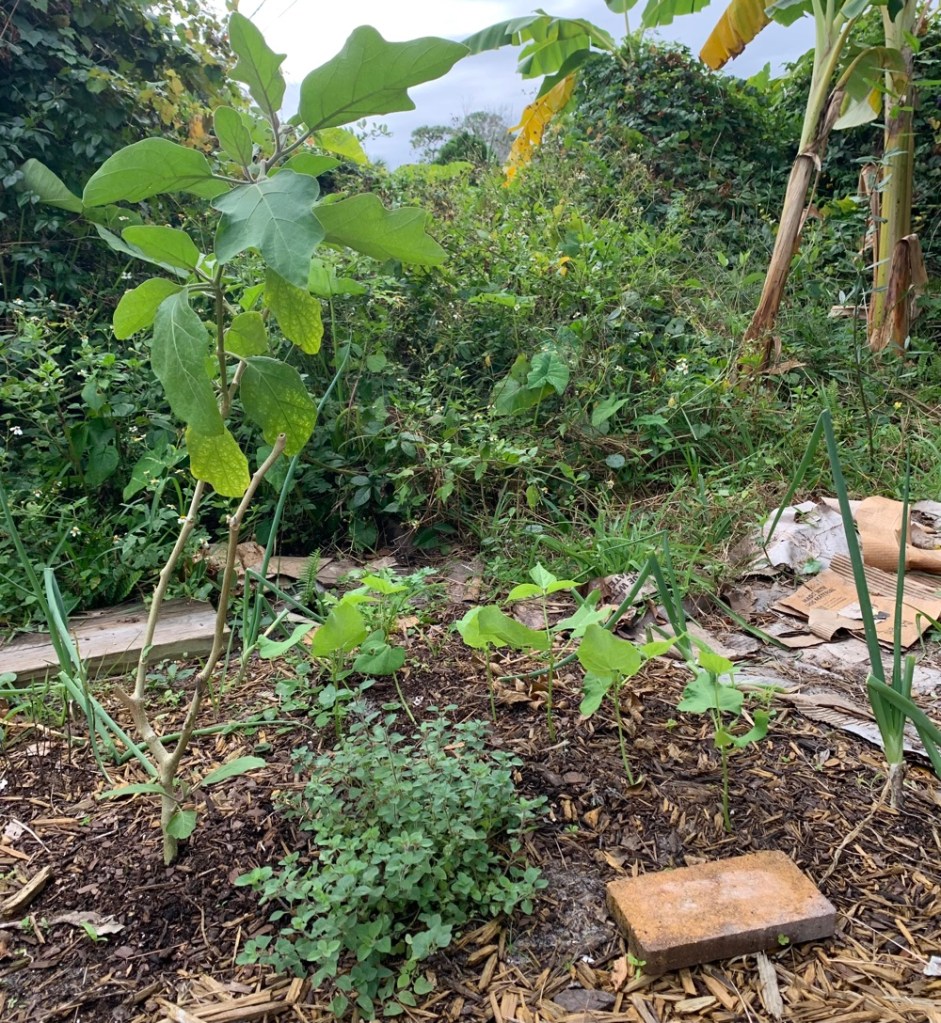
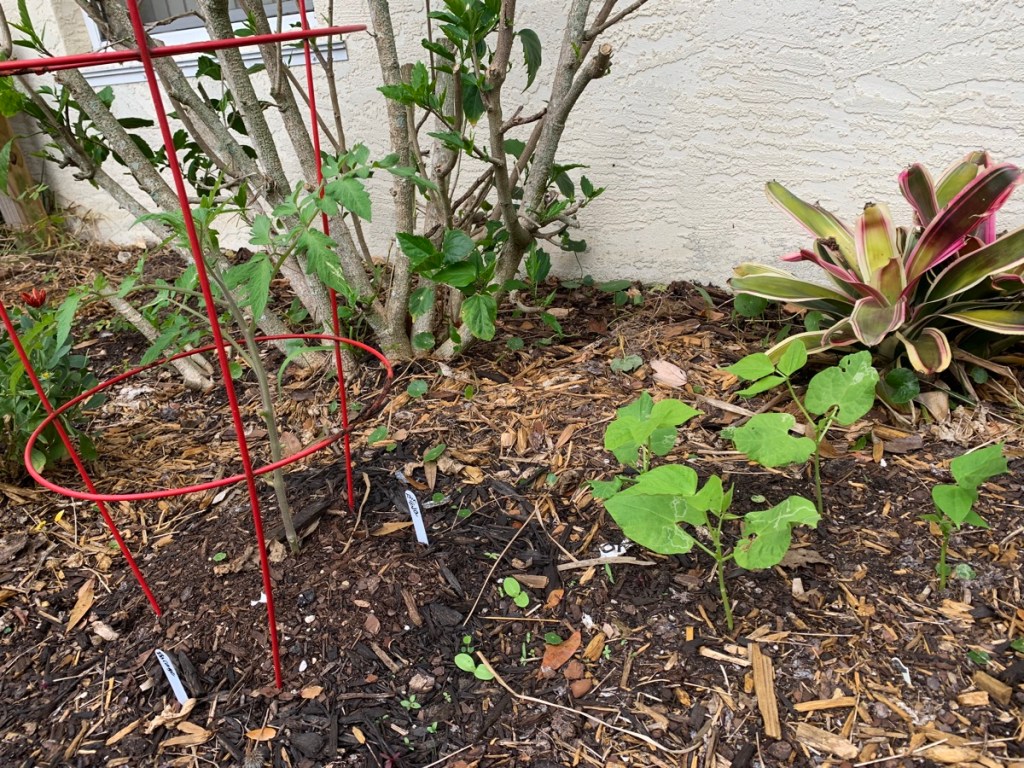
Besides the two rows of beans, I planted a few beans beside the eggplant, and a few near the hibiscus. A few more seeds were placed randomly into my white barrel raised beds.
A few bean plants in the hibiscus garden
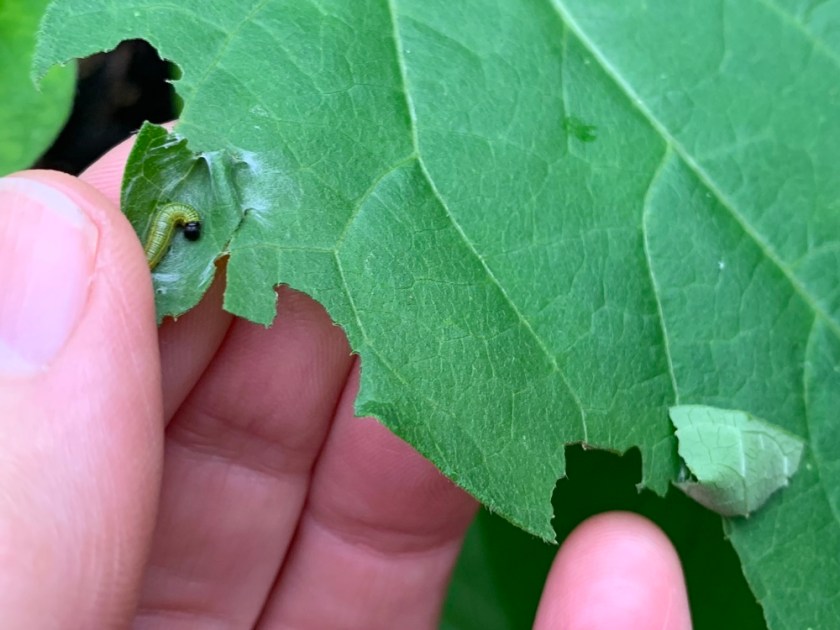
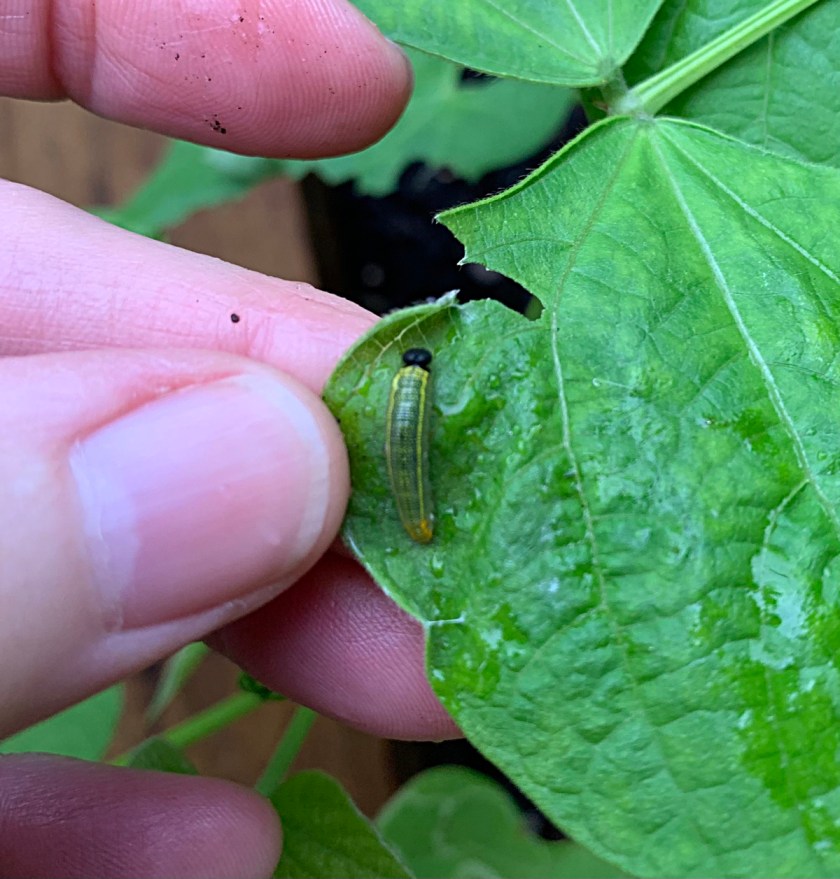
The Leafroller Worm
I created two rows of Contender bush beans in the little garden area where my Suyo Long cucumber plants had been growing. I had lots of worms on my cucumbers, but they were pickleworms, and much more of a nuisance.
The Leafroller worm is named very well. It cuts a little bit of the leaf and rolls it over itself and hides inside. The worms are green with black heads. It was easy to spot their hiding places because the underside of the bean leaves is light green.
I pulled back the leaf, picked off the worm, and threw it into the grass for the lizards.
Leafroller Worm on bean leaf
Leafroller worm
Whereas I gave up on picking all the worms off the cucumber plants, the bean plant infestation was not bad at all. As of this time, I don’t even see any more worms on the leaves.
December 1, 2023
Bean plants December 1st
The Weather
We’ve had some crazy up and down temperatures this fall, which is pretty typical for Florida. We can have temps in the 40’s and 50’s overnight but it gets into the 80’s during the day. A few days stayed quite chilly all day. We’ve also had a few bouts of rain which lasted for about a week each time.
It is interesting to see that the beans did very well through all these weather changes. For that reason, I have planted my second crop of green beans. The new crop is organic Blue Lake Bush beans. I have one more packet left to plant when my first batch of plants goes by.
It is not often that I buy cauliflower, but I do eat it. When I had the chance to buy seeds, I decided to try my hand at growing my own. One nice head would be just fine, but the packet has 600 seeds!
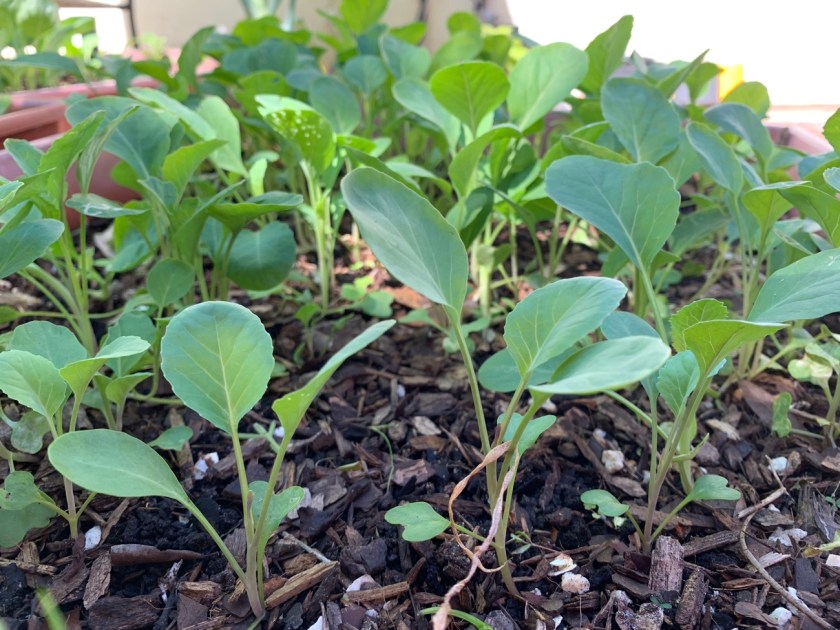
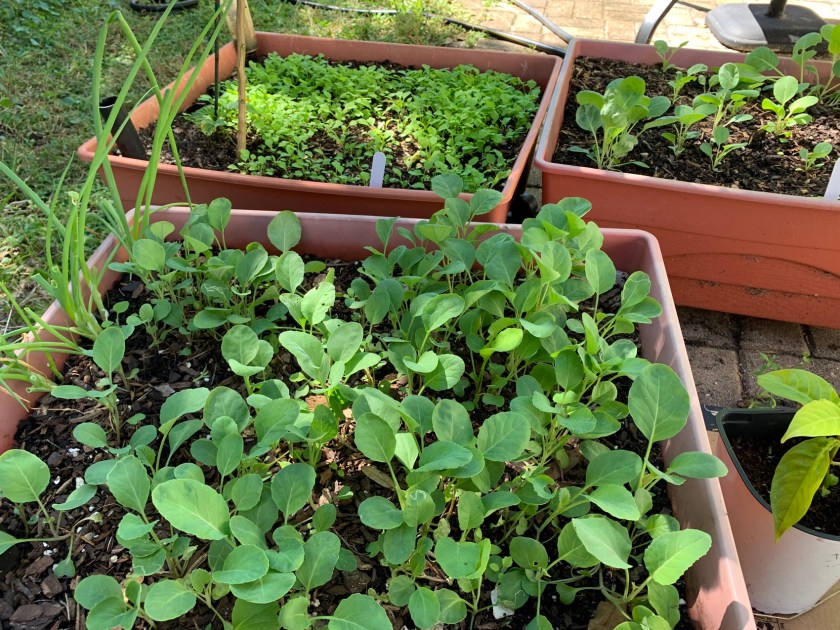
Often my grow boxes, aka little raised beds, become a nursery for seedlings. Once the babies grow, I can redistribute them to large pots or into the ground. A lot of these plants will be pulled up, or cut off, and added to the compost bin.
Cauliflower likes cooler weather. Here in Central Florida it can be planted in fall. I put some of my seeds into a grow box on September 12th, and by October 21st they have really sprouted! (photo below)
Overcrowded cauliflower seedlings – 10/21
Cauliflower plants need a foot or more of space for each plant to grow. That means I will probably grow only one plant in this box! Obviously a lot of these seedlings will have to go. A few can be put into the back garden, and I might use my grow bags for a couple.
According to the UF|IFAS Gardening Solutions “Cauliflower” page, each plant needs to be 12-18 inches apart. All of my gardening areas are small, so I will only be attempting to grow a few cauliflower plants. How much cauliflower do I need anyway?
Self-blanching cauliflower means that when the leaves grow, they will automatically wrap around the head. This is for protection from the sun. Thankfully, I had purchased Snowball Self-blanching, so I shouldn’t have to worry about that – BUT the seed packet says this, “Tie the inner leaves around the crowns as they form to blanch them white.”
Cauliflower Seedlings
After the seeds were planted in this box outside, and just beginning to grow, we had over a week of rain – lots of rain. We had 9 inches in just 2 days and it rained for over a week. I wondered if any of my newly planted seeds would survive, but they did.
The seed packet directions also inform me to provide fertile, well-drained soil and even moisture. I guess they can handle the water. This grow box is not getting a lot of sun. The plants will have more sun in the grow bags.
Once the sun was heading down, I dug up groups of the cauliflower seedlings, from the box, and planted the whole clump into each of two bags.
Once they began to grow, I thinned them down to one plant per bag. After months of growing, I never got an actual cauliflower head, so I began to eat the leaves! Many cruciferous vegetable leaves are edible.
A few seedlings in each potThinned to one auliflower plant
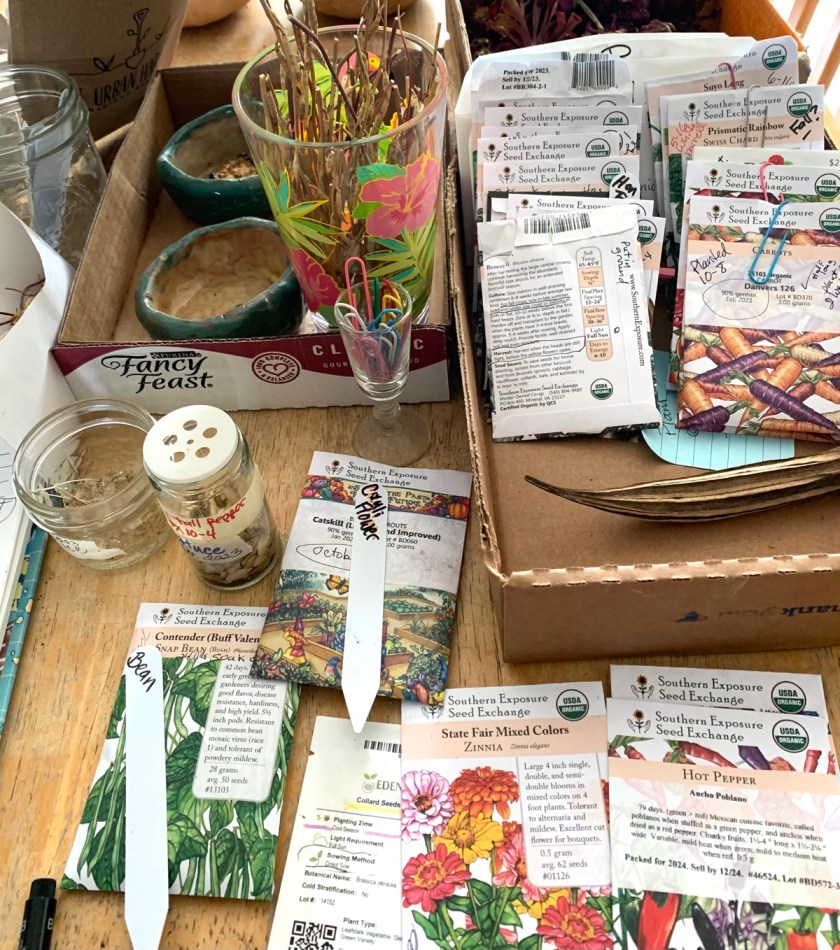
Tendency to Overbuy Seeds
Little seed packages are inexpensive. Because of this, we tend to overbuy. Each seed packet usually has more than enough seeds for a small, backyard garden area.
I’ve divided my seed packets into Fall and Spring, with a few Cow Peas / Black Eyed peas to use in summer. I’m not going to try to grow much next summer.
My garden planning area and my used (and unused) seed packets.
The exception to this packaging of seeds, is the Moringa. The seeds are large and I think there were only seven or eight in the packet. Also, other larger seeds like squash, cucumber, beans, and watermelon won’t have a lot of seeds. But, if your garden is small, one package will probably work.
I am still learning what to grow in my area, so I have over-bought this past year. Seeds don’t stay viable for more than a year or two – unless the packet says differently. They can’t be kept and stored for long (as far as I know), so there is really no need to stock up without having a plan for sowing.
Saving seeds is fun too, although I am learning that it should not be done if you grow more than one type of that vegetable, or from that family. They can get cross-pollinated and the seeds won’t give you the correct vegetable next time – when you use the saved seeds to grow again. It gets complicated. If you want more info on saving seeds, read this article at Seed Savers Exchange.
I saved lettuce and arugula seeds from Spring and have recently planted those seeds. Both veggies are growing well. I have a lot of seeds left over too.
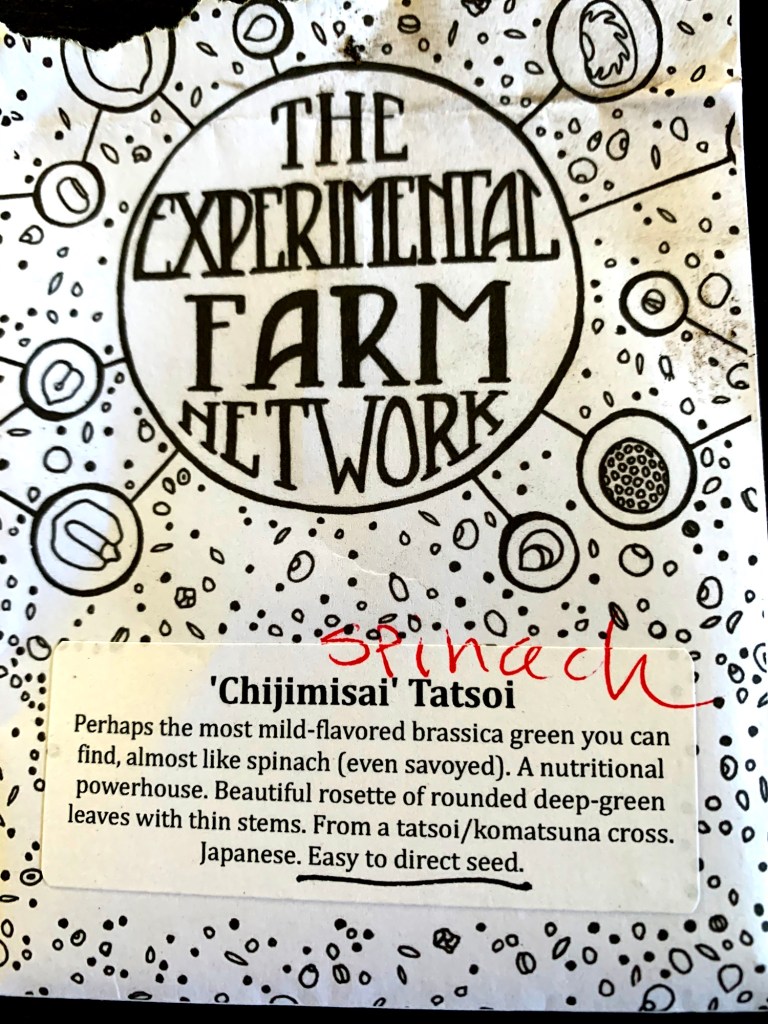
This year I learned about growing greens that will do well here in Central Florida gardens. I have just planted something called Chijimisai. It is supposed to be a lot like spinach.
In general, greens like lettuce and kale, must grow in cooler weather. In order to pick greens for salads, smoothies and for stir-frying we must grow during the correct season for where we live.
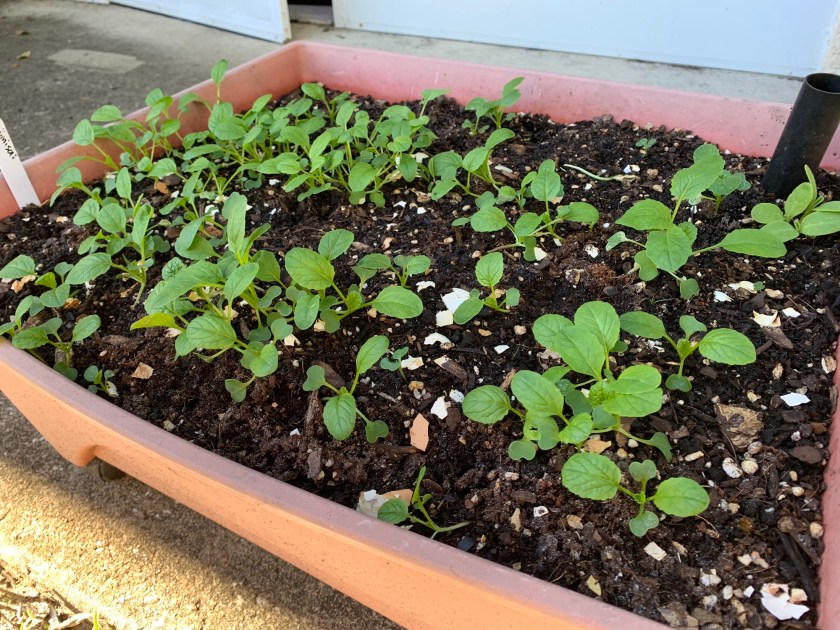
Now, it is mid October and cooler weather is here. I direct seeded the Chijimisai into a grow pot on the 4th of this month. Today, two weeks later, it looks like this:
Chijimisai at two weeks – planted from seed.
After two weeks, I was wondering about thinning the greens. I found a YouTube video of a man (in Texas I think) harvesting / thinning his Chijimisai and it was very crowded. He had let it grow and then thinned it when the plants were pretty large. At that point he could use the bigger leaves to eat.
That is what I plan to do.
Right after I planted the seeds in this pot, the raccoons walked all through my planters and I’m sure stopped the growth of some seeds. Grrrrrr…. I put eggshells all over the dirt to deter their little paws. I don’t know if that works, but I had to try something.
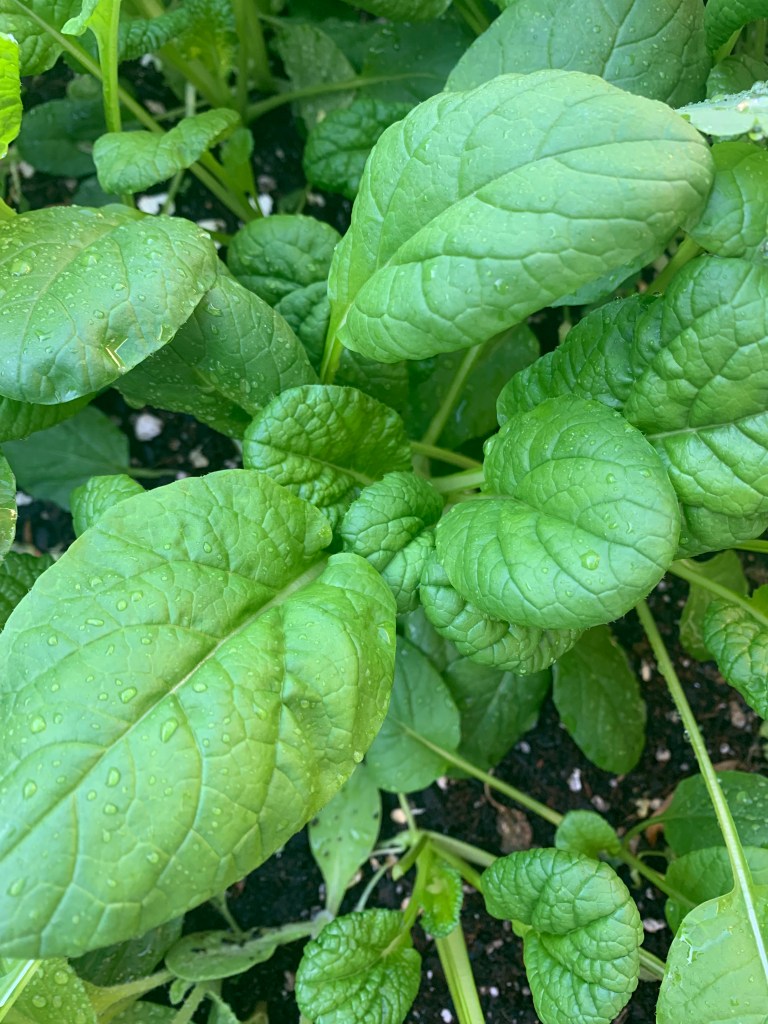
By the first of November my spinach garden is full of wonderful, edible green leaves!
Arugula, spinach, and lettuce with radishes.
Buying Chijimisai Seeds
This is the packet of seeds. I still have some left to sow later on. At this point I don’t know what will grow and what won’t. I’ve only planted partial amounts of seeds in my small pots and some areas of the garden.
I bought my seeds from The Urban Harvest. They sometimes send seeds that come from other providers. I’ve had luck with most of the seeds they’ve mailed me and I continue to buy from them.
I’ll update the blog as the season progresses. I’m really hoping for some good greens this Fall.