February Garden Planting

It is the end of February and here in Florida I am getting some seedlings and sweet potato slips into the raised beds.

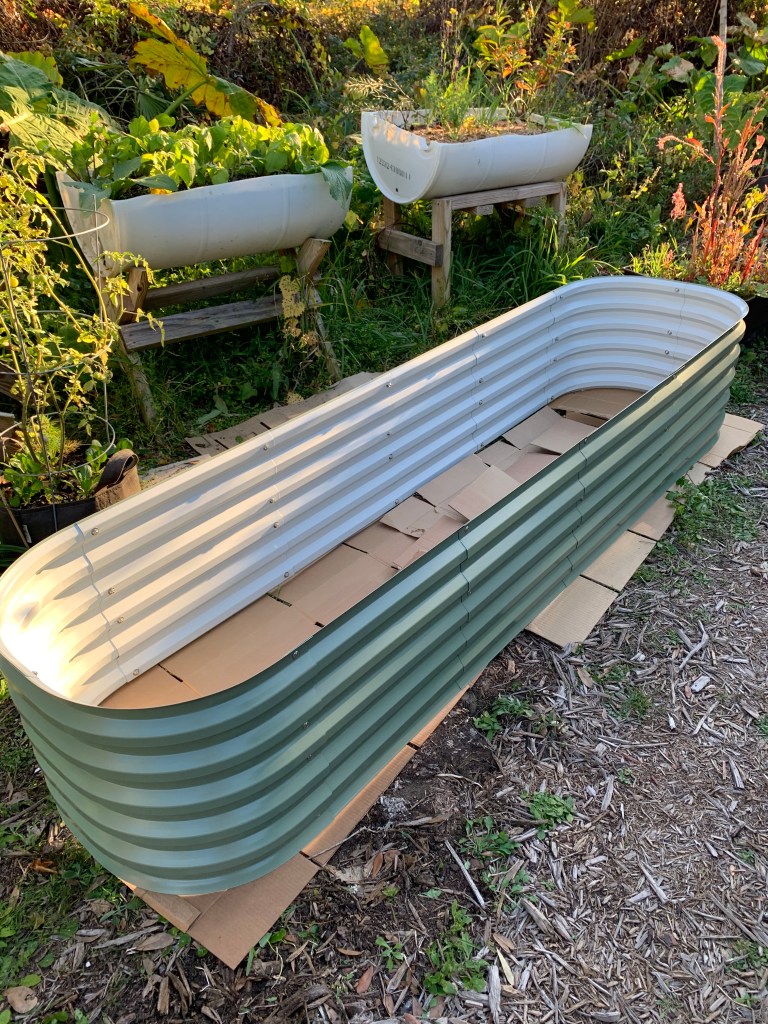
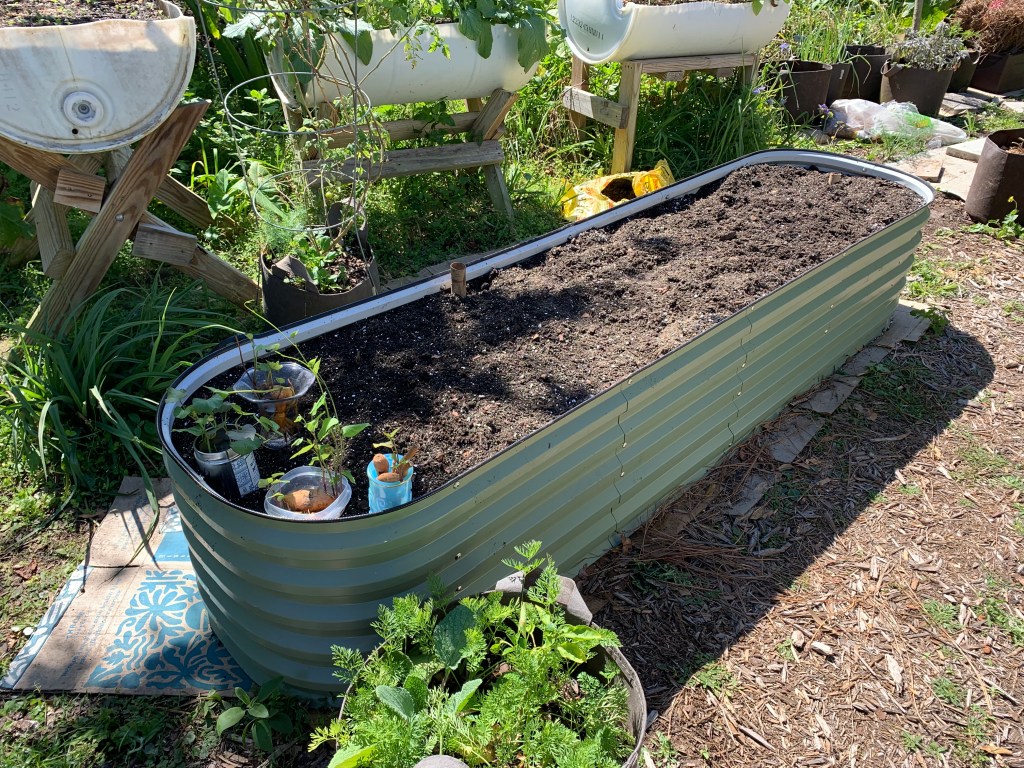
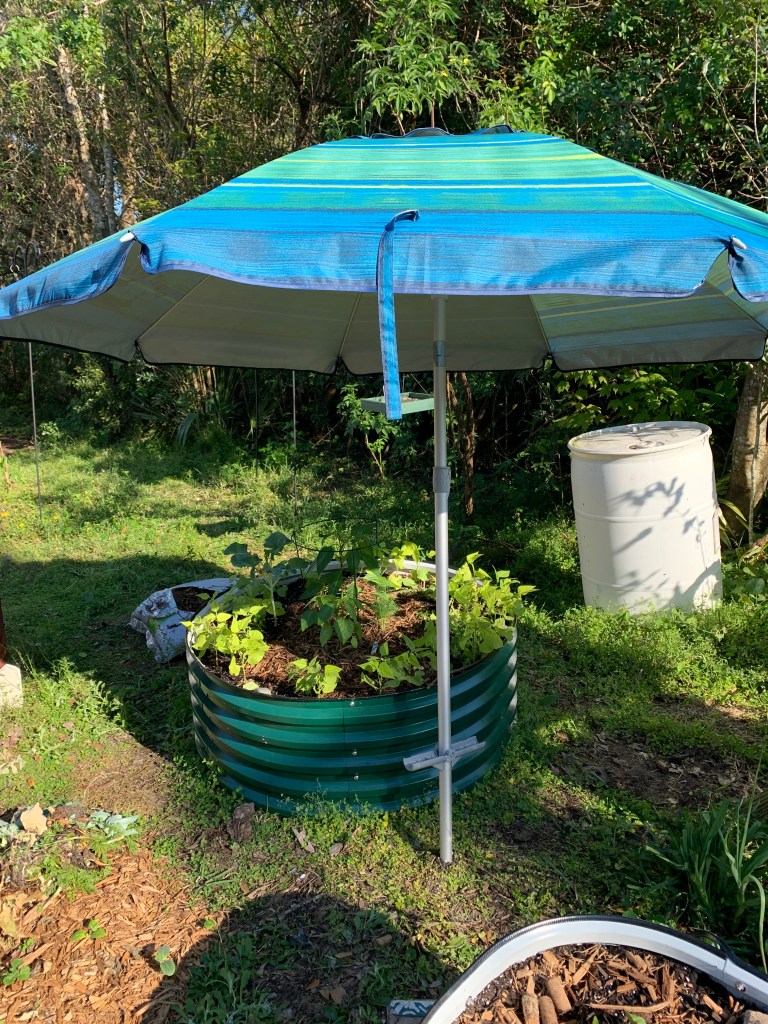
Finally I have filled my long raised bed. This took some real effort. The metal bed is from Vegega and is 17 inches high. It had 12 pieces to assemble and it was a hot day. It actually took me 2 days to put it together, and then it was time to fill. That took many days and a couple of trips to the Yard Shop.

The last push to fill it took 8 bags of purchased soil. I also mixed in some perlite, compost, and fertilizer. At last it was full.

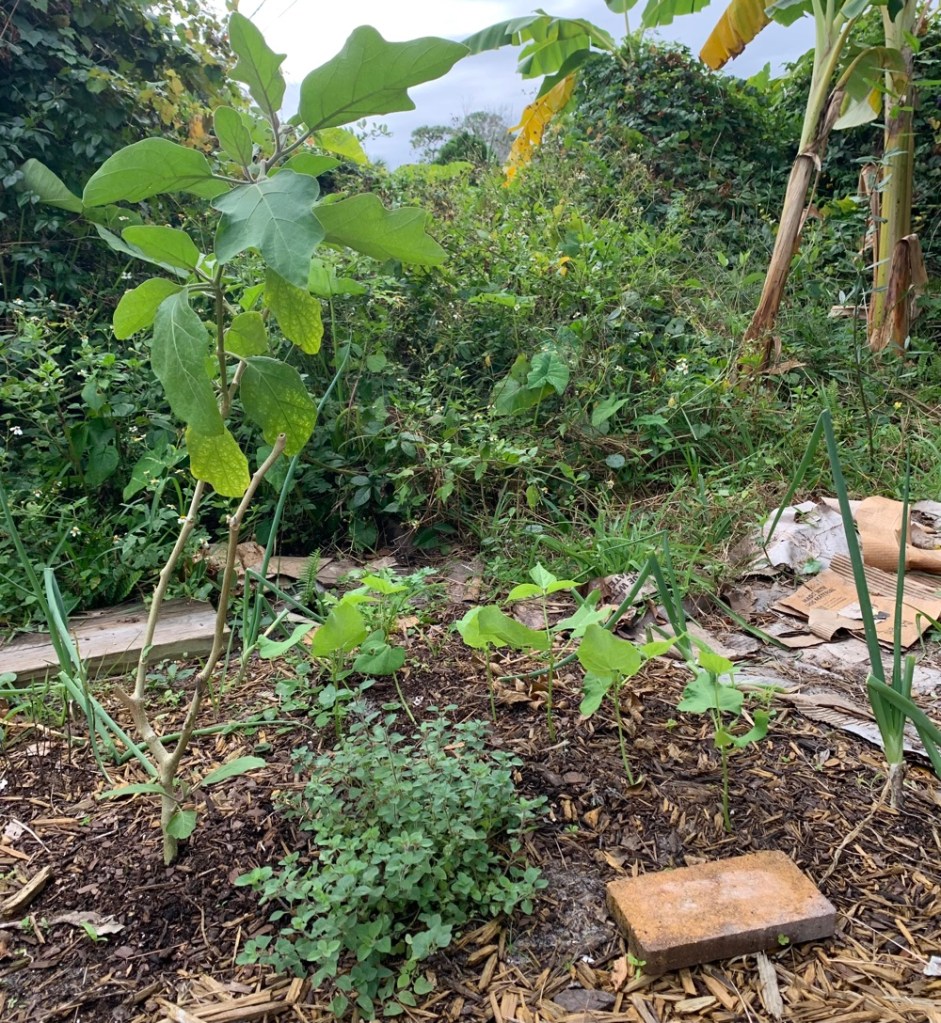
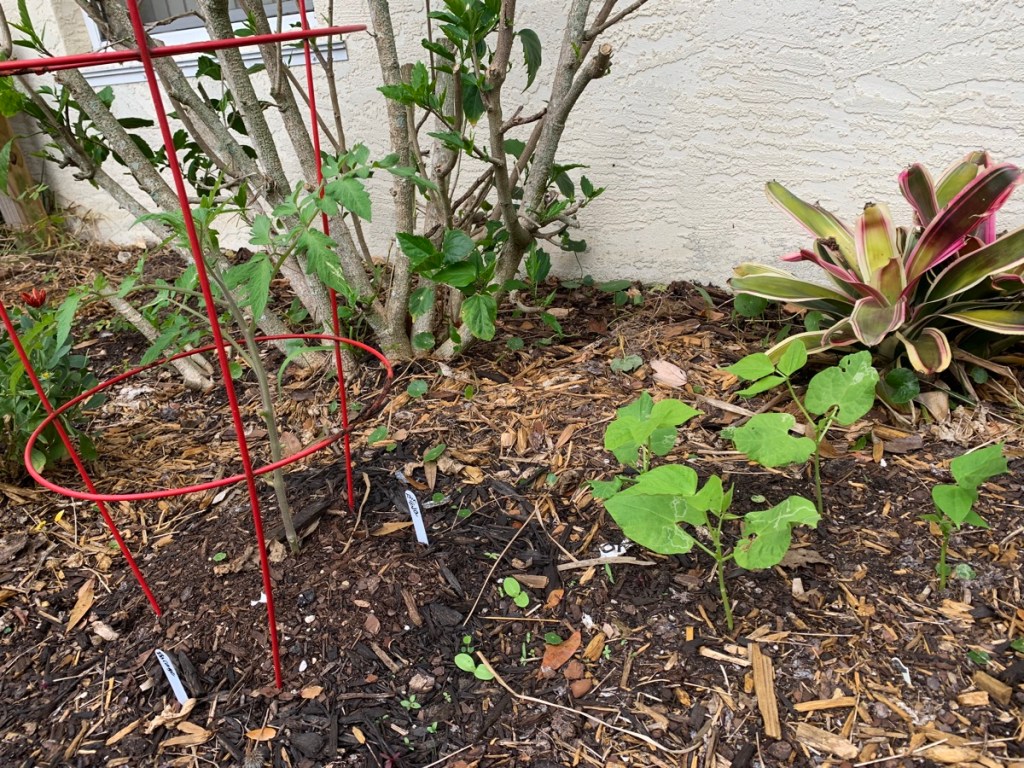
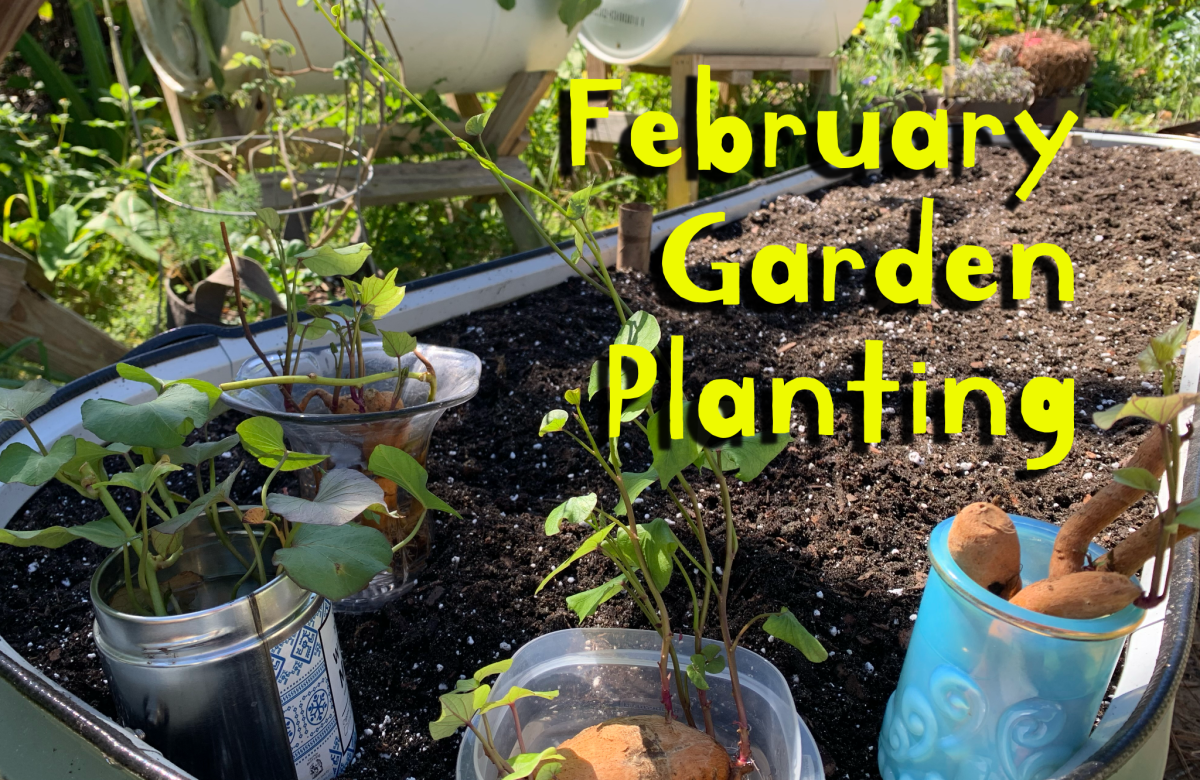
I’ve had some sweet potato slips growing on my windowsill for a few weeks. I kept finding sweet potatoes buried in the yard that were rooting. They really needed to get into the ground. Our weather is not super hot yet, but I figure the plants are better off in dirt than in water in my house. Also, we have an upcoming camping trip. The goal is to plant things before I leave.

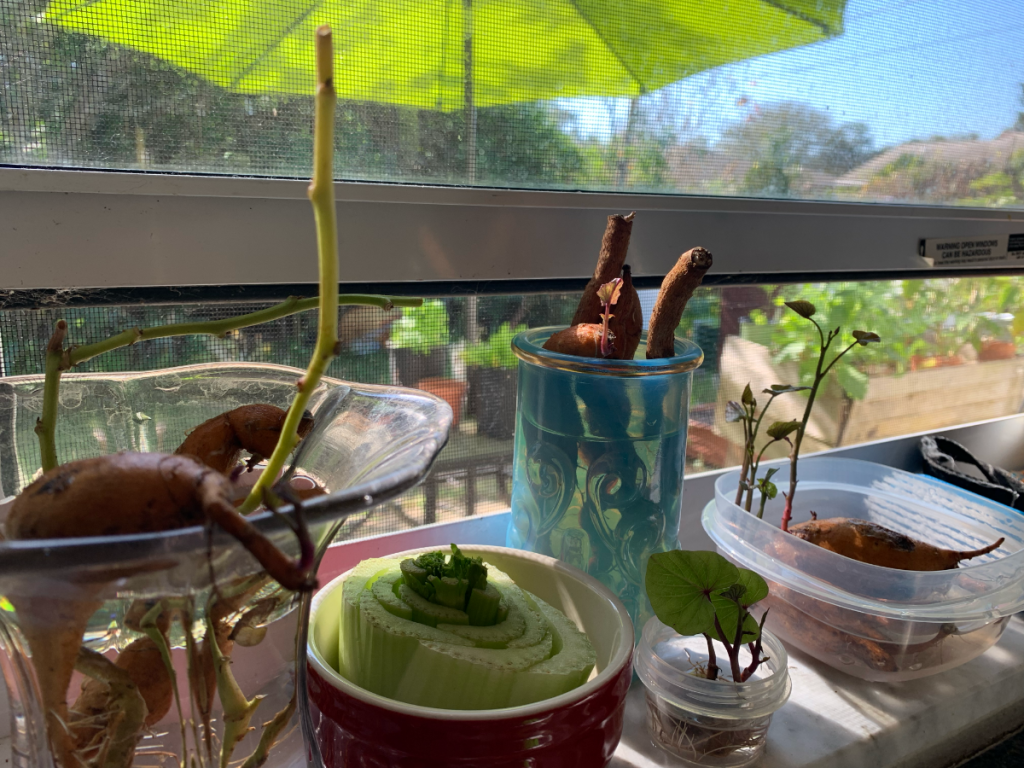
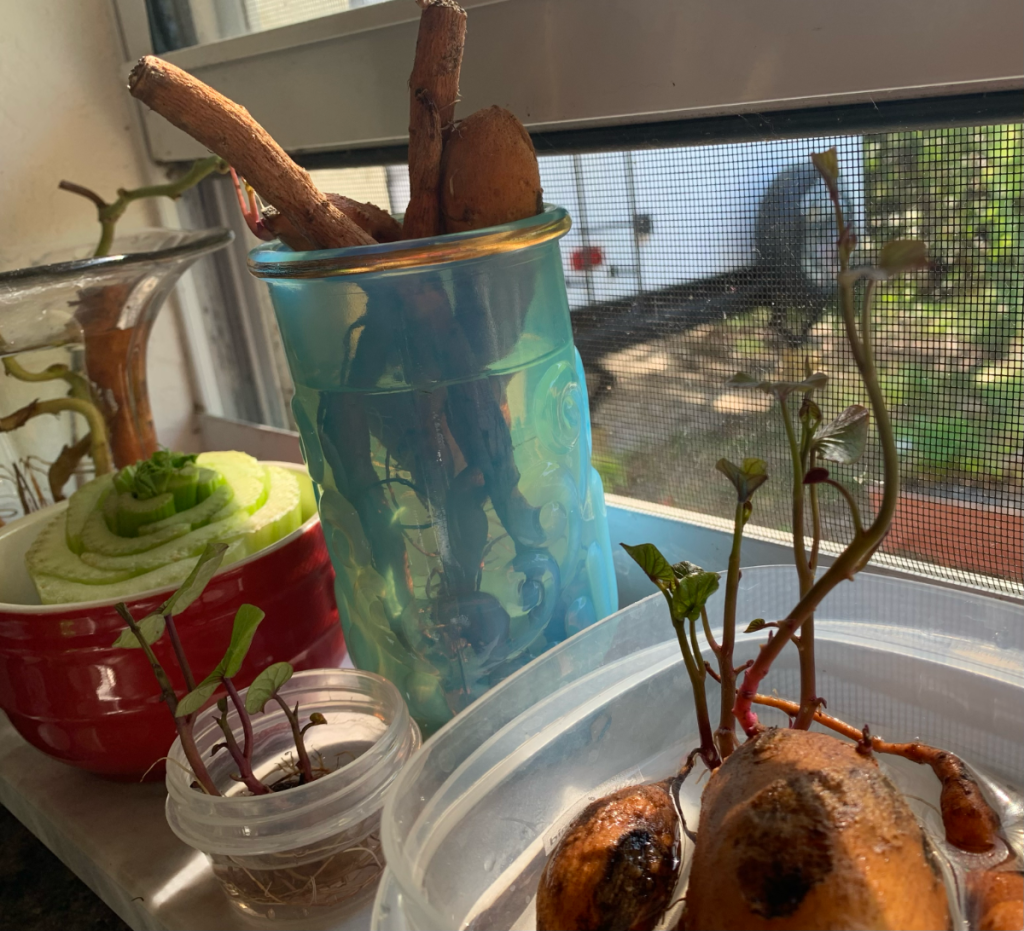
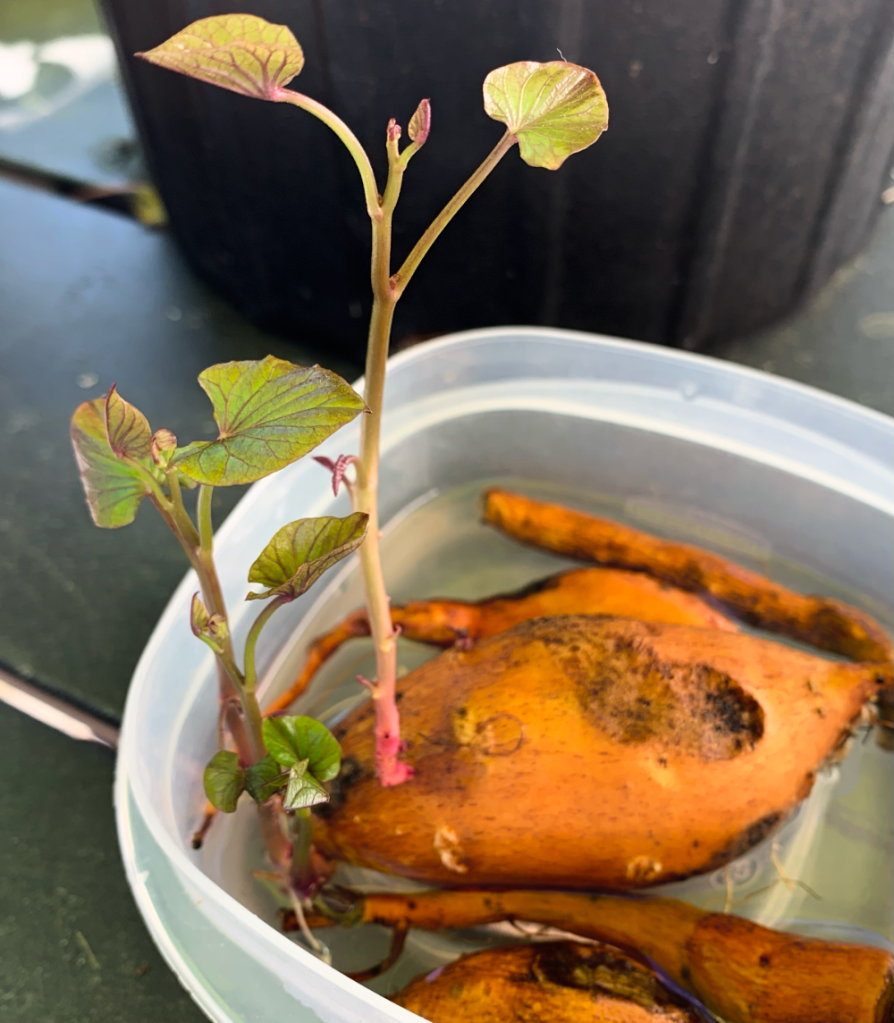
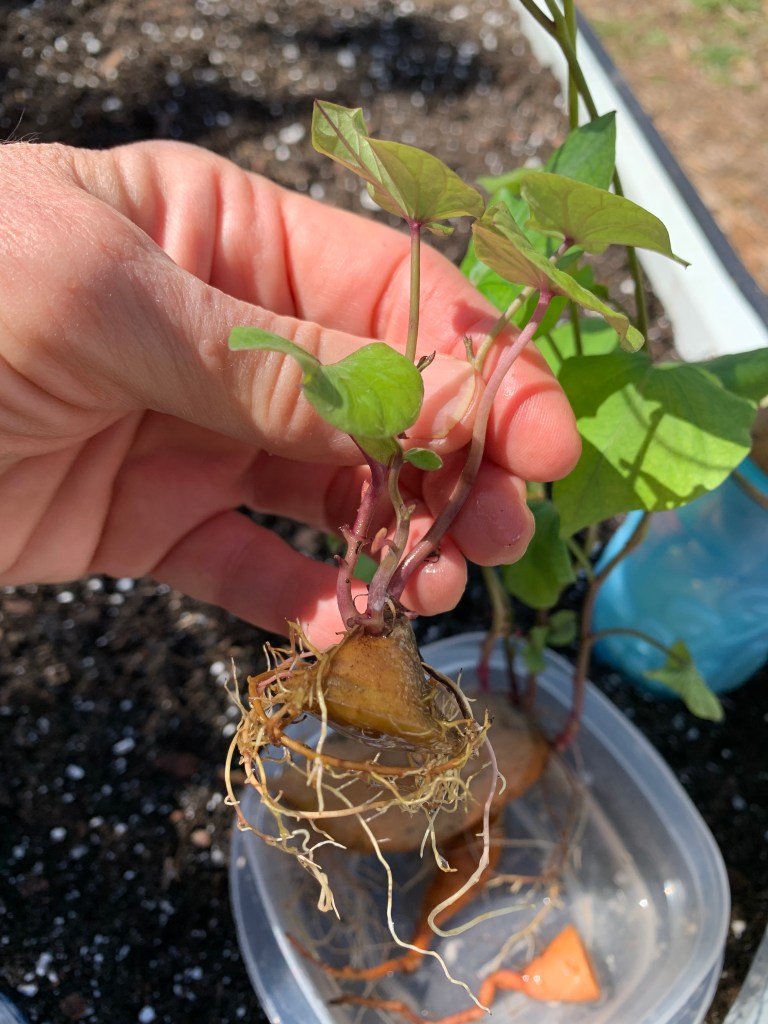
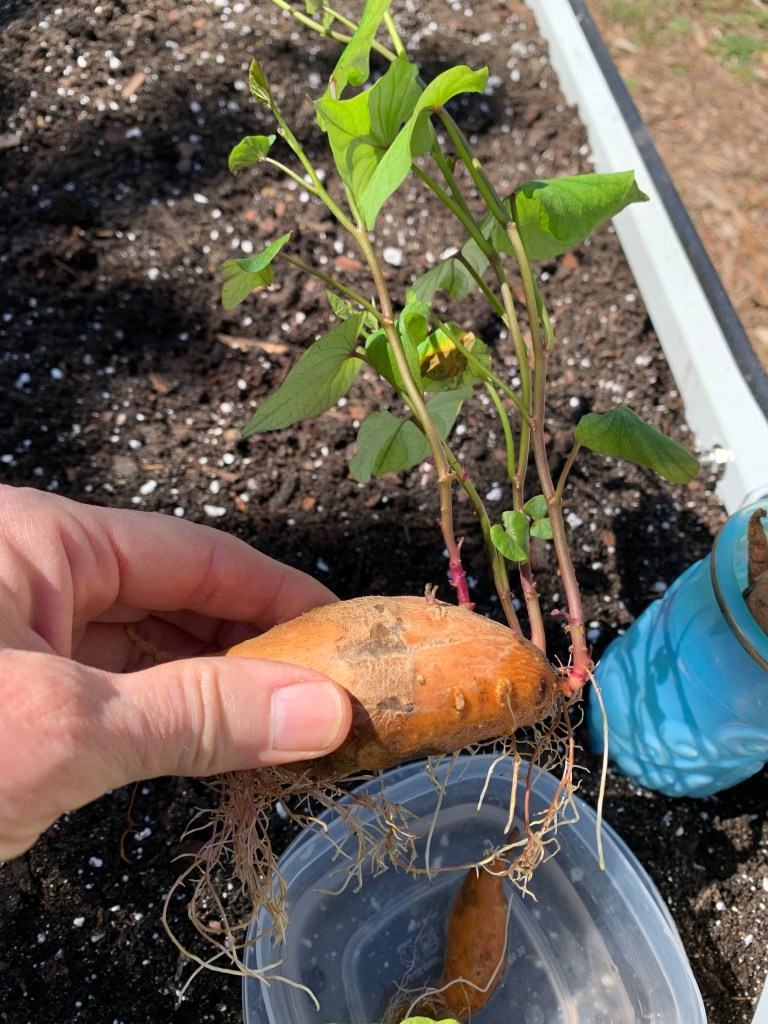
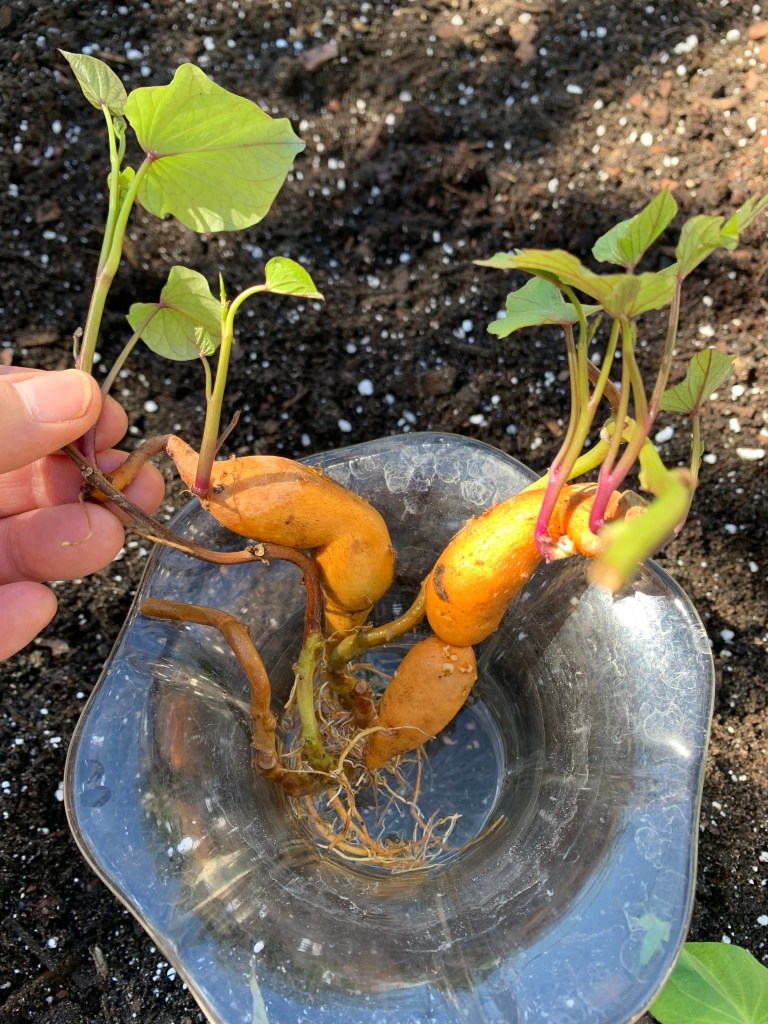
Originally, I had planned to order some sweet potato slips. When companies send out the slips, they do not specify when they will come. We have a couple of camping trips coming up and I’m afraid I will not be home when the slips arrive. Also, I found so many potatoes in my yard that were already growing, that I don’t really have room to plant more.

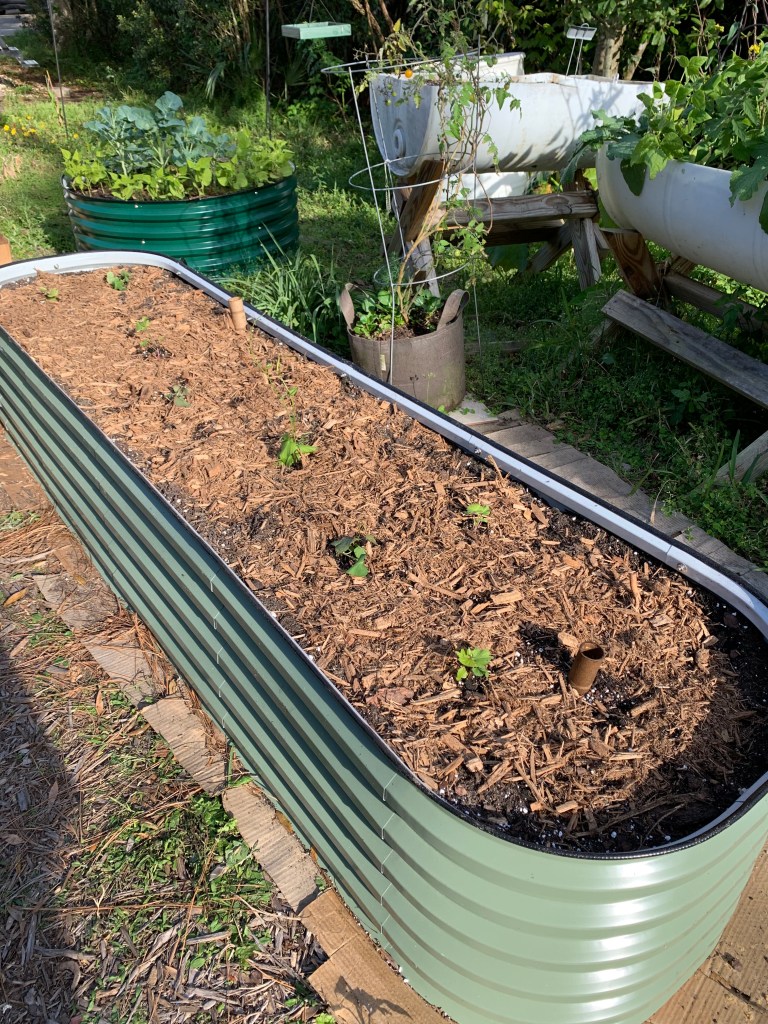
I have one more raised bed to set up. It could take me a while. I’m feeling good that this one is planted and hopefully I will have sweet potatoes to eat in a few months.

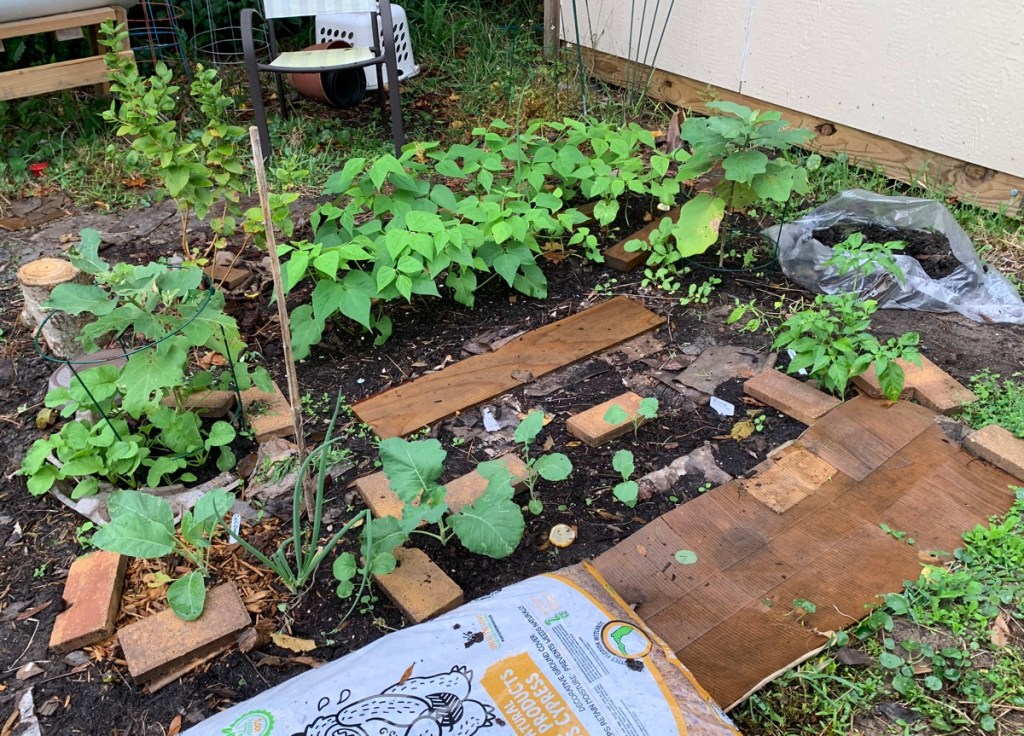
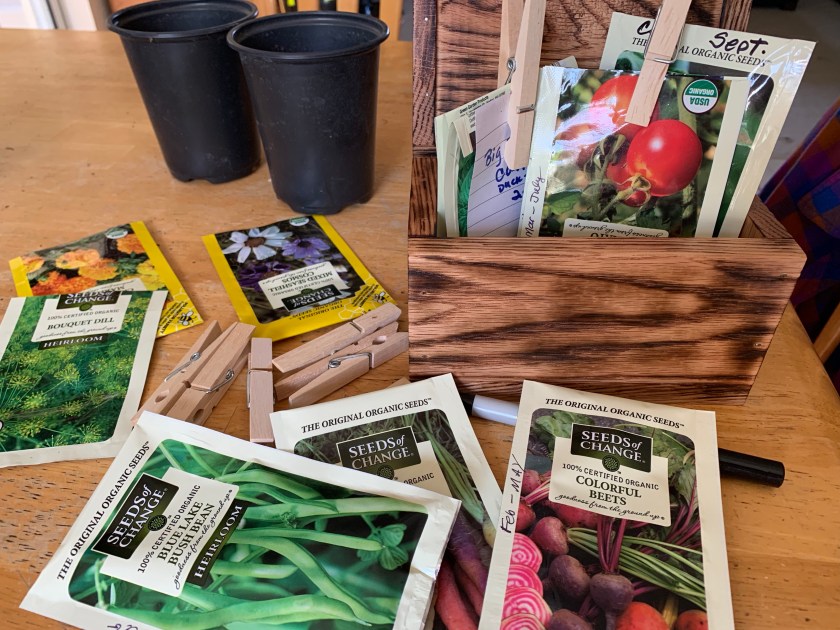
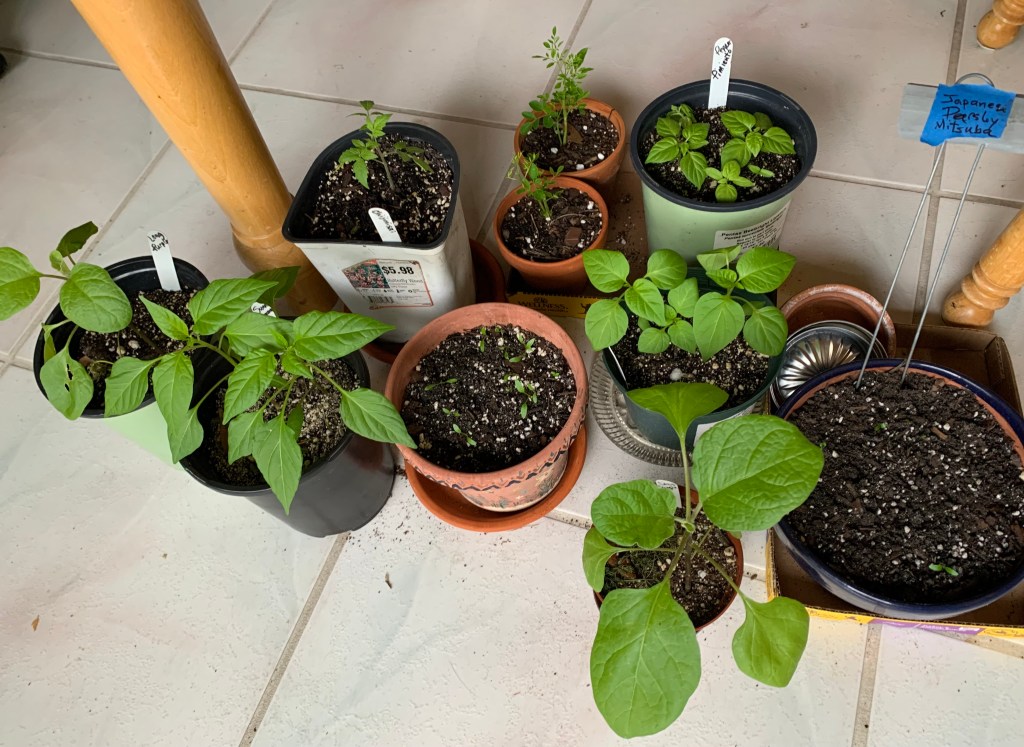
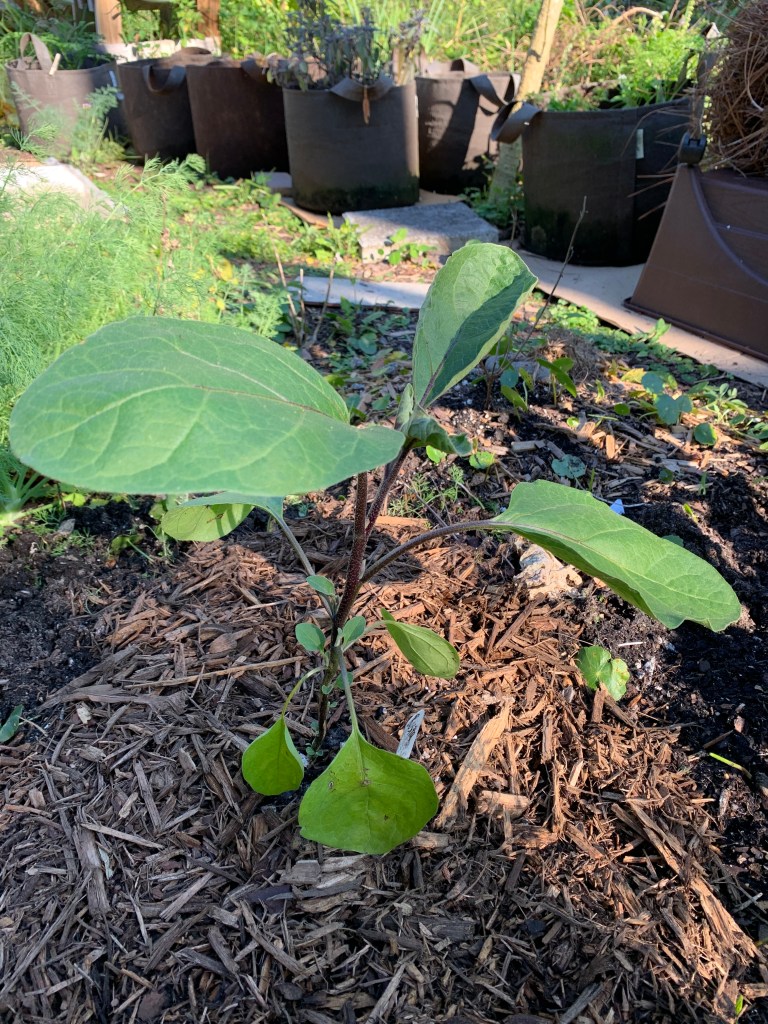
Peppers and Eggplant

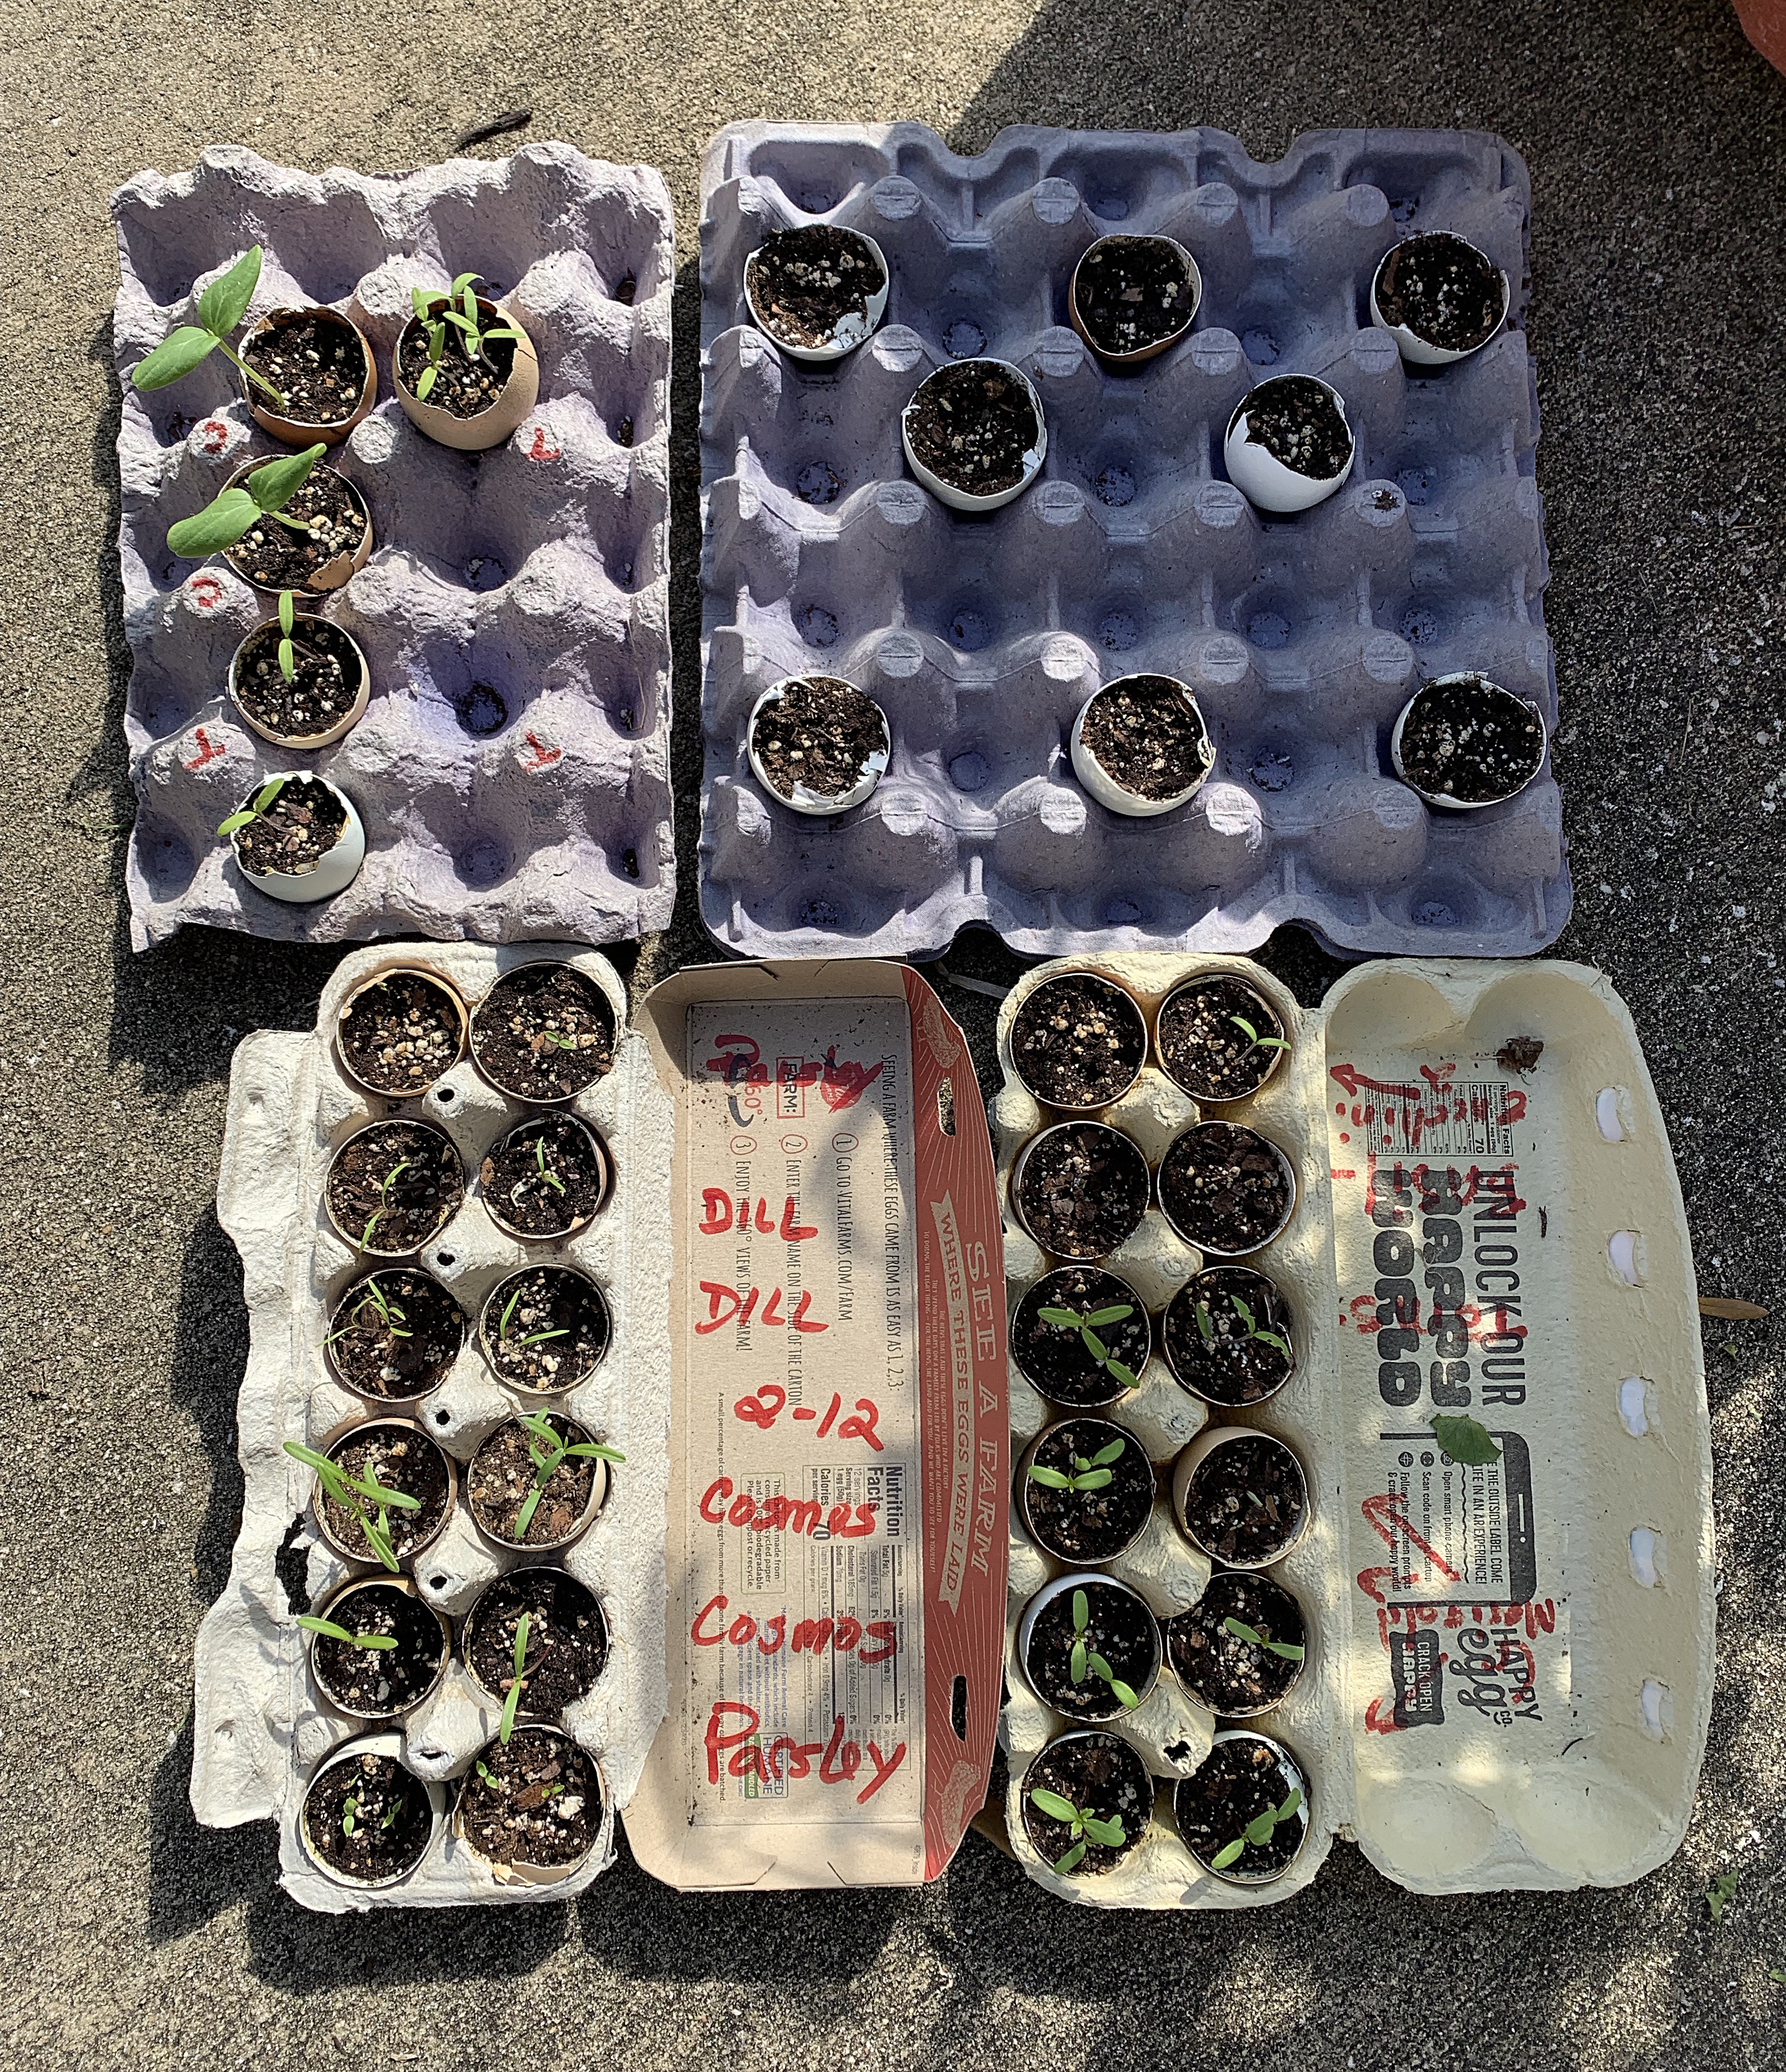
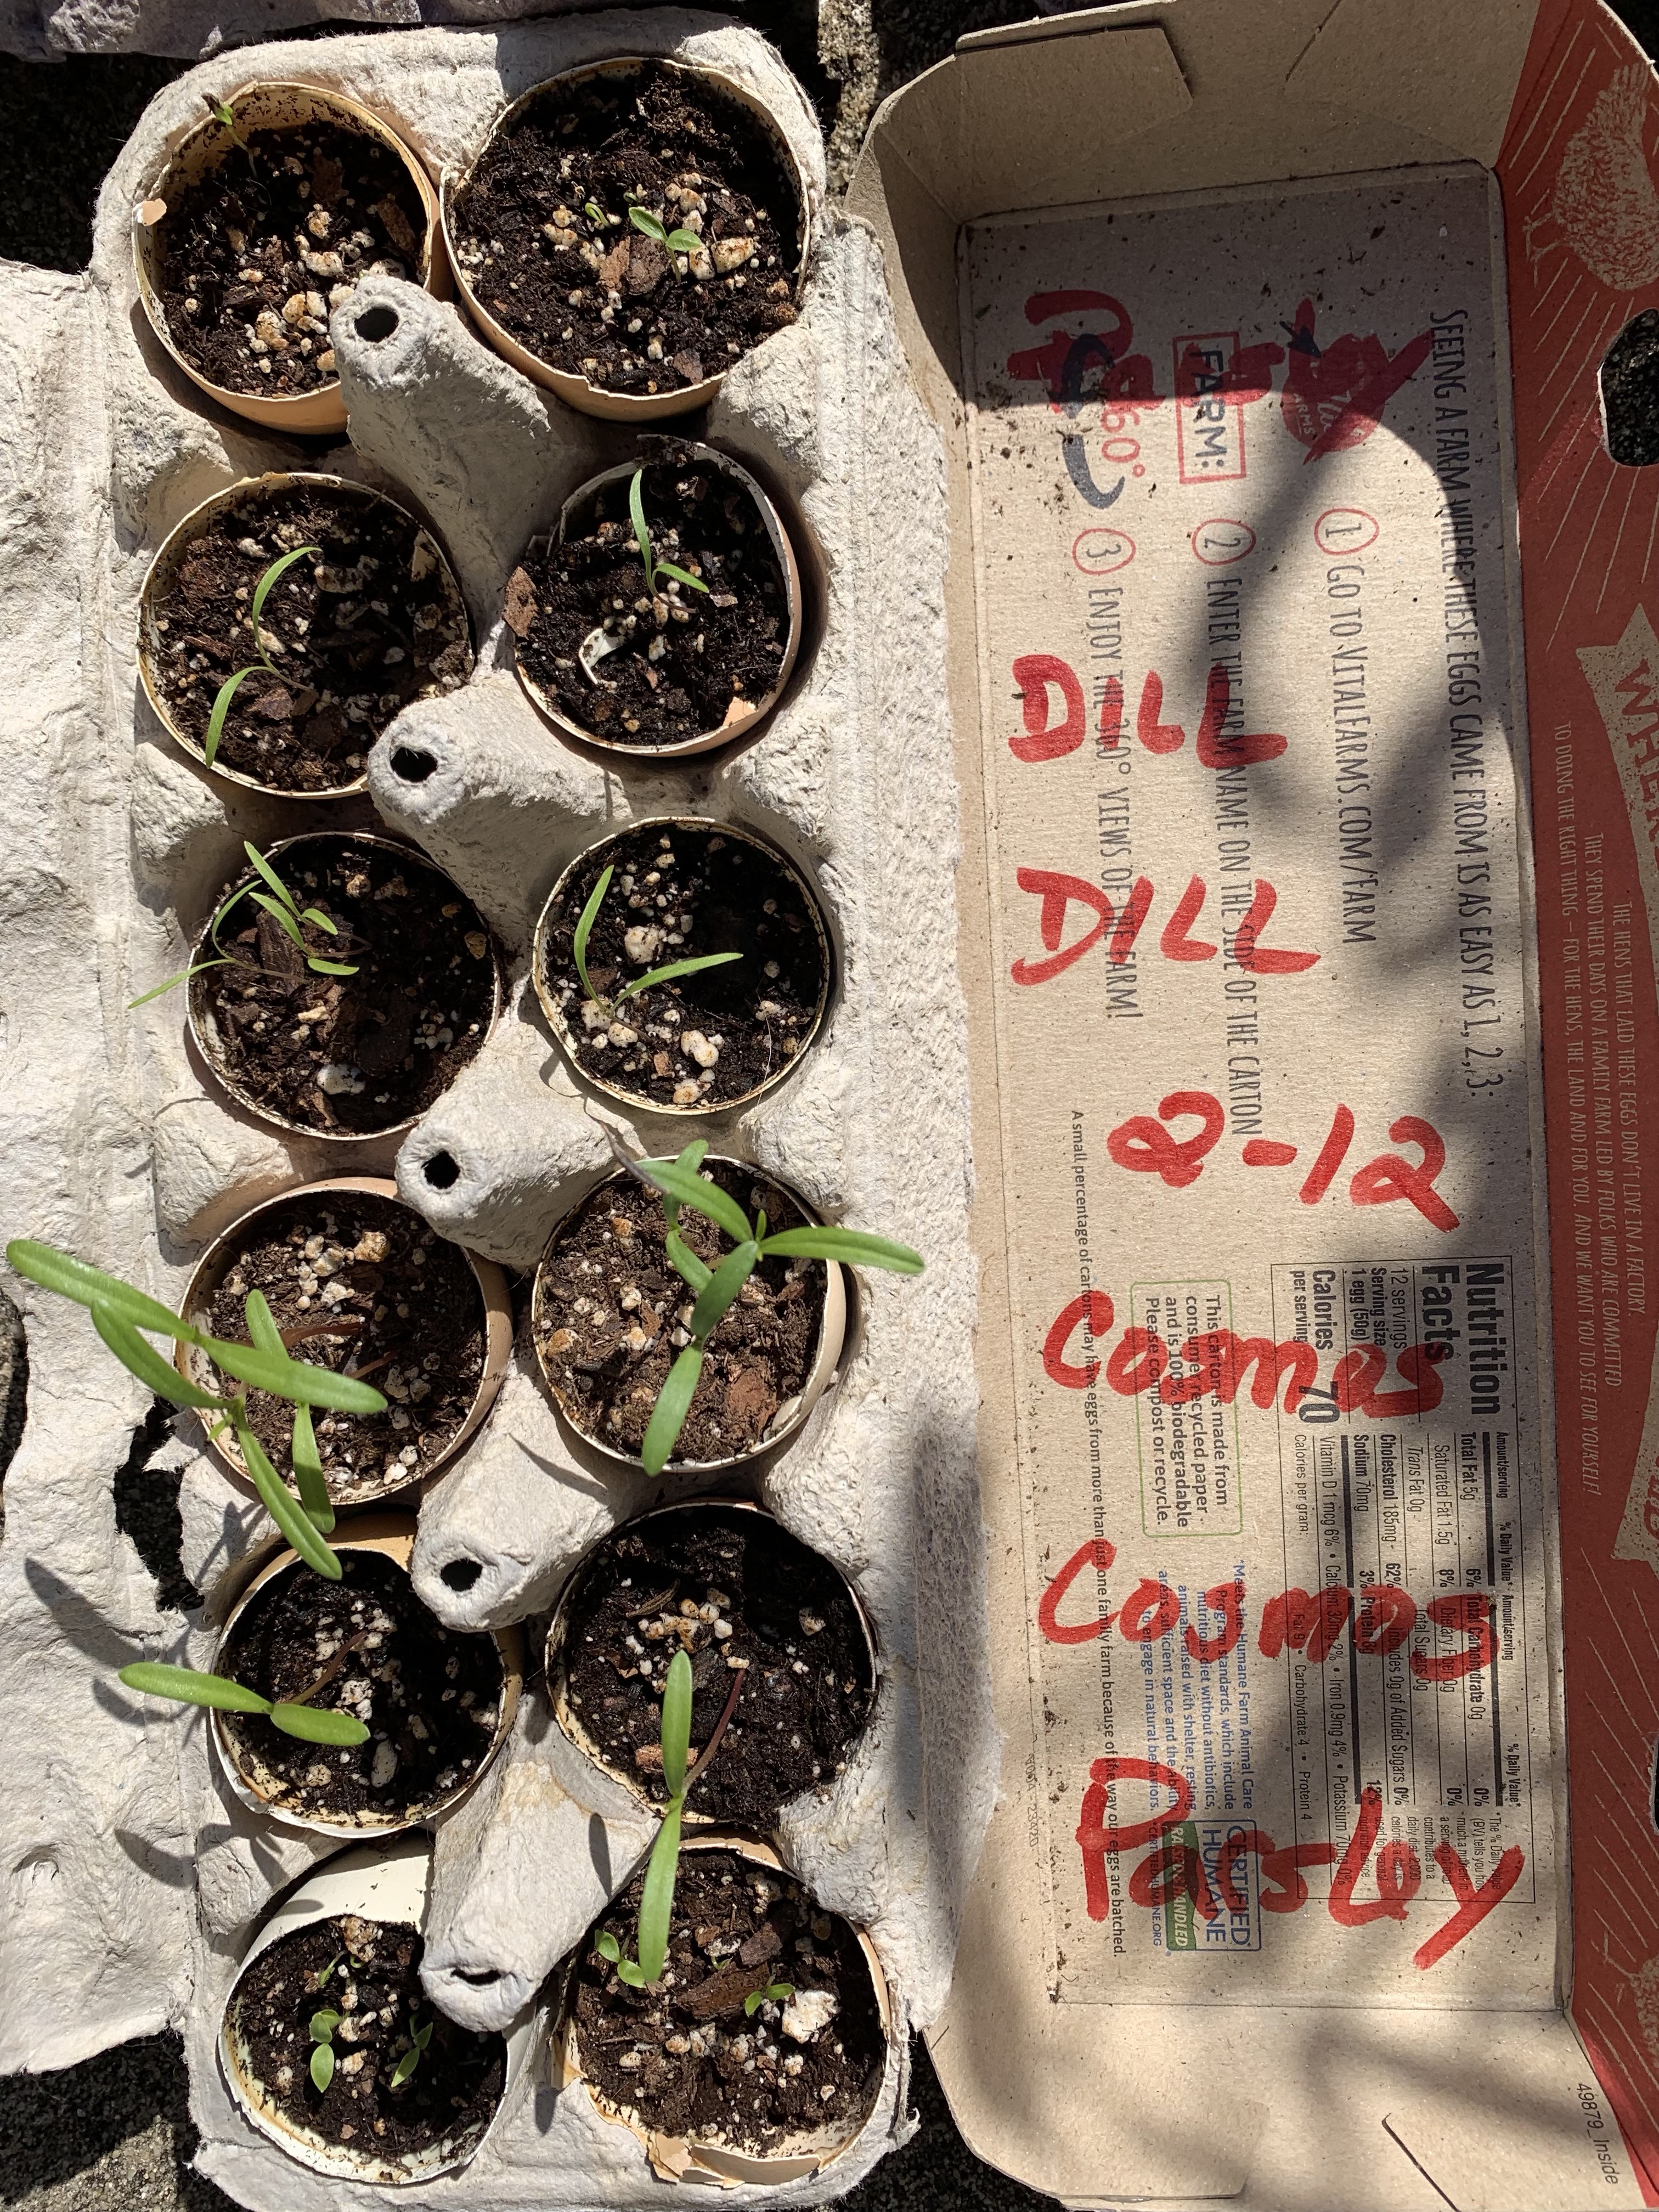
Both pots of peppers were doing nicely. I have not tried to grow either type before. I planted the seeds for the Sweet Banana and Ubatuba months ago. The seedlings were thinned to 2 in each pot. Have you ever heard that peppers like to touch each other? I remembered this so I left 2 together. I’ve always had a very hard time getting peppers to grow, so I don’t have high hopes for these.

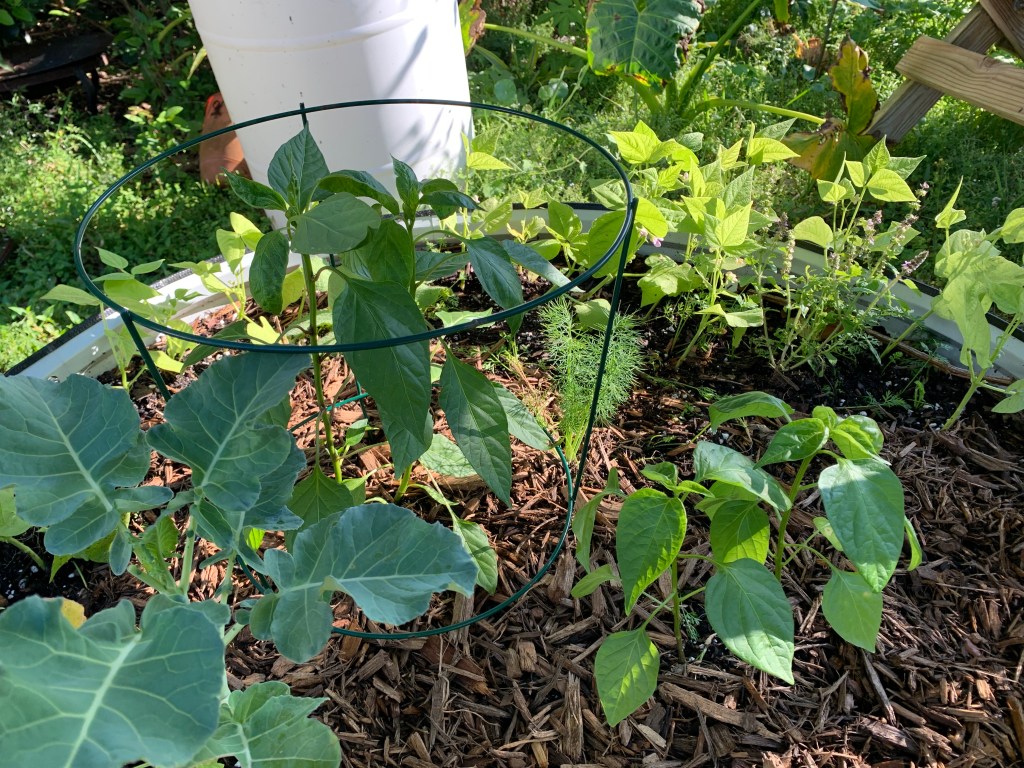
Now they are safely planted into the round metal bed. I had to set up my umbrella because it was very hot and sunny. I’ll let them have sun all day once they are adjusted to their new grow space, or if it cools off a bit. They will definitely need this shade every afternoon during summer.

In Hindsight

I’ve written about growing peppers often. Last year I had many plants that looked great for a while and then suddenly died. One had waterlogged roots, so I knew the cause of that. It made me empty my grow boxes and drill holes for drainage.

The other pepper plants were in fabric bags. I think there is a problem with these bags. First, I moved the plants from one area to another. I suspect the roots were damaged when I did that. Also, fabric bags dry out fast. I’m learning this from emptying them now. Even though I water like mad, there is lots of dry soil in every bag. I plan to write more about this.

Happy gardening! … to those who are lucky enough to be able to do it in February.

garden vegetables divider
Thanks for reading!

Yay, It’s Time to Cook the Garden Beets!

A simply and healthy way to use beets from the backyard garden. Use the whole beet to get all the nutrition they offer.

I am becoming very impatient with my beets. They were planted back in September and it is now January. The tops are beginning to break off so I decided to pull some of the bigger ones. Haha… they are not very big.

I love beets, and have had a bit more success growing them this year. Even the small beets can be eaten, along with the green tops.

beets pulled from garden grow box
Fresh pulled beets

The beets are small. The Golden variety grew larger than the red. I had tags in the beds to differentiate the red varieties (Detroit red and Lutz), but they have disappeared. I blame the raccoons who love to mess with my things. I wanted to know which ones grew best, but I think the Golden are the winner!

If you are curious about the healthy benefits of eating beets (and especially fresh from the yard!), read this page at Heart.org.

Easy Peasy – Simply Boil Them

There are many ways to cook beets. From boiled to roasted, you can find many recipes online. I immensely dislike all the pop up ads on cooking websites, so I cooked my beets the way I always do. Simply boil them in good water. I always save my vegetable cooking water.

To cook the beets I cut off the tops and roots. Then, I scrubbed them with a brush under water. I did not peel them, except for the really dried up areas around the top. After that, I thinly sliced them. After boiling in water for about 30 minutes they were tender. Freeze or use the water leftover!

I didn’t get many, and the yellow ones turned red, but they are good. There is nothing like fresh picked garden vegetables.

sliced cooked beets in a jar
Cooked beets

The beet greens were rinsed and finely chopped. The beets, greens and red water will be part of the slow cooker soup I am making tomorrow.

More beets are still growing in the yard and I’ll leave them to get larger. I don’t need the dirt space this time of year. Our Central Florida January has been pretty cold so far.

More small backyard gardening stories

My First Experience With Daikon Radishes: Tips & Recipe

Growing the white, Daikon radish in my Florida yard. Trying a new slaw recipe to use them up.

This fall, for the first time, I am growing Daikon radishes in my garden. I direct sowed seeds in a small bed back in September.

It is now mid-November and I am pulling up my first radish. I’ve never grown, or eaten a Daikon radish before. I had to do some research into ways to use them.

Pulling the Daikons by the end of November

Growing Daikon Radish – An Early Fall Crop

My experience with growing the Daikon radish was a good one. I put seeds into the back garden (early September), watered them occasionally, and watched them grow. Of course the raccoons (or possibly an armadillo) dug around the garden, but most of the radishes survived. I thinned them out a little, but they can grow fairly close together.

The first planting took place September first. One month later I planted another section with seeds from another company. I was eating the first ones in 3 months.

Daikon radish seeds packets from Annies and SESE
Daikon seeds packets from Annies and SESE

As is always true, the planting instructions are meant for normal (more northern climates). Wording such as; “Direct sow in Spring as soon as the soil can be worked” and “plant in late summer for a Fall harvest” or “harvest before the ground freezes”, don’t apply to my area. I can only grow cold weather crops in Florida’s “winter” months.

The fact that I planted Daikon seeds the first of September, and they grew, is very encouraging. It was still very hot in September. This type was from Annies Heirloom Seeds, and is called Raphanus sativus (organic daikon radish).

Preparing and Eating Daikon Radish

First of all, the leaves can be eaten! I only just discovered this. However, like beets, I wouldn’t want to use too many as it could keep the roots from growing well. Also, the leaves are prickly! Might just add them to the compost.

Pick the white Daikon when the top is around an inch across. A lot can be done with these radishes. Slice or shred into a salad. Stir fry with other vegetables. Make into pickled veggies.

Here is a video I found for Musaengchae. This is a quick, and instant salad made with white radish that incorporates garlic, green onion, and very little sugar. Her radish is huge, but I’m thinking that my smaller ones would work.

My Own Daikon Slaw Experience

So I have pulled a few daikon radishes from my garden. They grew so nicely that I want to keep them in mind for next year. But, I need to find a way to use them. They taste a lot like a normal red radish, to me. And I’m not a big fan.

When shredded and added to a mix of sugar (honey / Swerve Amazon paid link), vinegar and oil, they do taste pretty good. I added carrots. The mix lasts in the fridge for three days.

Because my Tatsoi greens are also growing well by December, I can mix this Daikon slaw into a normal salad. It’s pretty good. I don’t eat much sugar, so I add as little as possible and use Swerve as much as possible. It doesn’t have a weird aftertaste like other fake sugars.

If you grow this type of radish, I’d love to hear about your favorite ways to use them.

Harvesting the Beets and Cooking a Meal of Greens

Using the beets and greens that have grown over winter in my Florida backyard.

It is January 25th and today I pulled up all the beets. They were growing in a box which I needed for planting and growing green beans. 

The beets were small and most were not really beets, but long red roots. However I did get a few to cut up and cook. I’m not sure, but I think maybe beets are mainly grown for the greens where I live. I didn’t have luck with growing actual beets.

Thanks to this site, I knew how to deal with the greens and incorporated them into my beets and rice meal. 

How I Made This Meal

  • Pull beets from backyard and rinse dirt
  • Separate greens from beets and trim and cut beets for cooking. Simmer in water for 20 minutes, or until soft – my beets were small.
  • Remove stems from greens and chop
  • Slice onions (also from backyard), along with garlic
  • Saute onion, garlic and stems in oil for a minute or two and then add a little water. Cover and simmer to soften.
  • Chop leaves a bit and add to sautéed mix with a bit more water if needed
  • Cover and simmer for 3-4 minutes until it all looks cooked.
  • Squeeze in a little lime juice. 
  • Cook Basmati rice in the beet water – 1/2 cup

If any water is leftover in the pan, dump it into the beets pan. Reserve all that water once the beets are cooked and use it to cook rice.

This is a waste free meal that reserves all the goodness of fresh picked vegetables. The roots and yellowed leaves of the beets went into my compost pile.

Add salt and pepper and butter… yummy!

beets and greens with rice
Garden beets and greens cooked and served with Basmati rice

Picking Green Beans in December

I planted Contender bush beans back on October 16th. Today is December 1st and I have picked my first batch of little green beans!

One plant is doing especially well in a raised bed. I planted it next to the pineapple.

one green bean plant
One green bean plant is growing next to the double-pineapple plant in a raised bed. This plant is full of beans!
green beans in garden
Beans on one plant

Finding Space For the Bean Plants

Before planting, I soaked the bean seeds overnight, then I read that they don’t really need to soak. I did not have any innoculent so they went straight into the ground. The hardest thing was trying to find space for all the plants in my small yard. Not all garden areas are ready for planting yet.

Besides the two rows of beans, I planted a few beans beside the eggplant, and a few near the hibiscus. A few more seeds were placed randomly into my white barrel raised beds.

The Leafroller Worm

I created two rows of Contender bush beans in the little garden area where my Suyo Long cucumber plants had been growing. I had lots of worms on my cucumbers, but they were pickleworms, and much more of a nuisance.

The Leafroller worm is named very well. It cuts a little bit of the leaf and rolls it over itself and hides inside. The worms are green with black heads. It was easy to spot their hiding places because the underside of the bean leaves is light green.

I pulled back the leaf, picked off the worm, and threw it into the grass for the lizards.

rolled leaves and worm
Leafroller Worm on bean leaf
bean leafroller worm
Leafroller worm

Whereas I gave up on picking all the worms off the cucumber plants, the bean plant infestation was not bad at all. As of this time, I don’t even see any more worms on the leaves.

December 1, 2023

Contender bean plants
Bean plants December 1st

The Weather

We’ve had some crazy up and down temperatures this fall, which is pretty typical for Florida. We can have temps in the 40’s and 50’s overnight but it gets into the 80’s during the day. A few days stayed quite chilly all day. We’ve also had a few bouts of rain which lasted for about a week each time.

It is interesting to see that the beans did very well through all these weather changes. For that reason, I have planted my second crop of green beans. The new crop is organic Blue Lake Bush beans. I have one more packet left to plant when my first batch of plants goes by.

More garden stories:

Starting Vegetable Seeds in Eggshells

While using my local, fresh, free range chicken eggs one day, I looked at the beautiful shell color and remembered something. I had read, at one time, about using eggshells as pots to start seedlings for the garden.

The shells were so pretty that I hated to just throw them out, so I began rinsing the broken shells to save.

free range chicken egg colors

Getting Ready to Plant Seeds in Eggshells

Here in central Florida frosts and freezes tend to happen in January and February, if they happen at all. By March the weather seldom gets all that cold, but can be chilly overnight. March is the month to plant in Florida.

However, seeds can be started indoors in February, or sooner, to have little seedlings ready to go into the ground by March. I planted mine in the middle of February.

With my organic bags of dirt – Black Gold by Sungro (Amazon affiliate link)- is what I used, and organic seeds purchased, I filled each eggshell and then stuck seeds down into the soil. Keep the egg cartons to use as the plant tray.

When the weather got nice enough, I put all the cartons outside in the sun for the day. I brought them inside each evening. And checked them often to add water.

Difficulties and Challenges to Eggshell Gardening

Unlike little pots, the eggshells are delicate. One online site said to put a pin hole in the bottom of the shell for drainage. I did not do that because I tried and failed to make a little hole. It is not really necessary as long as you don’t overwater. Also, with a hole in the bottom, the cardboard containers would be wet.

Watering can be challenging. The eggshell pots are very small. They will dry out quickly when outside in the Florida sun. I water the seedlings twice a day, and this is March. Because the pots are so small and I don’t want to overwater and have them sitting in a puddle, I use my pour-over tea pot which has a small thin spout. Alternatively you could use a paper cup or anything that allows you to easily add small amounts of water.

Get the Seedlings Outside During the Day

Each day I put the seedlings – or soil with seeds – outside into the sun. Once the plants begin to grow they will need lots of direct sunlight and also some moving air. When plants grow in slightly windy conditions, it causes the stems to become strong. Or so I’ve heard.

Seedlings growing in eggshells
Seedlings are about a month old

I’m lucky enough to be home all day and can easily do this. Even if the plants can sit in front of a sunny window it will be helpful.

All in all, be ready to spend some time caring for the little pots. You can’t just plant and forget.

Choosing Seeds to Grow in Starter Pots

It is tempting to go overboard when picking out seed packets! I’m picturing the bounty of fresh veggies – arms loaded as I come in from the back yard. Realistically, I certainly don’t have space for many plants and seeds are generally good for one year only.

I love almost all vegetables, but must be picky about which ones I will grow. Fresh herbs are one thing I would use often. My basil and parsley has diminished over the years so I wanted to grow those two things again. I also have had difficulty finding dill plants here in Florida, so I am trying to grow that. Dill and fennel plants have flowers that attract the Swallowtail Butterfly.

Italian flat leaf parsley seedlings
Flat leaf Italian parsley seedlings – lookin good!

Getting to start plants from seeds gives me the chance to learn what’s what in newly sprouted form.

The basil did pretty well, but something did eat some of my basil. I planted as much as I could, filling all the saved eggshells. I knew that some things would do better than others.

Basil seedlings in eggshells
Little basil plants

My yard needs more flowering plants. Some of these eggshells contain marigolds and cosmos. I plan to plant more of those flower seeds in larger containers as well. Flowers don’t have to be planted in the garden – especially when your garden is made up of a few grow boxes. They can be in containers to save on garden space.

Flowering plants in pots can be moved around the yard as needed to keep bad bugs away and hopefully draw in the beneficials.

organic seed packets

Larger seeds such as zucchini and cucumber can go directly into the ground. Let’s face it, I would need a lot more egg shells to get everything started. Also, I don’t know how well transplanting will go. More to come on that!

For now I am keeping up with the shell starters.