I am writing today to make you feel better. Yup, it’s a pretty depressing morning here, so I hope that will make you feel better about your bad start to the day. If you had a good start, yay for you. If you are having gardening troubles, you are not alone.
Here in the jungle, summer is the pits. It is too hot to be outside for long, and if I venture out, it’s either loaded with bug repellent, or covered in long sleeves and pants.
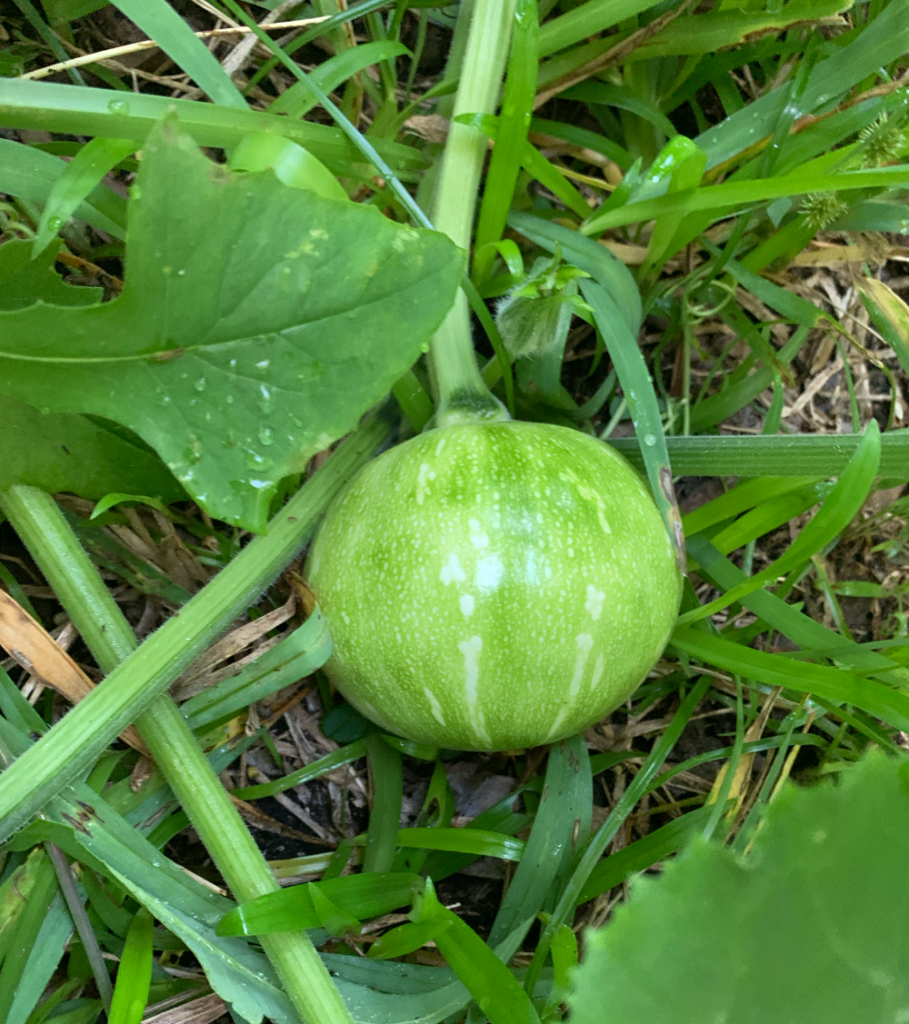
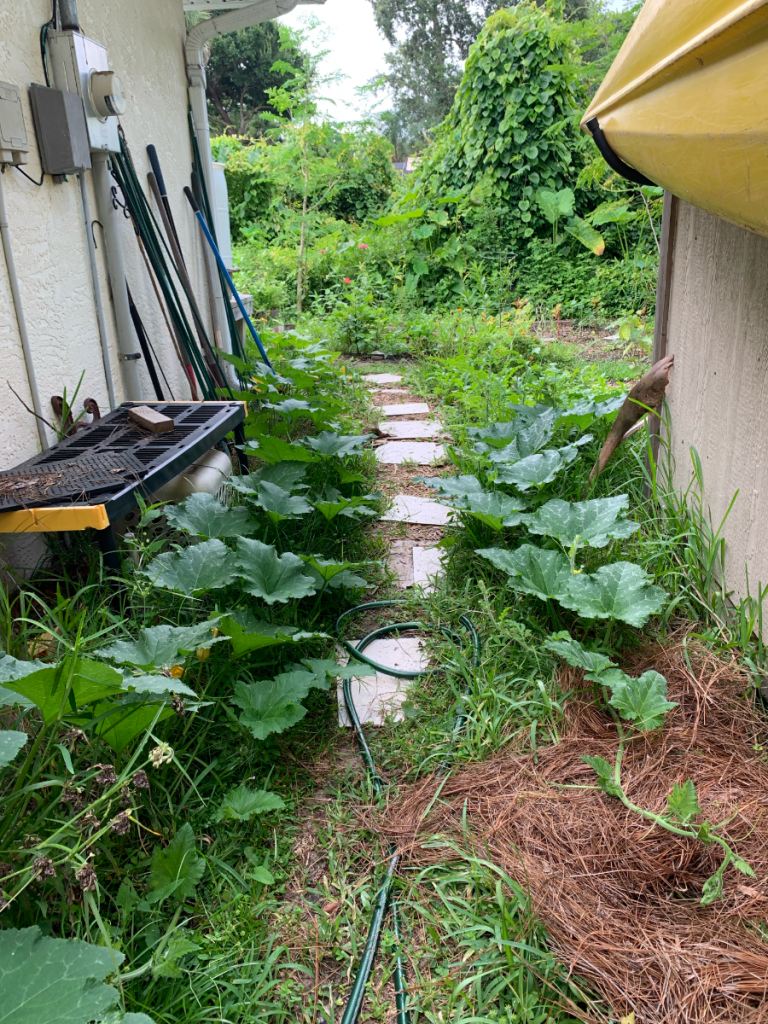
On top of that, there is very little in the way of food growing. All my Seminole pumpkins start to grow, then turn yellow and fall off the vine.
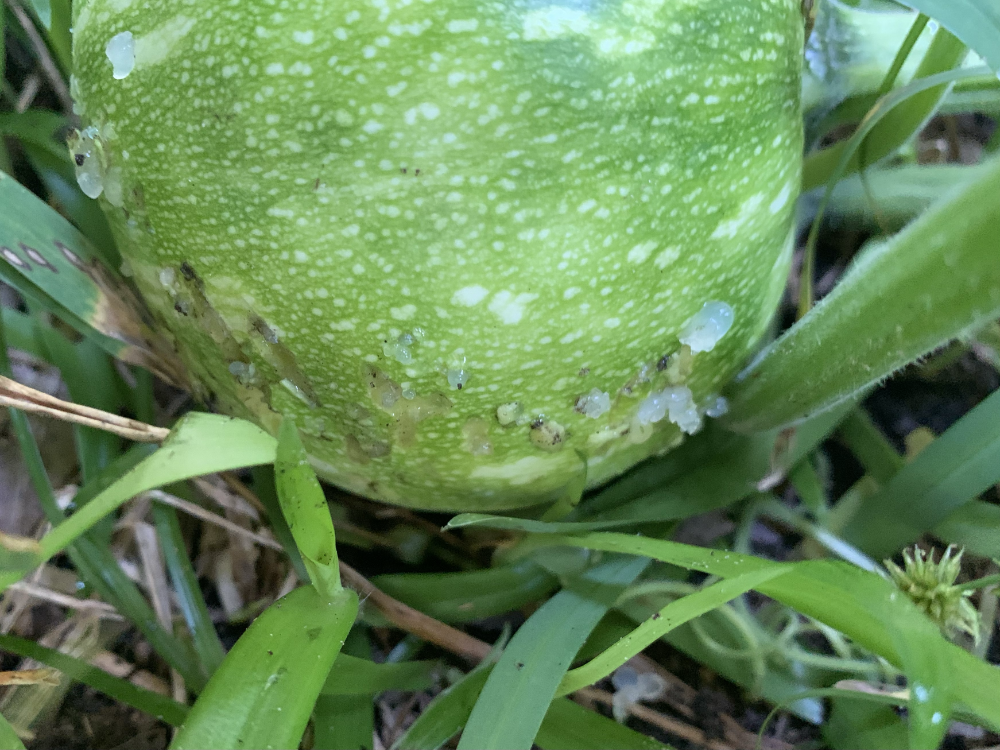
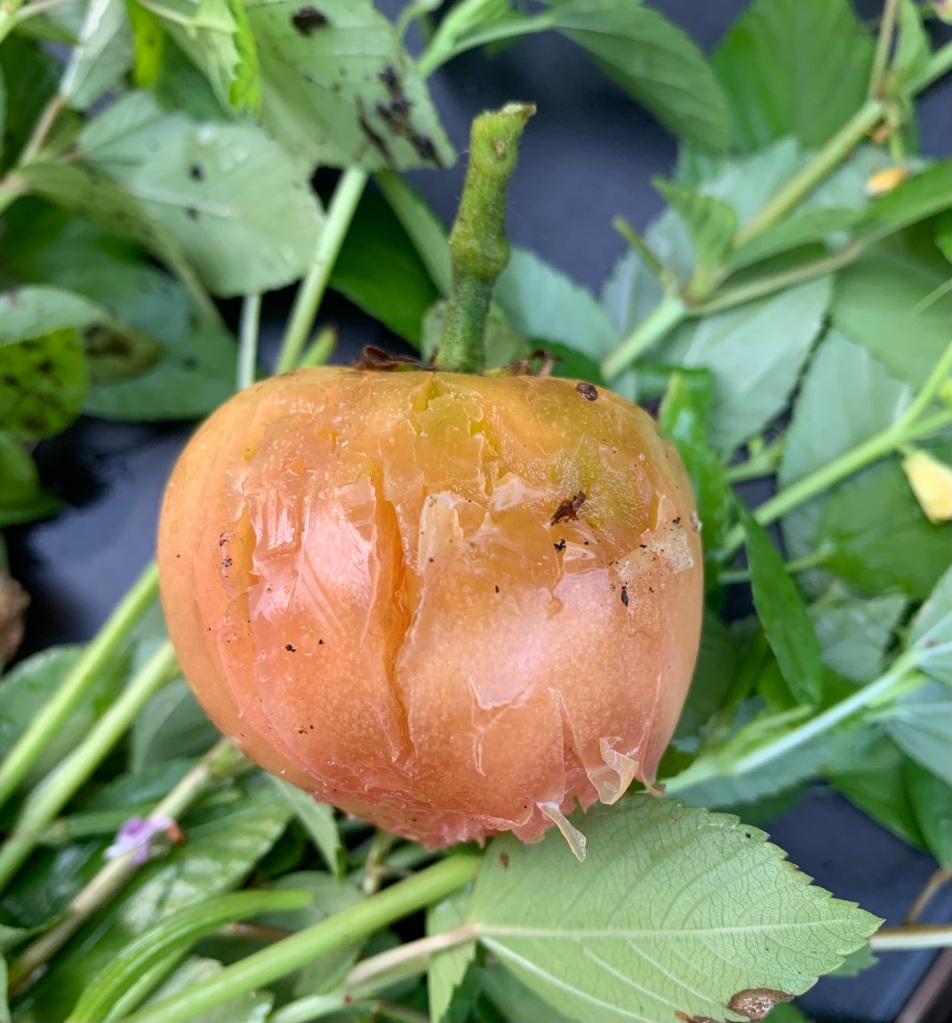
Finally, I have one that looks like it will continue to grow. And today I see that raccoons (my best guess) have scratched it all up!
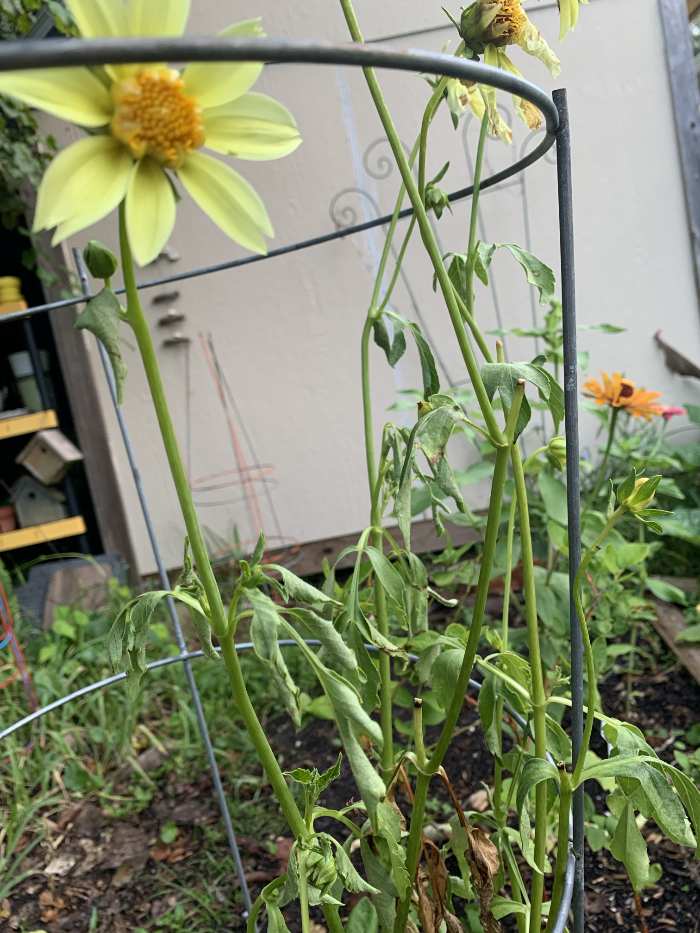
The Dahlia is wilting. We just had a little tropical system swirling over our area of the state and it dropped 4 inches of rain. We had minor flooding, which went away quickly. But maybe the dahlia did not like all that water. Maybe it doesn’t like July in Florida. I can’t blame it.
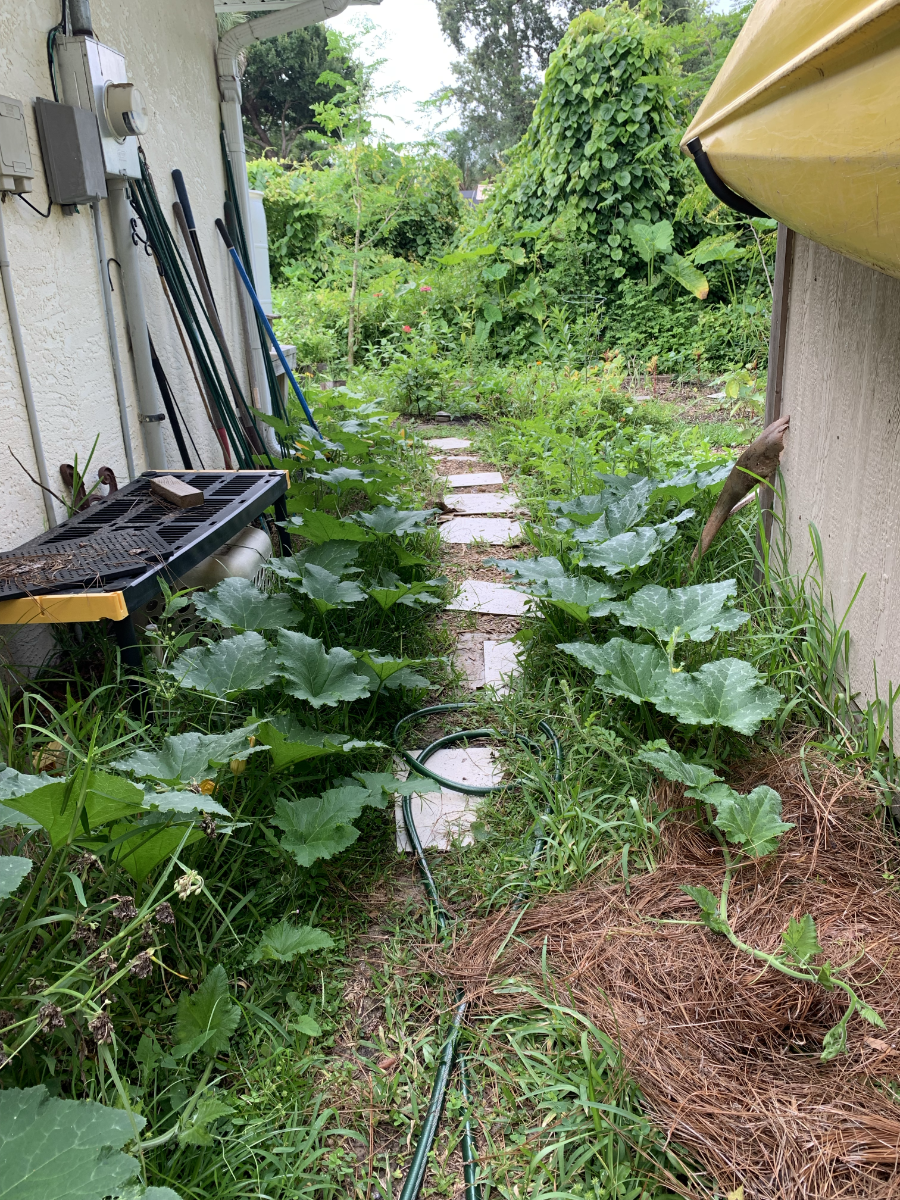
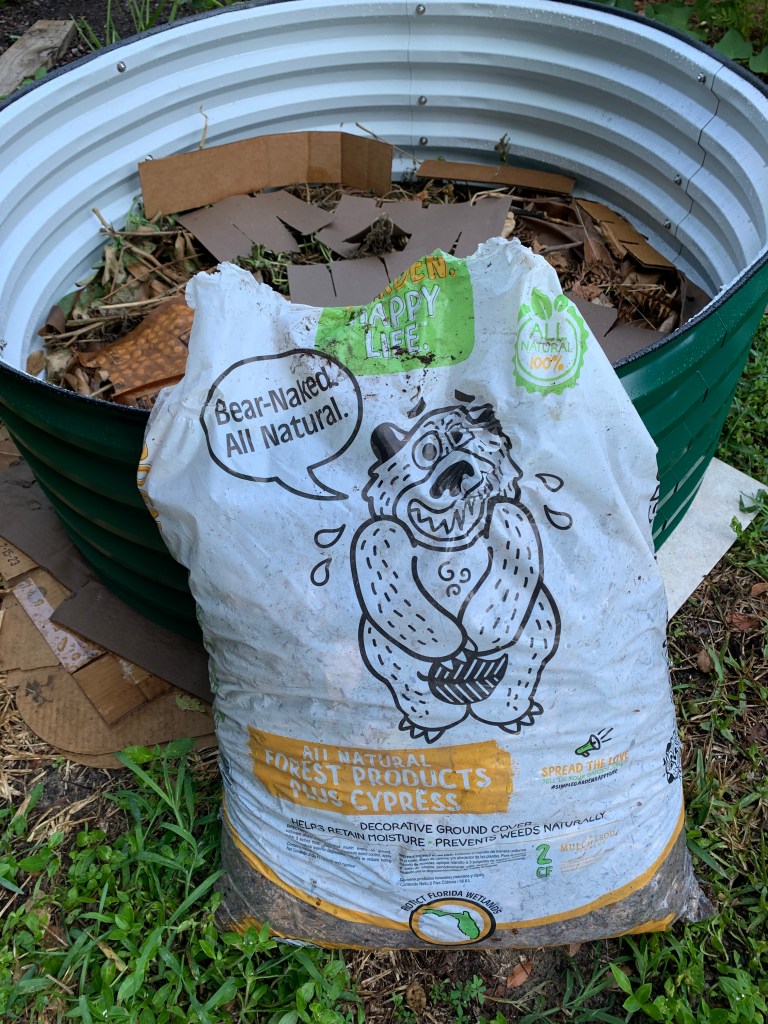
The weeds, or should I say, grass has gone nuts. This is all getting away from me because of all the vines that are sprawling all over the yard. The squash vine is done, and I should pull it up. But it’s too hot and buggy.
The watermelon vines have 1 watermelon. The pumpkin vines – well, I mentioned that above. Those vines have nearly made it from the back of the house to the front. They’ve dropped about 10 pumpkins at this point.
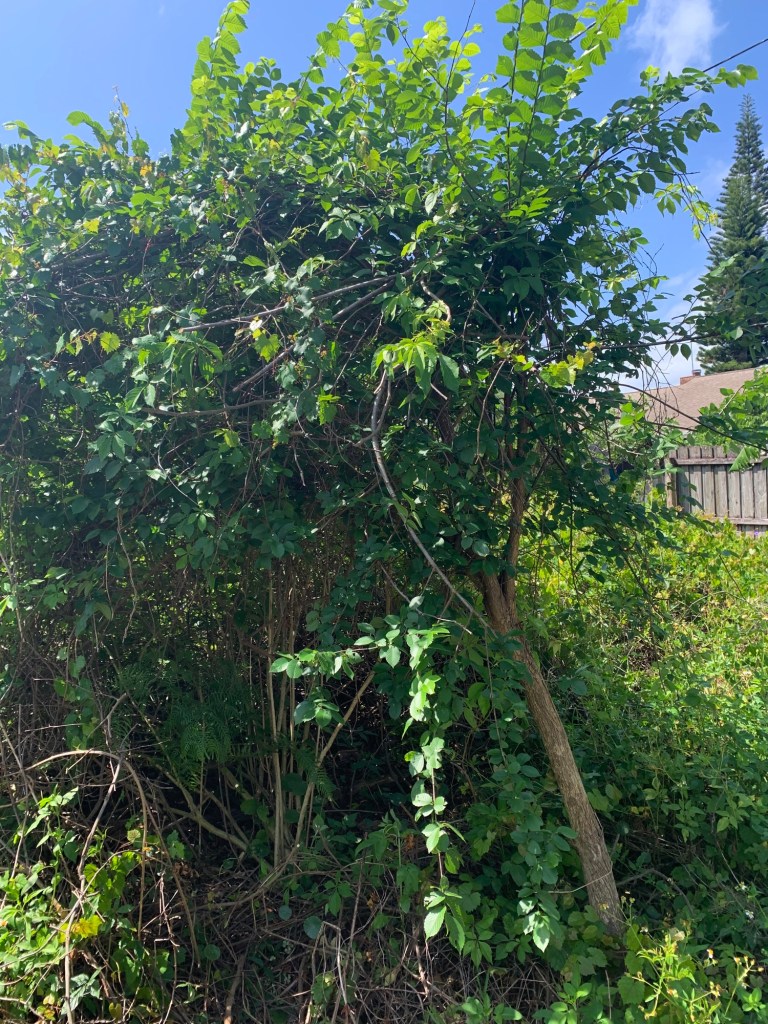
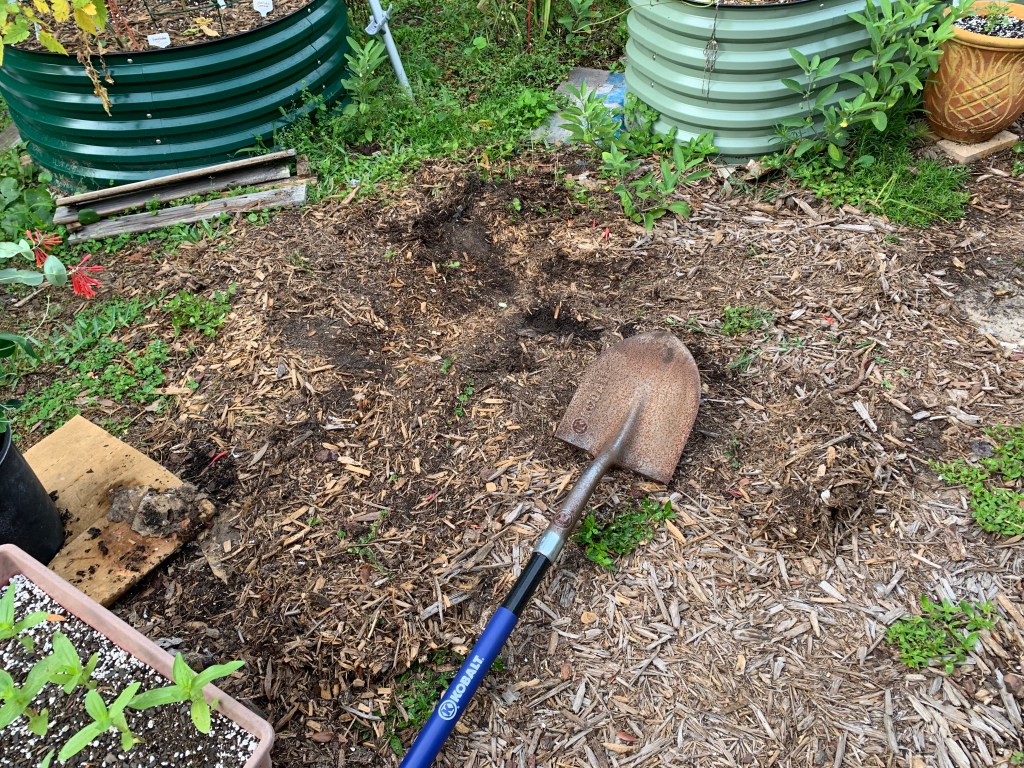
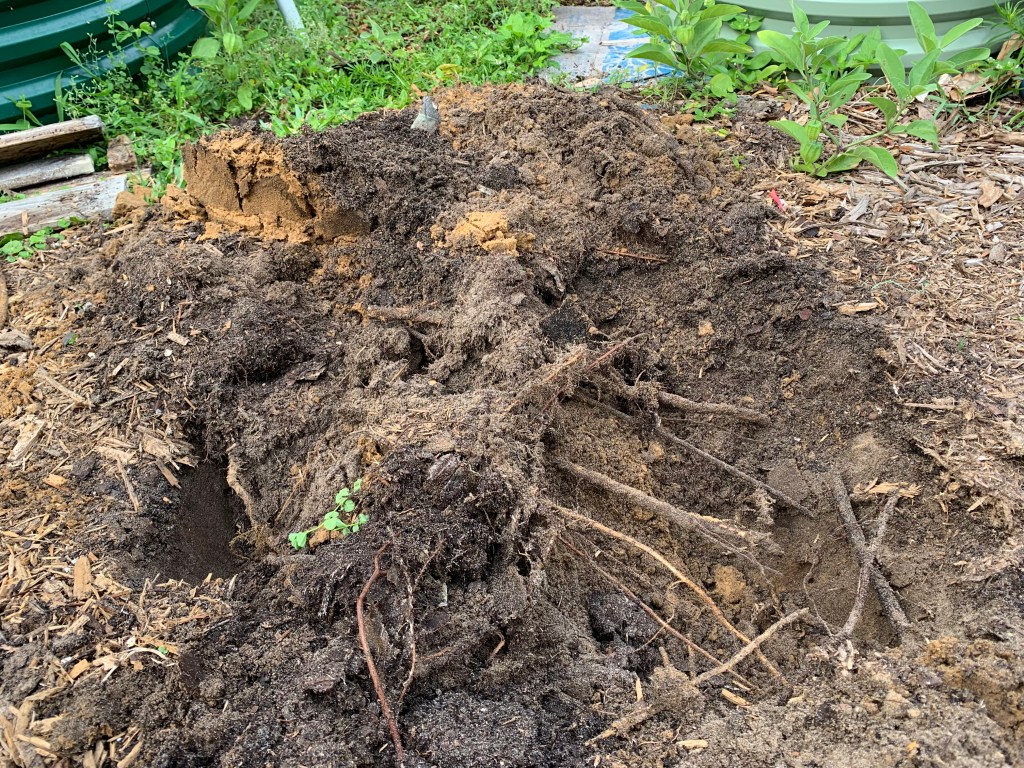
Speaking of vines. That mound in the distance in my photo above is an Elm tree next to a Beautyberry bush. Below is a photo of the two trees with most of the vines pulled off. I used to work at this, even though this is not part of my yard. I’d love to see both grow and do well. As you can see it’s a losing battle.
These are trying to grow under that mound of vines in the photo above.
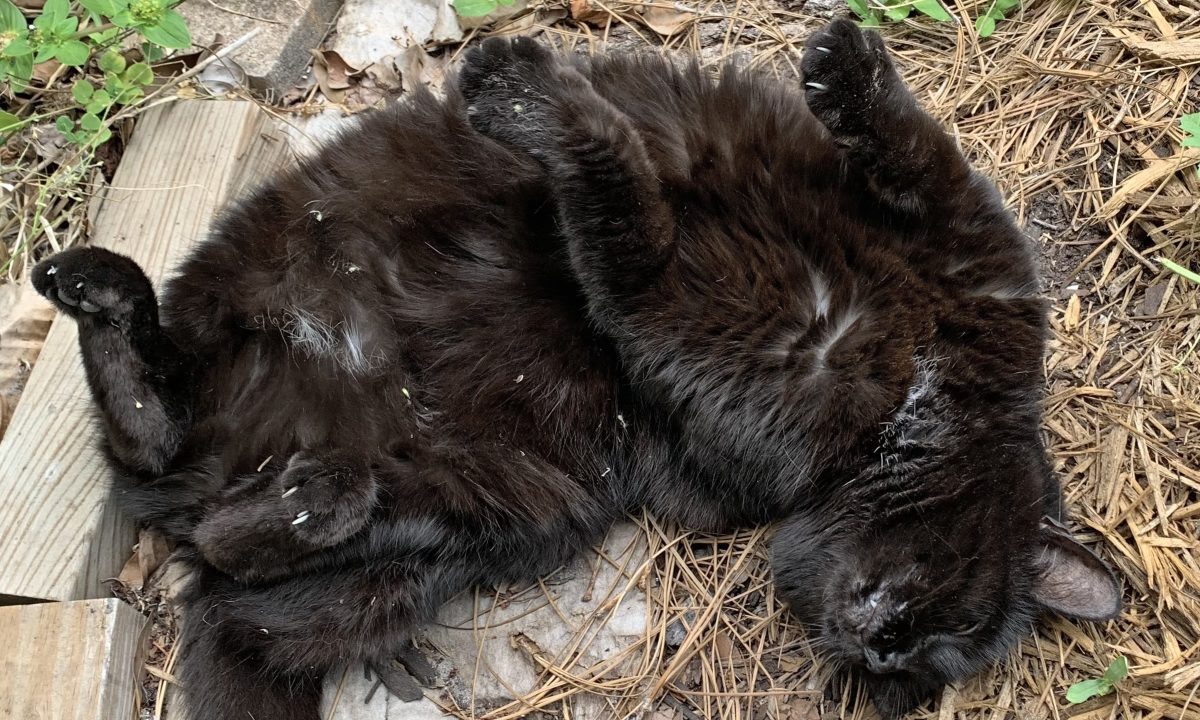
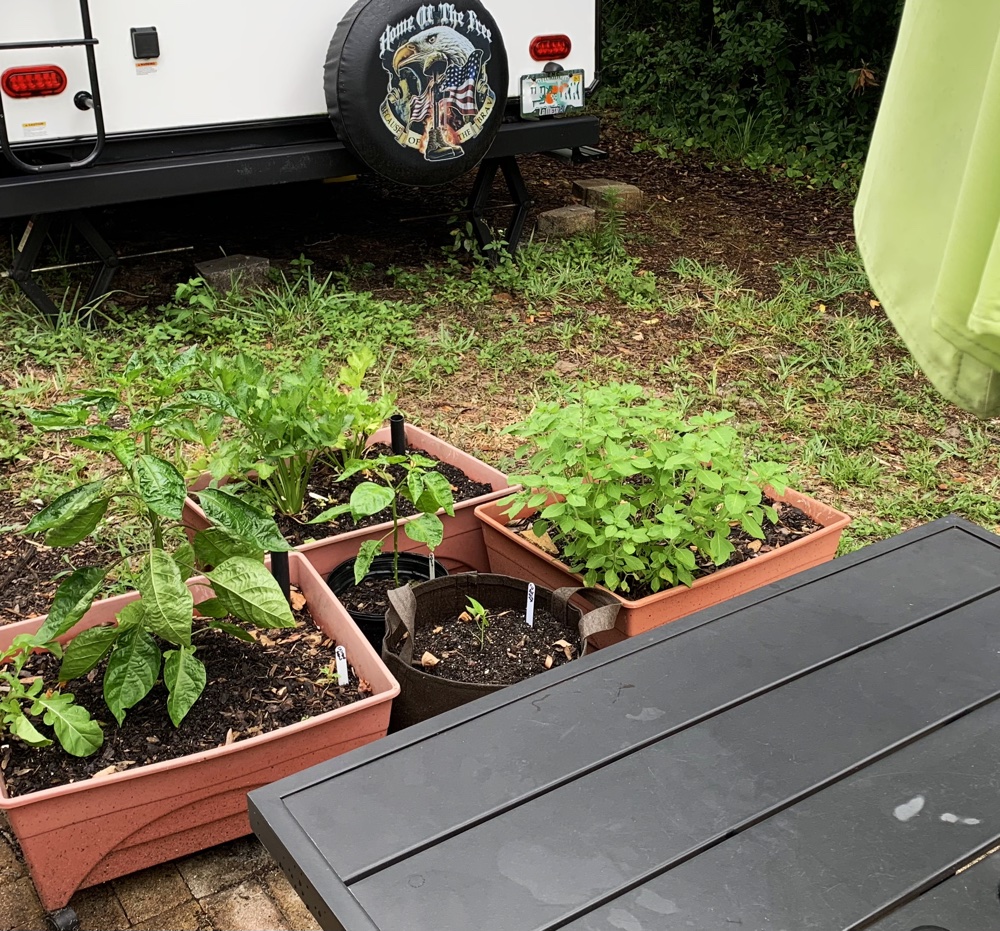
A banana pepper plant has died, and the other peppers don’t look so good. So it’s a depressing start to the day for me. I think I’ll stay inside.
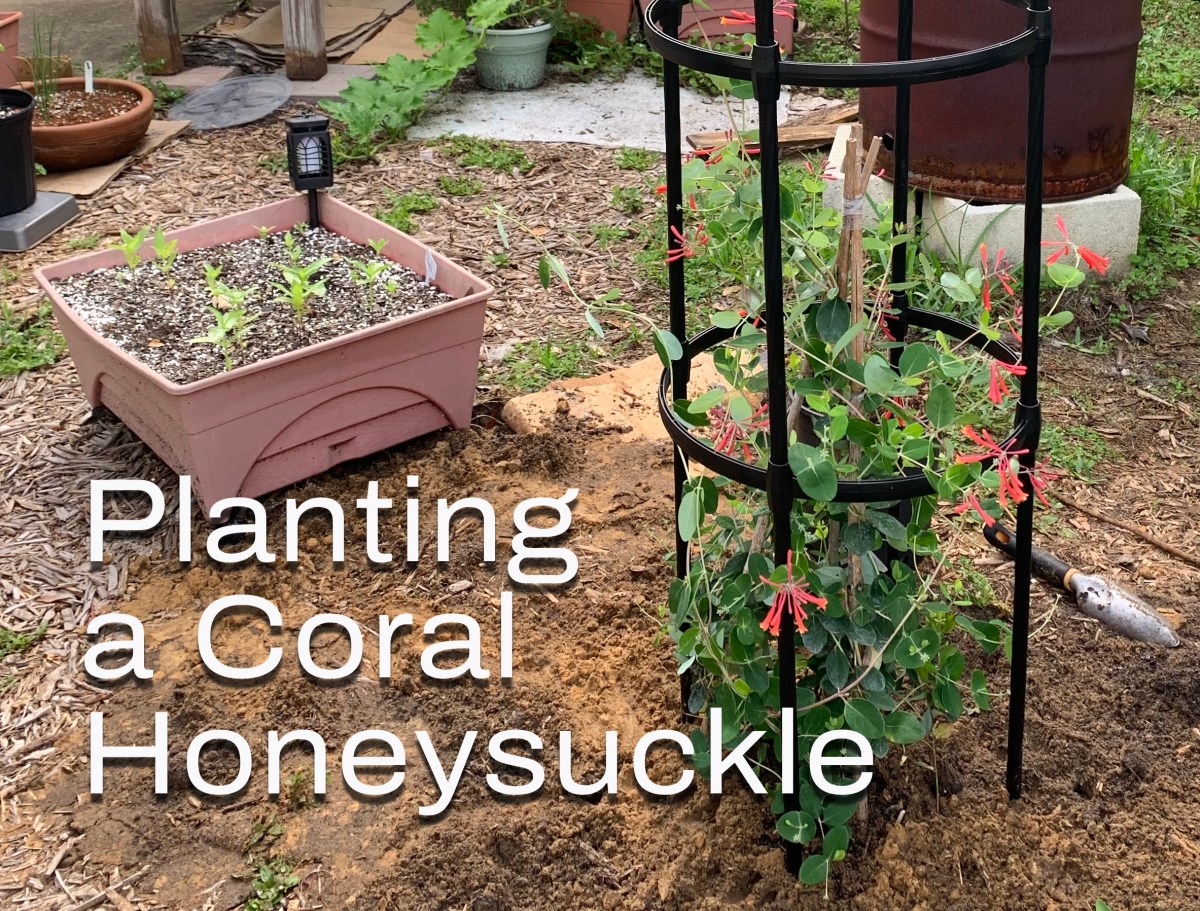
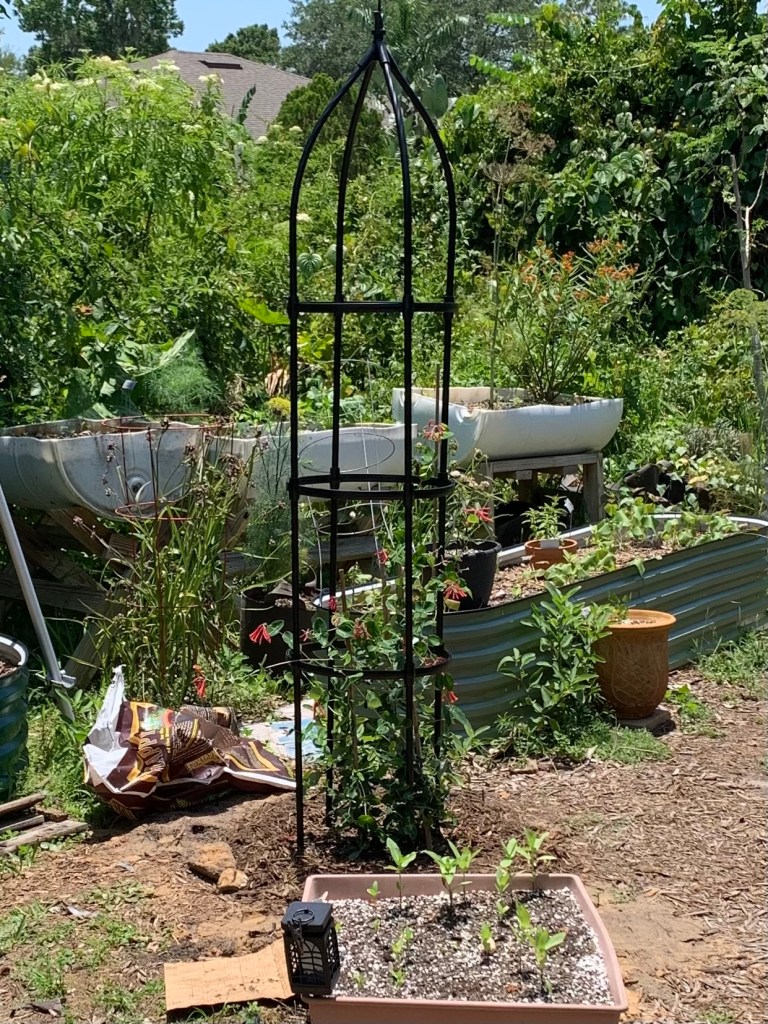
Planting the coral honeysuckle with a new obelisk for support.
A Florida native plant that I’ve wanted in the yard for some time is the Coral Honeysuckle. A tiny plant was part of my mail order selection, but the plant arrived very tiny. I’m not sure I would live long enough to see it reach a great height!
After putting my Lee Valley Obelisk (large size) together, I needed a plant to go with it. At my local nursery there were many Coral Honeysuckle plants that looked great. I chose one, popped it into my little car, and planted it the following day.
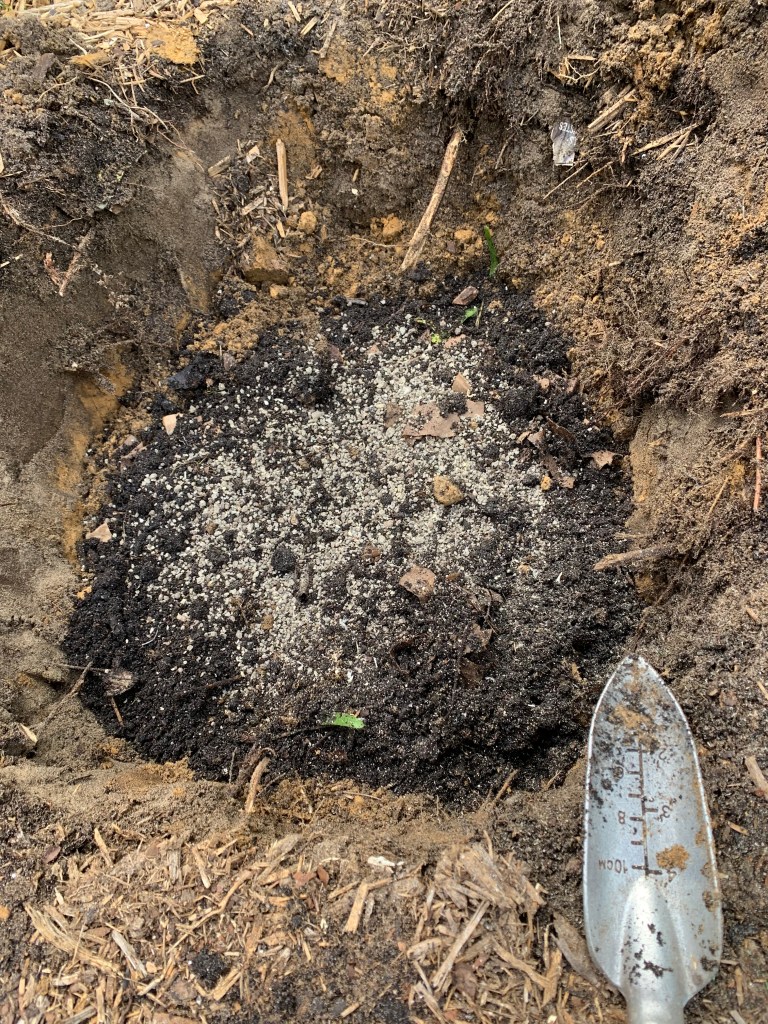
The hole was easy to dig, once I removed all the roots growing under the sand. Here in Florida, rocks are not a problem when digging, but you may come across pieces of concrete that were left behind from the building of the house.
When checking out at the nursery, the woman talked me into getting a little bag of fertilizer to add to the hole. I also mixed in some of my own compost and a bit of Happy Frog, with the sand. BUT…. before I added dirt back into the hole, I placed my obelisk around the plant. That way the poles were down nice and far into the ground.
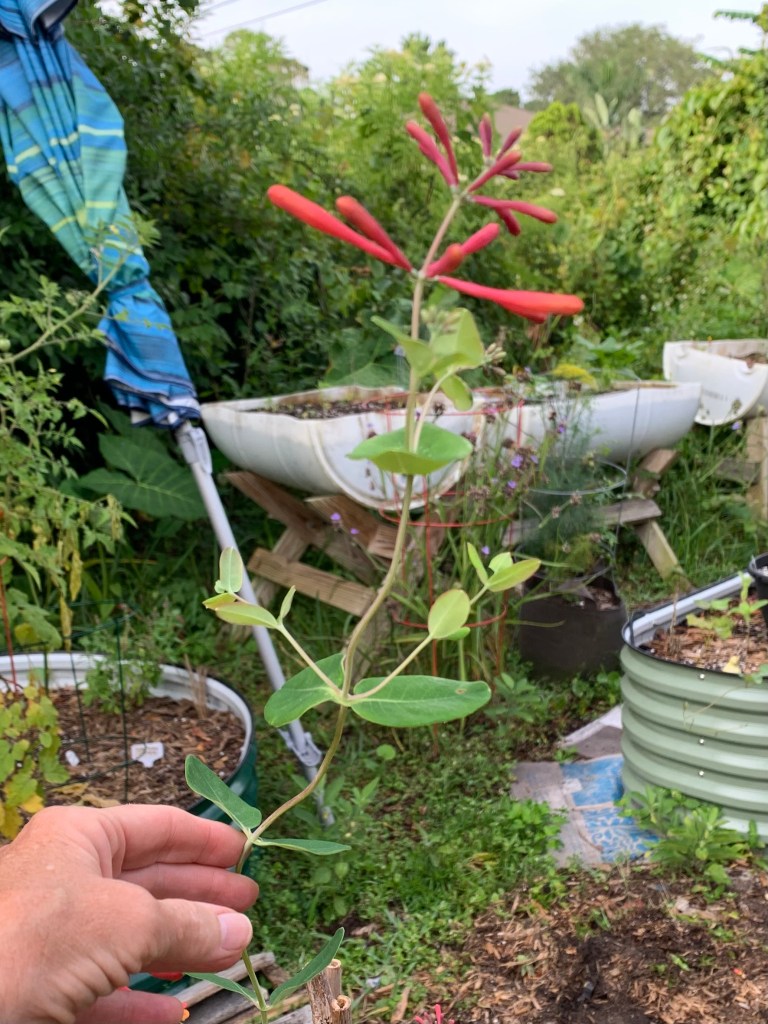
I also planted the tiny, mail order plant right next to the bigger plant.
Spot is chosenDigging roots and sandMixing good stuff into the soilOld staking system
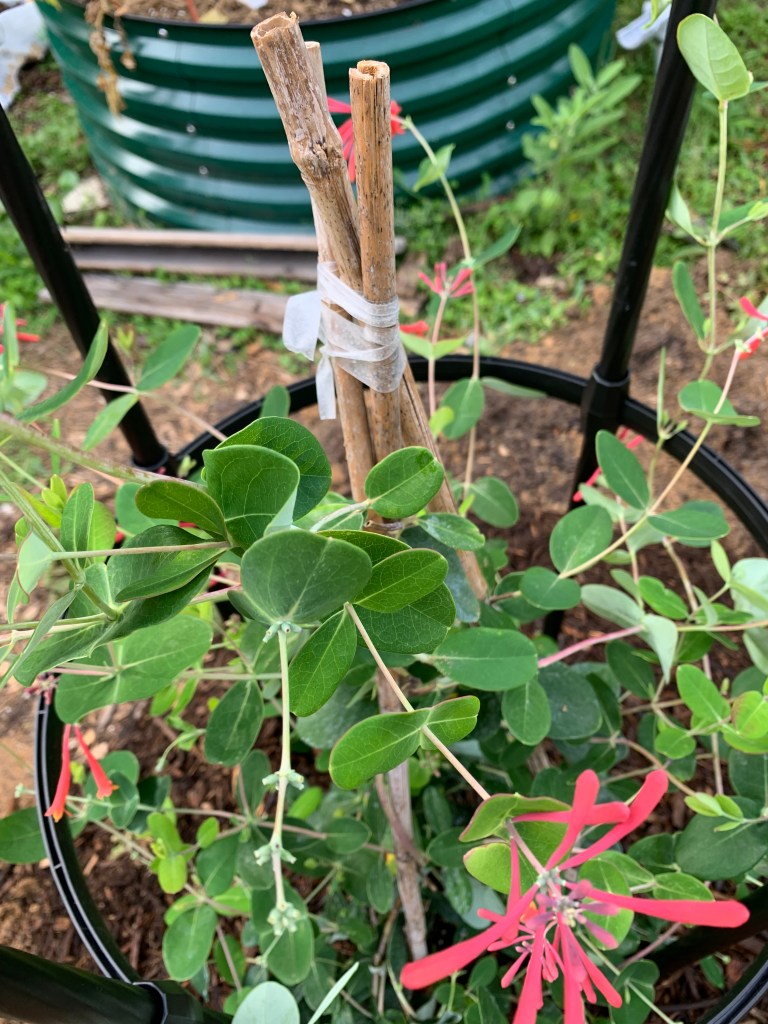
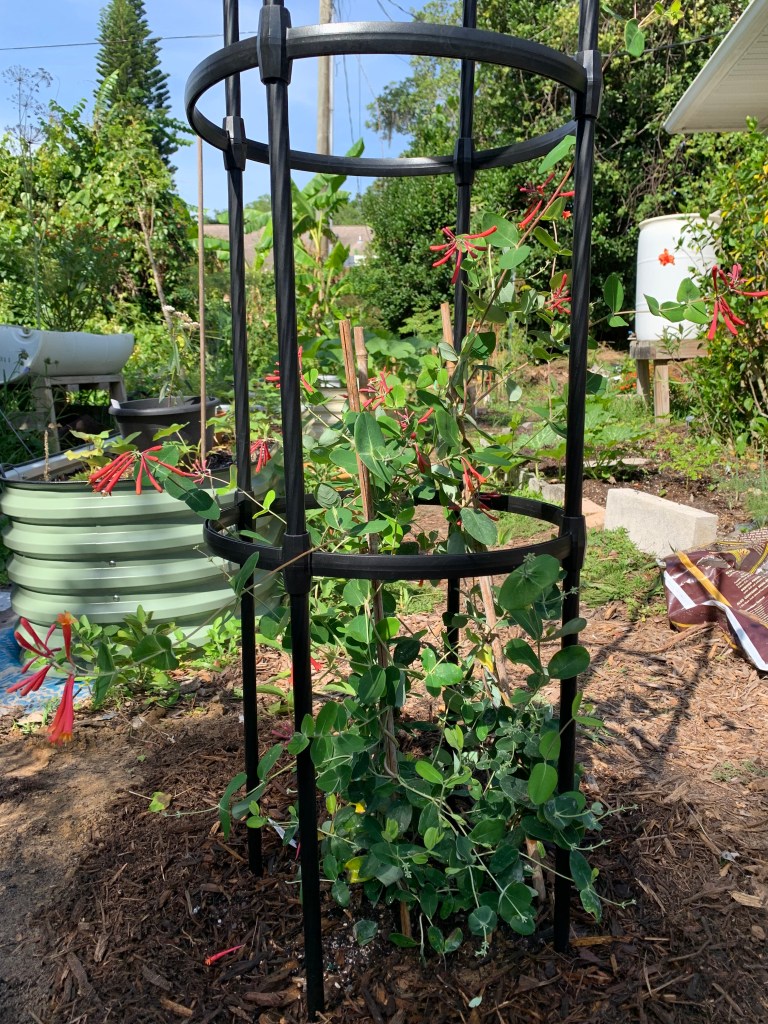
Once the plant was in the ground, I undid the ties holding the old trellis system. Three bamboo stakes were tied for the vine to wrap around. I planned to remove the bamboo completely, but decided to leave it in place. Much of the honeysuckle was already firmly wrapped around them.
I will train the vines to continue up the trellis. Once it gets tall, the hummingbirds should love it. I haven’t had hummingbirds since the Firespike plant lost its red flowers. Honeysuckle can loose its leaves in cold locations, but grows well in the entire state of Florida, Zones 4-10. It will bloom all Spring and Summer!
Once the mulch was down, I gave this new plant a good soaking with three fills of my Haws watering can.
Once the Coral Honeysuckle is established, it shouldn’t need much attention. I’ll keep it pruned to fit the round trellis.
Coral honeysuckle flower
The rainy season is here, and with our regular afternoon storms, this plant should do quite well.
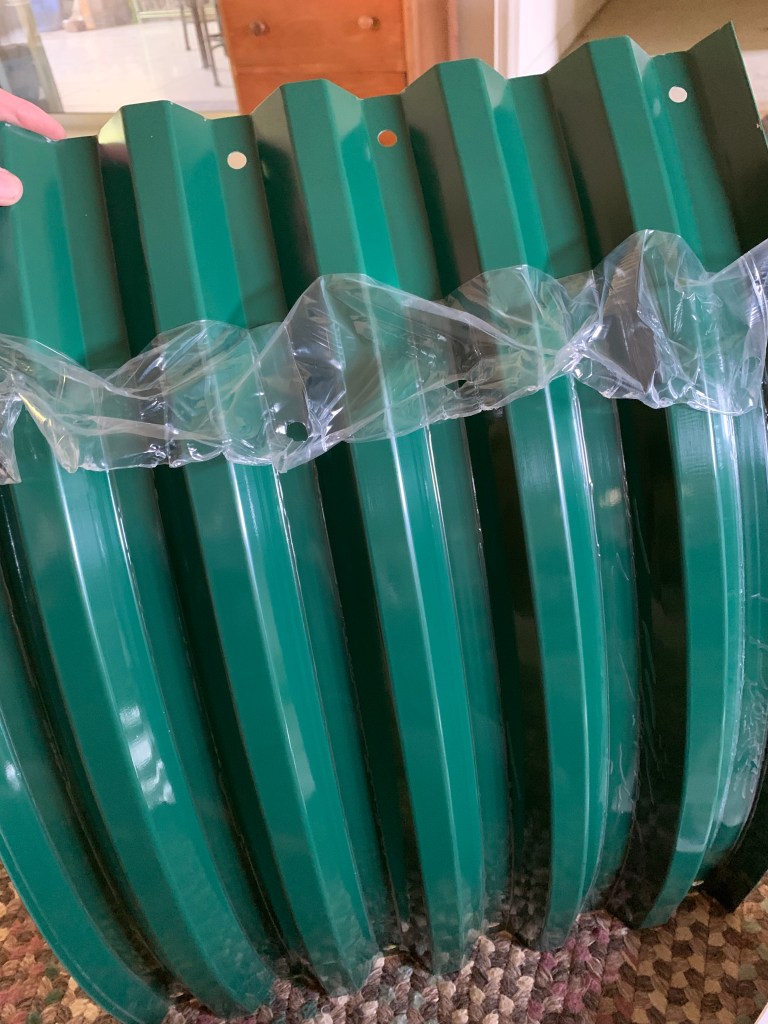
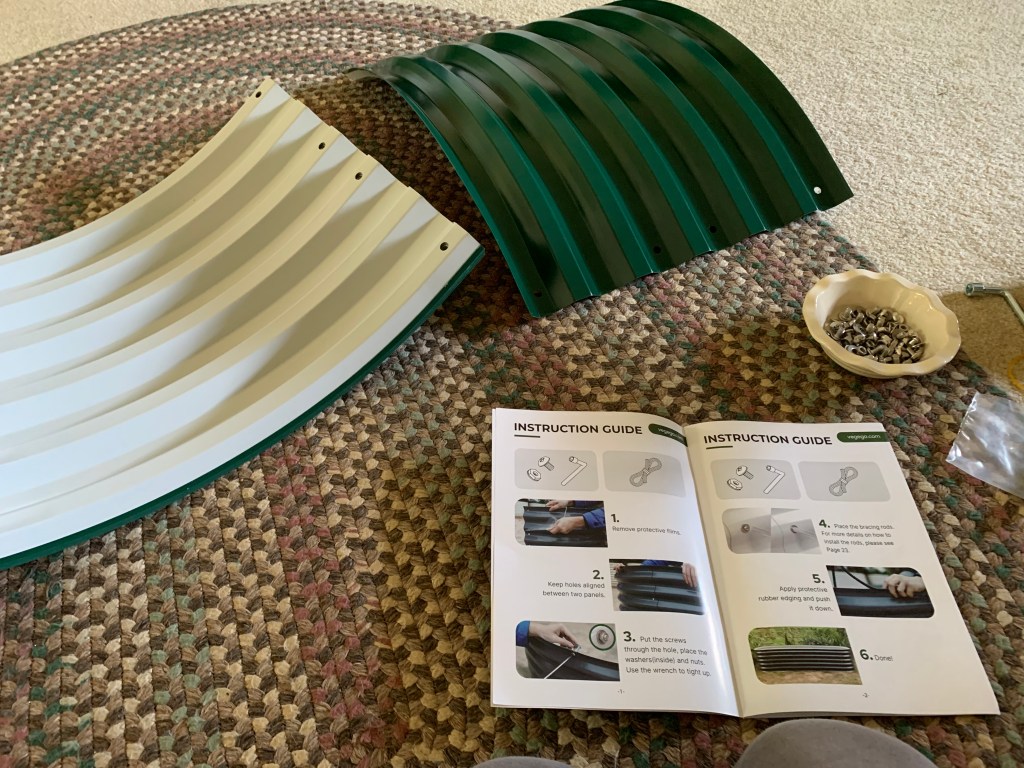
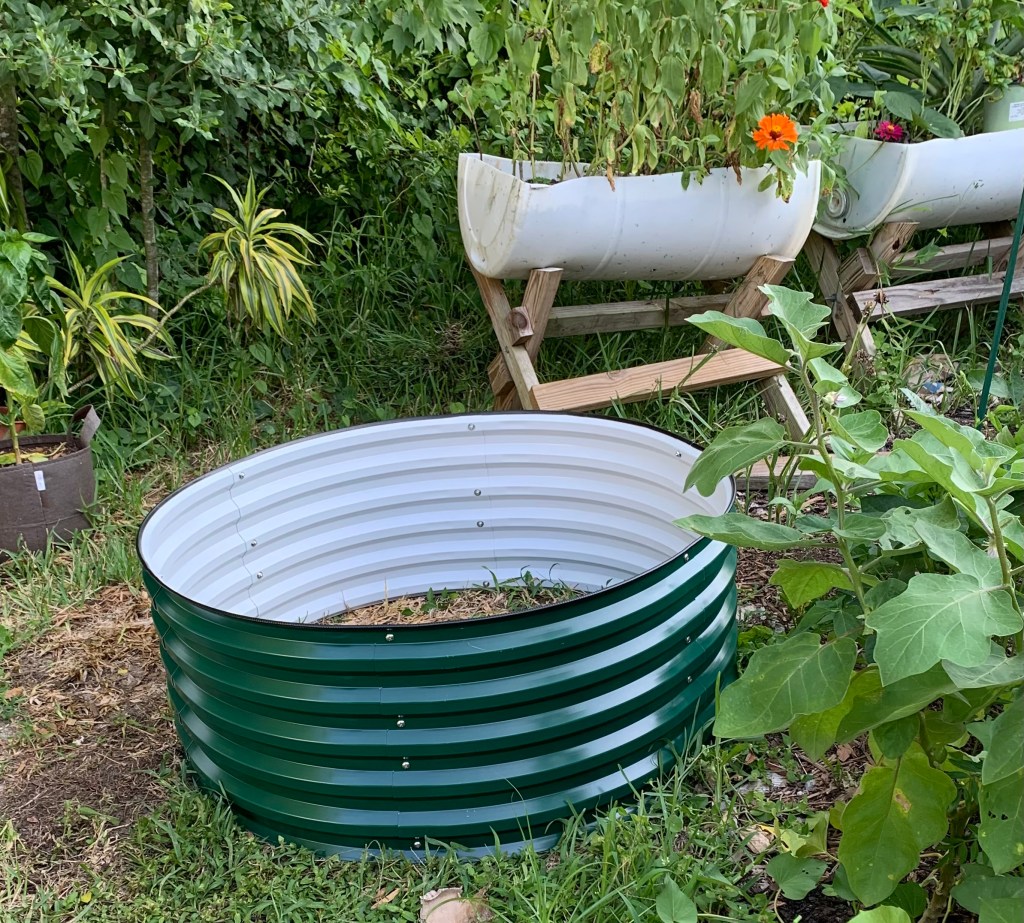
I’ve wanted a permanent (not made from wood that rots), large raised garden bed for a while. Raised garden vegetables are easier to manage than in the ground planting. I have better luck in a bed usually. This metal, round Vegega bed seems perfect.
Every time I have searched for metal raised beds, they have seemed way too expensive for me to buy. A few hundred dollars for one bed is way out of my budget. I had no idea of the quality either, until I found a review of the Vegega brand.
At Wild Floridian, I found a nice video review, and she offered a discount code to use for buyers. Her video convinced me to look into this brand further. See the review Vegega bed video by Wild Floridian where she has had the bed for a year and compares it to another type she had problems with (not named).
When I browsed the Vegega site, I liked the bed shape options. They offer sets that can be shaped as you wish once the product arrives – called 9-in-one, 10-in-one. Some of the pretty light colors were not available when I shopped, so I chose dark green.
My yard is small, and I was not sure where I’d put my bed. The round shape seemed perfect and I chose the 17 inch depth. This is a perfect depth to grow all kinds of vegetables including the ones with longer root systems like tomatoes, watermelon, and pumpkin. At this point, I have no idea what will be planted in this bed, but I will not be restricted by depth.
Putting The Vegega Bed Together
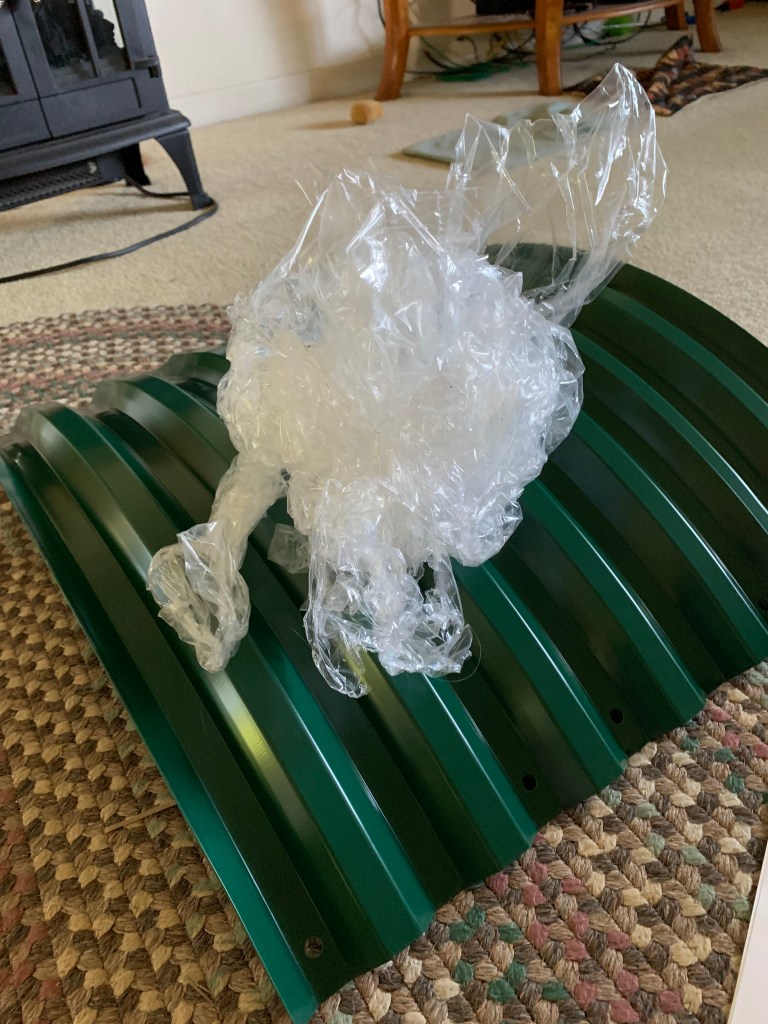
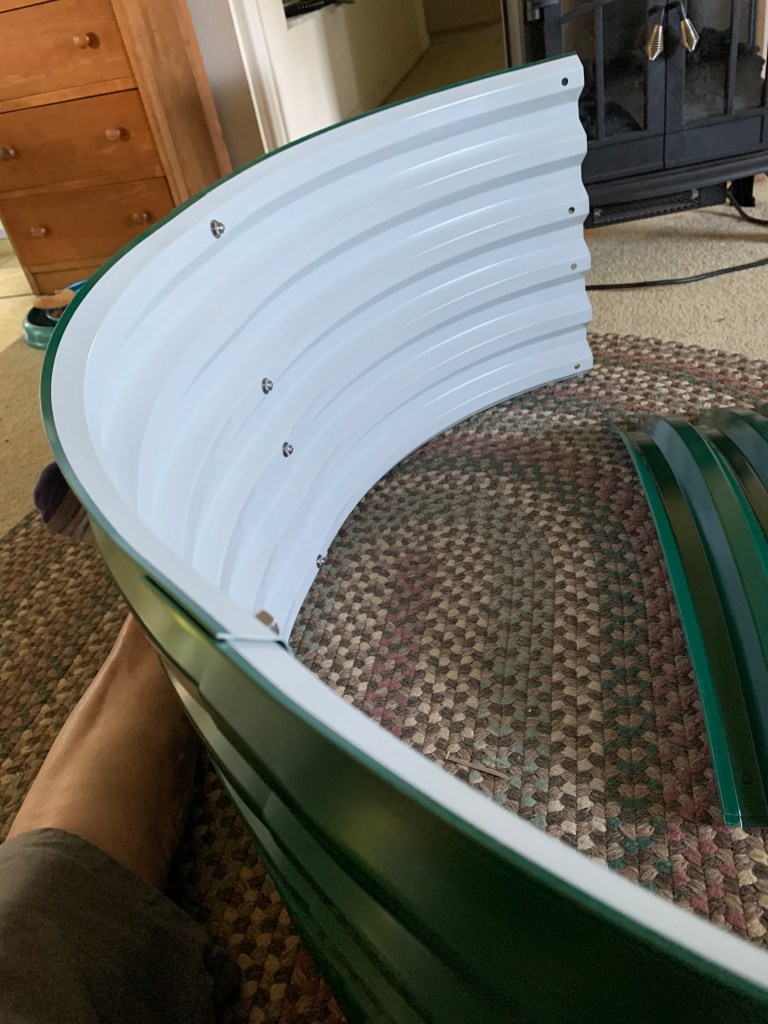
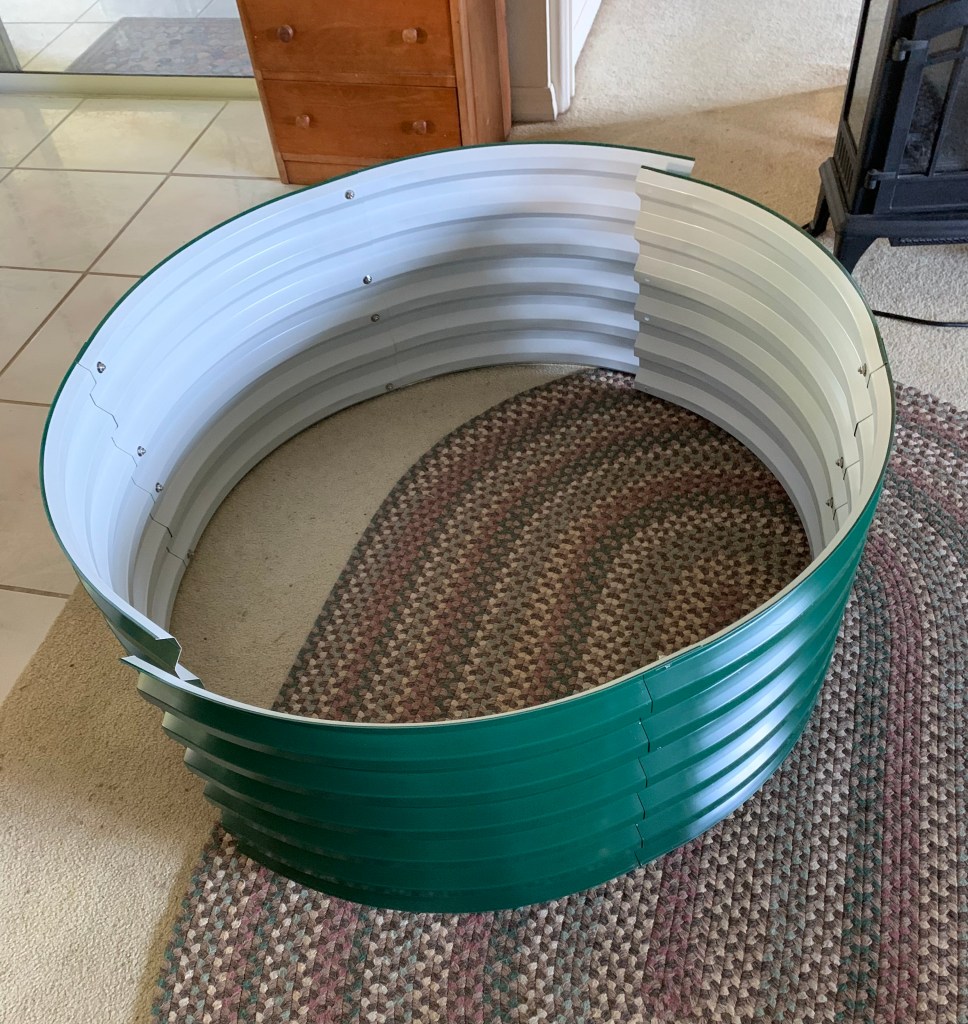
Assembly of the garden bed was fairly easy. I did it by myself in the house (it’s hot here). I think I spent the most time removing the film that covers each section! Screwing the pieces together was very easy. I decided to complete each half of the circle so I could move it outside in two sections to complete the assembly.
Remove filmGood directionsAll film removed!Indoor assembly completeNew bed for the garden
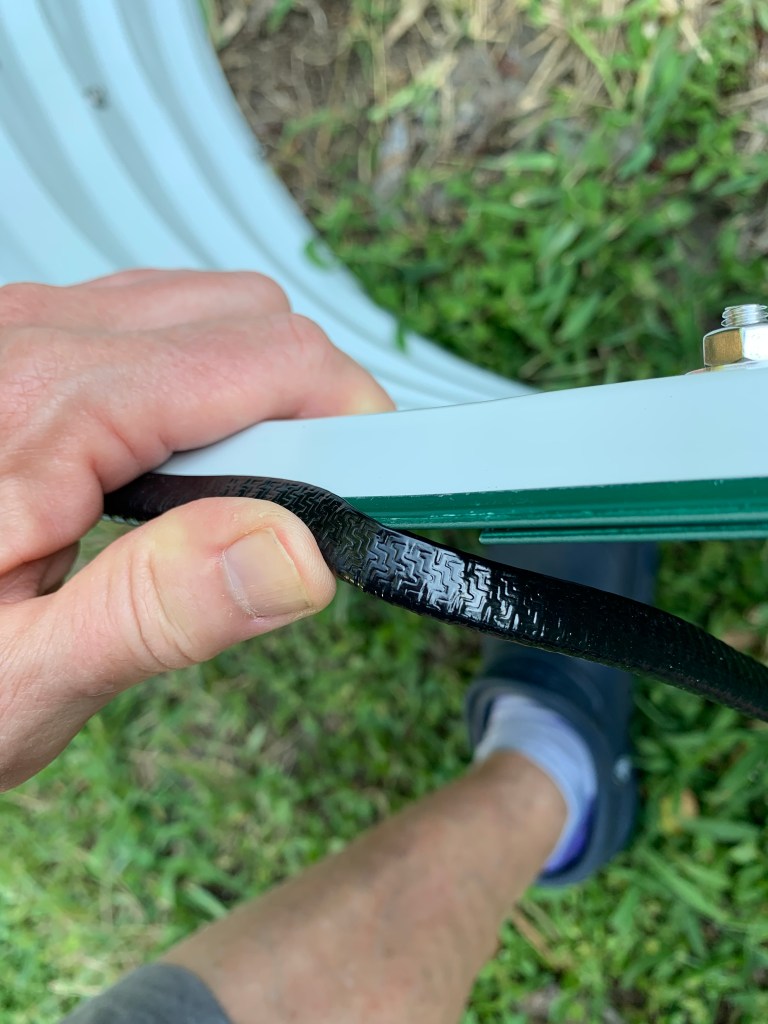
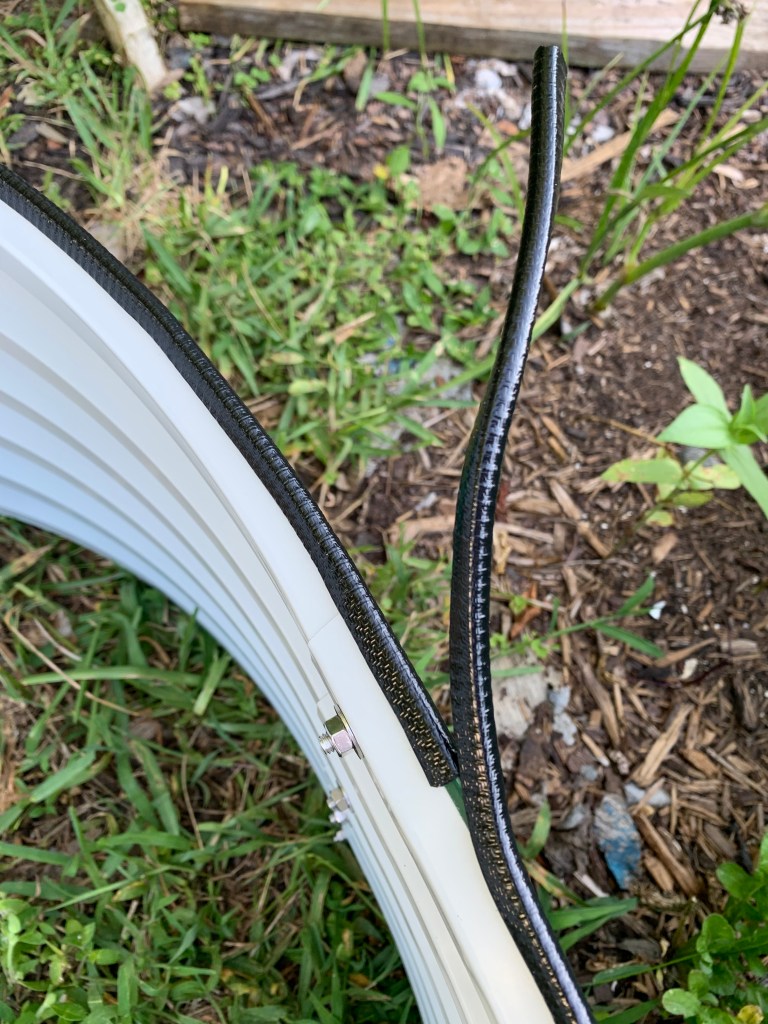
Once the sides are all screwed together, a rubber strip is added to the top. This also was very easy to do, with plenty left over.
Adding the rubberPlenty!
How I Am Filling My Raised Bed
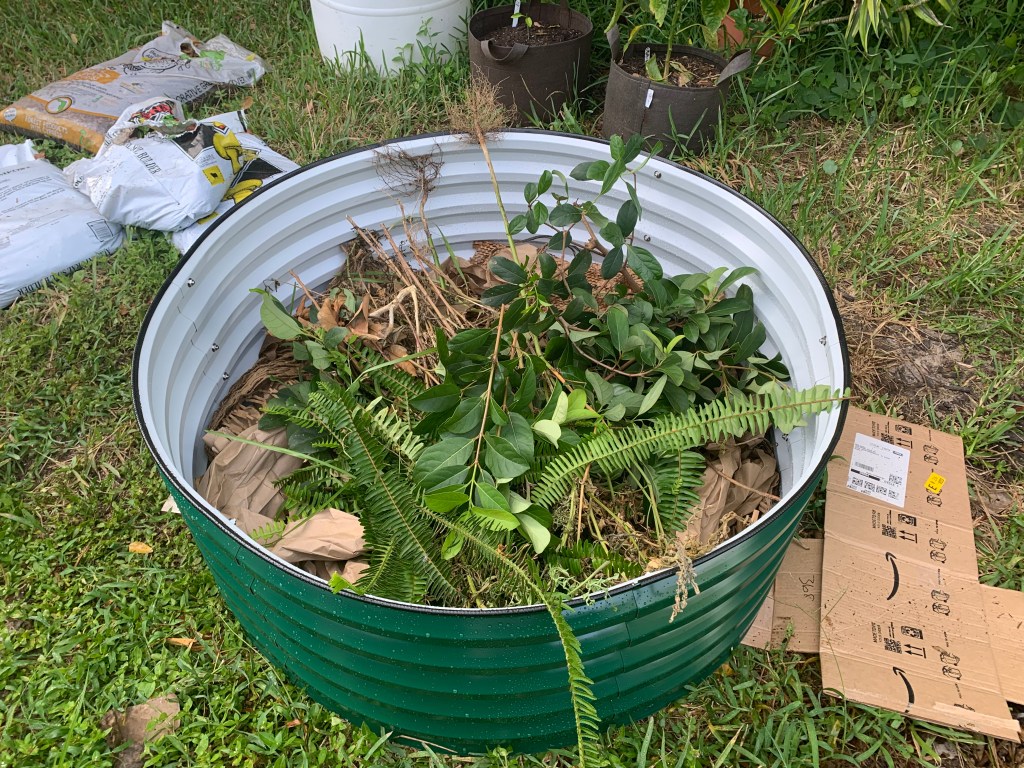
I’ve read all about various ways to fill a garden bed. This is part of the expense, but it’s worth it to create a good environment for the vegetables to grow. I’m not in a hurry, as I won’t be using this bed for a few months.
I have cardboard, so I am using it to level the bed. I also have added packaging paper, along with cuttings from the shrubs, and mulch to begin the fill.
Adding mulch
Don’t try to make your raised bed into a restrictive “container”. Leave the bottom open just in case roots want to expand. Also, think about water drainage. Everything I am adding here will eventually break down. Soon, the greenery will turn brown and decomposition will happen. All of this will become a layer of nutrients at the bottom of the bed.
As my marigolds die, I will cut them off and add them here. The same with any other flowers. I’m growing cowpeas now, and some of those plants may end up as a layer.
*FYI: I read someplace that using rocks in the bottom for drainage may not be a good idea, especially if you want to move the bed later on. The rocks will have become part of the earth and will be difficult to move / remove.
My Reason For Wanting a Raised Bed
I want raised beds because it’s easier to add and keep nutrients in the soil. Whenever I compare similar plants that are in the ground, to the ones in the bed, the bed / grow box plants are always doing better.
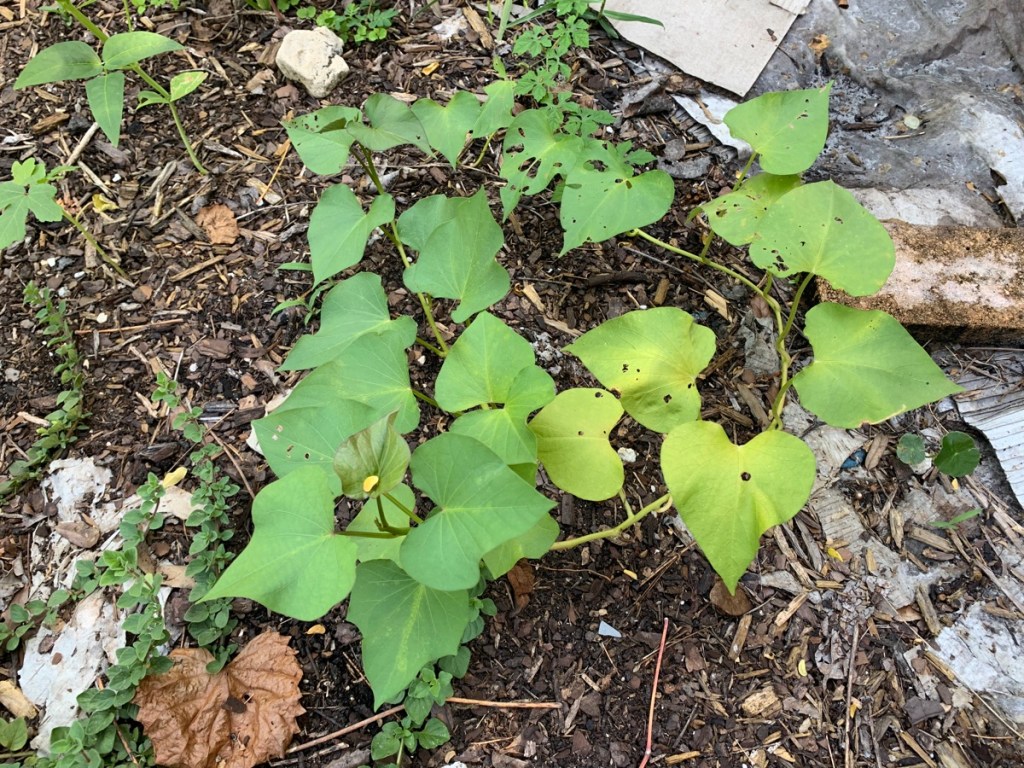
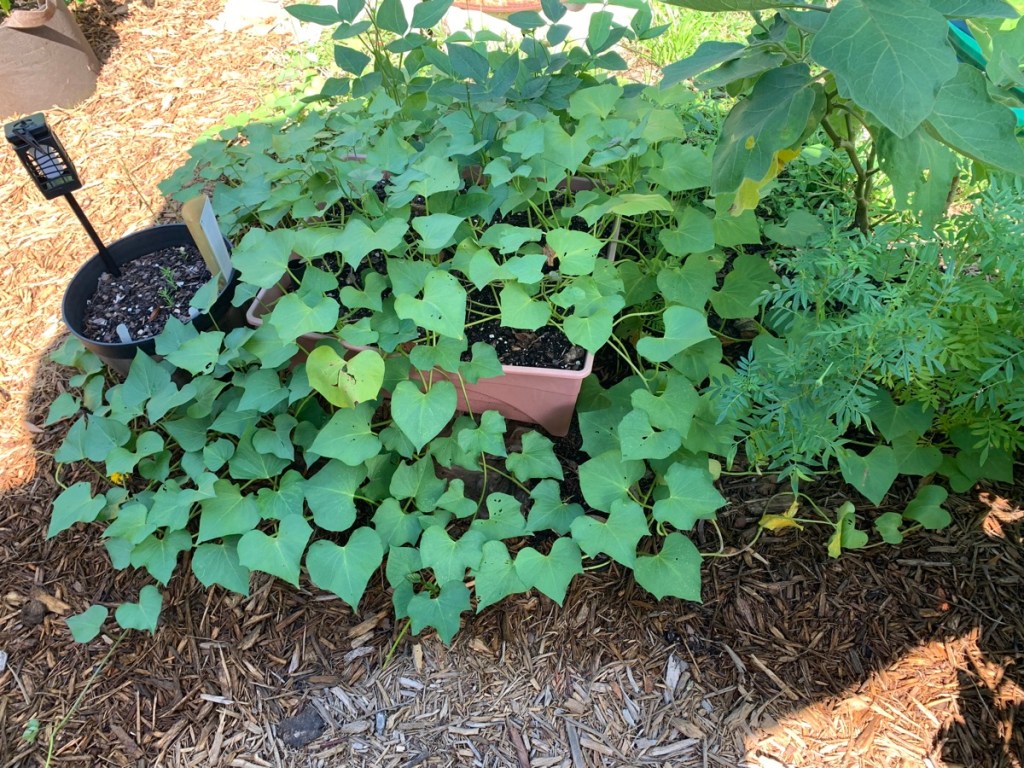
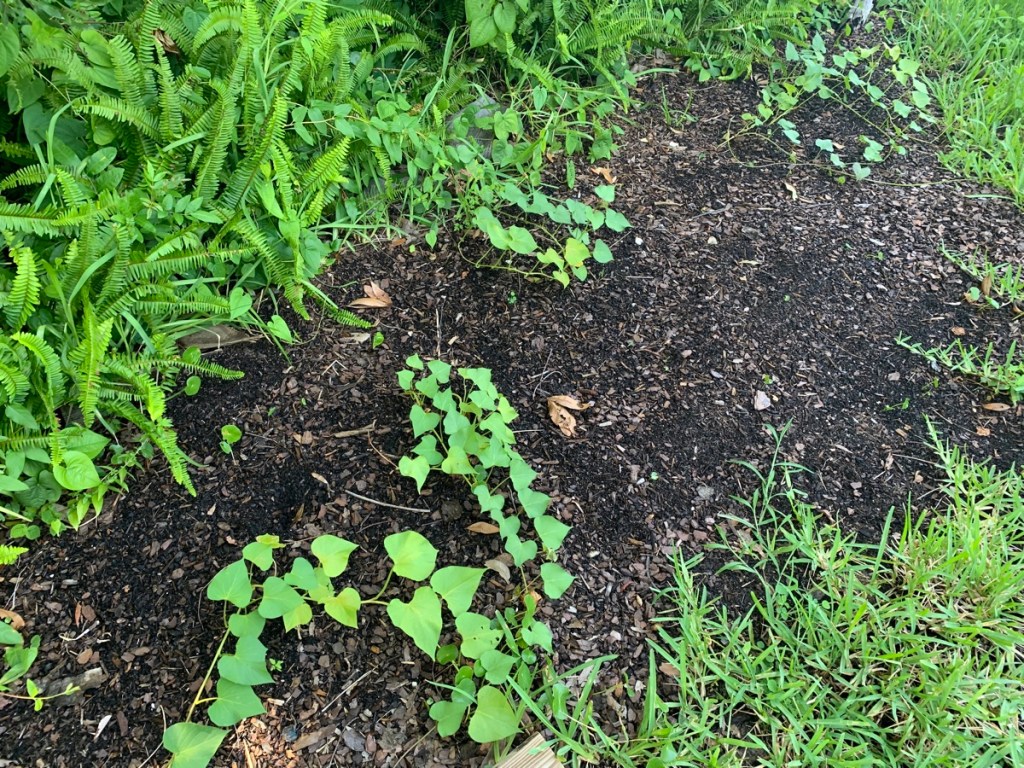
As an example, I bought and planted sweet potato slips just before my trip north. One slip went into a grow box (center) and others were planted randomly around the yard in the ground. The grow box sweet potato is going crazy with vines all over the place – even though that box is really not nearly deep enough. All the other sweet potatoes are much smaller. We’ll see in a few months if I get actual potatoes to compare.
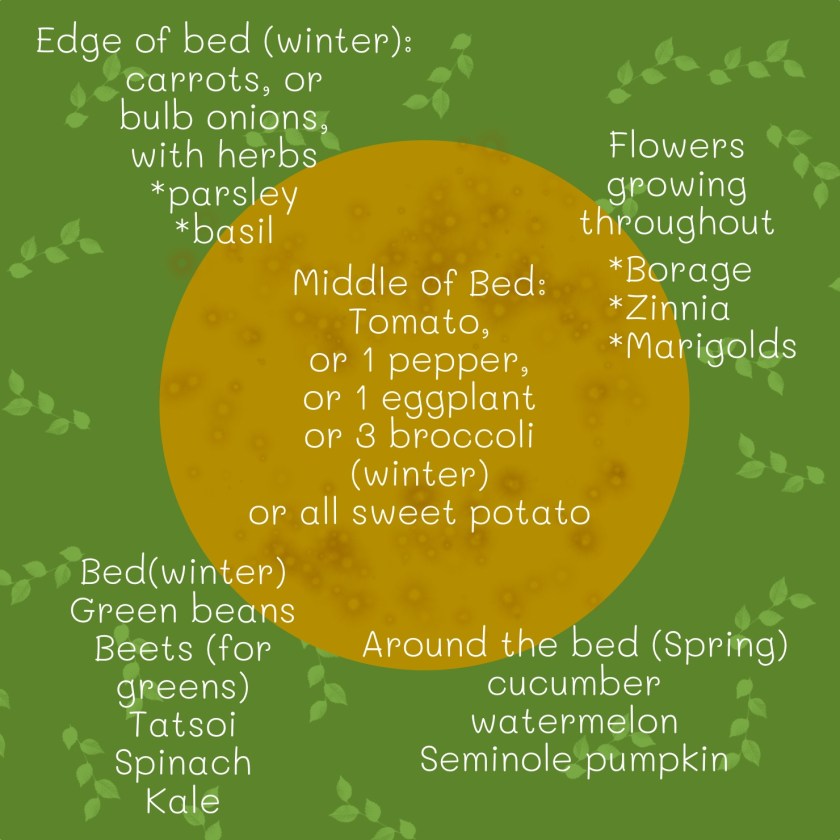
When considering what I have grown successfully (for the most part) I created this diagram with ideas for what to plant in my new, round raised garden bed.
That big circumference is perfect for root crops near the edge. I’m thinking carrots and bulb onions (garlic for you northerners). Both onions and carrots take months to mature. Putting them in as a border – out of the way – leaves space for bigger crops in the middle. I’m thinking of planting broccoli here this winter.
Planting ideas
Eventually I will be adding garden soil along with perlite for good drainage. Before I plant, I will mix in some other amendments such as bone meal. More to come about planting in this new space. I’m already thinking about buying one more bed in a rectangle shape.
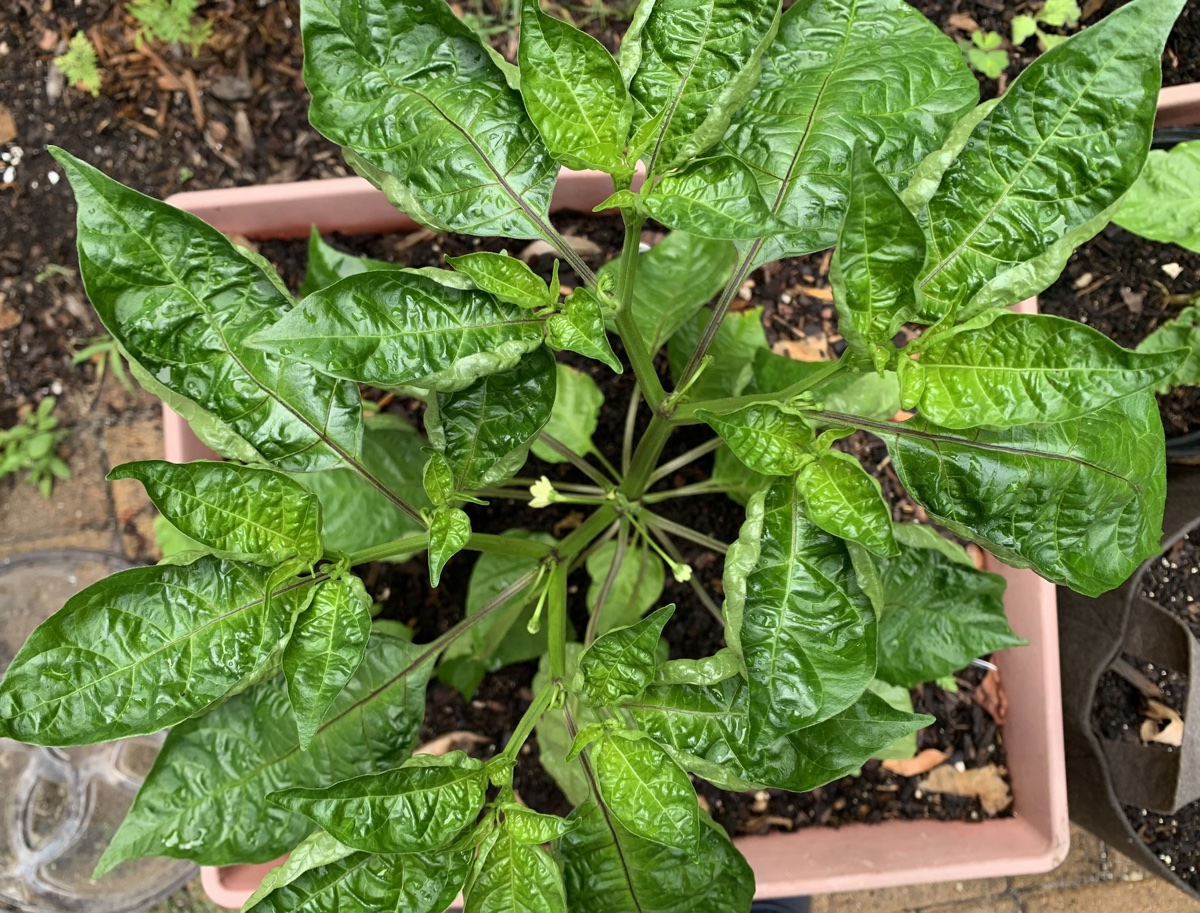
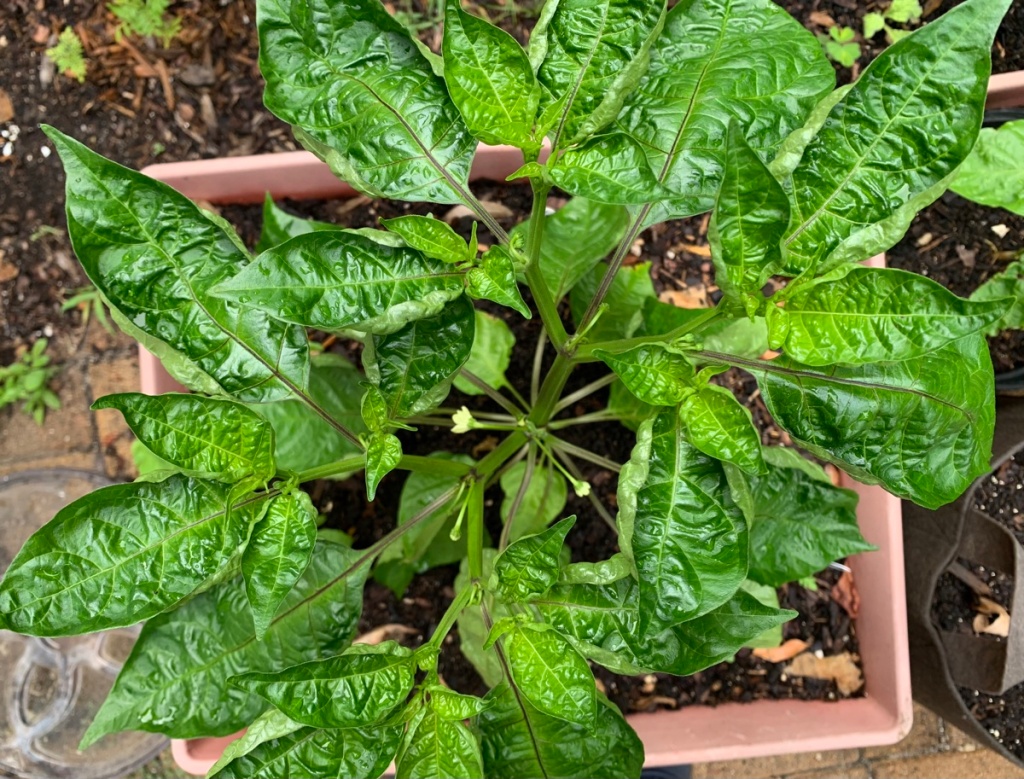
This year I am growing the Suave Nu Mex peppers, which are not going to be hot peppers. They should be orange in color and not red like the hot ones. After starting from seed, I have two plants growing and doing well.
Peppers, of all kinds, would be fabulous to have growing in my backyard. I use onions daily, and I would use peppers too, if I had them. This year I am growing the orange Suave Nu Mex peppers for the first time. (Not the hot ones.)
Pepper plants are tough to grow. I had trouble growing them when I lived in New Hampshire, because they would just be starting to have nice looking peppers, and the season would be over. They were purchased as seedlings, but the the short summer was a downfall. Now, in Florida, I have a long season, but the peppers were still not easy for me to grow.
DiseaseWinter pepper seedlingsPepper plants with disease
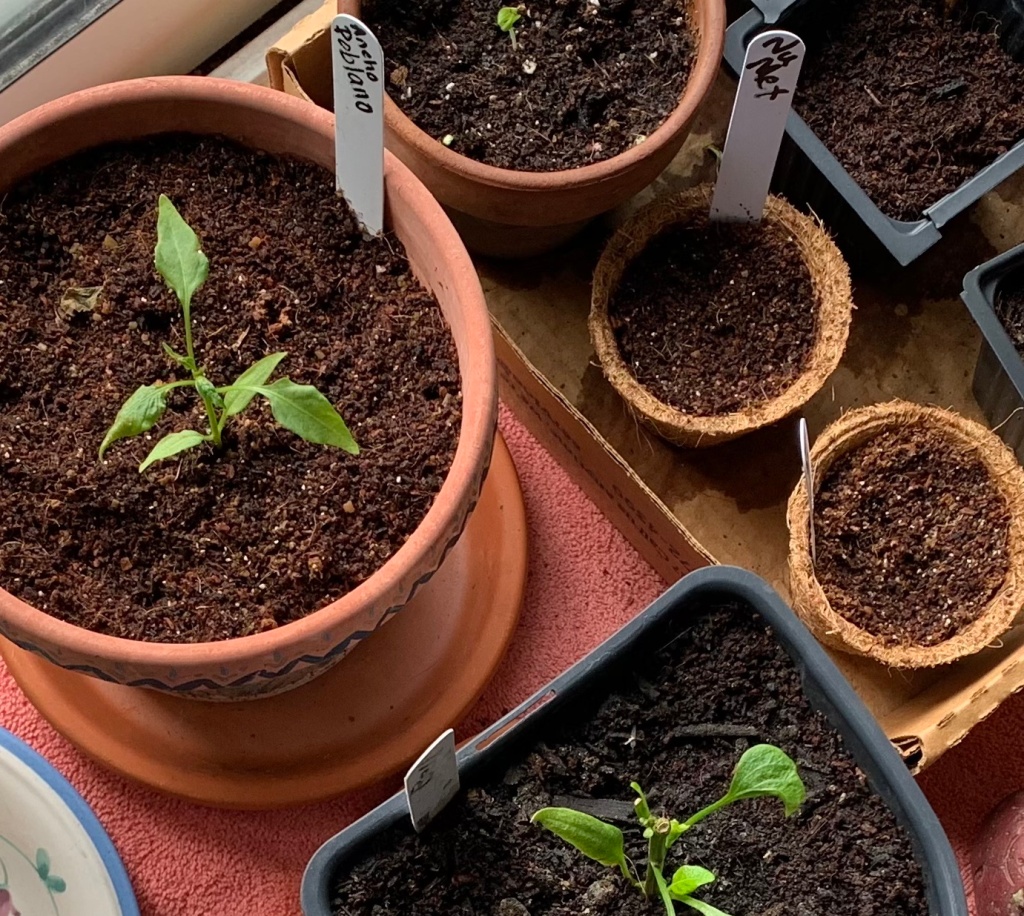
I began my peppers from seeds, in small pots. I tried to keep them going over the winter months, but they didn’t do well. Most of the seedlings ended up dying. Then, the older plants got some sort of disease.
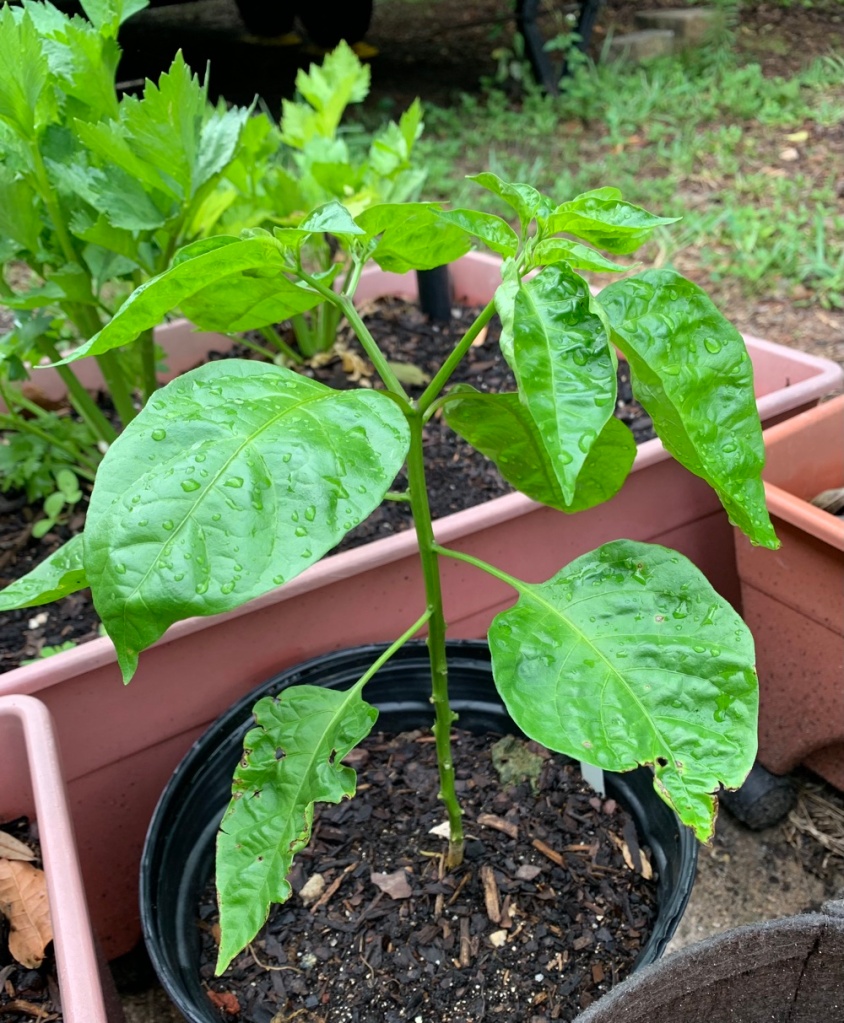
Because my seedlings were have such troubles, I waited for Spring (Feb.) to plant the Nu Mex seeds outside in one of the grow boxes. I waited to see what would grow, and ended up with 2 plants. Yup, only two.
It is now June, and I have one Nu Mex still growing in the box where it began. The other has been transplanted to a plastic pot. Eventually, I will re-plant it somewhere.
Smaller plant
Florida Gardening Conditions
Hot, heat, sun, blazing high temps.
Too much drenching rain, OR not enough rain (we just have over 2 months with NO rain in my area! Temps are reaching over 100.
Gardens need sun, but it’s too much for some plants. Must supply shade.
Humidity… lots of it.
My dilemma is that the boxes are great for starting plants from seed outdoors. But, those boxes are not very deep. They are better for shallow rooted crops. A Nu Mex can be 4 feet tall, and I’m sure it has an extensive root system. It really needs to be in the ground.
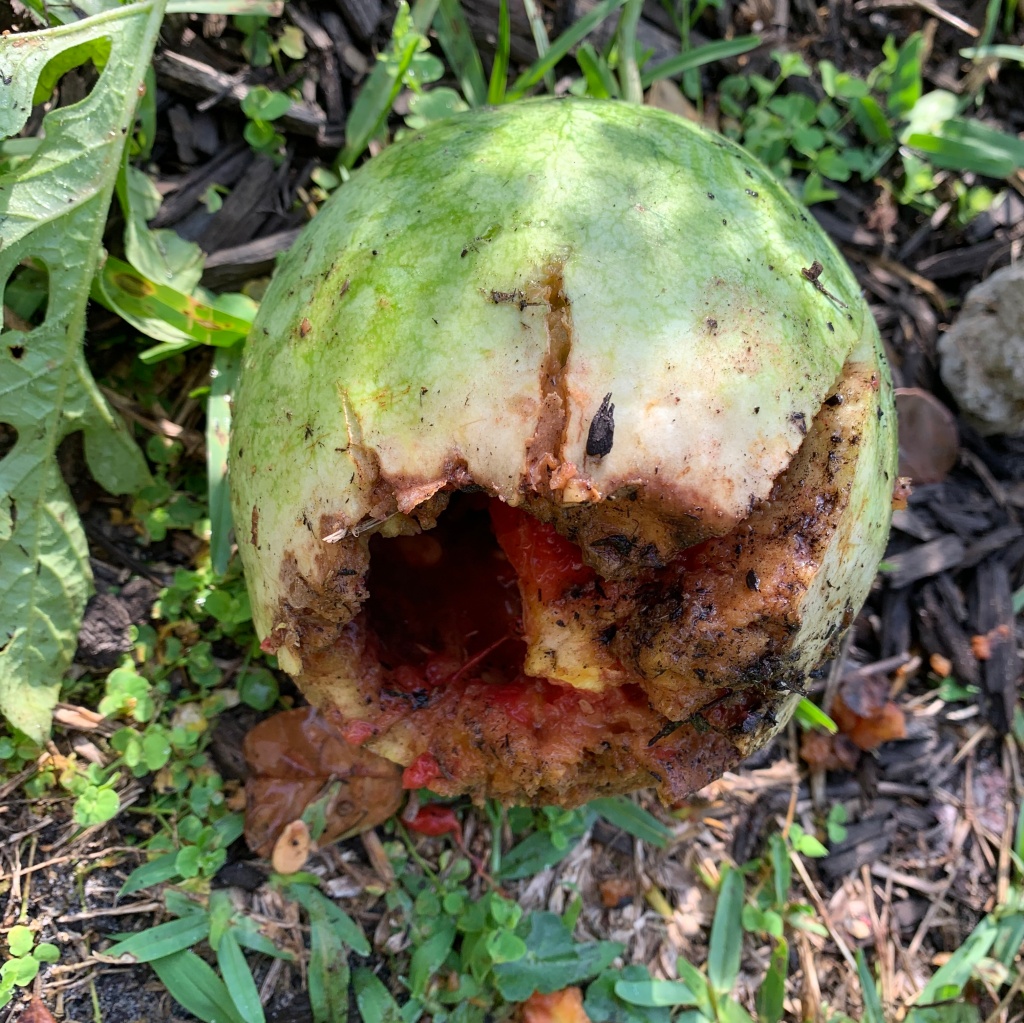
Anything growing in the ground in my yard, is open to raccoons harvesting my produce. They will rip the peppers right off the plant, as they do with tomatoes, eggplant, watermelon, and whatever else is in their line of sight. It’s a conundrum.
Raccoon got the tomatoWatermelon disaster
About the Suave Nu Mex Variety
The Suave Nu Mex (orange) peppers will look like habanero peppers, but won’t be hot like those. It means I can use them in meals without worrying about the heat. At least this is the hope!
Watch this video by Elise Pickett of The Urban Harvest, where she discusses which peppers to grow in Florida and how to care for them.
Nu Mex leaves
The leaves on the Nu Mex peppers are curled on the edges. I’m not sure if this is a characteristic of the variety, or if it’s a signal that something is wrong. The plants both look healthy, and the larger one has flowers. These plants are about four months old.
The Secret is to Give the Peppers Some Shade
The peppers that grew well from seed looked nice, but I was worried about how much water to give them. The sun is so hot, and it dries the ground pretty fast. But I don’t want to overwater either.
After a month of growing my pepper seedlings, one thing I discovered is to give them shade early in the day. They were getting a lot of sun until later in the afternoon, but it was too much.
Other Peppers Growing Well
After struggling to get my pepper plants past the seedling stage, I now have these types growing in my little backyard. I wrote a page about them here.
4 Carolina Wonder Bell pepper plants
2 Suave Nu Mex, orange, not hot variety (this page)
2 Aji Dulce spice pepper / seasoning peppers
1 Ancho poblano (2 have already died, so fingers crossed)
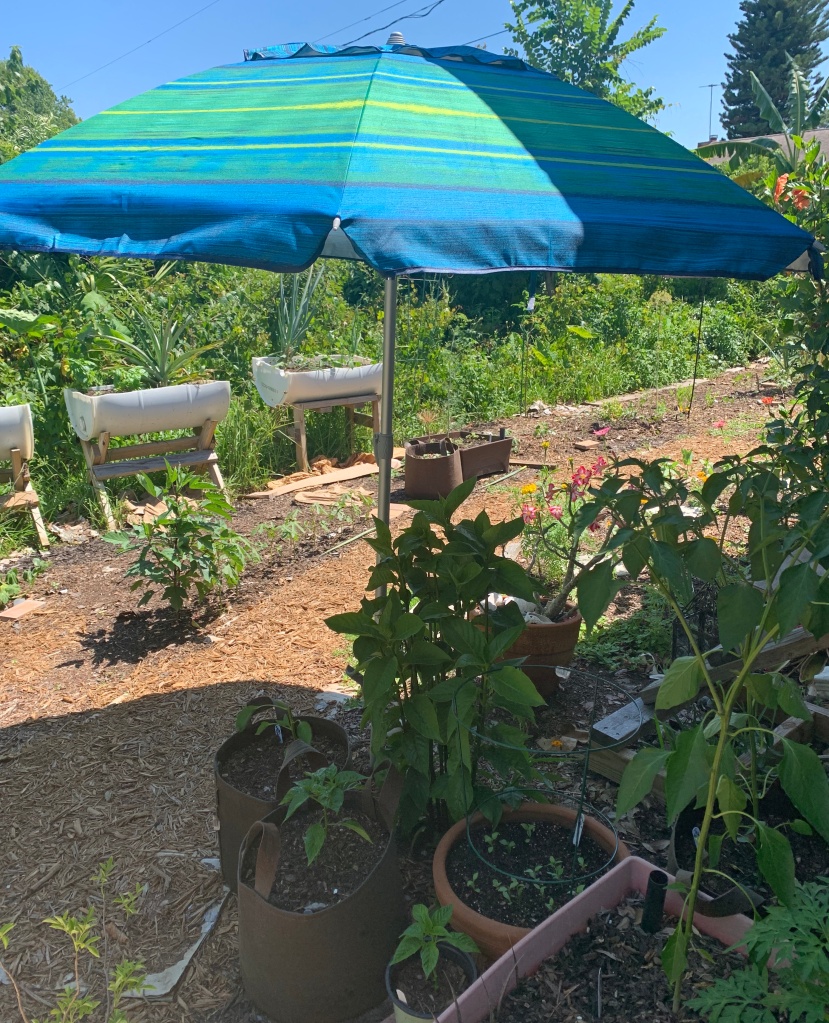
Using Umbrellas For Shade in the Garden
I have set up my beach umbrella next to the fire spike – which droops in the sun every day. I’ve arranged some peppers in bags around the bottom and try to remember to open up the umbrella by noon.
Both Nu Mex plants are near my table umbrella, which I put up to block the afternoon sun. All the pepper plants have begun to do much better now that they have less direct sun.
Beach umbrella is up for shadeNu Mex – will get afternoon shade when I open that umbrella
Epsom Salt and Fertilizer
In Ellise’s video (link provided up this page), she talks about adding Epsom salt (paid link) to her pepper plants. About once a month, sprinkle a little around the plants. I have been doing this with all my peppers.
Don’t fertilize too much either or they will grow like mad, but not produce. Once they begin to grow little peppers, they may need more fertilizer. Some places say to fertilize once a month. I’m still in the learning stages and I’m not good at keeping track of when I fertilize what plants.
Umbrella Suggestions
If you want to use a stand alone (beach umbrella) to shade portions of the yard, be sure to get one that screws into the ground. Mine has the screw part attached at the bottom, with fold out handles to screw it in. The top of the umbrella comes completely out, which is nice if it gets super windy. Also the height is adjustable, and it tilts.
The one I bought (back in 2017) is similar to this one on Amazon (this is a paid link), but I’m not sure the quality is the same. The one I have is currently unavailable.
The plastic screw anchor is easy to put into the sandy ground, or take it out to move. Umbrella anchors can be purchased separately, and then you could find a cheap umbrella to use with it. The problem I see with that set up, is the wind. If the umbrella sets into the anchor, it could come out and blow away.
Another option for shade is to buy a shade cloth. I’ve never used one, but they are big and need to be anchored somehow and tied somewhere. This works best if you have a big area to cover.
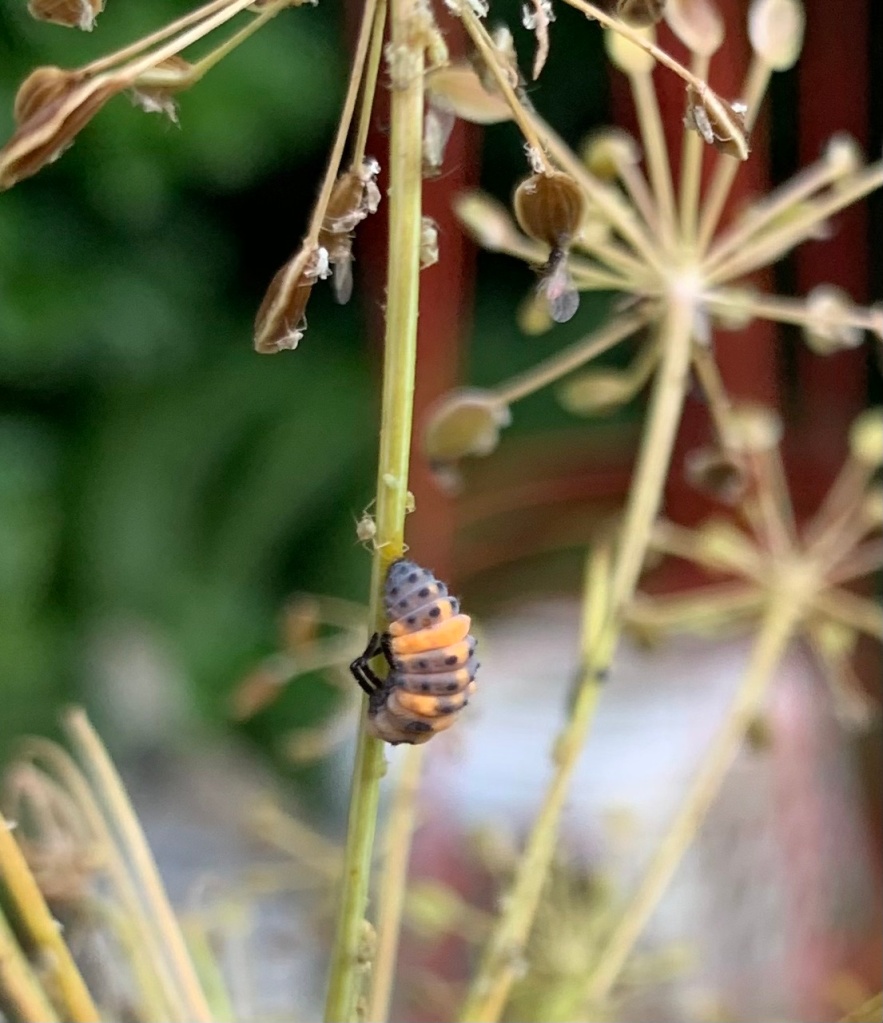
If you have an aphid infestation, check regularly for ladybug eggs, larvae and pupa on the plants.
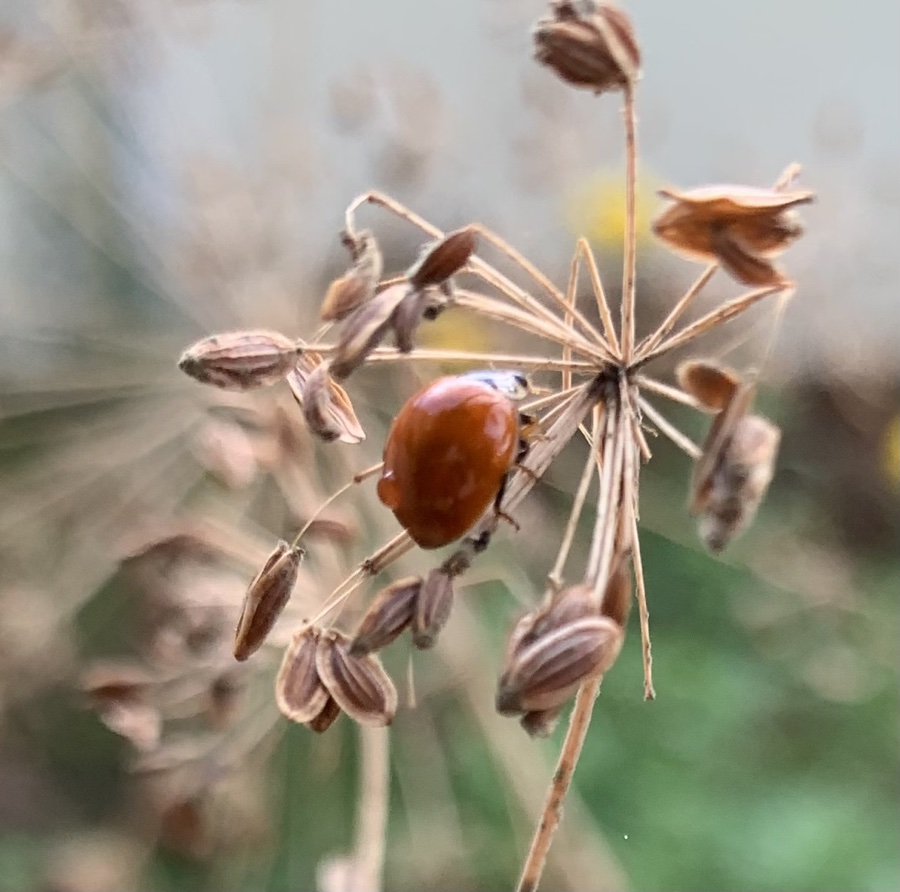
I believe in not being too quick to clean up the garden. It is June, and my old, aphid-filled dill plants are now full of ladybug larvae! This is why I leave plants up after they have grown, bloomed and begun to die.
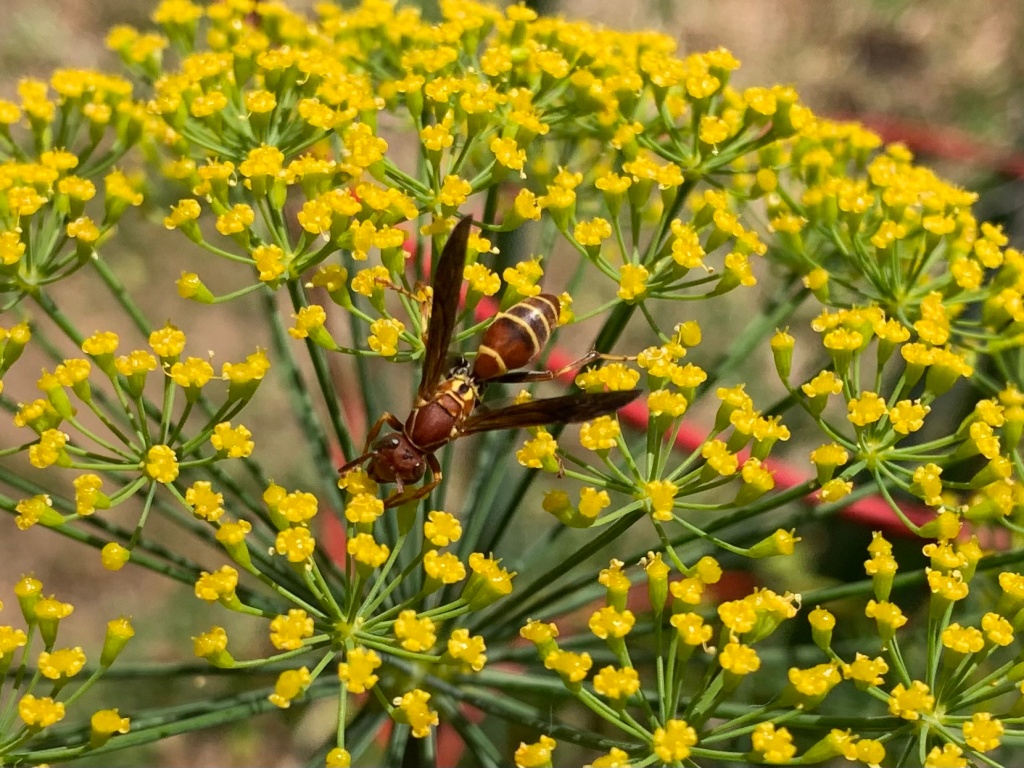
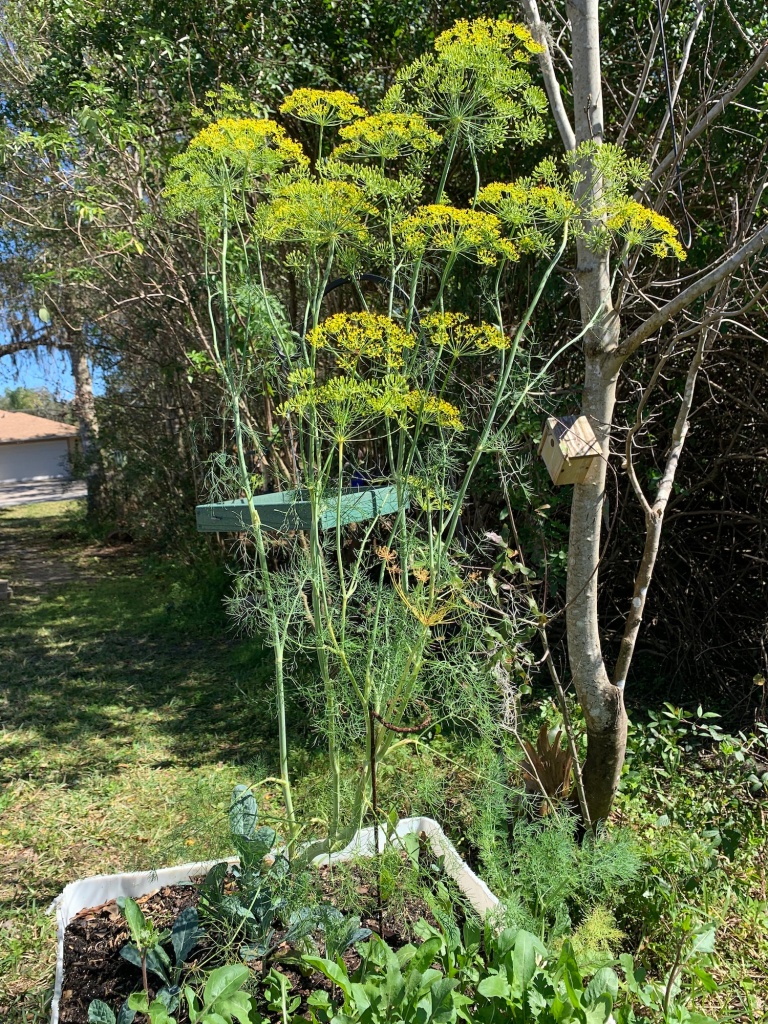
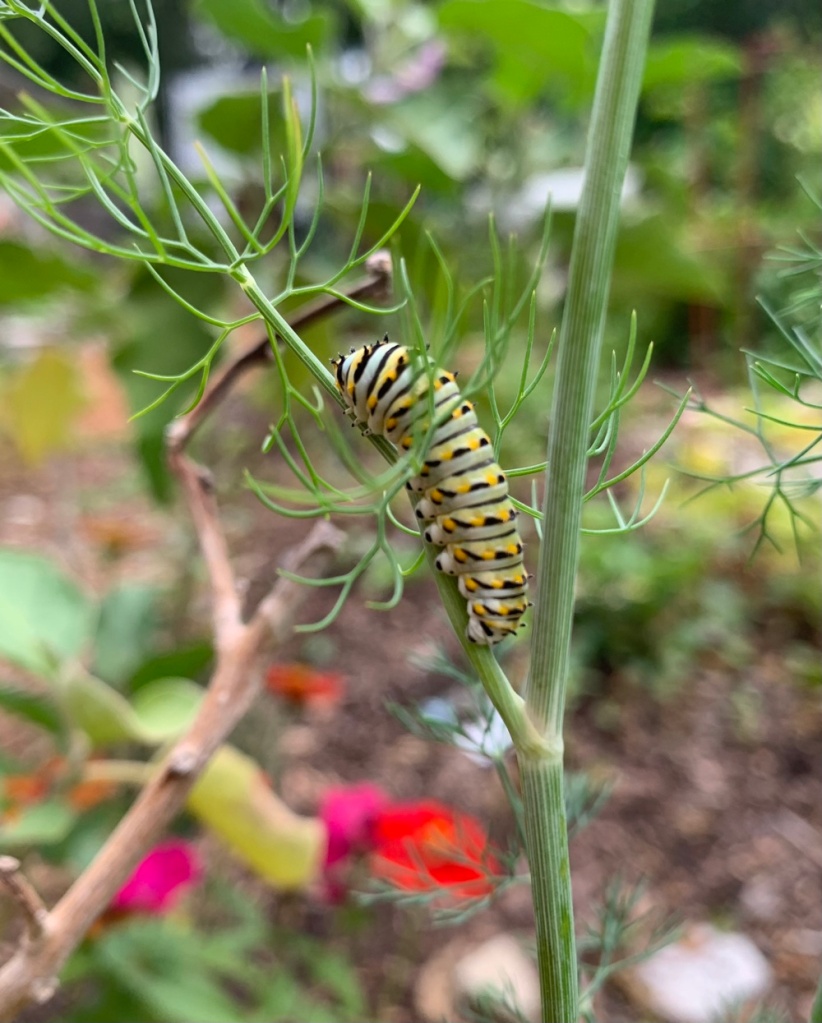
Dill is one of the great herbs to grow in the garden. Some of my plants have come up on their own. When I see them growing I just leave them. The flowers are gorgeous and feed bees and butterflies. The seeds are easy to gather and save, and black swallowtail butterflies lay eggs here.
Dill flower
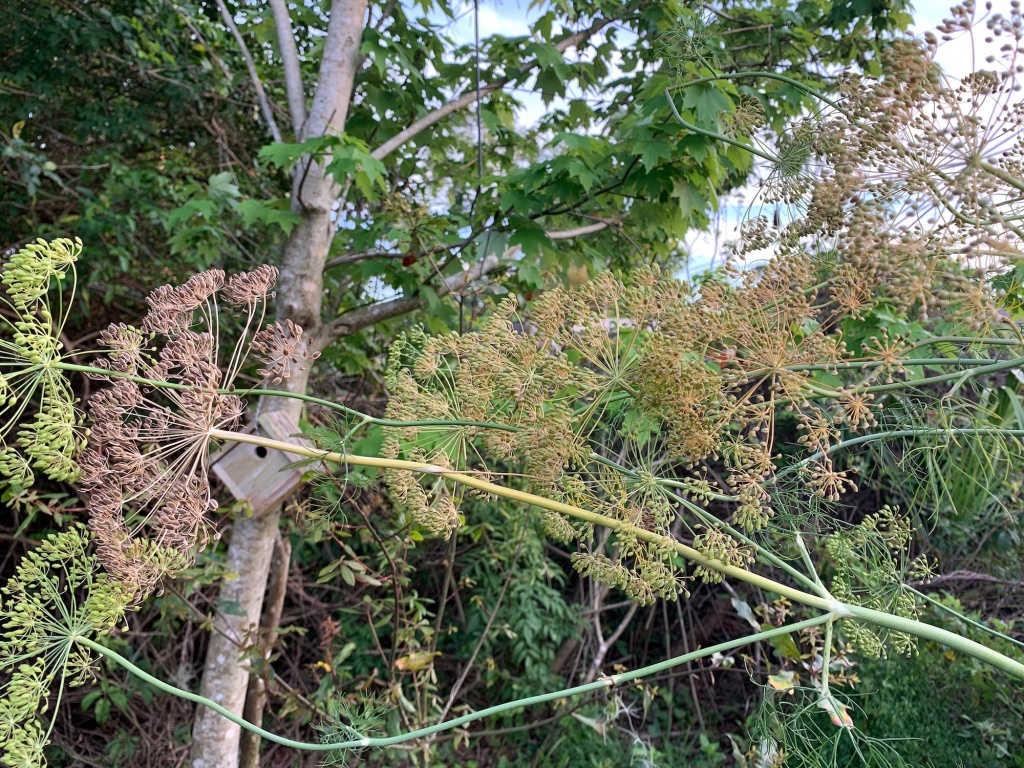
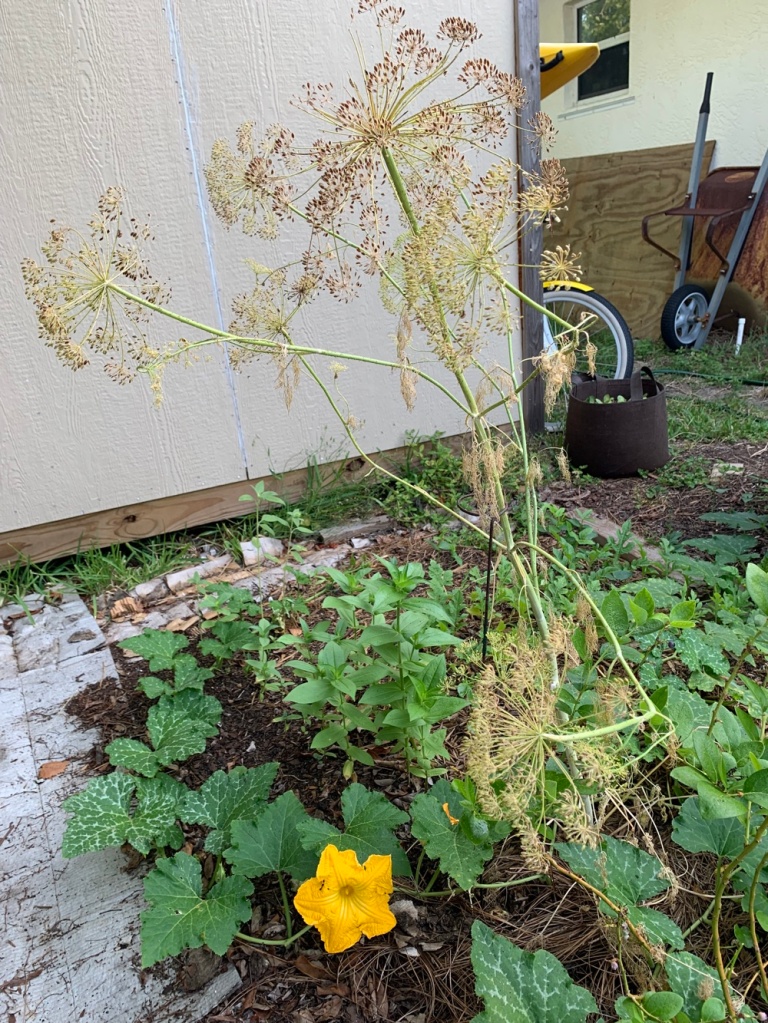
Dill does not like the extreme Florida summer heat and the plants are done flowering by June. The seeds have formed, and I did cut one big head off to save the seeds for next Spring. The rest, are still on the plants, which now look pretty awful.
Aphids have found the old dill plant and it is covered in them! But there are also many ladybug larvae and even a ladybug or two.
Aphids and larvaeOld dill is full of aphids, which ladybugs love!
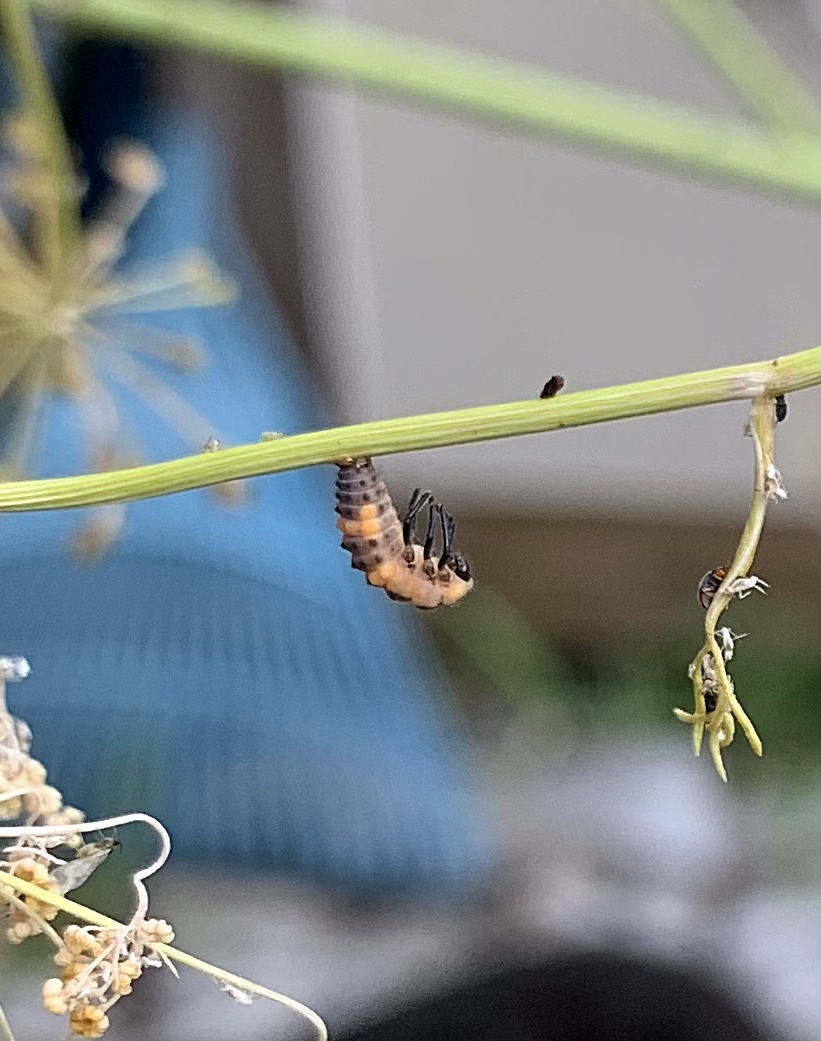
The day I saw all this larvae, I counted 15 little guys crawling around. They are tiny, and hard to see in the mess of aphids, so there might be even more.
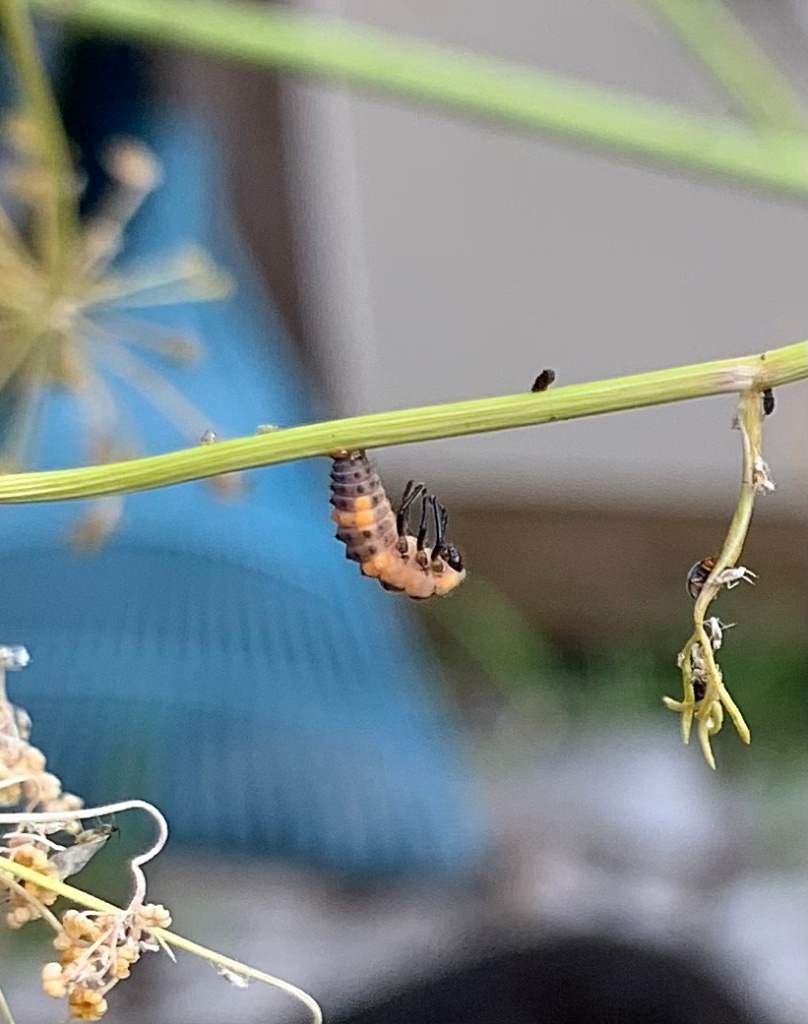
The next day I realized they were beginning to attach and hang – going into the pupa stage.
Becoming pupaNext dayLarvae to pupa
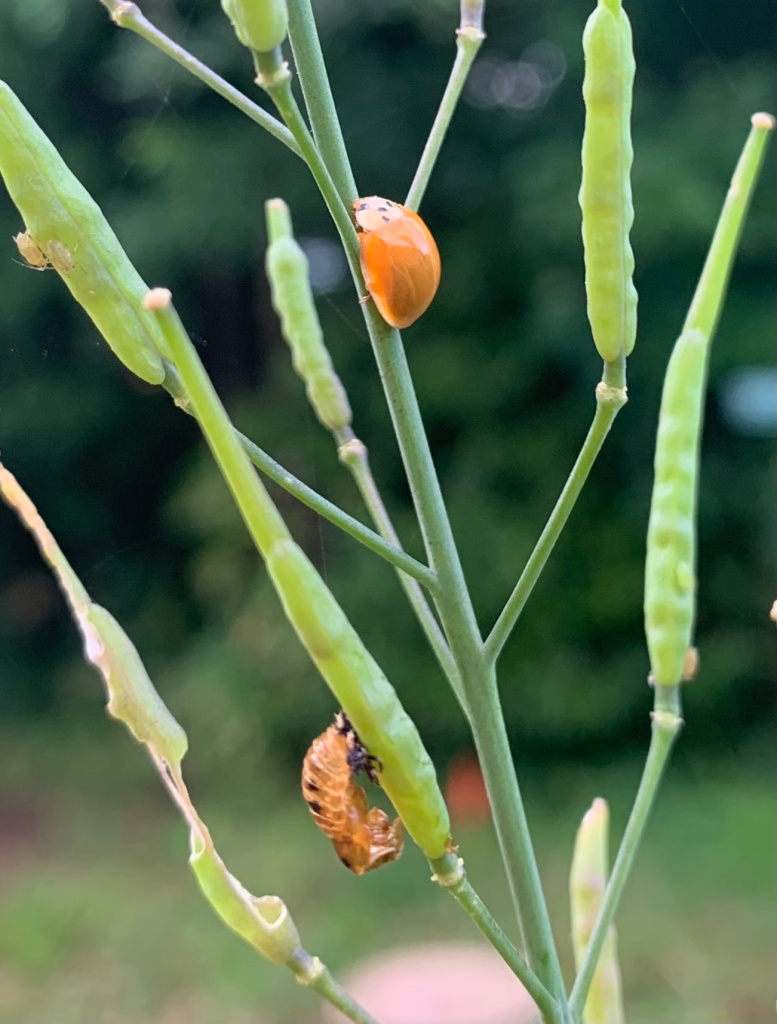
A few days later the new ladybugs were crawling all over the dried dill stalks.
Newly hatched ladybug exploring the dried dill seeds
Ladybugs on the Hon Tsai Flowering Broccoli
Just a few weeks before the dill ladybugs were noticed, I had watched ladybugs come out of their pupa stage on my Hon Tsai flowering broccoli plant. It was setting seeds, and had some aphids at the top. This was a random plant that grew late in the season.
Ladybugs feed on aphids, so they lay eggs where the “babies” aka larvae, will be able to get food.
Just out of the pupaThe spotted one
Four ladybugs hatched from their “shells” which were attached to the seed stems of this plant. Three ladybugs were solid orange, and one had loads of black spots.
Newly hatched ladybug!
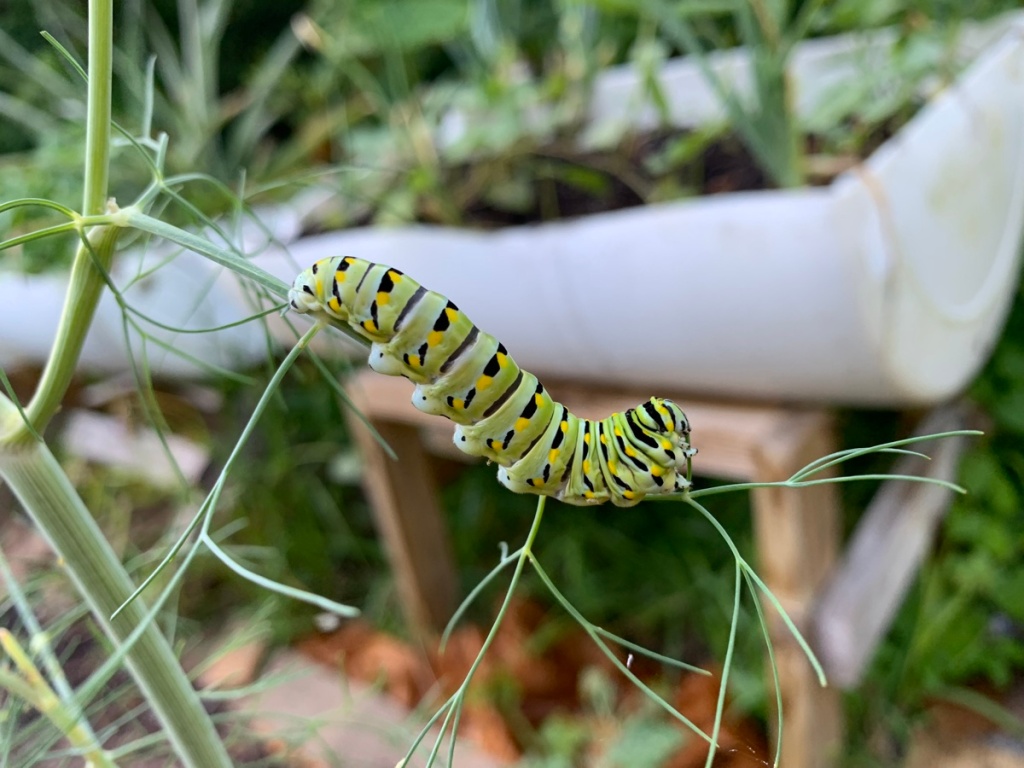
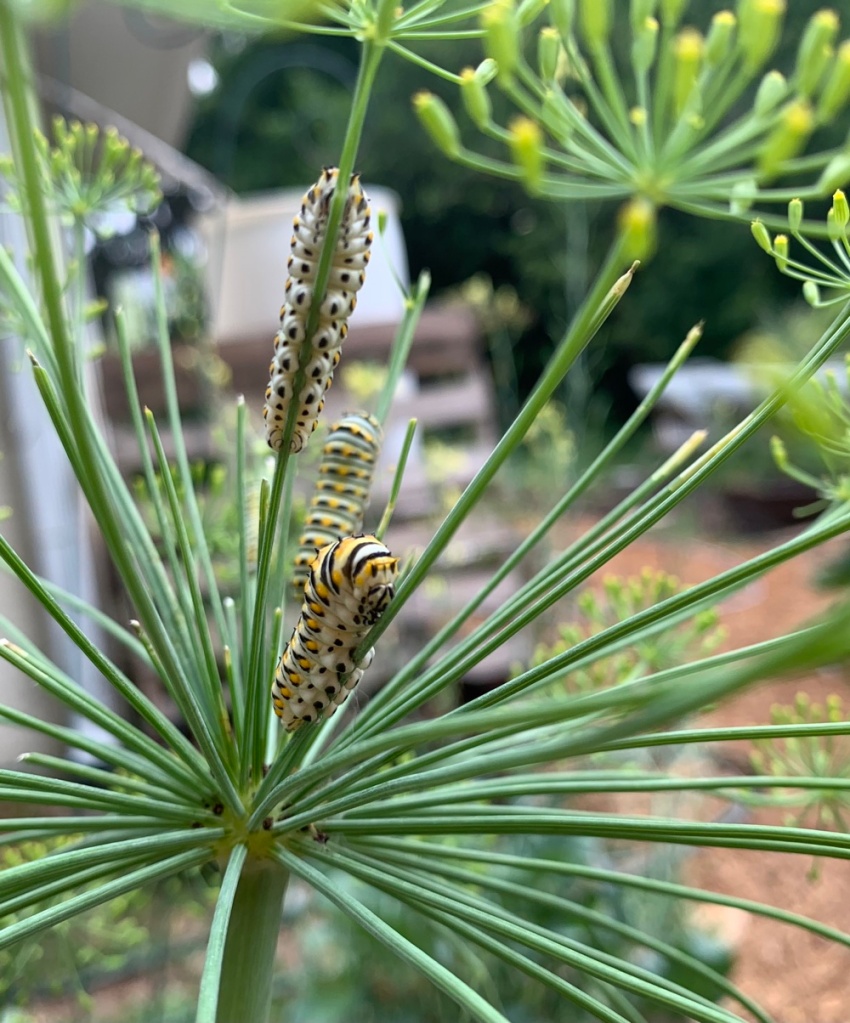
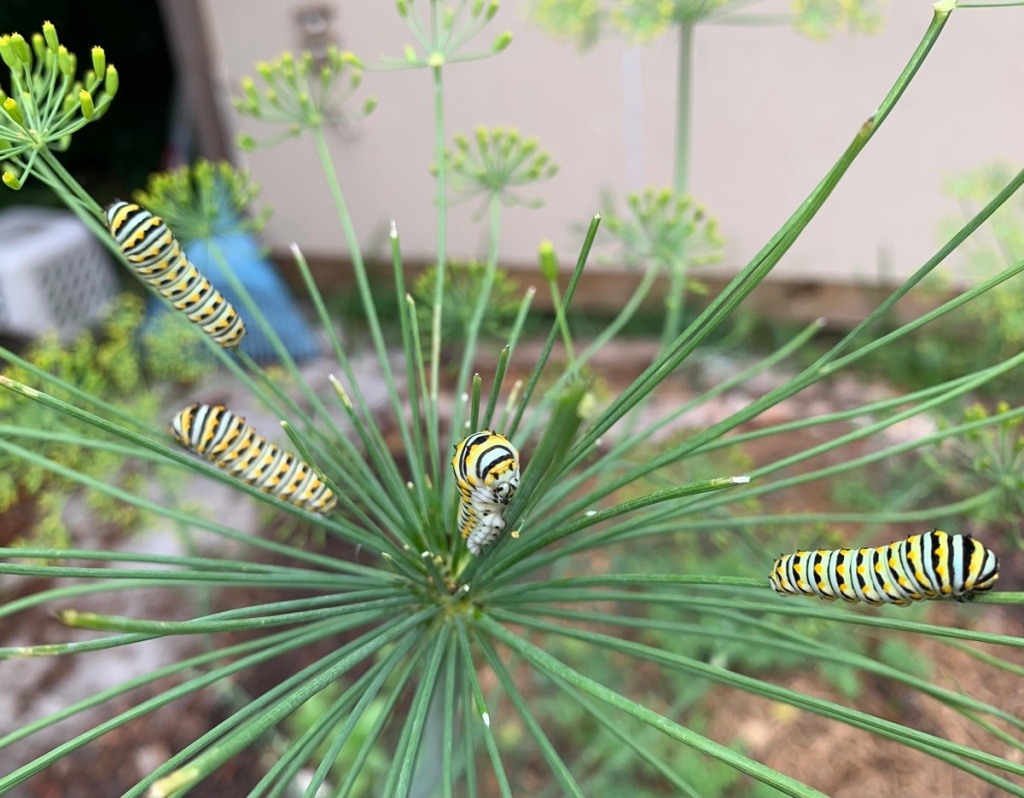
Dill is Feeding the Caterpillars
Even though the dill plants have mostly died and are drying up, I have found two caterpillars on one of them.
There is not much left for them to eat. I’m very surprised that the cardinals have not picked them off by now. I check on the beauties every day, but I have big doubts that they will reach pupa stage.
*Update: the next day one caterpillar was gone and the day after the other one was gone too. I suspect birds needed a meal.
This guy is so pretty, he almost looks fake.
This is a reminder to look closely at what is happening in the garden. Before you decide to rip out that old plant, consider what creatures might need it for shelter, eggs, or food.
Spring is a busy time for me with garden plans and life plans colliding.
In Florida we don’t get a break from the growing season. Something is happening year round in the garden and yard. In a way, this is good. What fails at one time of year can maybe be tried again in a few months. We don’t have to wait an entire year for the growing season to return.
It also means we gardeners stay busy year round, planning and planting. This is only my second year trying to expand and grow here in east, Central Florida.
Plans and Planting and Juggling it All
Every time the first of the year rolls around, I find myself swamped. This was true even before I began to garden.
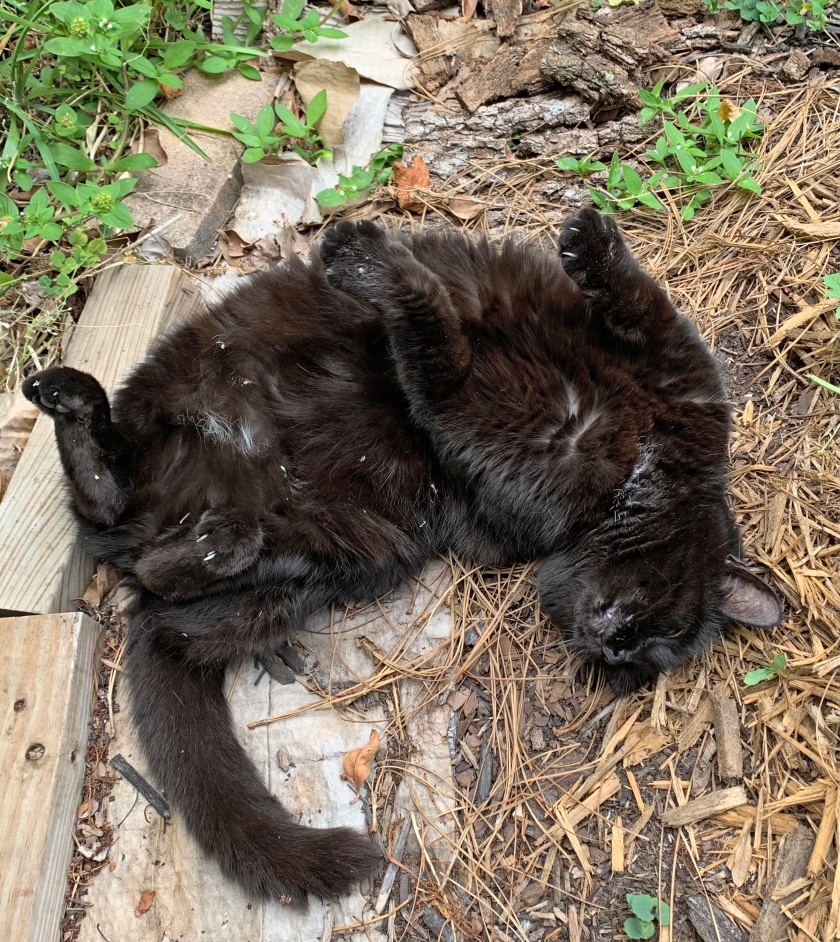
After cleaning up from the holiday season this year, we had a few camping trips planned. Also, both of my cats had to go to the vet for their annual shots, AND I needed to get new eyeglasses. (Did I mention it is also an expensive time of year?)
Skittle – Learn to chill like a cat
My high school class reunion (a milestone 50th, wow) was being held in April. I had originally planned to skip it, because it meant traveling to New England. My daughter wanted me to come up to New Hampshire for a visit, so I combined the visit with the reunion. But first, my youngest son came for a visit! Busy, busy.
In between all these life plans, I had to do Spring gardening. I bought mulch, compost, and seed packets. Transplanted crops beginning in February, and did weeding, cardboard layering, digging and watering.
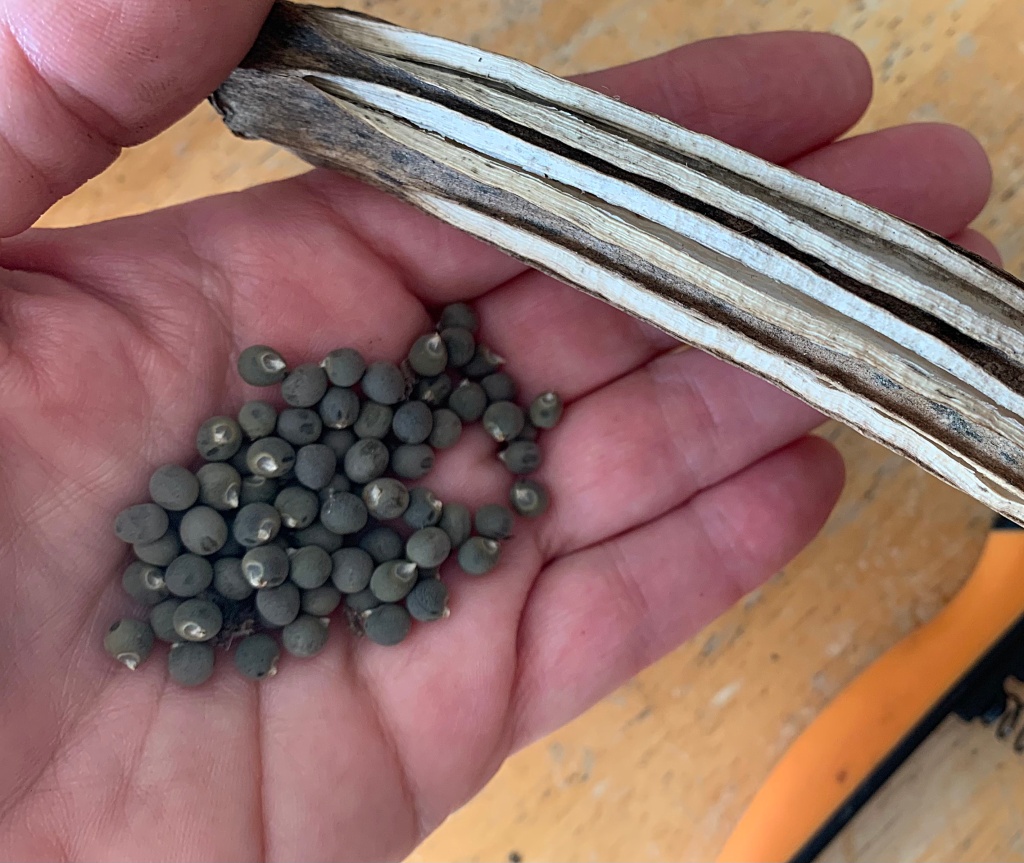
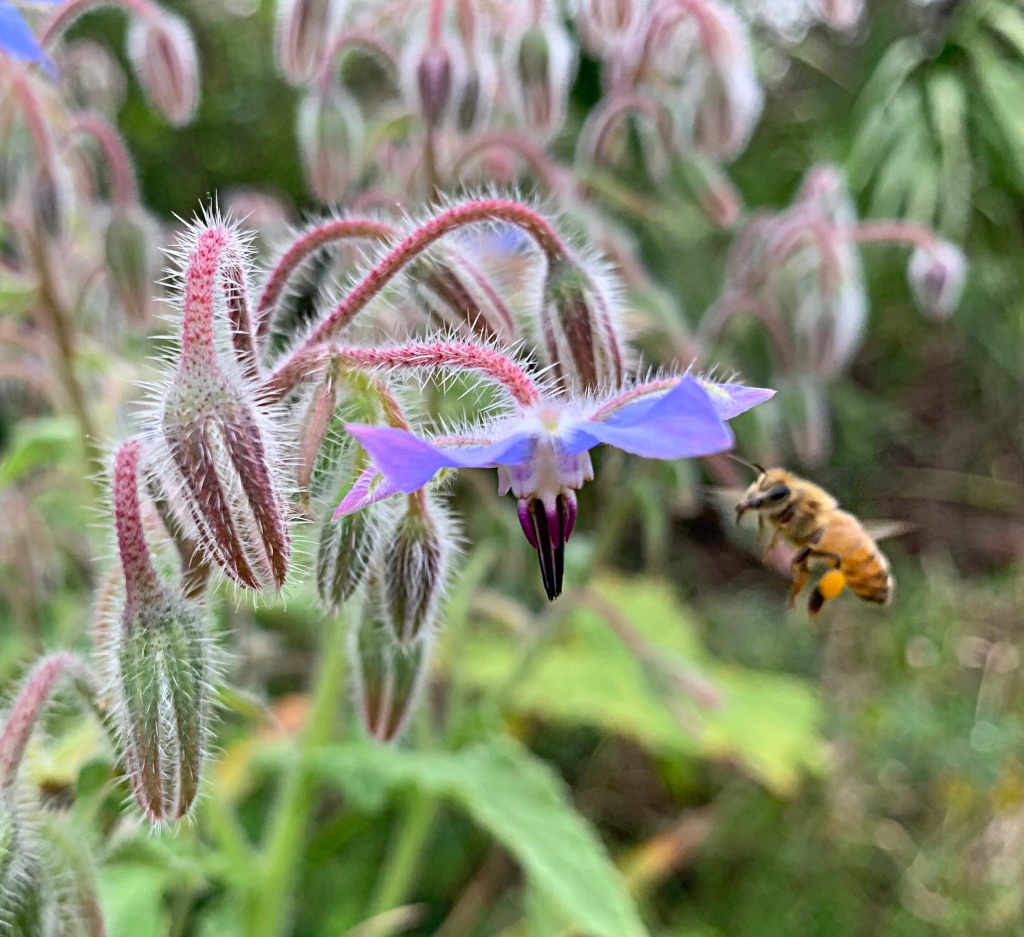
Saved okra seedsBorage flower
While I was up north for two weeks, we got ZERO rain in the area of Florida where I live! My son was watering, but without good soakings, the ground all dried out. Once I got back home, I spent every morning trying to get water into the ground for my plants.
Finally, almost a week later, we had some much needed rain.
Rainclouds bring much needed rain to the area.
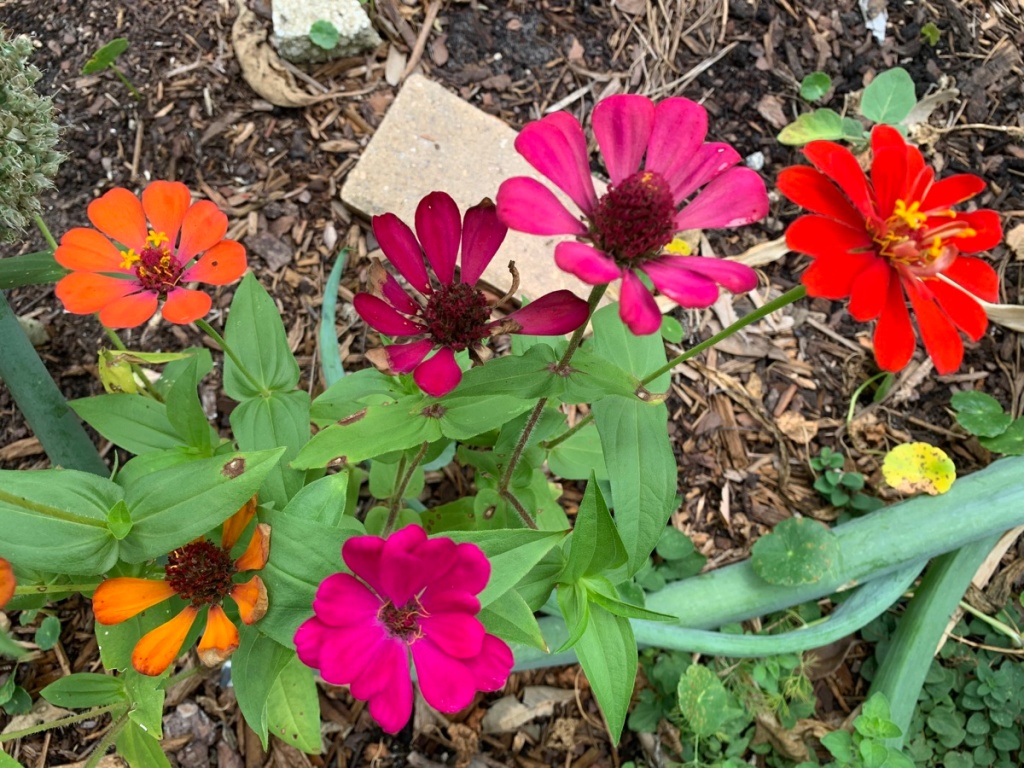
For the most part my plants have survived the drought. The hardy zinnias are blooming, caterpillars are eating the dill, and I’m even picking a few ripe blueberries each morning from the one plant in the garden.
The crops that did not do well are cucumbers and spaghetti squash. I needed to get the cukes growing early to miss the moths that arrive in June, or July. Last year I battled the caterpillars that ate up my plants. To solve the problem, plant cucumber before the moths arrive in the area. Now, it’s too late to re-plant. I also tried a new type called “Ashley” but I may never plant them again.
Spaghetti squash was something new I wanted to try. The plants began by looking great. Just before I left on my trip, they began to get powdery mildew. I sprayed the leaves, but by the time I got back most of the plants had died. The drought didn’t help, I’m sure. It is possible that this type of squash won’t do well where I live.
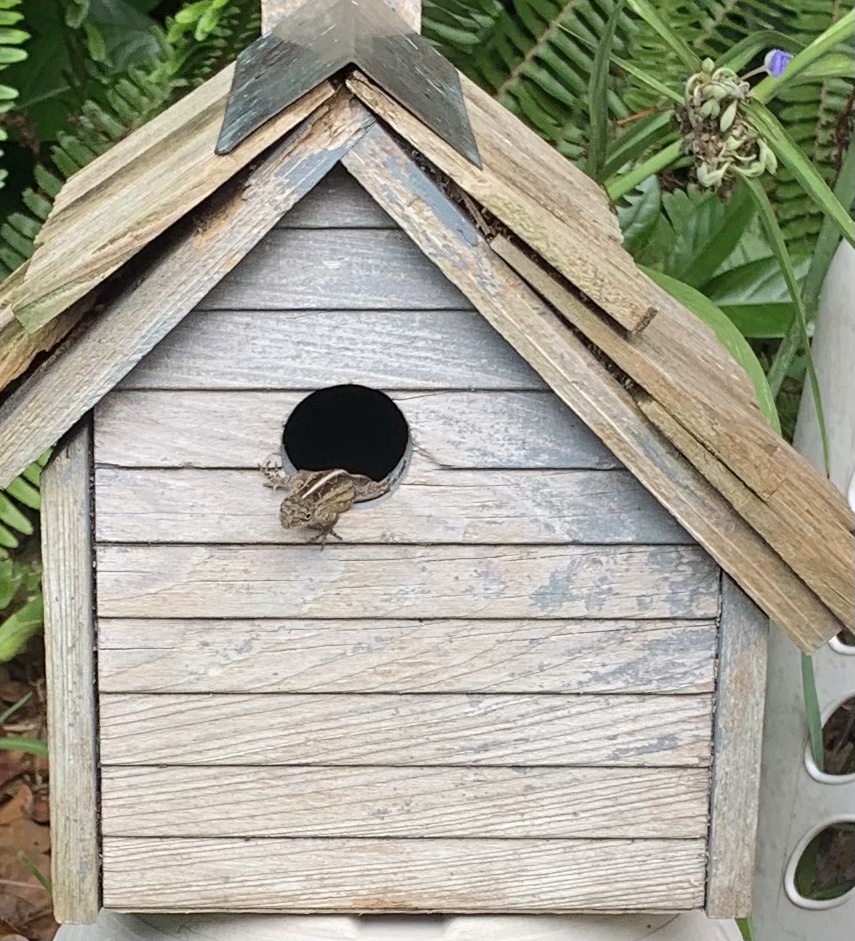
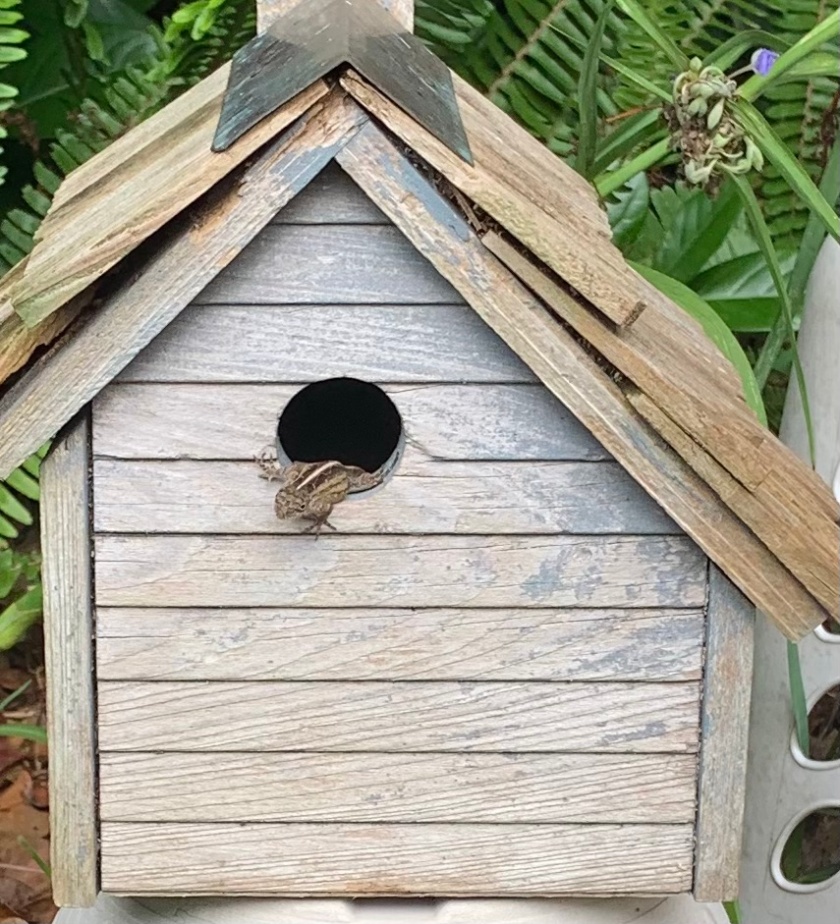
Lizard
It’s good to be back h0me and now I will be gardening regularly once again. I’m trying to keep the watermelon and Seminole pumpkins going. Also, I am growing Egyptian spinach. Will let you know what happens with that.