How to Use Coconut Coir in the Garden

Using coconut coir for the first time to grow seeds.

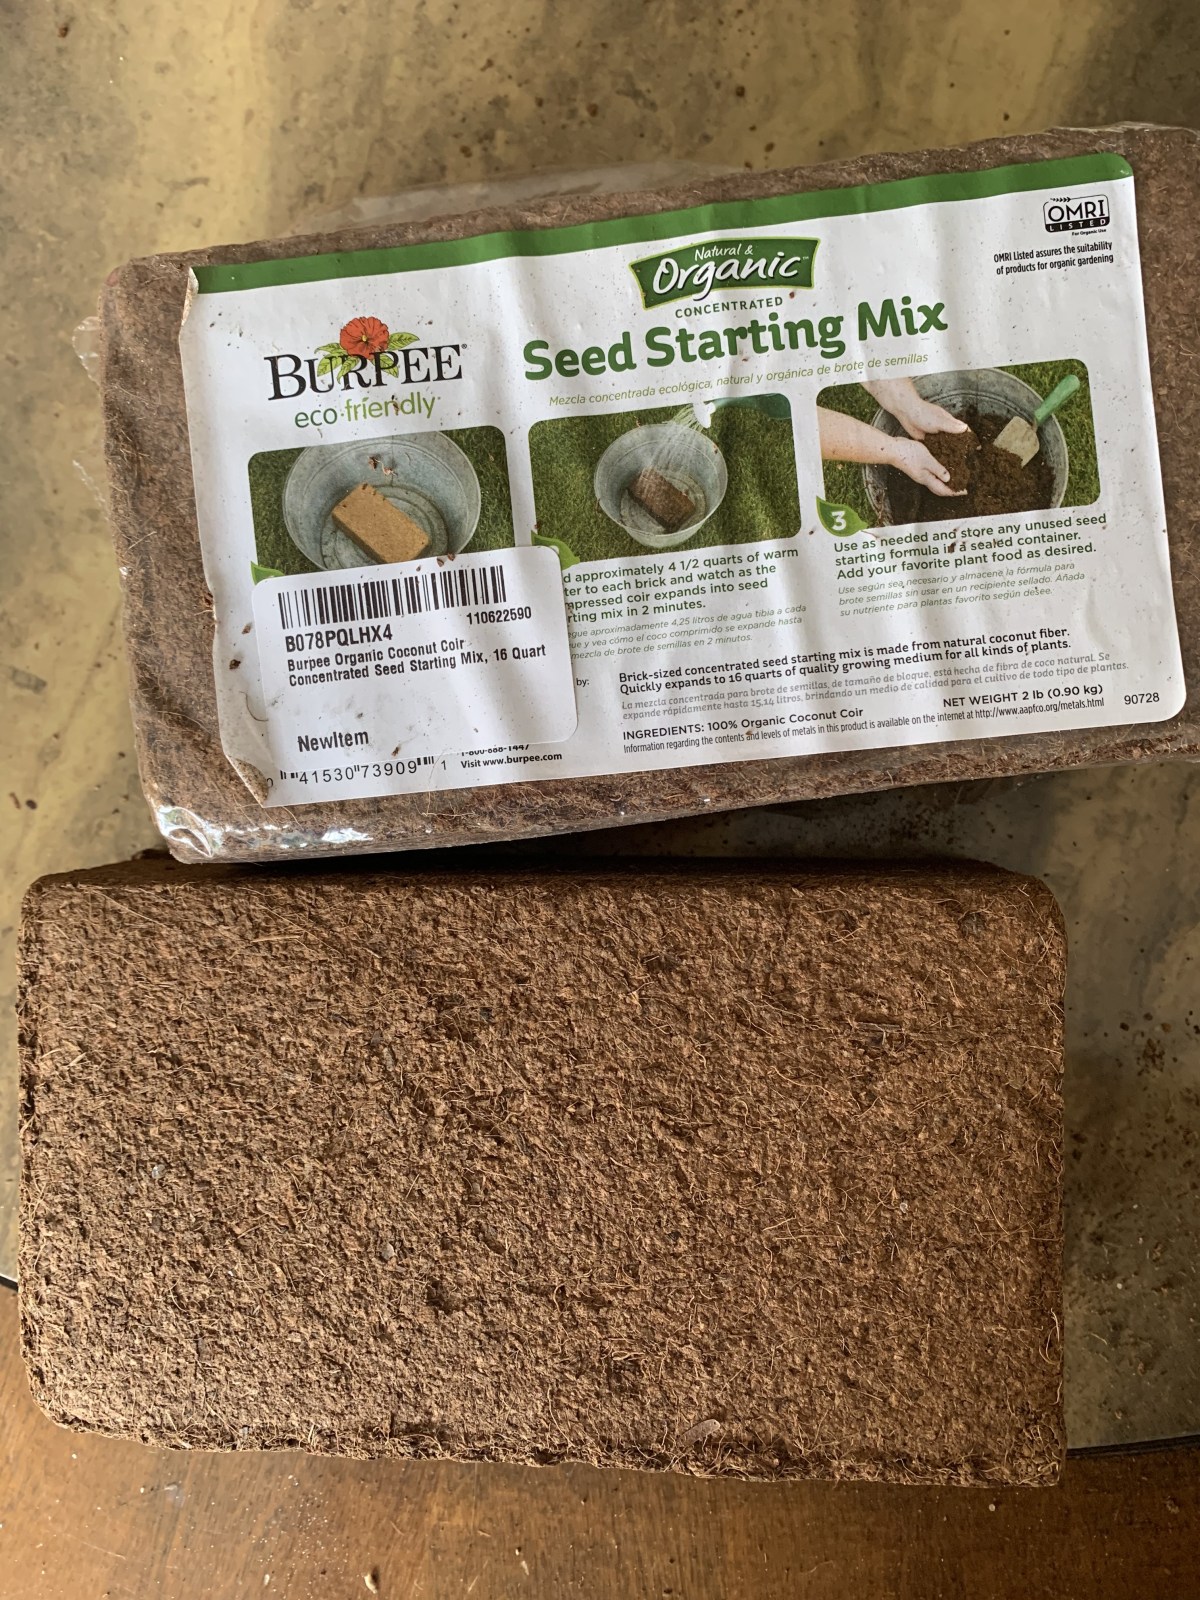
For the first time ever, I purchased a block (well two) of Coconut coir. I’ve heard about this stuff for gardening and for some reason never tried it. What a mistake to overlook this wonderful planting material!

I chose the Burpee brand, which claims to be organic. The package comes with two bricks of coco coir.

coconut coir
This link goes to Amazon, where I am an affiliate. This is the brand I bought and used.

Is the coir only used for seedlings? Apparently not. It can be used to grow plants, or mixed with soil in a pot to increase aeration. It works like peat moss, if you’ve ever used that, but is more environmentally friendly. The idea is to break up the soil and provide an easier growing environment for roots. The coir also holds water well even though it is quite loose. When watering, the water will pour right out, but the coir retains moisture enough to nourish the roots. This way, the roots will not become waterlogged, but have the moisture needed to thrive.

Coir for Starting Seeds

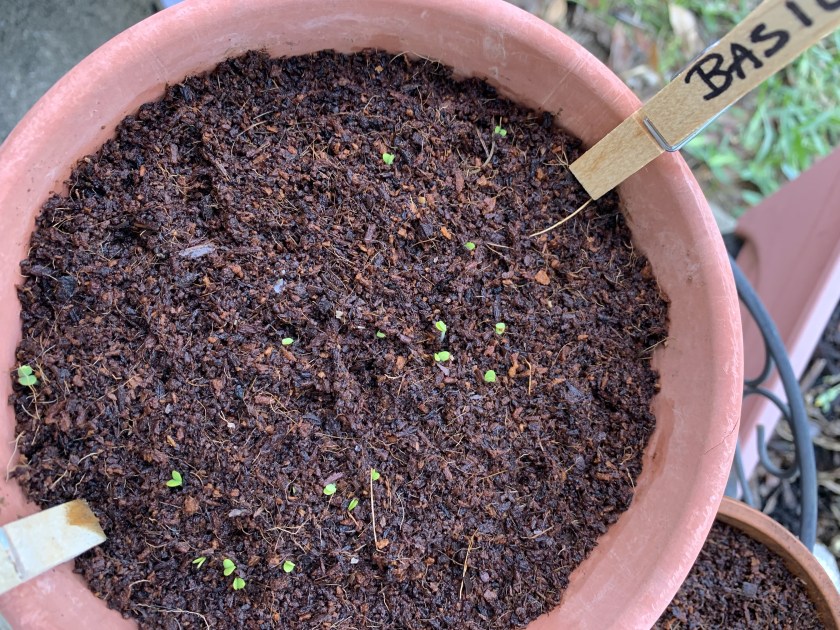
My basil died over winter and I’ve been trying to grow more from seeds in pots this spring. The new plantings in dirt finally sprouted and are still pretty small. So I used the remaining seeds by putting them into the coir.

Three days later…. seedlings already showing! I am amazed by this quick sprouting action in the coir.

Basil is sprouting in Coconut Coir – after 3 days

basil seedlings in coconut coir
Basil seeds sprouting after 3 days in the coconut coir

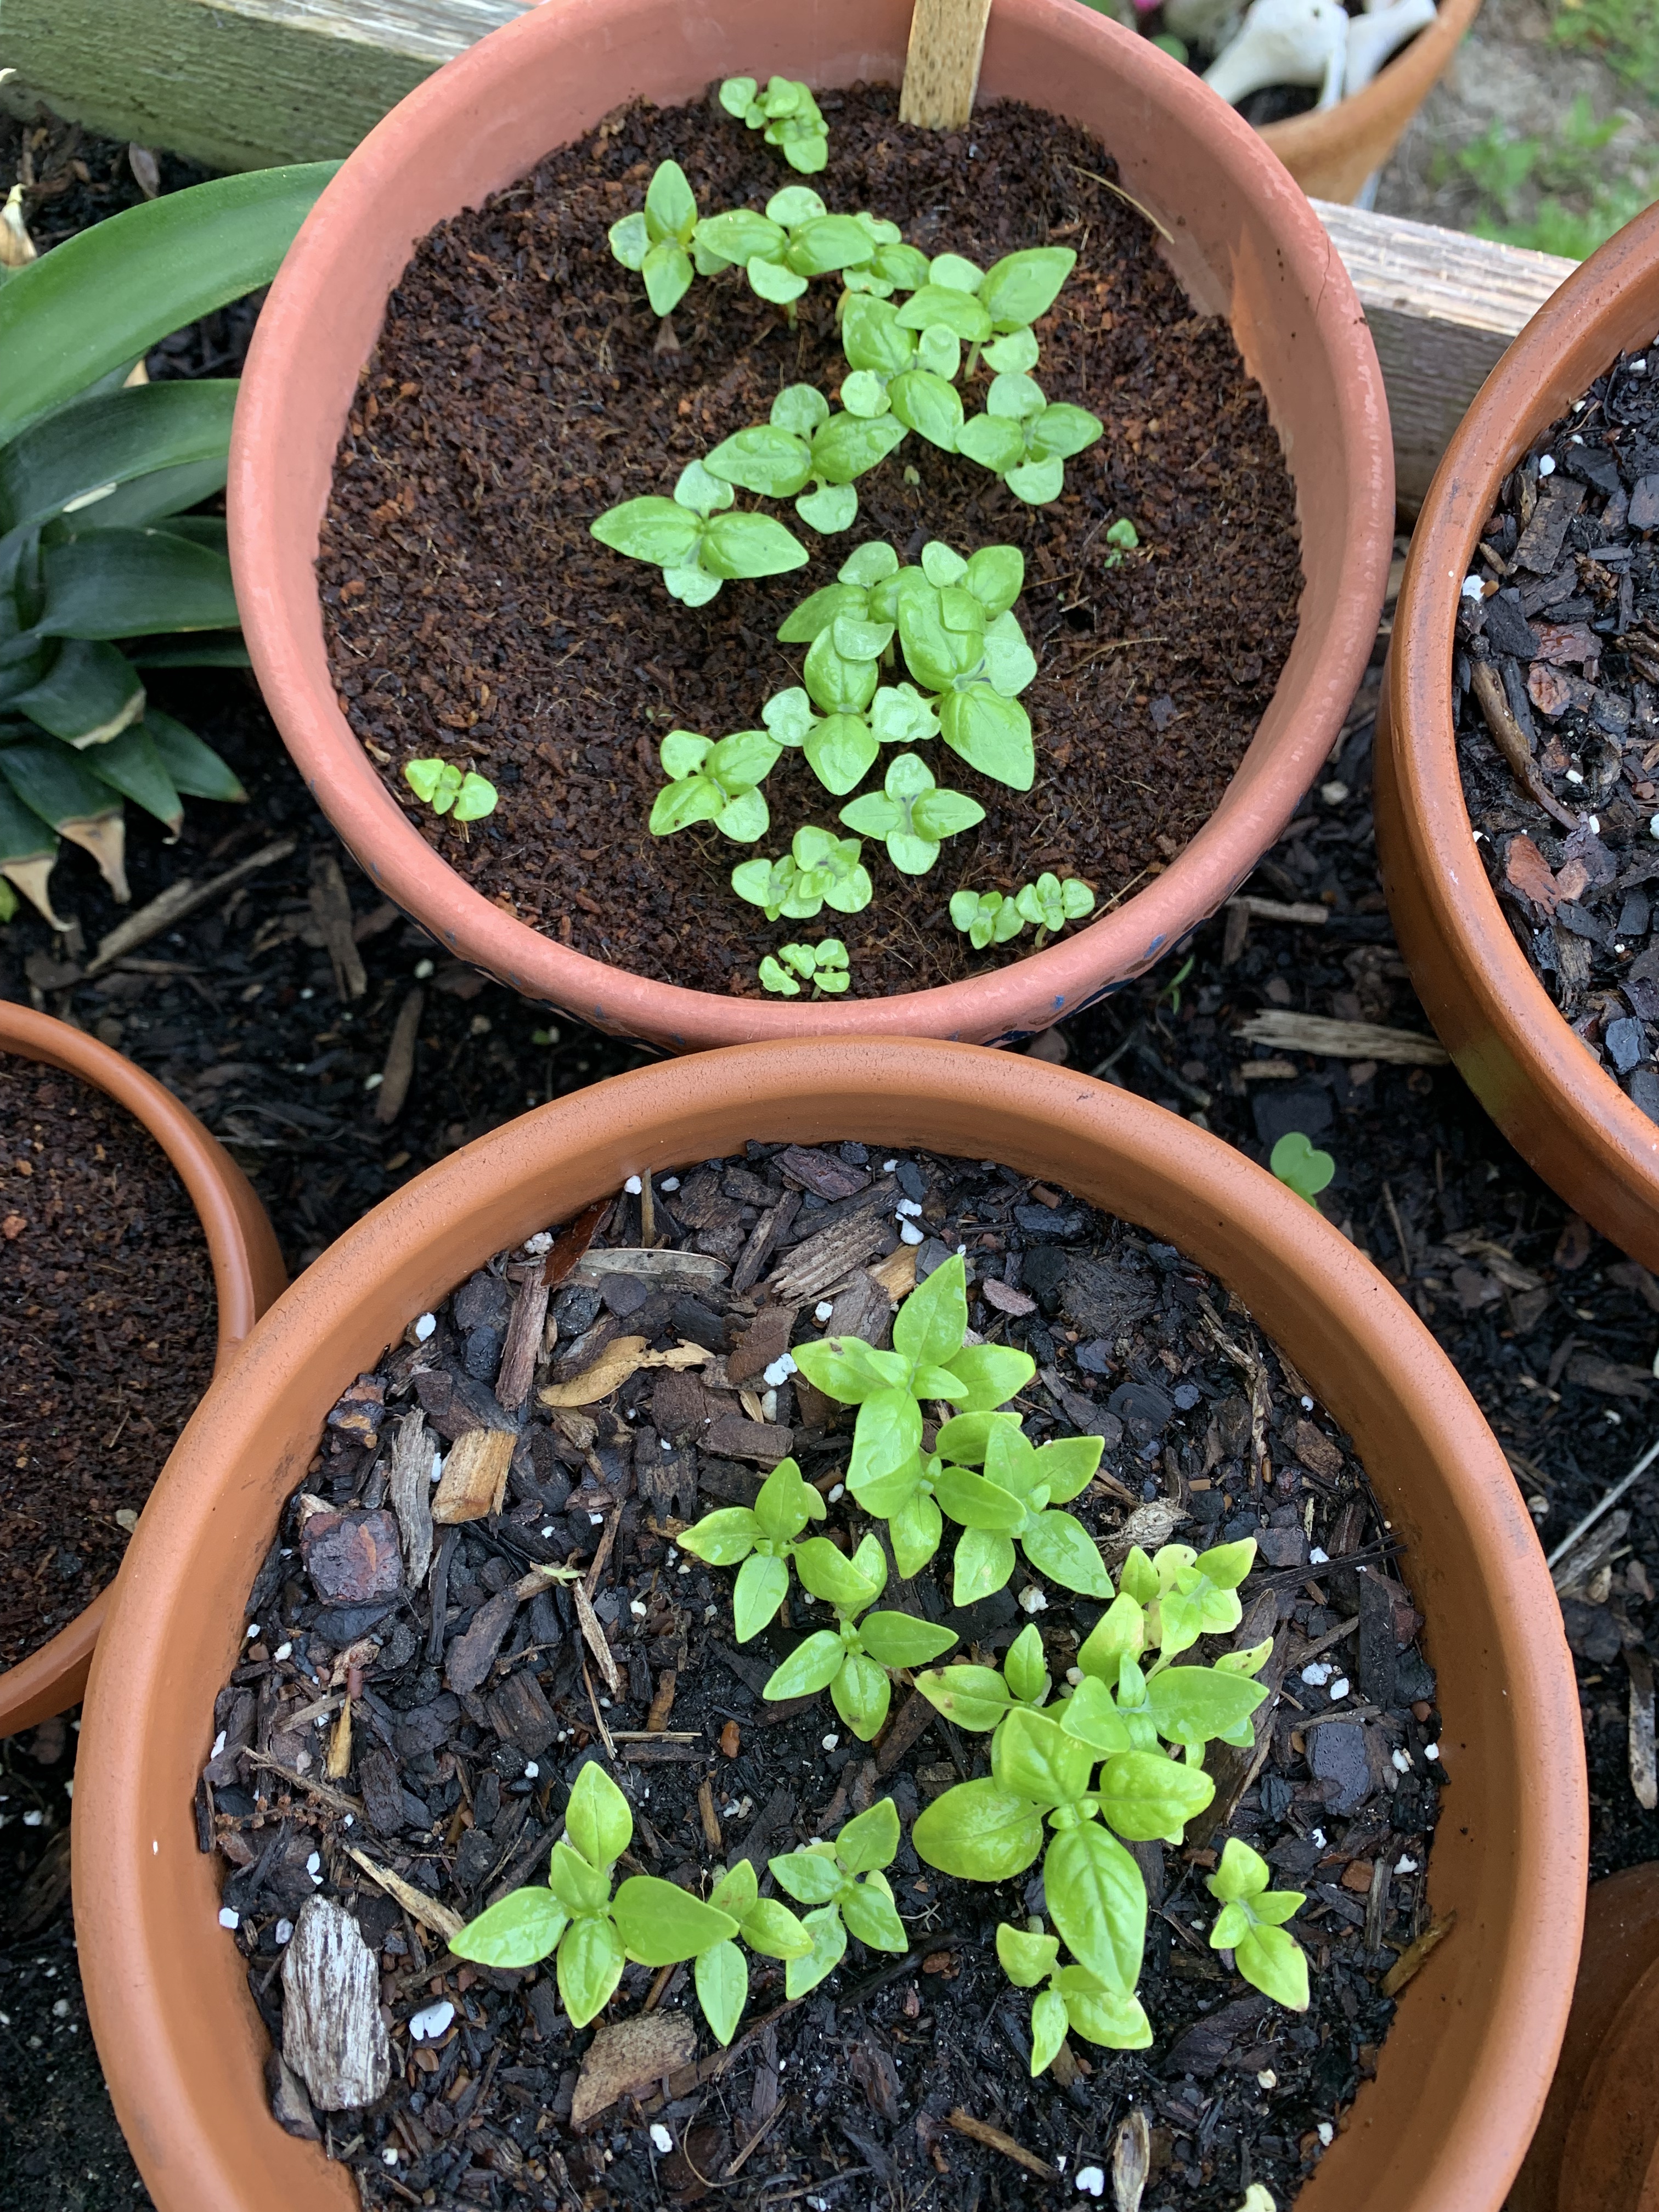
The first seedlings below were planted weeks ago in a dirt, compost mix and are still very small. I’m betting that the basil in the coir will surpass the dirt-growing plants!

Basil seeds planted in soil- weeks ago

Basil seedlings growing in soil.

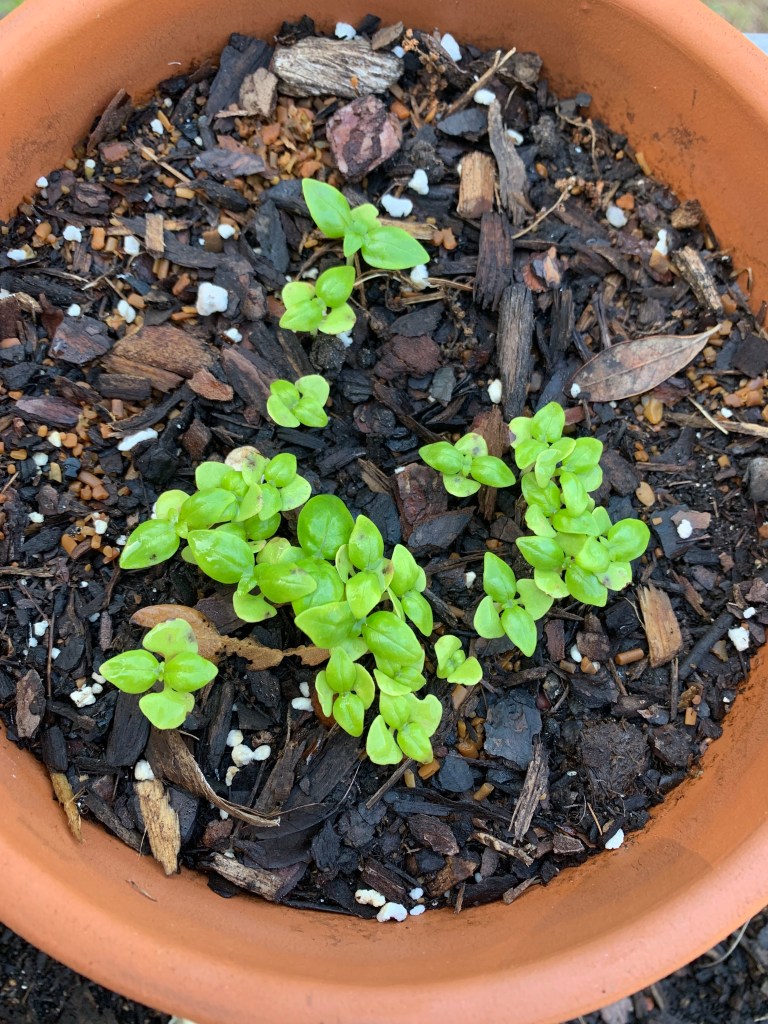
By May 1, the basil in the coir has nearly caught up with the basil in the dirt.

basil growing in pots
May first – a comparison of the basil seeds

The coir does not contain any good nutrients for the little seedlings. Once they begin to grow be sure to give them something… I water with a fish fertilizer. When my seedlings are a little bigger I will put them into a combination of coir, compost and soil….. BUT, better yet, do not start seeds in Coir only.

In fact, the next time I made up pots with “soil” I used the coir in the bottom for good drainage, then a layer of coir mixed with compost, dirt and bone meal.

My basil seeds are Genovese Basil from Seeds of Change. I bought them at the local Home Depot last year and they (Seeds of Change) were not available this year. My local store did not carry any of this brand for some reason. Now I am looking for someplace to buy organic, non GMO seeds. I did buy seeds from the Urban Harvest (which is a local Florida company), but many varieties of veggies were sold out.

From Coconut Blocks to Growing Medium

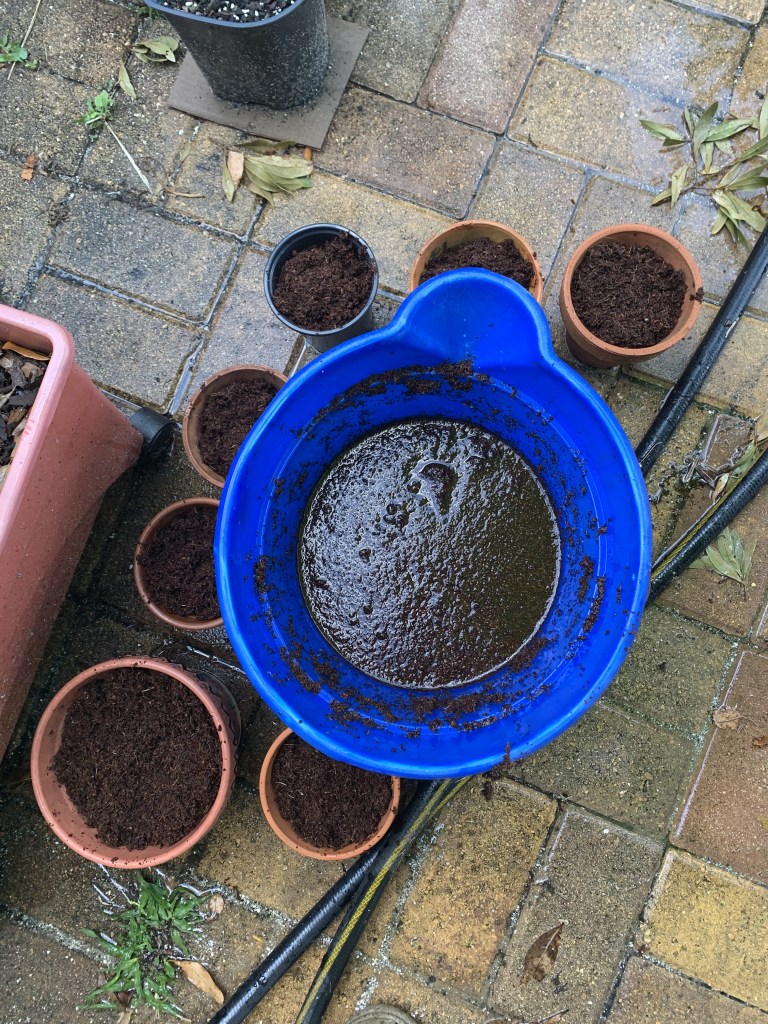
If you are wondering how the bricks become fluffy medium for planting, it couldn’t be easier. Just add water. It does get a little messy. I added too much water and the stuff became soggy, but it doesn’t really matter. It was easy to pull out the coir and add it to pots and then strain out the excess water. All this was done outdoors.

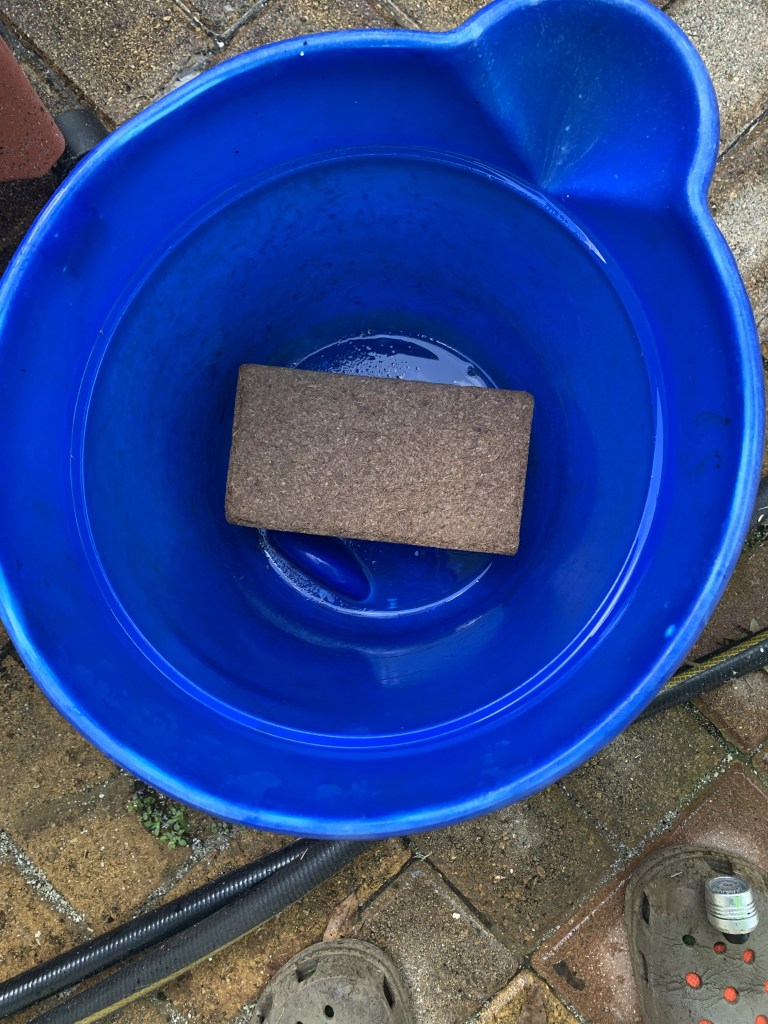
I suggest you don’t add lots of water all at once as the directions say.

Certain flowering plants may do better when planted in the coir. It is also a good idea to mix the coir into a planting bed to loosen the soil. Research according to what you are planting and then decide how much you want to spend to add this fine “soil” to your gardening plans.

Use as a Rooting Medium For Cuttings

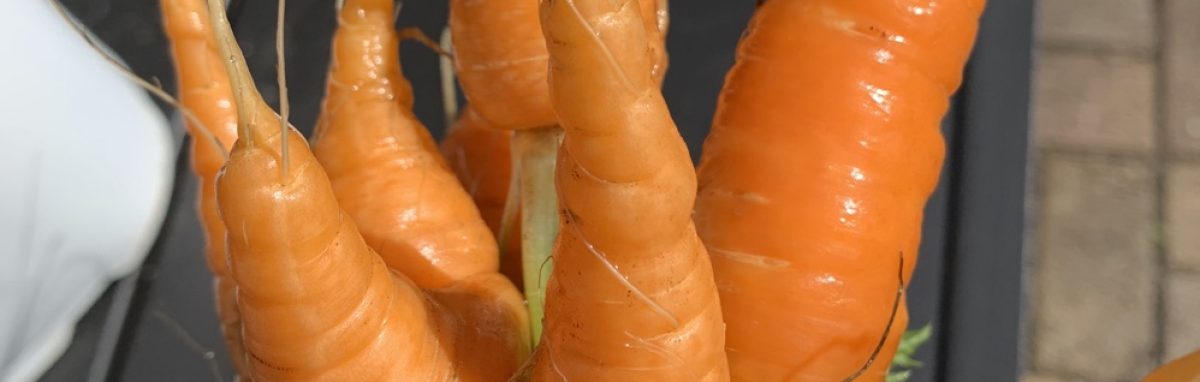
I’ve had some cuttings from the Elderberry and Beautyberry trees / shrubs that are growing wild in my yard. The cuttings have been sitting in water for a few days now, but don’t seem to be doing well.

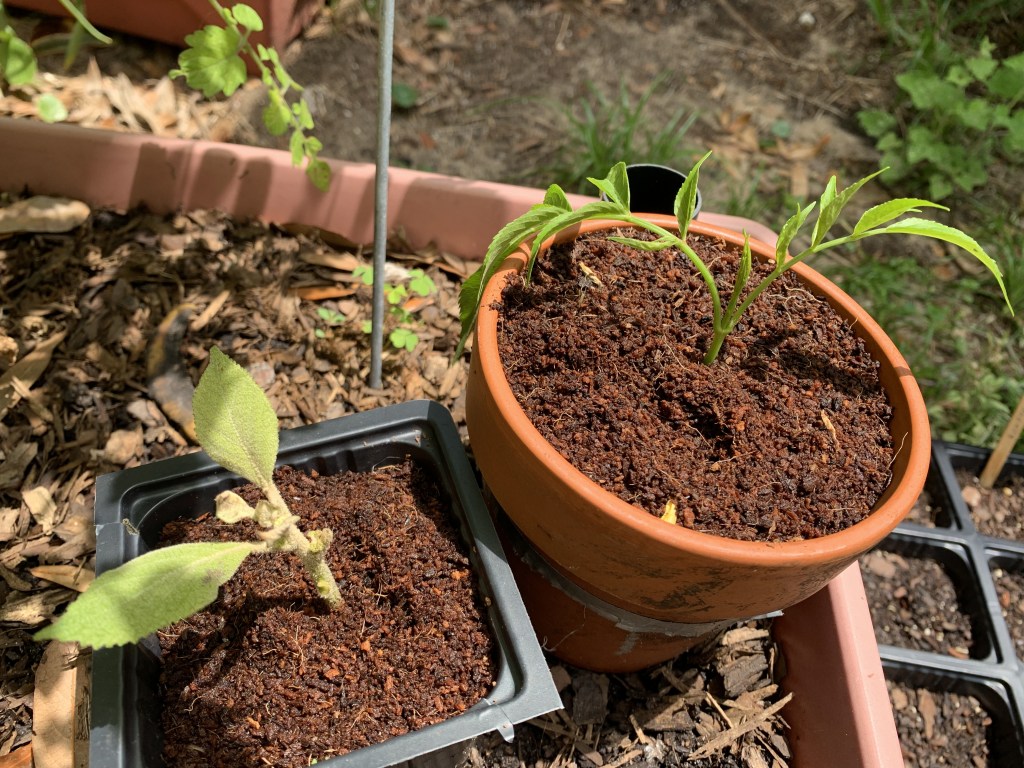
I took more fresh cuttings and stuck them straight into the coir in pots.

Here they are: Beautyberry on the left, and Elderberry on the right. I keep the pots outside tucked up under the cherry tomato for shade.

The Beautyberry is difficult. I’ve tried to root this one before without success.

Cuttings of the beauty berry

Helpful articles about coconut coir

Please keep reading more gardening stories…

Go With the Flow and Stop Wasting Time

I’ve been growing fresh vegetables in my backyard for years. Now I struggle to get food to grow.

We learn from experience and observation. Life is about change. If we are wise, we will go with the flow and not waste time with something we cannot change. I am applying this philosophy to my backyard vegetable garden.

Observation and Common Sense

One thing I have observed since I began gardening in Florida is that a lot of vegetables simply won’t grow here. Maybe I am doing something wrong, but I grew veggies fine in New Hampshire. I am not an inexperienced gardener, but vegetable gardening in this climate is obviously beyond my grasp.

It’s been two years. That is plenty of time to grow something well. I’ve built up the dirt with compost and fertilizer, watered like mad, and thwarted raccoon attacks on the plants. I’ve picked worms, loved the lady bugs, and sprayed off mites. My little raised bed garden has given me very little to eat in return.

With the exception of about three eggplants (total) and occasional small bell peppers, there is little food coming from the backyard.

Herbs Seem to Flourish

On the other hand, my observation is that many herbs do grow very nicely here. In fact, my parsley, basil, thyme, mint and fennel have lasted a very long time.

Herbs are hardy. When I first began growing parsley I lived in New Hampshire. The green stems would push up through the first snowfall, which amazed me. Deer used to help themselves to the lush green herb.

In Florida I have had the same parsley plants growing in my garden for over two years! Parsley not only survives the cold, it can take the heat and oppressive humidity.

It is depressing to put work into trying to grow decent tomatoes, squash, zucchini and root vegetables, only to watch them rot, wilt or end up too tiny to bother with.

How long do I keep trying, only to watch the plants produce nothing I can eat? I’m about over it.

Changes All Around

My life is always changing, and recently it went through another change. My youngest son has moved out. He’s nearly done with college and does online classes, so he went back to the northeast to live. Good for him. Wish I could afford to do the same.  I did take a trip back to stay for a week, which was so nice.

My youngest son has always been a very picky eater. If I don’t make food he likes, he could literally go all day long without eating. So, I tended to make food he would eat. That type of food was very different from the type of food I eat.  Now that he has moved out, I can concentrate on cooking for me only.

This is a very new idea and it will take a while for my brain to wrap around the concept. I’ve been cooking for my children for over 40 years!  My way of cooking will be changing. Although I am not crazy about spending a lot of time in the kitchen, I am a very good cook. As an “almost vegetarian” meat is not my main focus. I love to cook soups, stews and one pot meals (using my Dutch oven) which are full of fresh vegetables.

Since I can’t grow all the vegetables I’d like to, I will concentrate on growing the herbs. I learned very late in life how much herbs can brighten the flavor of a meal. Now I can’t make anything without using herbs because it’s not worth eating.

Because my herbs will grow year round, I don’t have to spend time drying or freezing them.  Sometimes I even get to collect their seeds.  I still need to find a store that sells good fresh, organic vegetables.  Publix is a good store, but as I have discovered, their produce is not the best.

I also have access to fresh citrus, which I should begin incorporating into my food as well.  Both my lime tree and lemon tree are still growing, but the lime needs re-potting.

So I’m collecting recipes to make for myself and will concentrate more on eating healthy. The weather is much cooler now here in Florida, and I do get outside for walks as much as possible.  My neighborhood is a boring place to walk, and there are no hills to get my heart pumping, but I do what I can.

(They Yacht is not mine. Photo taken at a nearby Marina.)

Hydrangeas in My Yard: The Paniculatas

My last post was about the macrophylla varieties of hydrangeas growing in my yard. Those have big, rounded blooms and large leaves. This post contains pictures of my two types of paniculatas, which are hydrangeas with elongated type flowers.

In general I have found the paniculatas to be very easy to care for. They seldom droop in a drought, as the macrophyllas (Blushing Bride and Endless Summer) wilt quite easily in hot sun, and when they are dry.

The first photo is of the Limelight hydrangea. It was taken in August 2015, and as you can see it is not flowering, but it does have buds. The second photo is from last year at approximately the same time.  As you can see, this year I will not get the blooms like last year.  Again, I blame this on our incredibly horrible winter.  The extreme cold and piles of snow have done a number on just about everything in my yard.   Some of my Hostas never grew back, and the perennials I thought had died, are still living, but they are way behind on growth, like the hydrangeas.

limelight hydrangea shrub
Limelight Hydrangea – Aug. 10th, 2015

flowering limelight hydrangea
Limelight Hydrangea – August 20th, 2014

The last picture I have is of the Pinky Winky hydrangea. I have come to love this plant for it’s beautiful, long-lasting blooms. It is also a very easy plant to grow. Plant it and forget it.
pinky winky hydrangea
Unfortunately, I could have chosen a better spot for this one to grow. Without a lot of yard space, I thought it would have plenty of room to expand next to the garage. Then the snow came and my plow guy pushed loads of snow over the poor thing. It came back and grew fine.
This year I had to have a broken tree taken down, and as the tree-cutters brought the big beech down, the branches landed on my Pinky Winky. It was enough to break one of the main, low branches. I will have to cut it, as it’s split. I want to wait until the blooms go by.

Pinky Winky 8/20/14
One year ago – Pinky Winky, August 20th, 2014

The only problem I have with this one is that the deer eat it – see how lopsided it is in the photo above?  There is a big deer population around my house and they come up from the woods at the side of the house to check the yard for dinner.  After they munch on my rhododendron, they chew down the stalks of the hydrangea. It’s the only hydrangea they eat, and I think it’s placed just right (or wrong).
So between the broken branches and deer trimming, I may not get to see this perennial grow too large before I move, but it’s still beautiful.

This is the only hydrangea that doesn’t seem to have been bothered as much by the extremely cold winter.  I would love to have more Pinky Winky hydrangeas in my yard.

Sparse Vegetable Garden This Year

zucchini in the garden
Growing Zucchini

It seems to be the consensus here in my part of New England, the gardens are not growing all that well.  Not that I know that many people, but almost everyone I do know has a small backyard, or patio garden.

Just last night, one of my neighbors walked by and we chatted for a few minutes.  I know she has beautiful raised garden beds behind her house, so I asked how the garden was growing.  She said it’s not producing well.

My sister grows all her vegetables on a big, sunny deck in front of her house.  It’s convenient to care for, as she works long hours each day.  But this year she doesn’t even have zucchini growing.  If we lived closer I would have some extra to give her.  My zucchini started off slowly, but now I’m picking one or two from the two plants I have.

The cucumber is really slow.  I’ve only had 2 cukes so far.  And the hot pepper plant is also not producing the many peppers I remember having last year.  The only thing that is doing better this year than last is my garlic.  Even the parsley, one of my favorite things, is not all that big. Continue reading “Sparse Vegetable Garden This Year”

“Blushing Bride” The White Hydrangea

hydrangea plant in garden
Newly planted “Blushing Bride” hydrangea shrub.

In the mix of hydrangea shrubs I recently purchased, the white flowering “Blushing Bride” was new to me. I’ve had the blue endless summer variety, limelight, pee gee and a few other types, but not the one with round, white flowers. I planted it in the front of the house, next to the entryway. It won’t be really large – only 3 to 5 feet across – so won’t block the doorway.

(My yard is a work in progress – soon this front garden will be spectacular! Wait and see.)

The tag says that the flowers will be blue in acidic soil, so this new type of hydrangea is apparently closely related to the Endless Summer. I don’t know if my soil is acidic or not so I guess I’ll just wait and see what the flowers look like on this one.
I’ve read a bit about it and it should be a hardy plant. If you have one, here are some things to remember:
* Don’t cut it back. This one blooms on new and old wood. (Trimming of dead stalks can be done mid-summer.)
* It likes sun with some shade
* White to light pink flowers (in alkaline soil)
* Cutting the flowers in summer will produce more blooms
* Pile mulch around the base for winter
When mine gets flowers, I will be sure to share them here. It already has buds so I’ll expect flowers by July.

See the updated page with flowers here!

Propagating Hydangrangeas Could Be Easier Than You Think

blue flowers
Create another shrub easily.

Most people think of starting a new hydrangea plant from a cutting, but I am talking about propagating by root or ground layering here – and it’s especially easy if it’s been done for you by mother nature.

My new yard has no hydrangeas, except for the tiny ones I planted this fall. But the duplex I rented for three years had a large, beautiful bush right outside my front window.

As I was weeding around it one spring I found a low hanging branch that had rooted itself into the dirt. I dug it up (with permission from the landlady) and replanted it near the front steps.

The following year she had another little hydrangea shrub to decorate her yard – for free! All it took was digging and watering.  It’s an easy, and super cheap, way to increase the beauty of your landscape.  And you’ll know exactly what you are getting!

Read the full story with photos by clicking here.  And check those low lying branches this Spring – it’s coming.