New England native, Florida resident. Blogging about boating, beach-combing, gardening, camping, and knitting. Work for Zazzle as a designer since 2008.
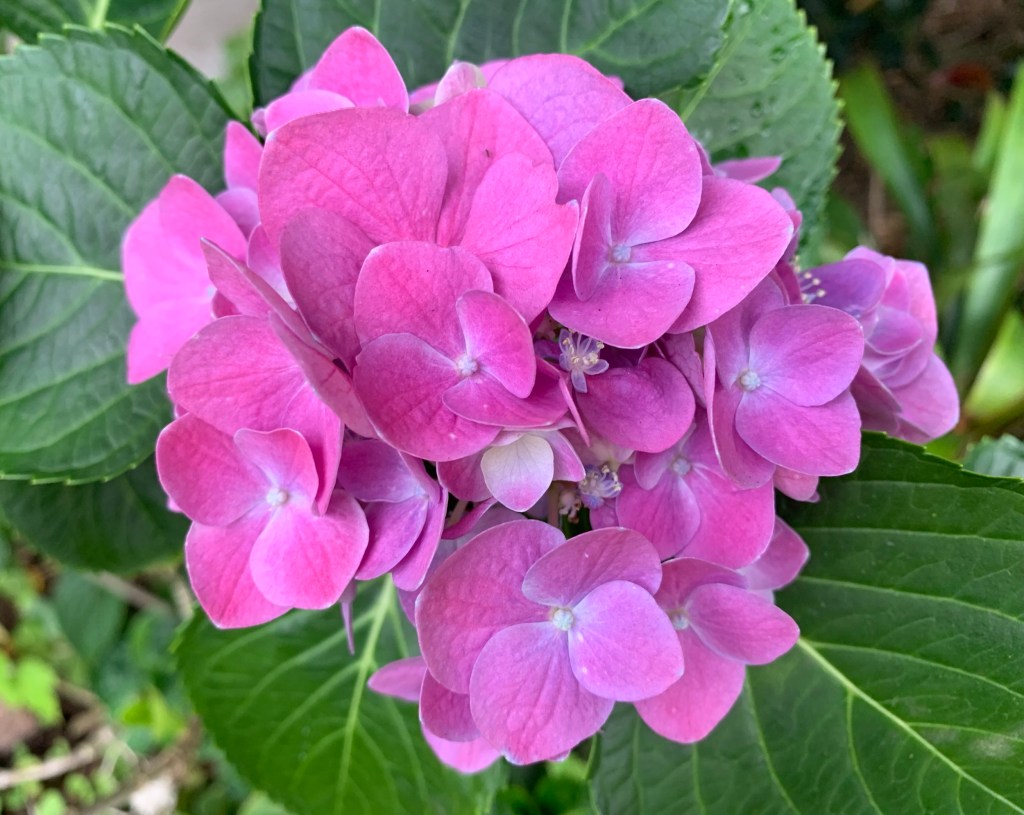
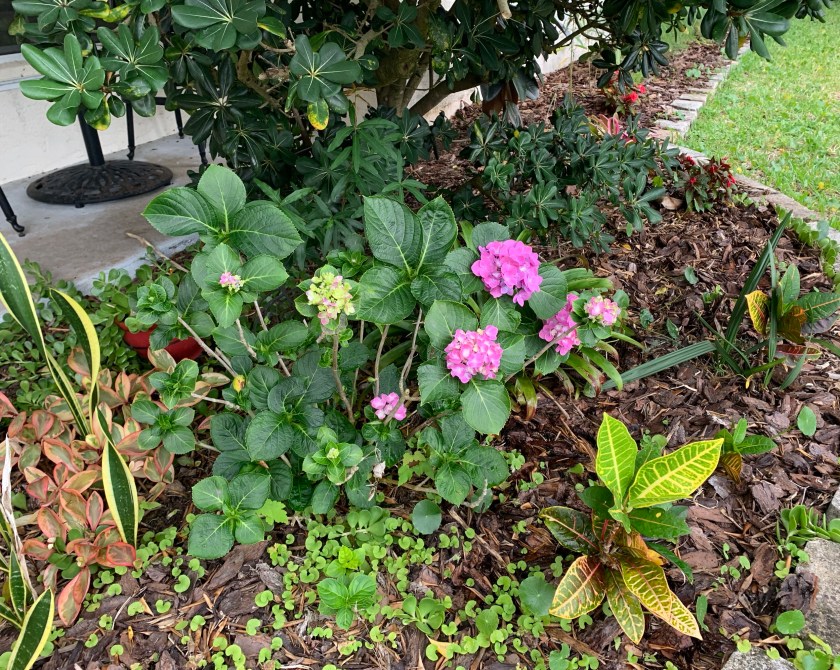
The hydrangea shrub in my Florida yard is doing well and blooming with pink flowers.
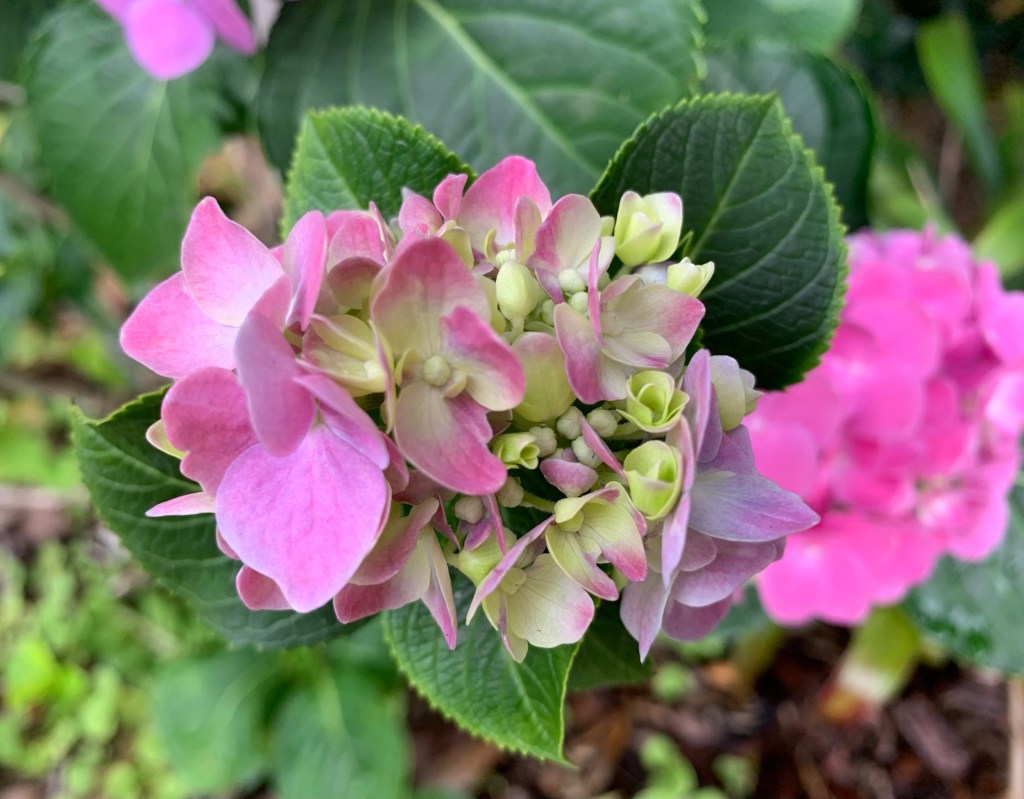
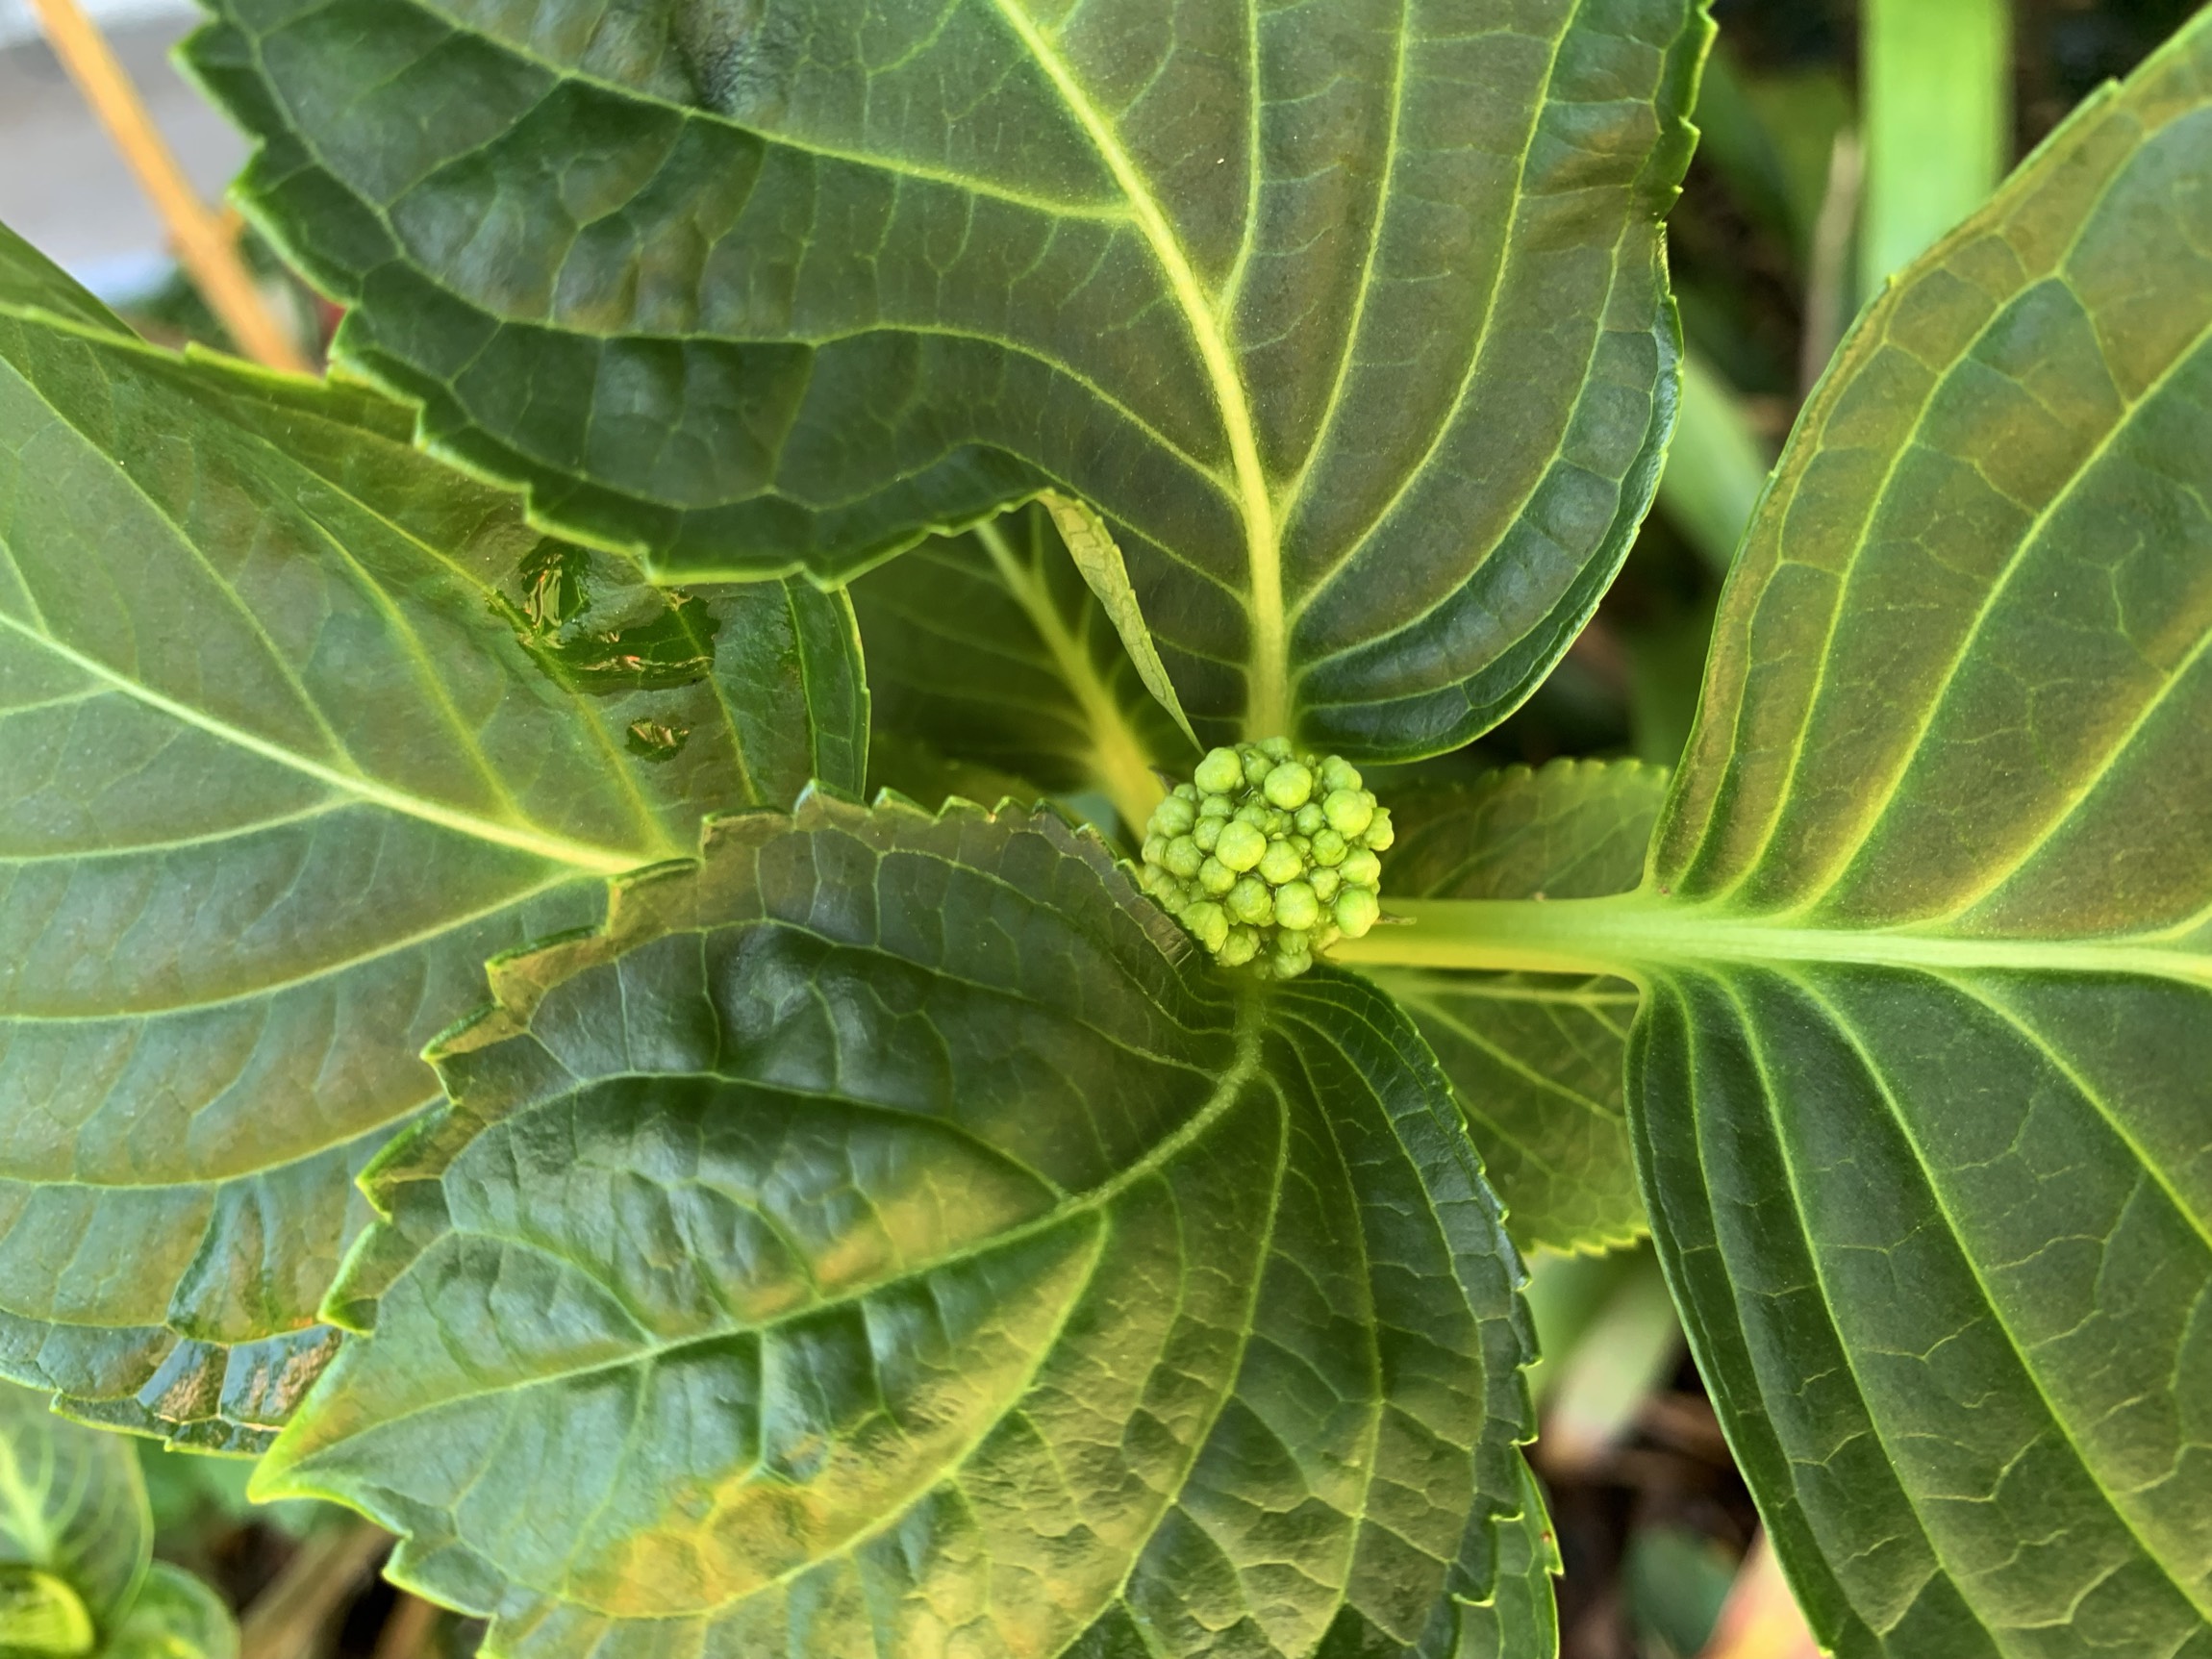
The hydrangea I planted in my Florida garden a few years ago is now blooming once again. Soil in Florida tends to be alkaline so the flowers are pink. When I first bought the plant the flowers were blue, no doubt due to amendments to the soil. Everyone wants blue flowering hydrangeas.
But when this hydrangea plant was left to grow in the sandy soil in my southern yard, the flowers became pink. I don’t care. Pink is pretty too.
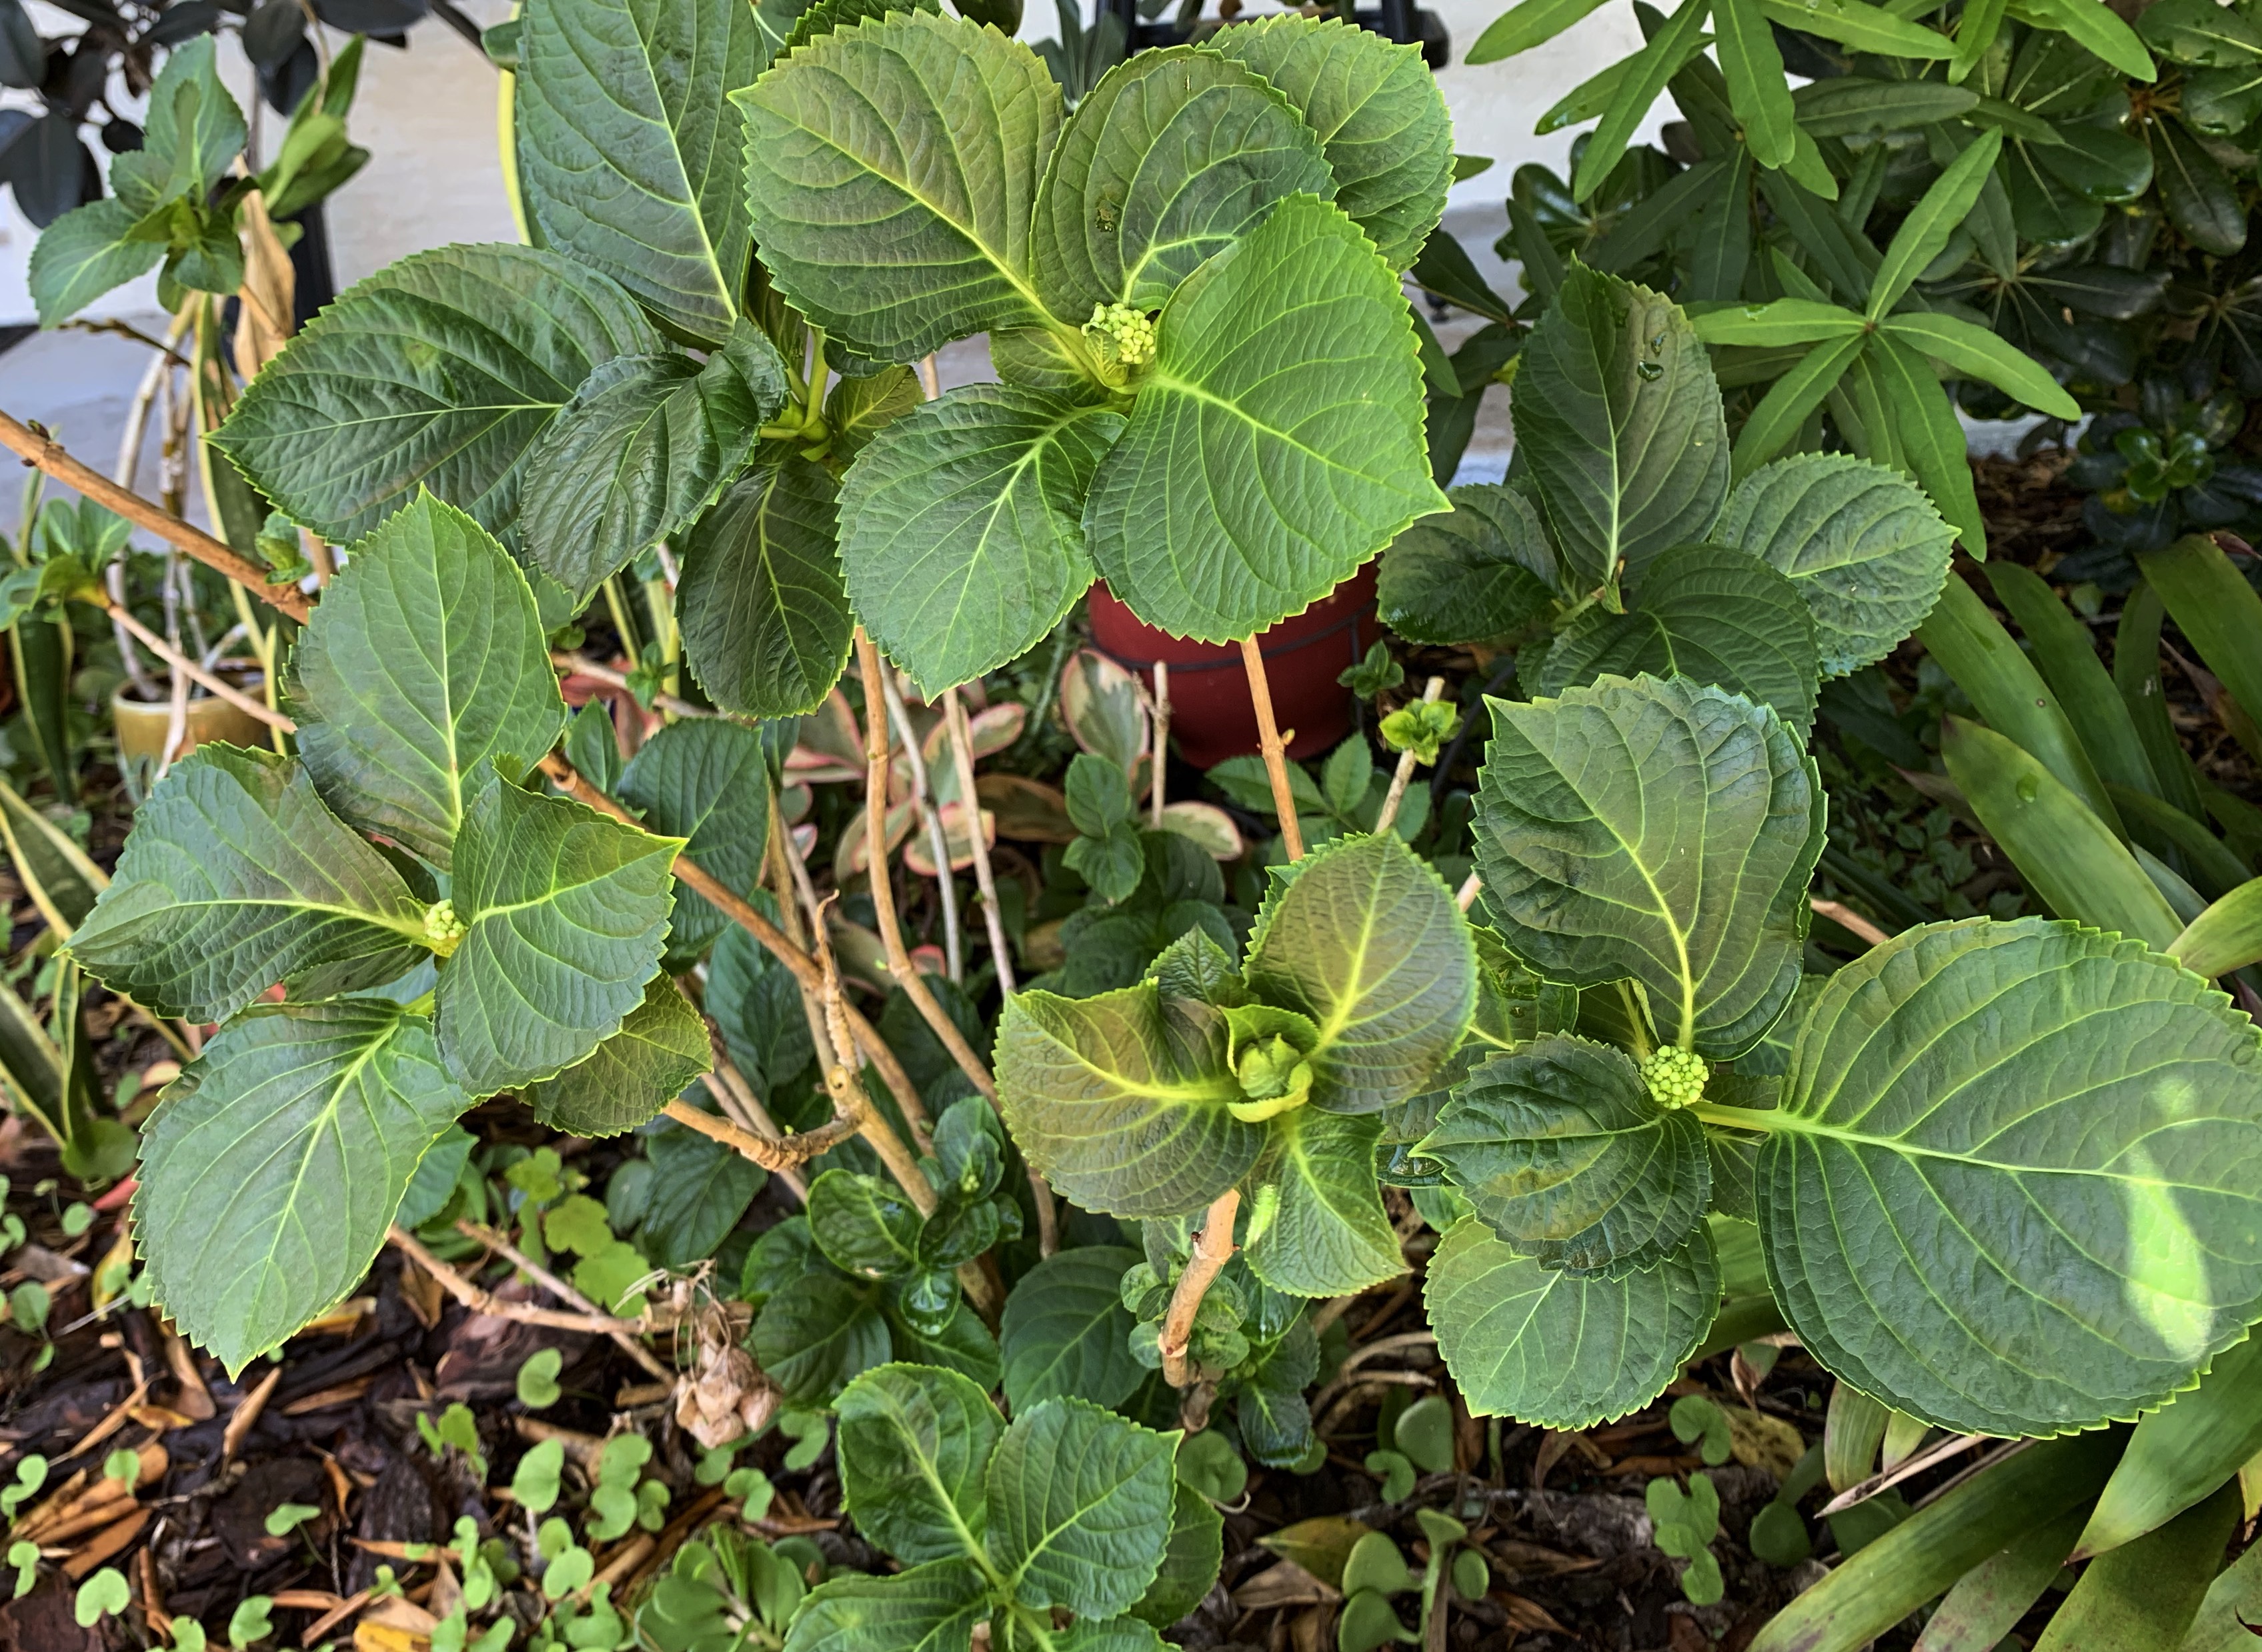
The key to success when growing hydrangeas in the hot and humid Florida climate is to give the plant shade. All the leaves fall off for winter but the greenery comes back along the stems in Spring. Don’t cut the plant back! The first year I did cut it, but it’s not necessary.
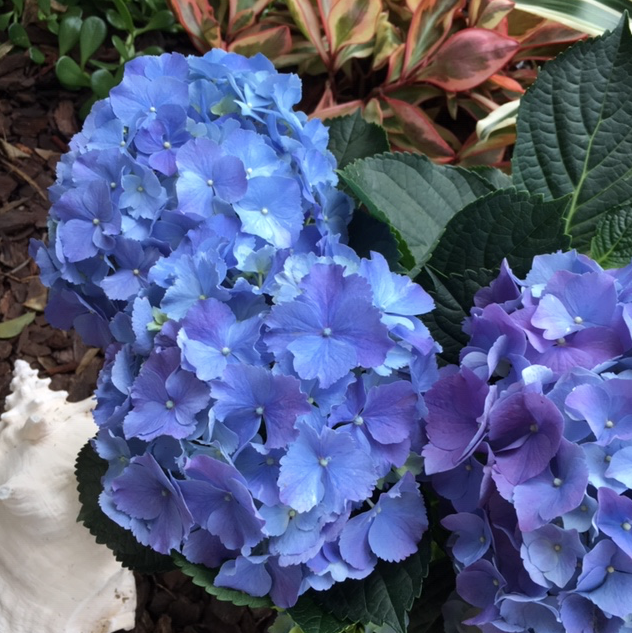
2017 Potted and blue
Here is the hydrangea plant when I first bought it. It was probably grown in a greenhouse and given something acidic for the flowers to bloom blue.
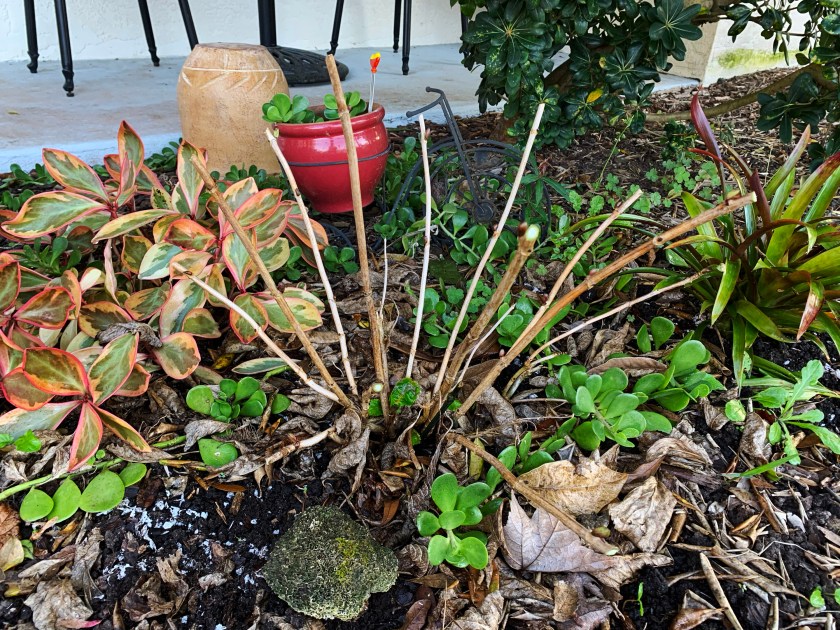
For the winter months in Florida, the plant is nothing but stems. Once the weather gets permanently warm again – around February – the stems will begin to show green growth.
February – hydrangea is stems only!
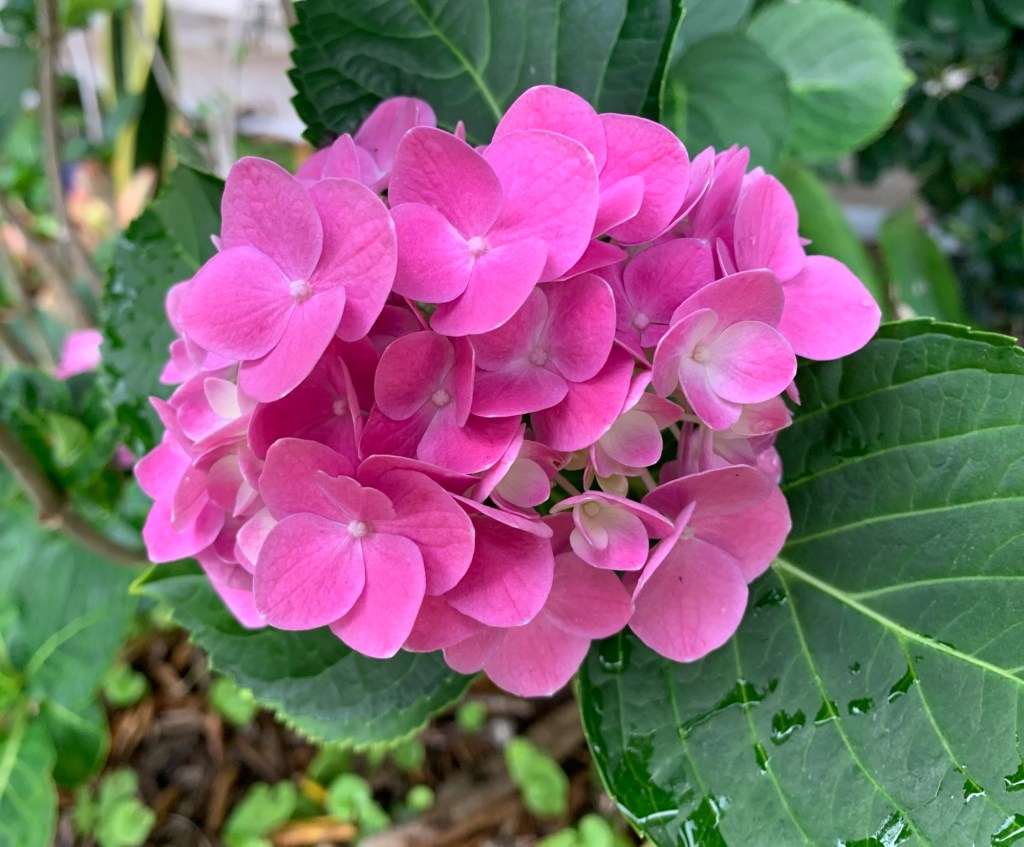
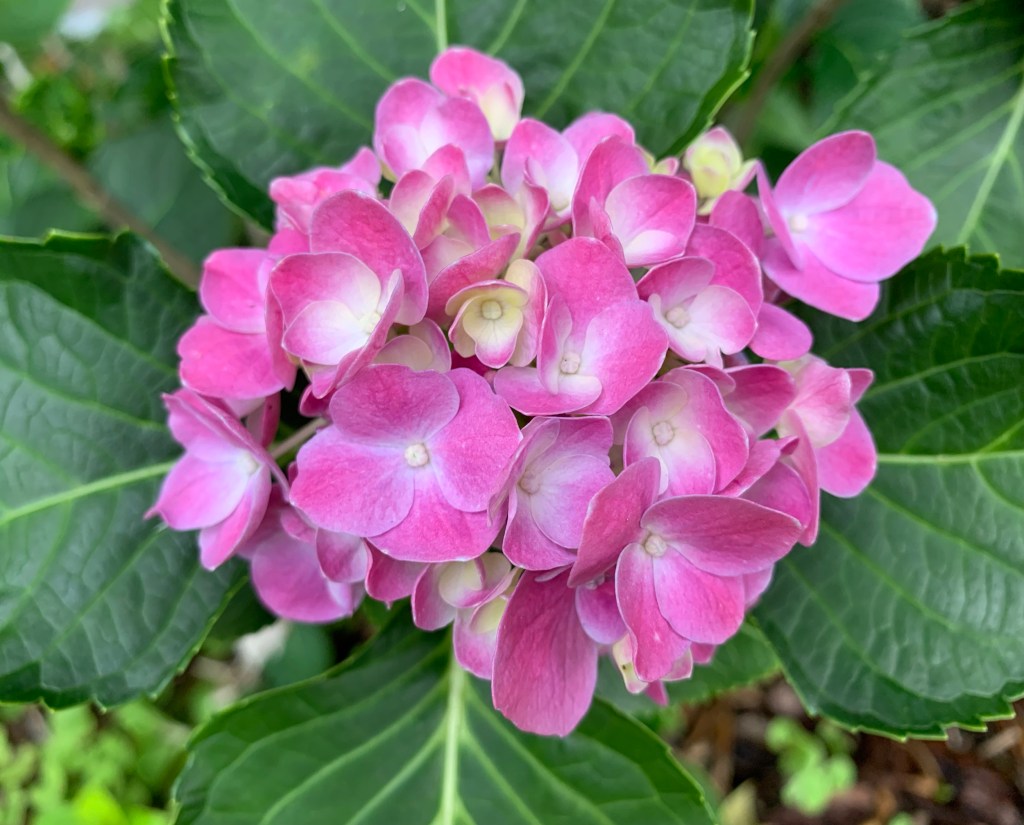
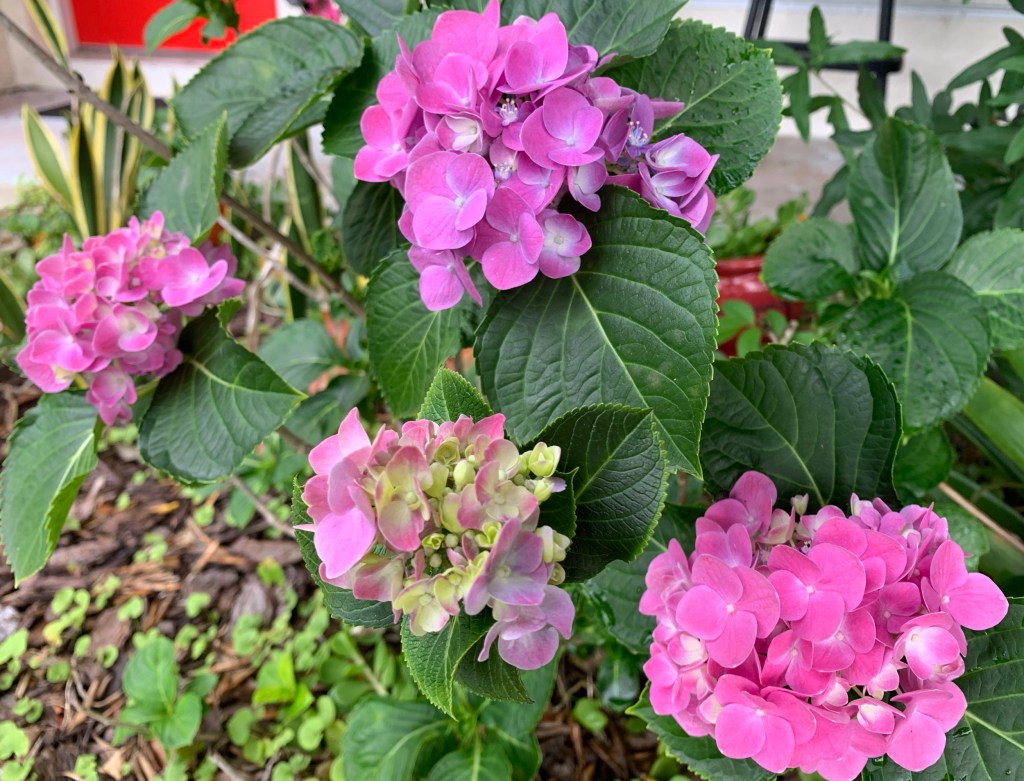
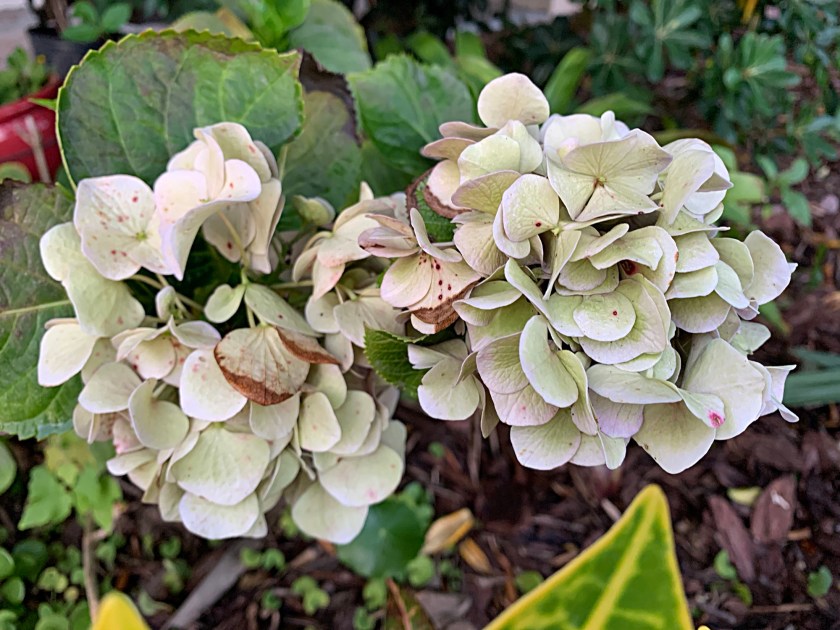
2022 June – Pink flowers
The flowers will only be blue if the soil is acidic. In Florida, azaleas, camellias, gardenias, and crepe myrtle all like acidic soil. So planting hydrangeas near these plants means they can all be amended with bone meal, or something to naturally turn the soil acidic. Read about more ways to turn soil acidic.
It seems that each year this plant has more, and larger, flowers. I try to give it plenty of water and it is never in direct sunlight thanks to the fact that a large shrub covers it.
June 2022
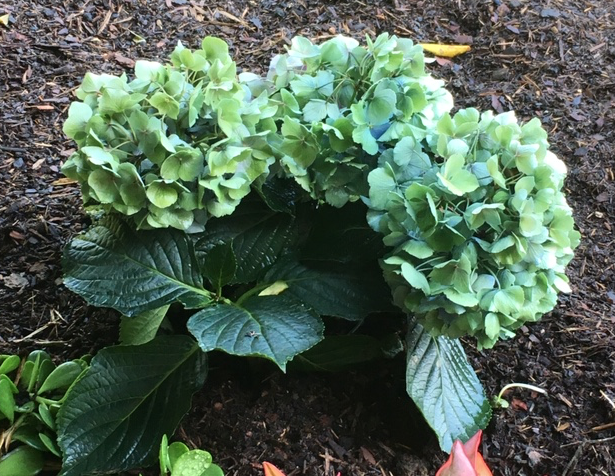
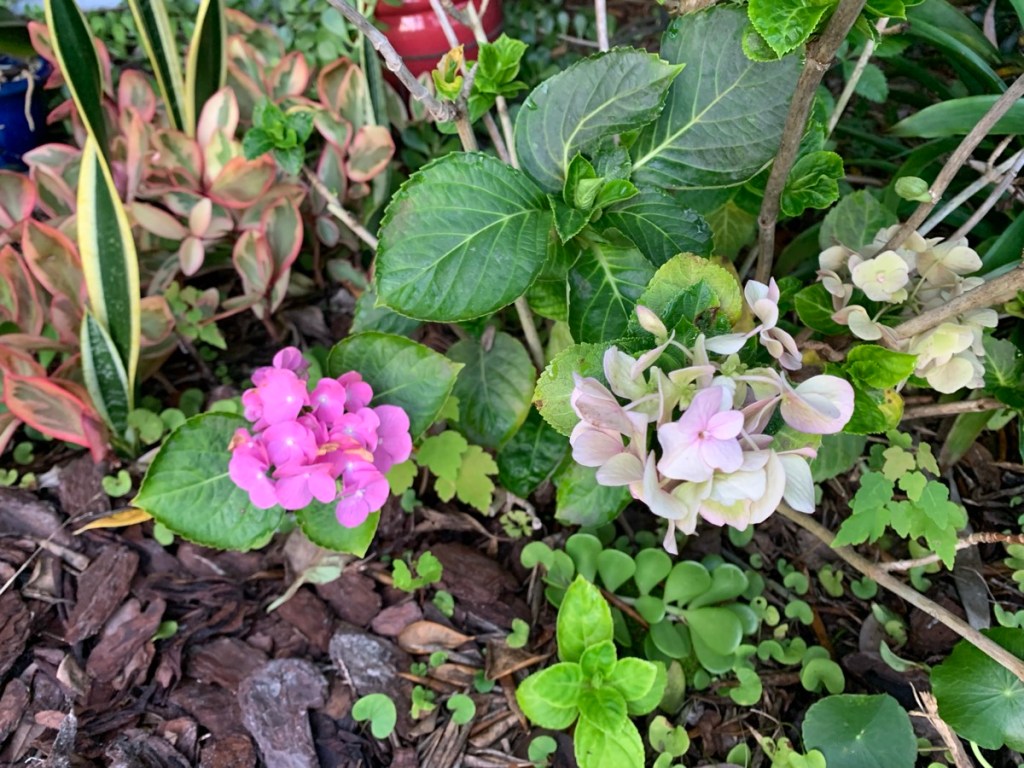
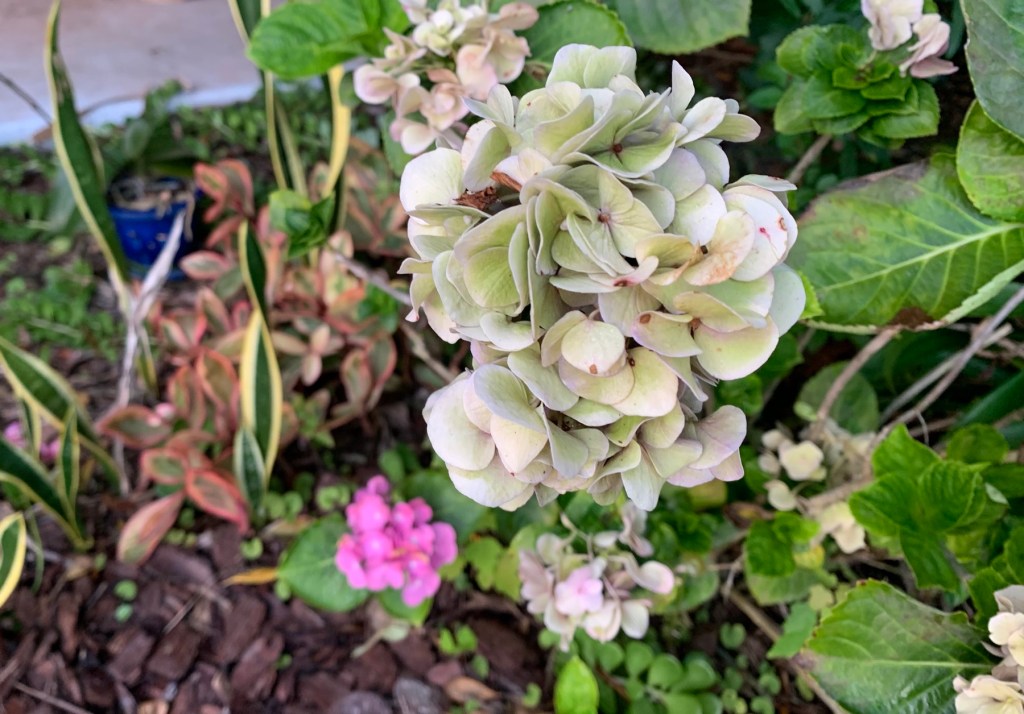
July and the Blooms Are Fading
July’s faded blooms
I was sick with Covid for nearly a month and only recently have been back out in my Florida yard. Now my pink hydrangea flowers are a very light greenish color. One little pink bloom hangs on.
I’ve given it a lot of thought and I really don’t have time to continue writing on this blog. Or, maybe I should say I’m cutting way back. My efforts need to go into starting a new online business. My knitting blog gets a lot of views and that is where I need to write.…
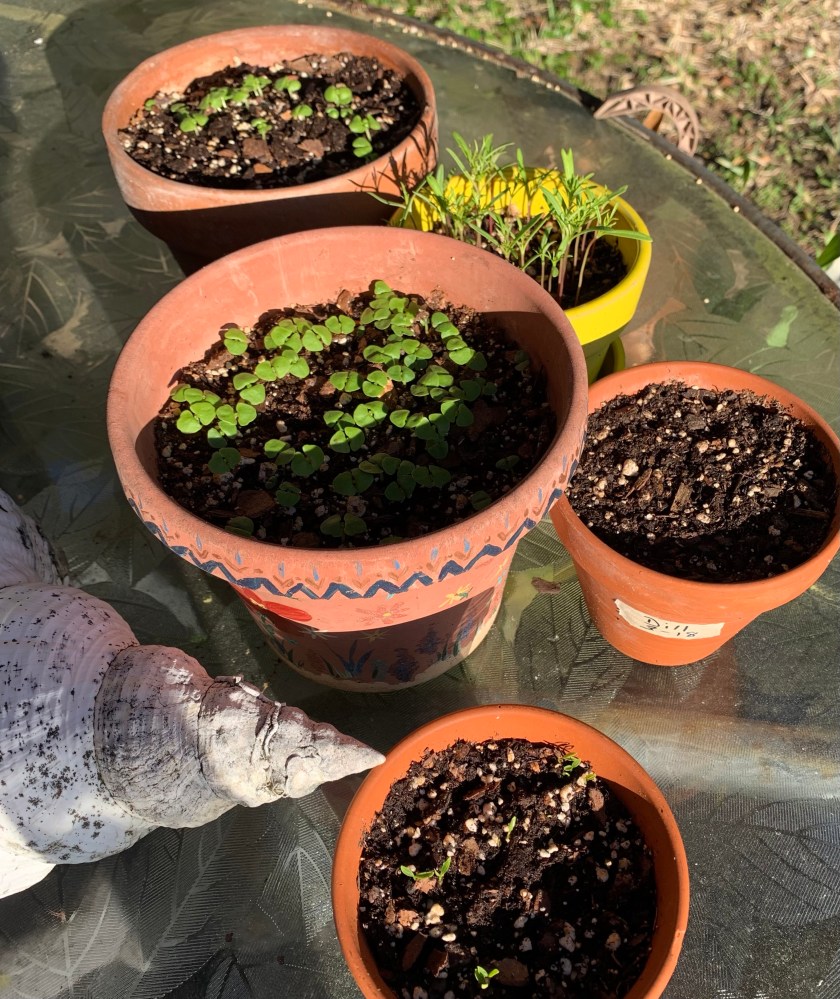
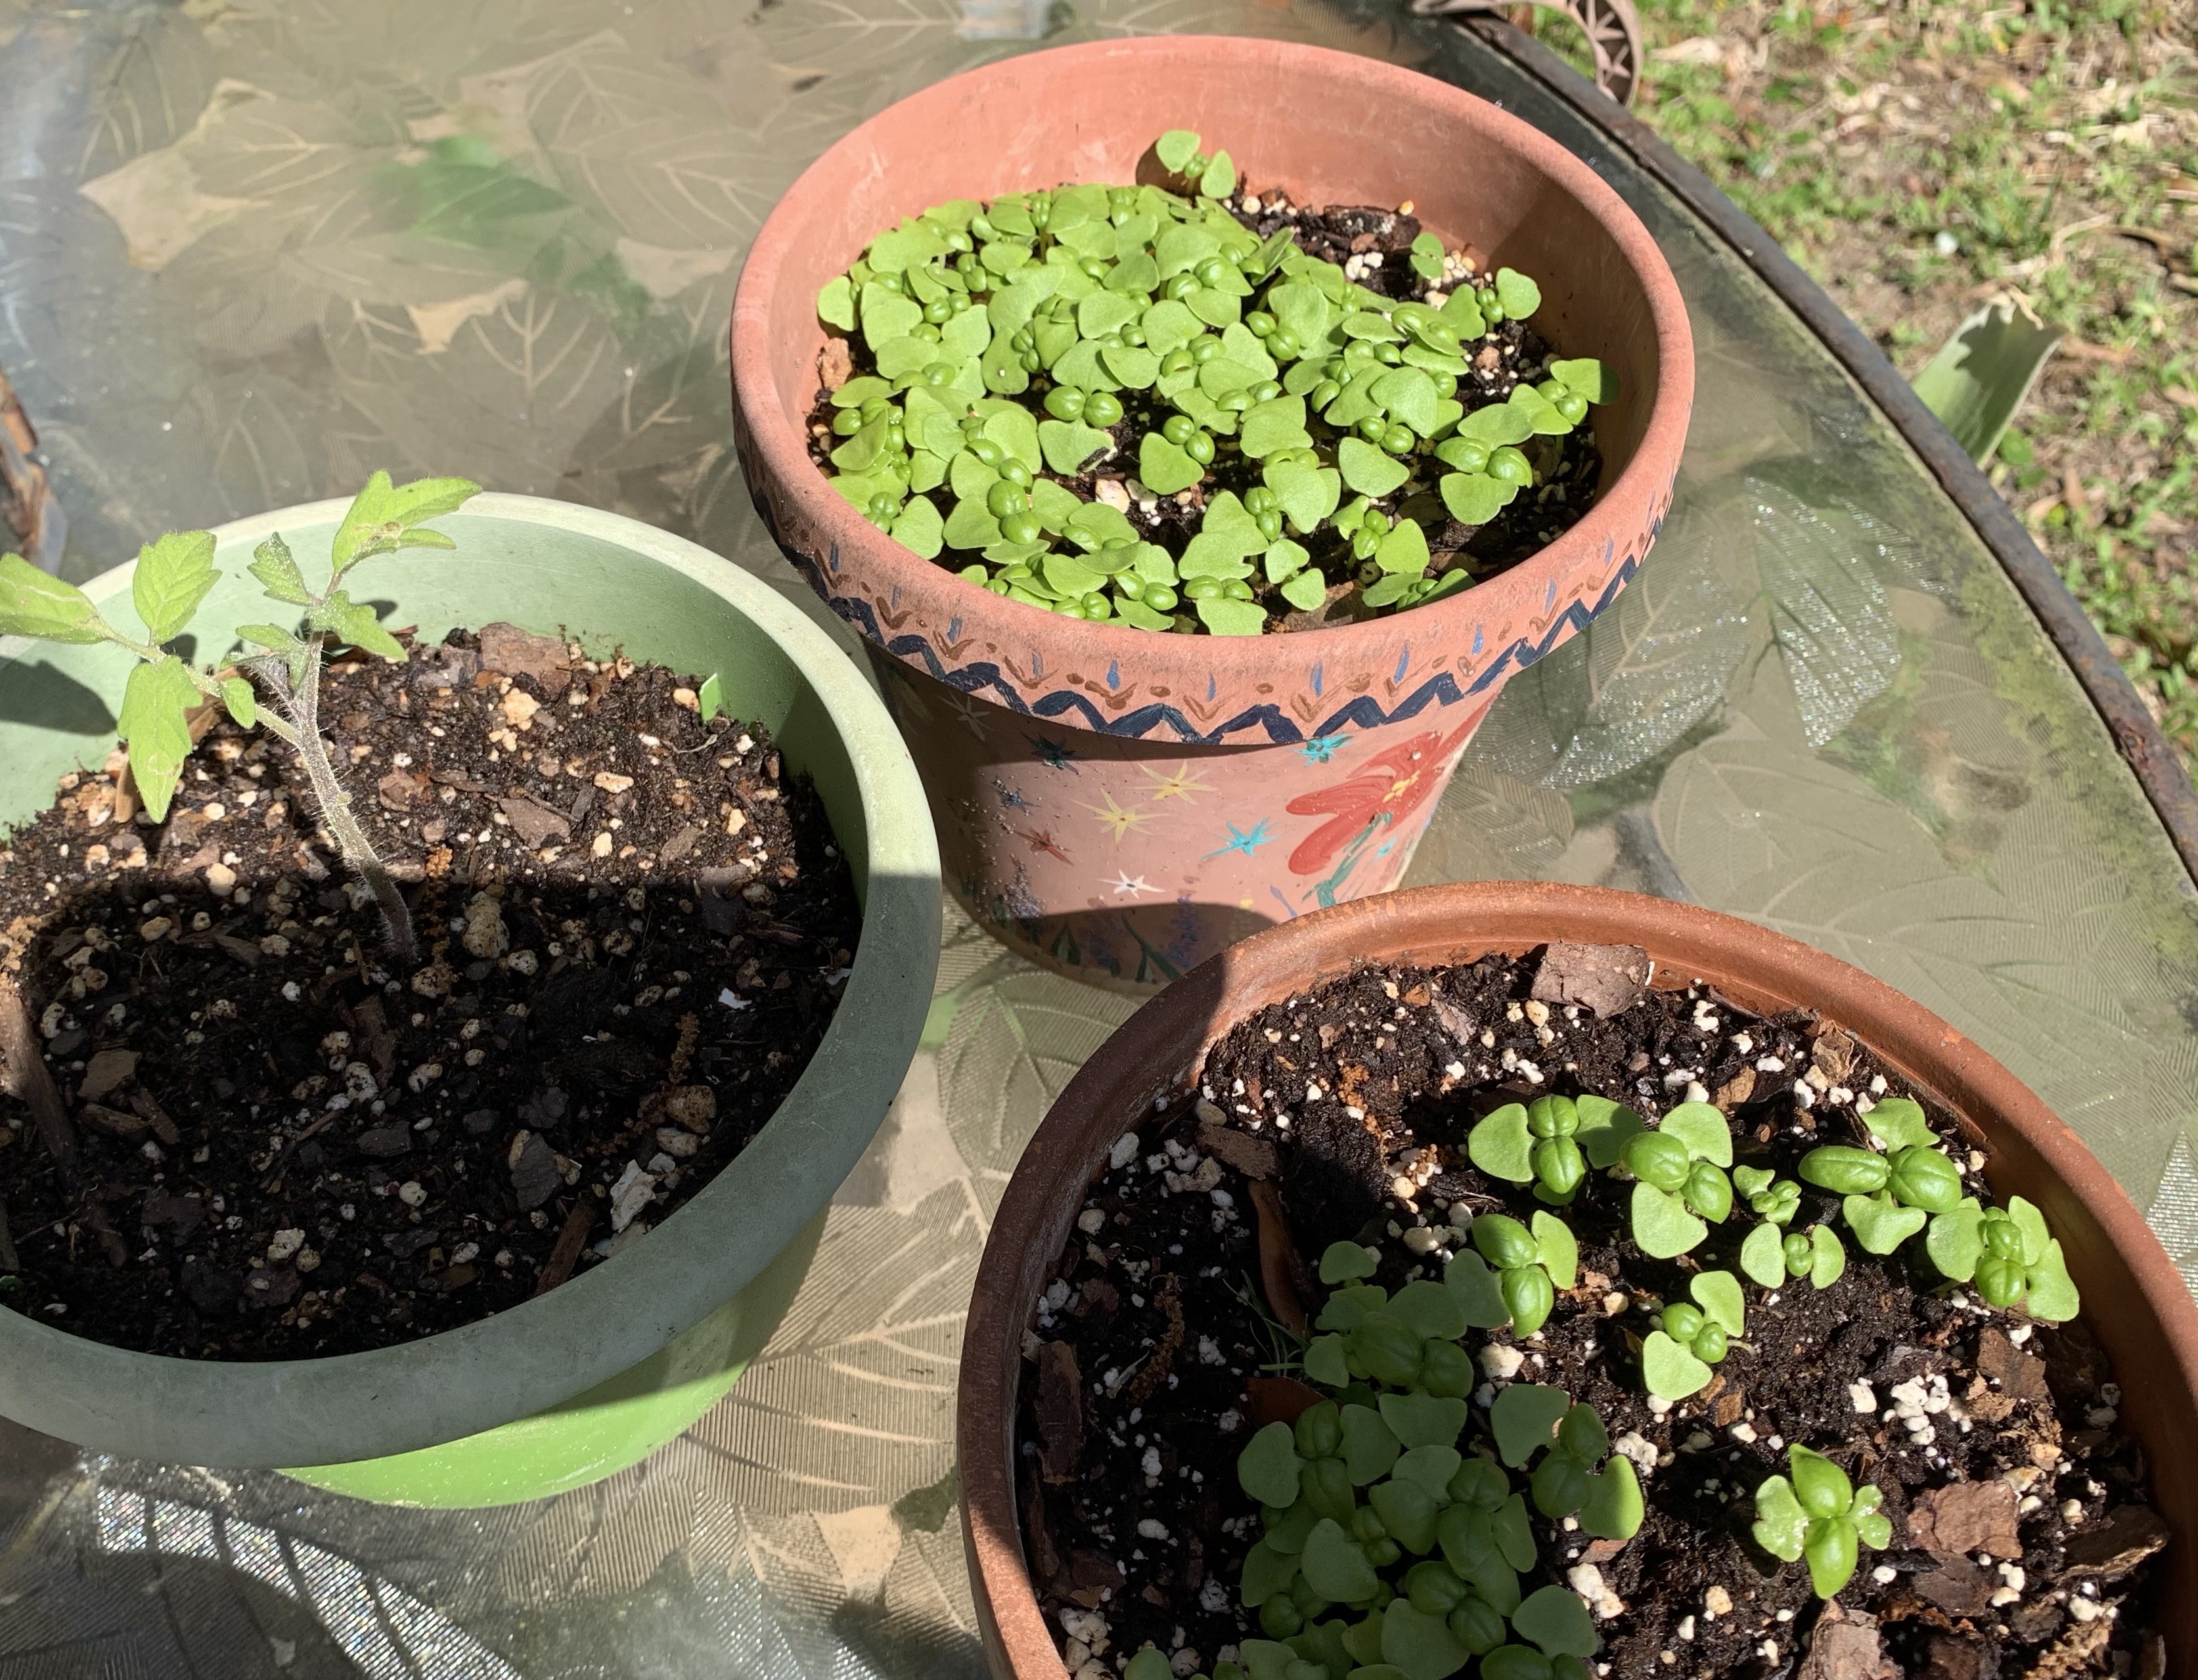
With attention and lots of watering, the seeds I started in larger pots are doing well.
After caring for my seedlings in eggshell pots for weeks, I decided to start some seeds in big pots. They won’t dry out as quickly and are able to stay outside overnight.
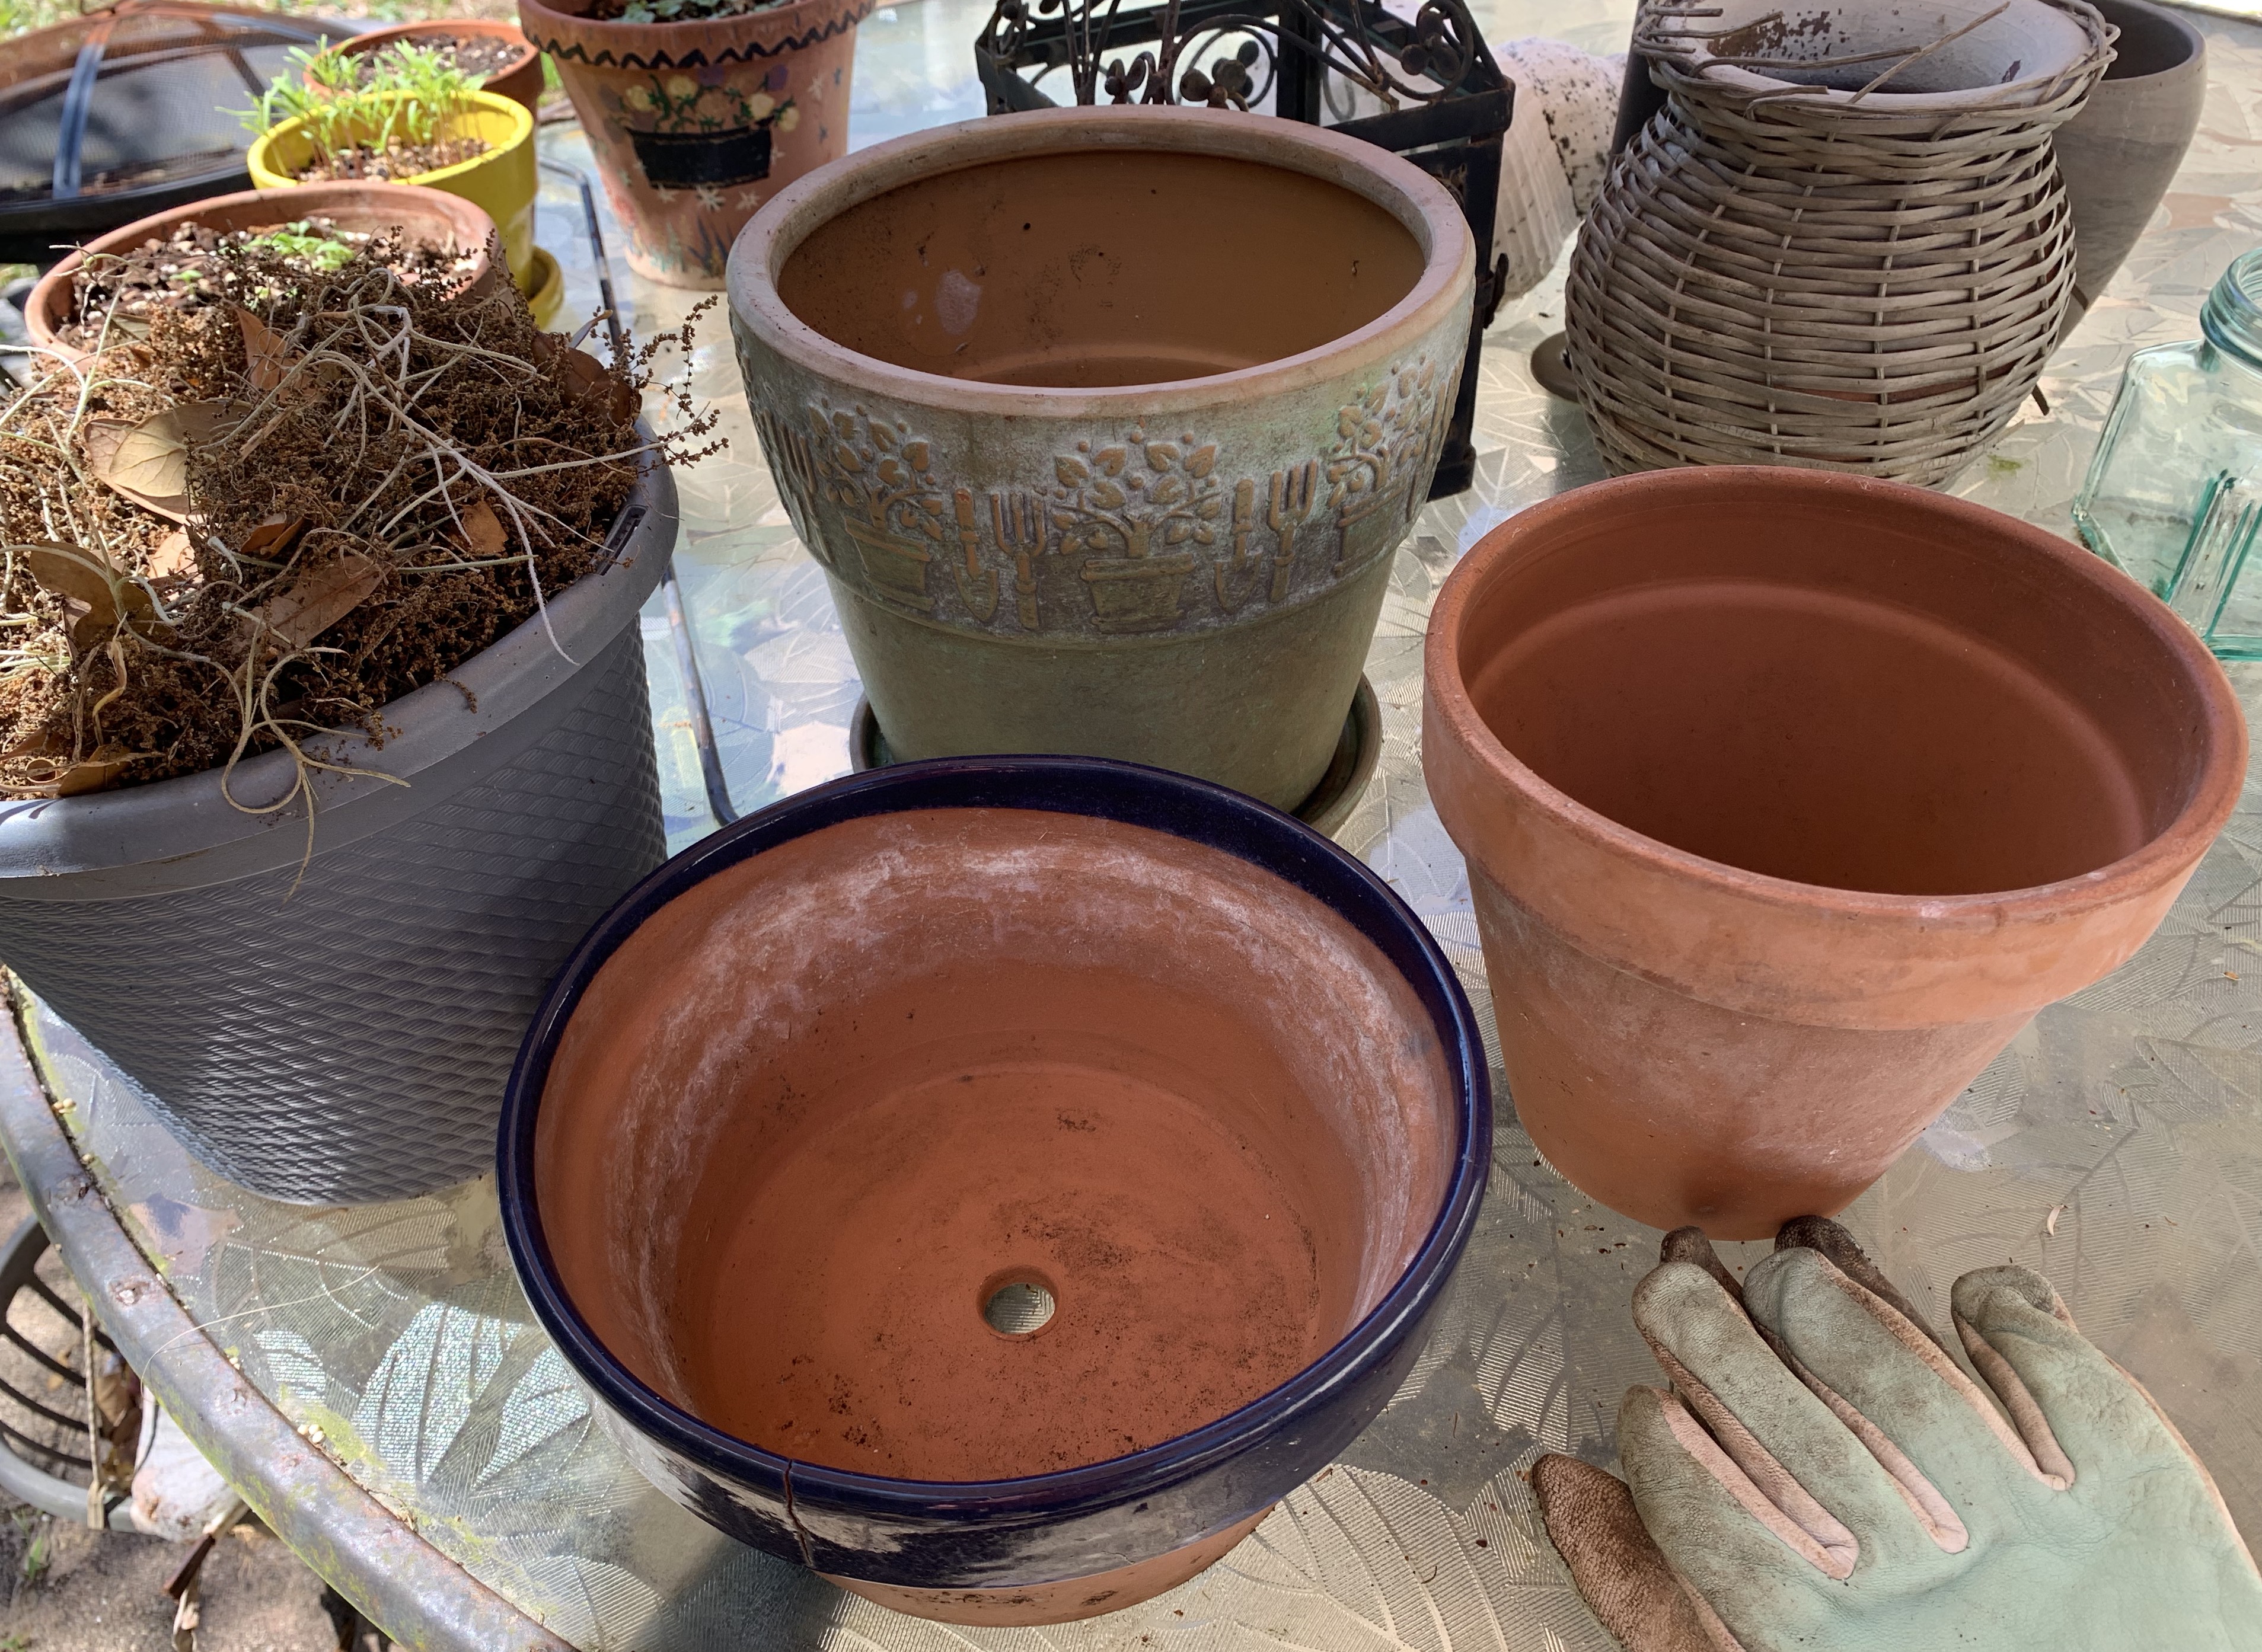
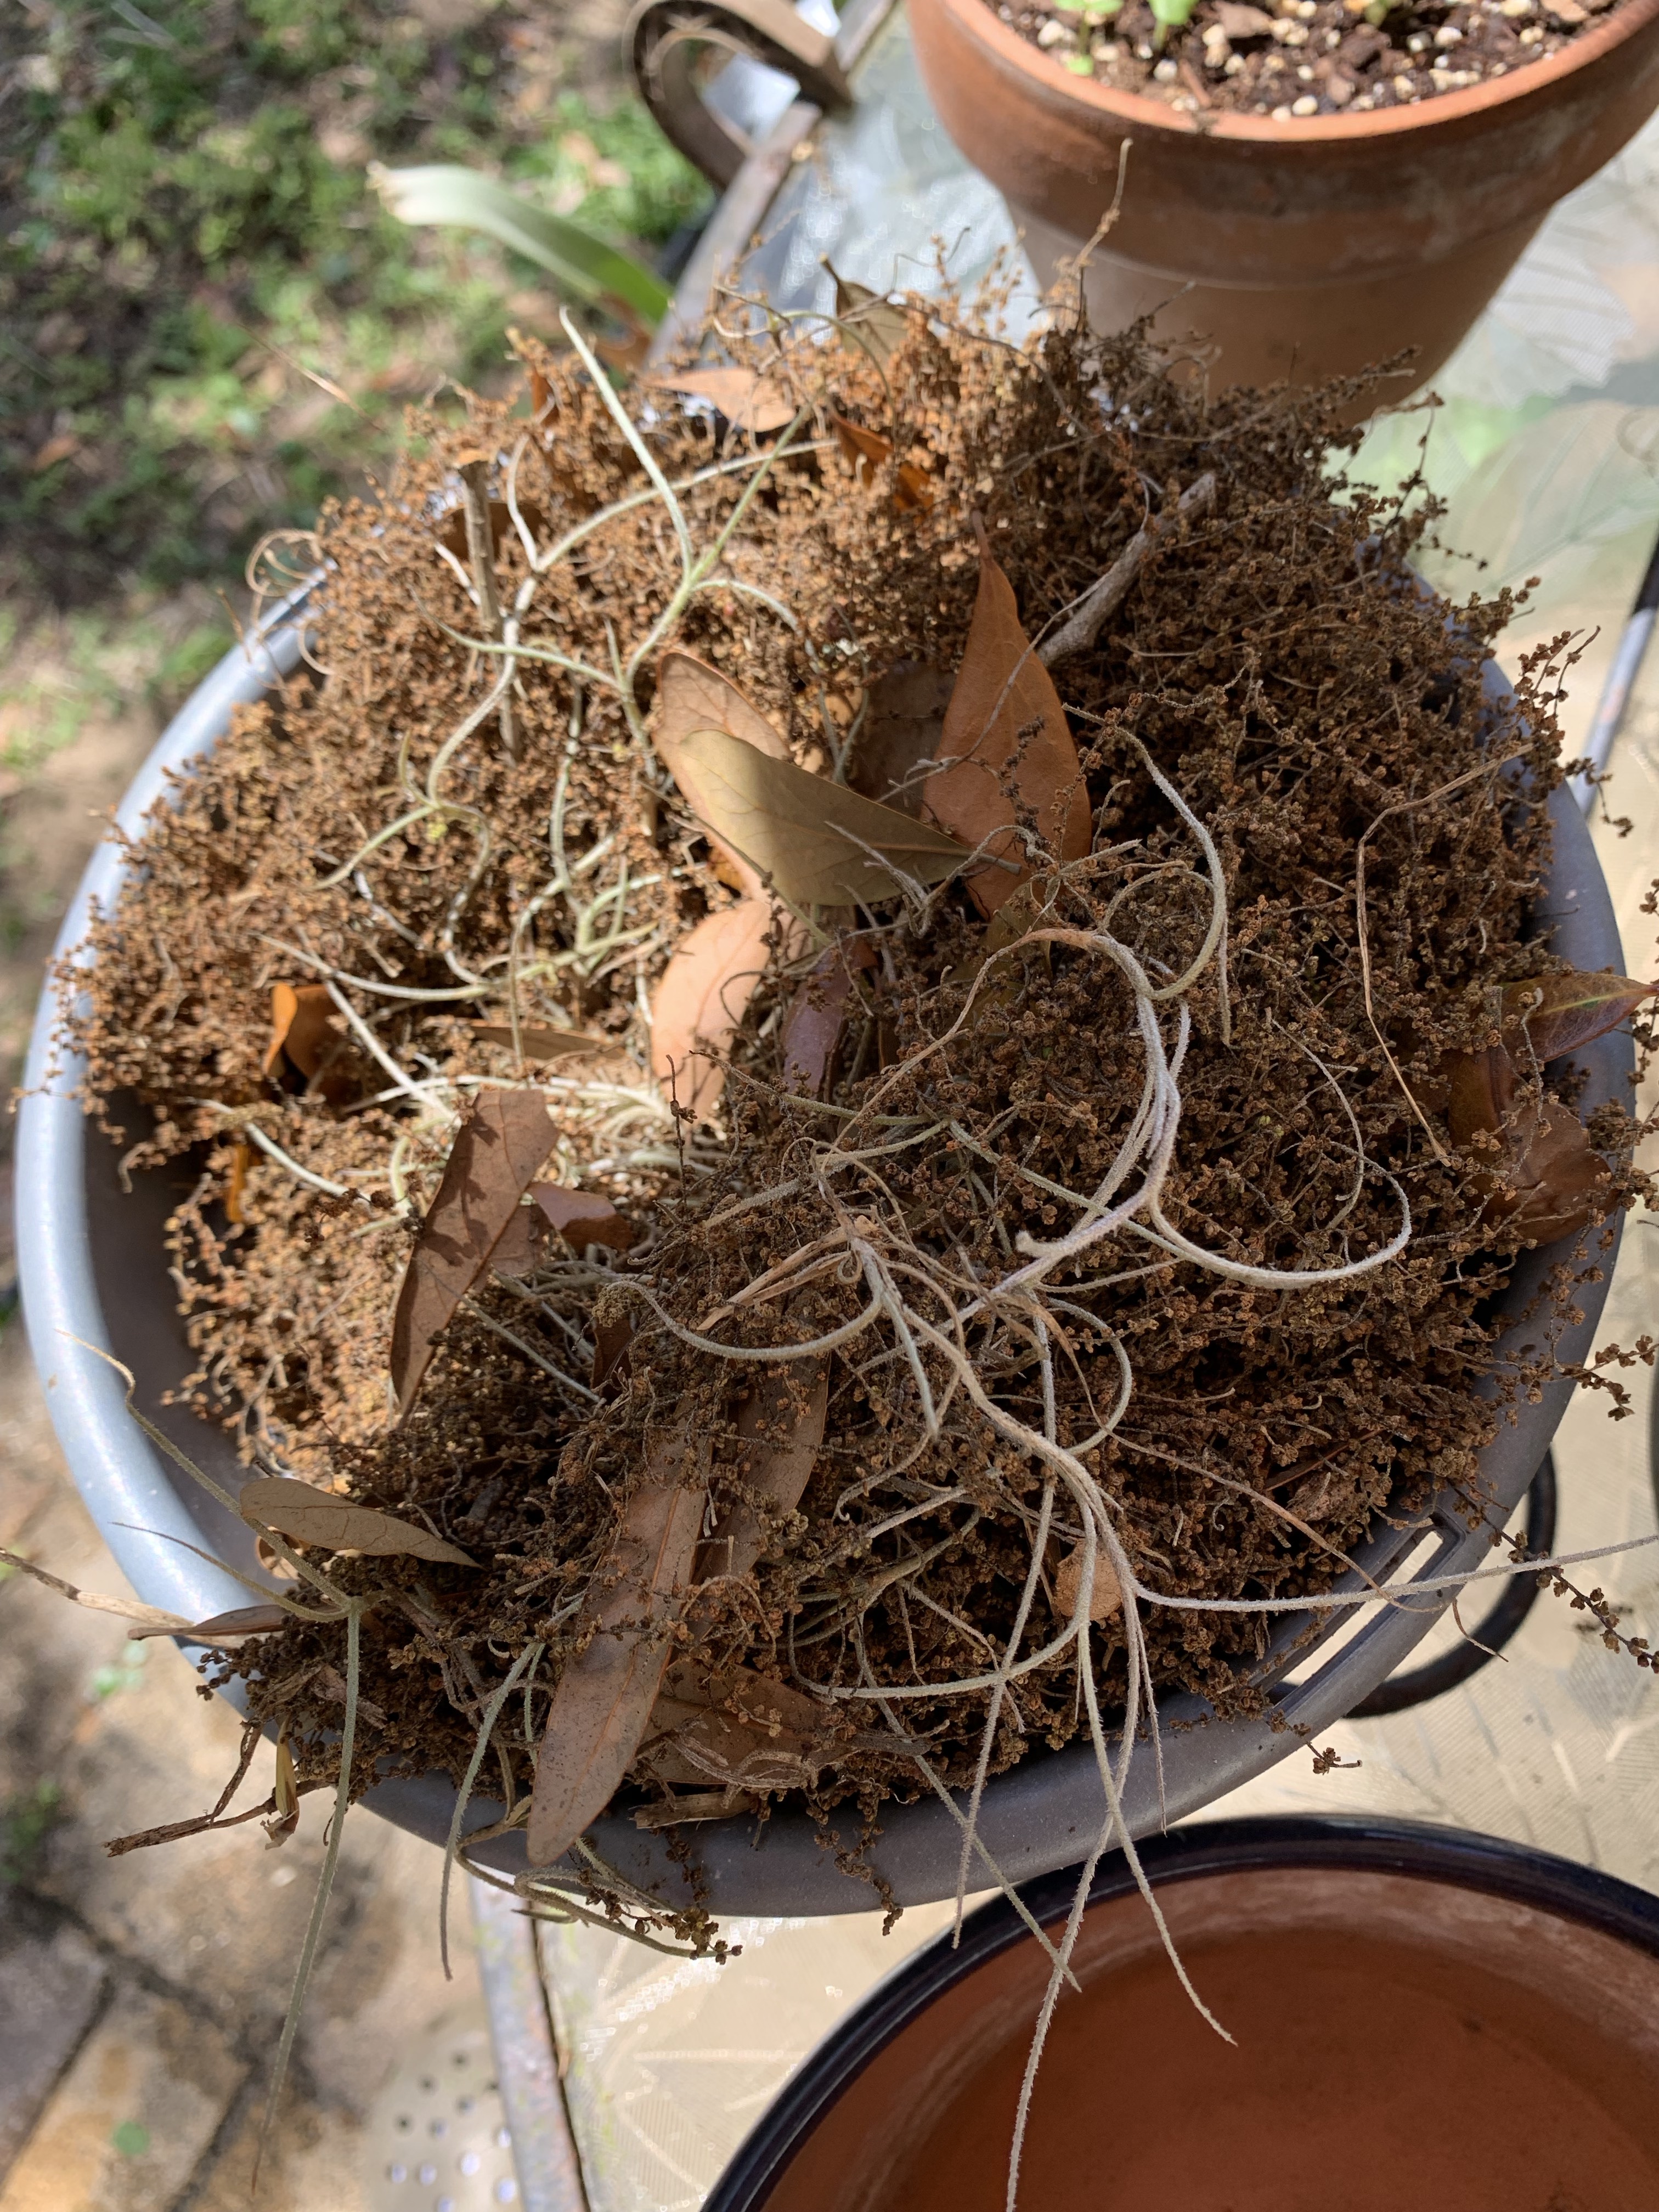
I gathered up pots of all sizes that had been lying around and cleaned them out. for drainage I used yard debris, which was a mix of oak leaves, catkins (those long brown things) and Spanish moss. That mixture was pushed into the bottom of each pot before adding dirt.
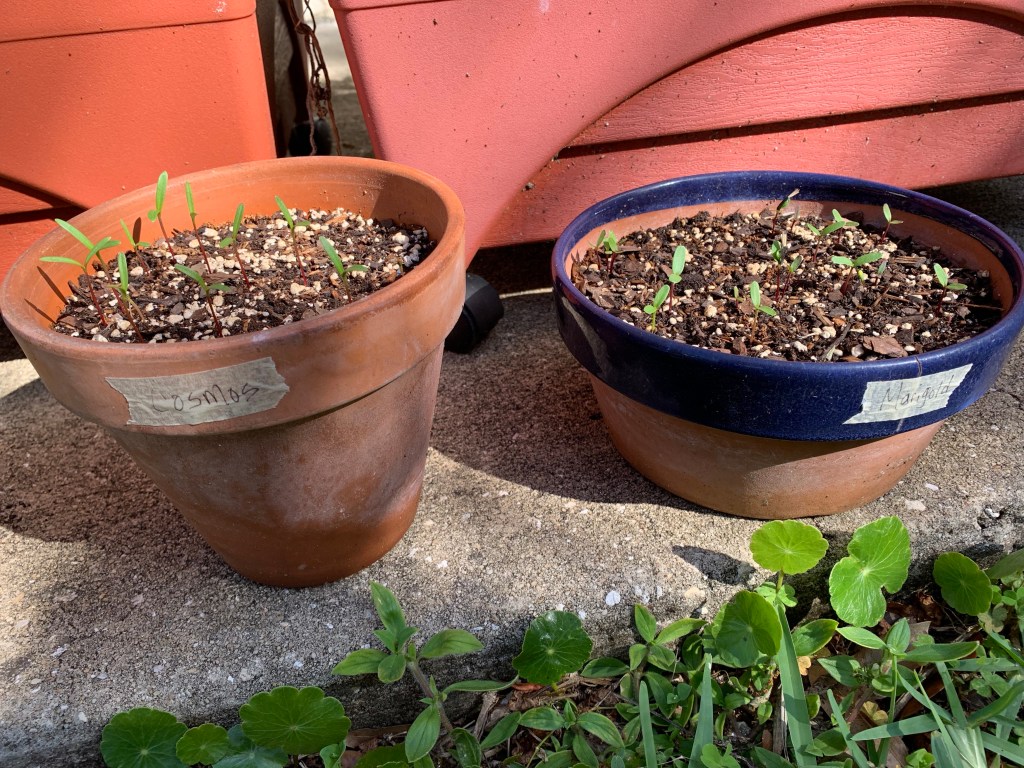
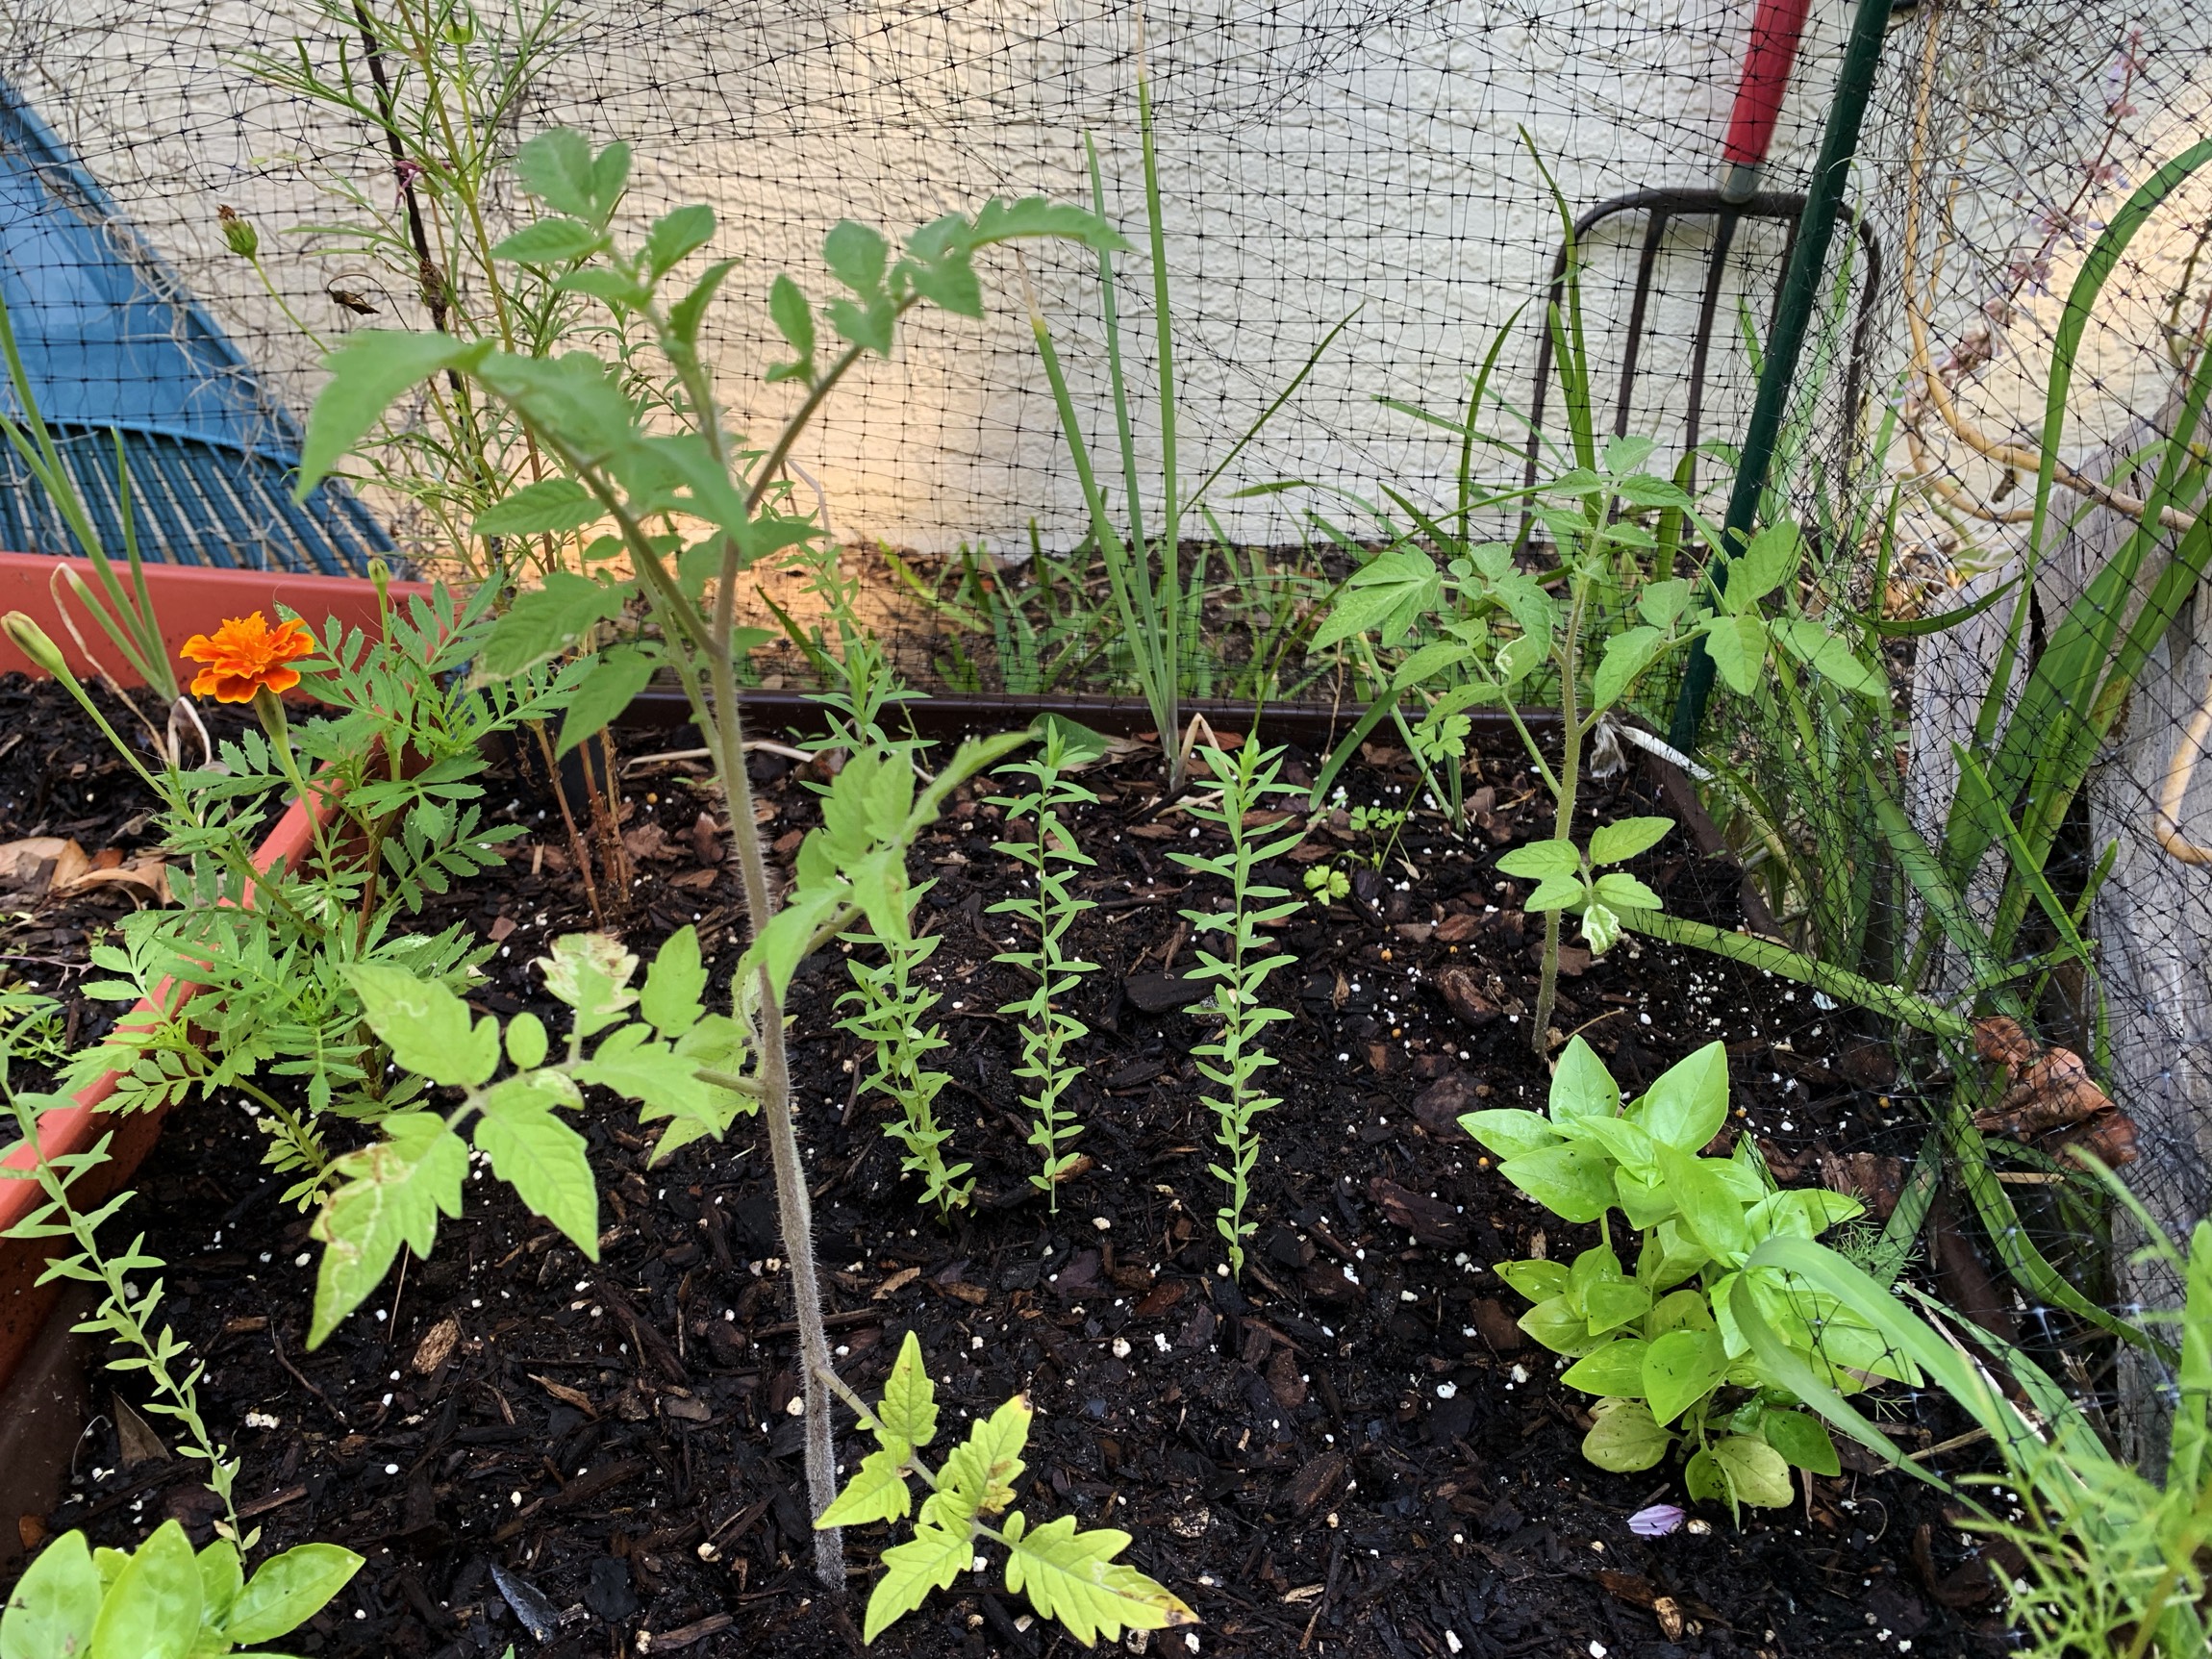
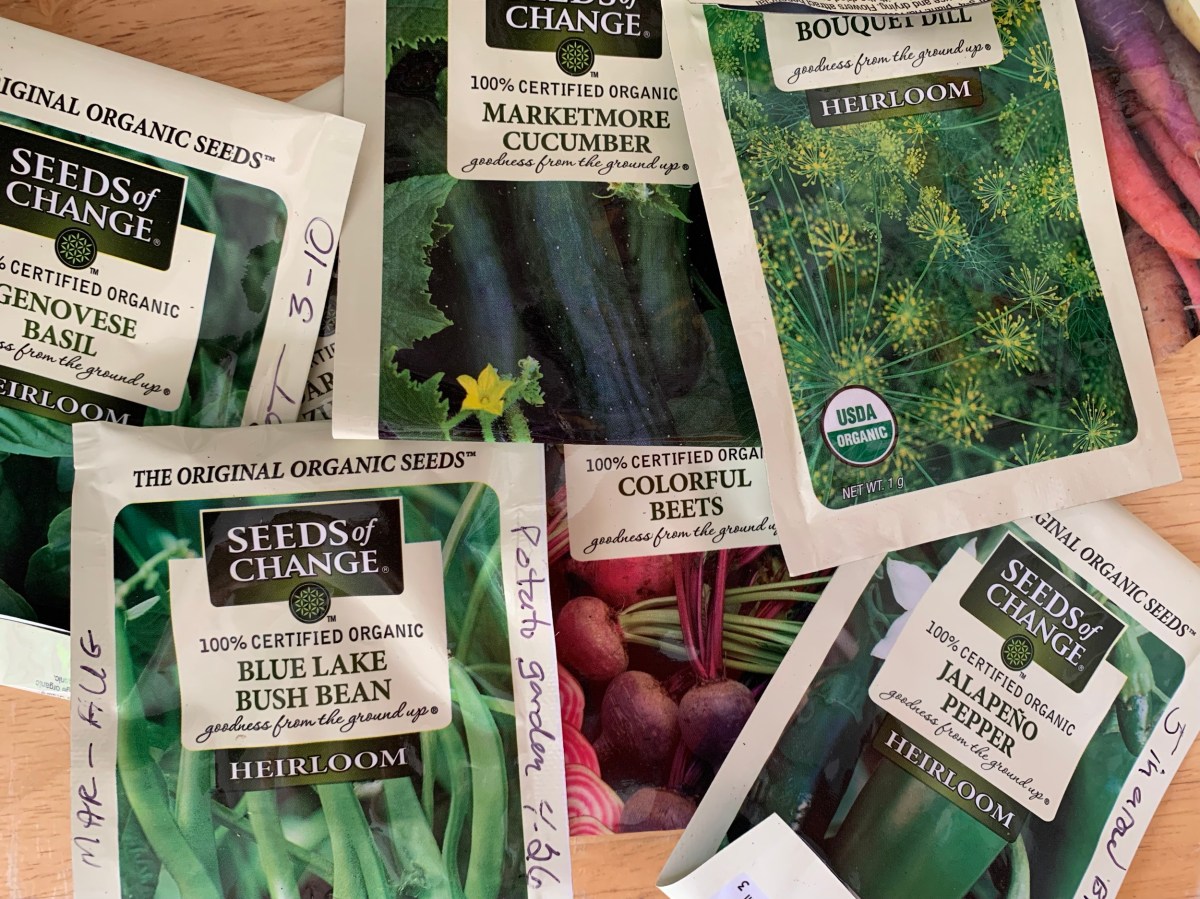
I’ve planted basil, dill, cherry tomatoes, marigolds and cosmos. I used freezer tape to label the pots with the date they were planted.
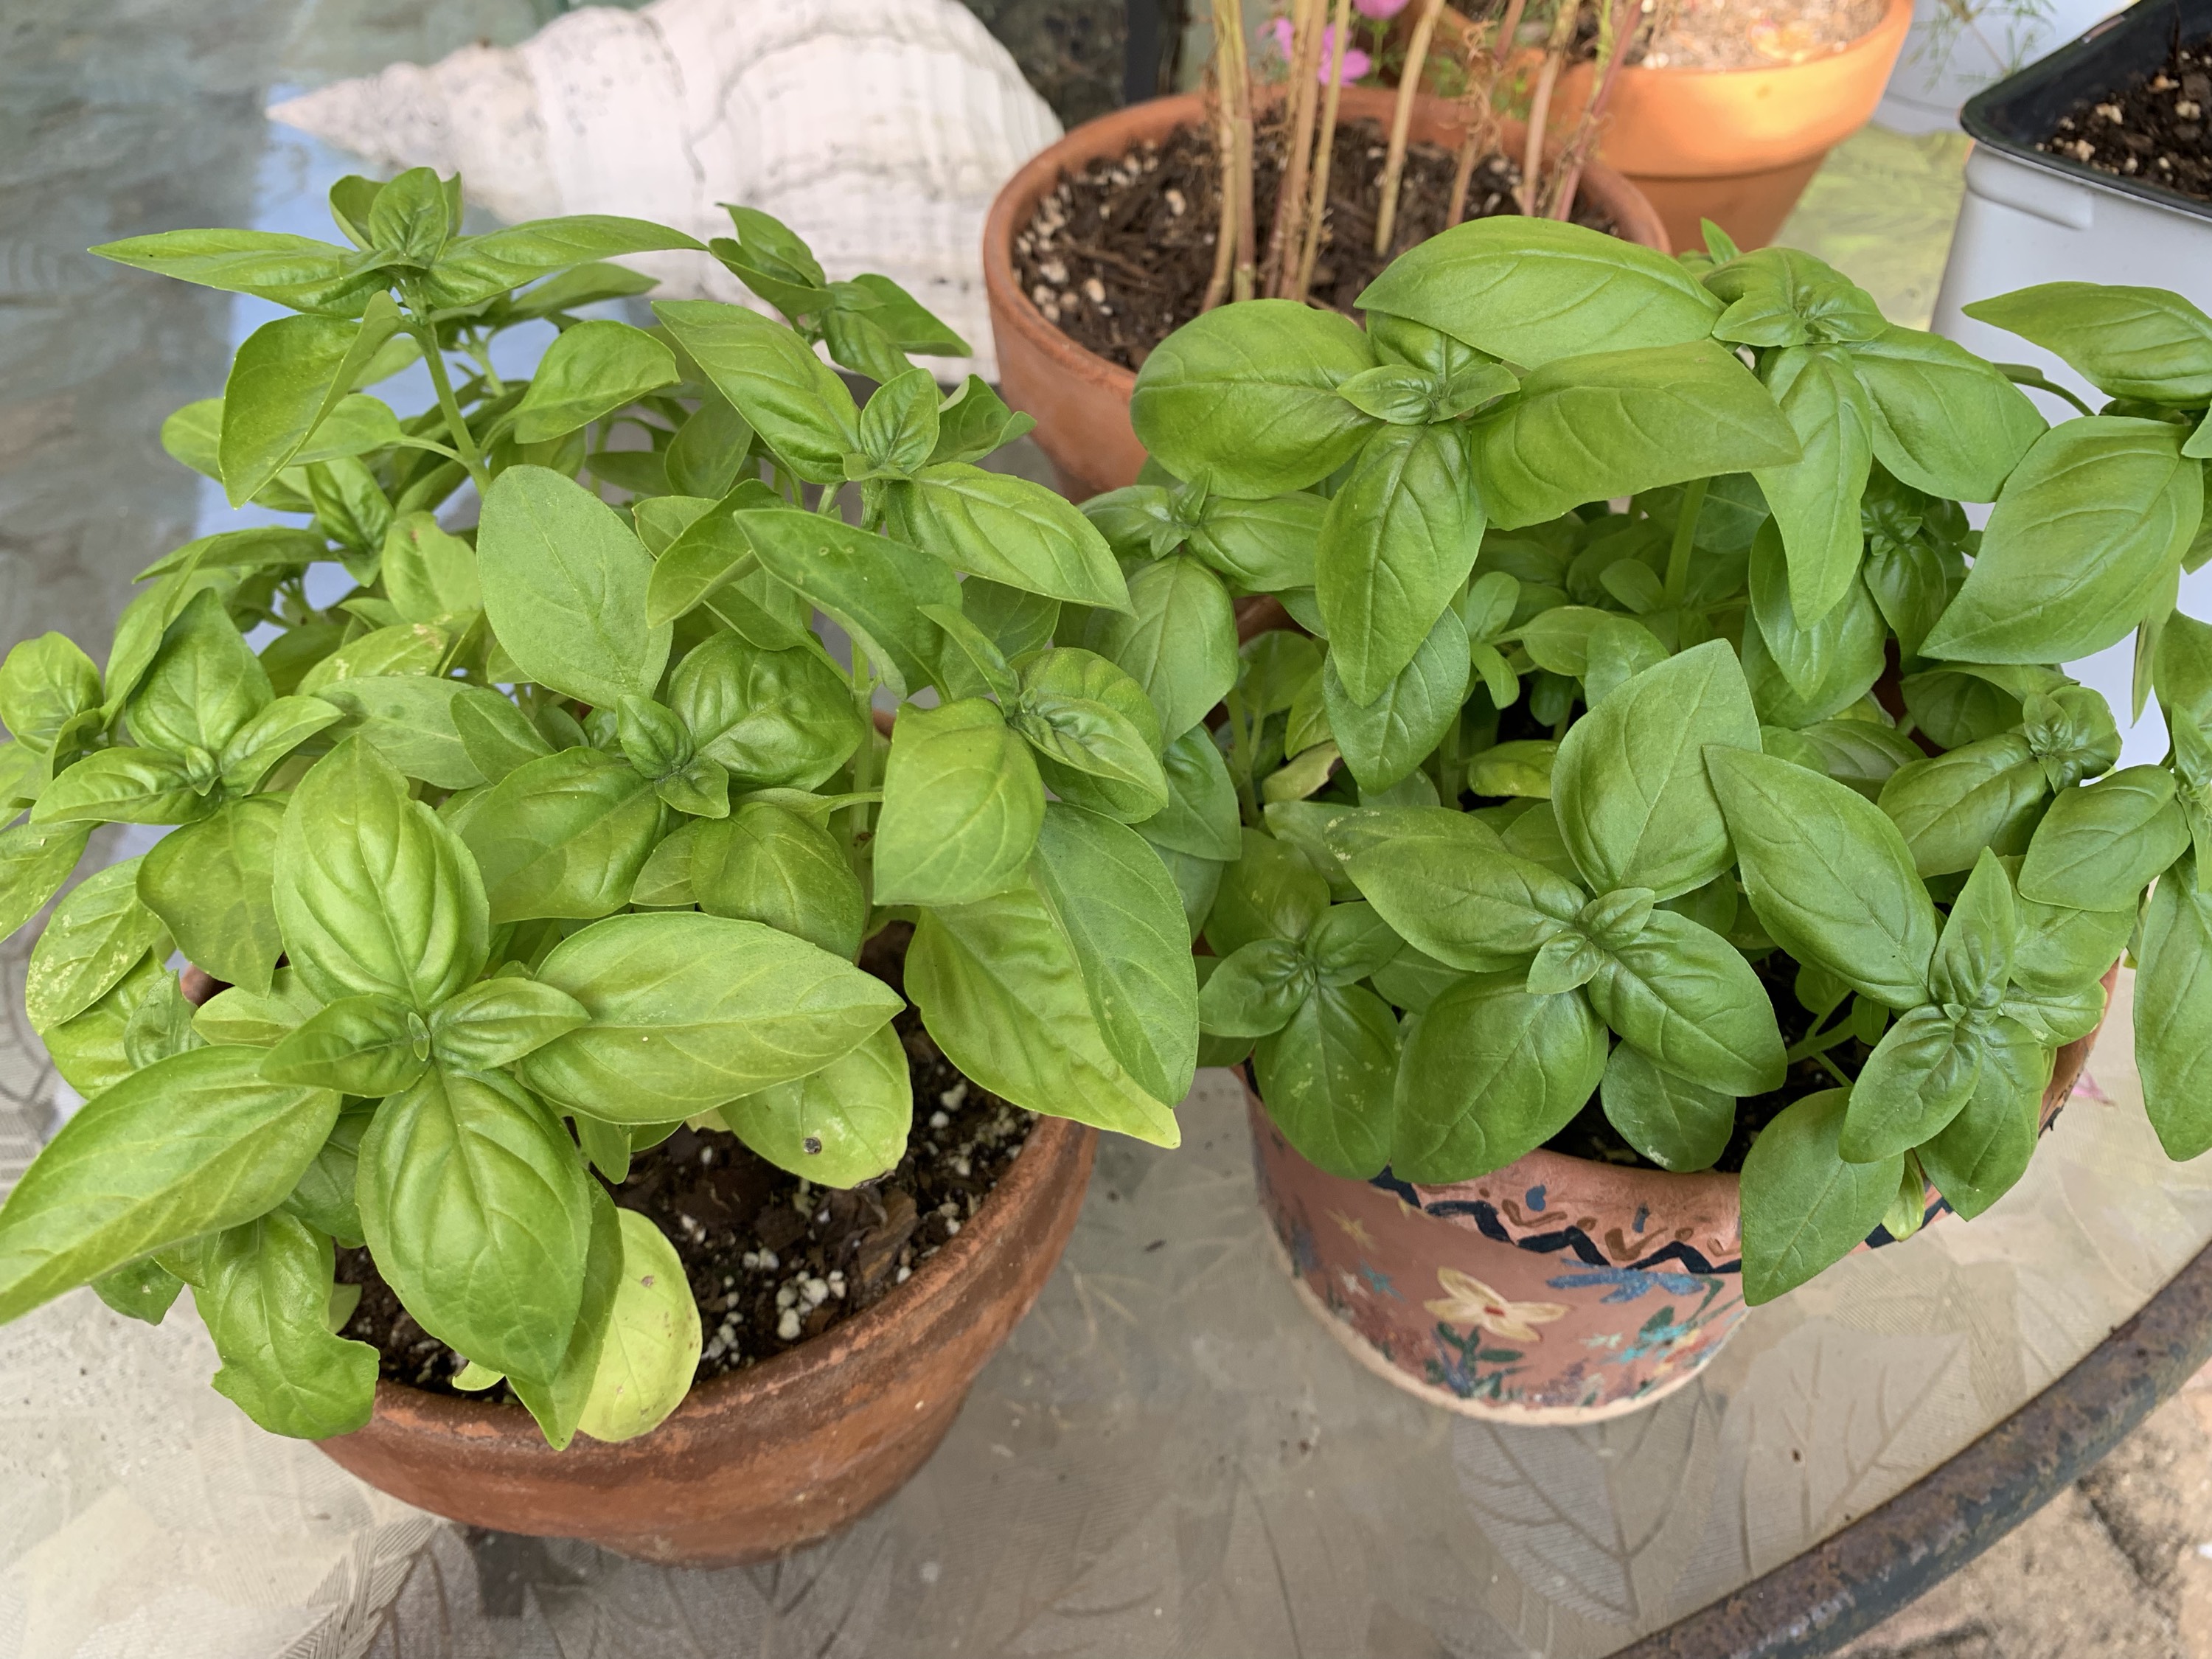
Growing Basil
Basil can be difficult to grow in Florida, or so I’ve heard. I had some basil plants in the garden that lasted a couple of years, but then they died. Basil does self-sow if you let seeds form. I now have two pots of basil.
The basil seedlings became so crowded that I removed some of the plants by cutting them off. You should cut and not pull when thinning so as not to disturb the roots.
I kept the cuttings to use when cooking! So far, everything looks good and I hope to have nice big basil plants to pull from year round.
Before thinningBasil after thinningBasil one month later – end of May
Cosmos and Marigolds
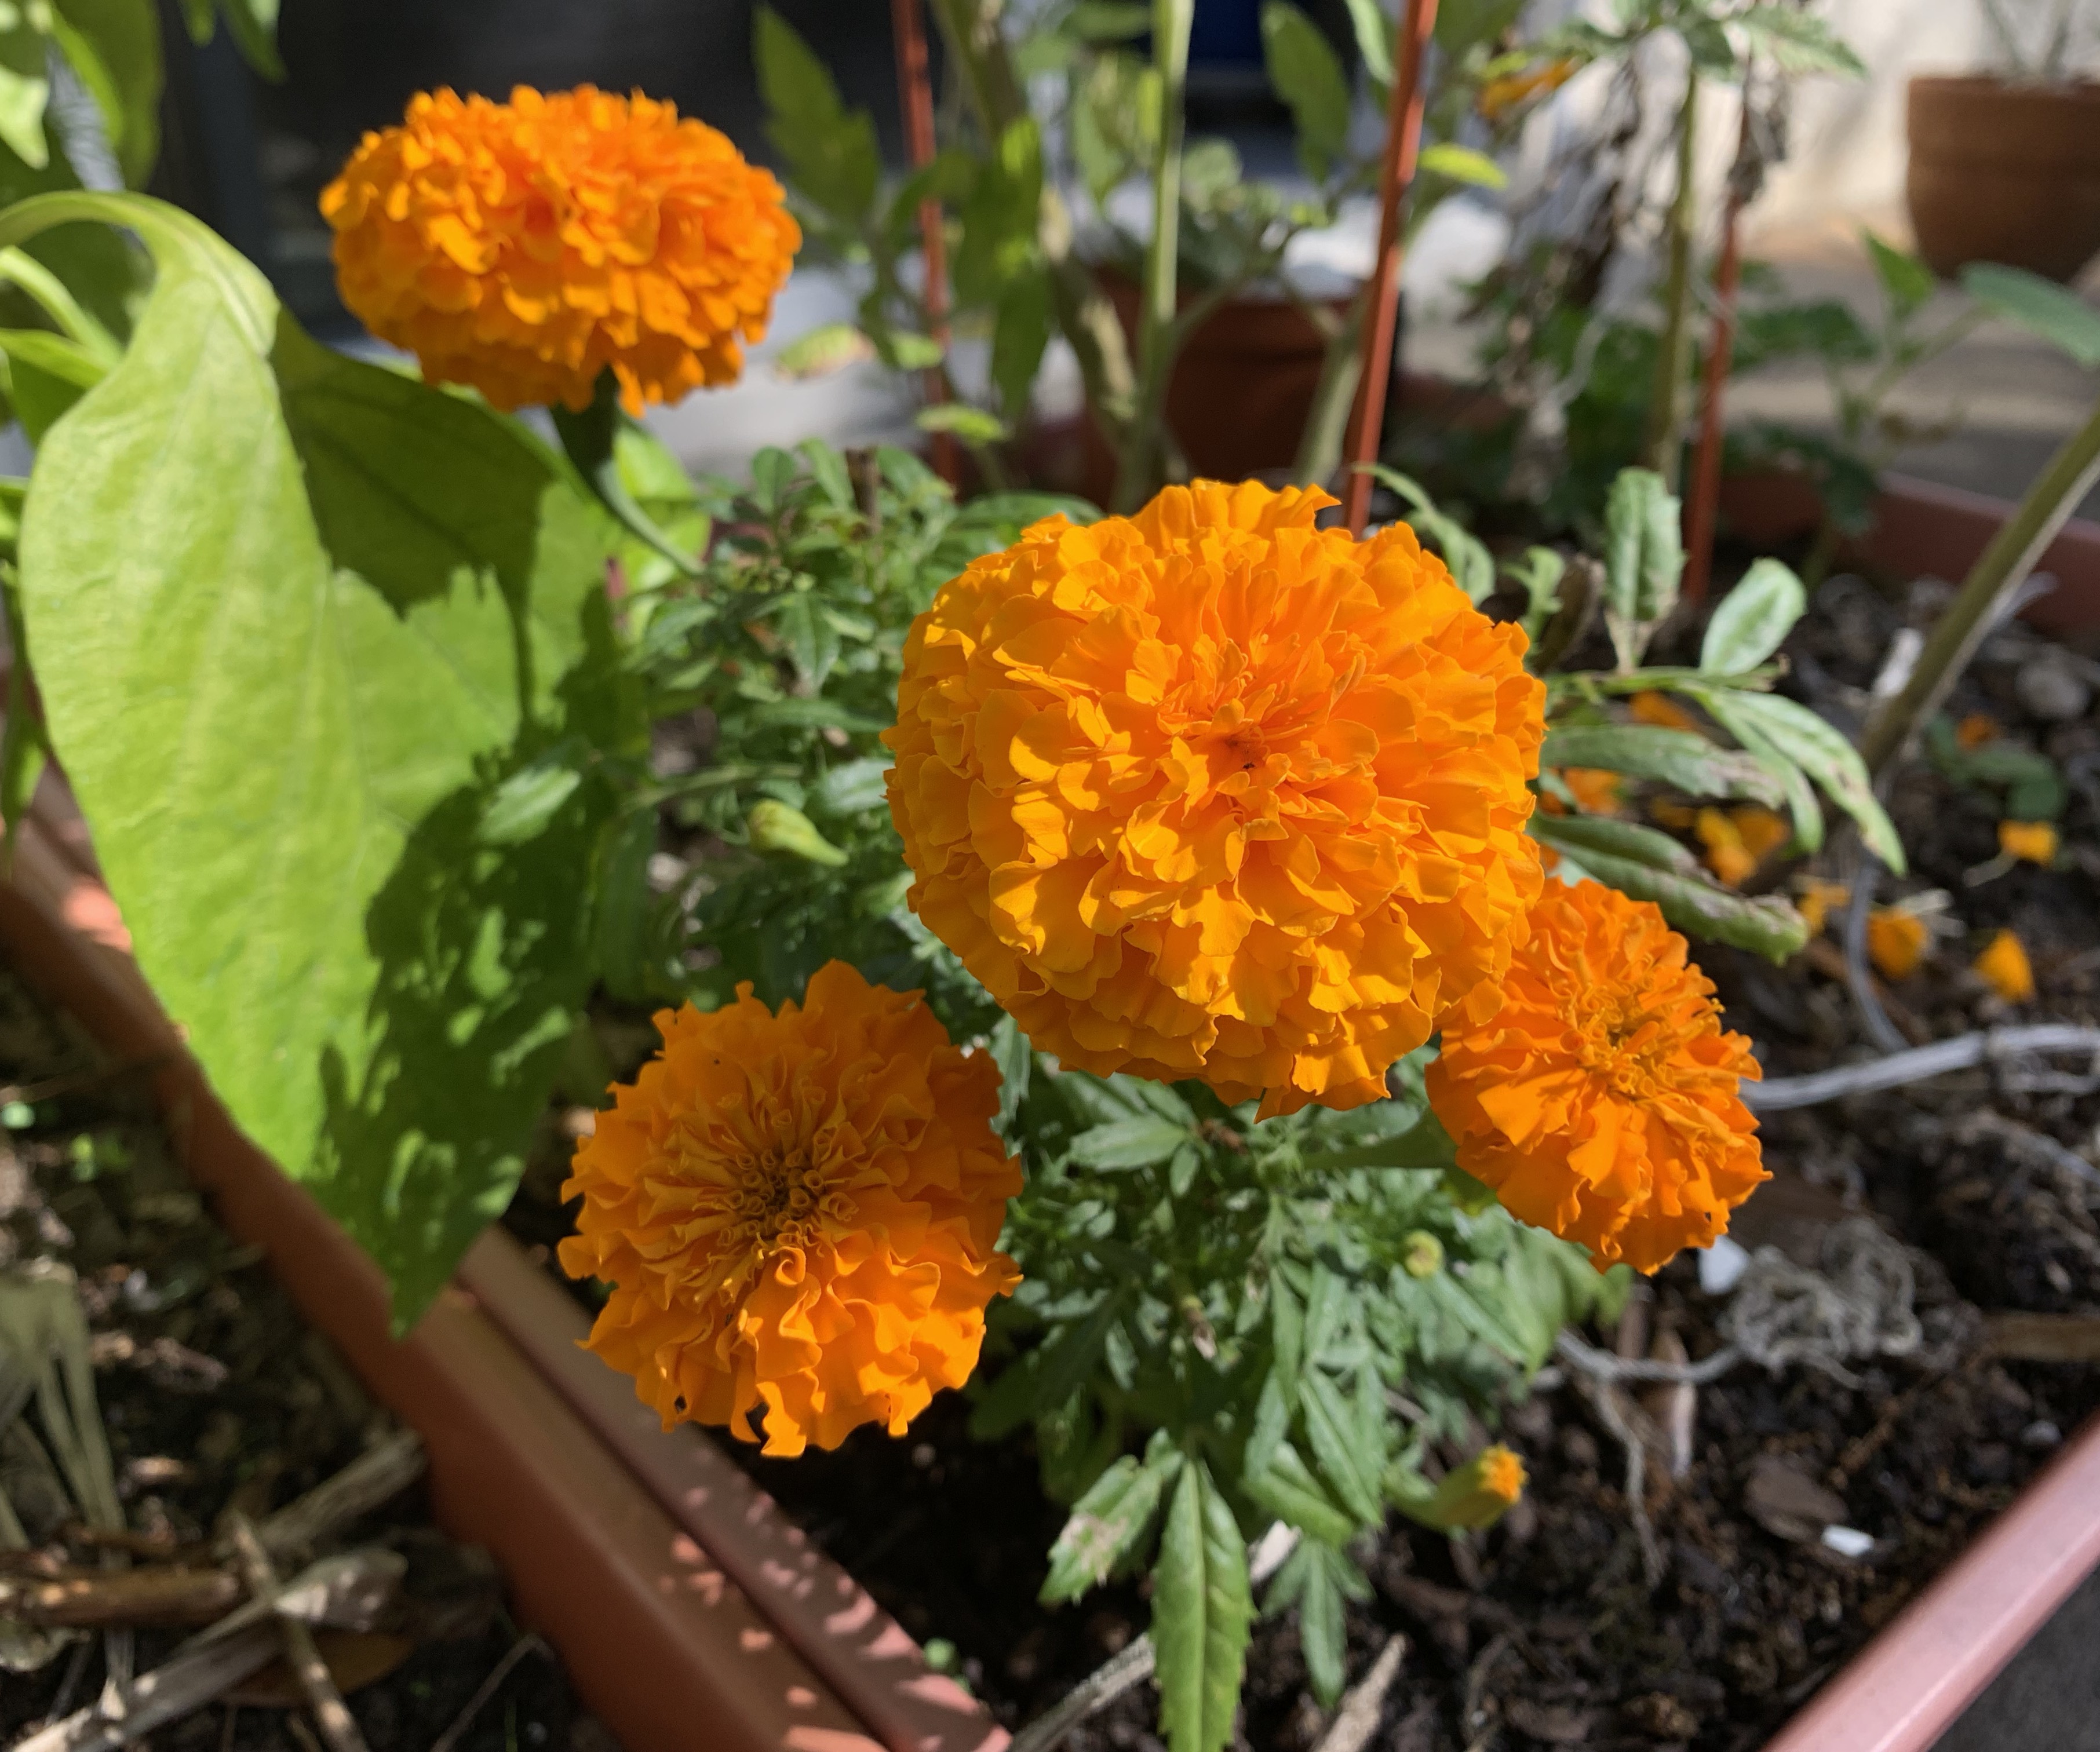
I chose two types of flower packets to grow from seeds. Marigolds are so wonderful for gardens, because they repel certain bugs that could be destructive. They should be dead-headed (pull off the old flowers) and I rip the flower head apart and scatter it among the vegetables. Every gardener probably includes marigolds when planting. I think certain varieties are better than others, but I didn’t have a lot to choose from at the store.
I bought two flowering marigold plants – see the orange one below – and will see what happens with the seeds.
MarigoldMarigold plantCosmos and MarigoldsCosmosCosmos
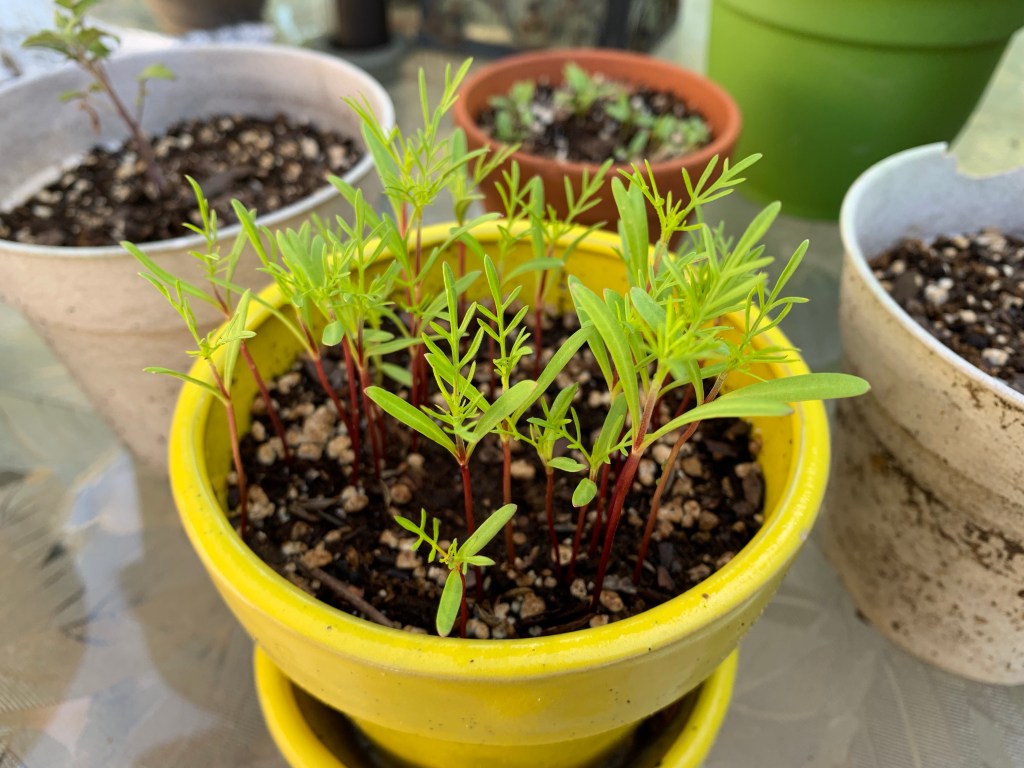
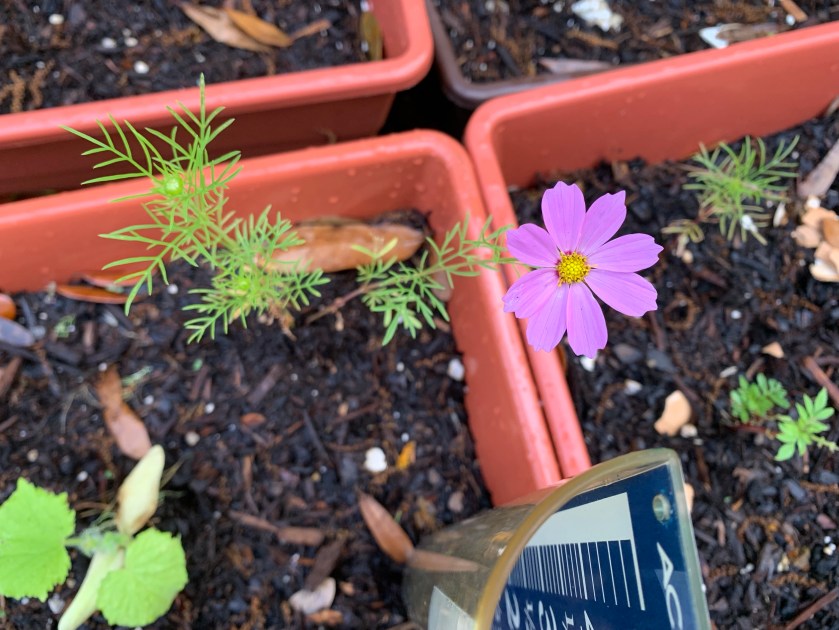
Flowering cosmos in a grow box
The cosmos seedlings are looking pretty good. A little purple cosmos flower has bloomed in my grow box. That plant was begun in an eggshell pot.
This is certainly a different looking cosmos from what I am used to growing in New Hampshire. Or maybe the plant needs to mature to grow larger.
Actually, the secret is to plant seeds in real good dirt.
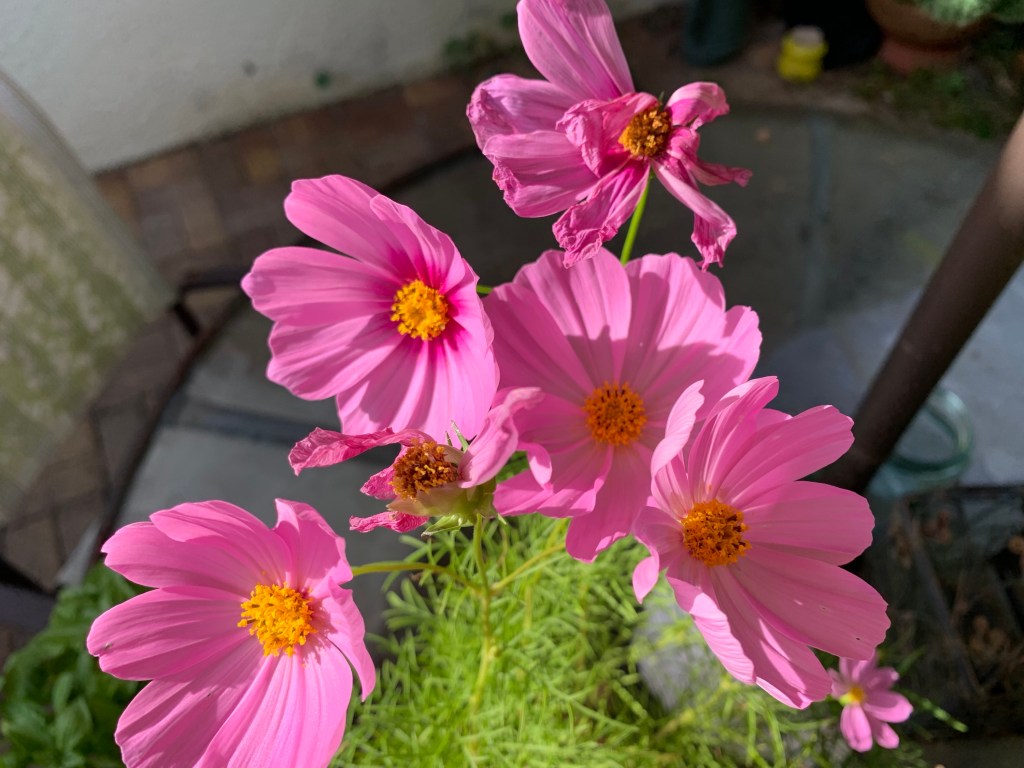
The cosmos in the larger pot is looking nice and blooming regularly
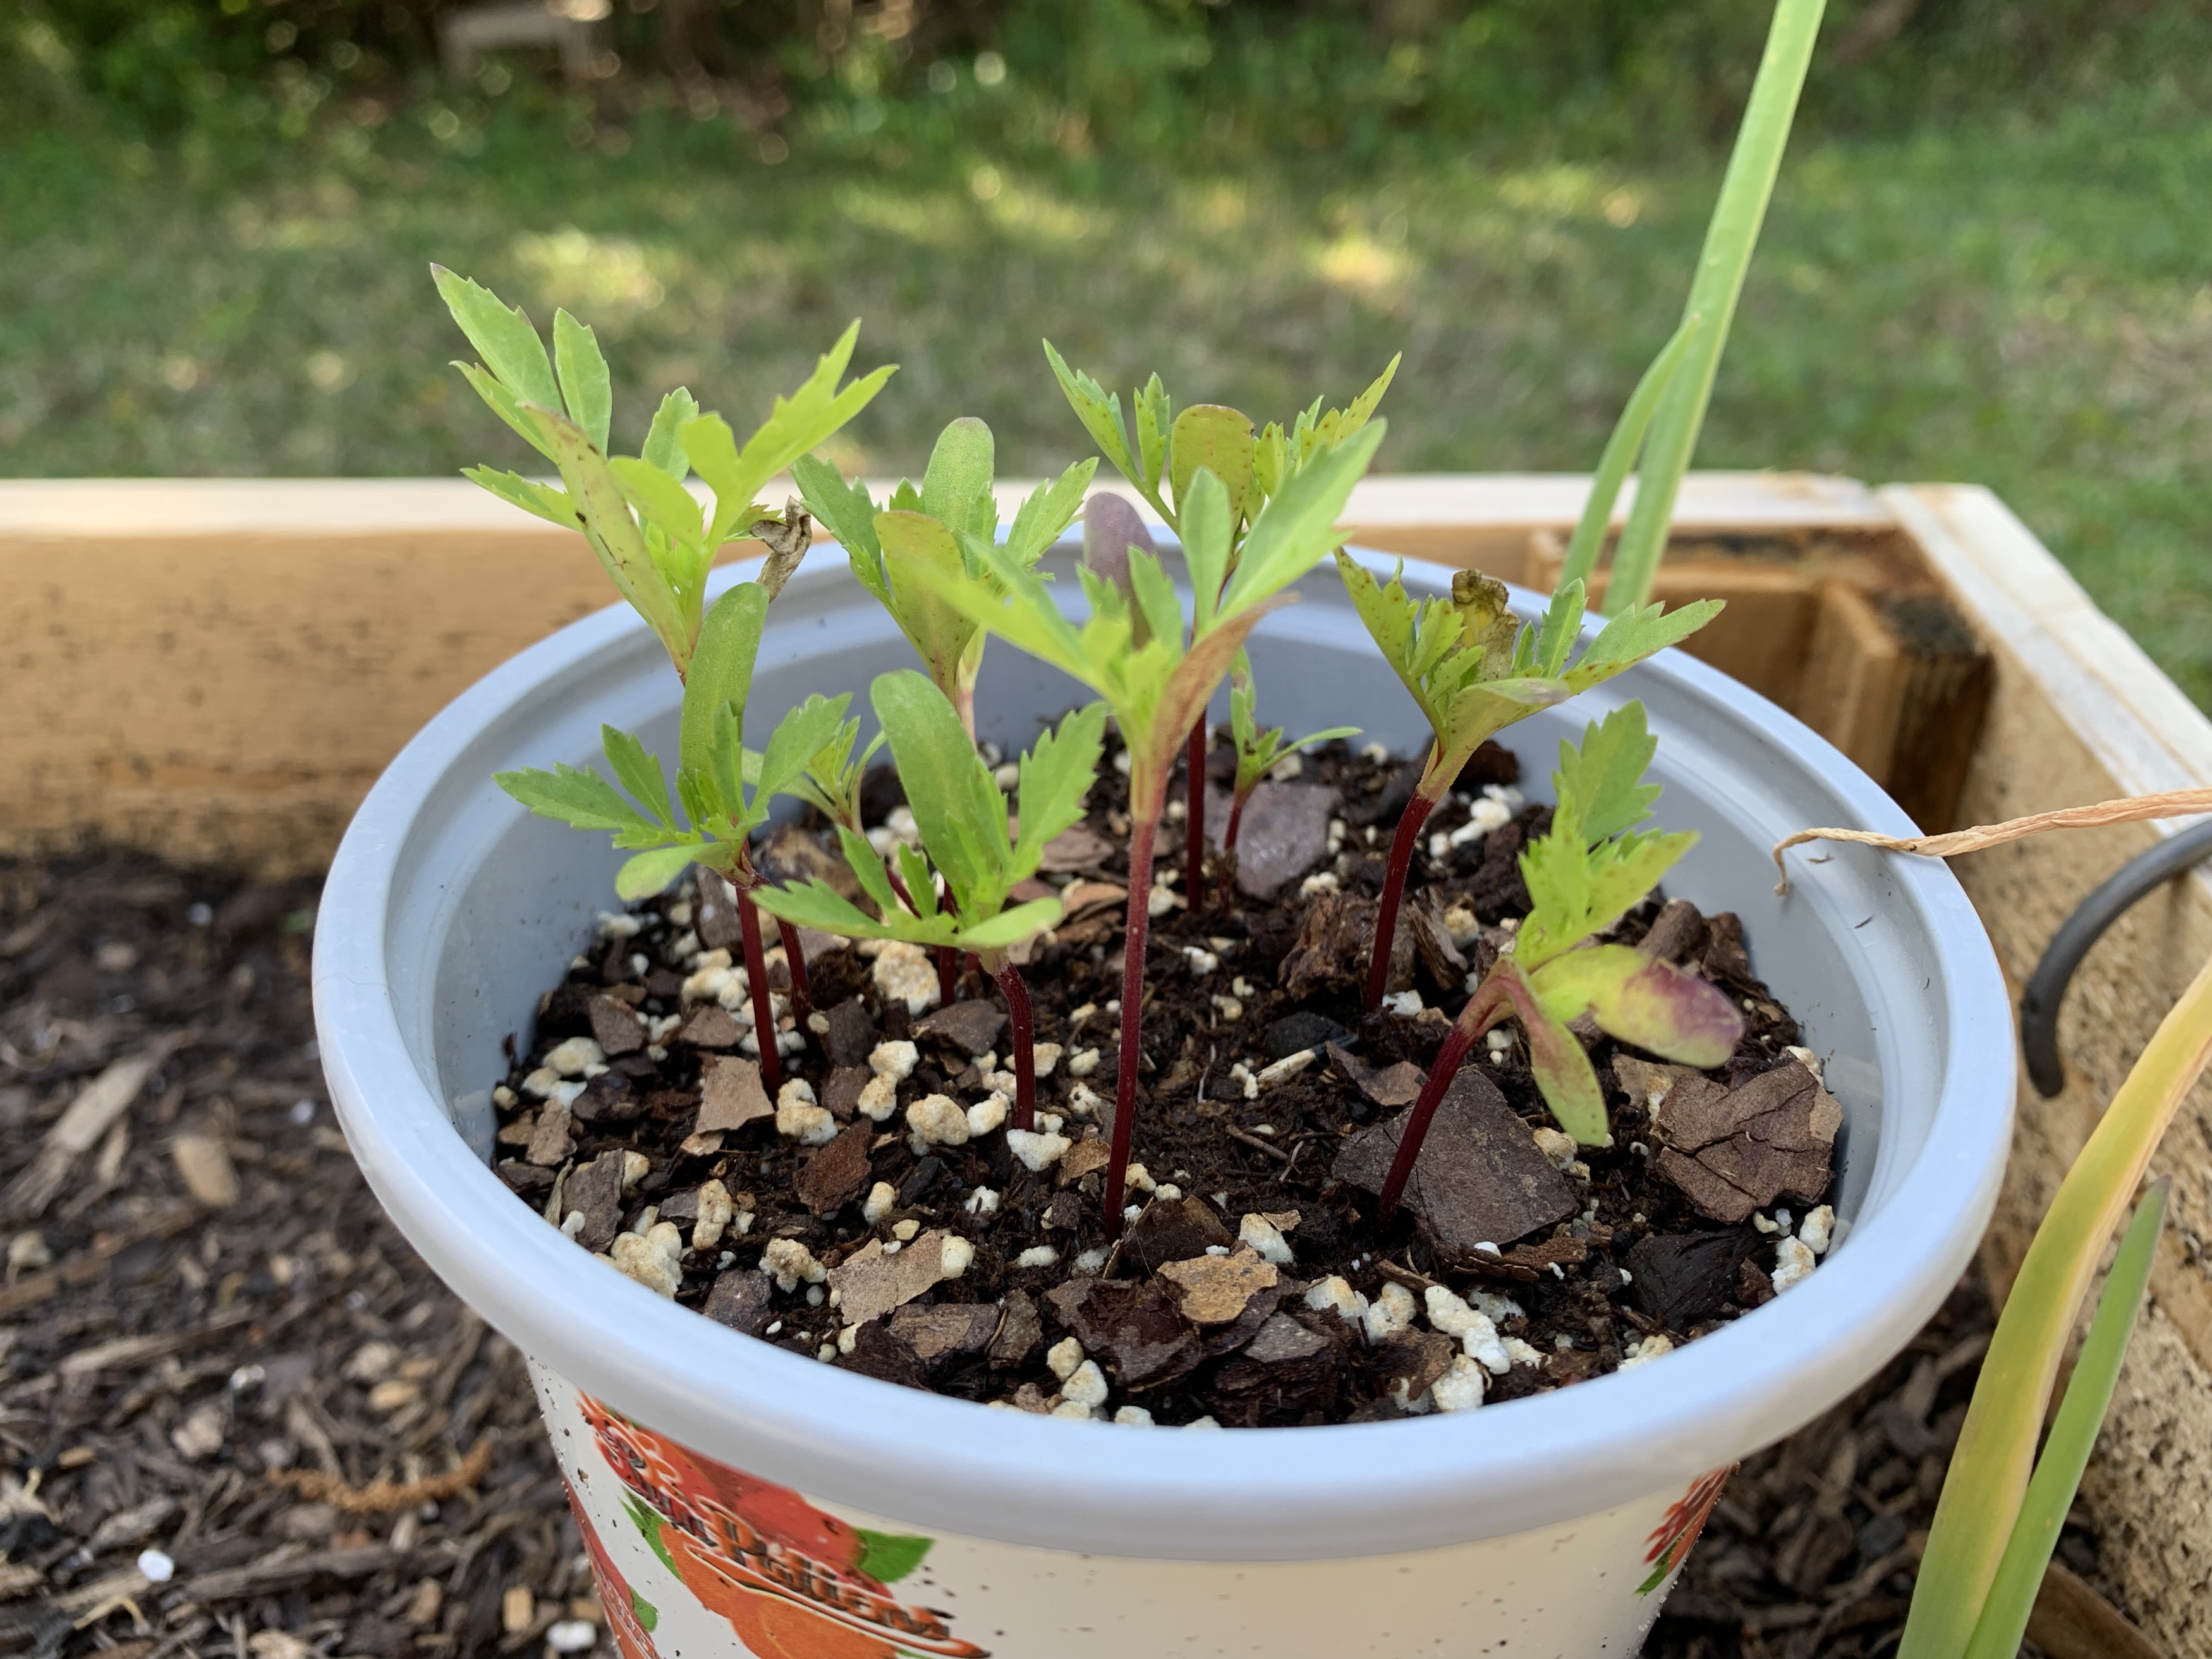
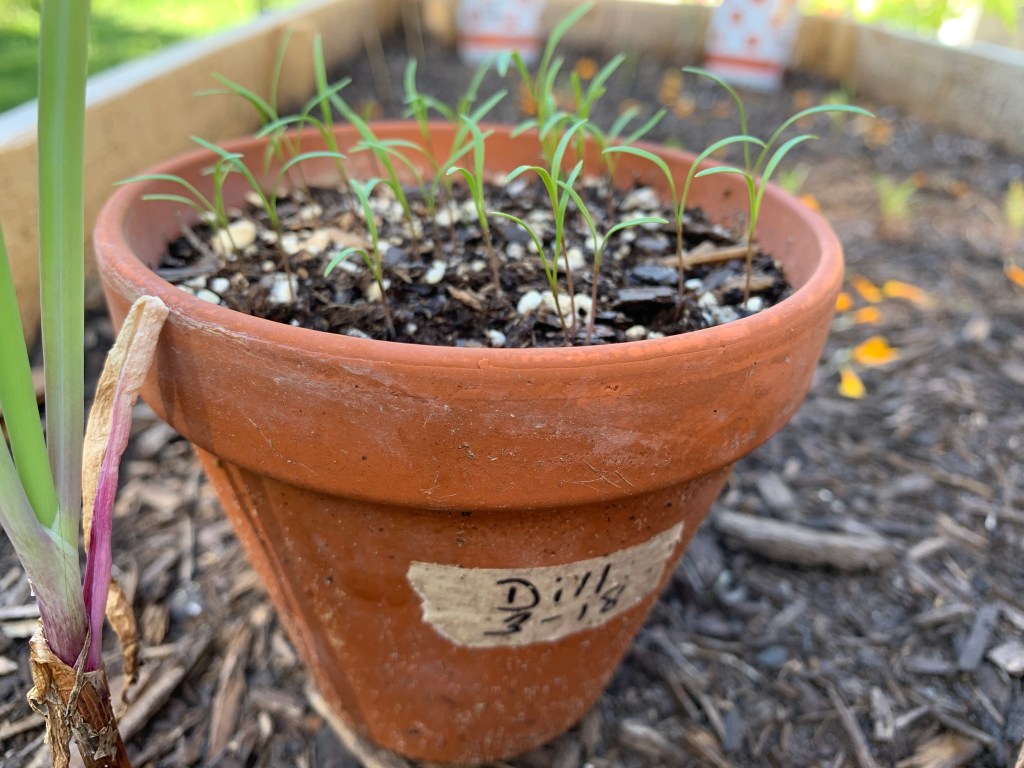
Growing Dill
I always grew dill in my northern garden, but have not had luck growing it here in Florida. I do have a few small seedlings in the grow boxes, and now have dill sprouting in this terra cotta pot.
Because I don’t have much luck growing dill, I have chosen to grow fennel. It is similar in that it also grows tall and feathery and has flowers that attract beneficial bugs. Also the Swallowtail butterfly will leave her eggs on fennel, just like parsley and dill.
Dill seedlings
I needed up putting the dill into the potato garden and planted more dill seeds in a large pot.
Cherry Tomatoes
My cherry tomato seedlings were not doing much at first, but now in May they are large plants. I’ve transplanted them a few times and they have little tomatoes on the vine.
Both tomato plants in their new potsPlants by the end of May
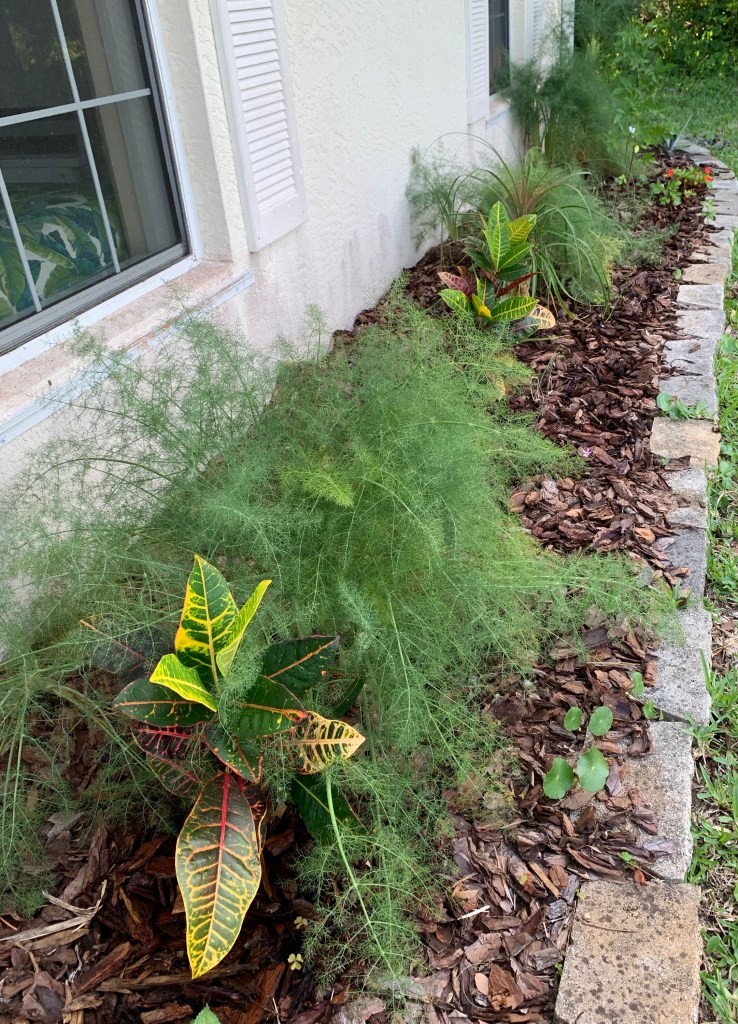
I’ve combined these two herbs in this post because one of them I can’t seem to grow. Because dill doesn’t like my yard, I’ve grown fennel in it’s place.
The two herbs are not interchangeable for cooking and seasoning, as they are both different, but as far as gardening goes, they are similar. They are both airy and lacy and have big yellow, open flowers that attract beneficials.
Dill
I first grew dill in my New Hampshire yard. I absolutely loved the flowers that came at the end of the season, which attracted good bugs. Here in Florida I have tried numerous times to grow it without success. This potted dill you see here was grown from seeds.
Aside from the fact that the raccoons dug around in the pot one night, it looks pretty good.
Fennel
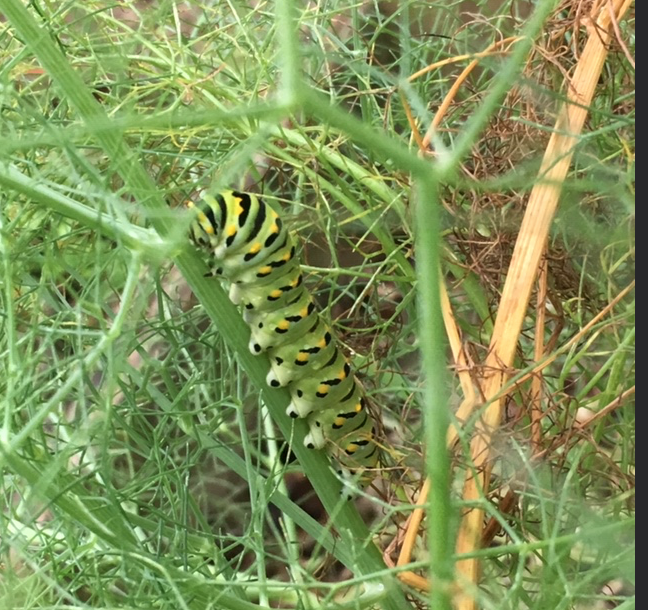
Fennel on the other hand grows all on it’s own. It is considered a perennial. It has successfully re-seeded itself in my front yard and I’ve seen caterpillars on it in past years. And often the stalks will last into the following year. Here in Florida that happens with many vegetables.
Unfortunately the brown lizards ate all the worms, so I didn’t see any turn into Swallowtail butterflies.
Parsley worm which will become a black swallowtail butterfly
Saving Seeds
Both dill and fennel have seeds that form on the flowers and are very easy to save. Because I don’t have luck with dill, I have photos of fennel seeds only.
Fennel flowers turning to seeds
Fennel easily grows from seeds. I have some plants that have sprung up along the front of the house. This year I saw no caterpillars on them, but I like to have them just in case a butterfly comes by to lay her eggs.
May in my Florida vegetable and flower gardens. See what is growing well and what is not. Also advice on beginning plants from seeds.
Because there are no farm stands to buy Spring seedlings, I started my vegetables from seeds this year.
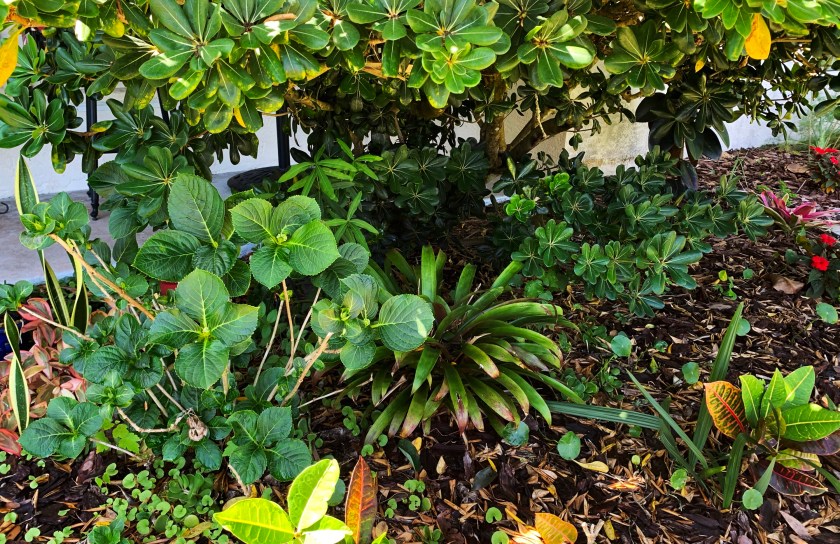
This page is an update on how my vegetables, and some flowers are growing. The hydrangea that I planted in the yard a few years ago is still doing well – surprisingly. See photos down the page.
Zucchini, Beans, Tomato, and Eggplant
Zucchini seeds were planted directly into a grow box. One plant is hanging on, the other two died. It is not growing well.
The beans are newly planted and doing very well. More about the beans further down the page.
The Cherry Tomato plants are thriving, and the eggplant (not from seeds) is giving me little eggplants.
Most plants have been in the ground, or transplanted to pots, for a few weeks now. We have not had much rain, so I water every day.
ZucchiniBush beansCherry tomatoJapanese eggplant
The Cherry Tomato Plants
All of the cherry tomato plants were begun in eggshell pots. Depending on where they went when transplanted, it has really made a big difference in their growth.
tomato plant seedlingtwo tomato plants in garden box
the First Transplanting of the tomatoes
The little seedlings that went straight into the garden grow box are still quite small. In fact, one of them died.
The cherry tomato plants that were transplanted into small, individual pots began to thrive. I think I would plant seeds directly into these pots next time.
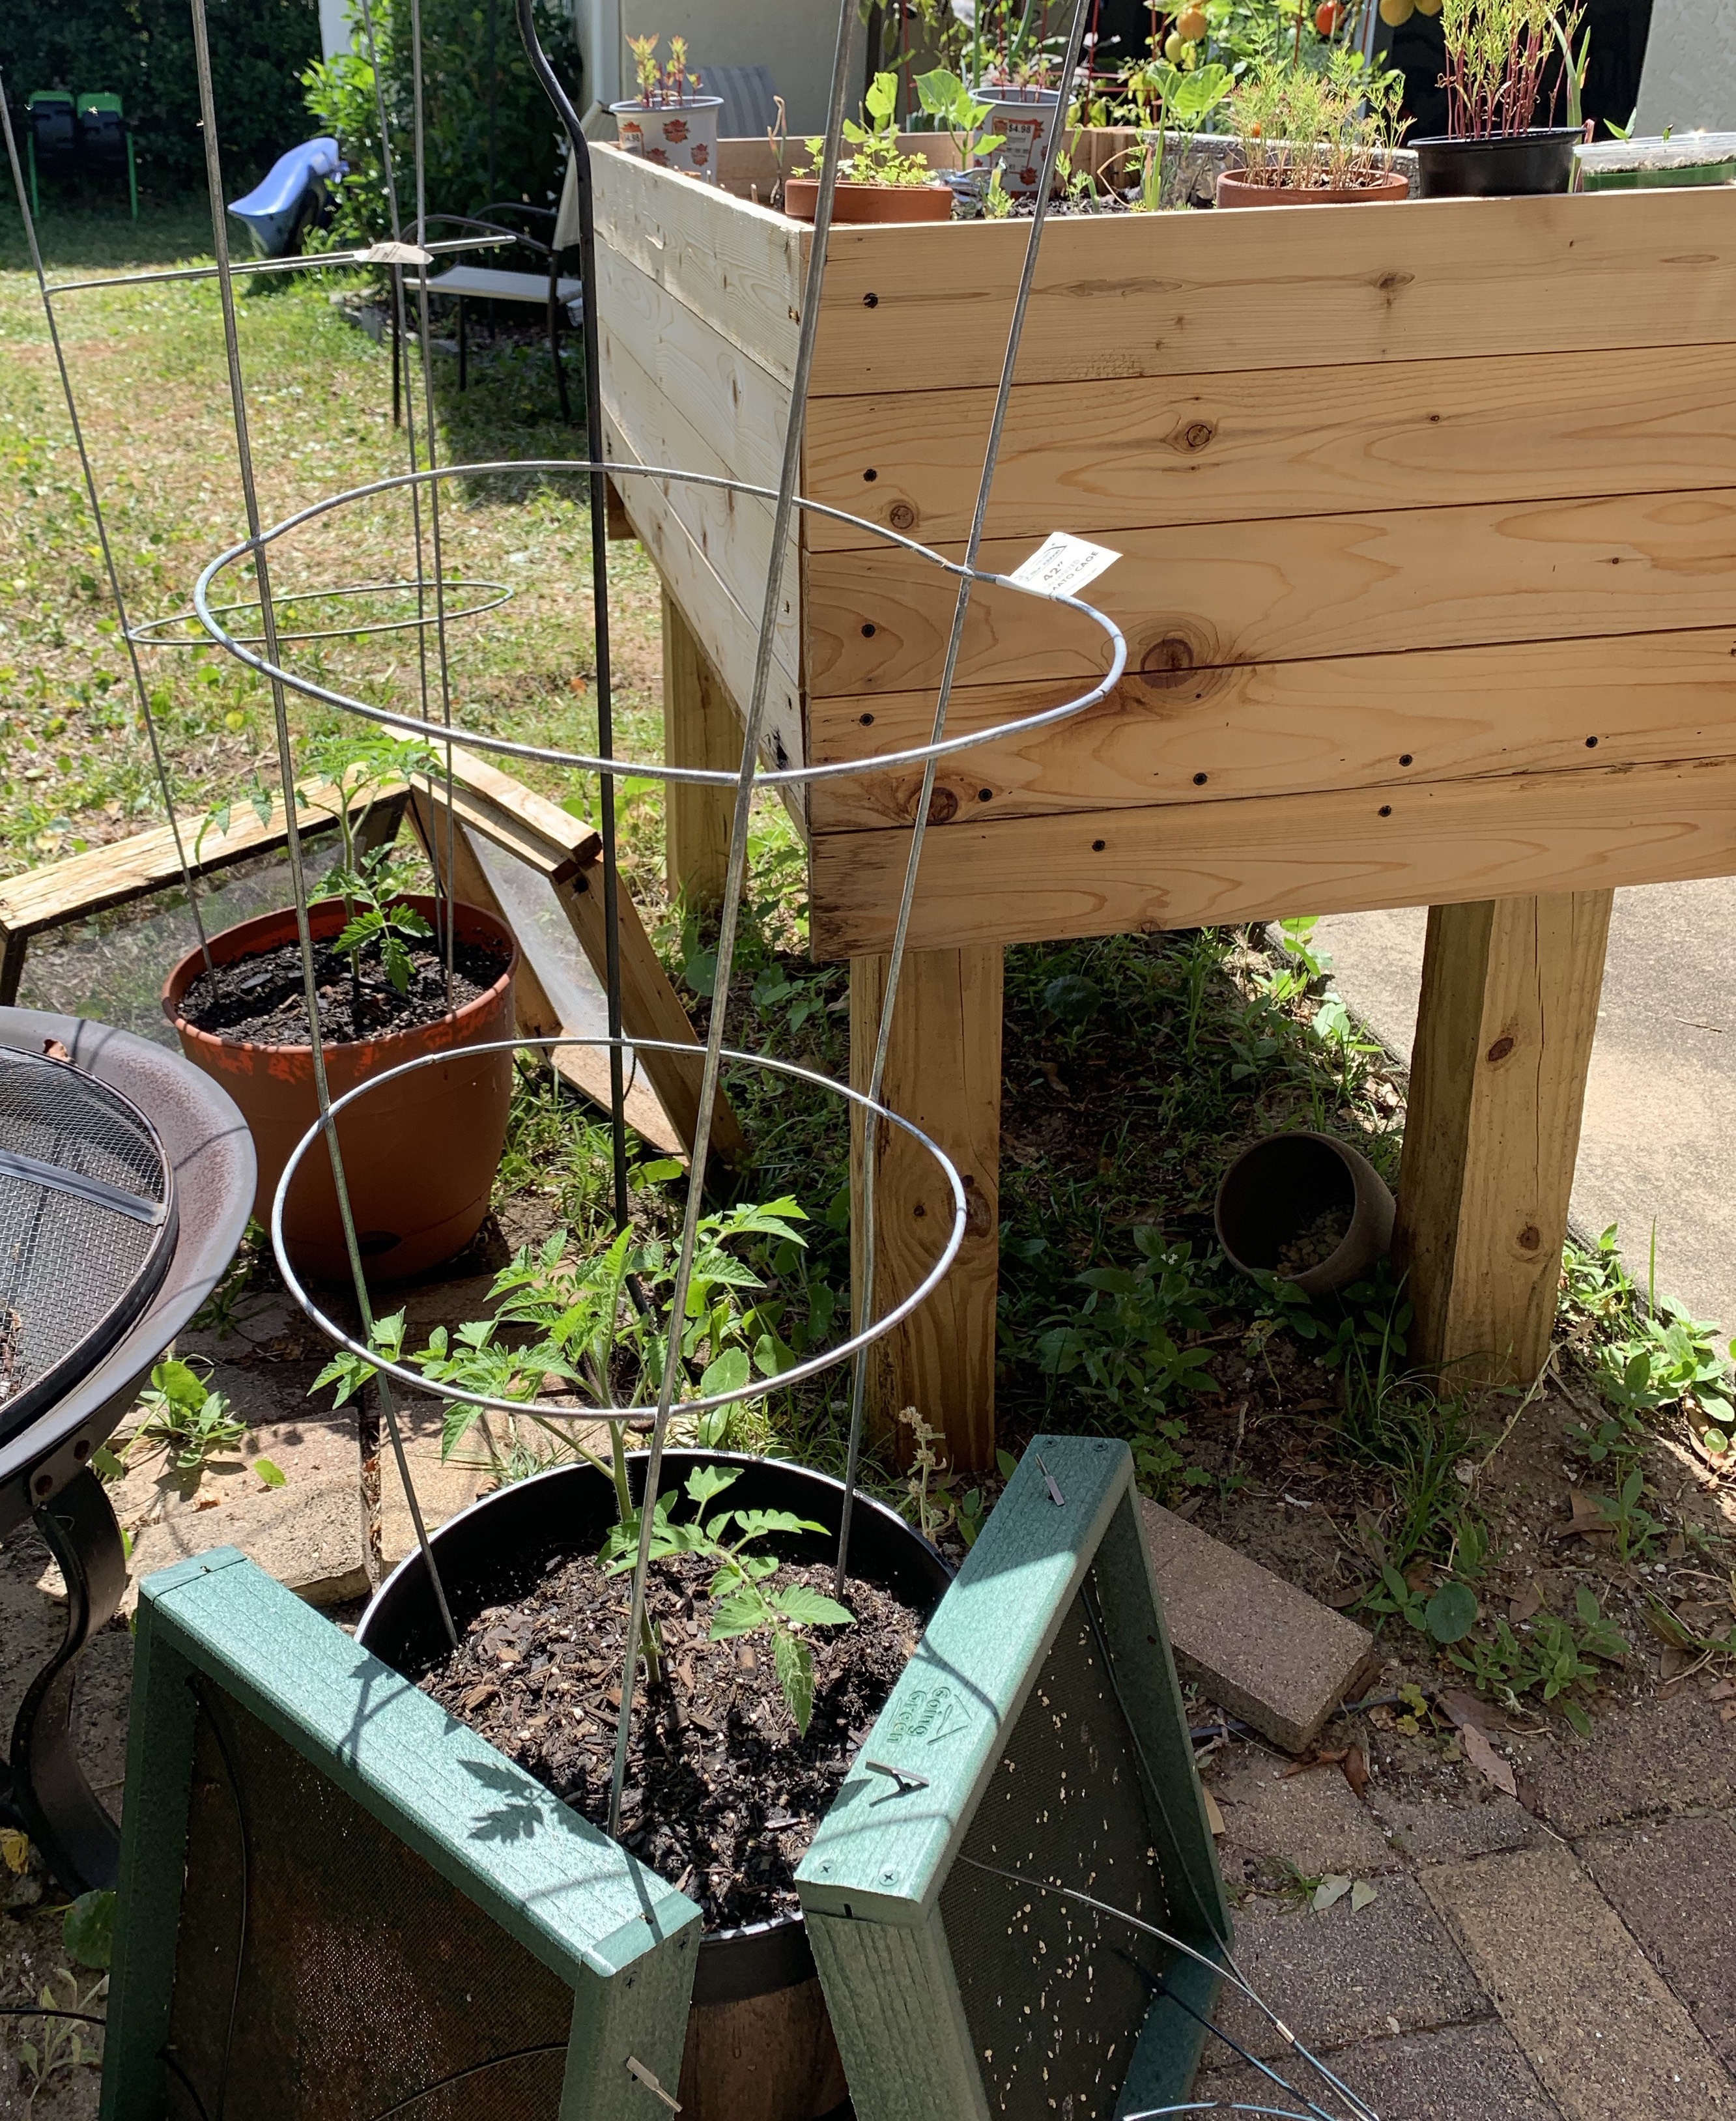
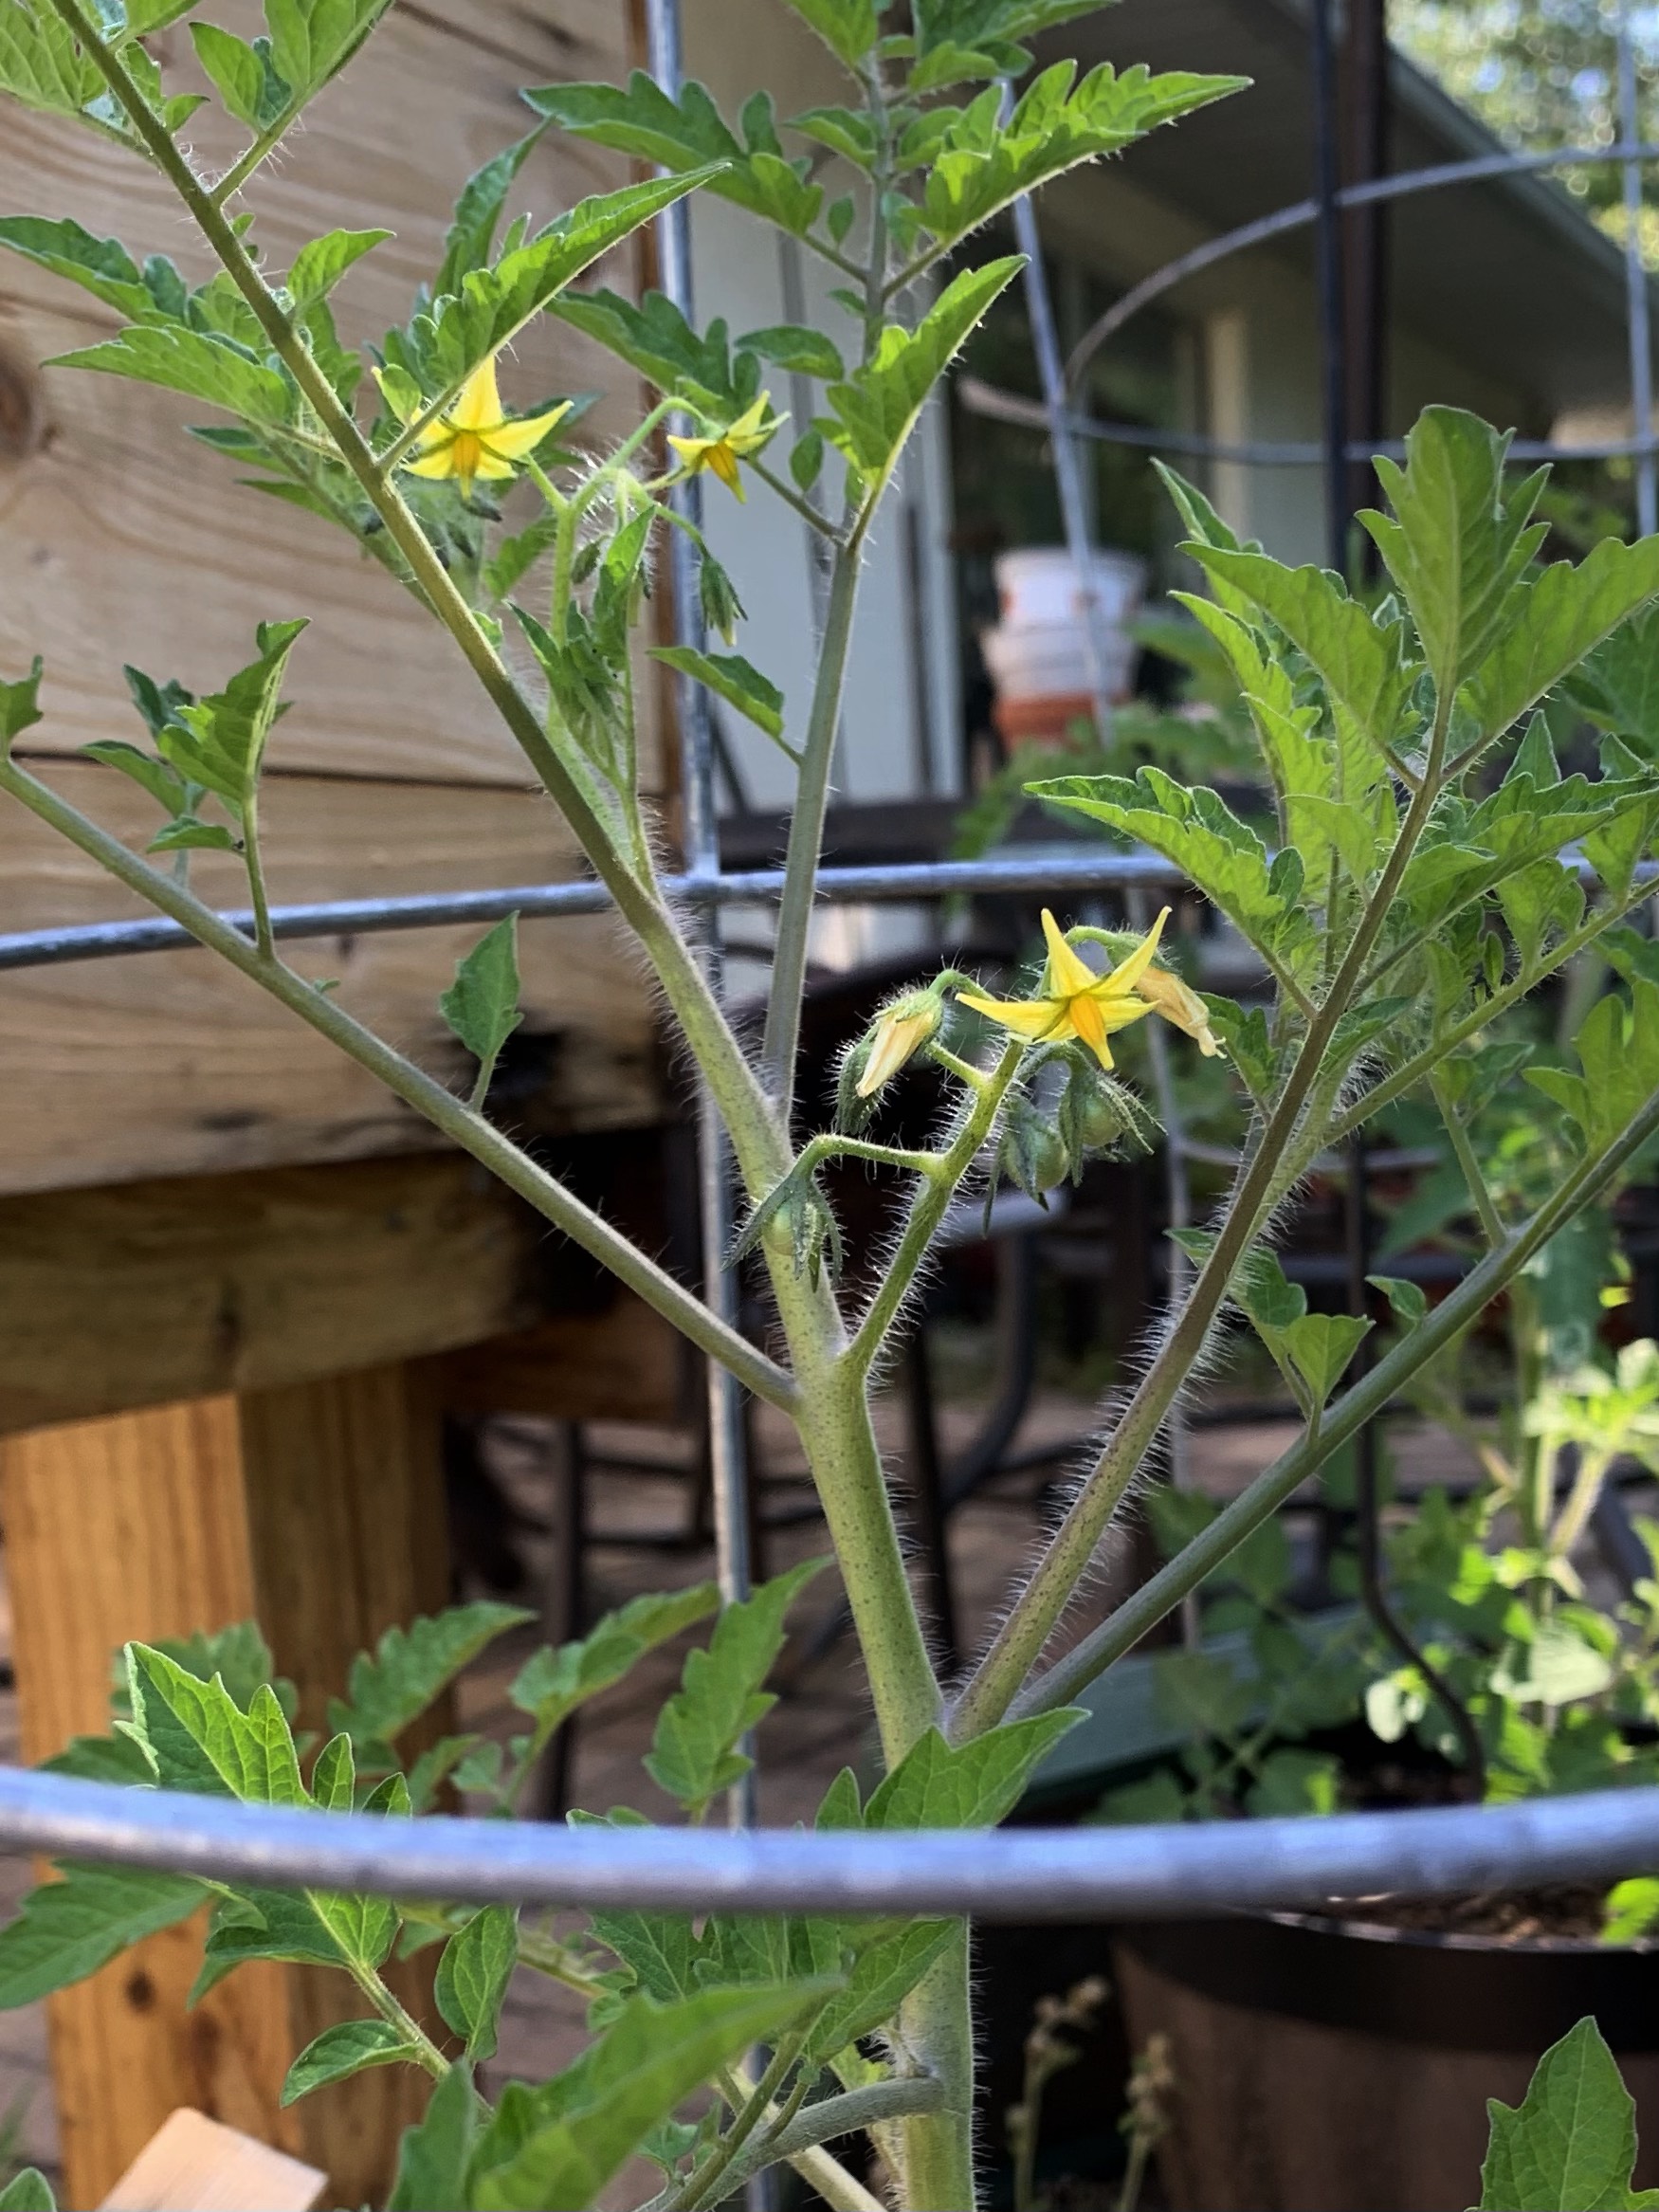
From the small pots they went into large patio pots where they will stay. Already they have flowers forming.
Transplanting into big pots in April
Bigger plants today
Tomato plant todayFlowering tomato plant
My suggestion
Planting the seeds in small pots (eggshells in my case) got the plants off to an early start in March, however… I would skip that next time and put the seeds straight into small 4-6” pots instead. Caring for the little eggshells was time consuming as they needed watering often.
But, it has made all the difference in the way I transplanted them. The plants in the garden box are not growing fast at all. The plants I transplanted twice – into good garden potting soil – are nearly ready to give me tomatoes.!
Jalepeño Pepper Plants
The pepper plants are doing nicely. It seems to be one thing that grows well in Florida, mainly because peppers like it hot. In New Hampshire it took way too long for the plants to grow to a size to begin producing – and by then the frosts came.
These jalepeño peppers are in small clay pots for now.
The Dirt Makes All The Difference
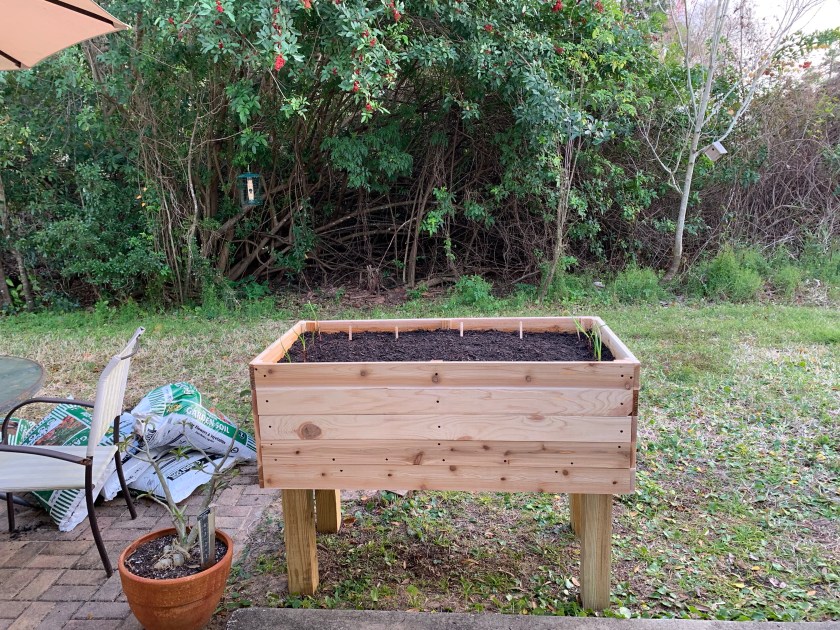
We set up new garden boxes in the yard this year. We mistakenly bought many bags of dirt at the local Home Depot that was not good soil. It was supposed to be added to already established beds. We dumped it into the grow boxes and raised beds. Nothing that has been planted in that soil has done well.
First plantings in April
All we can do is amend the soil with better dirt, so that is what I am doing. But it is too late for the seeds and seedlings struggling in those boxes.
The Black Gold brand is what I had good luck with – this is an Amazon affiliate link. But the Black Gold is expensive if you need to fill a large box or raised bed. I plan to make my own compost and amend the soil with that. Dirt can be improved, but it might take time. Here in Florida we can plant again in Fall.
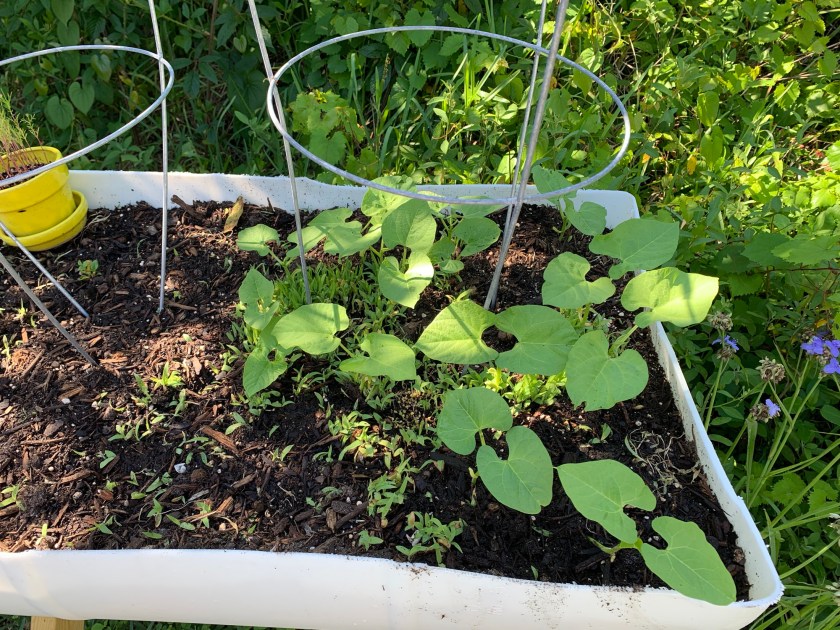
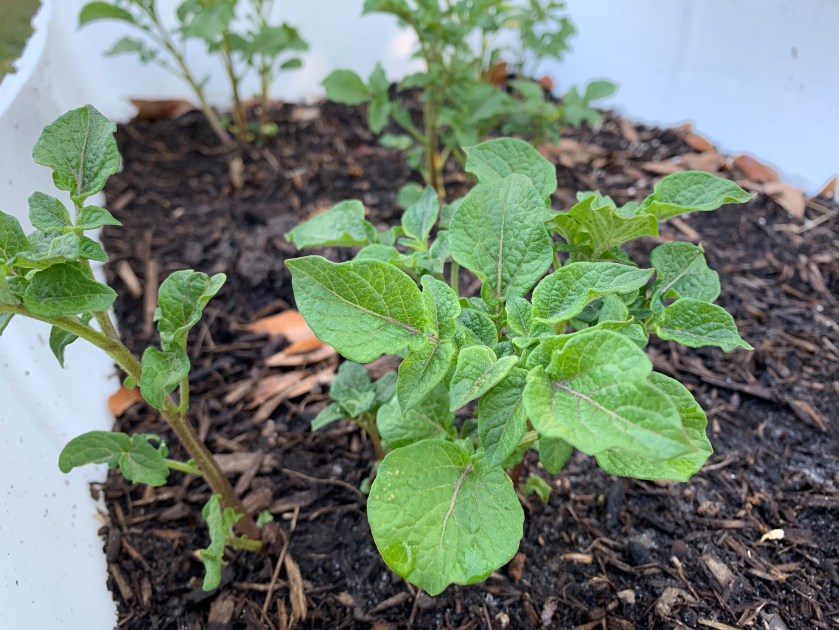
Potatoes and Green Beans
The white raised beds had been planted with potatoes. They were doing well until the cutworms arrived.
Most every potato stalk has died, so I am filling those two beds with bean seeds. Beans and potatoes are companion plants.
These are bush beans and do not need staking, but I put the cages in to keep animals from digging around in the dirt. Something climbs up into the beds at night and digs. I’ve already lost a couple bean seedlings.
Beans do okay with heat, so I am hoping they will grow throughout the summer.
Eggplant
I’m having better luck with the Japanese eggplant than I did with the regular eggplant. The old one grew into a small tree and only gave me a few eggplants to eat.
At the end of last year I planted this Japanese eggplant plant. I bought it as a small plant.
It has consistently given me little eggplants to enjoy. It quit producing over winter, but now it is going strong. The eggplants are small but are the perfect size for me.
Japanese eggplant
No Luck With These
Carrots – they are simply not growing
Cucumber – small vines, curling cukes
Beets – leaves totally eaten by something
Older Garden Boxes
The eggplant is growing in one box, with peppers in the center box and a scraggly tomato plant in the third. I’m waiting for all the tomatoes to turn red and then the plant will be ripped out. It doesn’t have many leaves and is not doing well. All these plants had to be covered at night all winter, and they did not like those colder temps.
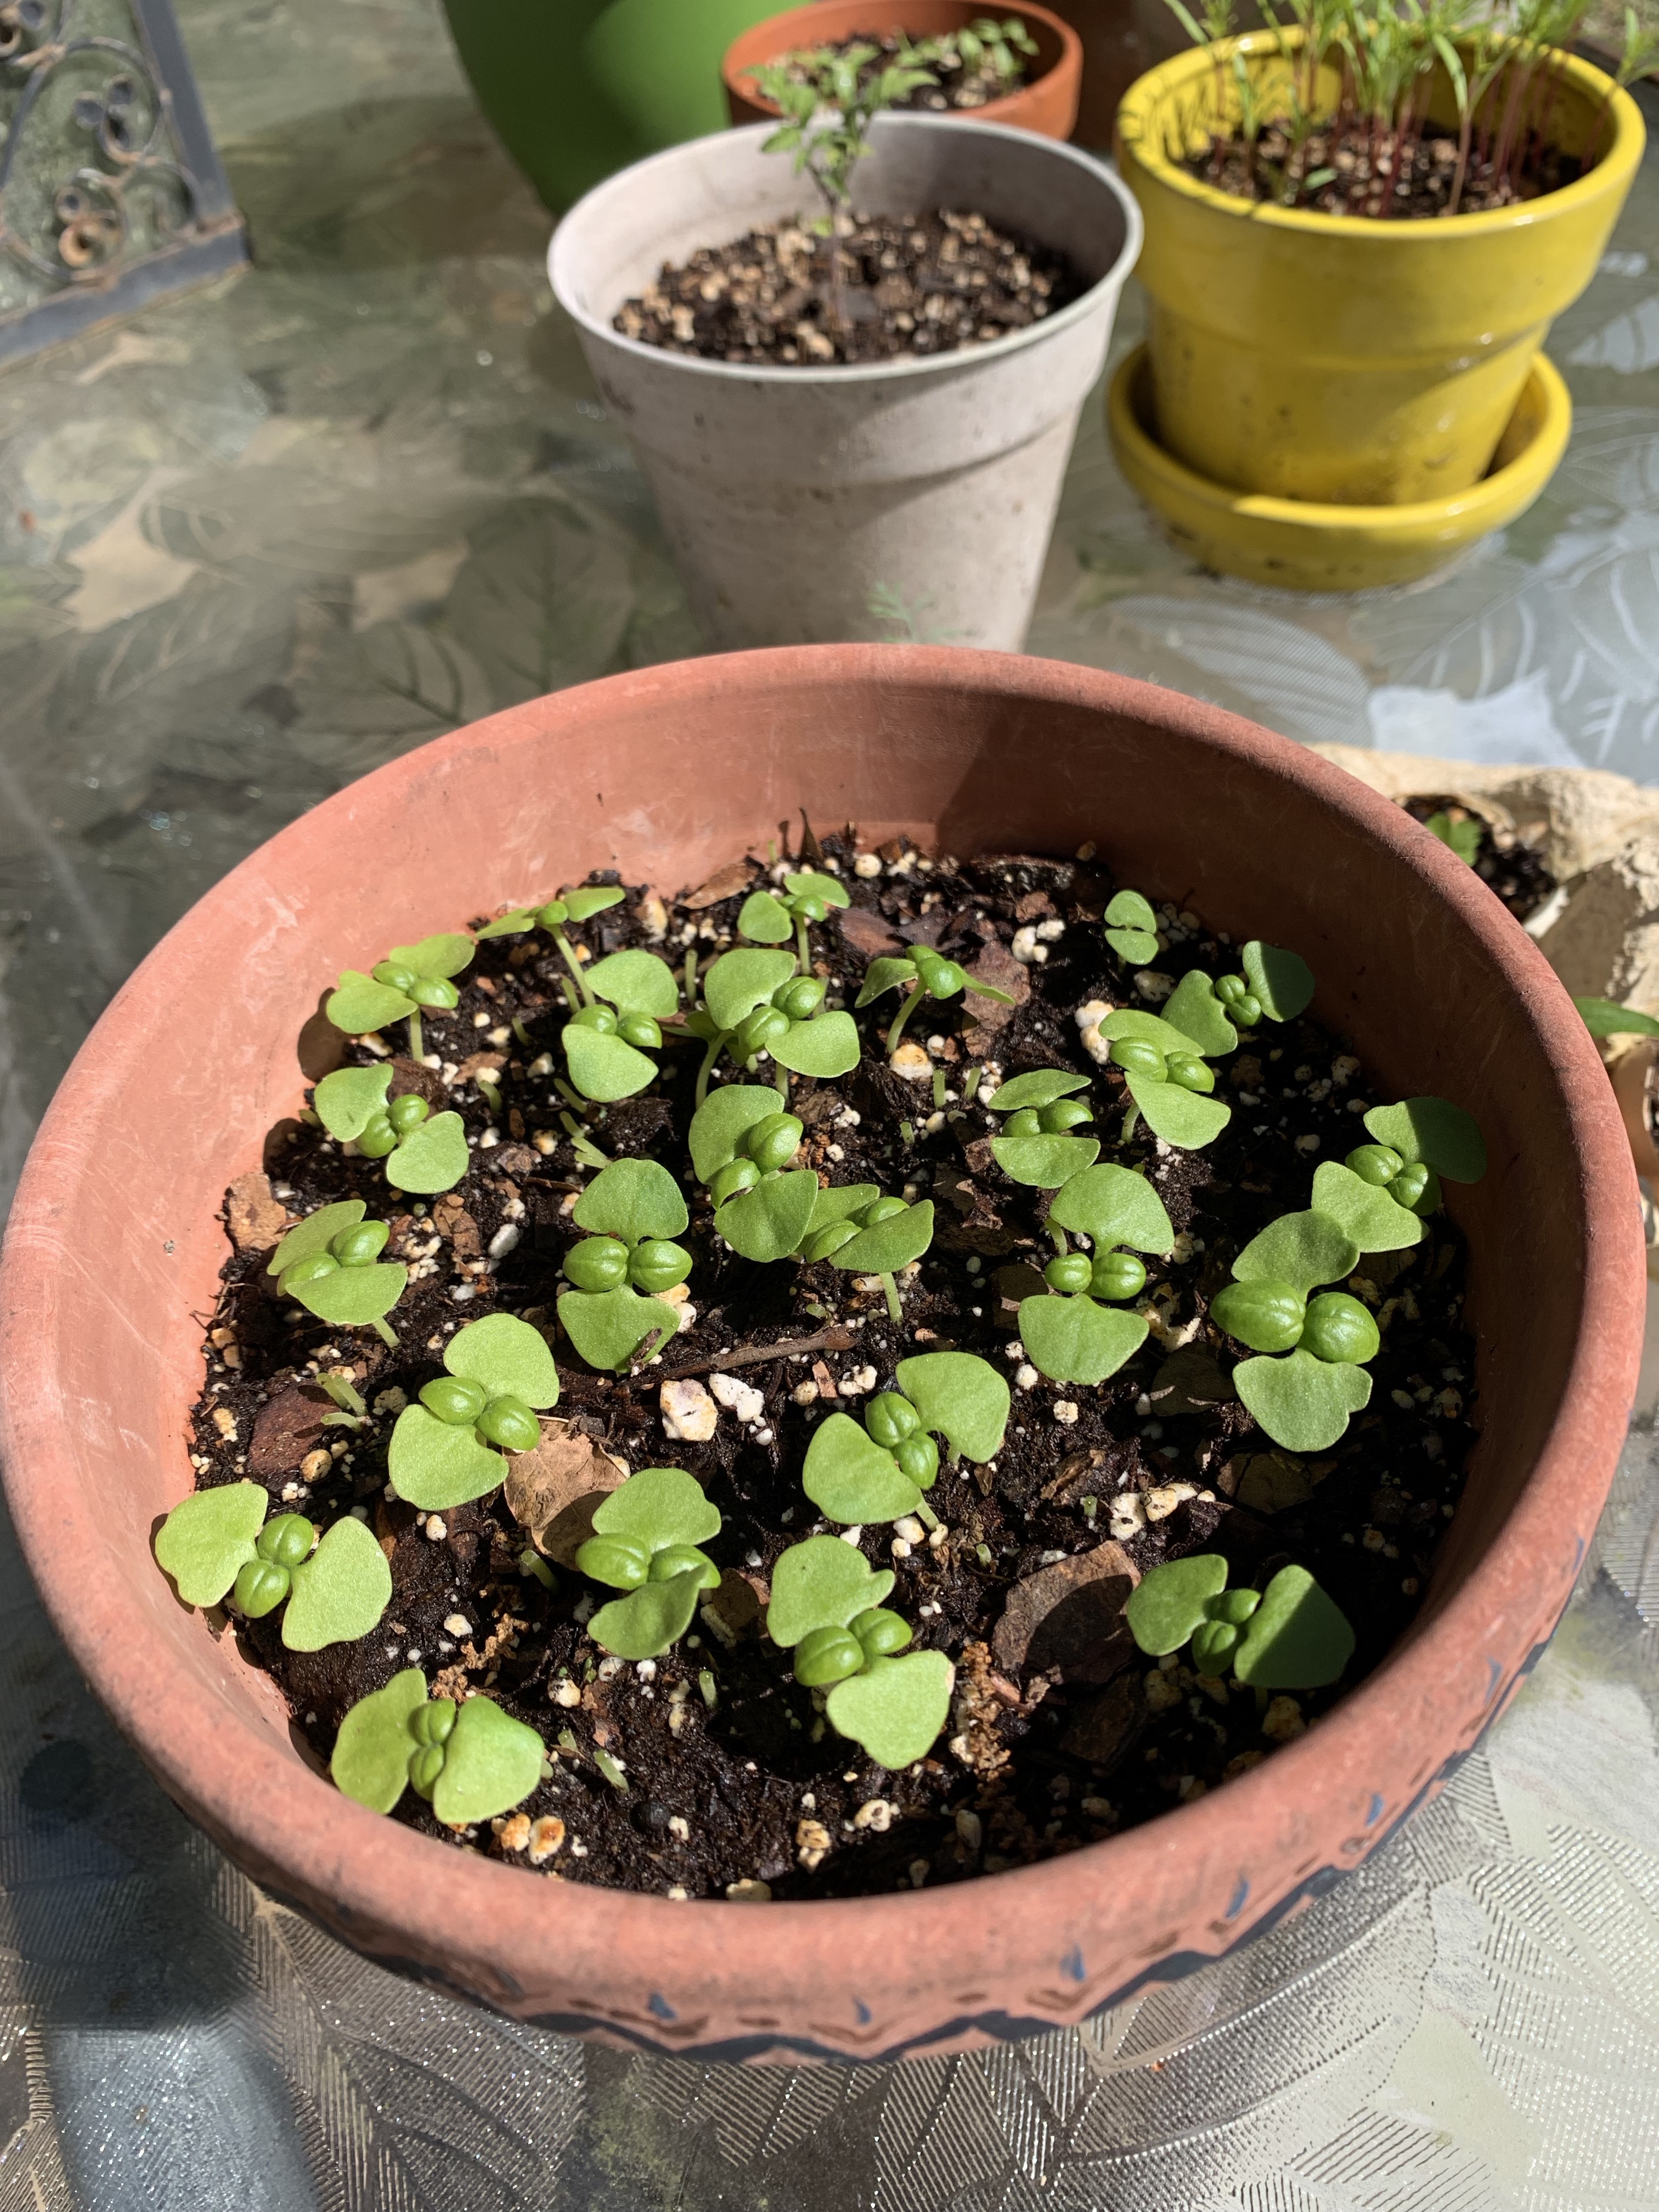
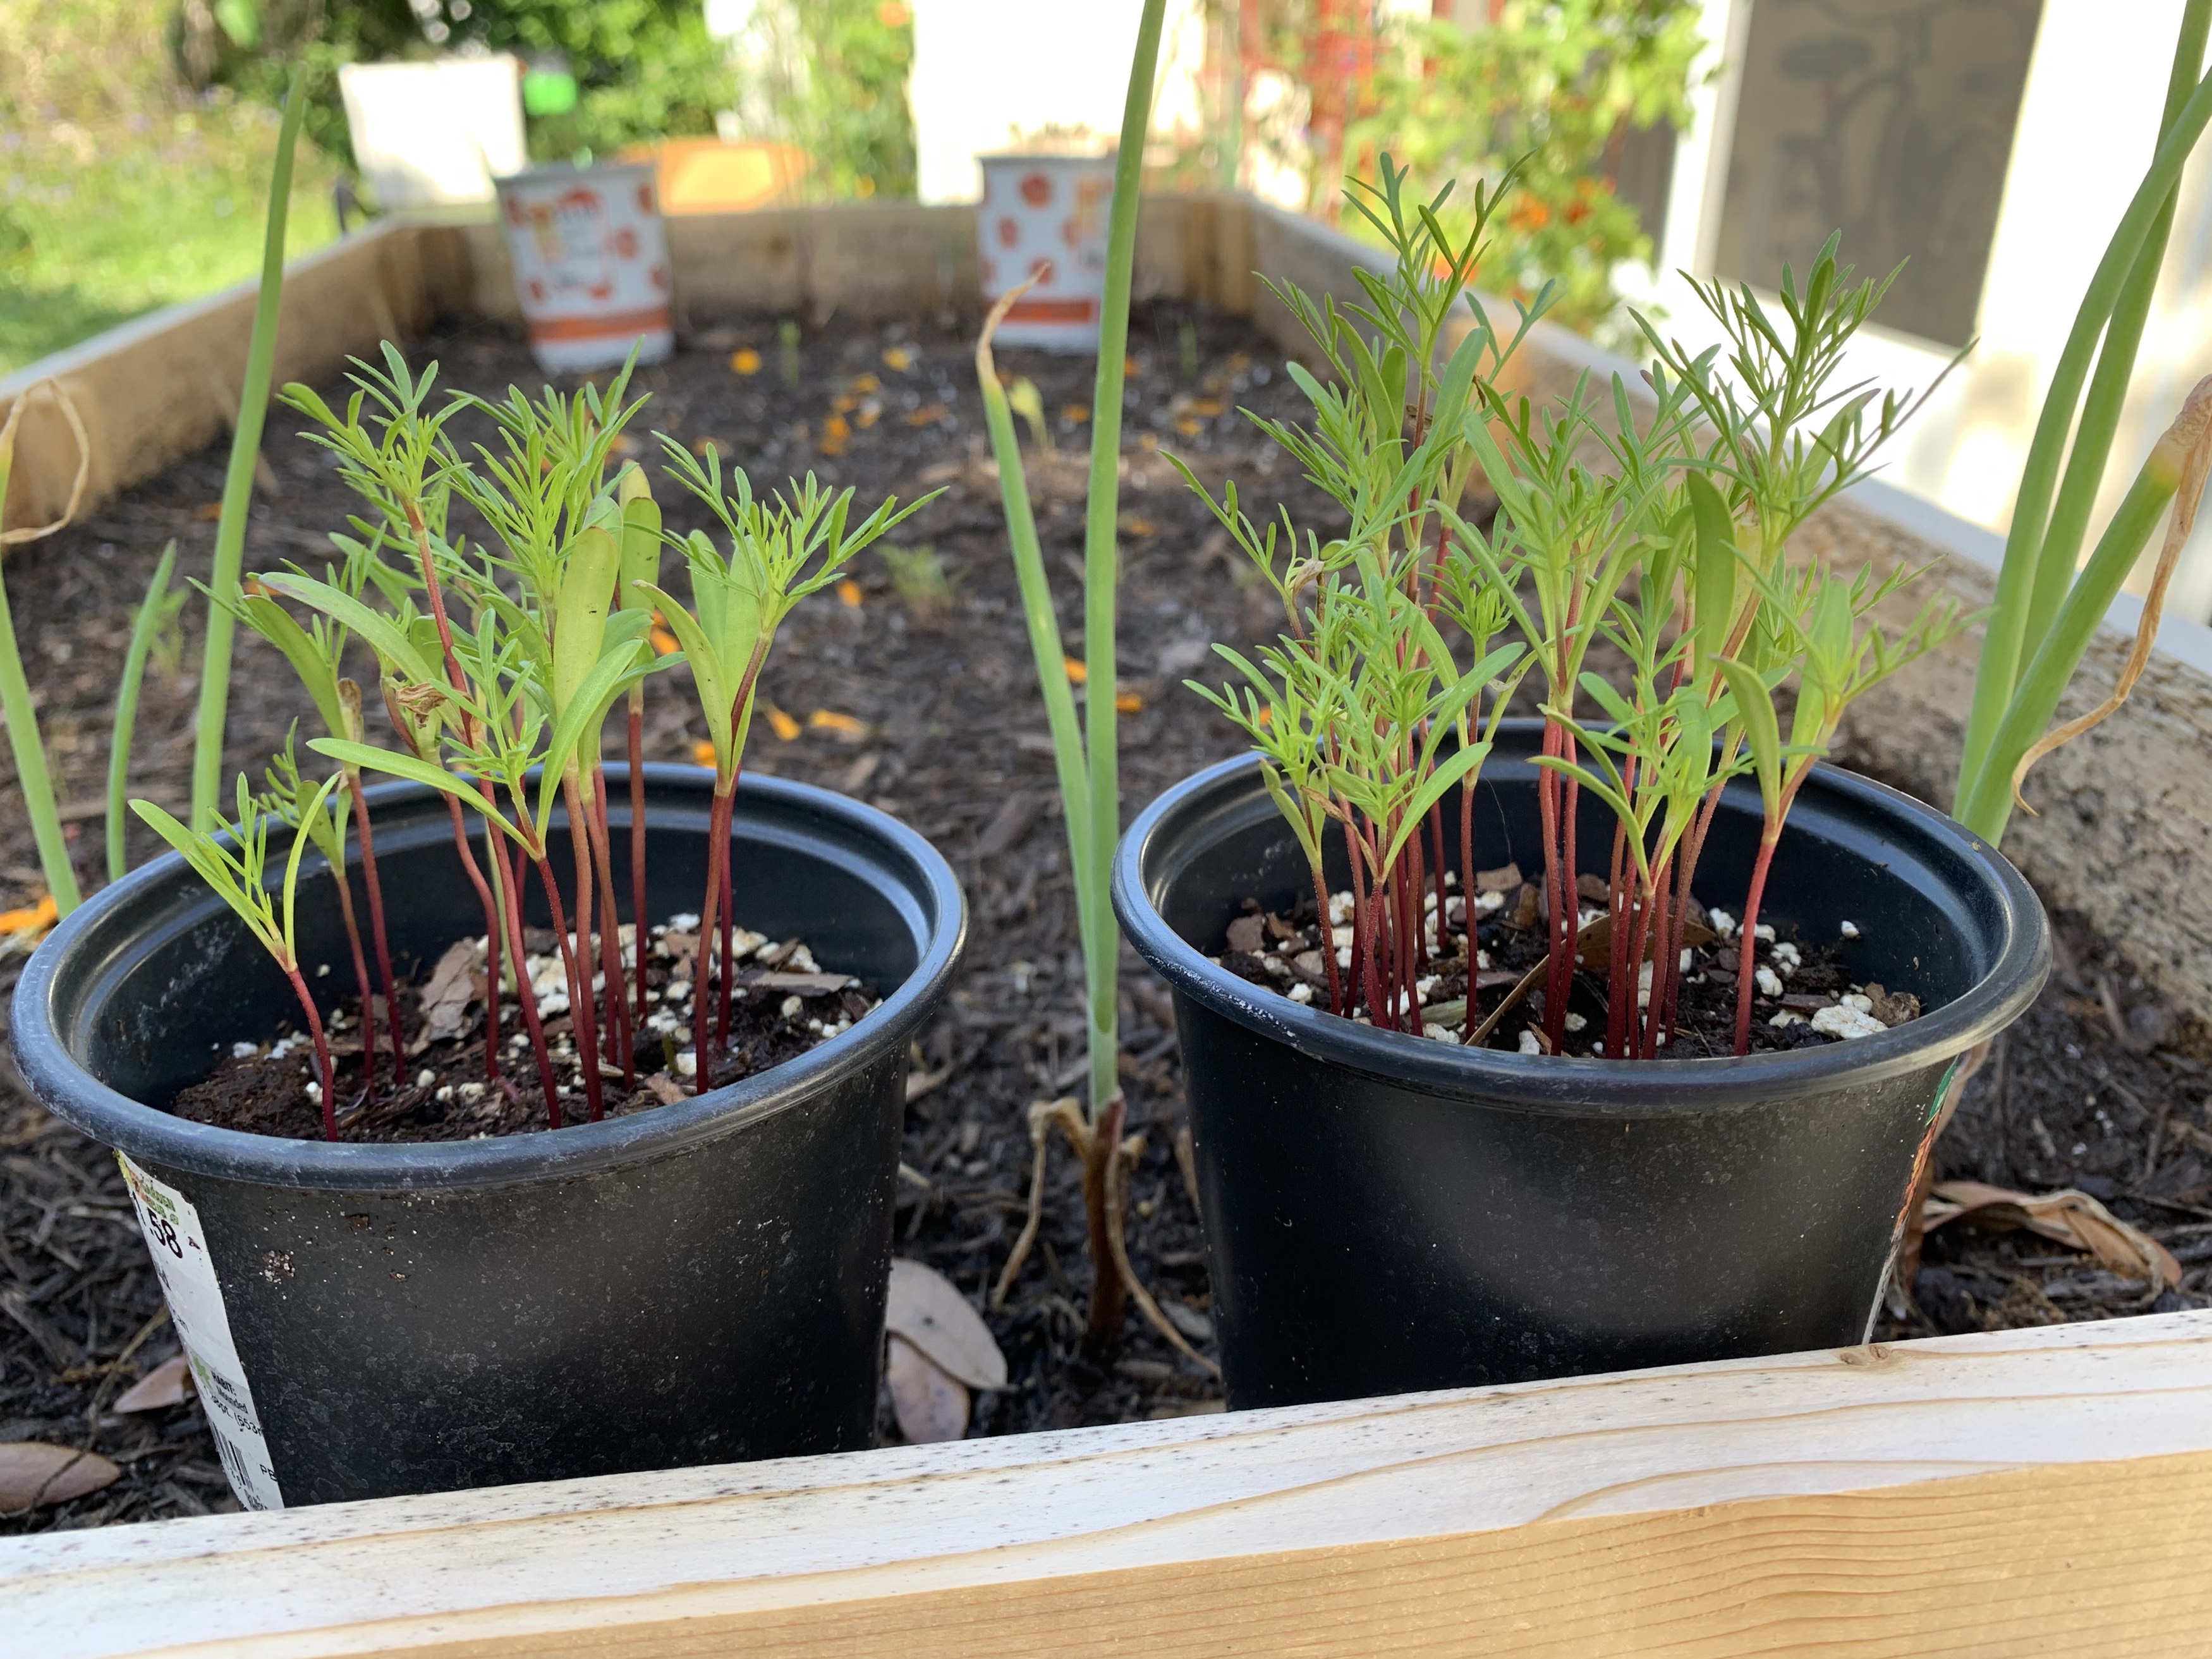
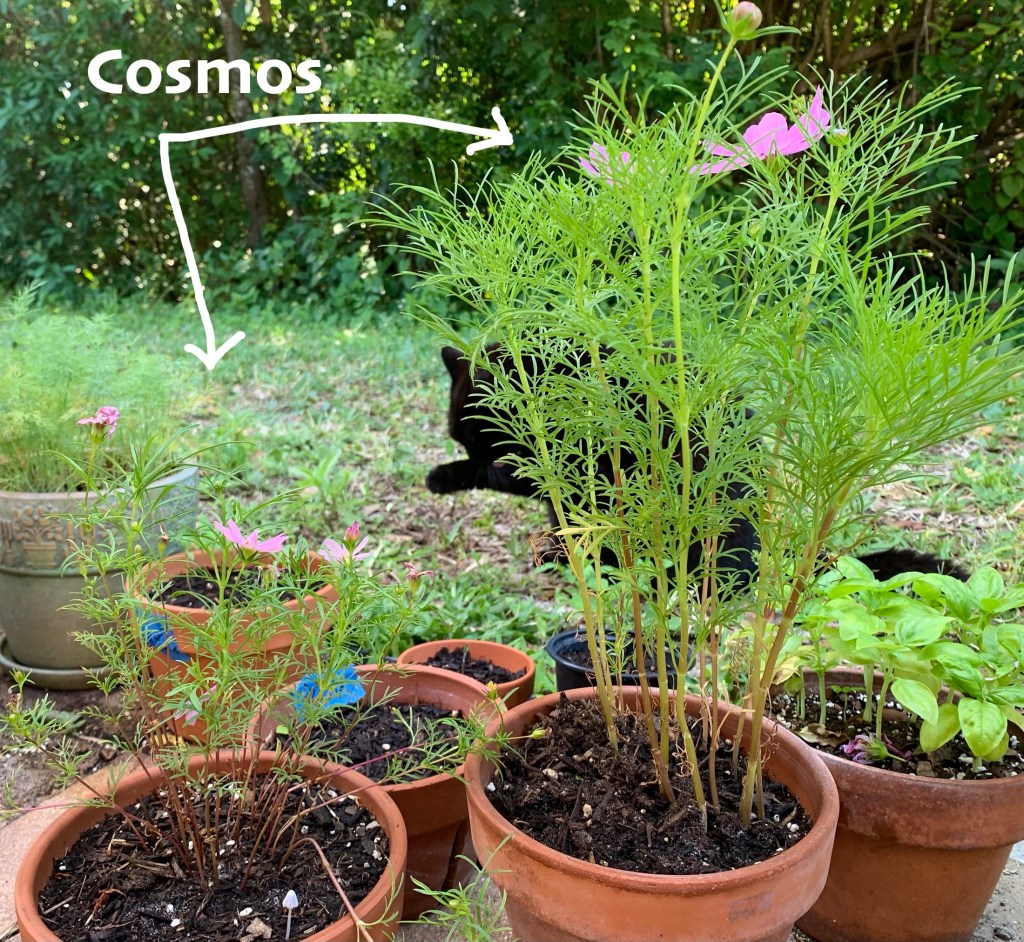
Growing Cosmos From Seeds
Plant the cosmos seeds in good dirt in a larger size pot. I began a few cosmos plants in eggshells, but they didn’t do well at all.
Directly sow seeds into big pots and they will create a pretty display.
In my photo here I have two pots and one is doing a lot better. It’s the dirt. The smaller plant was recently transplanted into good dirt and now I’m hopeful it will flourish.
The raccoons got into the other pot and dug up part of the seedlings. The ones left are blooming and look good.
The Hydrangea Plant in May
New leaves have grown on my one hydrangea plant and today I noticed there are about five tiny buds. The plant looks nice and healthy.
I am growing cherry tomato plants from seeds. The seedlings began growing in March and were started in eggshells. (See my post on eggshell gardening.)
This post contains affiliate links to products I’ve bought and recommend. I could earn a small amount if a purchase is made through my link – with no extra cost to the buyer.
From there, they went into either the container garden or single, larger pots. I’m all for trying different things to see which growing idea works out best. So far, the tomatoes in the big containers are not doing as well as the ones in their own pots.
The tomatoes growing in their own small pots are doing very well. Each day I take them off the patio table and set them in the sun, along with my basil, dill, cosmos and marigolds.
At night I put them back up on the table so the raccoons won’t mess with them.
Two small tomato plants are growing in the box below. One died, and the other is still fairly small. The tomatoes above in their own pots are doing much better.
Cherry tomato plants in grow bed
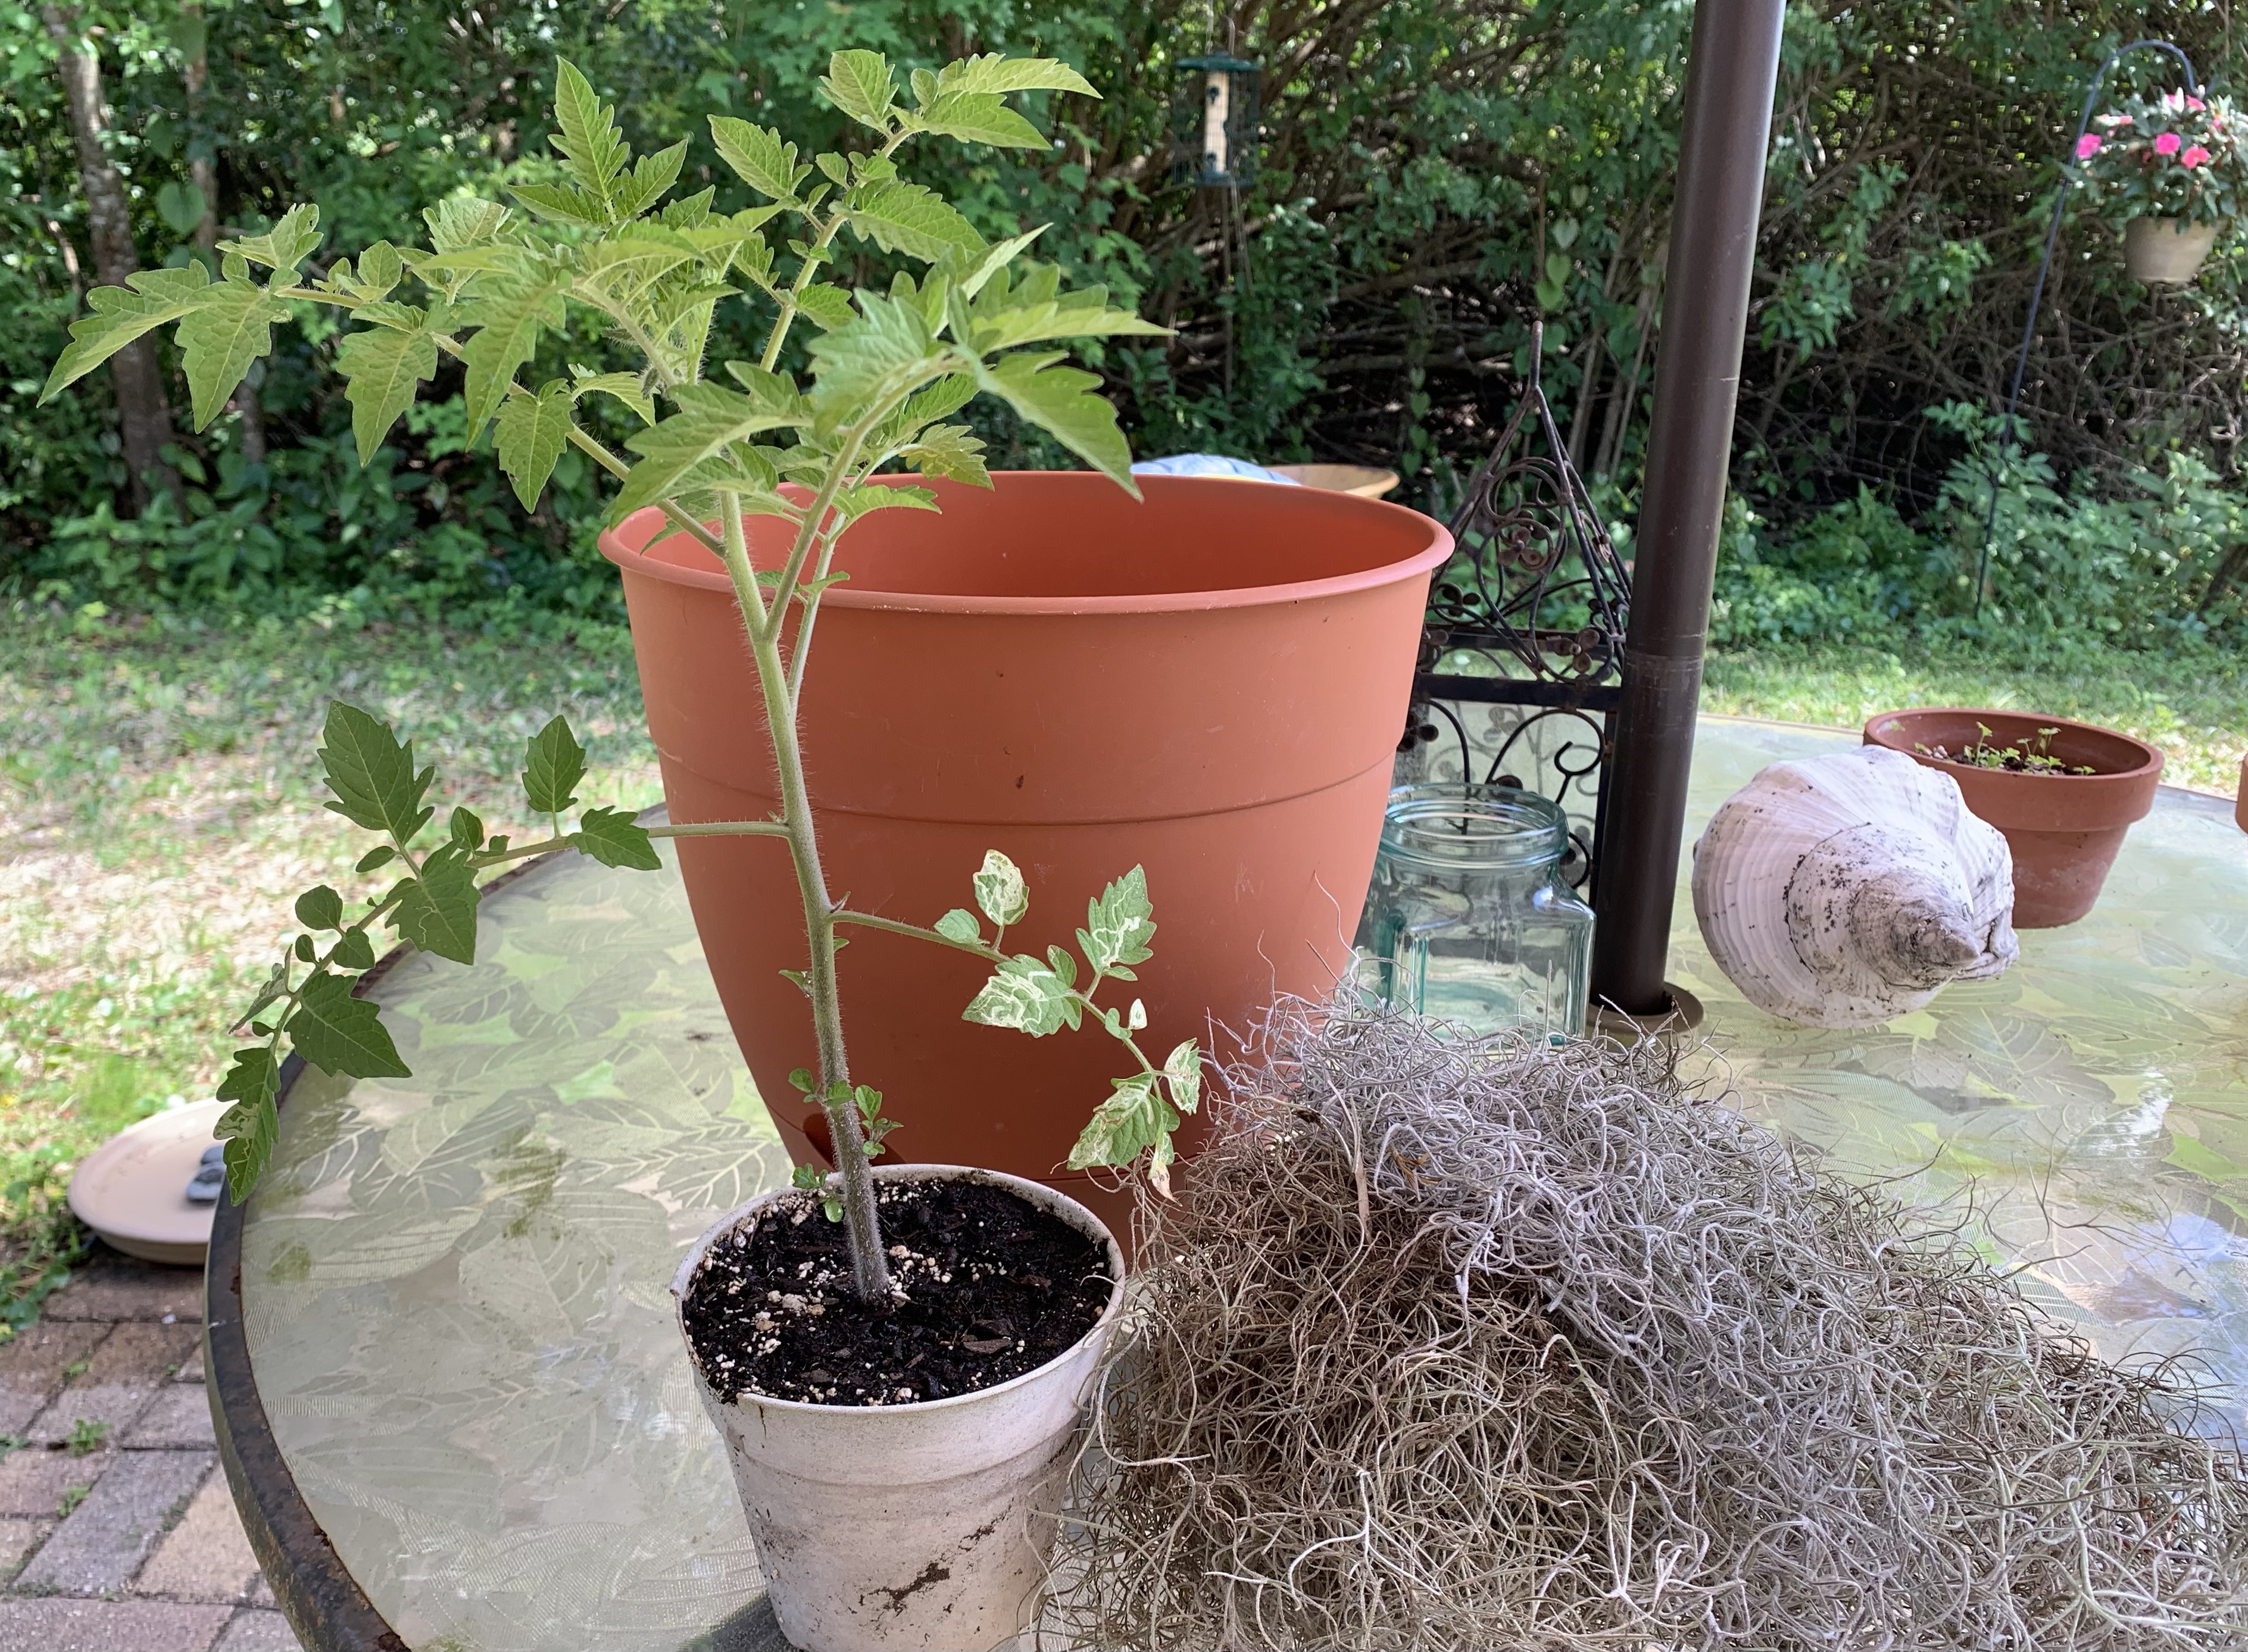
Transplanting in Florida
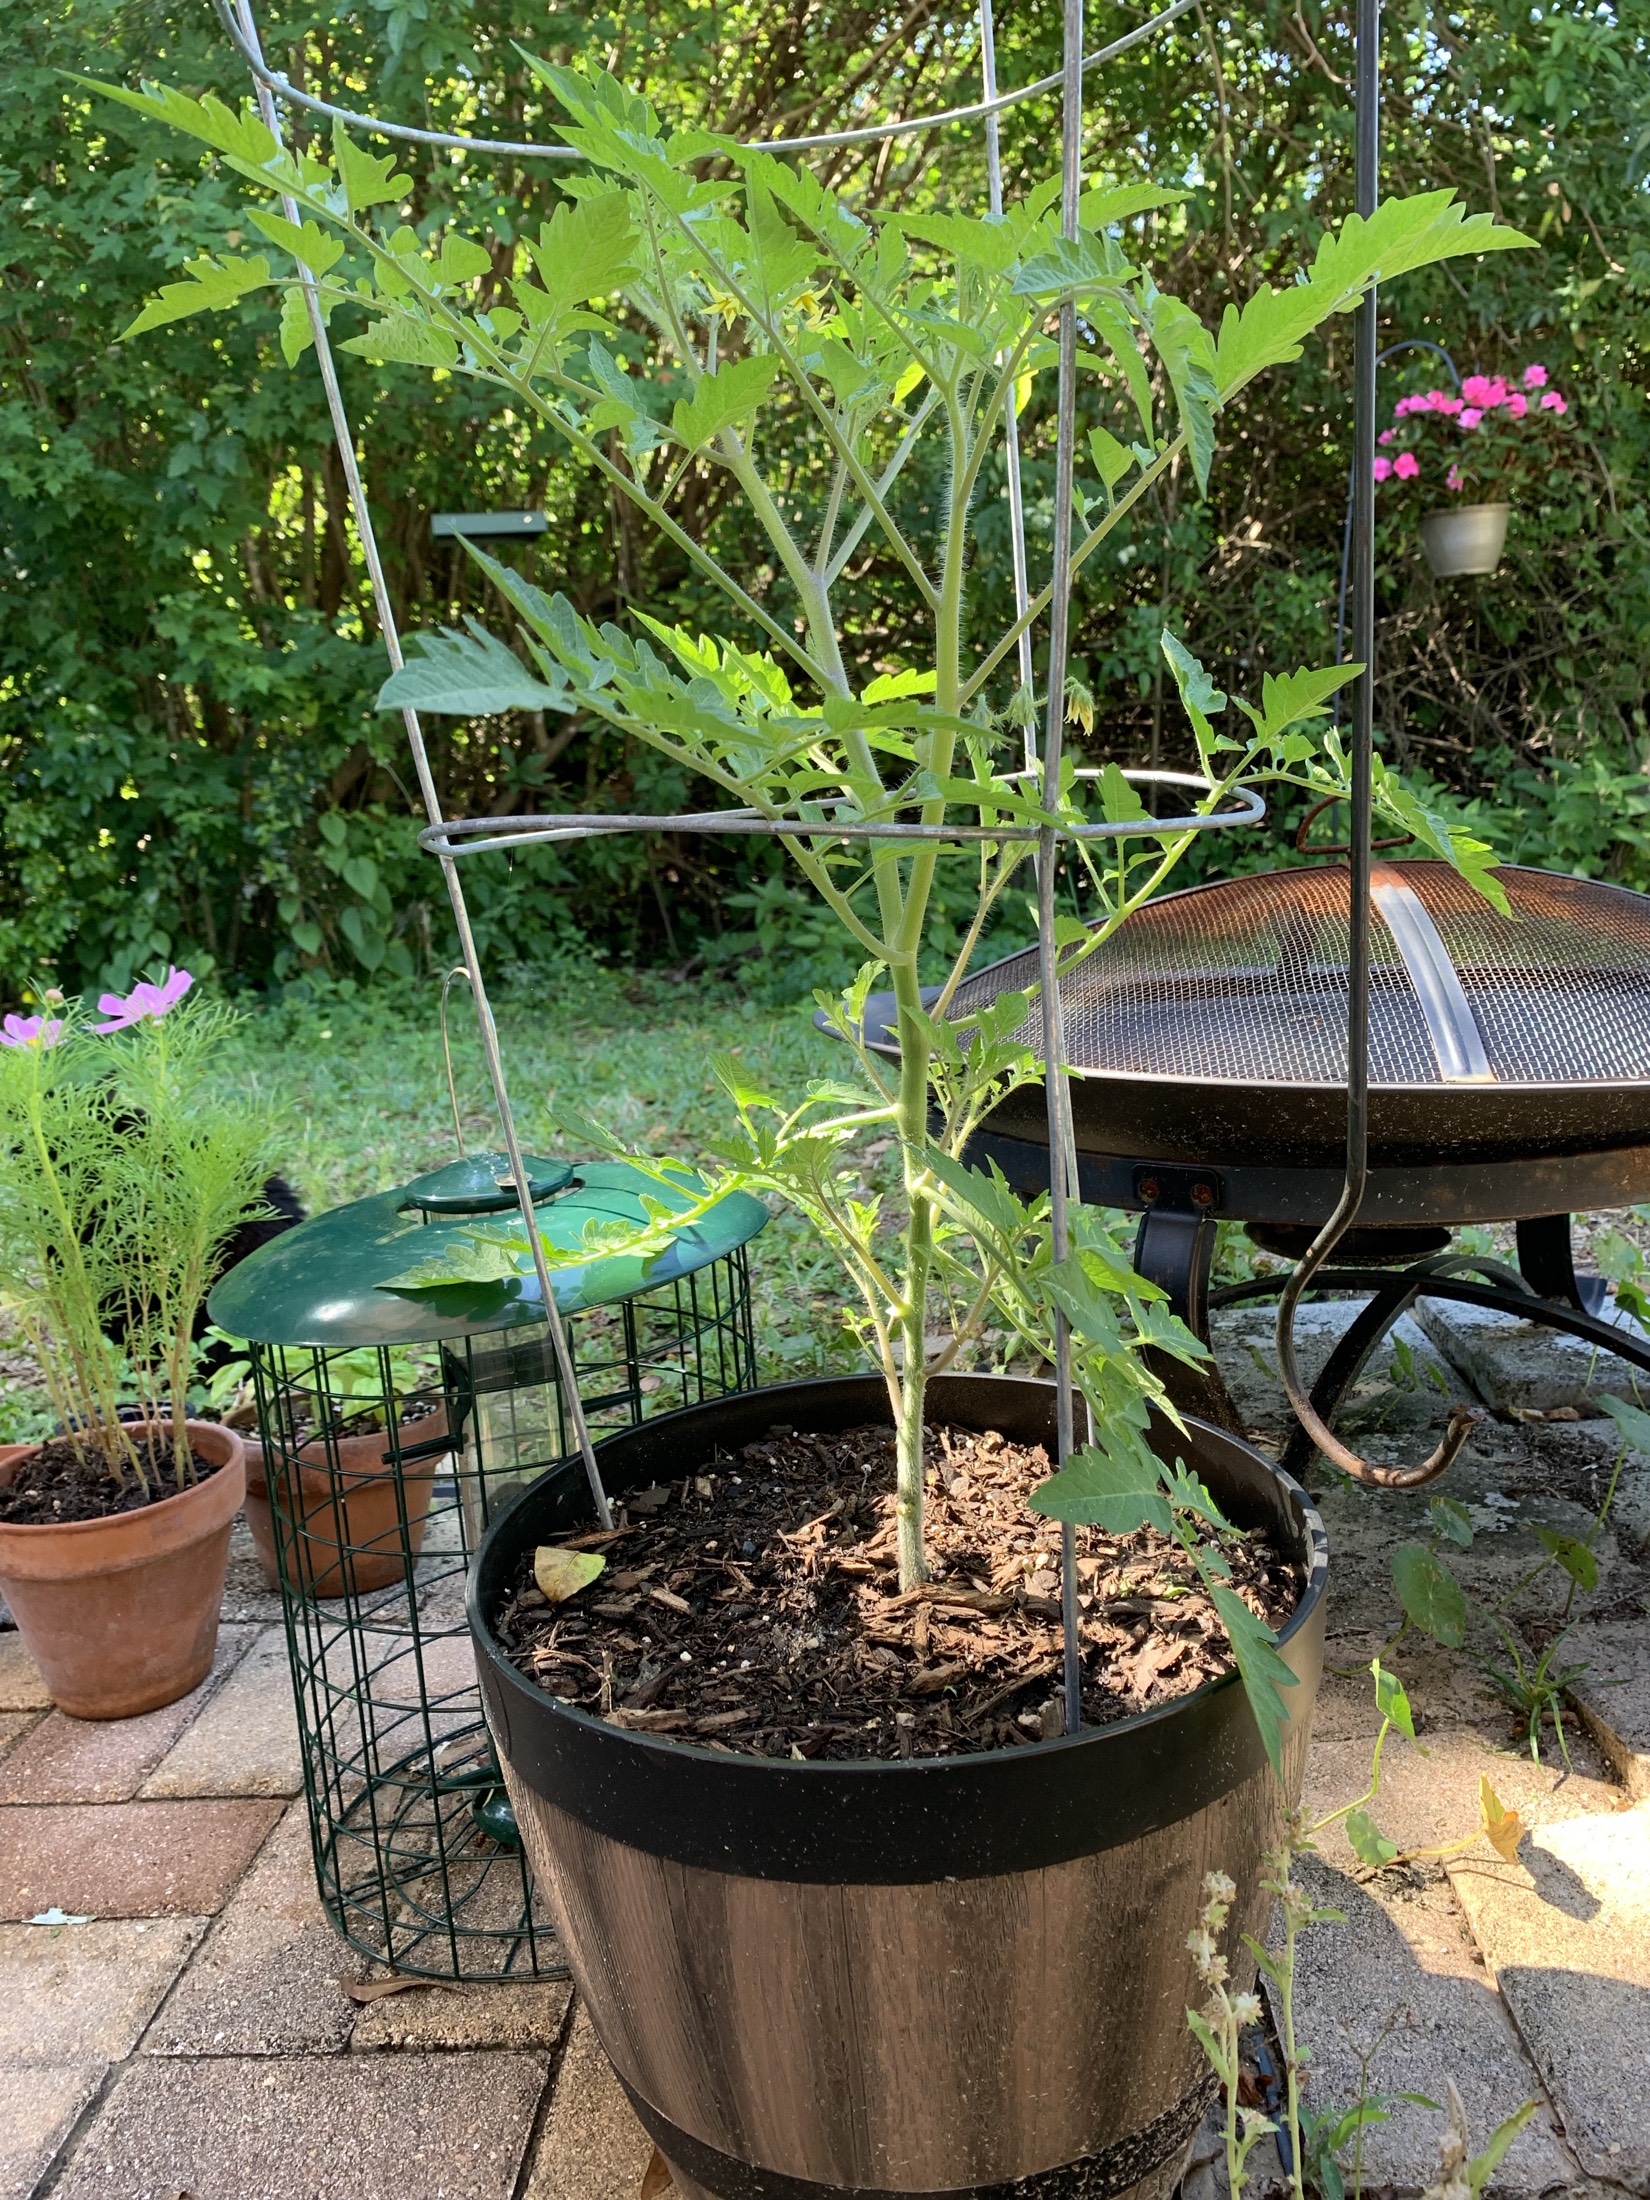
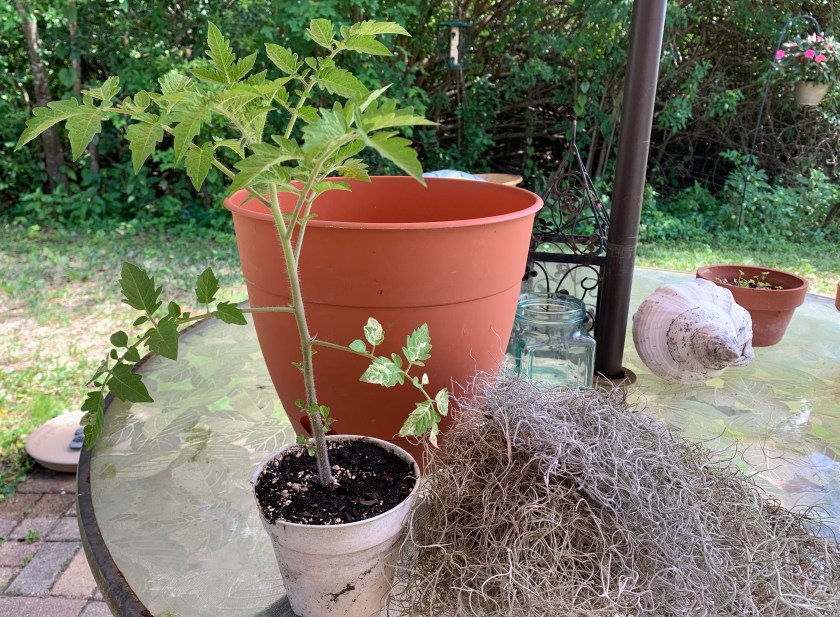
Now it is the end of April. These tomato plants have outgrown their little pots so it’s time to re-pot. Since I don’t have a lot of space, I decided to use a tall pot. I prefer to grow plants in the ground, but here in Florida it’s difficult.
I bought one more tall pot, because I have two plants, and spent some time today moving the plants into their new, bigger containers.
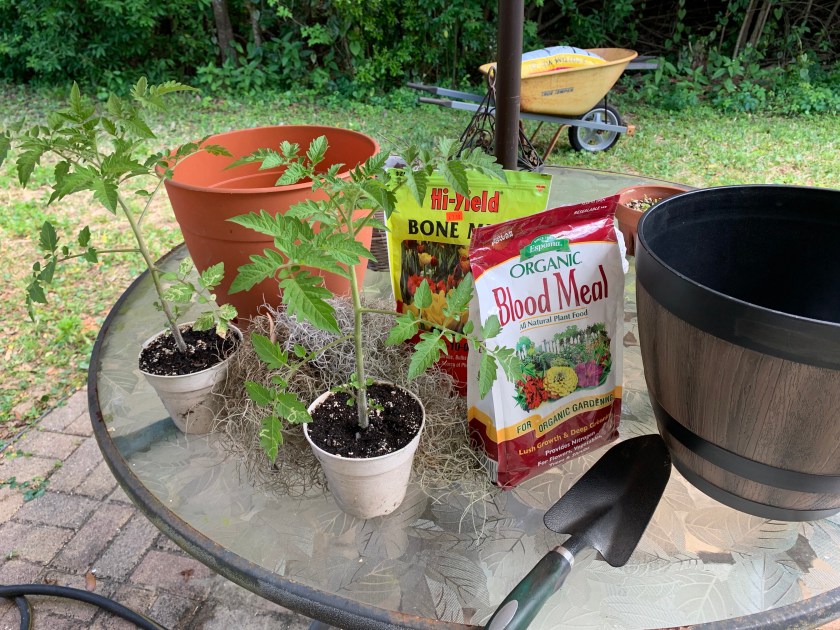
I gathered up some Spanish moss for the bottom of the container – a perk from living in Florida. It will serve as drainage. Then I mixed in some Blood Meal and Bone Meal (both links are Amazon affiliate links) with the purchased organic dirt as I filled the pot.
The bottom leaves of the tomato plants were removed, as they should not touch the dirt, and I planted the transplants as deep as I could. Some people plant tomato plants lying down with only the top leaves showing. This creates lots of extra roots for sturdy and hardy plants.
Now my only problem could be with the raccoons that come each night and are nosy and destructive. They like to dig in the dirt with their little paws and mess with my plants.
To hopefully deter them, I places some tray bird feeders around the pots.
Both tomato plants in their new pots
The old tomato plant
The tomatoes below are growing in a grow box and the plant has been growing all winter. These were planted in November, and I don’t suggest that. Here in Florida tomatoes should be planted in February or March.
Lots of the leaves became yellow and I trimmed them off. I’m just trying to get the tomatoes to turn red and be edible. I did use some organic spray on the leaves, which did seem to help.
I can’t remember what type of tomato these are, but they grew from a plant I purchased, and not from seeds – probably purchased at Home Depot. I really miss Tenney Farms in New Hampshire.
Tips for growing tomatoes from seed
Start tomatoes from seeds in small containers, such as eggshells.
Use a quality soil, such as Black Gold (Amazon affiliate link) (I bought this type of potting soil locally and paid half the price – so shop around – early in the season!)
Once they have a few leaves and lots of roots, transplant to a larger pot.
When they fill that pot, transplant to either the garden, or a permanent large container.
Be sure they get lots of sun and consistent water all throughout their life. A drought and then lots of water will cause tomatoes to split.
If you are in Florida and your tomato plants are growing over winter, they may have yellow leaves and scarred fruit. It can’t be helped because of the weather! Do the best you can and wait for the warm days to appear. This means covering them at night to protect from the cold.
Cutworms can quickly defoliate a plant and ruin garden crops. How do you know if it’s cutworms chewing on the leaves and stems?
How do you know if your garden problem is cutworms?
The short answer to that question is that whole stems will be cut off at the base. This is how the cutworm gets it’s name. The other part to that answer would be you won’t spot anything that could be doing the damage. It will seem to be a mystery.
Unlike many insects and worms that show up in a garden, the cutworm hides. When inspecting damaged leaves, you’ll likely see nothing. Cutworms sleep in the dirt during the day and feeds at night. Sneaky little buggers!
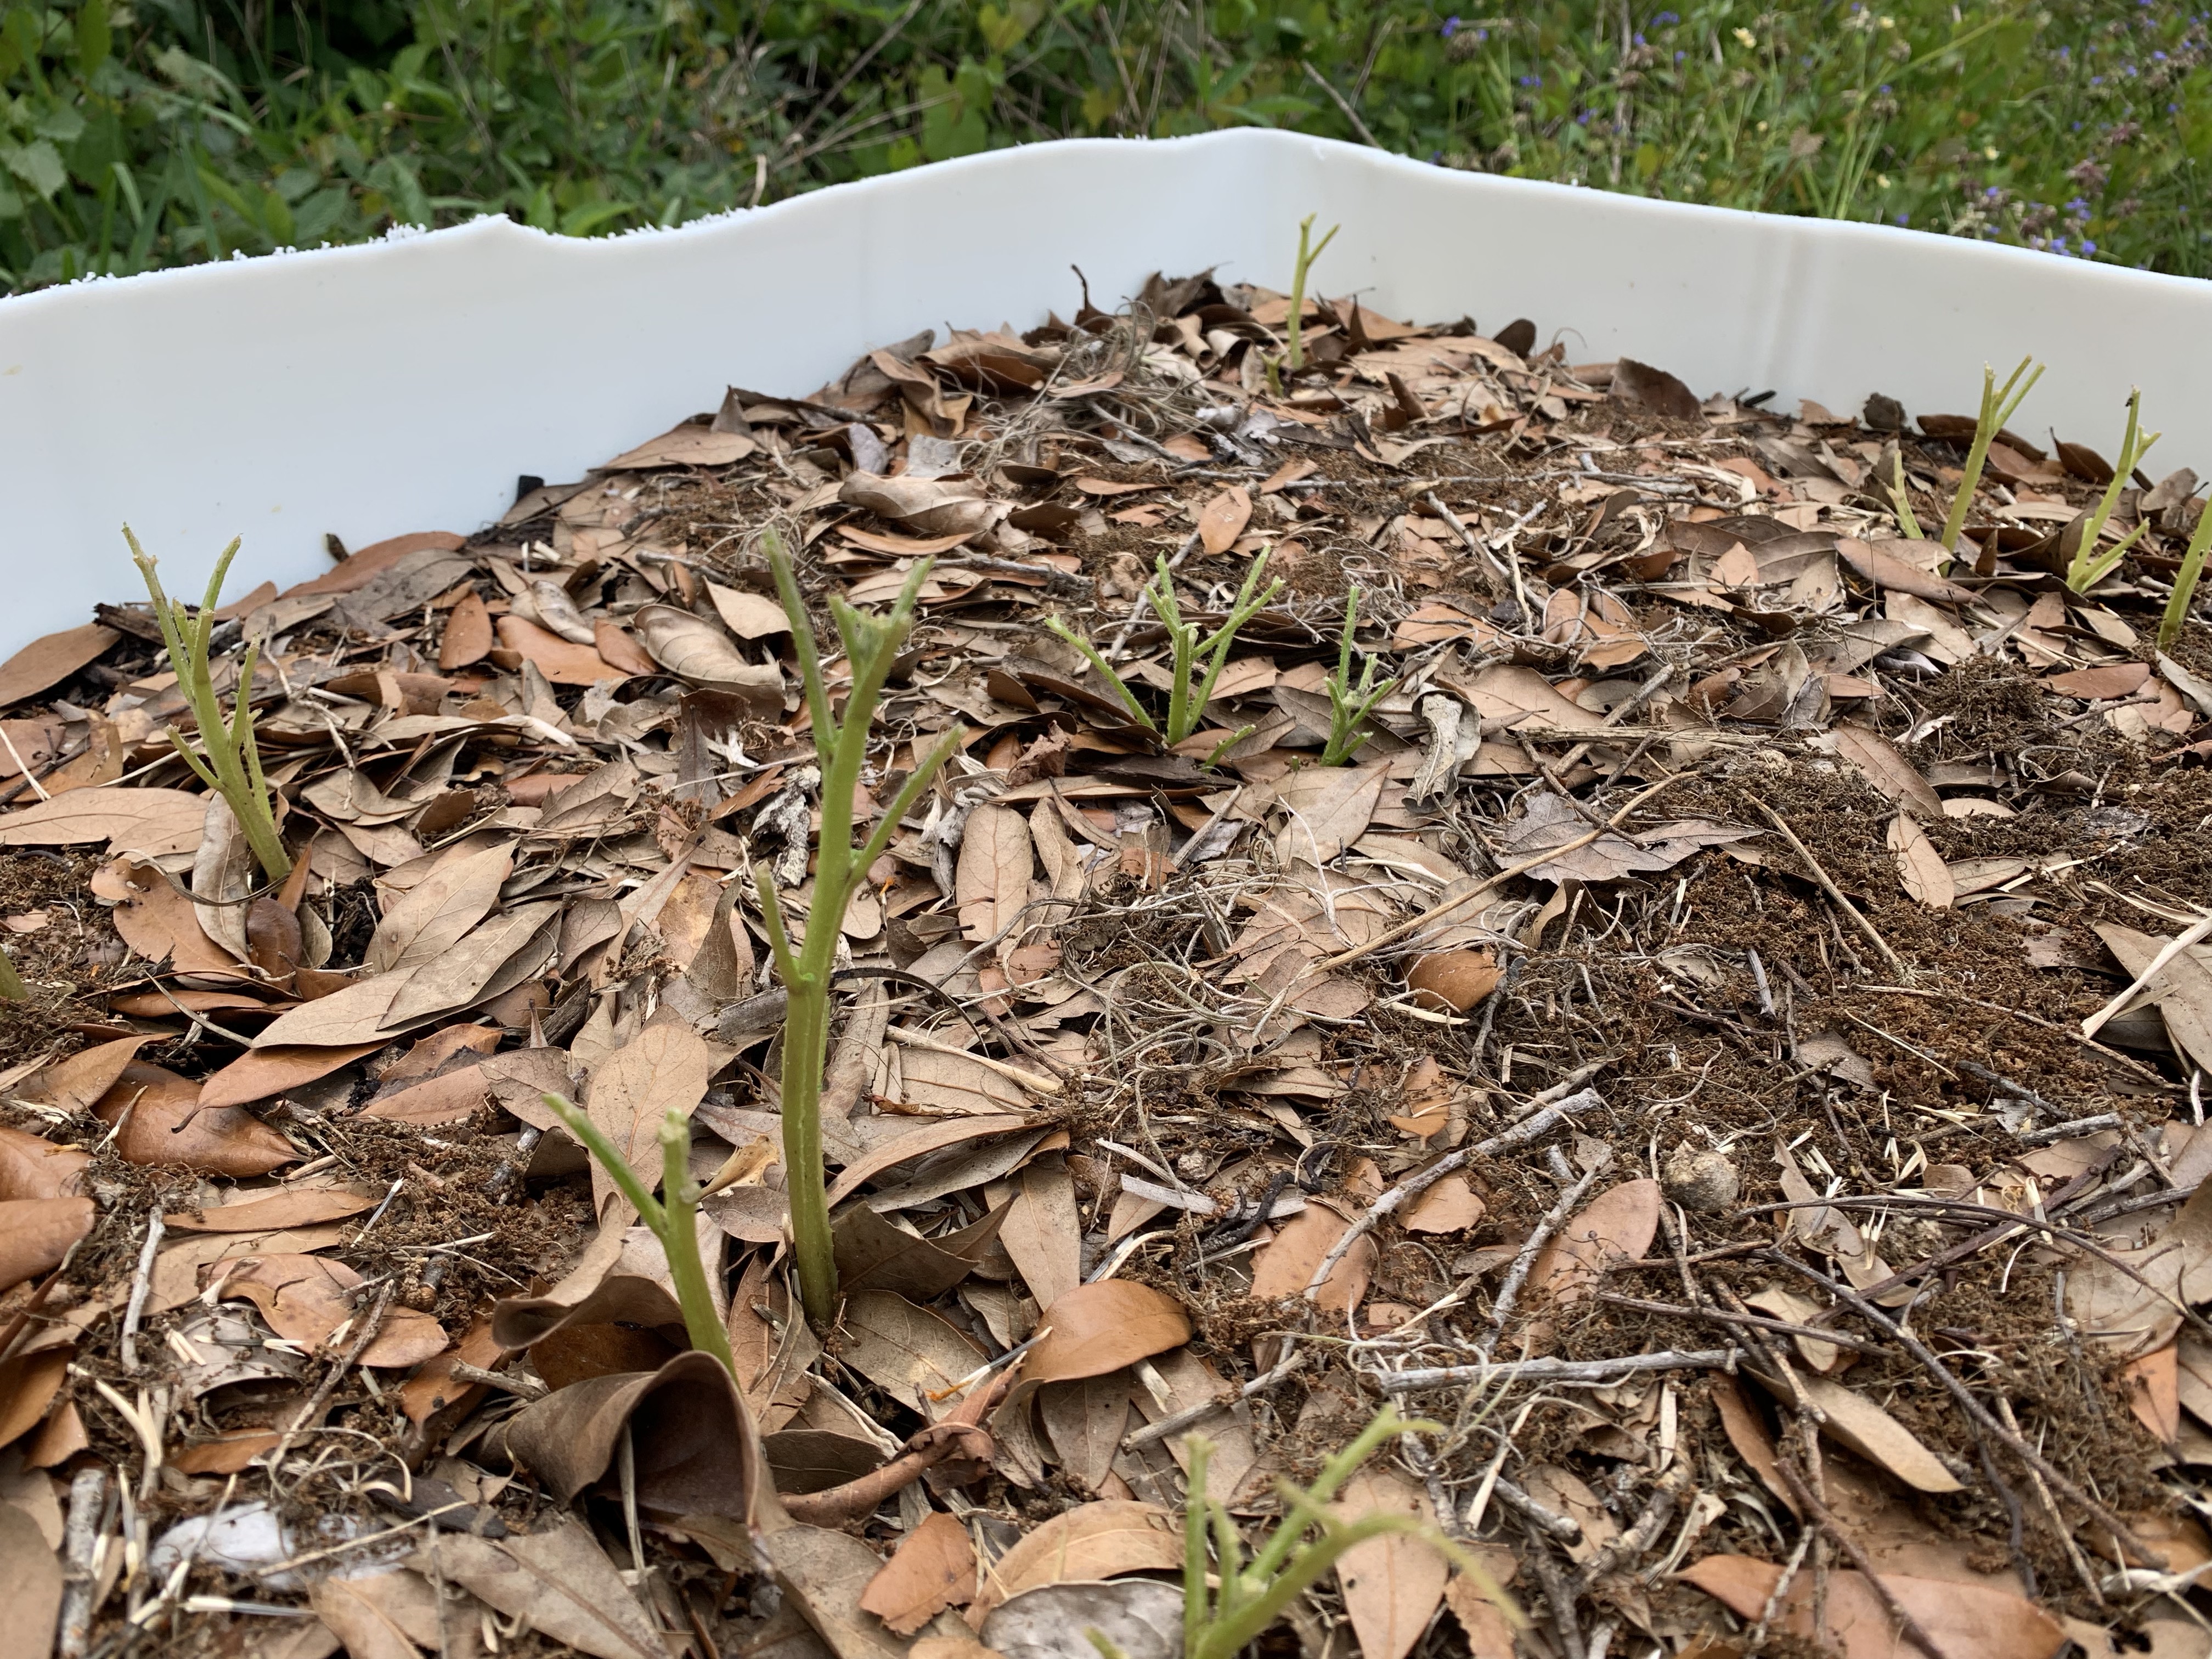
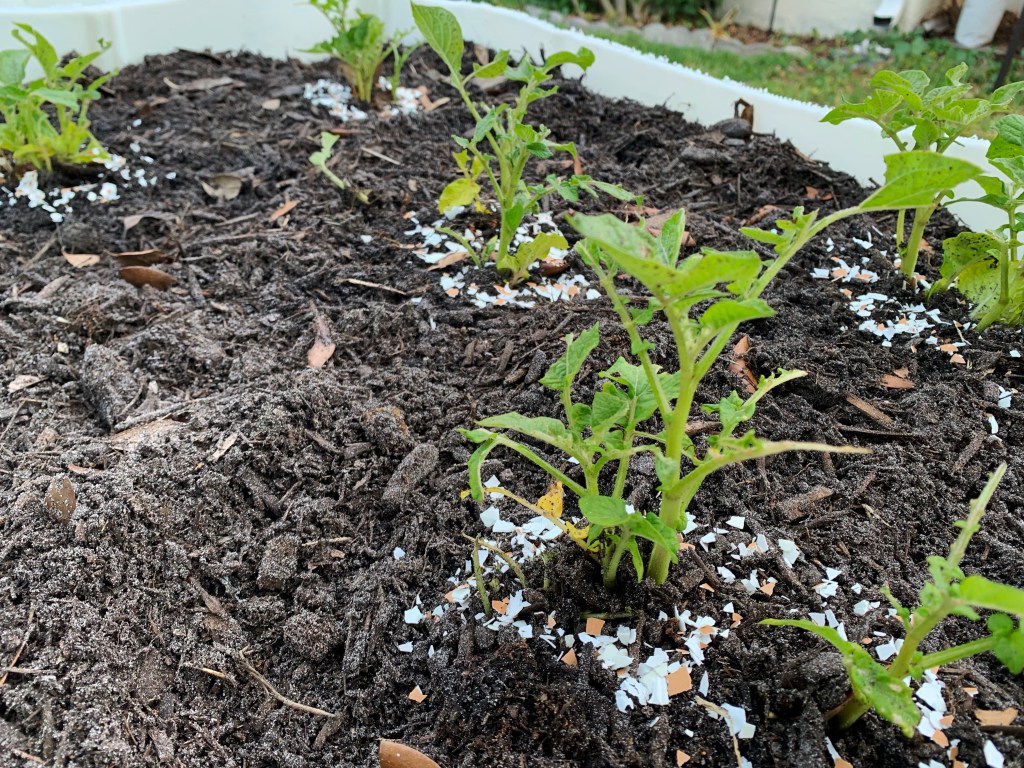
I noticed that something was eating my potato leaves. I was thinking “potato beetle” or slugs, and kept inspecting the plants and leaves closely. I saw nothing. Each day more leaves were eaten, and then the stalks began to fall – chewed off at the base. That clicked, because I know I’ve dealt with this before. Cutworms! Now, what is it they do? And how do I deal with them?
Potato plantLeafless potato plants
Organic Spray Did Not Help
I got my handy organic spray and sprayed the heck out of the plants. That didn’t seem to stop the problem one bit. I have two raised beds of potatoes and one was doing very poorly and then it began to show up in the other bed.
It was time for drastic measures. This meant researching online. Sure enough, it seemed the culprit was cutworms. I read that they overwinter in the soil and emerge in spring.
My Mistake
I believe I brought the cutworms into the raised beds when I added leaves from the yard as mulch. The potatoes were planted in dirt – new this year – from bags purchased at the local Home Depot, so I think the only way they could have been introduced was through the leaves and Spanish moss I added.
While researching the problem, I read that slugs will also eat potato leaves and mounding the soil around the plant will help. ( This page about slugs and potatoes is a good one for advice if you have that problem.)
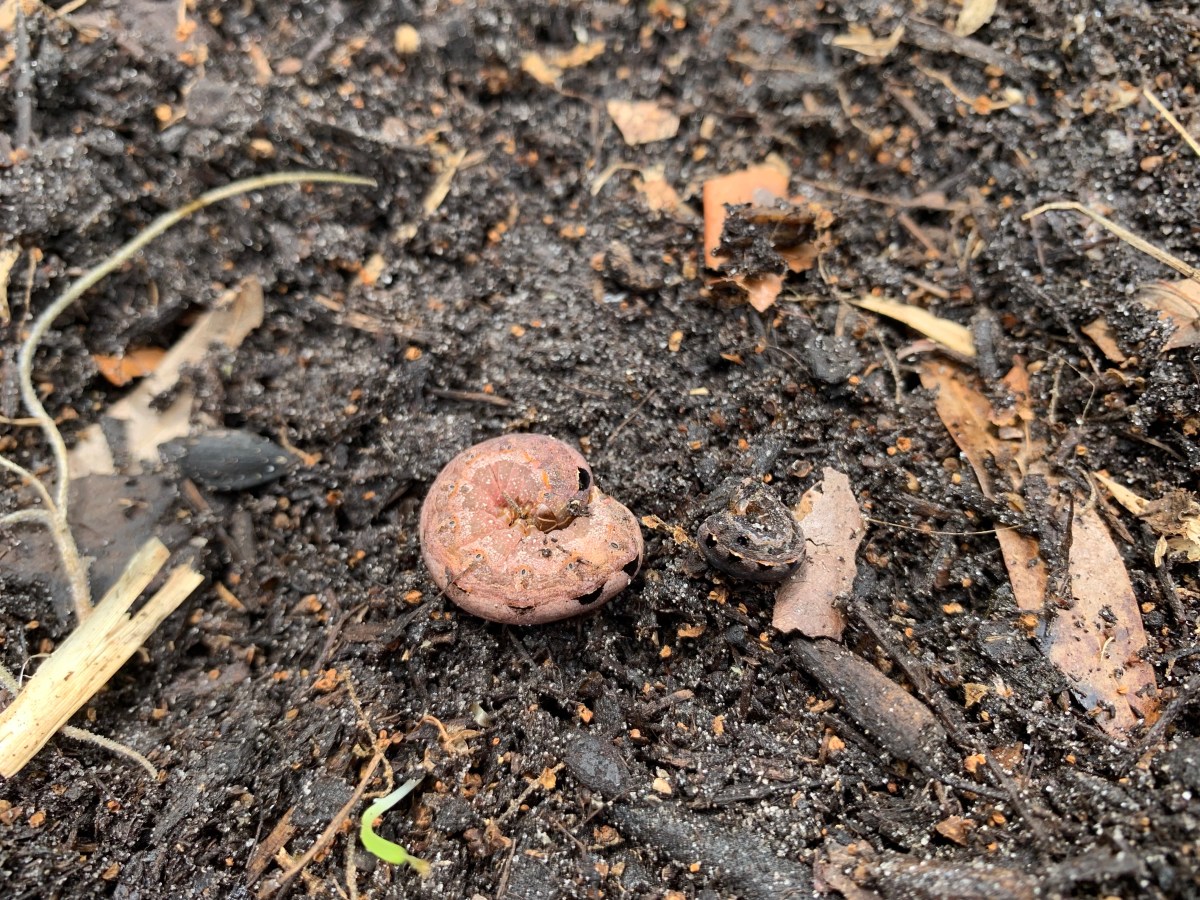
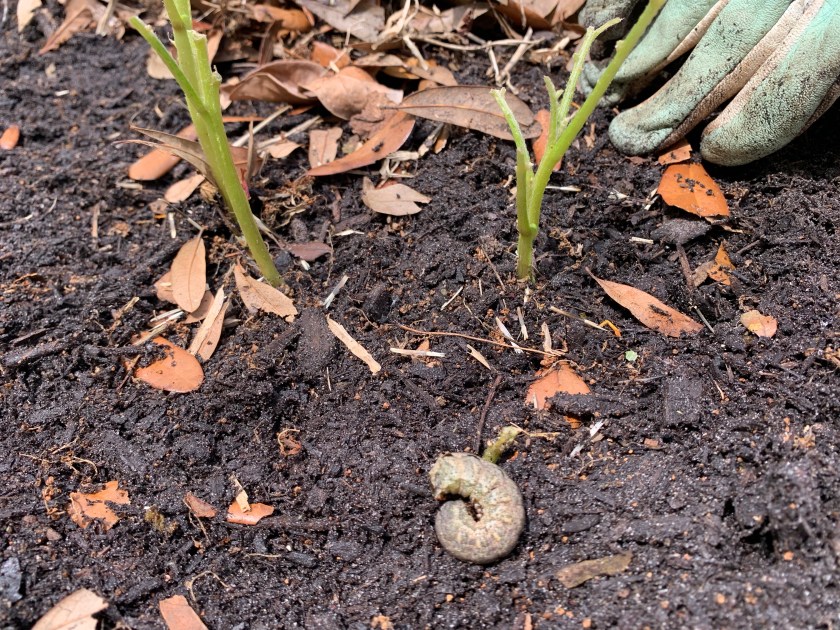
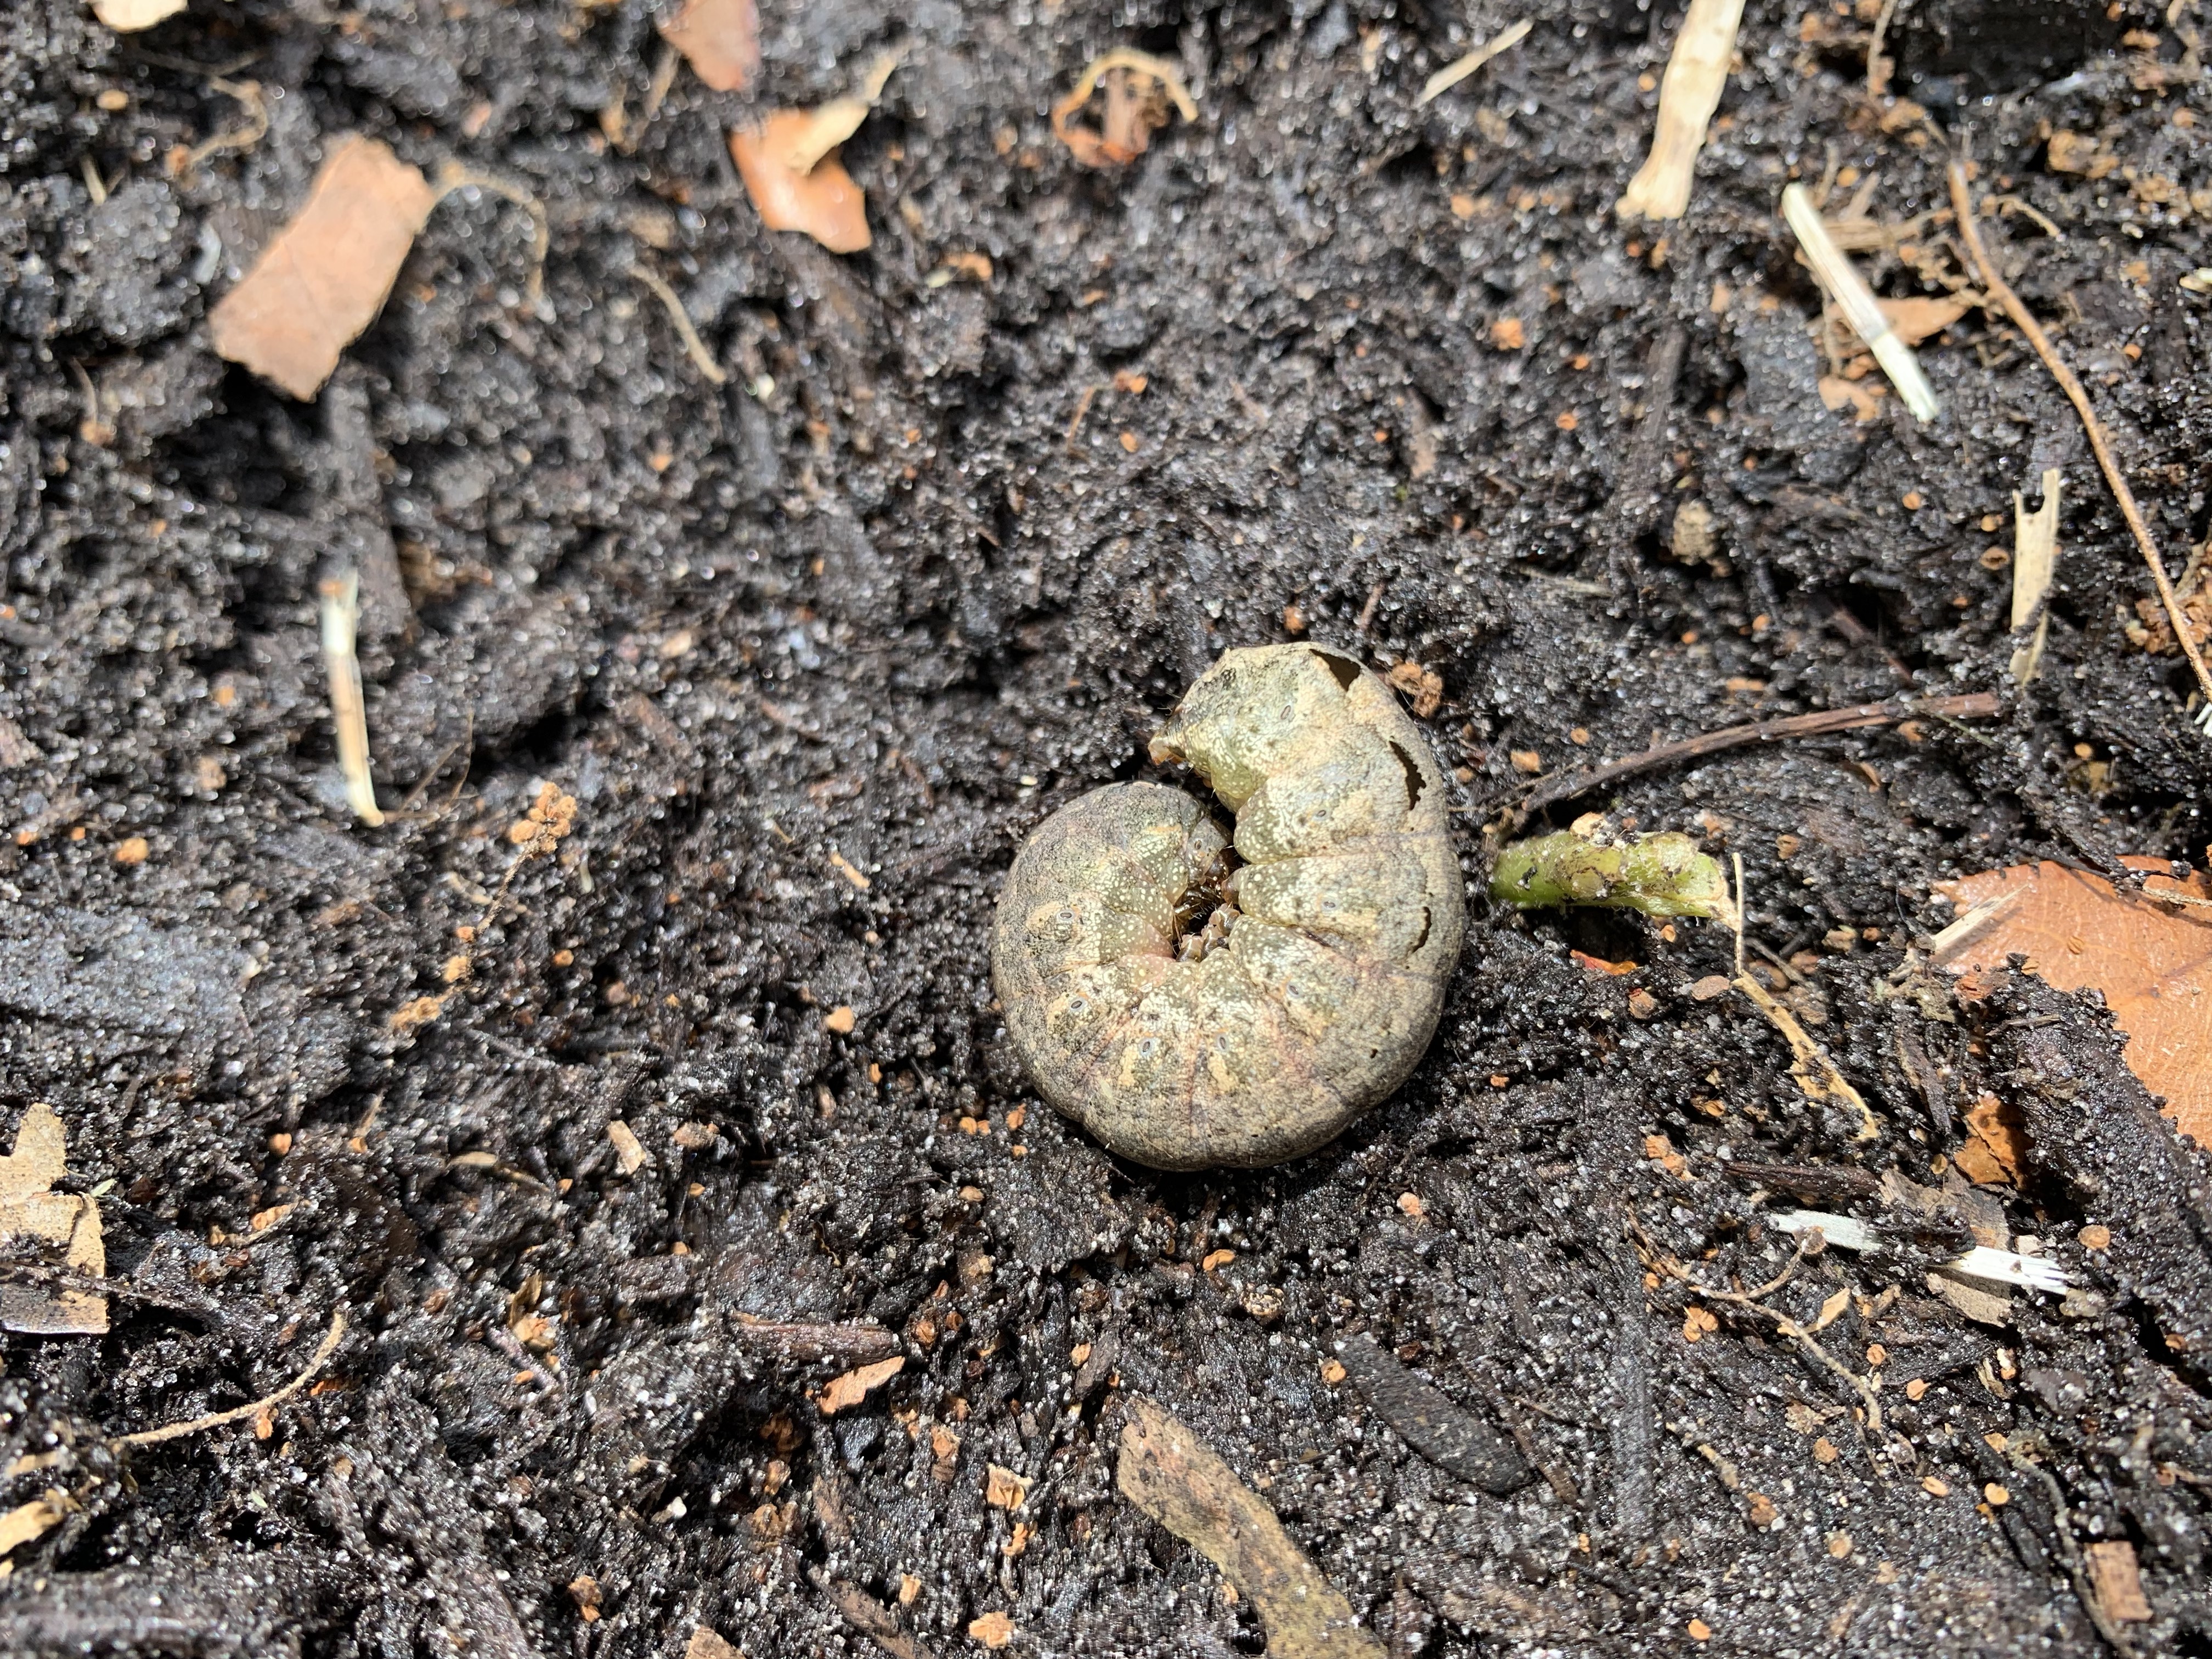
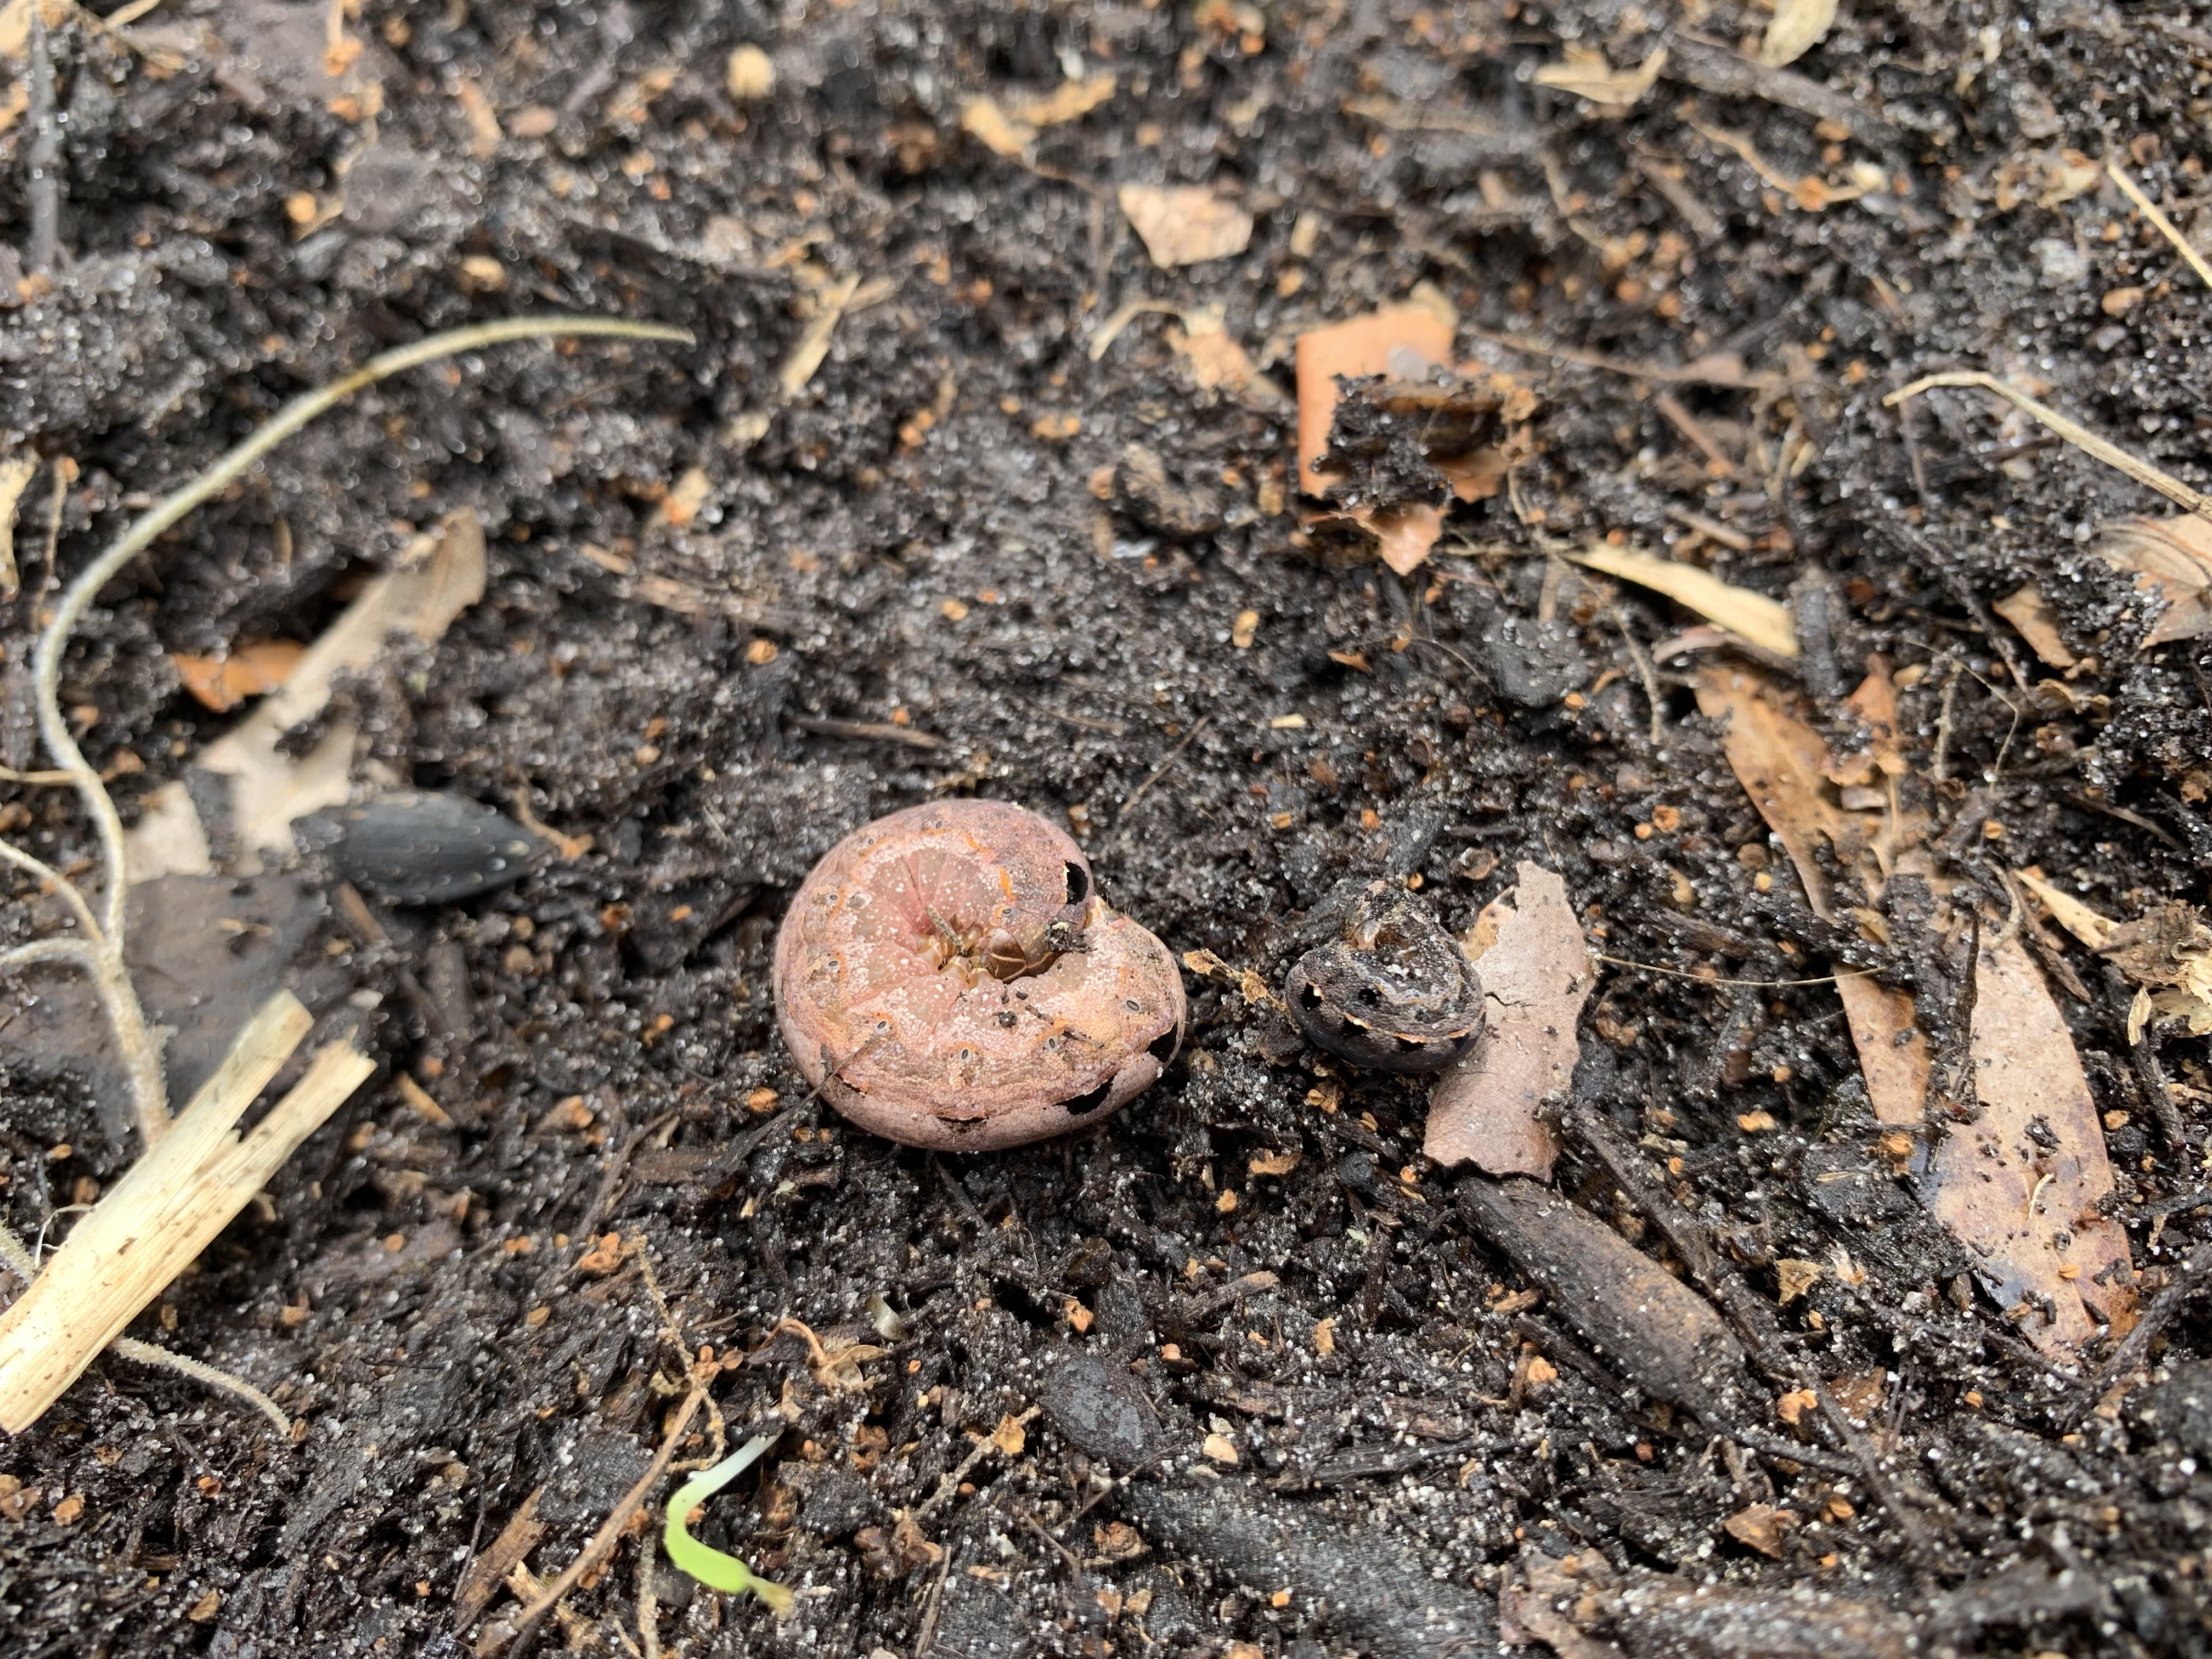
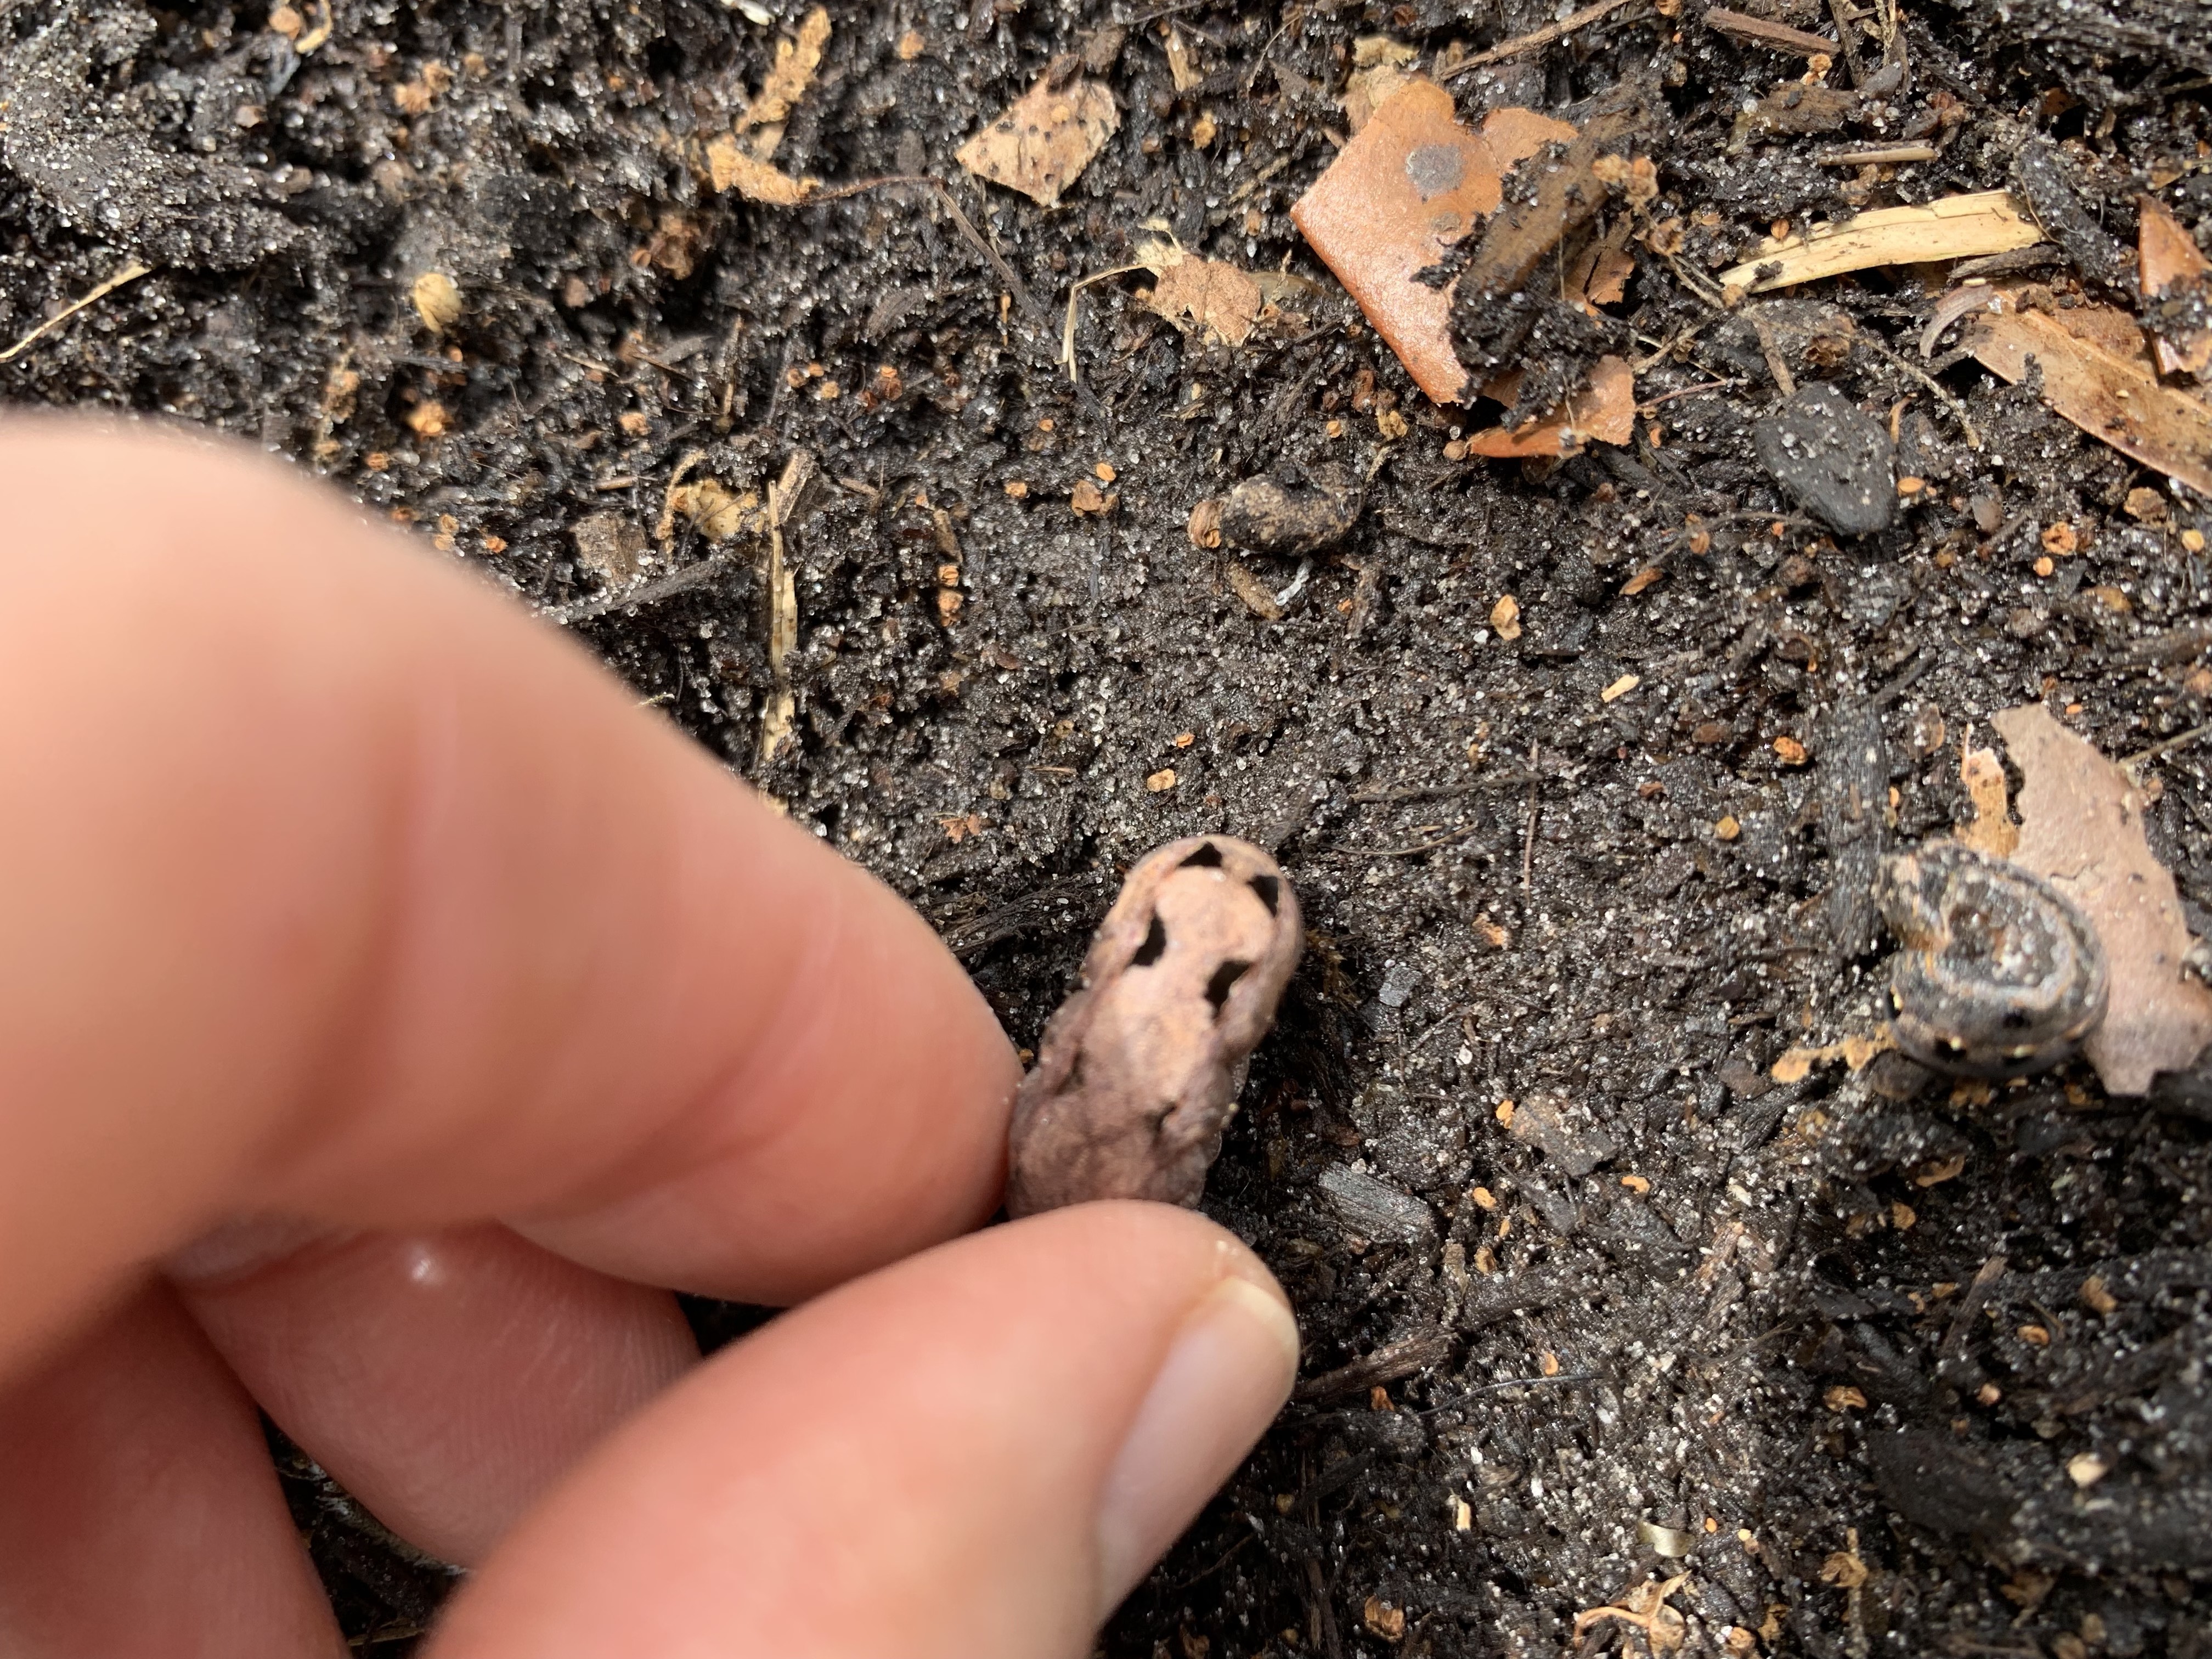
I began scraping away all the leaves I had on top of the gardens and throwing it in the woods. Then I began digging up hills to mound around each of the plants. And that is when I saw it – a big cutworm! Altogether I found about 6 worms, large and small. One was greenish, one was pink and the small ones were black.
Leafless potato plantsgreenish wormLarge pink worm, small black wormMarkings on the cutworm
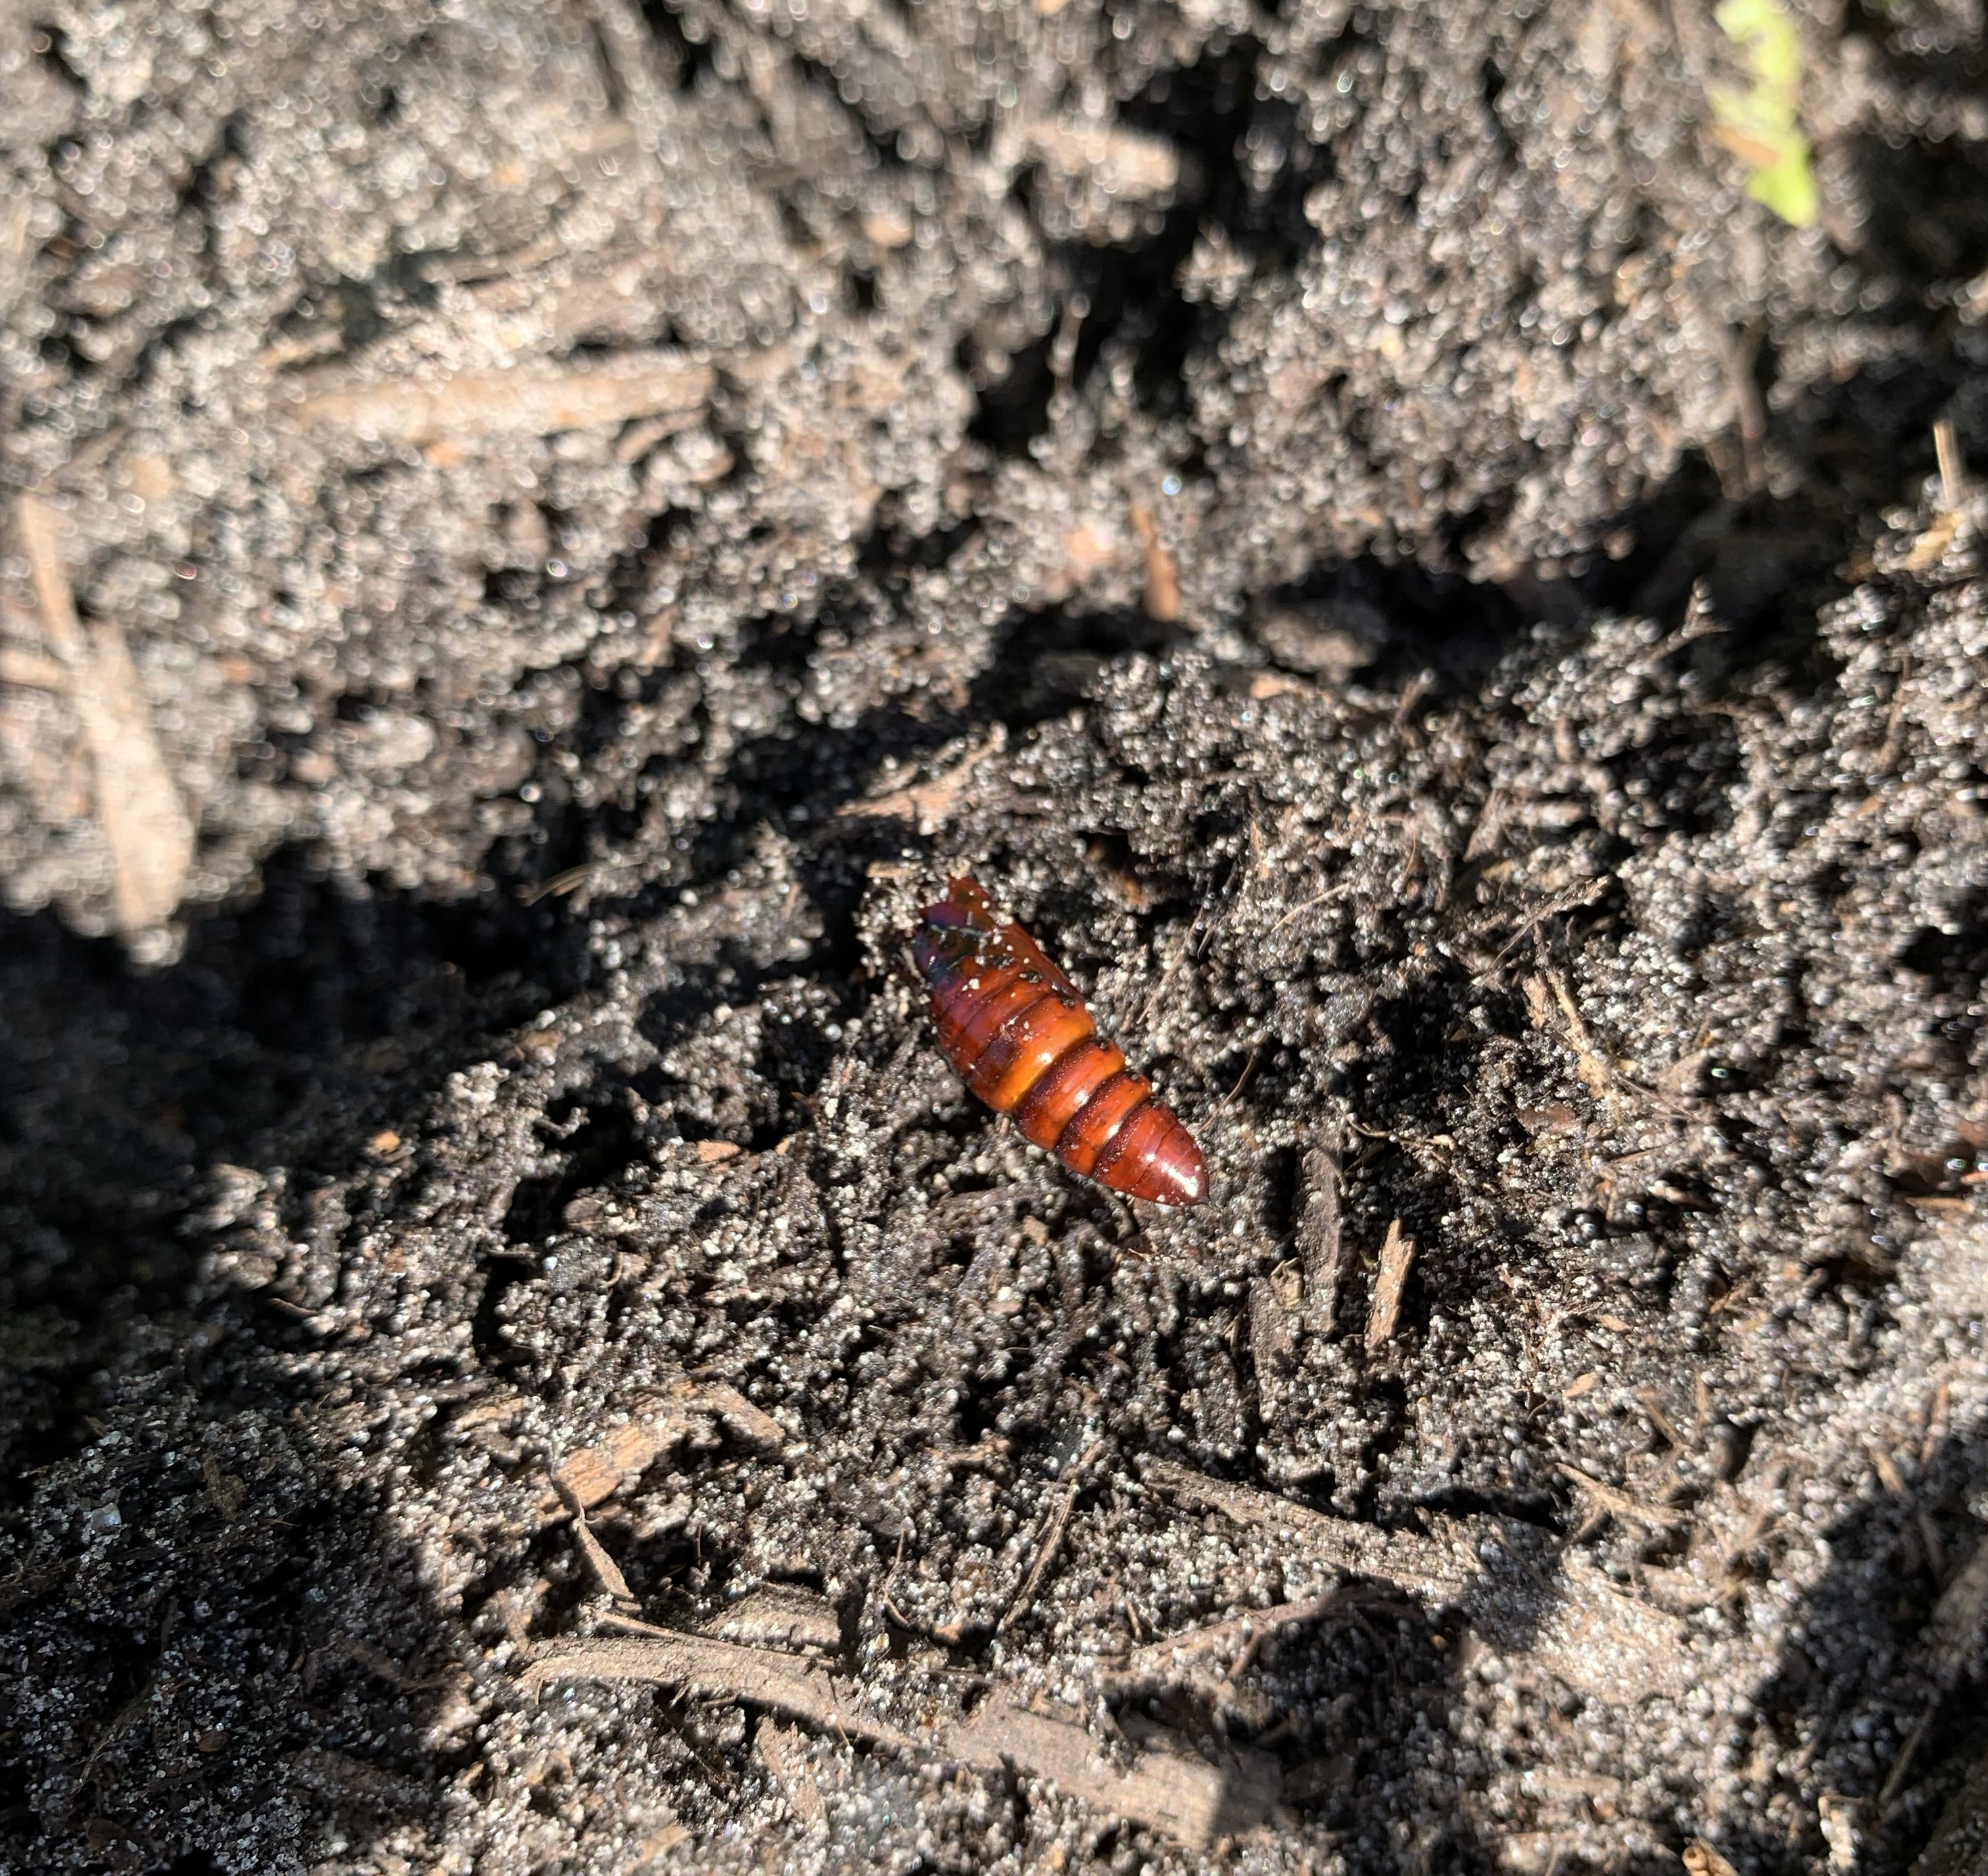
The pupae stage is when the worm / caterpillar has become a cocoon. The adult moth will emerge from this reddish orange shell to fly around and lay eggs that become more worms. But the worms are the worst in Spring – just in time for planting.
Cutworm pupa is reddish-orange
Getting Rid of Cutworms
My potato gardens are small. I have two raised beds with a total of 10 plants growing. I simply continued to dig around in the dirt searching for the worms.
Hand-picking
The cutworms I found were placed into my tray bird feeder and within a couple of minutes a cardinal was having the worms for a meal! This is a very simple way to get rid of the worms while helping out the birds. If you don’t have a tray feeder, just set them on a board or rock in the yard where birds visit. The birds come fast for the juicy meal.
I also went out at night to inspect the plants and found one more worm which I hand picked off. I continue to check for worms but haven’t found any more.
Eggshells and Coffee Grounds
Lots of online sites have advice about getting rid of these destructive worms, but I like to do so as naturally as possible. I had a few eggshells leftover from my eggshell seed starters project, so I crunched them up and sprinkled them around the base of the remaining potato plants. The only problem with this is that the shells get moved around when watering.
Also, the worms do not like coffee grounds so you could do the same thing with leftover grounds.
Eggshells sprinkled around the base of potato plants
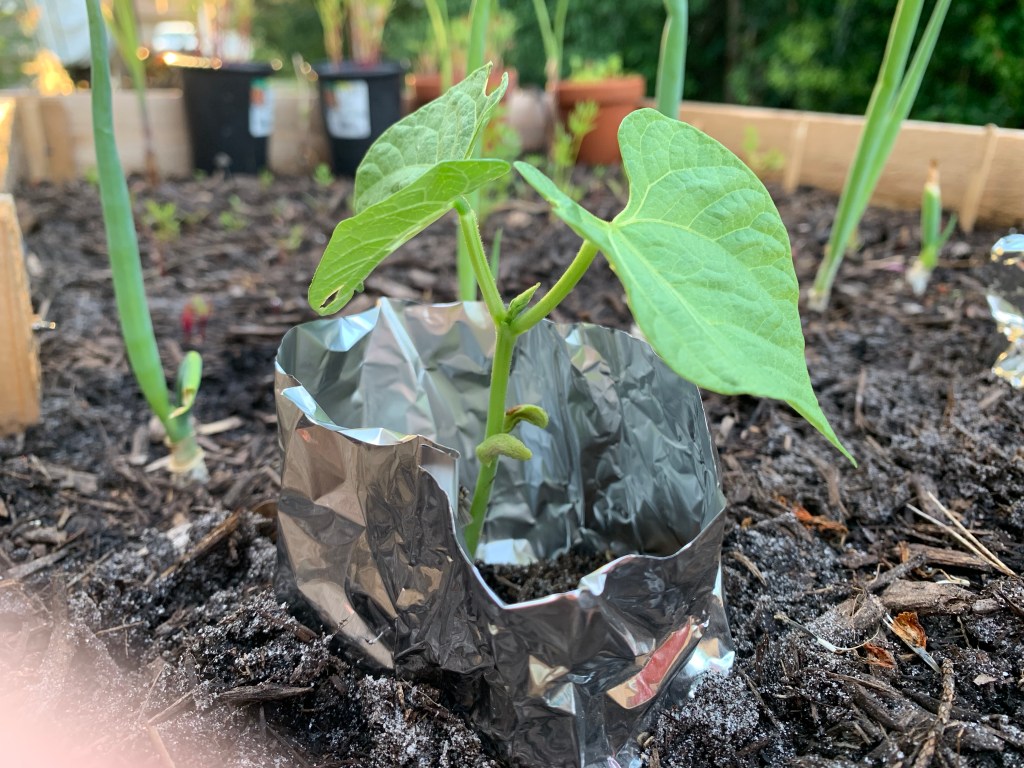
Make a Collar
After checking on my potatoes, I came over to the other raised bed and one of the bean plants was totally chewed off! Just in case the cutworm was to blame, I made tin foil collars for the other plants. They have to be pushed down into the dirt and must surround the stalk.
This is best done when the plants are very young so the roots will not be disturbed. I used foil, but other things work. Think toilet paper and paper towel cardboard. Plastic cups, plastic bottles, and anything round and open will work.
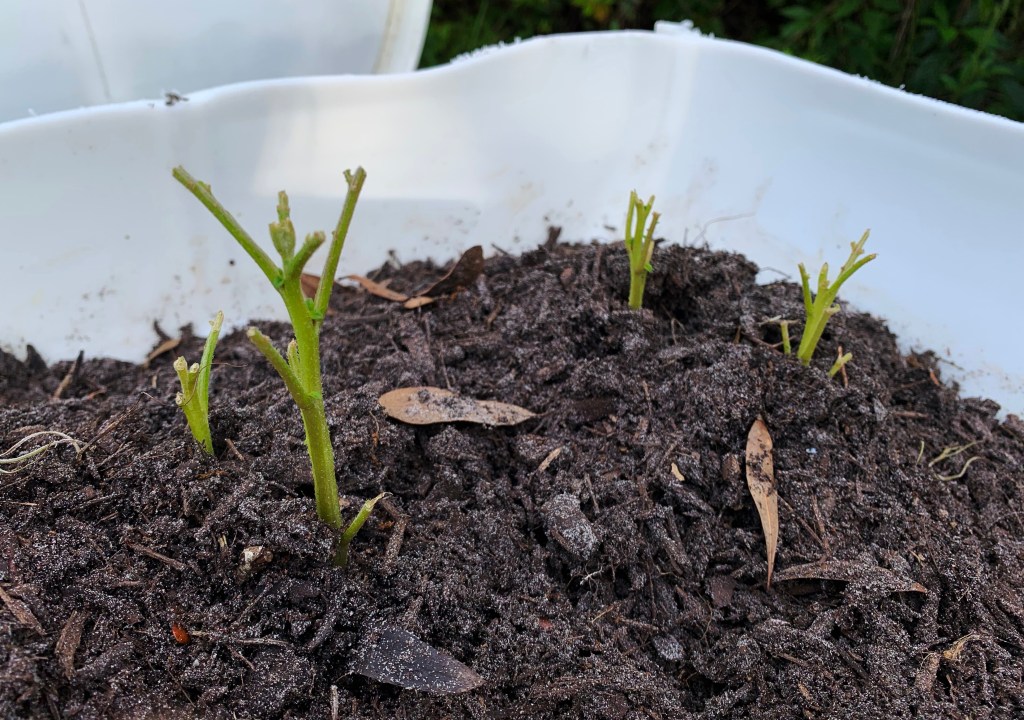
Now my potato plants (in garden number 2) look like bare stalks. I’ll continue to check for worms and watch to see if the stalks come back.
Ways to Prevent Cutworm Problems
The worms emerge from eggs in Spring and they have been existing underground. Till the garden or dig down a few inches to search for the worms and remove them before planting. Take precautions by using the collars mentioned above – this is not that difficult to do if the garden is small.
Please visit this page at The Real Dirt Blog which is full of excellent information and advice about the cutworm.
Read more here about cutworm stages: adult larvae and pupa drawings.