New England native, Florida resident. Blogging about boating, beach-combing, gardening, camping, and knitting. Work for Zazzle as a designer since 2008.
I’m all for learning something new each day, and today I learned that the clusters of purple berries on the stem in my backyard is part of the Beautyberry bush. This odd stem of berries in clumps caught my eye as I walked through my small backyard. I had to get photos, but the trouble I had was capturing the true purple color of these berries.
Beautyberry stem of purple berries
Using my iPhone, I took numerous photos of these striking purple clumps and none of the photos showed the actual dark purple color correctly. Below is the color my phone produced, but the other photos more closely match the actual darker purple. I had to replicate that in Pixelmator.
iPhone photo is brighter purple color than reality
This stem is sticking out of my backyard hedge. The hedge is made up of a variety of plants which have grown very tall and create a border between the back of my house and the house next door. I did not plant the Beautyberry, but someone may have done so years ago. Or maybe it grew wild.
The Beautyberry is a southern bush with berry stems that show up in September. It’s berries feed birds and wildlife and the leaves and berries are good as mosquito repellent. Read more interesting info at the Garden.org site.
A striking stem of purple berries
I found some other interesting flora to photograph that same day. The Elephant Ear was blooming and the banana trees had sent off a new shoot which would grow a long stem of bananas. A dead tree is full of clusters of dark purple berries and I don’t know yet what those are. There is always something new to learn when I step outside.
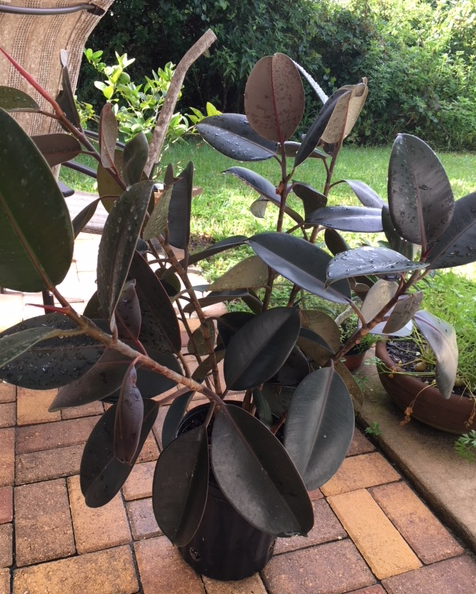
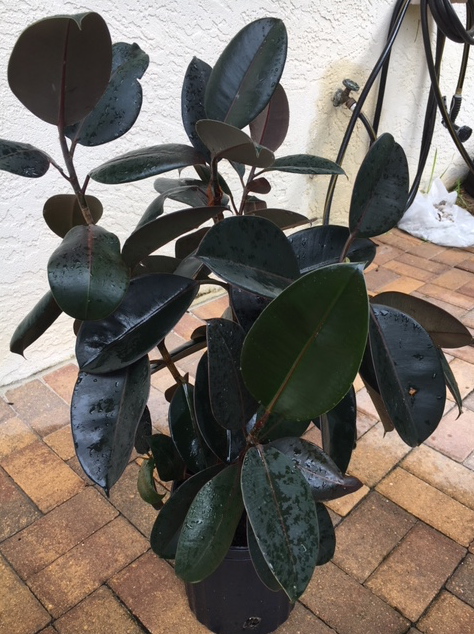
Rubber Trees are something you see a lot of here in Florida. They are tropical plants and don’t like the cold. They work well as house plants, but I’ve seen them growing outdoors here and can become quite large. They are susceptible to scorching sun which damages the leaves, and don’t like extreme cold.
I love the uniqueness of this tree with it’s thick, rubbery leaves which are dark green to purple in color. A reddish spike appears when a new leaf grows. These plants are hardy, but keep them out of the hot sun or the leaves will burn.
To keep a nice shape, the rubber tree will need pruning. To give it a good “bath” I take it outside and spray dust off the leaves. I can also give the dirt lots of water and some fertilizer. It’s possible to do that year round here.
I noticed the plant had a lot of new growth making the stems quite long. I’ve never pruned a rubber plant, but decided to give it a try.
Rubber tree in need of pruning
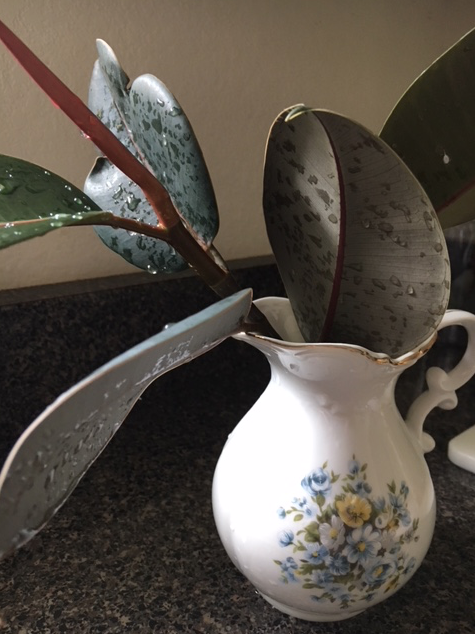
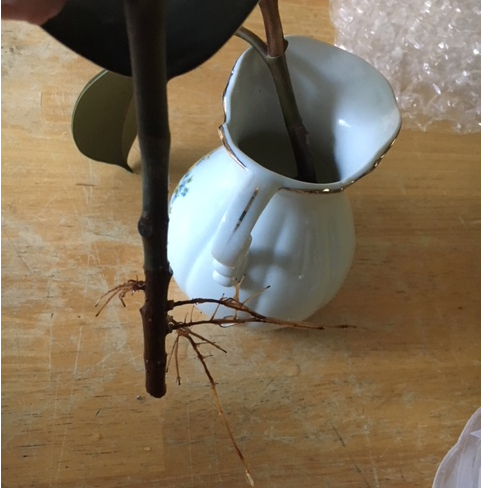
I ended up cutting back two stems to even up the shape a bit. If possible, I try to root cuttings (propagate) I take of large plants like this. When I searched online for info I got the general “use rooting compound” advice. I’ve never had luck using rooting compound. So I decided to do it my way.
My favorite way to create new plants from cuttings is to simply put the cuttings in water and wait for roots to develop. The water must be changed often – I do it every day. I’ve had good luck propagating crotons this way, but it doesn’t work for every plant. I’ve never tried to root rubber plant cuttings, so this was an experiment.
The rubber plant has white sap in the stems which is sticky, which is similar to what you see in hydrangea stems. The hydrangea stems can close up due to this white sap and make the cuttings wilt. (Read more about cutting hydrangeas.)
I kept an eye on the rubber plant cuttings and saw no drooping or signs of distress in the vase.
After a while – probably close to 2 weeks – I saw roots developing on one of the stems.
After a few weeks in water – roots!
I will be potting this soon. The other stem has not begun to send off roots, and I’m not sure it will. But I’ll wait a bit longer to see. (It never did and I gave up.)
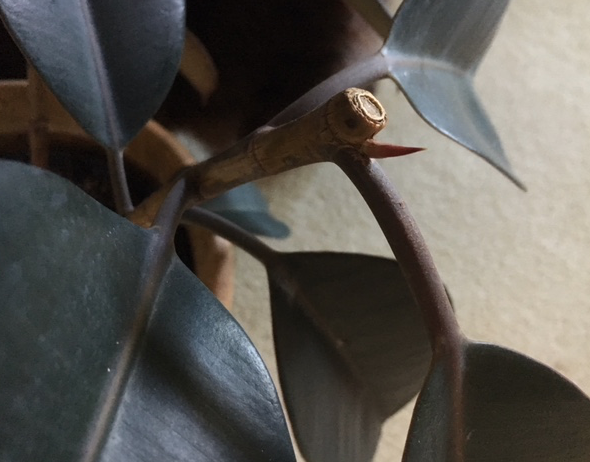
The main plant is sending off little shoots near the site of the cutting. I only see one shoot, so whoever the cut is made is where the new growth will take place – at the next leaf on the stem. Keep that in mind when making the cut.
New growth from the stem that was cut.
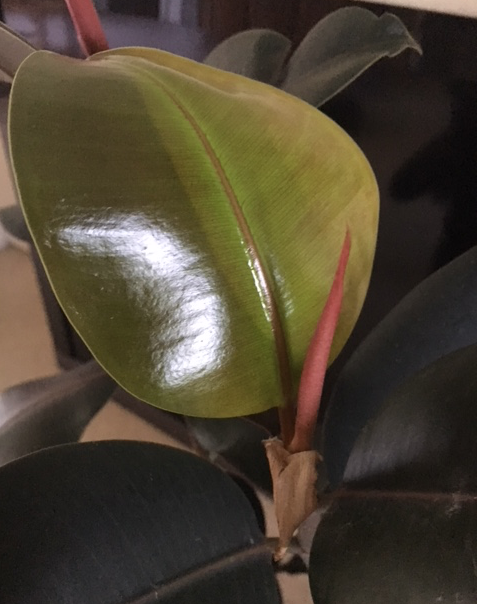
A new leaf unfurls in a pretty green color. It will eventually turn dark like the older leaves. My next chore will be to re-pot into something bigger. First, I may take a few more cuttings to further shape the tree.
Pretty new leaf emerging.
If the plant is too large to take outside and wash, use a damp cloth and clean the leaves every now and then. Be sure to fertilize it occasionally as well. I like to use organic fish emulsion diluted in water.
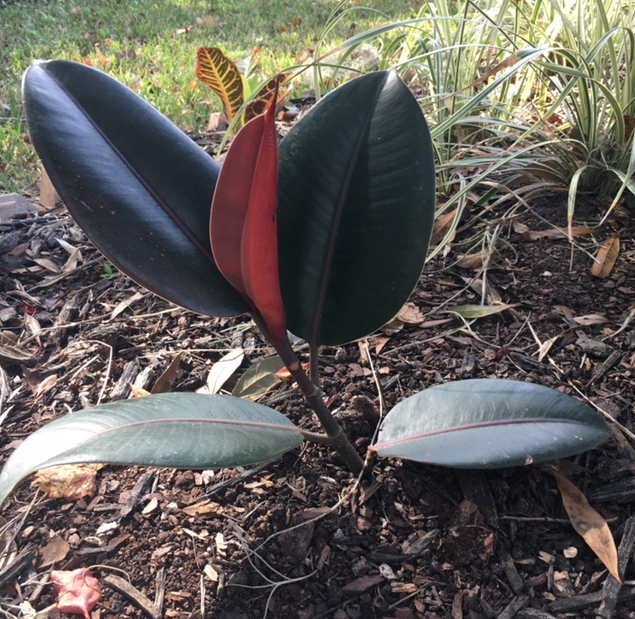
Planting the Rooted Rubber Tree Cutting
I planted the rooted cutting in my front yard under an Oak tree (see photo below). So far it is doing well without much attention from me.
Having plants beneath a tree help give it shade (obviously) but also keep it protected from wind and cold. Plants that grow near other plants can survive cold overnight temperatures better, and being in the shade means less watering.
When the temperature will be close to, or below, freezing I will cover this little plant with a towel overnight. It’s was 38 degrees the other night, and the rubber tree baby looks fine and I did not cover it.
For those who don’t know, when you cover plants over night be sure to remove the cover in the morning! Leaving them covered is not good.
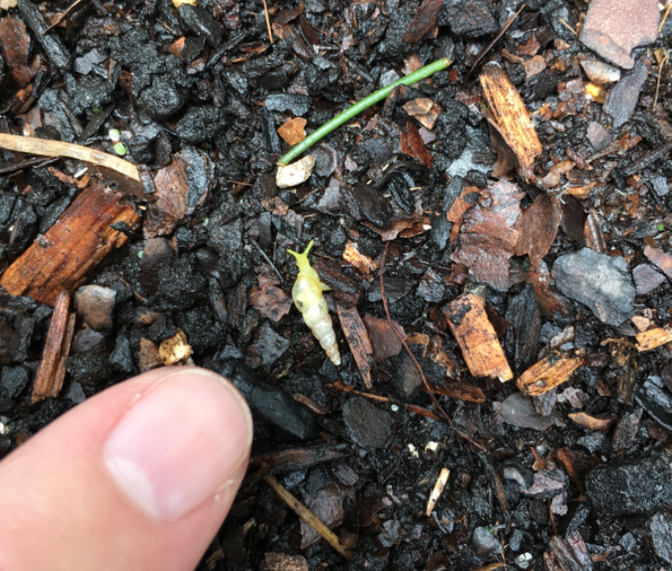
If you need more reasons than the obvious to grow vegetables organically, take a close look at the dirt in the garden bed. As I was out taking photos of the numerous mushrooms growing all over the garden, I saw an interesting, elongated shell. It looked like a mini version of the auger seashells I’ve found. I picked it up and got a photo, of what I thought was a shell only.
Shell found in the garden
I took the photo and put the shell back into the dirt. As I was photographing the mushrooms, I noticed that a bright yellow – chartreuse really – snail had come out of the shell and was moving around. He was so cute and unique that I tried to get some good pictures to show how tiny he / she was. I’m not sure I’ve ever seen a land snail with a shell like this one.
Although I searched the internet for a similar snail, I found none. He is a mystery. I keep thinking of my neighbors who cover their garden with black plastic in summer to kill all the nematodes. I wonder if they think about all the other little critters they may be killing.
If you just love snails, and want to know more about them, read this page full of info at the Welcome Wildlife site called, “All About Land Snails“.
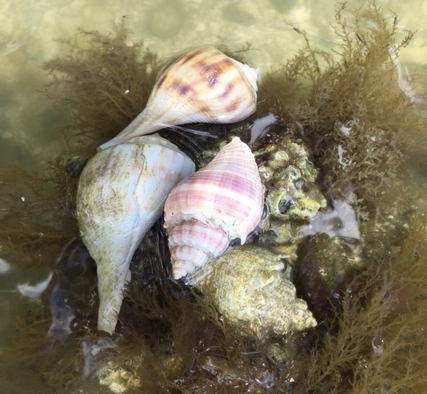
And if you love seashells, please visit my blog where I photograph and write about the seashells I collect in my part of Florida. I am much more familiar with sea snails!
Shells I found while beach-combing from our boat on the ICW in Florida
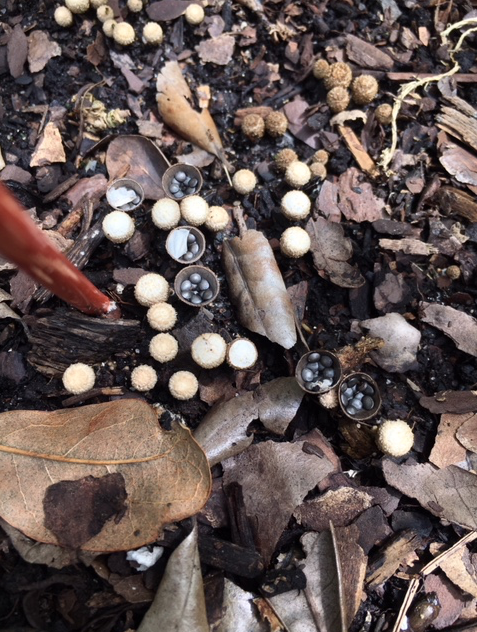
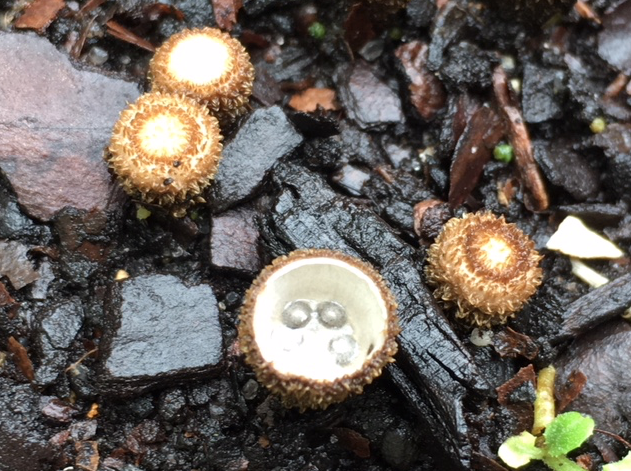
I kept seeing these interesting little growths in the dirt in my vegetable garden. As I searched for info about the orange mushrooms that keep popping up, I came across the bird’s nest mushroom (fungi), and I said…”Ah ha… that’s it!”
The Cyathus striatus is tiny and very unusual looking. To me it looks like a little bowl full of seeds. It begins as a little bumpy round ball- I’m not sure if it begins as white or brown, and then top “disintegrates” leaving the bowl shape and serving of beans inside.
Someone named it the “bird’s nest”. That works, but the bits look more like beans or seeds than eggs. These things are really small and easy to overlook unless you get down close to the earth. (The red post in my photos is one leg of a tomato cage.)
Bird’s Nest Mushroom (Cyathus stratus)
This is only one type of bird’s nest fungi. The “eggs” do not come out. I tried tipping a bowl over but the contents remained intact.
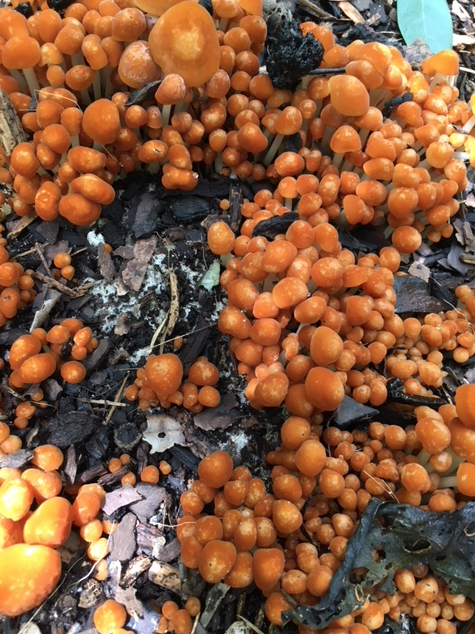
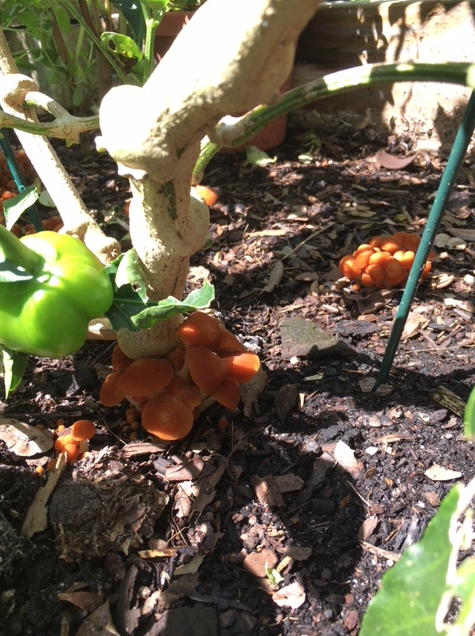
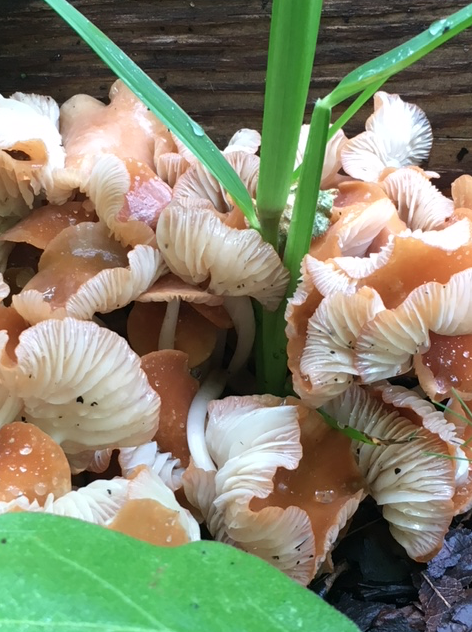
I’ve been seeing other mushrooms in my raised bed garden. The bright orange mushrooms continue to grow beneath the eggplant and pepper plant.
I’m trying to find out about these orange mushrooms that keep growing at the base of my vegetable plants. Are they okay to leave there? Are they good or bad for the garden? I have lots of questions because I have never had this happen in my garden before.
Read on for the answers I found. (All photos on this page are my own.)
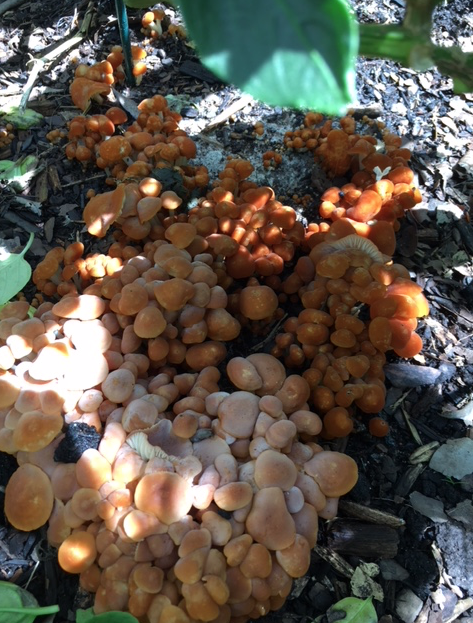
Orange mushrooms continue to grow in my raised bed garden
As soon as one “batch” of mushrooms dies down, others begin to form. They seemed to begin around the base of the eggplant, which has been growing for nearly 2 years now. I am wondering if that plant is dying.
So after searching around the internet, many gardeners say that mushrooms in the garden are a good thing. It is a sign that the soil is alive and well, or something like that. But I don’t know about when the mushroom grows off the stem of a plant. Usually mushrooms grow on dead or dying things, like trees. It could be that the mushrooms just look like they are on the plant, but are really coming out of the dirt. It’s hard to tell.
I did dig up the stinkhorn mushrooms that must have arrived when I added certain bags of soil to the bed. They really did stink, and were not something I wanted to look at either. I love nature, but those things were really disgusting.
Mushrooms growing at base of eggplant
Some people have mentioned that mushroom compost is excellent for amending the soil, so when these mushrooms die they are helping to compost the dirt in the bed. Mushrooms will grow on organic matter. We’ve had lots of rain lately, and they grow in the shady areas, beneath the bigger plants.
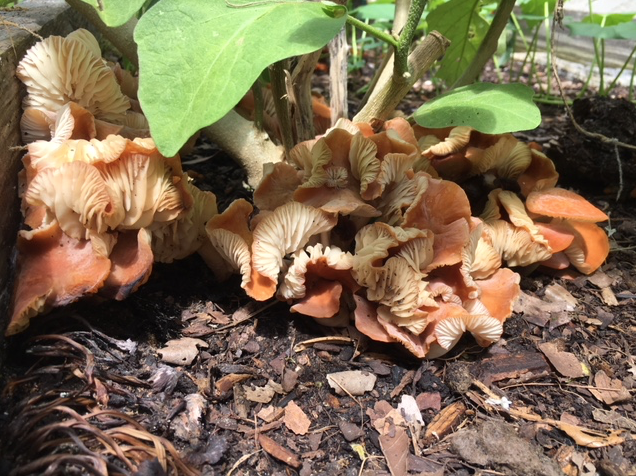
Orange mushrooms growing under and from the base of the pepper plant
I would love to know what type of mushroom this is. When I search “orange mushrooms” I get info about the chanterelle (good to eat, although I won’t ever eat a wild mushroom found by me!), and “pumpkin, or jack o’lantern, mushroom” (which is poisonous). I don’t believe it is either of those. Of course there are so many types of mushroom, I may never know the identity of this one.
For now I will let them grow and do their thing. I found some “bird’s nest” mushrooms in the garden as well.
Here are some links to more “mushrooms in the garden” information.
I only venture outdoors for about five minutes at a time these days because of the heat, but I do go out to get photos and check the vegetable garden.
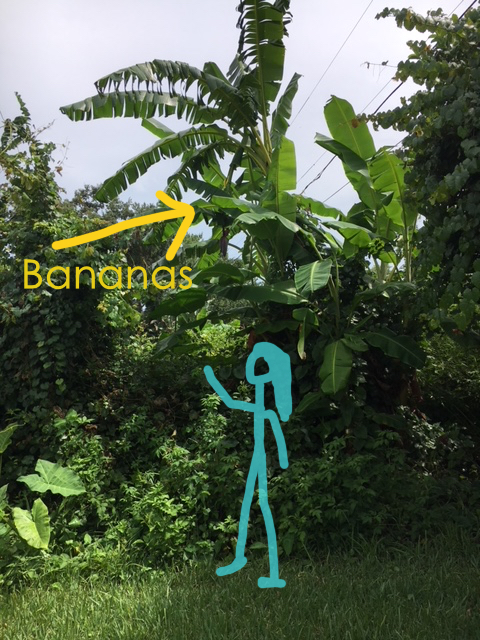
Although the banana trees in the back corner of the yard were frozen this winter, they have come back and grown very tall. In fact, one of them recently put off a shoot of bananas!
Height of tree and bunch of fruit – I am 5’5″ and can’t come close to reaching it. (That’s me in blue LOL)
I’ve had banana trees bear fruit before, but the bananas were never very good. Maybe we didn’t wait long enough to pick them. The only bananas I know about are the ones sitting on the grocery store end caps. So maybe it’s time to learn about those wild bunches of bananas.
How to Grow and Harvest Bananas – I Just Learned This!
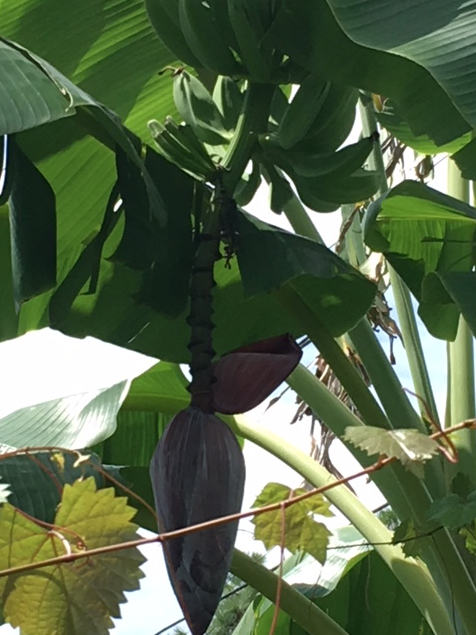
All those little bumps along the stem above the bulb on the end (photo below) will become bananas! This plant is just getting started. The Dole video below mentions waiting 12-13 weeks after the bananas begin to grow before harvesting. They cut theirs while they are green.
As the bananas fill in along that stem, they will get heavy (60 plus pounds!) and some trees need propping up. I don’t think I will be able to do that. This tree, and other little ones around it, are in the bushes next to my yard and not in a “garden” area. This bunch of bananas is on a tree that must be 15 feet tall (photo above). Since I took this photo, the branch has elongated so more bananas can form along the stem.
Bananas on the tree
First, I want to say that I did not plant those banana trees. The house behind mine has a big garden area and they do have banana plants in their yard. I’m guessing that the banana trees now growing on this side of their fence came from their yard. I have no idea what type of banana trees they are.
The University of Florida Gardening Solutions page says that because of sandy soil bananas need to be fertilized. No one has fertilized “my” banana trees.
Something I have learned is that once a tree produces bananas it is done. It will not produce any more. That is why bananas have off-shoots, or baby banana trees growing near the large one. The little ones will grow and do the same thing as the “mother” tree.
Growing Bananas Videos
In my search for growing bananas information I came across a couple of cool videos. The first one is nearly 30 minutes long and the grower is growing (and eating) “ice cream” bananas.
He makes a mistake by cutting of the 60 pound bunch of bananas thinking he can hold it in one hand – and drops it! Then, according to the comments below the video, he hangs the bunch the wrong way – I don’t know about that. Some viewers also left comments that cutting down the main tree is not necessary.
In the second video, which is about the Dole company and how they grow bananas, all the workers do is chop the leaves off the main plant and leave them on the ground to provide nutrients. They do not cut down the whole tree.
Dole company video – which I found to be interesting.
Potential Problems With Growing Bananas
A healthy banana tree can add interest to the yard, but when they turn brown, or begin to die and fall over, not so much.
Plant in an area where there is space for more “baby” plants to spring up. None of those banana trees in my photo were planted. They sprung up on their own.
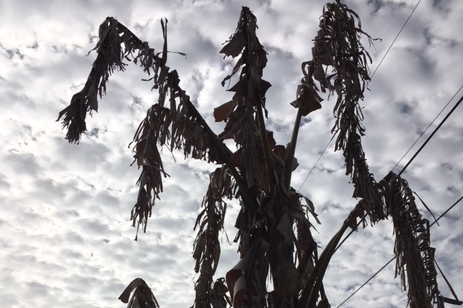
The hurricanes – we’ve had two major ones come through within the two years I’ve lived in this house – the wind shredded the leaves of the trees to bits.
Then we had some very cold nights over the past winter which turned the trees brown.
Yet, here we are with very tall, lovely trees less than a year later, and one is growing bananas already. The trees bounce back quickly in this hot, tropical climate, but they can die way down.