Time to Harvest the Roselle Hibiscus For Tea

This year I grew a few Roselle Hibiscus bushes to collect the pods and make tea. Ants are always a problem, but I found an easy solution.

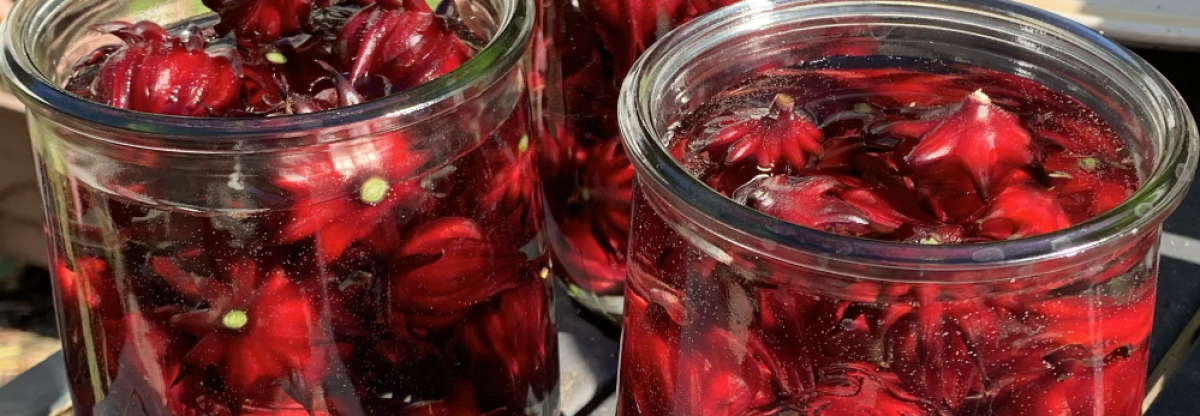
Last week I began cutting off the larger roselle hibiscus pods. Once they flower, the pod, or calyx, gets big with the seed pod inside. The red outer petals are ready to use.

Roselle stem with flowers and calyxes

This year only two large Roselle hibiscus plants were growing in the ground. I learned my lesson after the first year when I had way too many big, bushy roselle plants.

One plant would be plenty for me, but I guess I planted two to be on the safe side. I like to have the petals to make tea.

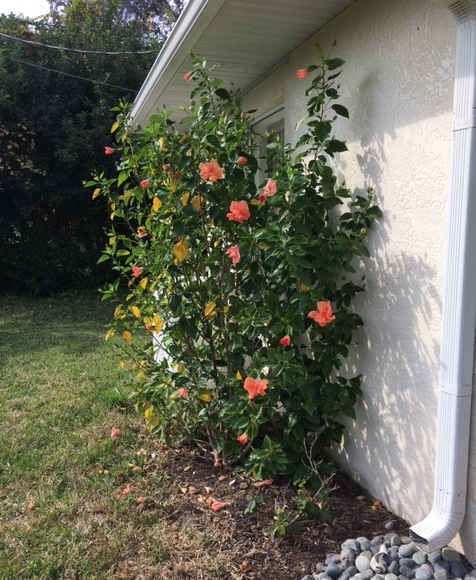
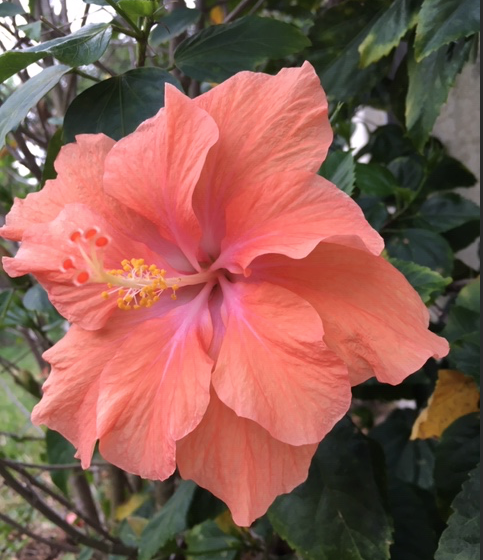
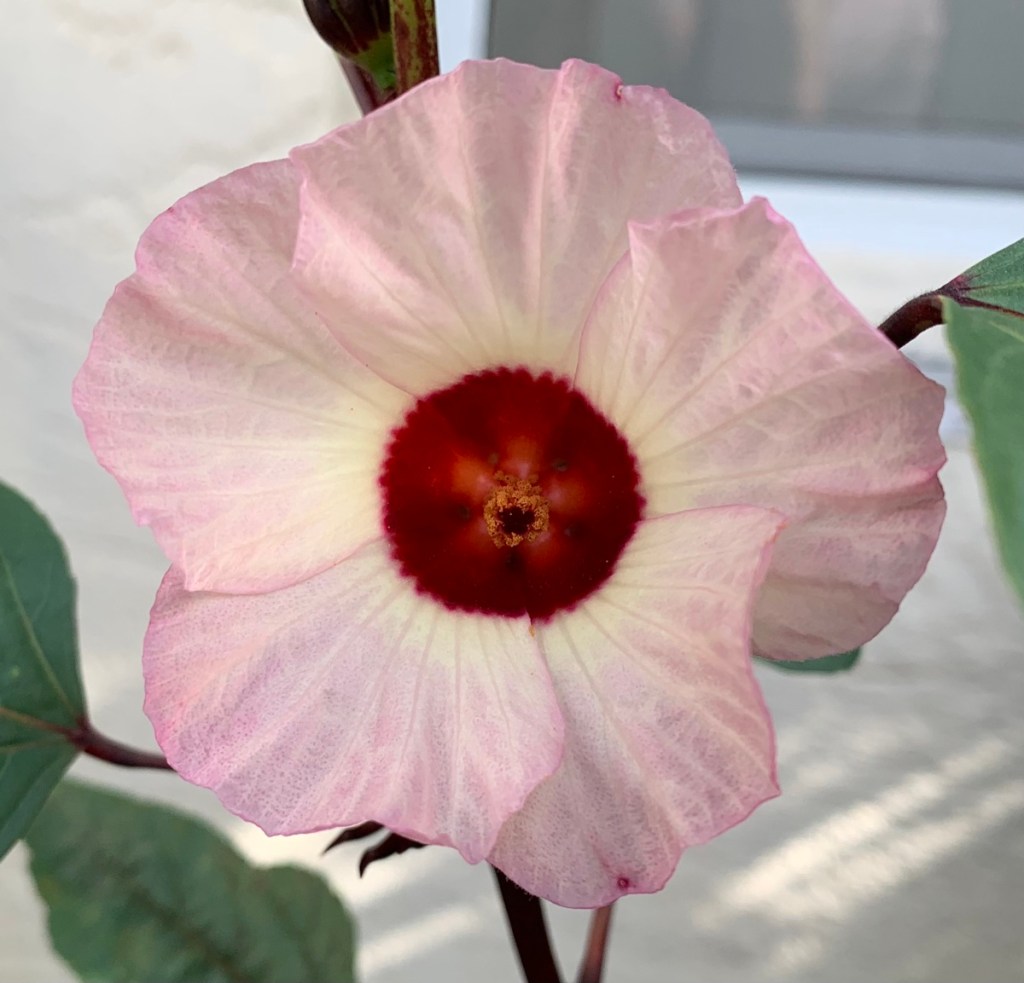
This hibiscus variety is not the same as the hibiscus that flowers and becomes a big bush here in Florida. The Roselle has flowers, that last about a day, but the pods that come after are what we want.

Dealing With the Ants – No Sprays Needed

Ants are drawn to the pods. If I wait too long there will also be white mealybugs inside the petals also. This year I harvested the largest calyxes (or pods, as I call them) in early October. Many large pods had already formed, but lots of smaller ones were still coming.

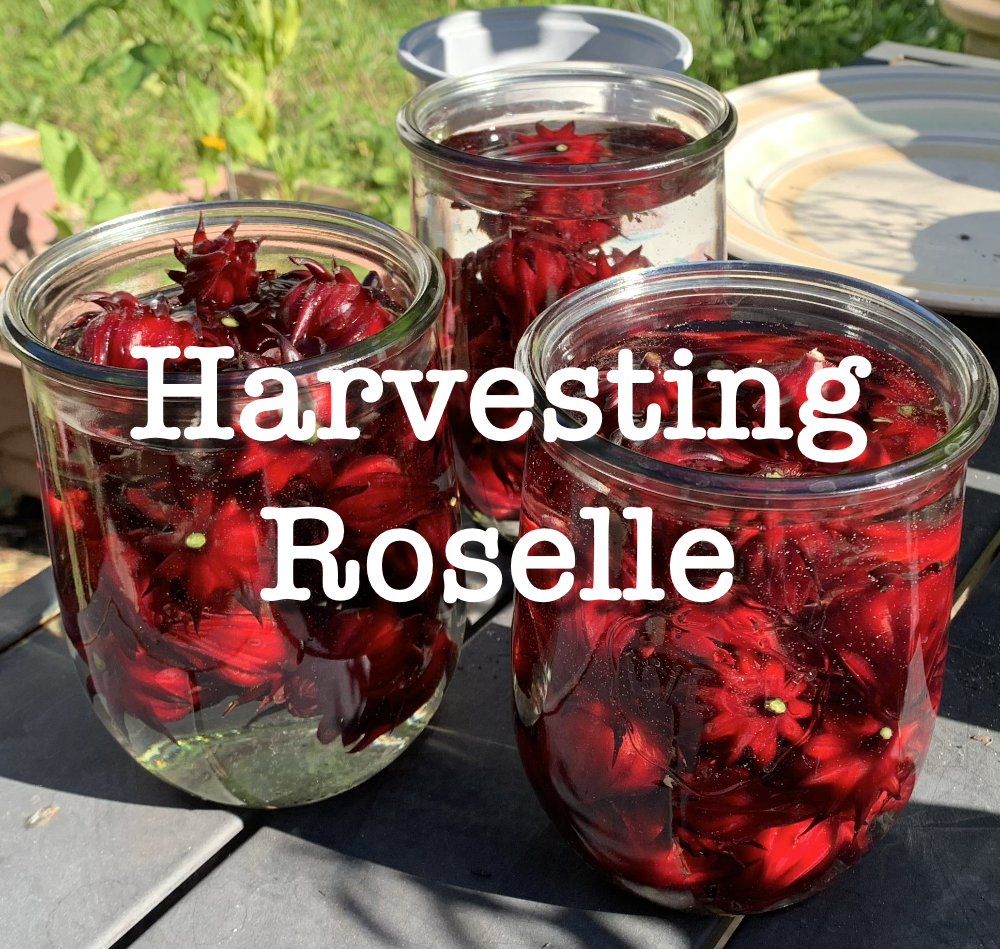
I soaked all the harvested pods in jars of water outdoors. This either killed the ants, or caused them to crawl out and leave the pods. By the way, these were not biting ants.

After a bit of a wait, I drained the pods and began to peel off the red petals. All the ants were gone. I found only one mealybug, so I think harvesting early helps with that.

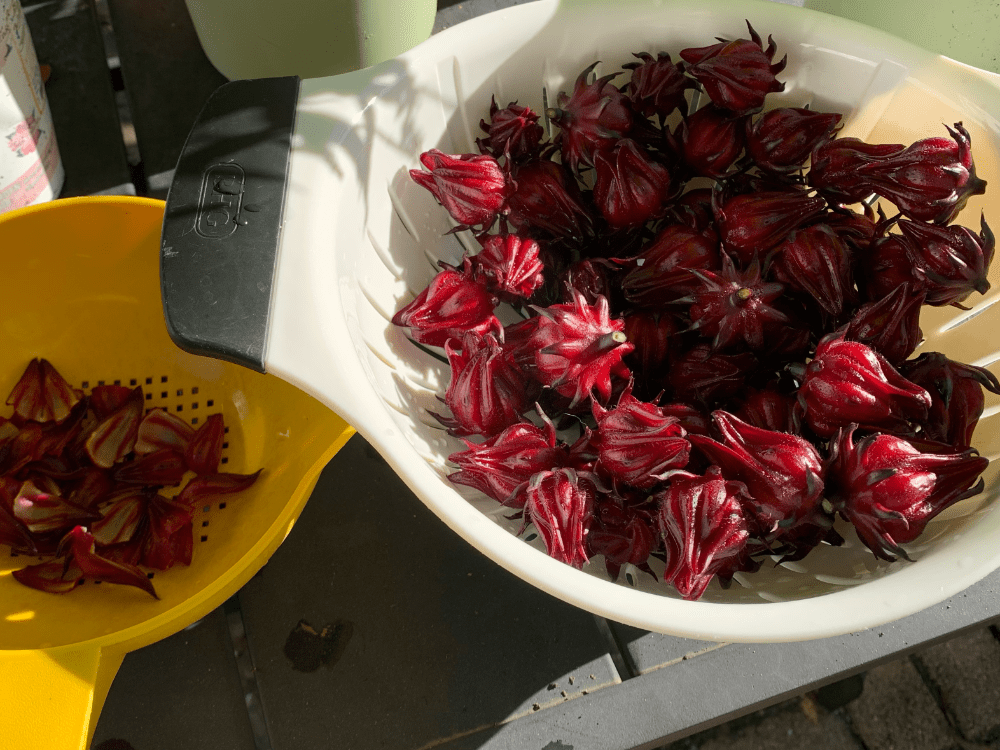
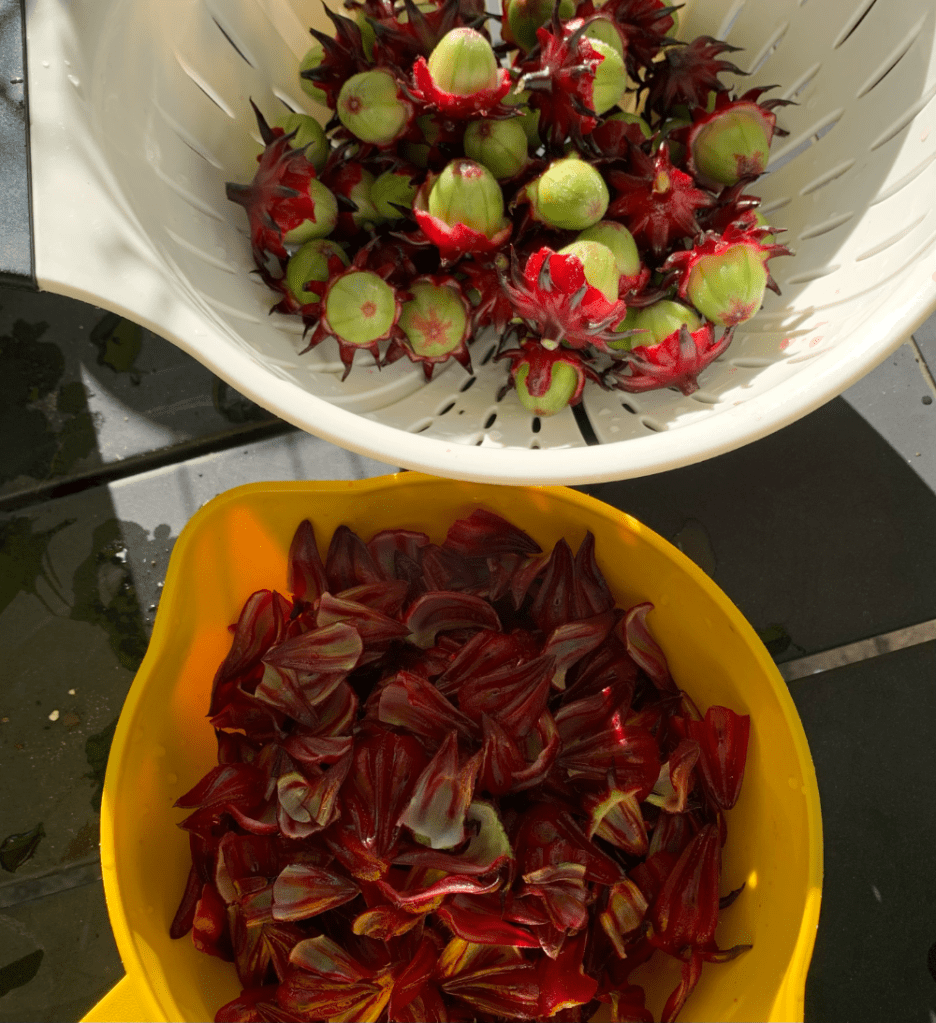
Once the petals were all removed, the remaining green pods went into the compost. I rinsed and dried the red petals and stored them in the freezer. I’ll take them out to use when making tea.

Simple Tea

All I do is boil water and let the petals soak in it for 10-15 minutes. Sometimes I make an herbal tea and simmer the roselle along with Moringa leaves, Maypop, rosemary and basil. Or, I use whatever is growing in the garden.

After the harvest of the biggest pods, I cut down the plants, leaving only a couple of tall stems. I’ll collect a few of the pods when they are dried and save the seeds inside. This hibiscus likes the heat and does not continue to grow over the winter in my yard.

The seeds will be planted next year to grow one, or two, new roselle bushes. No more than that!

bees

More fun times in the garden…

Ways to Use Garden Greens and Not as Salad

Fresh garden greens can be used in many ways besides making salads. They can also be cooked and added to many dishes for additional flavor and health.

Now that winter has come to Florida, I am growing a variety of greens, and I love it! It’s the best feeling to be able to walk into the backyard and pick my own fresh food.

Let’s first define the “greens”. Obviously, typical salad greens, like arugula, lettuces, and spinach are included. Broccoli and cauliflower leaves, and sweet potato leaves (use in summer) are some others I include.

During winter months I use my Chijimsai spinach and arugula leaves to make salads. Honestly, I do get tired of eating salads.

Fresh green leaves can be added to many dishes and they can even be sautéed. The garden provides greens year round in one form or another. The trick is to have them always available, and not letting them go to waste.

Cook Rice in a Healthy, Green Water

I’ve never been a big rice eater, but lately I’m eating Basmati rice mixed with vegetables. The type of rice does matter, and it has changed my mind. The vegetables may come from the garden, or can be store bought. Either way, a little bit of rice, with loads of vegetables, works well to create a healthy meal.

My Rice With Greens

From the garden I have picked one beet leaf, three small parsley sprigs, one piece of oregano, Chijimisai spinach leaves, arugula, and mustard greens. I’m using what is available right now.

After rinsing everything off, I rolled it up and chopped it finely. The green bits were added to water, along with dried basil, chopped onion and poblano peppers. I let it simmer for 20 minutes and then added the rice.

white rice cooked in water with fresh greens added
Basmati rice cooked with greens

Once the nutritious rise is made, combine it with just about anything!

Fresh Greens For Flavoring Soup

Pick greens fresh, rinse and add whole, or chopped, to any type of soup or stew. Unless the leaves are very large, or a bit tough, like kale and broccoli leaves, throw them into the soup whole.

Garden vegetable soup in mug
Garden Soup Recipe

Omelete Filling

Often I will sauté some greens and use them to fill an omelette.

Farmers Market vegetables and eggs

More Ways to Use Fresh Garden Greens

There are many ways to add your garden grown greens to food. Add to sandwiches, tacos, and any place traditional “lettuce” is used. Iceberg and Romaine can add crunch, but arugula and sorrel will add a flavor punch.

This page at Taste of Home has some nice suggestions for recipes that include all kinds of greens.

If you are not afraid of chopping, fresh greens of all types can be part of a Florida gardener’s meals year round.

Homemade Garden Soup, Informal Recipe

I cooked a garden vegetable soup the other day (with some beef) and wanted to share the informal recipe here. Make it vegetarian too. My garden has beets, carrots and herbs, which I used for freshness.

Whenever I make homemade soup, I know it will never be the same as the last time I made it. Soup should contain local and seasonal vegetables, if possible. I choose ingredients from my garden whenever possible. Depending on the season, I will have different food to use.

I’m not a food blogger, so this is an informal list of ingredients I used along with approximate cooking times. It is meant to be a guide.

Garden Soup Ingredients

During Florida winters, we can grow root vegetables and herbs. These are the ingredients I ended up using for my soup. You certainly don’t need to use the same ones. Feel free to add more, or use less. I pulled / picked vegetables (beets, carrots, and herbs) from the garden to supplement store bought. My soup ended up delicious and flavorful.

You will notice that I do not include amounts. I add whatever I think appropriate.

Ingredients

  • Chop celery, garlic, and onions and sauté in the bottom of a pan. I used my Staub pot on the stove. Then I moved it to a single electric burner (Amazon paid link) to slow cook. (My stove doesn’t work properly 😡.)
  • Add broth. I used approximately 6 cups total of vegetable (or chicken / beef) broth. I made all the broth myself and saved it in the freezer, plus beet juice from cooking my garden beets.
  • Chop and add: Carrots, beet greens, herbs (parsley, dill, basil & a rosemary sprig – pull out the stem after cooking). Sliced beets would work here, but mine were pre-boiled so I added them at the end of the cook time.
  • 2 bay leaves (remove at the end), 1 -2 Tbs. tomato paste (or can of diced tomatoes). A slice of jalapeño pepper for added flavor (removed at the end).

Dried peas, lentils, and rice

Adding dried items like rice, beans, lentils or even pasta, can help absorb some of the liquid in the soup. This will help thicken up the liquid. I added a little bit of all three items to mine. One of them alone would work well. Read my post about soup basics if you are new to soup cooking. I have more advice about how to thicken soup without using flour.

  • Brown rice
  • Split peas
  • Red Lentils
Garden soup in pot
Adding the partially frozen broth, chopped greens, veggies and lentils / peas / rice.

Slow Cook

Cook the vegetables, herbs and additional ingredients on a low setting for about 2 hours, or until the vegetables are soft.

Add near the end of Cooking time

Once the main vegetables are cooked, add these and cook on low for an additional hour to heat through. Personally, I rarely add salt to food while I am cooking it, but you might want to.

  • Any vegetables that are pre-cooked. My beets were cooked ahead of time so I added them about an hour before the end.
  • Beans – I used Cannelloni white beans
  • Chopped beef brisket (or any pre-cooked meat). It’s not necessary to use any meat. I happened to have a small amount of beef to use.
  • Vinegar – small amount (tsp. or so) – optional. Helps bring out the flavors.
soup in Weck jars

Once my soup was completely cooked, I divided it up for freezing. The 2 cup Weck jars are the perfect size to store a healthy, future meal in the freezer. And I ate a bowl of it too!

More to share here:

Create Homemade and Delicious Soup With Flavor and Consistency

Making a nutritional and good tasting soup is such an achievement. Homemade goodness can’t be beat. I have a few tips for making sure the flavor and consistency is there.

When the weather finally gets cool, or downright cold, here in Central Florida, I want a hearty soup. I rarely follow a recipe to the letter. Recipe tips combine with my own ingredients and knowledge to create a delicious soup.

I have cooked for many years. I have found some good ways to make sure my soups and stews are loaded with flavor and goodness. I’m sharing my ideas on this page.

Often the troubles that come when cooking soup have to do with blah flavor and / or watery consistency. There are simple ways to deal with these things. Easily make delicious soup every time. And, you don’t have to stir in flour or a thickener.

Flavor It

1. The best way to start a soup is to use a good broth or stock. I like to make my own and freeze it for things like this. Many places sell lovely broth as well. Read the ingredients and make sure it is good stuff. I also like organic.

One of the easiest, homemade vegetable broths is created from the water used to boil, or steam, vegetables. This is very easy to do. It’s perfect for vegans or vegetarians. Don’t pour that good nutrition down the drain. If you don’t want to save it, take it outside and pour it onto the plants!

I use Weck jars (paid link) with plastic lids, and add to them each time I have vegetable water leftover. *Be aware that only certain types of Weck jars are made for the freezer. and they must have the right type of lid that is plastic – not glass. The link goes to Amazon, but I buy mine from Weck.com.

soup in Weck jars
My Garden Soup – Recipe to come

Beef bone broth, as well as turkey and chicken broth, are popular too. It is very easy to make a stock, or broth. Use the crock pot, or an Instant pot to cook the bones on a low temperature for many hours. I always use my saved broth when cooking rice.

2. Herbs are a must. Herbs not only add flavor, they add goodness in the form of healthy nutrients. Get to know your herbs and how they taste. I’ve come to love Rosemary and grow it in a pot out back. I had never added it to soup until recently. Parsley, dill and basil are regular additions to my food. I grow them all so they are readily available at various times of the year. Dried, organic herbs are just as good and I use them too.

3. Cut and chop fresh vegetables. Fresh is key for a good tasting soup. If you are a grower, check the yard for anything that can be added. If they come from the store, find the freshest looking.

I had one pea pod – yes, only one – when I checked my garden the day I made my soup. I included about 10 little peas in my Garden Soup. Even though I may never even taste those peas, it’s the nutrition value from a backyard food that was added.

I also pulled some beets (and the chopped greens) and carrots. It all went into the soup. You can probably see why my soup comes out a little different every time I make it!

Thickening Without Flour

There are a couple of ways I like to thicken my soups and stews. They are all easy, and don’t involve flour or cornstarch.

  • A favorite method is to blend some of the soup, without meat pieces, and include some liquid. Make sure to cool it first. Pour the blended soup back into the pot. About a cup full of soup will work.
  • Add some type of white liquid like coconut cream or milk. It doesn’t really thicken it much, but looks better!
  • Include dried things like rice, split peas, and / or lentils. They will soak up some of the liquid. (I added a little of all of them to my Garden Soup!)
bags of dried rice, lentils and split peas

Once the soup is made it can be saved in the freezer. When I cook soup, I end up being the only one who eats it. The frozen jars of deliciousness often go camping with me. Or pull it out on a cool day when soup is appealing. Vegetable soup is a good side to other food also. Enjoy!

Keep reading the blog:

Harvesting the Beets and Cooking a Meal of Greens

Using the beets and greens that have grown over winter in my Florida backyard.

It is January 25th and today I pulled up all the beets. They were growing in a box which I needed for planting and growing green beans. 

The beets were small and most were not really beets, but long red roots. However I did get a few to cut up and cook. I’m not sure, but I think maybe beets are mainly grown for the greens where I live. I didn’t have luck with growing actual beets.

Thanks to this site, I knew how to deal with the greens and incorporated them into my beets and rice meal. 

How I Made This Meal

  • Pull beets from backyard and rinse dirt
  • Separate greens from beets and trim and cut beets for cooking. Simmer in water for 20 minutes, or until soft – my beets were small.
  • Remove stems from greens and chop
  • Slice onions (also from backyard), along with garlic
  • Saute onion, garlic and stems in oil for a minute or two and then add a little water. Cover and simmer to soften.
  • Chop leaves a bit and add to sautéed mix with a bit more water if needed
  • Cover and simmer for 3-4 minutes until it all looks cooked.
  • Squeeze in a little lime juice. 
  • Cook Basmati rice in the beet water – 1/2 cup

If any water is leftover in the pan, dump it into the beets pan. Reserve all that water once the beets are cooked and use it to cook rice.

This is a waste free meal that reserves all the goodness of fresh picked vegetables. The roots and yellowed leaves of the beets went into my compost pile.

Add salt and pepper and butter… yummy!

beets and greens with rice
Garden beets and greens cooked and served with Basmati rice

When the Food Doesn’t Grow, Eat the Leaves

Have you ever eaten the leafy parts of broccoli, cauliflower and Brussel sprouts? When the normal food did not grow from my beautiful plants, I began to use the leaves for food.

Over the winter months here in Florida, I have grown some nice looking cruciferous vegetables. Or should I say, the plants are nice looking. So far, there are no actual vegetable parts to eat.

The Brussel sprouts (Catskill – Long Island Improved), broccoli Calabrese, and cauliflower (Snowball) PLANTS have all grown nicely from seeds put into the ground this Fall.

Brussel Sprouts in December
Broccoli in December
Cauliflower in December

Be sure you know what you are eating as many vegetable leaves are not edible and some are dangerous to eat.

Even without the normal parts of the cruciferous plants, the leaves can be cooked and taste pretty good!

I don’t know if any of these plants will grow heads of cauliflower, stalks of broccoli or little green sprouts. I had high hopes, but maybe the weather has become too cold. I’ll continue to let them grow, while picking only a leaf or two from each plant to cook.

When these leaves are boiled or simmered for an hour or more, they are soft and easy to eat alone, or in a meal. I save the water too, which is full of nutrients.

Add the leaves, either whole or chopped, to soup, stew or in stock. They are similar to cabbage leaves. Freeze the leftover cooking water for later use.

A single electric burner works well for simmering for long periods of time. It also frees up the stove.

Other Garden Leaves Okay to Eat

I’m also enjoying my borage leaves and using them to make tea. Borage grows very well during the coldest part of a Florida winter. Even without the pretty blue flowers, the big bristly leaves can be picked to make a mild tasting tea. This page, at Sow Right Seeds, suggests picking the leaves while they are small, but I take the largest leaves from the bottom of the plant and leave the small ones to continue to grow. I steep them in hot water for 15 minutes.

Just last summer I discovered that sweet potato leaves can be eaten! In fact, they are very nutritional. These I do pick small and add a few to a salad or pot of soup, or stew. They are good chopped and added to a stir fry as well. Leaves are heart-shaped and they can have pretty flowers. Meanwhile the actual potatoes are busy growing underground AND they will come back and continue to grow year after year (in warm climate) if some of the plant is left in the ground.

Are you eating anything new from your garden?