Finally, Growing Tomatoes Advice For the Florida Climate

As I was searching for some other gardening advice altogether, I came across a Florida gardening blogger who seems to have very useful information to share. Unfortunately it looks as if his blogging stopped a few years ago in 2015. Maybe he moved away to a better place.

I found a post with growing tomatoes advice which would explain why I have such a difficult time with tomatoes.

First of all he starts with seeds (Plant Your Tomato Seeds). I’ve been wondering if the fact that I buy seedlings from Home Depot (there is nowhere else I’ve found) is my biggest problem. He says store bought plants “are never very good”. I already suspected this.

Start planting seeds early enough to have seedlings ready for the garden by March first. He says to buy a combination of sizes, but tomatoes won’t grow very large in this climate. I’ve found that to be true as well. I don’t have the space for a lot of plants, but I can use my fabric bags.

Which Tomato Seeds to Buy?

The blogger I am referencing plants Hybrid Tomatoes only.  I am not sure why, except that they are probably tougher than heirlooms.  A hybrid is a cross-pollinated plant.  The characteristics are better yield and disease resistance, among others.

Roma tomato seed packet

In case you are interested in buying tomato seeds online:  Organic Heirloom tomato seeds can be purchased at the Tomato Fest site. These are NOT hybrids. Heirloom tomatoes give the grower the option to save seeds to plant the following year. You can’t do that with hybrids.

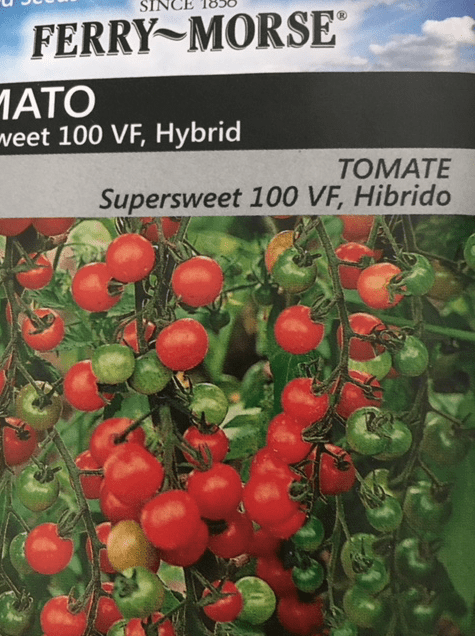
Buy the most disease and pest resistant varieties. Look at package labeling for letters that follow the name of the tomato. See the key list of what that lettering means on this page at Gurneys.  My packet above contains the letters VF which protects from wilt disease.

Indeterminates only – this means the tomatoes will continue to grow shooting out stems and growing tall all during the growing season. Indeterminates continue to set fruit while you pick ripe tomatoes. In other words, they just keep growing until something stops them. They need staking, whereas determinate varieties are more compact and can grow in pots.
**Note here: Indeterminates can grow to be 12 feet tall! I will need to re-think my staking. I suspect that in Florida they could easily grow to astounding heights.  I can see the raccoons climbing my stakes and destroying my crops.

Pick Tomatoes Early

Letting tomatoes ripen on the vine is my preference, but the raccoons tend to pick them before I get to.  My reference blogger picks his early and says they taste better when he lets them ripen indoors.  His blog is helpful, but not easy to navigate, so use the “search” area.

He mentions planting some tomatoes later in the season, in the shade, in a new area, and they did well.  Read about that at the bottom of this page where he “answers a question“.

I’m grateful for this info.

Why I Remove the Peat Pot When Planting Seedlings

From the time I first began buying plants from Pell’s Nursery in Osteen, Florida I was told to “rough up” the roots when the plant was removed from the pot.

I’m talking plastic pots here, which are the way big plants usually come. Often the plant is a bit root bound from growing in a container. In order for the plant to do well when it’s in the ground, the roots need to know they can now grow outwards.

Some plants with thick roots can actually be sliced, or cut to train them to spread. You do this at a few intervals around the root and dirt ball before it’s set into the ground.  The Pell family gave me good advice and I always had excellent luck when adding their trees and bushes to my Florida landscape.  Their planting suggestion was a good one.

Screen Shot 2018-05-13 at 8.17.22 AM
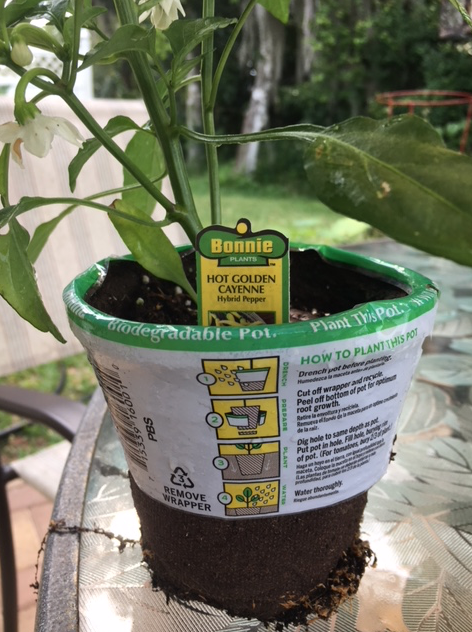
Hot pepper plant from store

These days little seedlings are often sold in biodegradable, plantable pots, which will disintegrate in the dirt. We are told to plop the whole thing (minus the bottom, says the label) into the ground. Easy-peasy, no muss, no fuss.

I don’t like it. Why would I want a pot in my garden? And what is it really made of? I also believe it inhibits plant growth.  “Peel off bottom of pot for optimum root growth” – it says this on the plastic.  So imagine if you let the roots around the sides have that optimum growth chance as well!

In short, it’s not necessary. Treat it like a regular pot and remove it.

Screen Shot 2018-05-13 at 8.17.15 AM
Everything removed and ready to plant

I always remove the peat pot when I plant something purchased at the store (in my case the Home Depot). I do this because it releases the roots so they can instantly grow into the garden dirt in a natural way. I see no reason to add a pot to the garden soil. It’s just as easy to remove the plastic wrap and the pot.

This type of pot is often used for starting seeds. When I tried this when growing things for my northern garden, the pots began to turn moldy! So they aren’t necessarily a good choice for that either.

Screen Shot 2018-05-13 at 8.17.05 AM
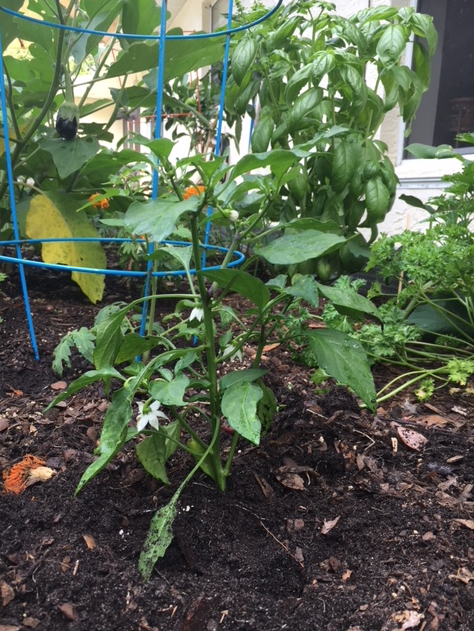
New little pepper plant

By the way, I’ve found that hot pepper plants are one of the easiest types of vegetable to grow.

Starting New Tomato Plants From Suckers

I always plant little tomato plant seedlings when I garden. But there is a way to start new little plants from the original seedlings.

Once the seedling begins to grow, it will probably grow “suckers” which sprout from between stems.  (If you don’t know what I am talking about, see an image of suckers at the Gardener’s Journal site.)  The key is to only remove suckers below the fruit producing area. Usually down by the first or second stems of the plant. The reason is to give the tomato plant fewer stems and leaves to deal with, sending production to the tomatoes themselves.

But the suckers can be turned into new plants! Warning if you live in an area of the country with a short growing season. The season is too short for these propagated plants to produce before the weather turns cold. I’ve tried.

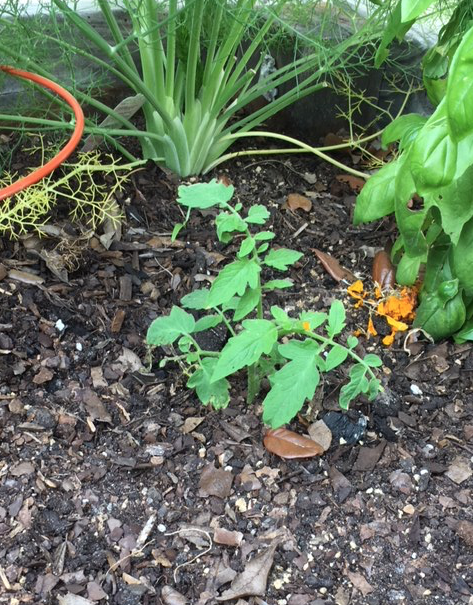
The “sucker” below was pulled off one of my store bought plants and I simply stuck it into the dirt in my garden bed. Each day I gave it plenty of water, and in the beginning it looked droopy. But they come back and begin to grow (plenty of water is the key here).

It doesn’t get any easier to have yourself a new, free tomato plant!

tomato propagating
Little tomato plant started from original, store bought plant

The other sucker plant (below) was brought into the house and stuck in a vase of water for about a week, or until it sprouted little white roots. Then I put it out in the garden.

As you can see, the water grown sucker looks better than the one simply stuck into the dirt. But you can do it either way. I look forward to seeing if these free plants do grow tomatoes eventually. It may become too hot before they get the chance.

propagating tomato plant
Propagating tomato

On a side note, this green pepper plant sprung up in the garden beneath my big pepper plant. I moved it to a better spot and it is growing nicely.

Be careful when weeding, and know what is what. I recognized the leaves of this little pepper and let it grow. It’s easy to simply pull out all the “weeds” and inadvertently remove a volunteer plant!

seed pepper volunteer
Bell / Green pepper plant started from a seed which dropped from the big plant

Update on Growing Eggplants That Survive Year Round

This year-round gardening with vegetables still blows my mind, but I have a few plants that have been in my garden for over a year now. Yes, they go dormant (and even look dead) when the cold weather moves into Florida, but they come back and produce even better the second time around.

Will they still be around next year? I have no idea. But this Spring season has been a great one for my bell pepper plant and now my eggplant is showing signs of producing as well.

In the Spring of 2017 I planted two eggplant plants. One was eaten up by a tomato worm and the other continued to grow and grow. It gave me no eggplants until well into the season. I finally got one. Only one. I tried the paintbrush pollination method but still nothing happened.

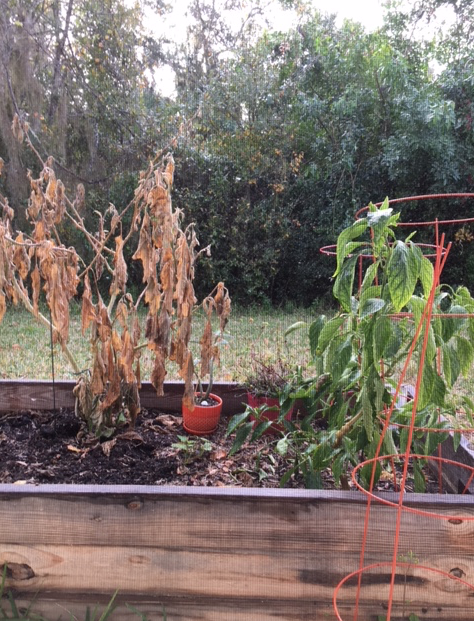
The plant got huge. I had to cut it back because it was taking over the garden bed. When the cold weather came, the entire plant turned brown and I thought that was it.  I’m used to plants dying and having to be planted in Spring.  When my vegetable plants don’t die, and instead begin to grow again, it amazes me.  I didn’t even know vegetables could do that.

dead eggplant
Eggplant plant turned brown during Florida winter.

However, at the base of the plant some greenery remained. As the weather warmed, more leaves and stems appeared.
Screen Shot 2018-05-09 at 5.55.53 PM
The plant is now large again, and getting lots of flowers, which contain spikes.

eggplant flower
Spikes on eggplant flower

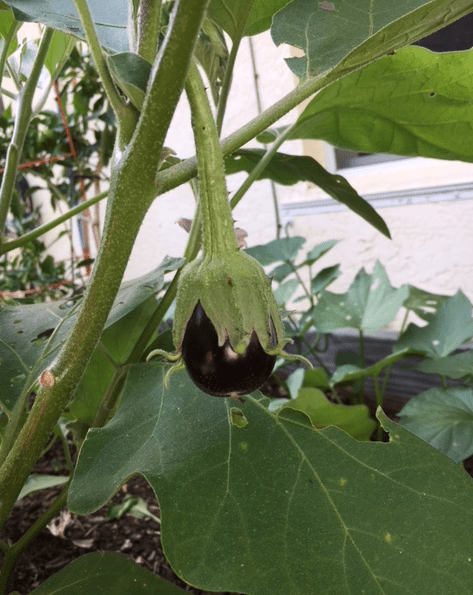
As of now, May 2018, the plant has been flowering like crazy but again the eggplants themselves were missing. So the other day I pulled lots of the flowers off (that is when I noticed how spiky they were!). I don’t know if that is what the plant needed, but suddenly I now see a small eggplant. There are signs of maybe a couple more ready to pop out as well.

Too many flowers? I don’t know if that was a coincidence, but if your eggplants are not producing, try removing some of the buds.

little eggplant
A new eggplant growing on this plant in it’s second year

Blossom End Rot Problem on The Squash

I’ve been having a blossom end rot problem with my Summer Squash. After reading a bit about the disease, I found a couple of solutions to try.

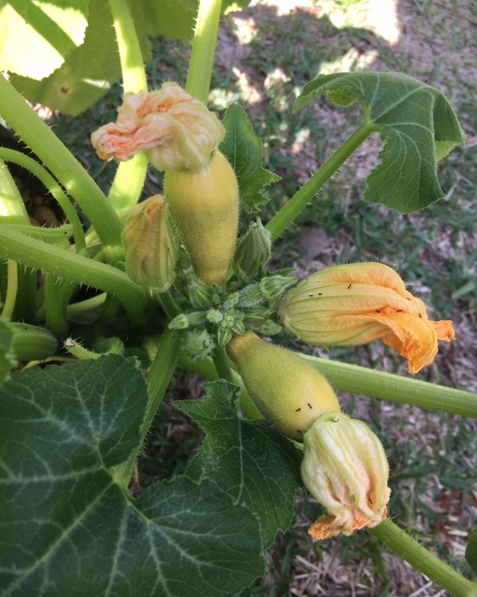
Vegetables will begin to grow and look fine, but then the ends will turn brown and rot the fruit like in my image below.

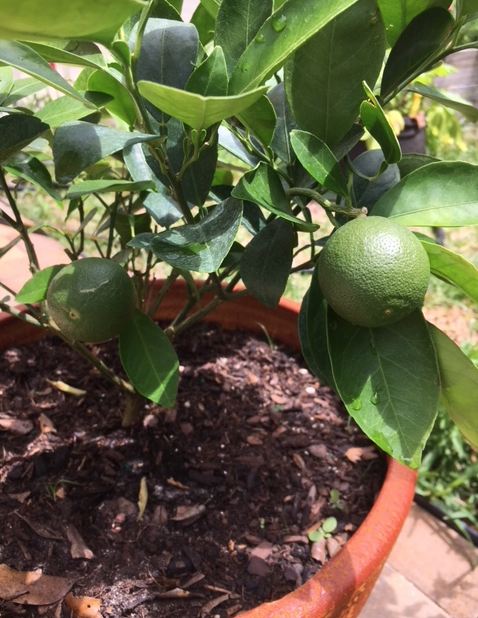
First, overwatering is a concern. Because it tends to be very hot here, I do water my garden every morning. Plants in pots outdoors, like my Persian Lime Tree, need lots of water.

The problem with too much water on the yellow squash, or zucchini which is similar, is that calcium leaches out of the soil and the plant can’t get enough to grow the squash correctly.

So adding calcium can help.   I decided to try adding eggshells, but store bought organic calcium may be the better way to go.  It’s not cheap, but this problem can affect many types of vegetables so the bag would probably come in handy.

squash blossom end rot
Squash blossom end rot

I have read that one way to add calcium to garden dirt is by adding crushed, dried eggshells.

A mortar and pestle can be used to crush the shells to make a fine powder. This can be added to the soil.  However, I also found this page at the Garden Myths site which claims that eggshells basically do very little to enhance soil.    They say that grinding the shells to powder and adding to acidic soil is your best shot for this idea to work.  They claim that eggshells remain intact for long periods of time and do not break down to add nutrients to the soil.

In the end, what the suffering plants probably need is additional calcium (in whatever form you choose to use) and possibly less water.  Read more about Blossom End Rot at the Gardeners site.

May Vegetable Garden in My Florida Backyard

May is here and my backyard vegetable garden is off to an okay start. I’m still getting used to growing veggies in this climate, but I’m happy to have big, luscious green peppers to use already!

My garden area is very small and the plants are divided between a raised bed, fabric bags, and an old grow box. All my Florida gardening is still in the experimental stages! I’m learning, but at least I have the raised bed filled with good dirt.

May garden
The backyard garden in May

This pepper plant has been around since last Spring! This amazes me. I always thought pepper plants liked the warmth, but this one survived winter. And, yes, it’s Florida, so “winter” is a dirty word here, but the temperatures were truly cold for a few days. I assumed the pepper plant would die, but it did not.

And once Spring arrived (February… hahaha) buds appeared and the peppers began to grow.  I was picking them by April.

green peppers
Picking green peppers this year by April

The yellow / summer squash is something that I am having trouble with. The plants (from seeds) grew nicely and then flowered and grew little squash. But then they began to pucker up and rot on the ends.

This can be caused by too much water, so I have been watering them less. Also I added some ground egg shells to the dirt because I read that a lack of calcium can be the culprit for blossom end rot.

I’ve picked two small squash so far and have had to throw many rotten ones away. The ones I ate were delicious!!! So I am hoping for more. Last year I tried to grow them also and had bugs and mold take over before I got squash to eat.

yellow squash
Yellow Squash

The cucumbers have just started to take off. Some are growing in fabric garden bags, and a few are planted at the edges of the raised bed.

I’m hoping for cukes to eat soon, but I’ve also read that the raccoons don’t like the feel of the fuzzy stems on cucumbers. If I have strands of cucumber vines all around my garden, will the raccoons leave my vegetables alone?  Please work……

cucumber plants
Cukes in fabric bag and inside bed

For the heck of it I threw a couple pieces of old sweet potato into my mostly empty garden back in February (?). Now the vines are long and pretty. When they start to die I will dig down and see if I find potatoes.  I’ve grown regular potatoes, but never sweet potatoes.

sweet potato
Sweet potato vines and leaves

My little red pepper plant is growing lots of peppers and I’ve already used a couple red ones. They are very hot. I really wanted jalapeños but there were no plants when I was shopping. I dislike having to buy all my plants at the Home Depot, but there are no farm stands around.

chili red hot peppers
Chili red hot peppers

I found a couple of parsley worms on my fennel. Dill plants were nowhere to be found, so I settled for fennel, which I have never grown. Ladybugs and apparently parsley worms enjoy it and I’ve been chopping it up to add to food I cook.

parsley worm on fennel
Parsley worm on fennel

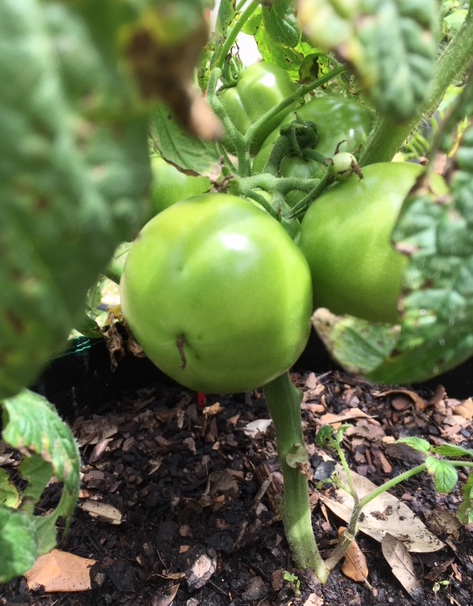
One tomato plant has 8 green tomatoes and the other has 6. I’m counting them to make sure the raccoons are not stealing any during the night. I’ll bring the plants inside if raccoons begin bothering them.

green tomatoes
Tomatoes are coming along

My little Navel orange tree lost a lot of it’s small fruit, but a few oranges are still growing.

navel oranges growing
A few oranges are growing on the new Navel Orange tree

The eggplant is still not giving me any eggplants, but it’s a good home for ladybugs. I’ve seen them in many forms (eggs, larvae, and beetle) crawling on the leaves. The aphid problem is no longer a problem. I can’t find a single aphid on anything! Don’t you love those ladybugs?

The weather will continue to get hotter and I may have to stop gardening within a month or so. I’ll see what lives and what doesn’t and go from there.

May garden in florida
May garden view