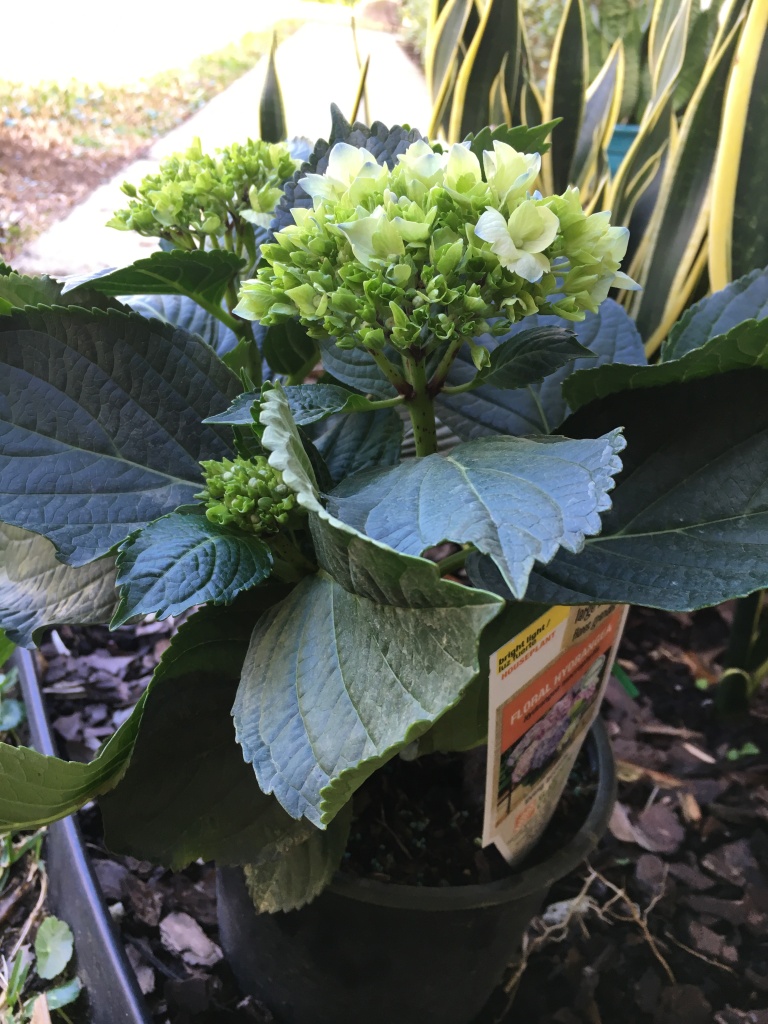
Walking through Home Depot the other day I came across a small display of potted hydrangeas. Because I have been wanting to see how hydrangeas do in this southern climate, I splurged and bought it. It cost around $12.00.
New hydrangea plant
Difference Between Indoor and Outdoor Hydrangeas
This potted plant is meant to stay in a pot and be grown indoors. It has probably been growing in a greenhouse and has been babied along with attention and fertilizer and whatever to make it bloom. This helps to get it sold. But once the plant is home and the blooms have gone by, then what? Well, I have no experience with growing potted hydrangeas.
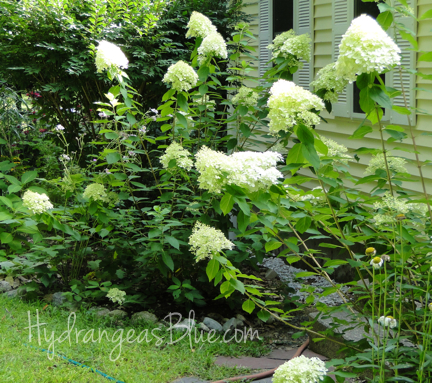
In New England, where I learned first hand about growing beautiful hydrangea perennials in my yard, the plants I bought were large and flowerless. I bought them in Spring or early Fall and planted them in the ground. They were meant to grow and thrive outdoors. Each year the plants grew larger and would provide pretty blooms in summer. Each winter they went into hibernation and came back to life in Spring.
Limelight Hydrangea – August 20th, 2014
I don’t know what to expect from this new little plant, or how it will do in my Florida yard. I won’t be keeping it in the pot because potted plants demand a lot of care.
Read my update on how the flowers changed color and what is happening now that it is in the ground.
I just bought a new iPhone XR and wanted to try out the camera so I took a quick walk around the yard this evening. The no-see-ums were brutal so it was a quick photo shoot. Not all photos were taken with the new camera.
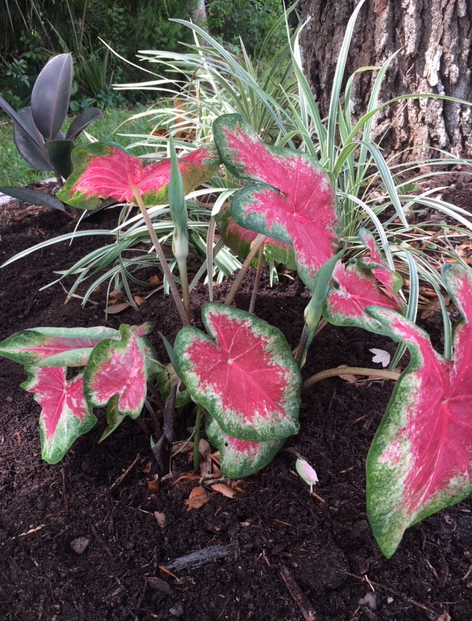
My caladiums are doing well. The white-leafed variety is not looking so good, but the red looks nice. Did you know they come back each year after winter?
Caladium with red leaves
My bromeliad is shooting off some new little babies. I already started two new plants from this one and it looks like I will have more.
Bromeliad with “babies”
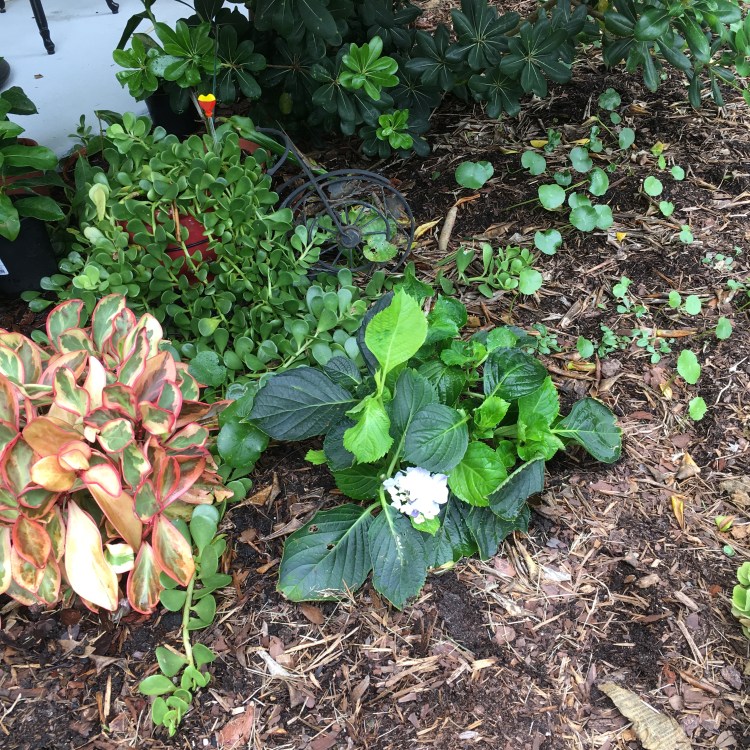
The hot house hydrangea, which I planted in the garden, is doing very well! It is in the shade most of the day and I think that helps a lot. I just cut off the dead blooms to find new flowers hidden among the greenery.
The hydrangea shrub is doing well!
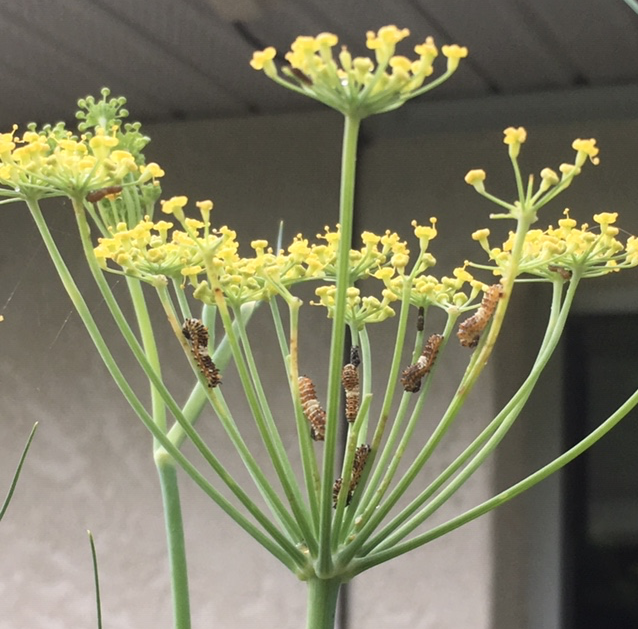
The swallowtail butterfly has been busy laying her eggs on my fennel plant and I counted 40 worms, in all stages, crawling on the stems and chowing down on the flowers. The cardinals have grabbed some, but many remain. I hope some of them survive to become butterflies.
This worm will become a Swallowtail butterfly if it survives the cardinal attacks
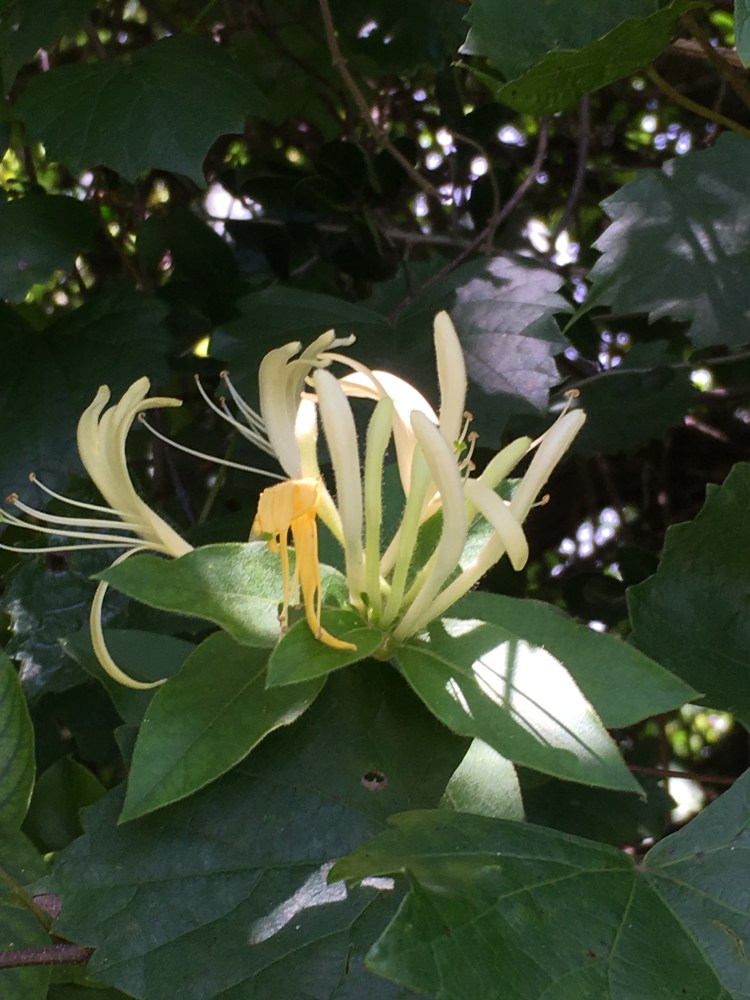
Along the back hedge I spotted this pretty white flower which looks quite exotic. I believe it is an invasive species (it’s Florida, what else is new?) called the Japanese Honeysuckle. On the other side of the house I have the invasive Brazilian Pepper plant growing like mad.
Japanese Honeysuckle?
The frogs were napping in their usual spot on top of my front door light. They make an awful mess, pooping all over the place. At night they travel over the window, front door and walls catching bugs.
If you look closely you can see the head of the third frog in the lower left of the photo. They are literally piled on top of each other. I believe this is an invasive species of frog which has killed off the beautiful green tree-frogs that used to be plentiful in Florida. I don’t know if these are Cuban tree frogs, but our outdoor security camera captured a possum climb the wall and snatch a frog off the light in the back yard! I also find dead frogs in the yard, so something is after them. The University of Florida has a page about frogs comparing the unwanted invaders with the cute green tree frogs which I never see these days.
Frogs on my front light
Of course my two cats followed me all around the yard. They love having my company outdoors and since it’s usually too hot, I don’t do much outside with them. Below is Skittle who is always interested when I am pulling weeds.
Skittle
Beautiful Fontana is my older cat but she loves to be outside as well. Both cats spend most of their day sleeping outdoors even though it is extremely hot this time of year. I am home, and always let them in to cool off and fill their bellies, but they usually go right back out.
Fontana
So that is my yard at the end of July. When we get through the next two months I will feel better. Nights will become cooler and I look forward to having a fan in the window at night. Aside from cutting the grass, not much is getting done in the yard. My vegetable garden is producing nothing much and my citrus trees are doing very poorly. I keep the bird bath filled and enjoy watching the birds that come to eat bugs and take baths.
My vegetable garden is failing, but that may be good for the beneficials and butterflies. By letting vegetables flower and go to seed, they might attract interesting creatures. I’m becoming familiar with the bugs that visit the garden and learning the good (beneficial) from the troublemakers. Nature is the way it is for a reason and I rarely like to interfere.
Because it’s tough to grow vegetables in Florida summer months, I’ve let my cherry tomato vines grow to produce only a few little tomatoes which mostly keep the cardinals happy. They pick through the skins to get the seeds! Myfennel is once again tall and I’ve found that it has become a nursery for the Swallowtail butterfly.
Fennel Flowers Become A Swallowtail Butterfly Nursery
Many tiny worms on a fennel flower head
I’m not eating my fennel because it is often home to eggs and worms of the Black Swallowtail butterfly. I’ve seen the butterfly land to deposit eggs, but seldom spot the eggs.
As I scouted the plant (it’s taller than I am) for signs of worms, I noticed that the flower heads were full! Nearly every flowering part of the plant held larvae in some stage. And near the bottom of the plant I found one large caterpillar who has managed to avoid becoming bird food.
Parsley worm which will become a black swallowtail butterfly
It used to be that the Swallowtail would lay eggs on my parsley. I documented thestages of the Black Swallowtail, eggs through hatching, on a previous post. Now that I have begun to grow fennel, I think the butterfly likes using it better than the parsley to deposit her eggs. This could be due to the flowers and the large size of the plant.
Who doesn’t love a butterfly? They don’t live long lives, but serve a purpose as pollinators and as a meal for birds and lizards. I really hope to see the lifecycle of these little hatchlings continue.
Update on the caterpillars
I have read that these types of crawlers don’t appeal to birds, the cardinals say otherwise. Each day I found fewer and fewer caterpillars feeding on the fennel. I first counted nearly 50 worms! But the following day I saw only about half that number. Now I find NO caterpillars at all left on this plant!
Cardinals are the birds I see most in my garden and I have witnessed their cherry tomato thievery. They are also very good about cleaning out the bugs – including butterfly larvae. But, that is nature for you. I will see no new butterflies but the birds are very well fed.
Beneficials (and Baddies) I’ve Seen
Beneficials, or good bugs, will remove unwanted pests from the garden. A year or so ago I found manyaphids on my squash, hibiscus, citrus and in other places. I also saw little black and red bugs. Because I didn’t recognize the bug I looked it up online. Come to find out it was ladybug larvae. It was there because of the aphids, which are it’s food.
My next-door neighbor recently told me that she was trying to kill “black and red bugs” in her garden. I warned her that they might be beneficial ladybugs.
You want beneficials in the yard and garden. They keep things in order naturally. If my neighbor kills her “black and red” bugs she will be doing more harm than good.
After larvae eats… attaches to leaf and curls up. It will change and become an aphid-eating ladybug!
With the internet close at hand, we can easily look up insects and find out which they are, harmful or beneficial. It’s worth knowing if you want harmony in the yard.
More beneficial bugs you may encounter are the Assassin bug (this one can sting a person), bees and butterflies (as pollinators), parasitic wasps, lacewings, and many more.
The truth is that we usually must see a problem before we see a beneficial. If the aphids (or other pests) are not present, neither will the good bugs come to stay.
Although it seems like you will be slicing and layering forever, this recipe does not take many vegetables at all so slicing was minimal. I used 2 very small summer squash, 1.5 small zucchini, 2 medium size tomatoes, and half (or less) of a large eggplant. I thought about digging out my mandarin slicer, but I really didn’t need it.
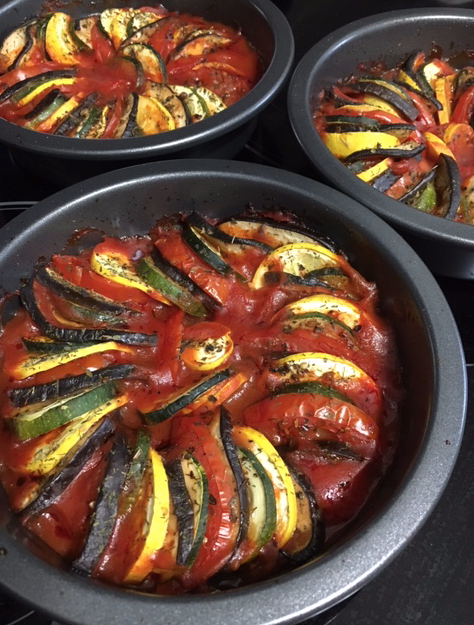
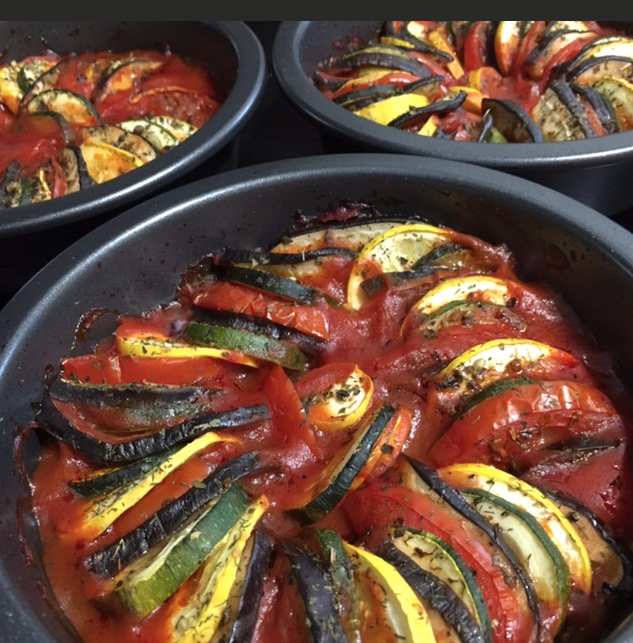
Most cooks used a large pan of some sort to create this dish. I decided to use three small round pans (about 6 inches across) because I am the only one who will eat it and I can freeze one of the servings.
What is Ratatouille?
The word “ratatouille” brings to mind that Disney cartoon about the mouse in the French kitchen helping a new young chef learn to cook. The dish for which the movie is named, is made of vegetables, usually the type that are harvested at around the same time in summer. This could mean all sorts of vegetables were used, and way back when, they probably used whatever was in abundance in the backyard garden.
I don’t know about the old original ratatouille recipes, but these days you see the dish as sliced and layered colorful vegetables. Because of this, all the various veggie flavors mingle while they bake. I was very happy with the outcome and ate it with some leftover noodles.
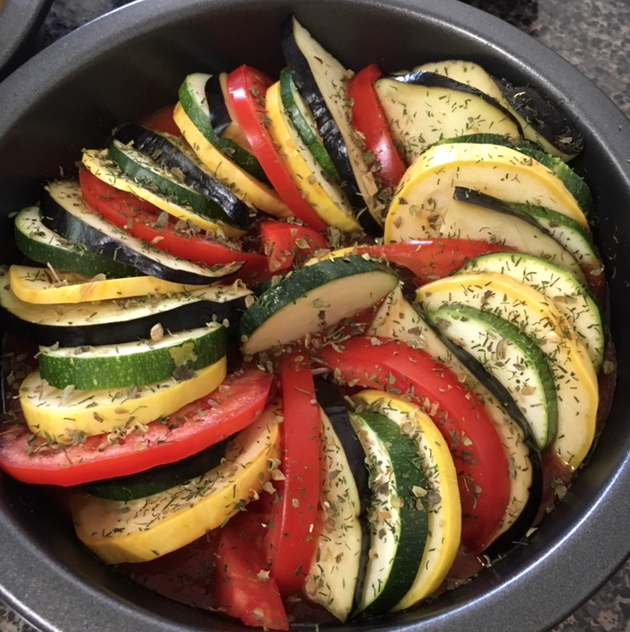
I sprinkled spices on before covering and baking
My own homemade sauce is my favorite, but this time I used store bought, low sodium, organic spaghetti sauce to save time. One medium size jar worked well to divide up between three small pans. I did sprinkle a little sugar on top of the sauce because the store bought sauce was not sweet enough for my taste.
I oiled the pans, then divided the sauce into each of the three pans. The sliced vegetables were layered on a plate (a few at a time) and then plunked into the pan. Once the pans were full, I tucked the remaining slices into the center and to fill in around the edge.
Vegetables to Use
The eggplant I bought was huge, so I cut each slice into fourths for layering. First I salted the slices and let them sit in my colander for about 20 minutes. This gets the bitterness out. Rinse the salt off before using. A Japanese eggplant, which is long and skinny, would probably work better.
I used 2 small yellow squash and only 1 and 1/2 zucchini. Since I only had small tomatoes, but not Roma, I cut the slices (from 2 small tomatoes) in half. The large eggplant slices I cut into fourths but only used about half the large eggplant.
Other vegetables that would work are thinly sliced bell pepper and onion.
Topping the Veggies
The original recipe I found said to add the herbs and oil after baking, but I sprinkled herbs over my slices before I covered them with foil to bake. It didn’t make sense to me to add all that nice flavor later on. Once the food was baked, I added nothing except a tiny bit of salt (because I add no salt when baking).
My Baking Time Was Reduced For the Smaller Size Pans
I used three small, round baking pans and baked them at 375 for 30 minutes, not 40. (They are covered with foil for the first baking sequence.) Once they were uncovered I baked them for an additional 10-15, which is less time than the 20 minutes suggested. My pans were small, so that makes sense. Just watch your baking time if you use smaller dishes.
Ready to cover and bake.
If you have a garden and can grow all these vegetables, your meal will be super cheap, and fresher than most. No wonder peasants were known for creating this dish! I wonder if they waited all year looking forward to tasting the first Ratatouille of summer?
I’ve seen some Ratatouille recipes baked in cast iron, but with the acidic tomatoes and sauce, I would use something other than cast iron. This recipe would work nicely in a pretty covered casserole dish. Or individual serving dishes / small cake pans like I used.
What to Serve With Your Ratatouille
Ideas for serving and eating the finished vegetable dish.
Serve over rice or noodles as a vegetarian dish.
Cook ground beef to combine with the tomato sauce to use as the base.
Make garlic bread (softened butter, minced garlic, parmesan cheese mixed and spread on bread and broiled to golden brown). Bread and ratatouille would make a perfect meal!
Serve Ratatouille as a side dish to any type of meat / fish, or in addition to a salad or other vegetable.
It’s awesome with macaroni and cheese! I liked it so much that the second time I made this recipe I put mac and cheese in the bottom of the pans, then the sauce, and vegetable layer.
Bon Appetit
Ever since I found Ingrid’s Produce just down the street I have been a veggie cooking fool. Over the weekend I made a scrumptious tomato soup with fresh ingredients.
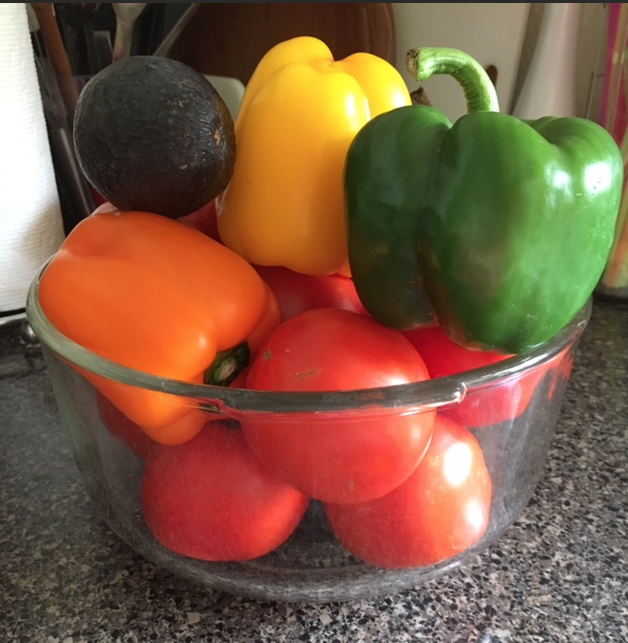
Fresh vegetables are difficult to find, or have been for me. You may think that a sunny, hot place like Florida would be full of wonderful produce, but that is not the case. Apparently it is too sunny and too hot. I’ve tried to garden here without luck. So the local Florida growers who are able to supply beautiful peppers and tomatoes like the ones in my photo here, make me feel grateful. Now that I have found some luscious produce, I will make homemade tomato soup from scratch.
Searching For a Tomato Soup Recipe
If you have ever searched online for any type of recipe you know how overwhelming it can be to find a good version. Food blogs are popular and in many cases copies of other food blogs. In other words the writer has never made the food themselves. Food photos are available for free and to buy, so anyone who wants to can pretend to be a foodie. There is money in the advertising and if you notice, most food blogs have many ads and popups everywhere. For this reason I have been wading through blogs featuring tomato soup recipes to find what I want.
My soup will be made entirely from fresh ingredients, as opposed to canned, and all I need to know is what basic additions to make to the obvious one.
Here’s a list of the ingredients I will be using:
Fresh, delicious tomatoes (thank you Ingrid’s Produce)
bell peppers (yellow orange red and green)
chopped onion
garlic, finely chopped – about 6 cloves
vegetable broth (my own from the freezer)
basil, parsley (from my garden)
celery
heavy cream
sugar (cuts down the acidity of the tomatoes)
Putting it All Together
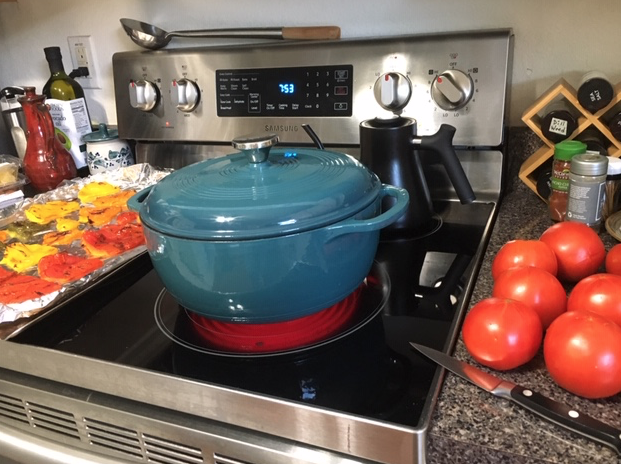
My plan was to roast the peppers on the grill and remove the skins. That didn’t work out too well because they didn’t blacken enough and the skin didn’t come off. Today I will roast them in the oven and try again. This worked, and I peeled the skin and chopped the pepper pieces to add to the vegetables in the pot.
Broiling the peppers to remove the skins
The 12 tomatoes will be blanched in boiling water and then the skin will be removed.
While the water heats to boiling, cut “X” marks in the bottom of each tomato. I read somewhere to do this and it greatly helps when peeling off the skin!
Boiling water to blanch the tomatoes
Use a big pot, like a dutch oven like mine, and bring the water to a full boil. Use a slotted spoon or some large scoop to put the tomatoes into the boiling water. They only need to be in the water for 30 seconds to a minute – seriously… Get them out when they look wizzled. I did all my tomatoes at once, but I should have done 6 at a time.
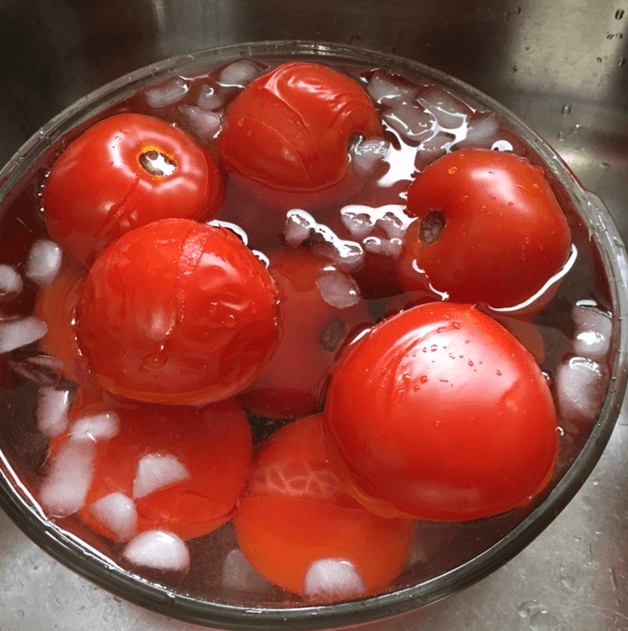
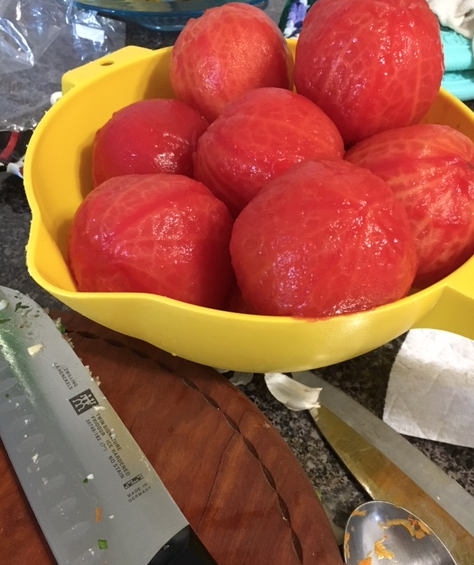
Be sure the ice water is ready so the tomatoes can go directly in when they come out of the boiling water. I needed a bigger bowl for this! All my tomatoes barely fit. As you can see, the skins have split and are ready to be peeled. Start at the bottom where you made that X and they come right off.
Boiled tomatoes need an ice bath
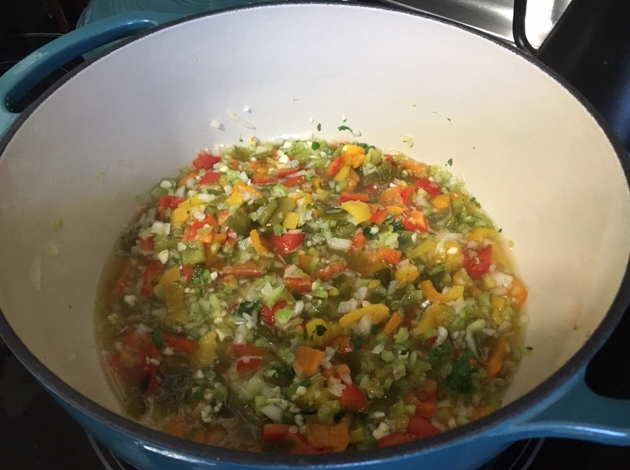
While I waited for the water to come to a boil for the tomatoes I chopped the roasted peppers, celery (3 stalks), whole onion, garlic cloves (around 6), and put them into the broth in my dutch oven. I used my big 6 quart Lodge pot because my LeCreuset pot was too small.
Save Your Own Broth
By the way, the broth I used was saved in my freezer from previously cooked vegetables. Don’t dump that vitamin rich water down the drain when cooking beans, peas, carrots, asparagus, etc., save it in the freezer in a large container and add to it as you boil veggies. It can be used in soup, stew, gravy, chili, and whatever later on.
Finely chopped veggies simmer in broth
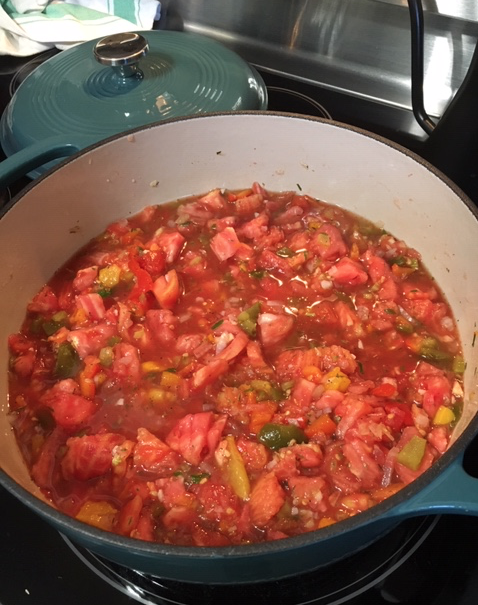
While the vegetables and broth simmered, I chopped up the tomatoes. I’m not sure they really needed to be chopped, but I did. I coarsely chopped them and removed the top stem area, and then added them to the other veggies in the pot. At this point I added chopped parsley and basil from my garden and other herbs from my spice rack, including a tiny bit of salt and some black pepper.
Tomato skins are removed and they are ready to chop
I almost forgot the sugar, so added a couple tablespoons to the mix. I always add sugar to homemade tomato sauce and it helps with the flavor. Then I let it simmer for 3-4 hours. I didn’t time it, but I figured the softer the vegetables the better.
I simmered all the veggies for about 3-4 hours.
Cooling, Blending, Straining, and Reheating The Soup
Once I had let the pot of vegetables cook a long while, I turned off the heat and began to cool the food. I used a pyrex measuring cup to scoop out the hot mix and put it into large bowls which I set on a wire cooling rack. Once the soup mixture was cool, I used the measuring cup to pour small amounts into my Oster Blender.
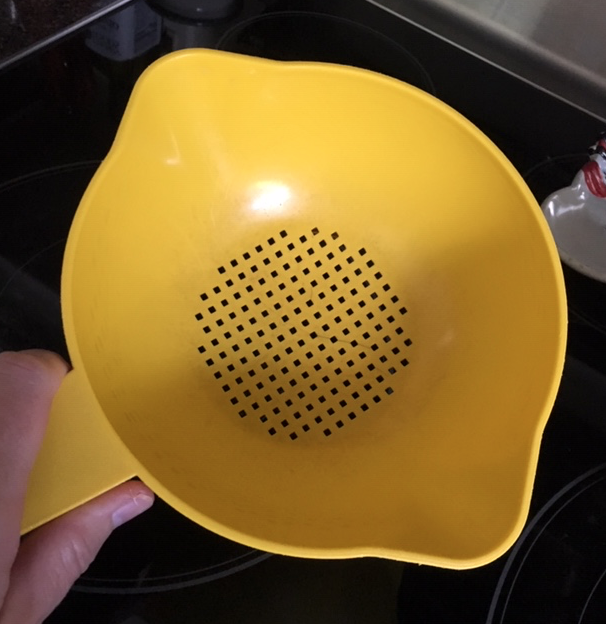
From there I poured the blended soup through my colander which has the perfect size holes! I had no idea how this would work out, but since I had removed the skins from the peppers and tomatoes, all that was left was the tomato seeds. And my yellow colander caught those! So use something with holes large enough for the sauce to easily pass through, but will catch the seeds.
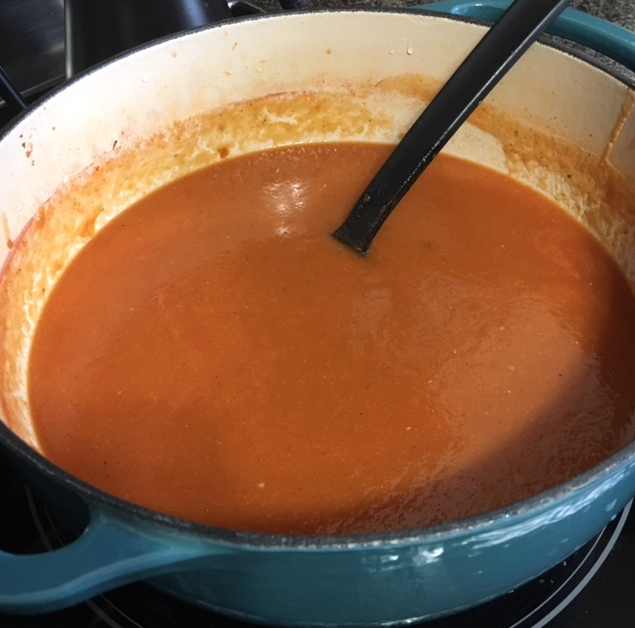
I repeated the process of blending and straining the seeds until all the soup was back in the same dutch oven. I reheated it and then added some heavy cream (this lightens the color of the soup to more orange than red). I didn’t measure, just poured, but probably a half a cup or so. I’m considering using yogurt or Kite Hill non-dairy yogurt next time.
Reheating the soup and adding some heavy cream
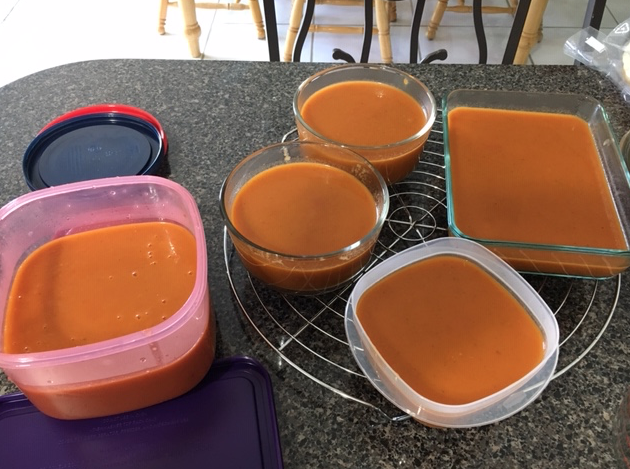
I’m pleased with the taste and I know exactly what is in my homemade soup. Because I am the only one who will eat it, I filled several small freezer containers which I labeled and froze. Grilled cheese and tomato soup for supper tonight! Can’t wait.
Yum… this was my supper!
Making this soup was time consuming. Between chopping all the vegetables and doing the tomatoes then cooling, blending and reheating it took some time. But I love homemade soup and this is worth making again.
Use common sense when looking for “recipes” online. Some tomato soup recipes called for flour or canned tomato paste. Sometimes a few good recipes will give you ideas and when combined, you get a stunning result. I wanted fresh ingredients only, and I believe I have achieved that.
Done and ready to freeze!
Butternut Squash Tomato Soup
When I visited New Hampshire last Fall, the Fiddleheads Café, in Hancock featured butternut squash tomato soup on their menu, which sounded so good! Unfortunately they were out of it the day I wanted some, so I decided that one day I would make my own. Since then I have been searching my local Florida area for good tomatoes to use. Most tomatoes here taste like nothing. Once you eat garden fresh tomatoes it really does spoil you. I gave up on making soup because of that.
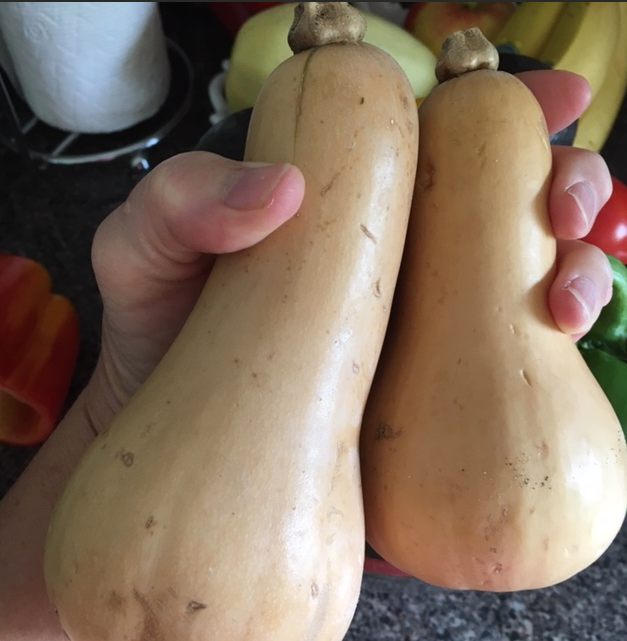
Just the other day I discovered a fresh produce store just down the road from me. And the tomatoes are fresh and tasty! The owner also had little butternut squash, so I bought two. I love the size because I can’t eat a whole, large squash myself. Now I am thinking about adding some to my soup.
I love the small size of this squash
Update on the squash. I baked them both and wasn’t happy with the flavor. They tasted like they needed more time to grow! So maybe that is the case. I ate the squash and did not add it to my soup.
I’m thinking that I could cook some squash (a larger, more tasty one) and simply add it to my already made tomato soup. Why not?
May is here and it’s muggy in Florida. The AC is on day and night now. Even when it’s “cool” the humidity makes being outside less than fun. The worst is yet to come, but it has begun.
First, a Nice Surprise in The Garden
The caladium is coming back!
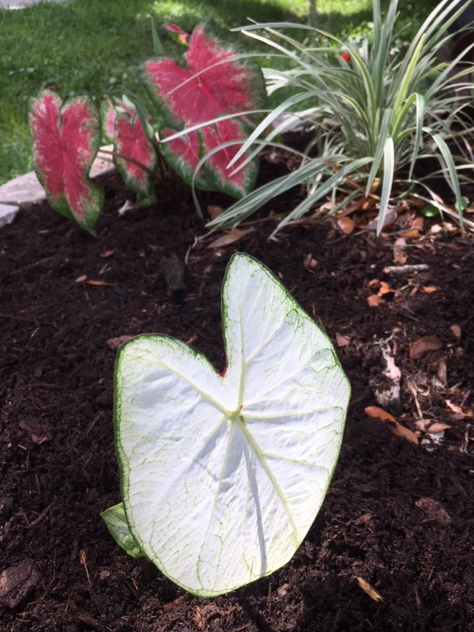
As I was checking on my front garden, there it was…the caladium that had disappeared and was presumed dead. In fact both the pink and white leaved varieties were popping up through the dirt. They had both disappeared on me and I was mad that they died off so quickly. (See my post when they were first planted.) The impatiens which I planted at the same time are gone.
The white-leaf caladium is coming back
I’ve never grown caladiums but they look so nice against the green of the yard. Their big arrow-shaped leaves. Even though I watered them and they seemed to be growing well, they began to die. Or maybe they go into hibernation for the colder season. I need to look that up… hold on.
Okay…. They do go dormant so my caladiums were just doing what caladiums do. I never knew that! Although I have lived in Florida for many years, I just learned something new about my landscape.
Travel the Yard With Me
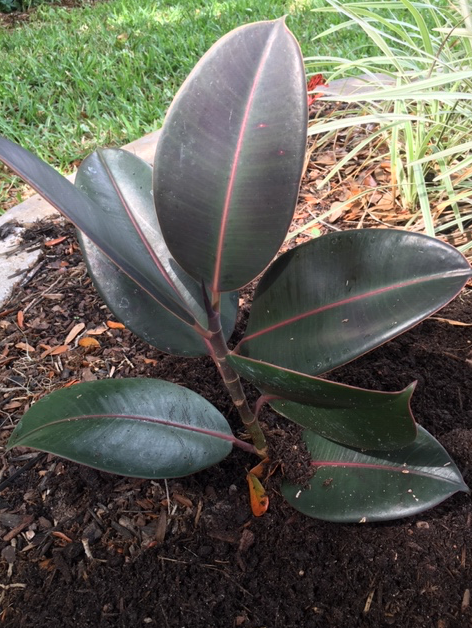
The garden beneath the oak was already there when we moved into our house a few years ago. It had become overrun with weeds, but now it contains my rubber tree which I propagated a while ago. I’ve discovered that rubber tree cuttings grow very well outdoors. Look at that sucker… isn’t it beautiful? I’m noticing that many big rubber trees are doing quite well in the landscape in my area. I’ve propagated a few more which I will plant sometime soon and write about them.
My newly propagated rubber plant is doing nicely
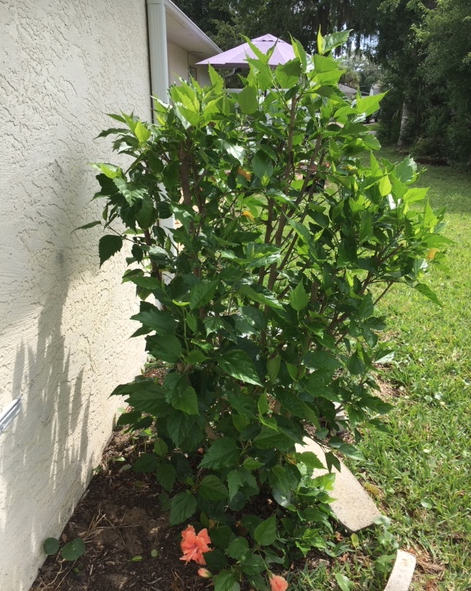
The orange flowering hibiscus was trimmed back at the end of April and now it is filling out nicely. Buds are forming, and it will be covered in blooms soon. I want to keep it trimmed away from the house so maybe it won’t get those nasty fuzzy whiteflies it had last year.
Trimmed hibiscus is filling out
Hydrangea For the Yard
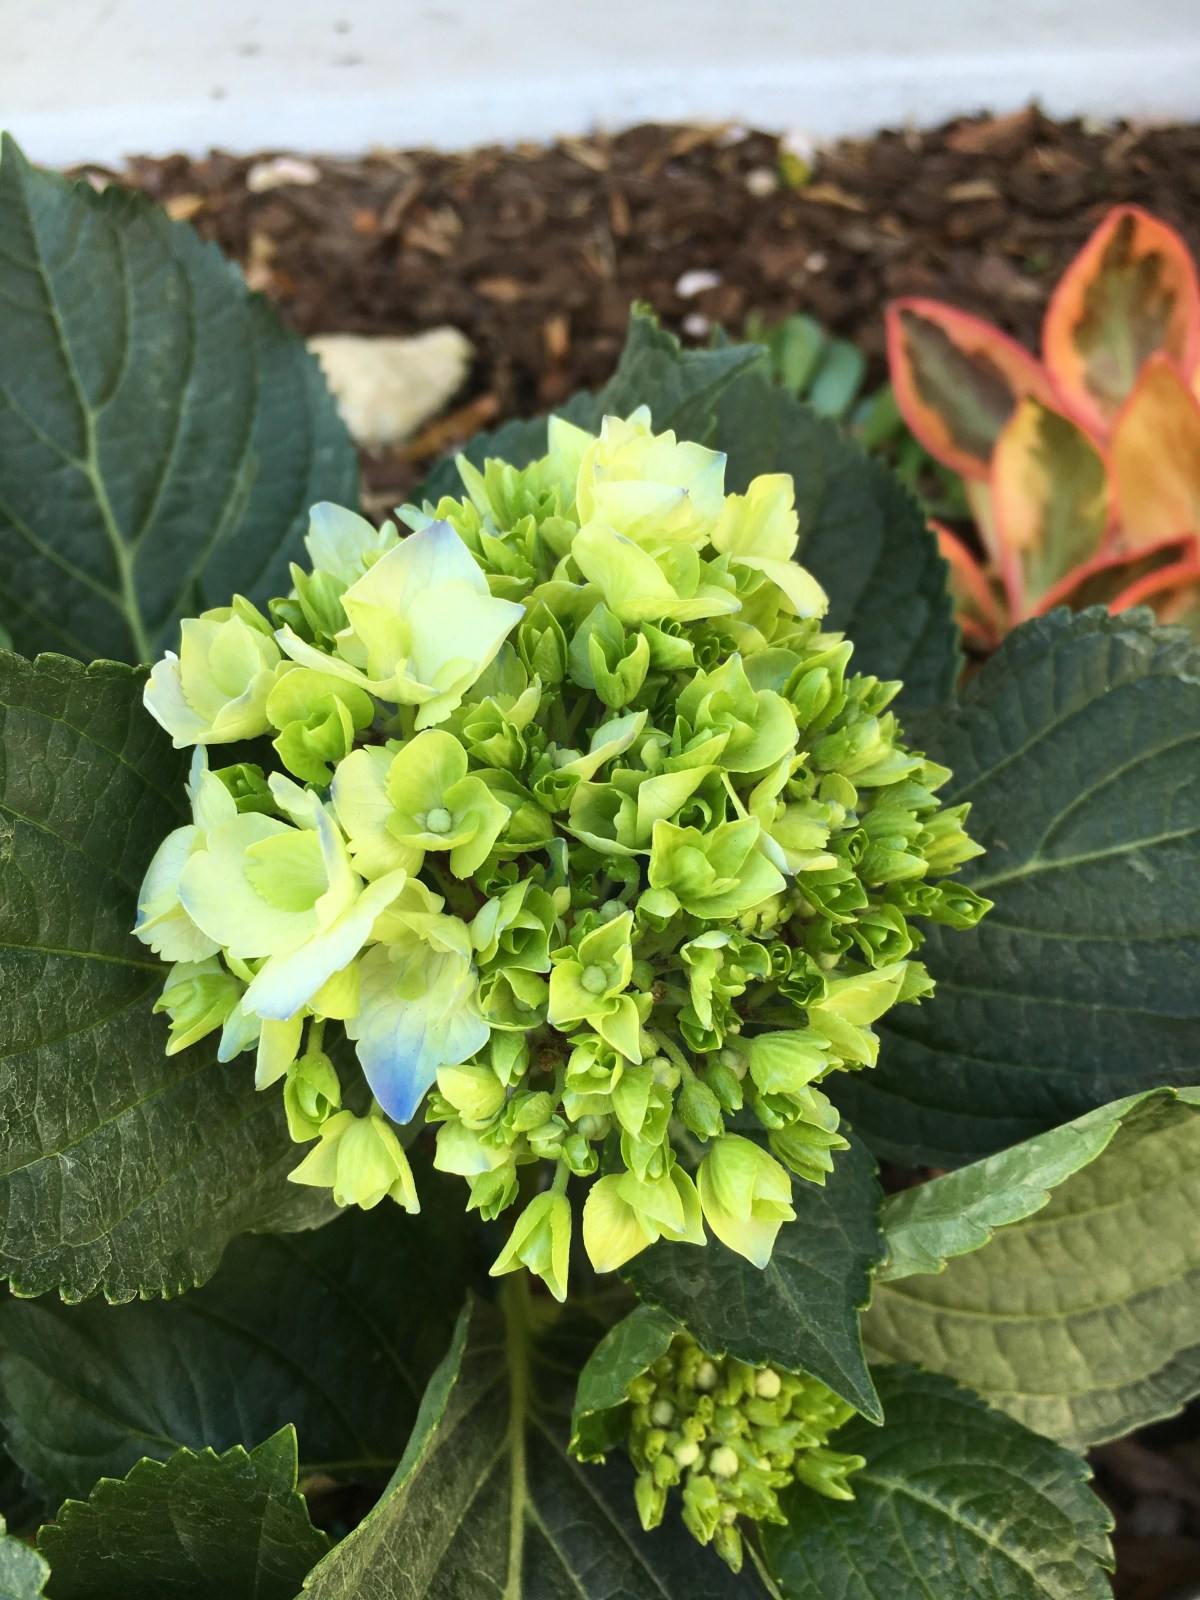
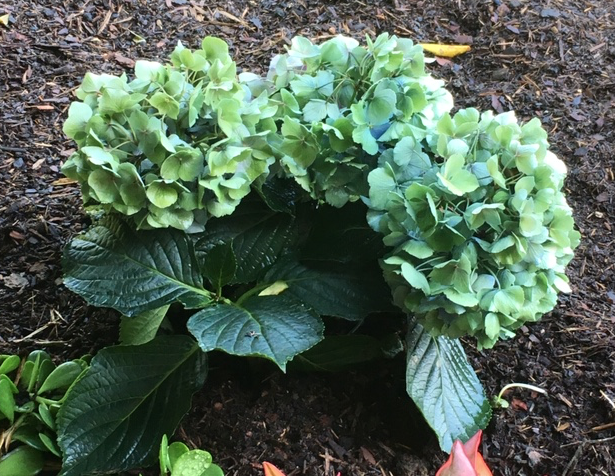
When I bought this little hydrangea plant it had some buds. They popped open with beautiful big flowers of blue and purple. Now the flowers have faded to that lovely shade of green I love to see on hydrangeas. (See more photos of the blooming timeline here.)
The potted plant was recently removed from it’s pot and put into my front garden. I’ve had to water it every day and still it tends to droop. It never gets direct sun, but I am unsure of how well it will do during the very hot Florida summer. Look at those green flowers! Never deadhead hydrangeas. Wait and watch how the flowers fade to new colors and eventually they should dry up on the stem. They are interesting when the blooms have faded too.
My blue hydrangea flowers have turned green
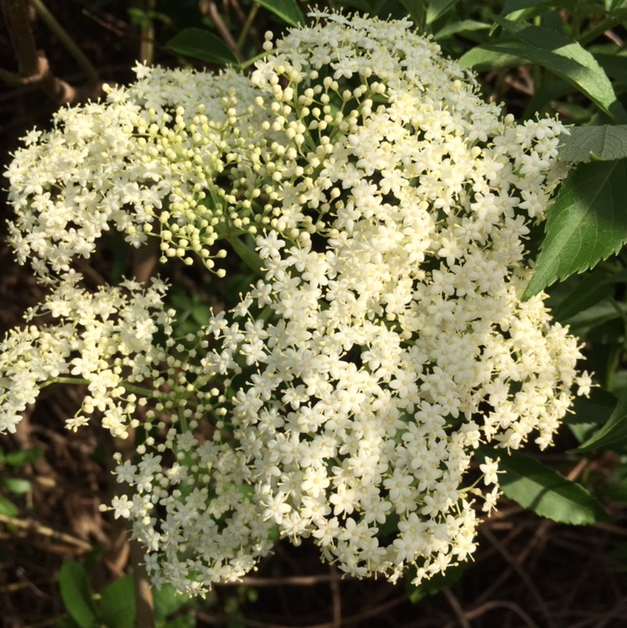
In the woods next too my house the white-flowering Elderberry bush / tree is looking wonderful. These flowers will become berries soon. I’ve read that this is a poisonous plant but mostly it grows in swampy areas and not in the yard. The land slopes down around my yard and this Elderberry grows in that uncleared lot. I don’t pick the berries, but some people do and make jam, wine, and pies. Taking chances eating wild stuff is not my style. I would definitely need more information.
White Elderberry flowers
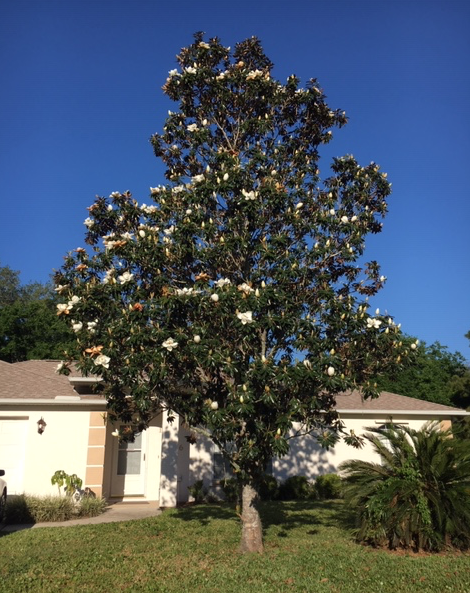
This magnolia tree is growing in the front yard of a house I pass on my morning walks. I have always loved magnolias. As I pass this house I can smell the aroma of the blooms. It’s got me thinking …. maybe a magnolia tree needs to live in my yard.
Flowering magnolia tree
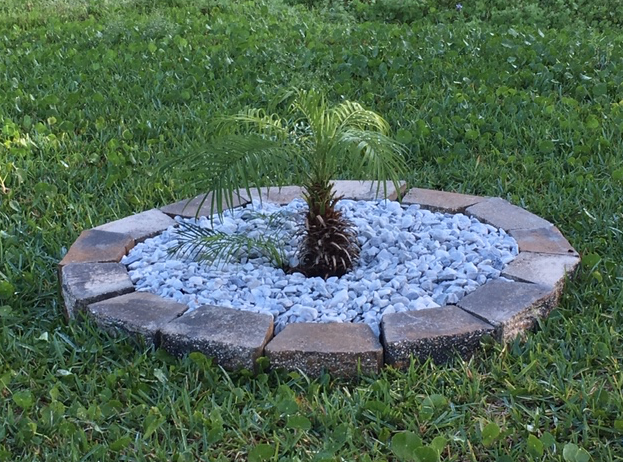
The little palm tree pictured below is a new addition to my yard. It was growing next to the house near the walkway to the door. That location was ridiculous. It never got full sun, and if it had grown tall, it would have blocked the walkway to the front door.
So we dug it up and put it out in the yard where the croton planter used to be. When my crotons froze, and my son chopped up the stump it sat on, it became clear that something needed to be done.
I believe this is a Pygmy Date Palm and many houses in the neighborhood have them growing in their landscape. I’m hoping this one will grow nicely now that it’s out in the sun where palm trees should be (although I’ve read that this one can take shade). Once it grows taller it will be nice. A baby tree is growing out of the base.
Little palm tree moved to a better location
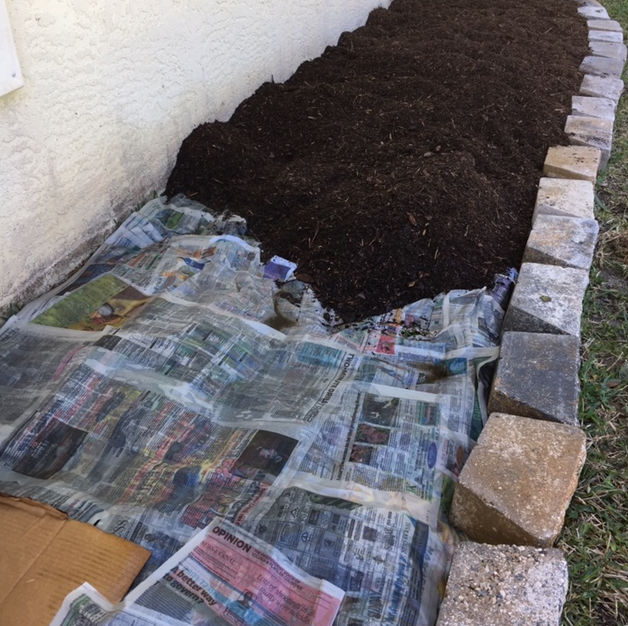
My son and I began a new garden bed along the front of the house. When I lived in New Hampshire I always put down newspapers to block the weeds and grass before adding dirt. I’m doing that here, but I’m not sure how well it will work with these Florida weeds and tough grass. I plan to write all about it on another post. Plants won’t go in until next Fall.
Getting the ground ready for a new garden
I hope you are having a good May wherever you live. In the northeast, May was a time for dealing with black flies but it also meant that vegetable planting time was just around the corner.













 Hydrangeas Blue