Fresh garden greens can be used in many ways besides making salads. They can also be cooked and added to many dishes for additional flavor and health.
Now that winter has come to Florida, I am growing a variety of greens, and I love it! It’s the best feeling to be able to walk into the backyard and pick my own fresh food.
Let’s first define the “greens”. Obviously, typical salad greens, like arugula, lettuces, and spinach are included. Broccoli and cauliflower leaves, and sweet potato leaves (use in summer) are some others I include.
During winter months I use my Chijimsai spinach and arugula leaves to make salads. Honestly, I do get tired of eating salads.
Fresh green leaves can be added to many dishes and they can even be sautéed. The garden provides greens year round in one form or another. The trick is to have them always available, and not letting them go to waste.
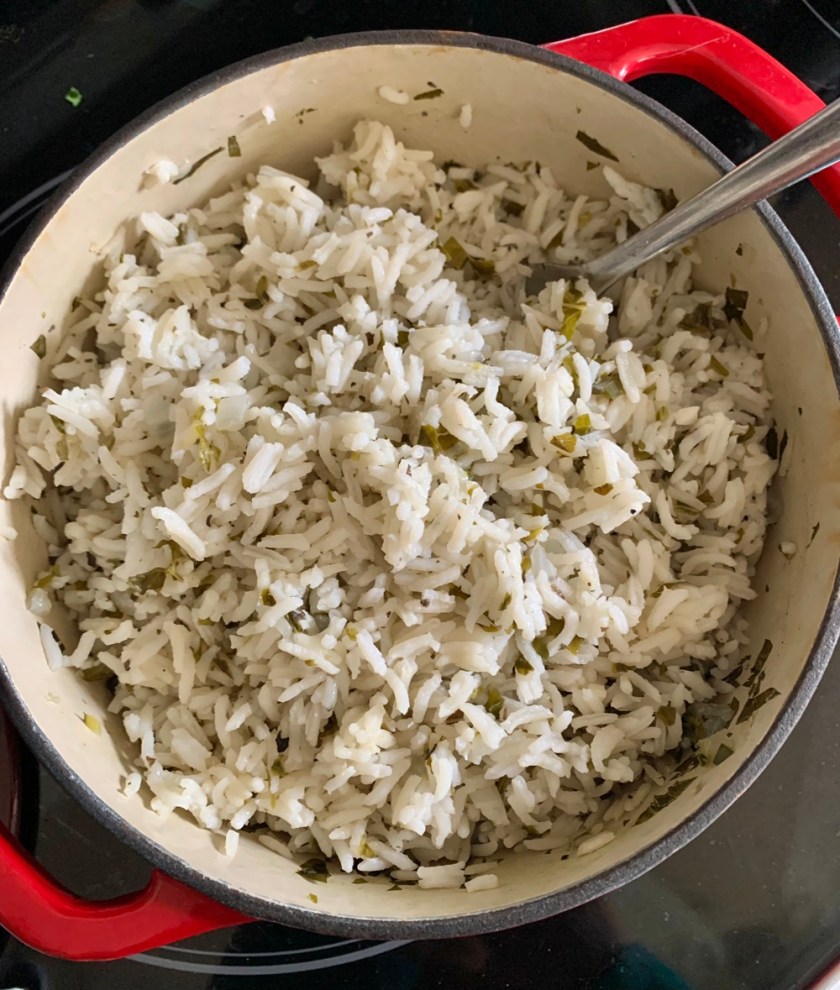
Cook Rice in a Healthy, Green Water
I’ve never been a big rice eater, but lately I’m eating Basmati rice mixed with vegetables. The type of rice does matter, and it has changed my mind. The vegetables may come from the garden, or can be store bought. Either way, a little bit of rice, with loads of vegetables, works well to create a healthy meal.
My Rice With Greens
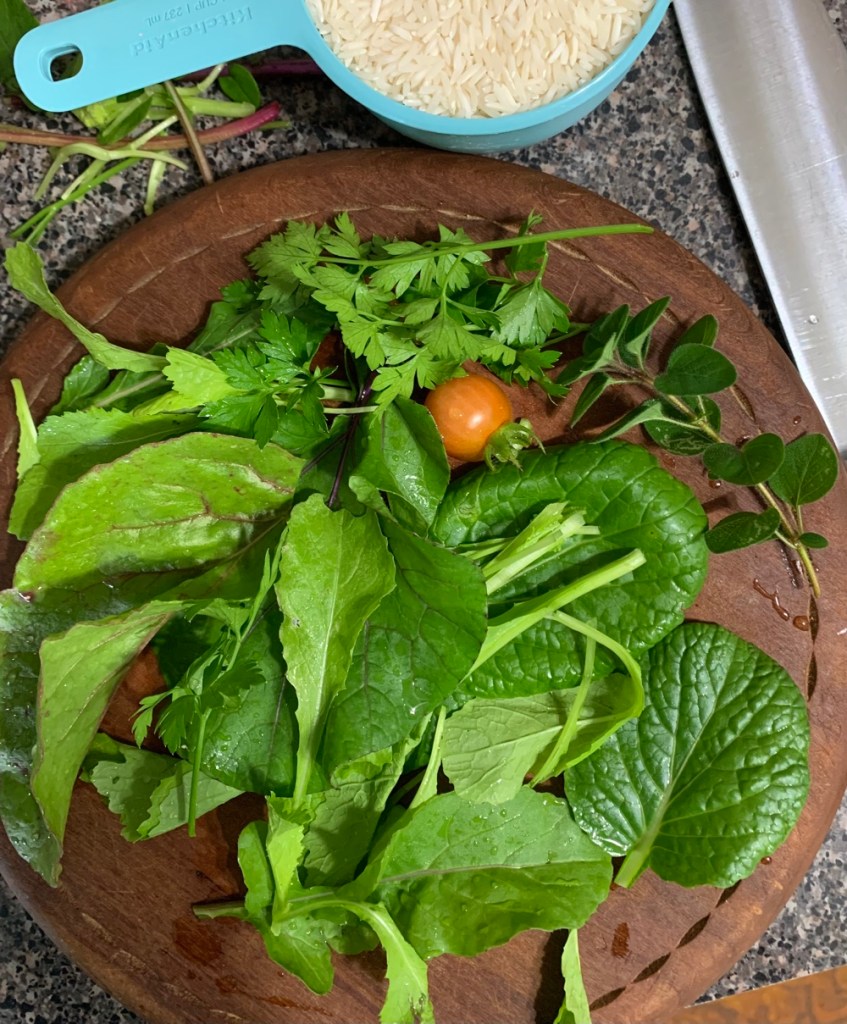
From the garden I have picked one beet leaf, three small parsley sprigs, one piece of oregano, Chijimisai spinach leaves, arugula, and mustard greens. I’m using what is available right now.
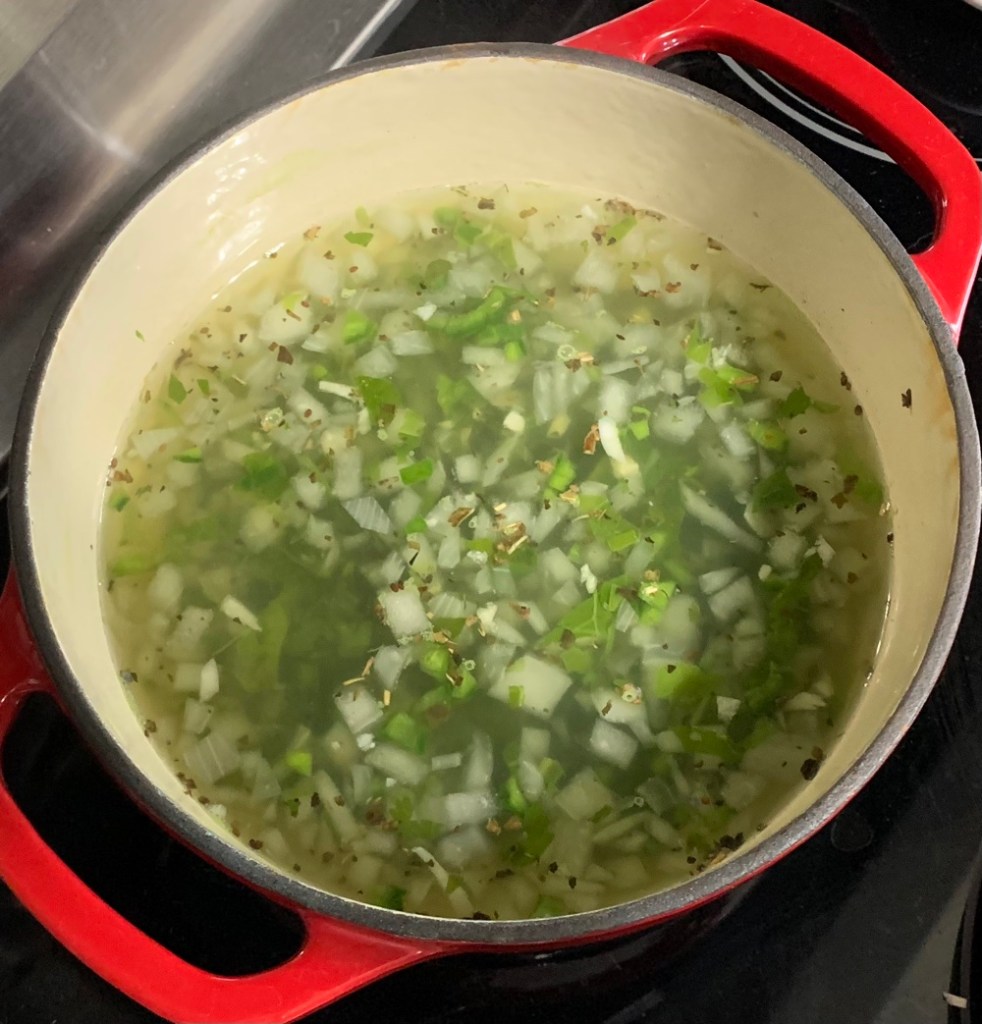
After rinsing everything off, I rolled it up and chopped it finely. The green bits were added to water, along with dried basil, chopped onion and poblano peppers. I let it simmer for 20 minutes and then added the rice.
Greens (and one tomato) from the gardenSimmeringBasmati rice cooked with greens
Once the nutritious rise is made, combine it with just about anything!
When it’s time to thin the carrots, beets, Broccoli, and other edible seedlings, eat those as microgreens!
Fresh Greens For Flavoring Soup
Pick greens fresh, rinse and add whole, or chopped, to any type of soup or stew. Unless the leaves are very large, or a bit tough, like kale and broccoli leaves, throw them into the soup whole.
Often I will sauté some greens and use them to fill an omelette.
More Ways to Use Fresh Garden Greens
There are many ways to add your garden grown greens to food. Add to sandwiches, tacos, and any place traditional “lettuce” is used. Iceberg and Romaine can add crunch, but arugula and sorrel will add a flavor punch.
This page at Taste of Home has some nice suggestions for recipes that include all kinds of greens.
If you are not afraid of chopping, fresh greens of all types can be part of a Florida gardener’s meals year round.
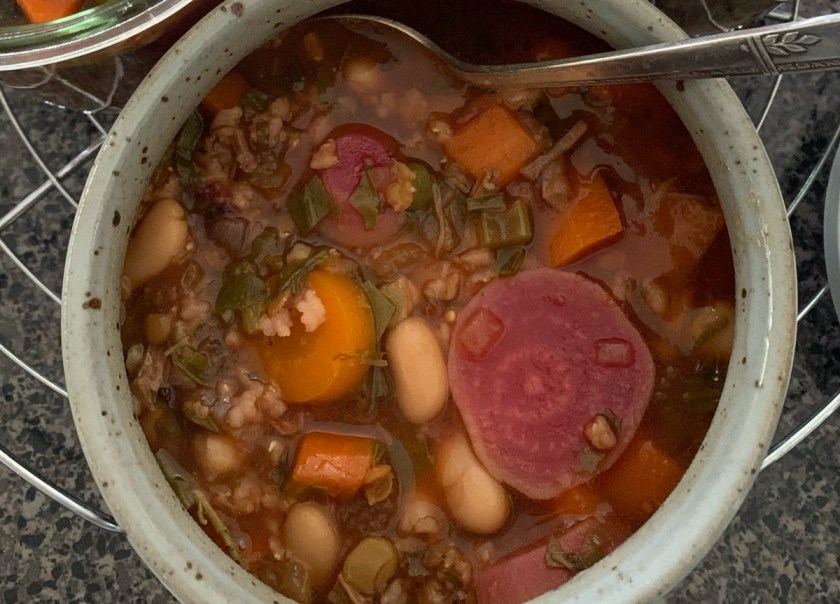
Making a nutritional and good tasting soup is such an achievement. Homemade goodness can’t be beat. I have a few tips for making sure the flavor and consistency is there.
When the weather finally gets cool, or downright cold, here in Central Florida, I want a hearty soup. I rarely follow a recipe to the letter. Recipe tips combine with my own ingredients and knowledge to create a delicious soup.
I have cooked for many years. I have found some good ways to make sure my soups and stews are loaded with flavor and goodness. I’m sharing my ideas on this page.
Soup With Flavor Plus Good Consistency
Often the troubles that come when cooking soup have to do with blah flavor and / or watery consistency. There are simple ways to deal with these things. Easily make delicious soup every time. And, you don’t have to stir in flour or a thickener.
Flavor It
1. The best way to start a soup is to use a good broth or stock. I like to make my own and freeze it for things like this. Many places sell lovely broth as well. Read the ingredients and make sure it is good stuff. I also like organic.
One of the easiest, homemade vegetable broths is created from the water used to boil, or steam, vegetables. This is very easy to do. It’s perfect for vegans or vegetarians. Don’t pour that good nutrition down the drain. If you don’t want to save it, take it outside and pour it onto the plants!
I use Weck jars (paid link) with plastic lids, and add to them each time I have vegetable water leftover. *Be aware that only certain types of Weck jars are made for the freezer. and they must have the right type of lid that is plastic – not glass. The link goes to Amazon, but I buy mine from Weck.com.
My Garden Soup – Recipe to come
Beef bone broth, as well as turkey and chicken broth, are popular too. It is very easy to make a stock, or broth. Use the crock pot, or an Instant pot to cook the bones on a low temperature for many hours. I always use my saved broth when cooking rice.
2. Herbs are a must. Herbs not only add flavor, they add goodness in the form of healthy nutrients. Get to know your herbs and how they taste. I’ve come to love Rosemary and grow it in a pot out back. I had never added it to soup until recently. Parsley, dill and basil are regular additions to my food. I grow them all so they are readily available at various times of the year. Dried, organic herbs are just as good and I use them too.
3. Cut and chop fresh vegetables. Fresh is key for a good tasting soup. If you are a grower, check the yard for anything that can be added. If they come from the store, find the freshest looking.
I had one pea pod – yes, only one – when I checked my garden the day I made my soup. I included about 10 little peas in my Garden Soup. Even though I may never even taste those peas, it’s the nutrition value from a backyard food that was added.
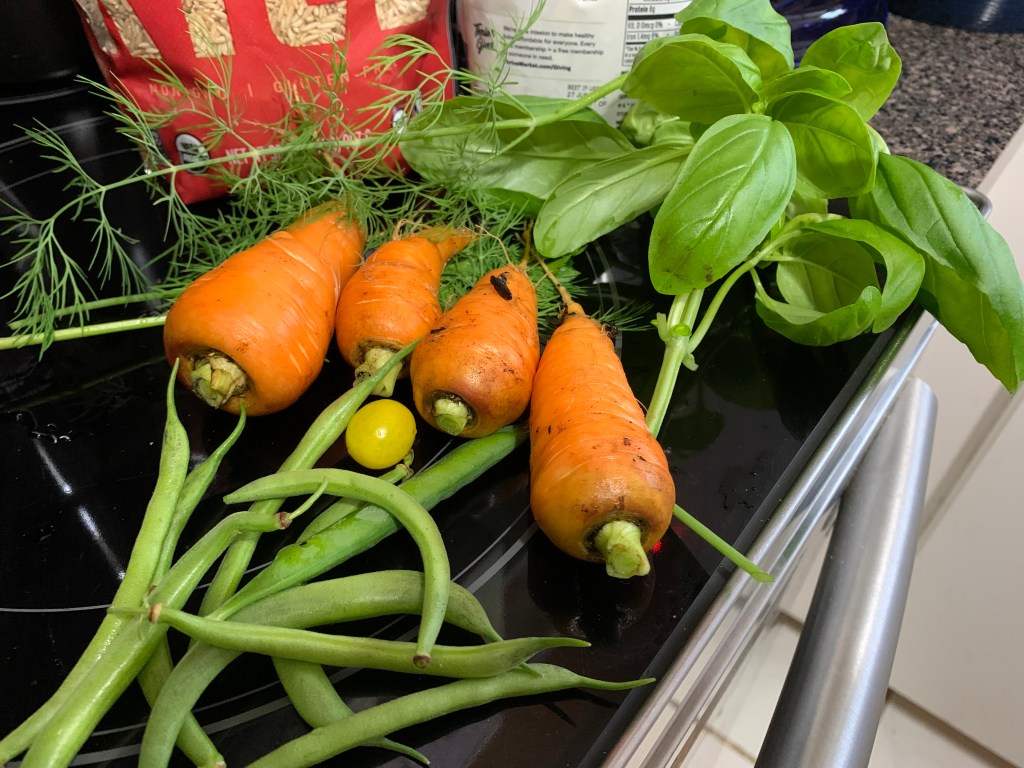
I also pulled some beets (and the chopped greens) and carrots. It all went into the soup. You can probably see why my soup comes out a little different every time I make it!
BeetsGarden carrots, beans, basil, dill, & one tiny tomato
Thickening Without Flour
There are a couple of ways I like to thicken my soups and stews. They are all easy, and don’t involve flour or cornstarch.
A favorite method is to blend some of the soup, without meat pieces, and include some liquid. Make sure to cool it first. Pour the blended soup back into the pot. About a cup full of soup will work.
Add some type of white liquid like coconut cream or milk. It doesn’t really thicken it much, but looks better!
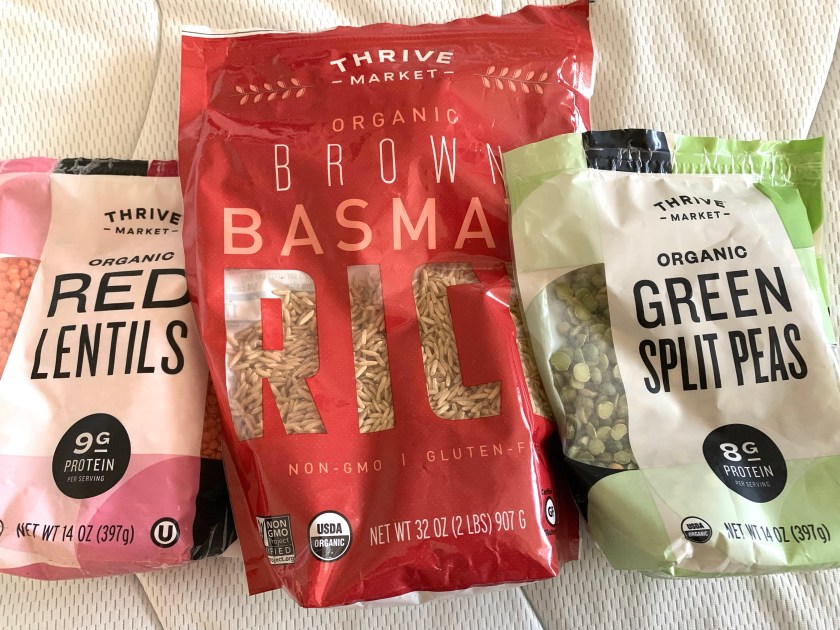
Include dried things like rice, split peas, and / or lentils. They will soak up some of the liquid. (I added a little of all of them to my Garden Soup!)
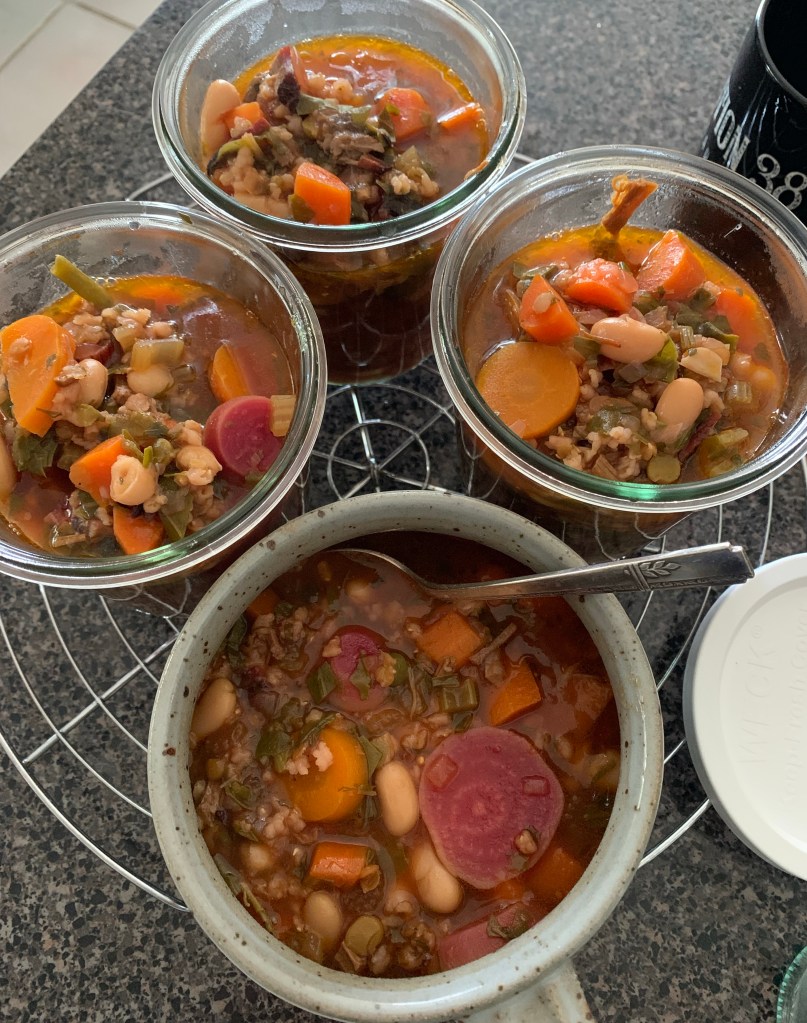
Savor It and Save It
Once the soup is made it can be saved in the freezer. When I cook soup, I end up being the only one who eats it. The frozen jars of deliciousness often go camping with me. Or pull it out on a cool day when soup is appealing. Vegetable soup is a good side to other food also. Enjoy!
A simply and healthy way to use beets from the backyard garden. Use the whole beet to get all the nutrition they offer.
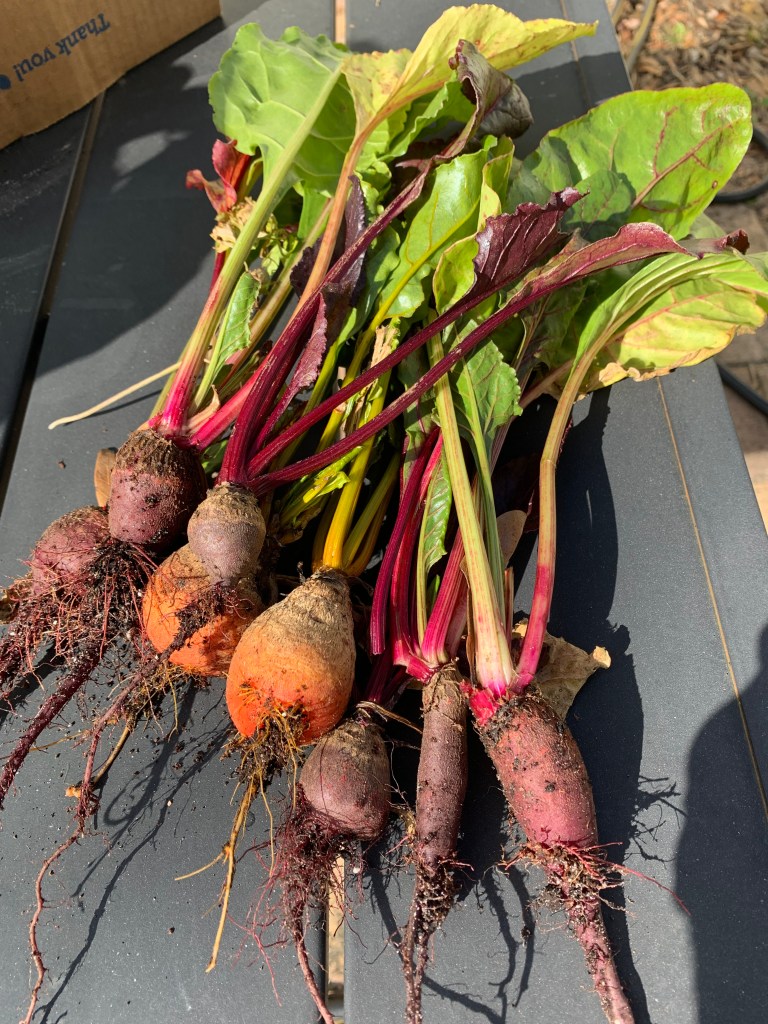
I am becoming very impatient with my beets. They were planted back in September and it is now January. The tops are beginning to break off so I decided to pull some of the bigger ones. Haha… they are not very big.
I love beets, and have had a bit more success growing them this year. Even the small beets can be eaten, along with the green tops.
Fresh pulled beets
The beets are small. The Golden variety grew larger than the red. I had tags in the beds to differentiate the red varieties (Detroit red and Lutz), but they have disappeared. I blame the raccoons who love to mess with my things. I wanted to know which ones grew best, but I think the Golden are the winner!
If you are curious about the healthy benefits of eating beets (and especially fresh from the yard!), read this page at Heart.org.
Easy Peasy – Simply Boil Them
There are many ways to cook beets. From boiled to roasted, you can find many recipes online. I immensely dislike all the pop up ads on cooking websites, so I cooked my beets the way I always do. Simply boil them in good water. I always save my vegetable cooking water.
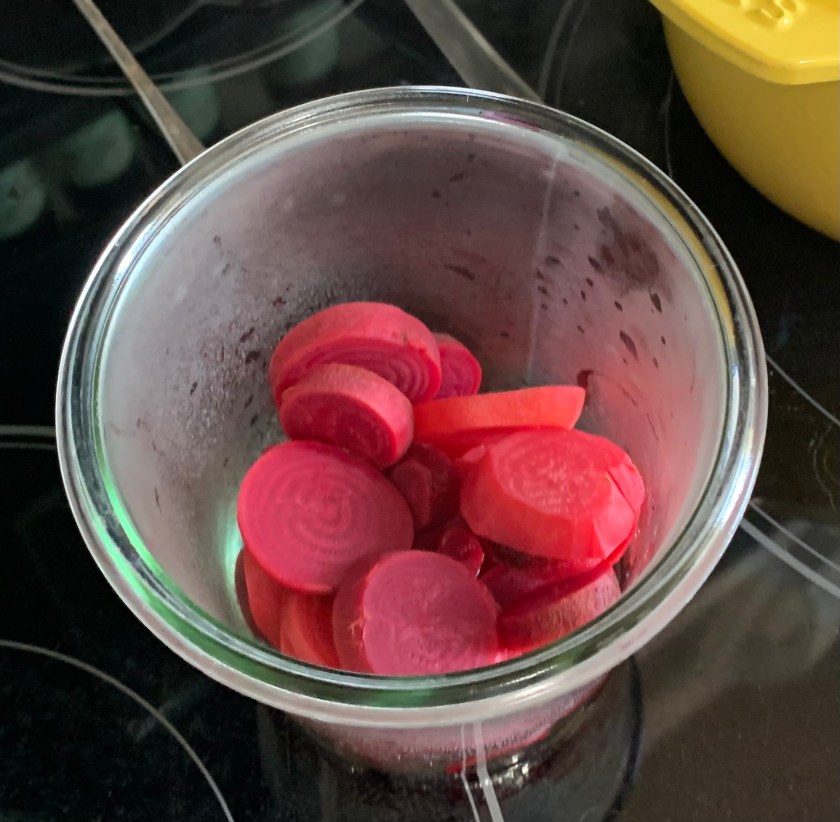
To cook the beets I cut off the tops and roots. Then, I scrubbed them with a brush under water. I did not peel them, except for the really dried up areas around the top. After that, I thinly sliced them. After boiling in water for about 30 minutes they were tender. Freeze or use the water leftover!
I didn’t get many, and the yellow ones turned red, but they are good. There is nothing like fresh picked garden vegetables.
Cooked beets
The beet greens were rinsed and finely chopped. The beets, greens and red water will be part of the slow cooker soup I am making tomorrow.
More beets are still growing in the yard and I’ll leave them to get larger. I don’t need the dirt space this time of year. Our Central Florida January has been pretty cold so far.
Using the beets and greens that have grown over winter in my Florida backyard.
It is January 25th and today I pulled up all the beets. They were growing in a box which I needed for planting and growing green beans.
The beets were small and most were not really beets, but long red roots. However I did get a few to cut up and cook. I’m not sure, but I think maybe beets are mainly grown for the greens where I live. I didn’t have luck with growing actual beets.
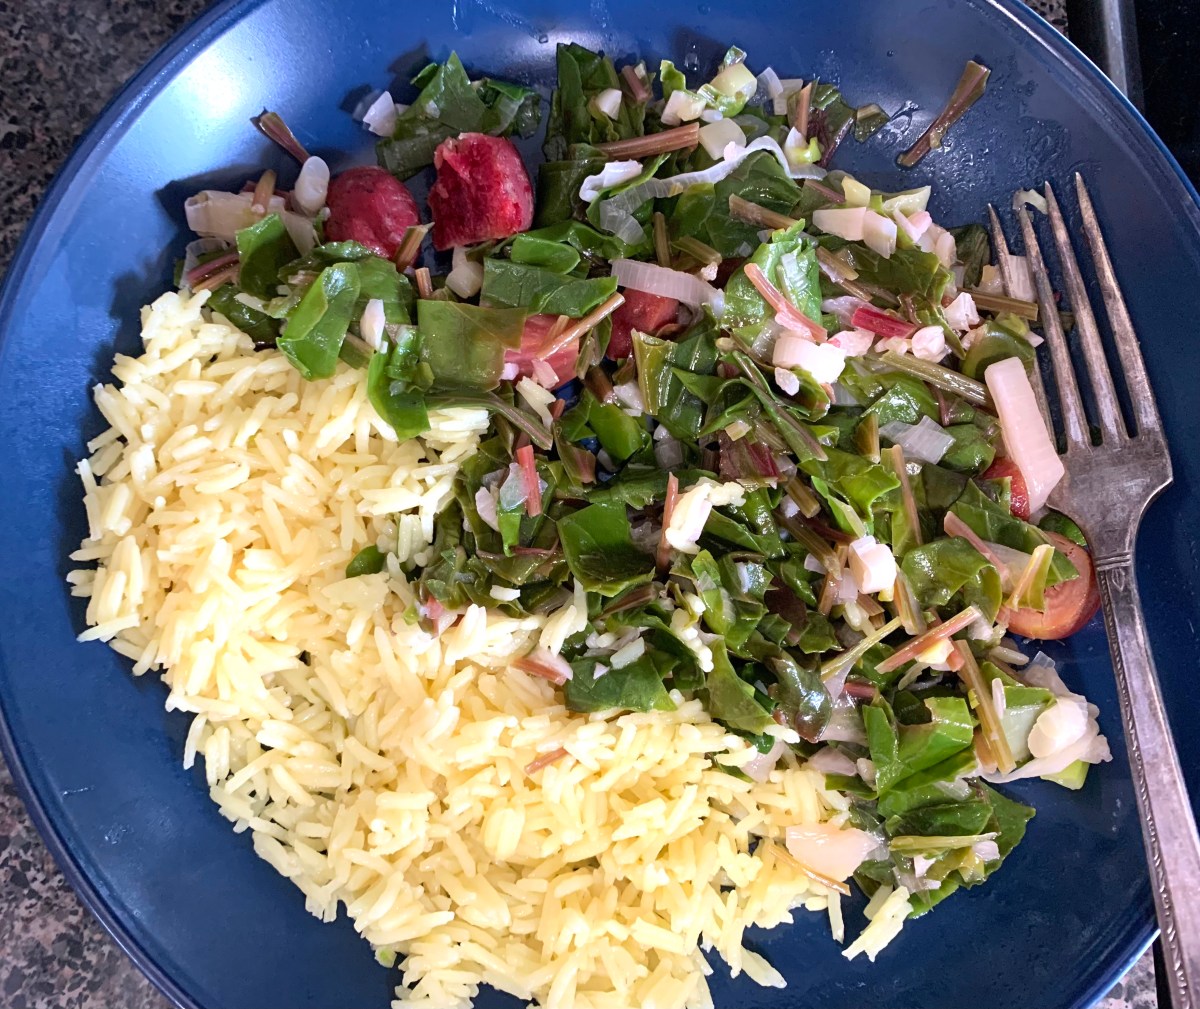
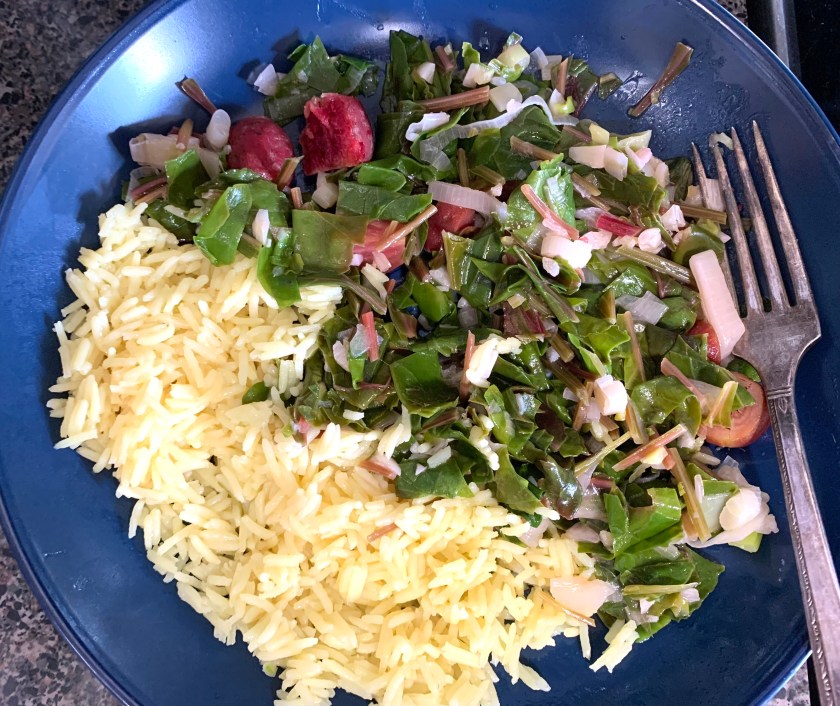
Thanks to this site, I knew how to deal with the greens and incorporated them into my beets and rice meal.
How I Made This Meal
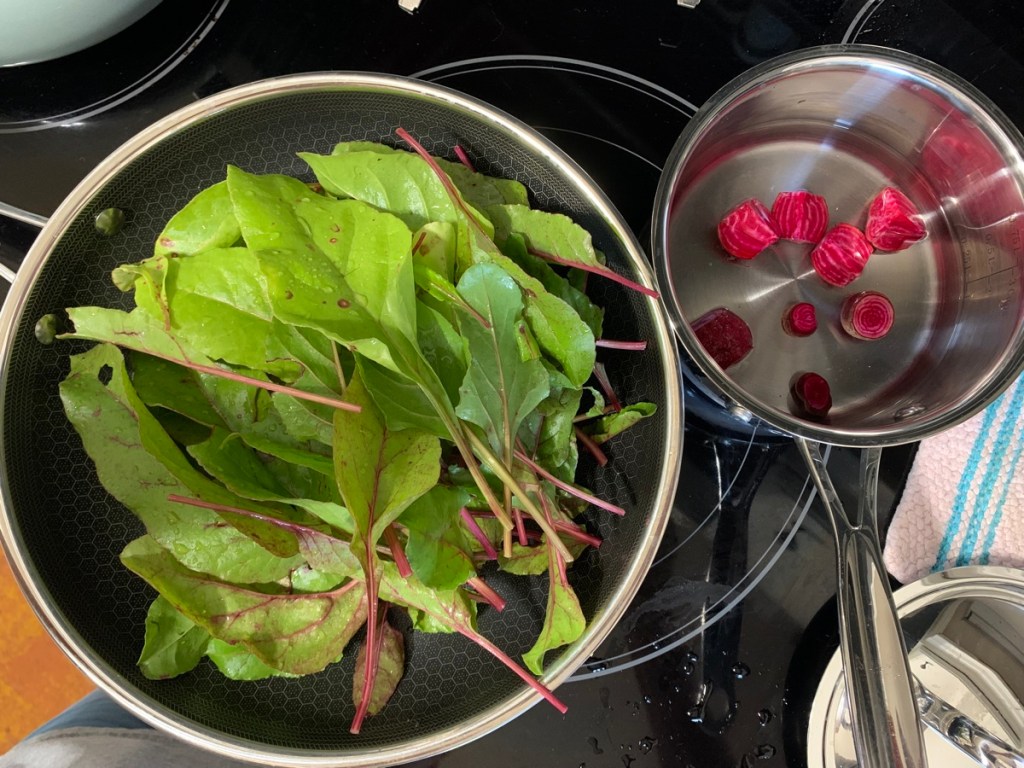
Pull beets from backyard and rinse dirt
Separate greens from beets and trim and cut beets for cooking. Simmer in water for 20 minutes, or until soft – my beets were small.
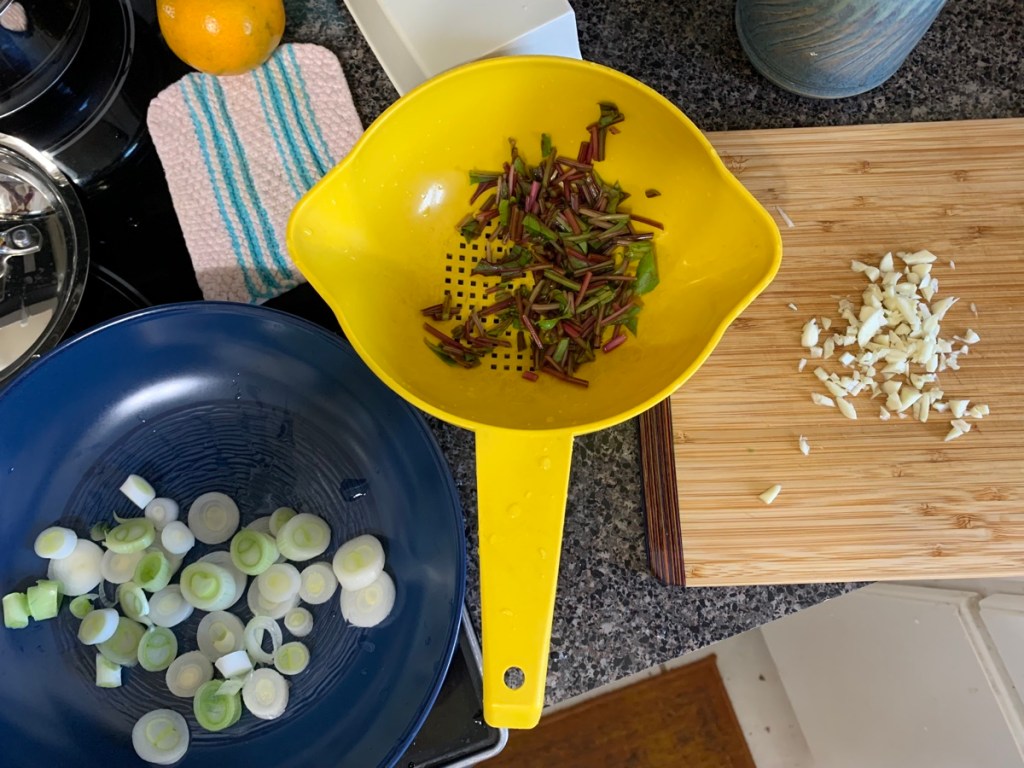
Remove stems from greens and chop
Slice onions (also from backyard), along with garlic
Saute onion, garlic and stems in oil for a minute or two and then add a little water. Cover and simmer to soften.
Chop leaves a bit and add to sautéed mix with a bit more water if needed
Cover and simmer for 3-4 minutes until it all looks cooked.
Squeeze in a little lime juice.
Cook Basmati rice in the beet water – 1/2 cup
If any water is leftover in the pan, dump it into the beets pan. Reserve all that water once the beets are cooked and use it to cook rice.
onion, beet green stems and garlicSaute
This is a waste free meal that reserves all the goodness of fresh picked vegetables. The roots and yellowed leaves of the beets went into my compost pile.
Add salt and pepper and butter… yummy!
Garden beets and greens cooked and served with Basmati rice
After nine months on the Keto diet, my low carb meals have evolved to become simple and healthy.
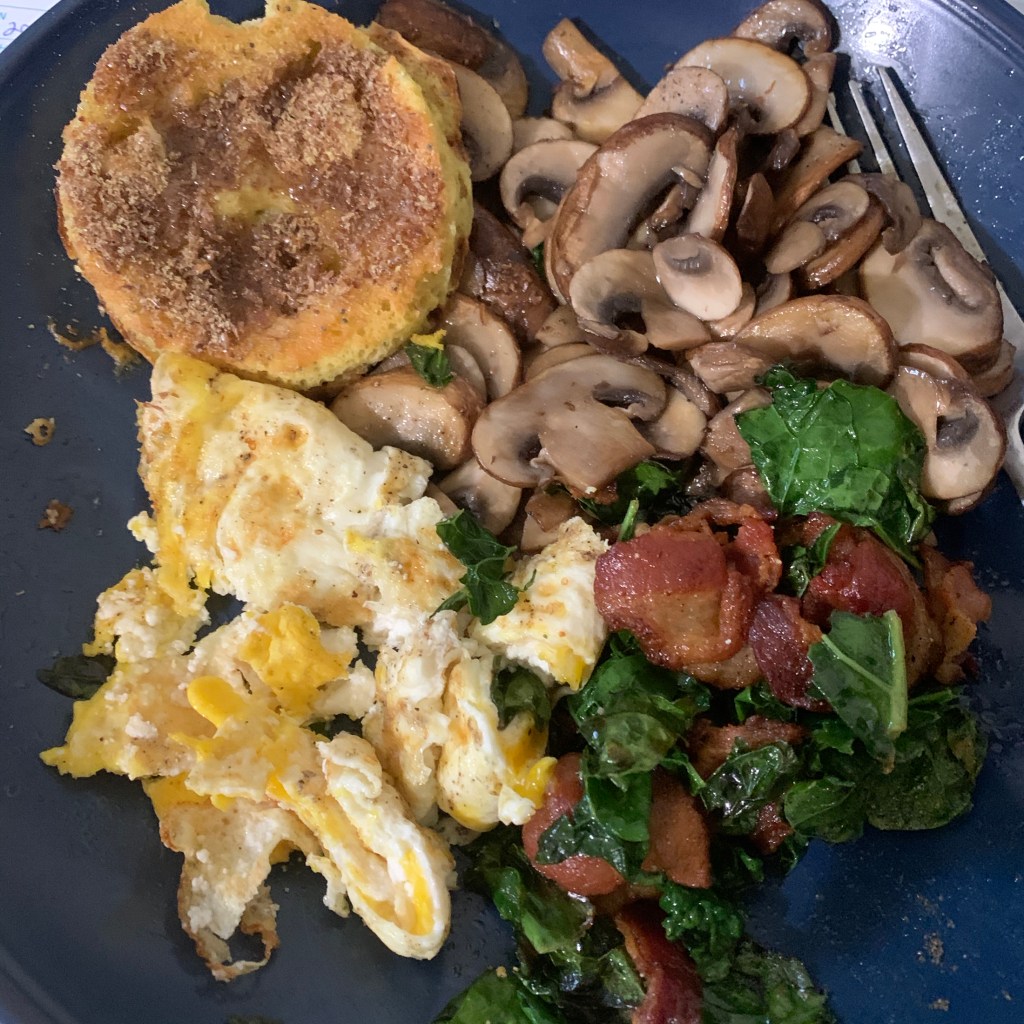
Meals don’t have to be difficult and I rarely follow a recipe. Vegetables are at the top of my list when I shop, and they make up the bulk of the food I eat. Often I eat vegetables, with an egg, for my “breakfast”, which I eat at noon.
Egg, kale with bacon, mushrooms, and keto muffin
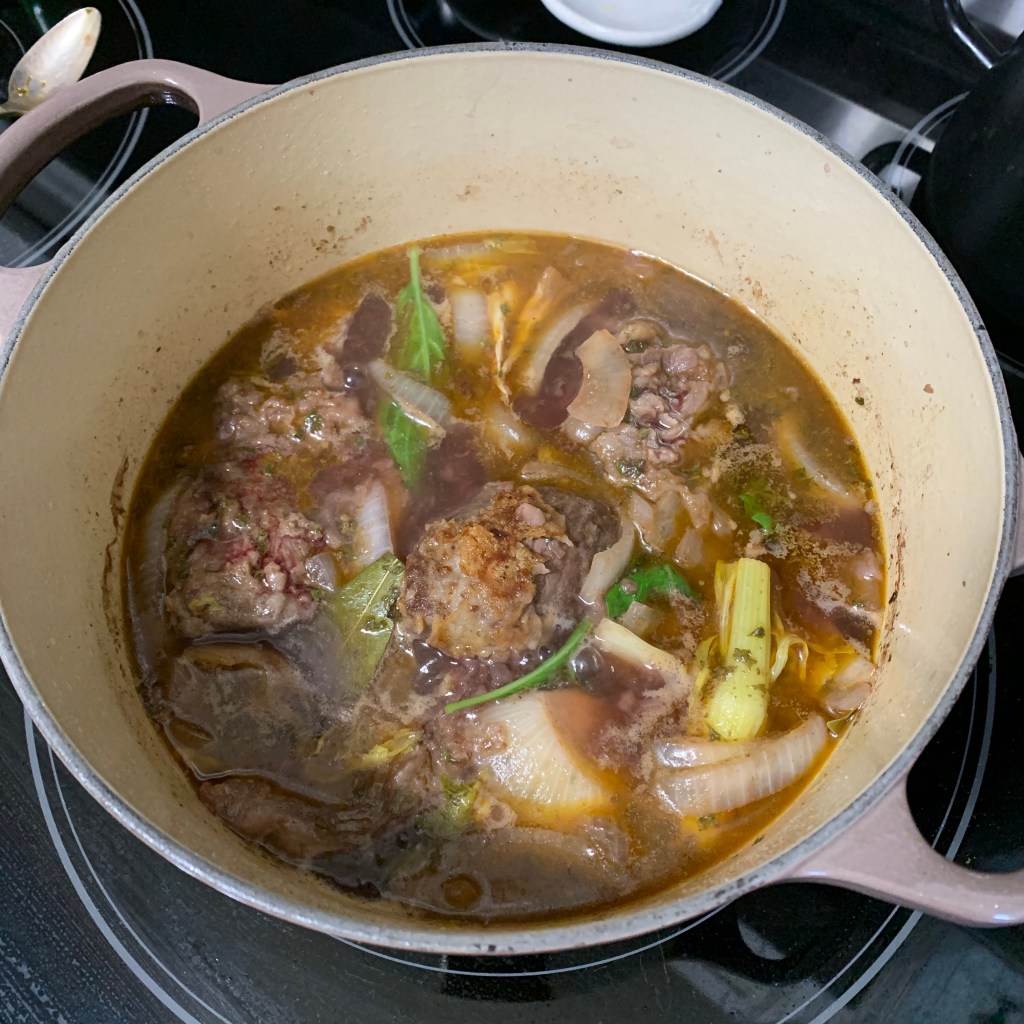
Many Meals Begin With Homemade Broth, or Stock
One thing I do quite often is make my own broth, or stock. The beef broth is made with bones I buy from the butcher. I bake the bones first to brown them, then add to water in my LeCrueset along with the bones, and fat that leaks out of the bones while they bake. Don’t skim off the fat! This is the good fat we need in our diets!
Chicken stock is made from the carcass of a baked chicken. Vegetable broth is of course made from only using vegetables.
Vegetables such as onion, celery, carrots, peppers, and herbs such as parsley and basil can be included. The vegetables don’t have to be perfect – use up older veggies this way. I usually add bay leaves too. The vegetables I add depends on what is around the house. Nothing has to be added, but the veggies add nutrients and flavor.
Make beef or chicken broth
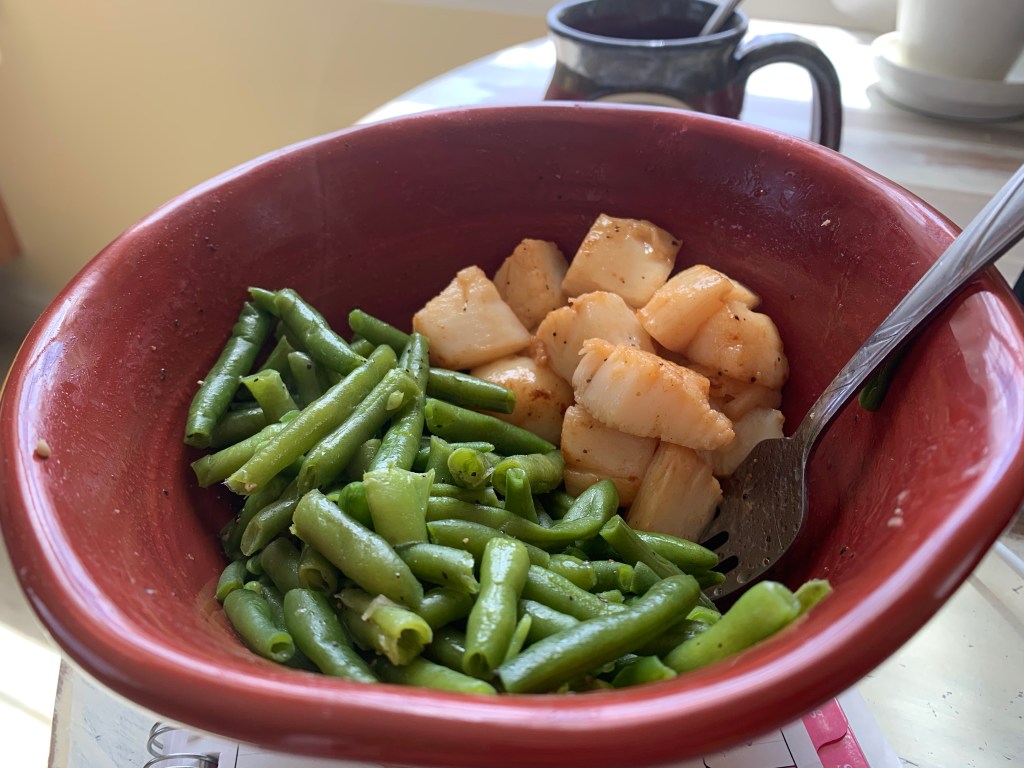
Simple Scallops and Green Beans Meal
Seafood is a favorite of mine and this simple meal consists of fresh scallops which cook up quickly in a frying pan. The frozen green beans were boiled in water then topped with butter. That’s it! Serve with a salad if you like.
Simple scallops and green beans meal
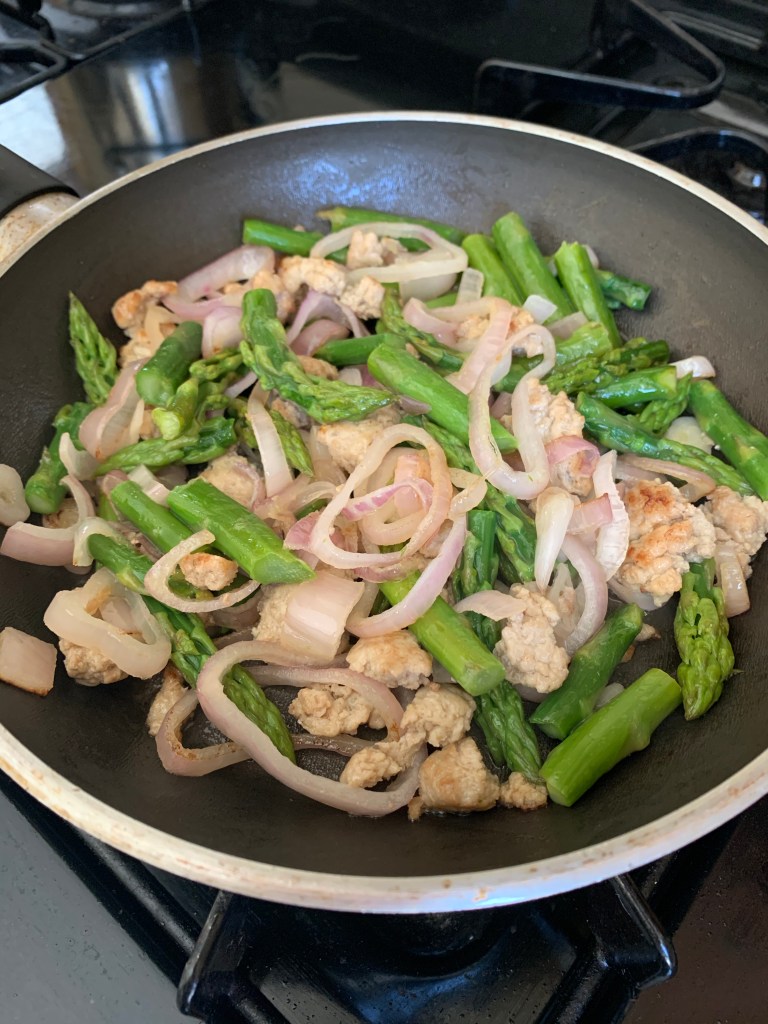
Ground Turkey, Asparagus and Shallots
Cook ground turkey (or chicken) in a pan. Remove the meat. Add butter and / or oil with pieces of fresh asparagus and sauce until nearly tender, then add sliced onions and return ground turkey to the pan.
Tamari or soy sauce can be added at this point, unless sodium is a problem.
Ground turkey dinner
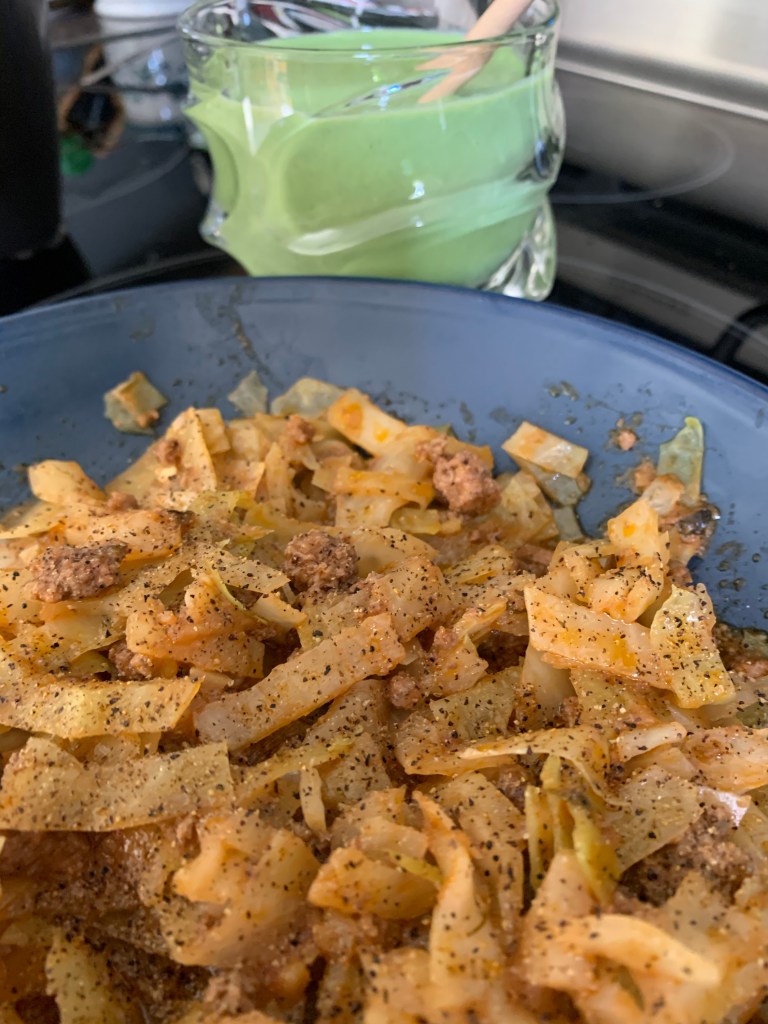
Beef and Cabbage Keto Meal
In a large pot brown ground beef. Add spices and herbs as you like. Remove the beef once it’s cooked and use the same pot to cook the cabbage. Slice a head of cabbage into “noodles” and boil them until tender. Either use water with (sodium free) bullion, or use homemade beef stock if you have it. I cook the cabbage in a small amount of liquid and don’t drain it.
Add the beef back to the pot, and some tomato sauce, or chopped tomatoes. Cook a bit longer (10-15 minutes) for flavors to combine.
Beef and cabbage
Cheeseburger Using Lettuce as “Bun”
Buy lettuce with big leaves and wrap a juicy bacon-cheeseburger inside. I honestly don’t eat much bacon, but this burger was delicious with onions, pickles, cheese and bacon.
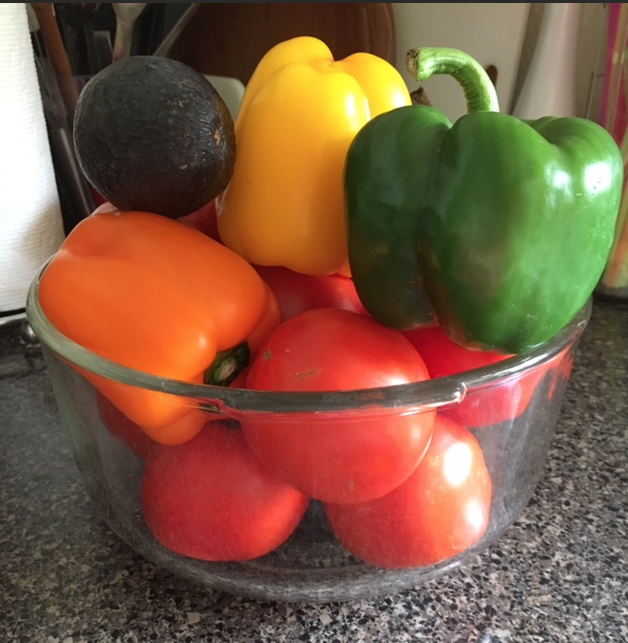
Fresh vegetables are difficult to find, or have been for me. You may think that a sunny, hot place like Florida would be full of wonderful produce, but that is not the case. Apparently it is too sunny and too hot. I’ve tried to garden here without luck. So the local Florida growers who are able to supply beautiful peppers and tomatoes like the ones in my photo here, make me feel grateful. Now that I have found some luscious produce, I will make homemade tomato soup from scratch.
Searching For a Tomato Soup Recipe
If you have ever searched online for any type of recipe you know how overwhelming it can be to find a good version. Food blogs are popular and in many cases copies of other food blogs. In other words the writer has never made the food themselves. Food photos are available for free and to buy, so anyone who wants to can pretend to be a foodie. There is money in the advertising and if you notice, most food blogs have many ads and popups everywhere. For this reason I have been wading through blogs featuring tomato soup recipes to find what I want.
My soup will be made entirely from fresh ingredients, as opposed to canned, and all I need to know is what basic additions to make to the obvious one.
Here’s a list of the ingredients I will be using:
Fresh, delicious tomatoes (thank you Ingrid’s Produce)
bell peppers (yellow orange red and green)
chopped onion
garlic, finely chopped – about 6 cloves
vegetable broth (my own from the freezer)
basil, parsley (from my garden)
celery
heavy cream
sugar (cuts down the acidity of the tomatoes)
Putting it All Together
My plan was to roast the peppers on the grill and remove the skins. That didn’t work out too well because they didn’t blacken enough and the skin didn’t come off. Today I will roast them in the oven and try again. This worked, and I peeled the skin and chopped the pepper pieces to add to the vegetables in the pot.
Broiling the peppers to remove the skins
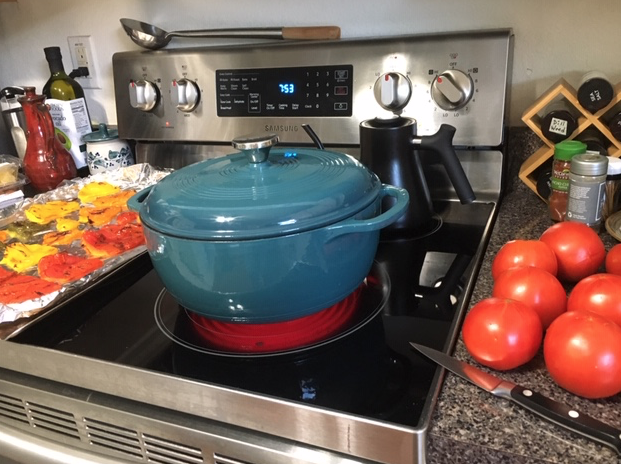
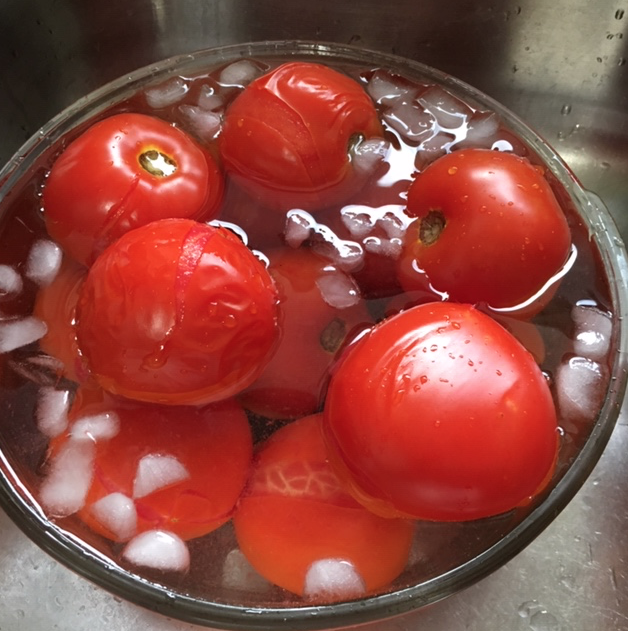
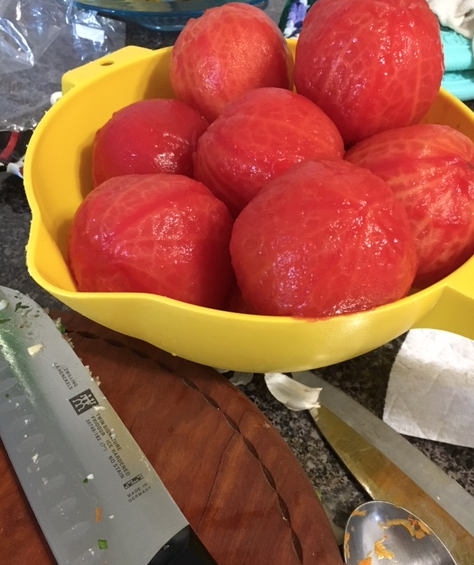
The 12 tomatoes will be blanched in boiling water and then the skin will be removed.
While the water heats to boiling, cut “X” marks in the bottom of each tomato. I read somewhere to do this and it greatly helps when peeling off the skin!
Boiling water to blanch the tomatoes
Use a big pot, like a dutch oven like mine, and bring the water to a full boil. Use a slotted spoon or some large scoop to put the tomatoes into the boiling water. They only need to be in the water for 30 seconds to a minute – seriously… Get them out when they look wizzled. I did all my tomatoes at once, but I should have done 6 at a time.
Be sure the ice water is ready so the tomatoes can go directly in when they come out of the boiling water. I needed a bigger bowl for this! All my tomatoes barely fit. As you can see, the skins have split and are ready to be peeled. Start at the bottom where you made that X and they come right off.
Boiled tomatoes need an ice bath
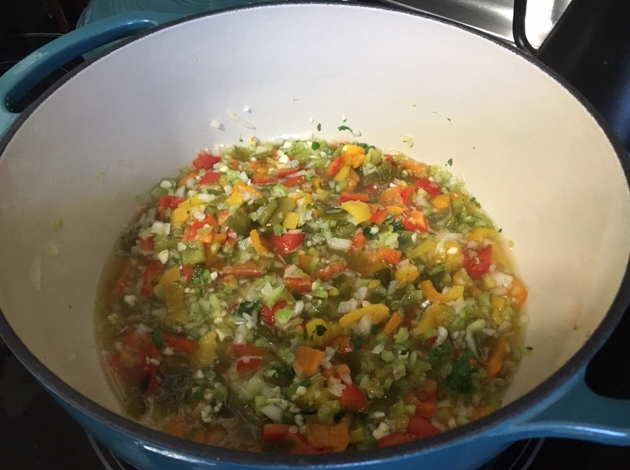
While I waited for the water to come to a boil for the tomatoes I chopped the roasted peppers, celery (3 stalks), whole onion, garlic cloves (around 6), and put them into the broth in my dutch oven. I used my big 6 quart Lodge pot because my LeCreuset pot was too small.
Save Your Own Broth
By the way, the broth I used was saved in my freezer from previously cooked vegetables. Don’t dump that vitamin rich water down the drain when cooking beans, peas, carrots, asparagus, etc., save it in the freezer in a large container and add to it as you boil veggies. It can be used in soup, stew, gravy, chili, and whatever later on.
Finely chopped veggies simmer in broth
While the vegetables and broth simmered, I chopped up the tomatoes. I’m not sure they really needed to be chopped, but I did. I coarsely chopped them and removed the top stem area, and then added them to the other veggies in the pot. At this point I added chopped parsley and basil from my garden and other herbs from my spice rack, including a tiny bit of salt and some black pepper.
Tomato skins are removed and they are ready to chop
I almost forgot the sugar, so added a couple tablespoons to the mix. I always add sugar to homemade tomato sauce and it helps with the flavor. Then I let it simmer for 3-4 hours. I didn’t time it, but I figured the softer the vegetables the better.
I simmered all the veggies for about 3-4 hours.
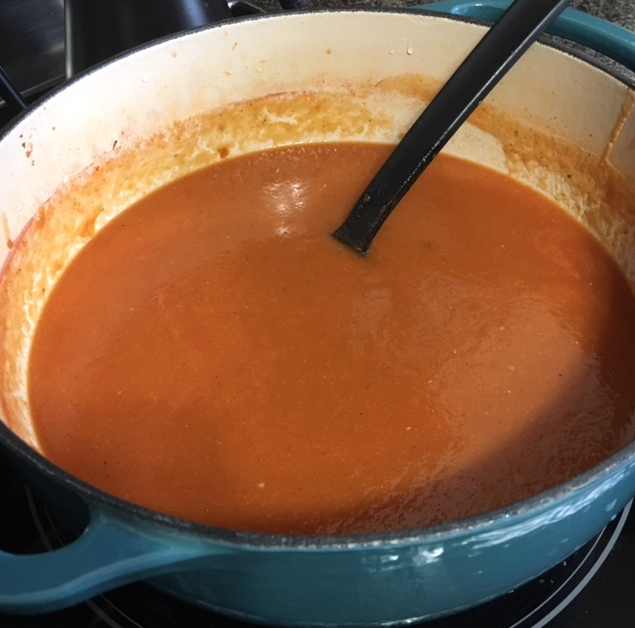
Cooling, Blending, Straining, and Reheating The Soup
Once I had let the pot of vegetables cook a long while, I turned off the heat and began to cool the food. I used a pyrex measuring cup to scoop out the hot mix and put it into large bowls which I set on a wire cooling rack. Once the soup mixture was cool, I used the measuring cup to pour small amounts into my Oster Blender.
From there I poured the blended soup through my colander which has the perfect size holes! I had no idea how this would work out, but since I had removed the skins from the peppers and tomatoes, all that was left was the tomato seeds. And my yellow colander caught those! So use something with holes large enough for the sauce to easily pass through, but will catch the seeds.
I repeated the process of blending and straining the seeds until all the soup was back in the same dutch oven. I reheated it and then added some heavy cream (this lightens the color of the soup to more orange than red). I didn’t measure, just poured, but probably a half a cup or so. I’m considering using yogurt or Kite Hill non-dairy yogurt next time.
Reheating the soup and adding some heavy cream
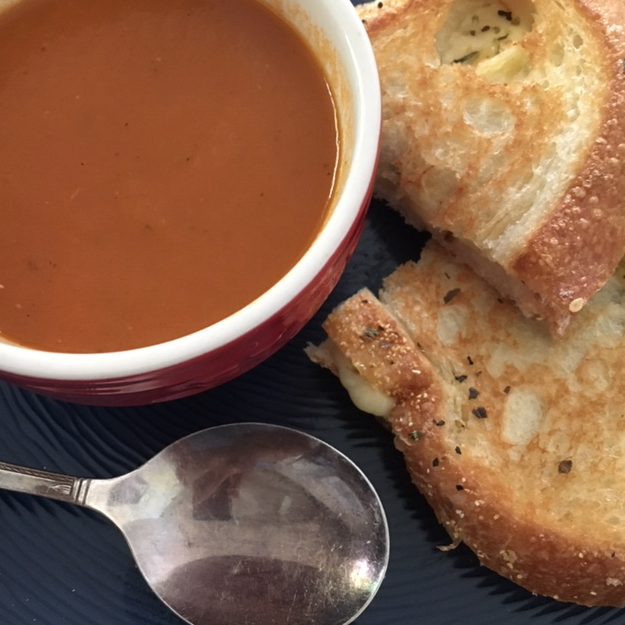
I’m pleased with the taste and I know exactly what is in my homemade soup. Because I am the only one who will eat it, I filled several small freezer containers which I labeled and froze. Grilled cheese and tomato soup for supper tonight! Can’t wait.
Yum… this was my supper!
Making this soup was time consuming. Between chopping all the vegetables and doing the tomatoes then cooling, blending and reheating it took some time. But I love homemade soup and this is worth making again.
Use common sense when looking for “recipes” online. Some tomato soup recipes called for flour or canned tomato paste. Sometimes a few good recipes will give you ideas and when combined, you get a stunning result. I wanted fresh ingredients only, and I believe I have achieved that.
Done and ready to freeze!
Butternut Squash Tomato Soup
When I visited New Hampshire last Fall, the Fiddleheads Café, in Hancock featured butternut squash tomato soup on their menu, which sounded so good! Unfortunately they were out of it the day I wanted some, so I decided that one day I would make my own. Since then I have been searching my local Florida area for good tomatoes to use. Most tomatoes here taste like nothing. Once you eat garden fresh tomatoes it really does spoil you. I gave up on making soup because of that.
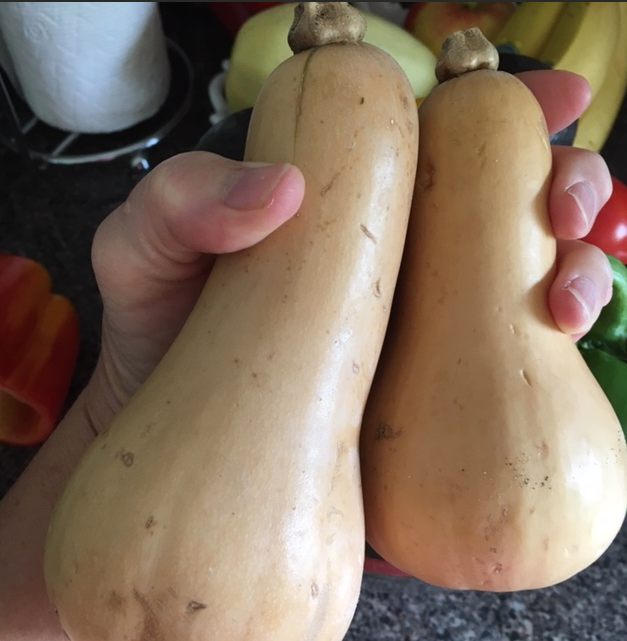
Just the other day I discovered a fresh produce store just down the road from me. And the tomatoes are fresh and tasty! The owner also had little butternut squash, so I bought two. I love the size because I can’t eat a whole, large squash myself. Now I am thinking about adding some to my soup.
I love the small size of this squash
Update on the squash. I baked them both and wasn’t happy with the flavor. They tasted like they needed more time to grow! So maybe that is the case. I ate the squash and did not add it to my soup.
I’m thinking that I could cook some squash (a larger, more tasty one) and simply add it to my already made tomato soup. Why not?