October is Florida Planting Season

Three cheers – it’s October! I’ve been waiting, and not so patiently. The extreme heat is mostly gone and temperatures have gone down to the 80’s. Then, today it was 67 when I went outside at 7:00am and I put on a flannel shirt! Yes, it is finally time to tackle that long list of outdoor chores that has been building over the long, hot summer.

Planning

Now is the time to get planting for the cooler season. Our Fall is more like a normal, northern summer so the plants will be happy.

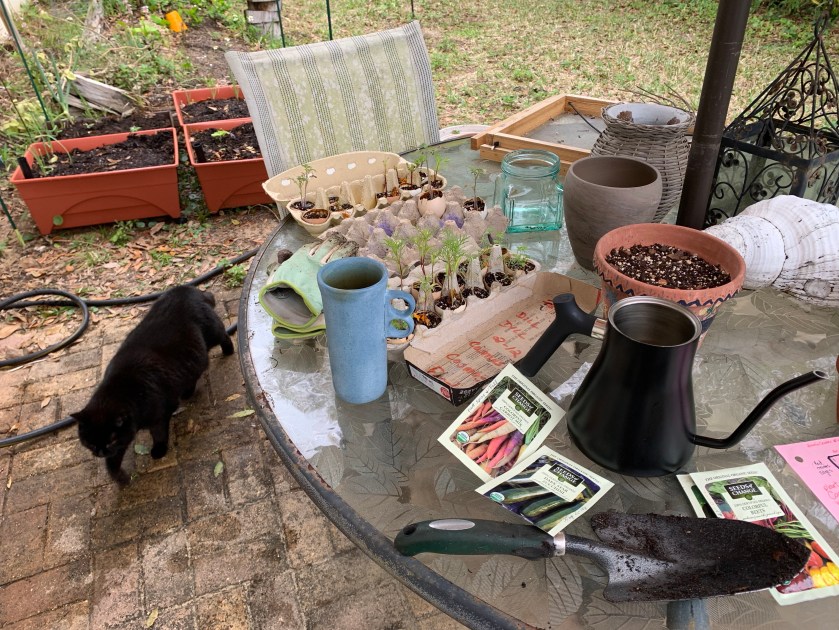
I’ve been planning where to plant the seeds and seedlings. We must have a garden plan – and I did.

garden seed packets planning
My garden planning area

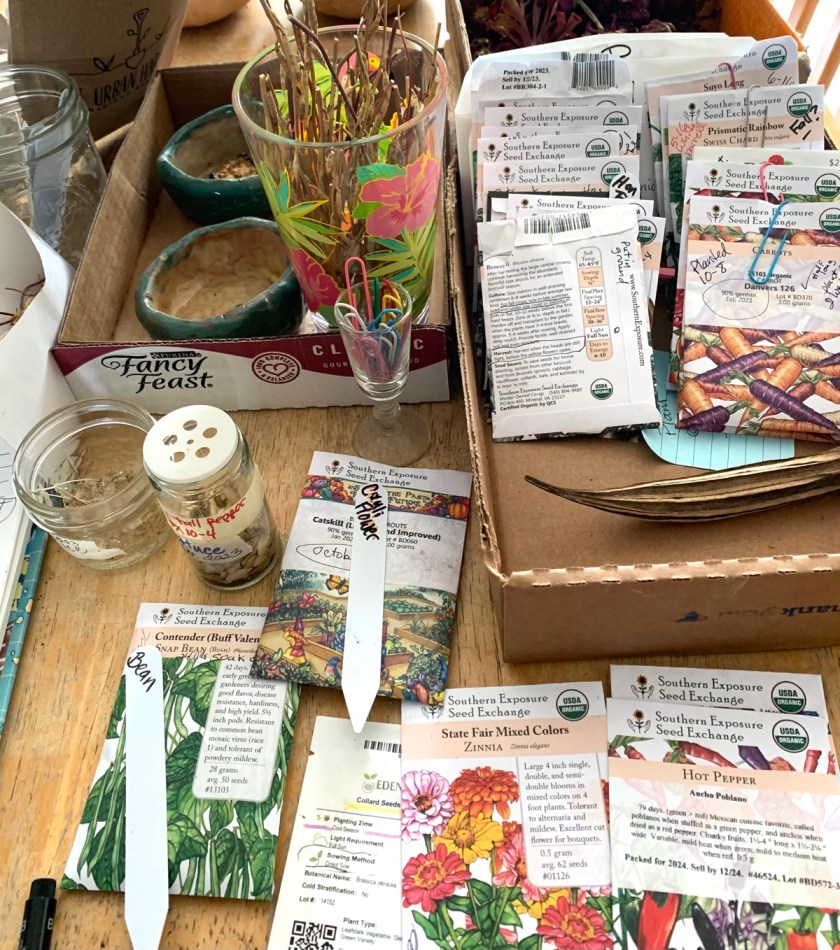
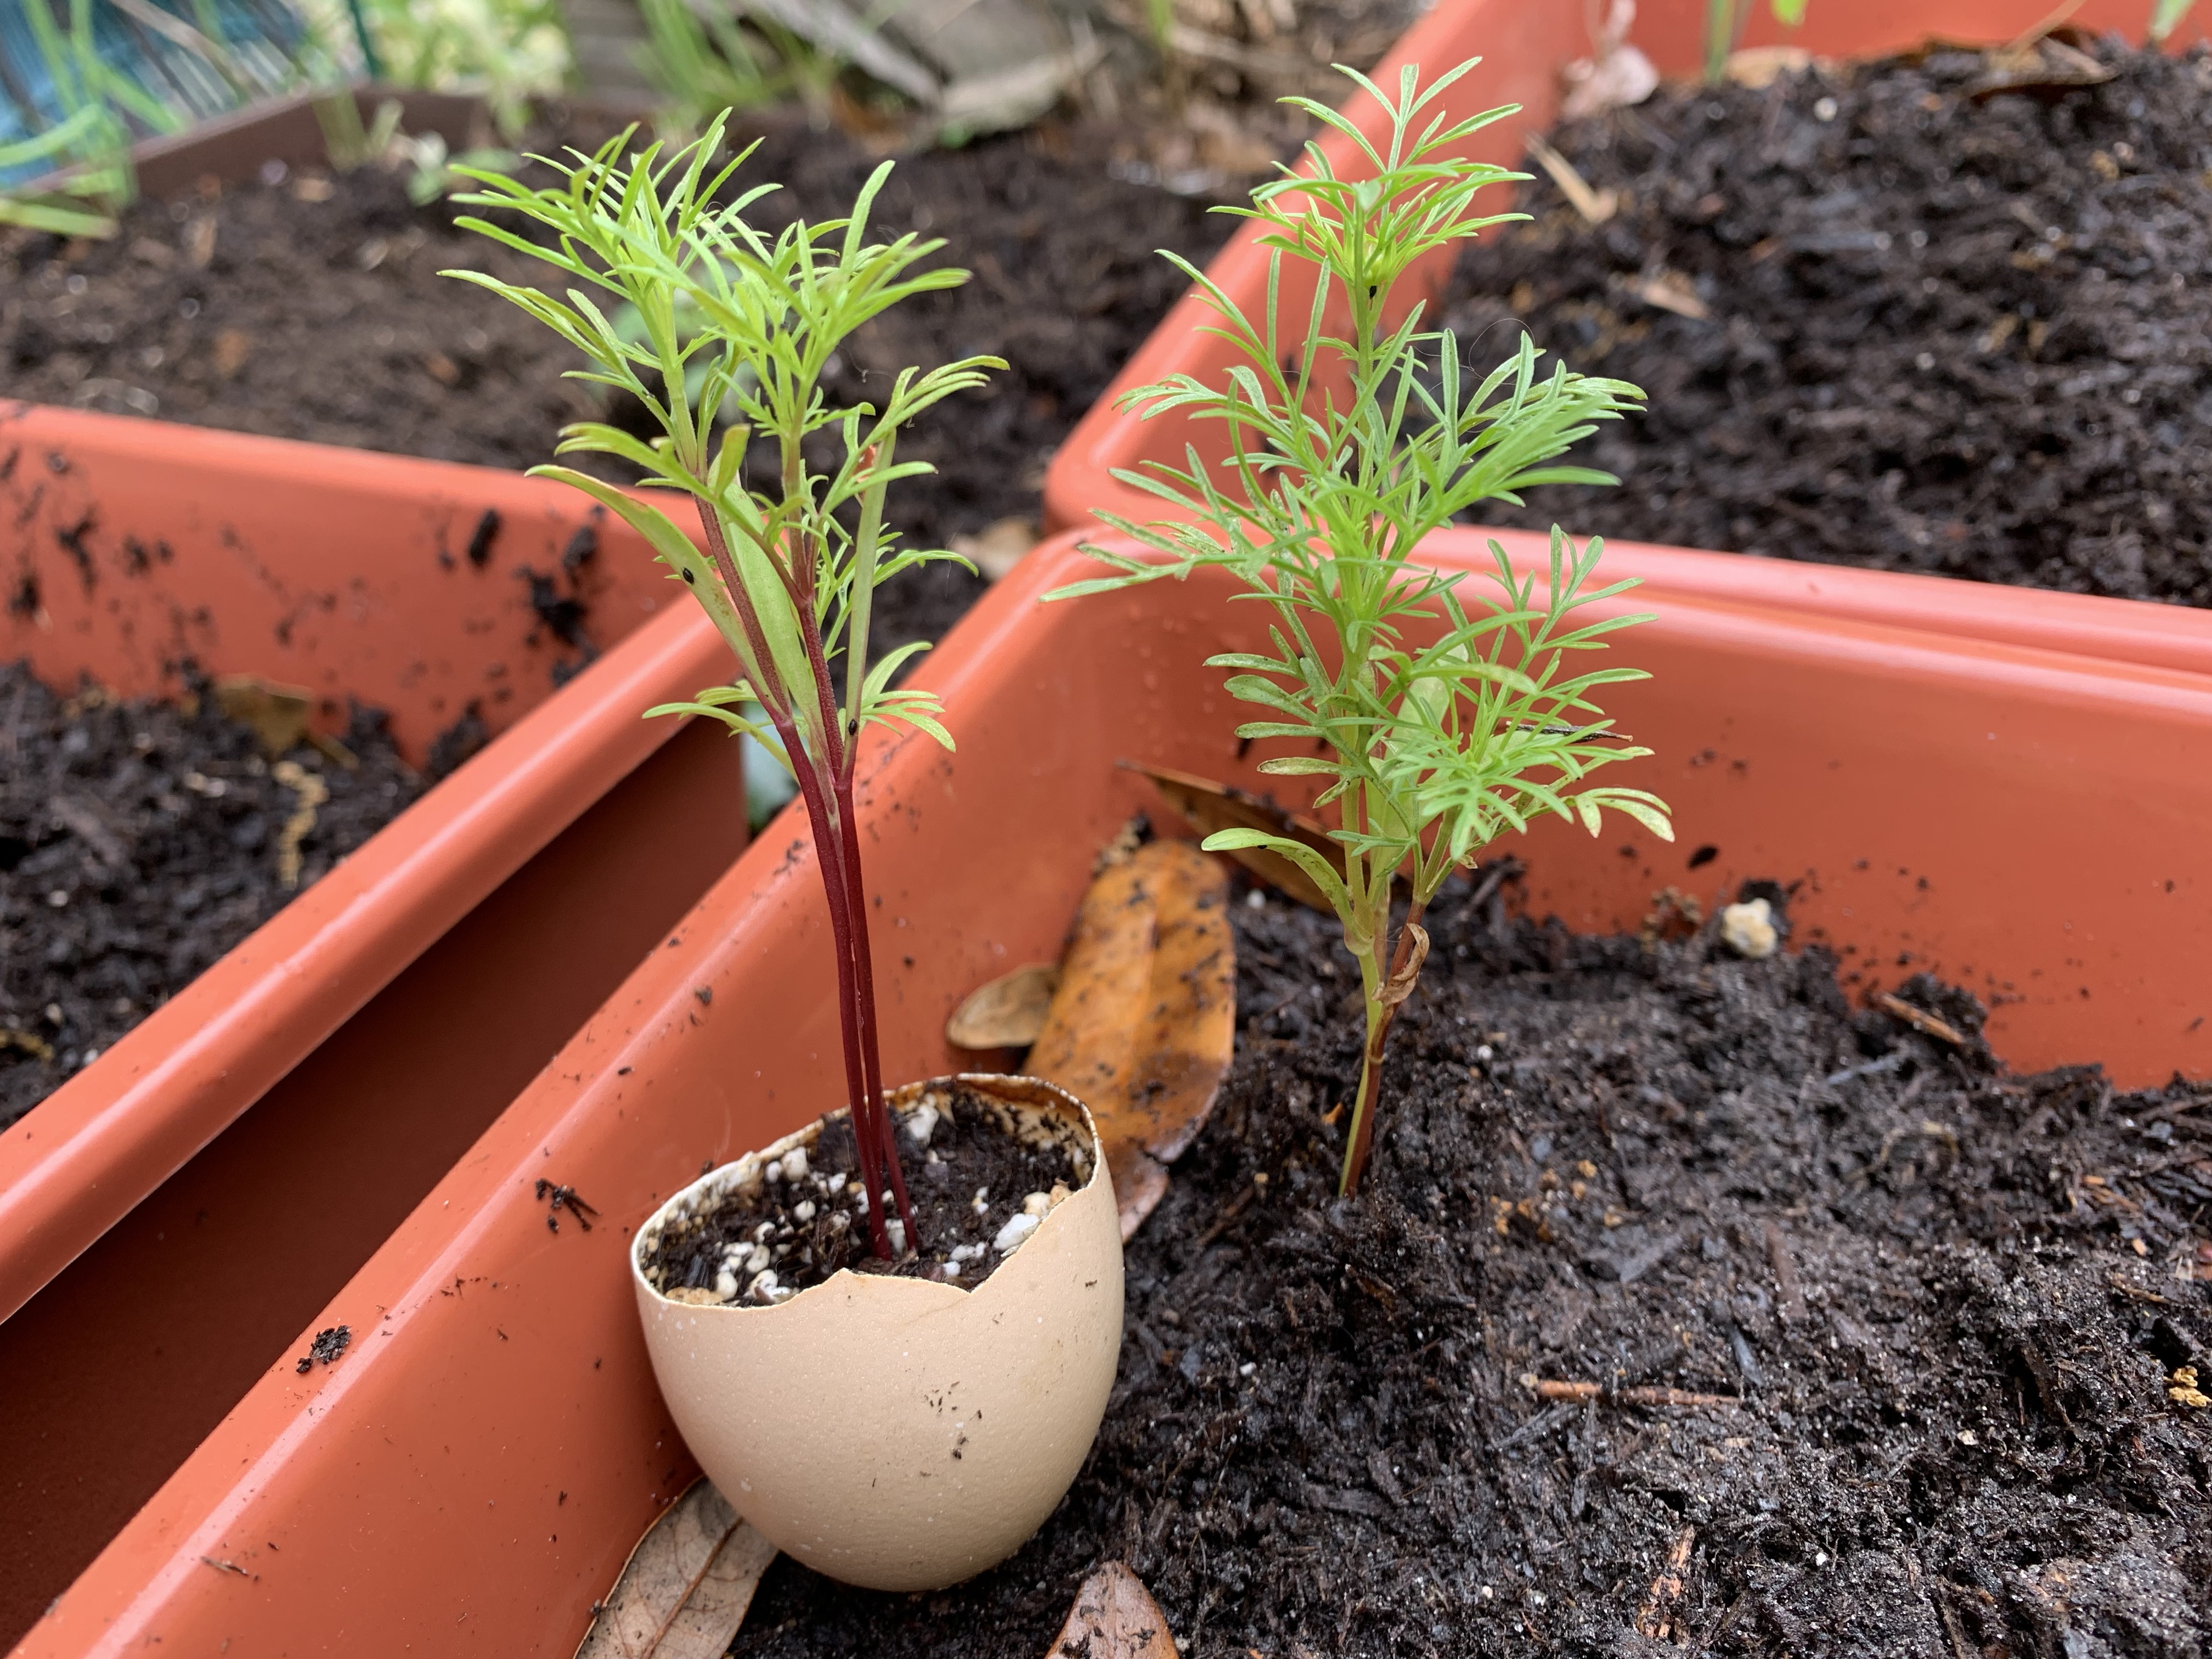
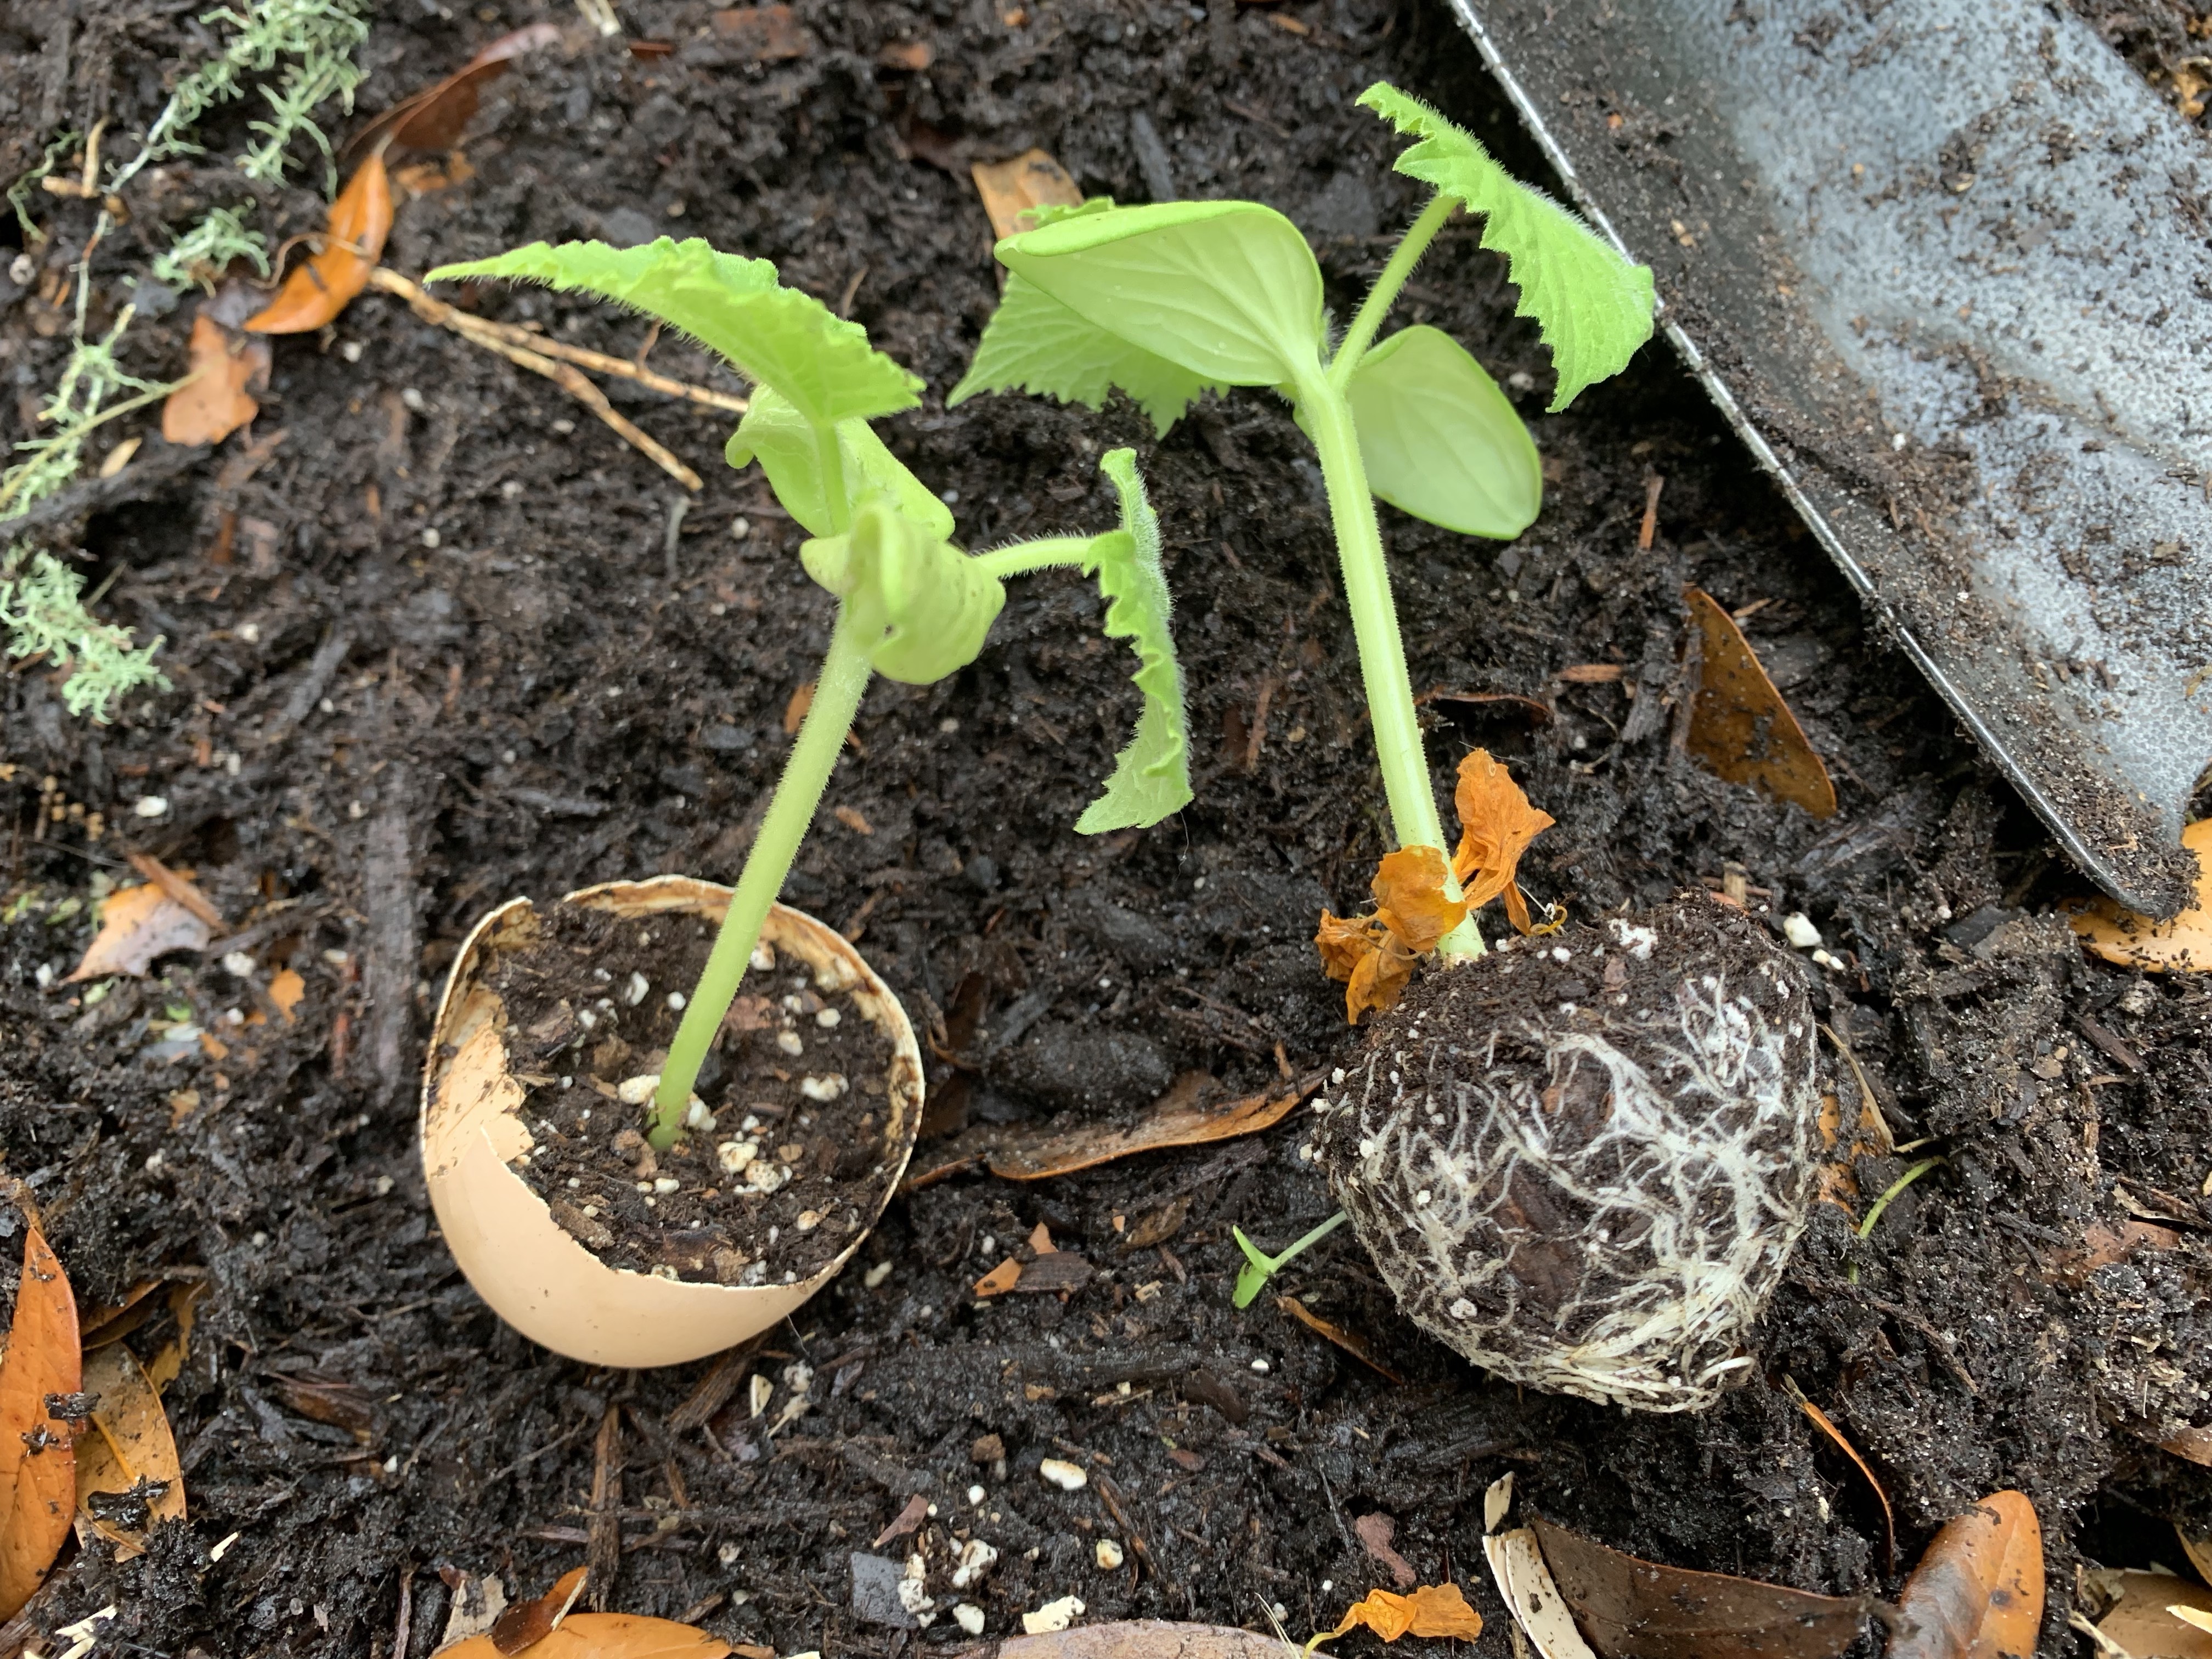
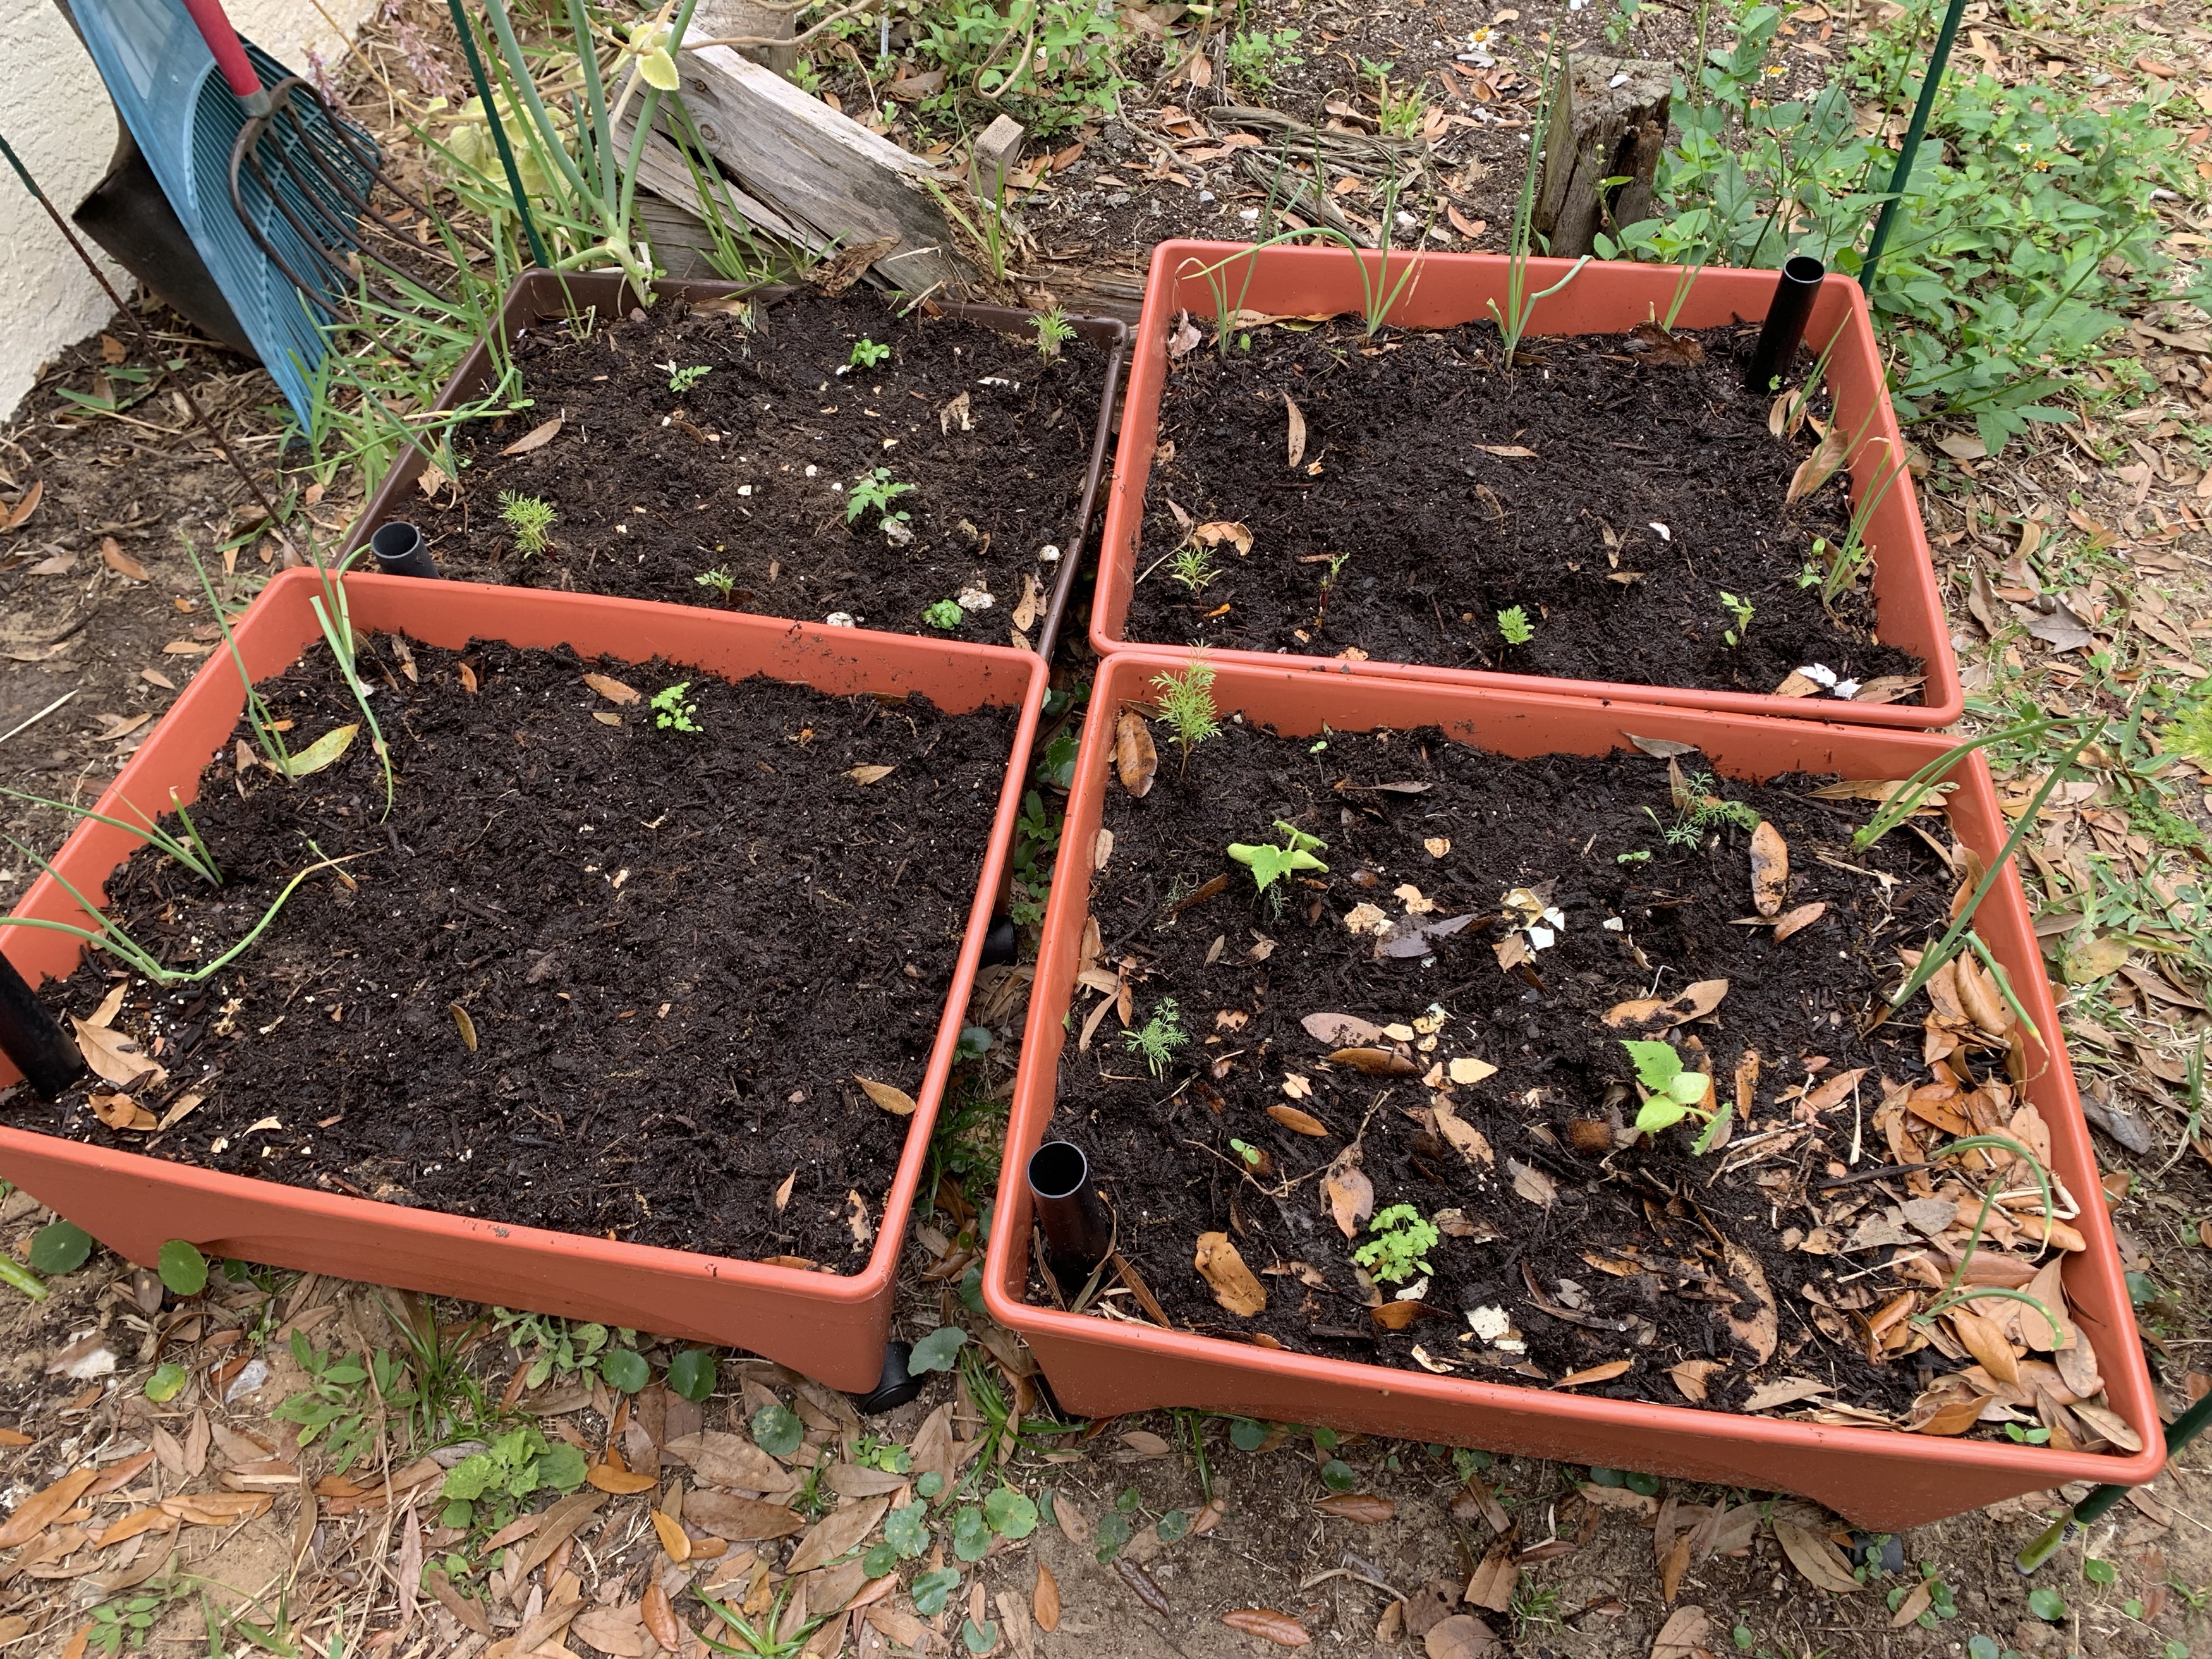
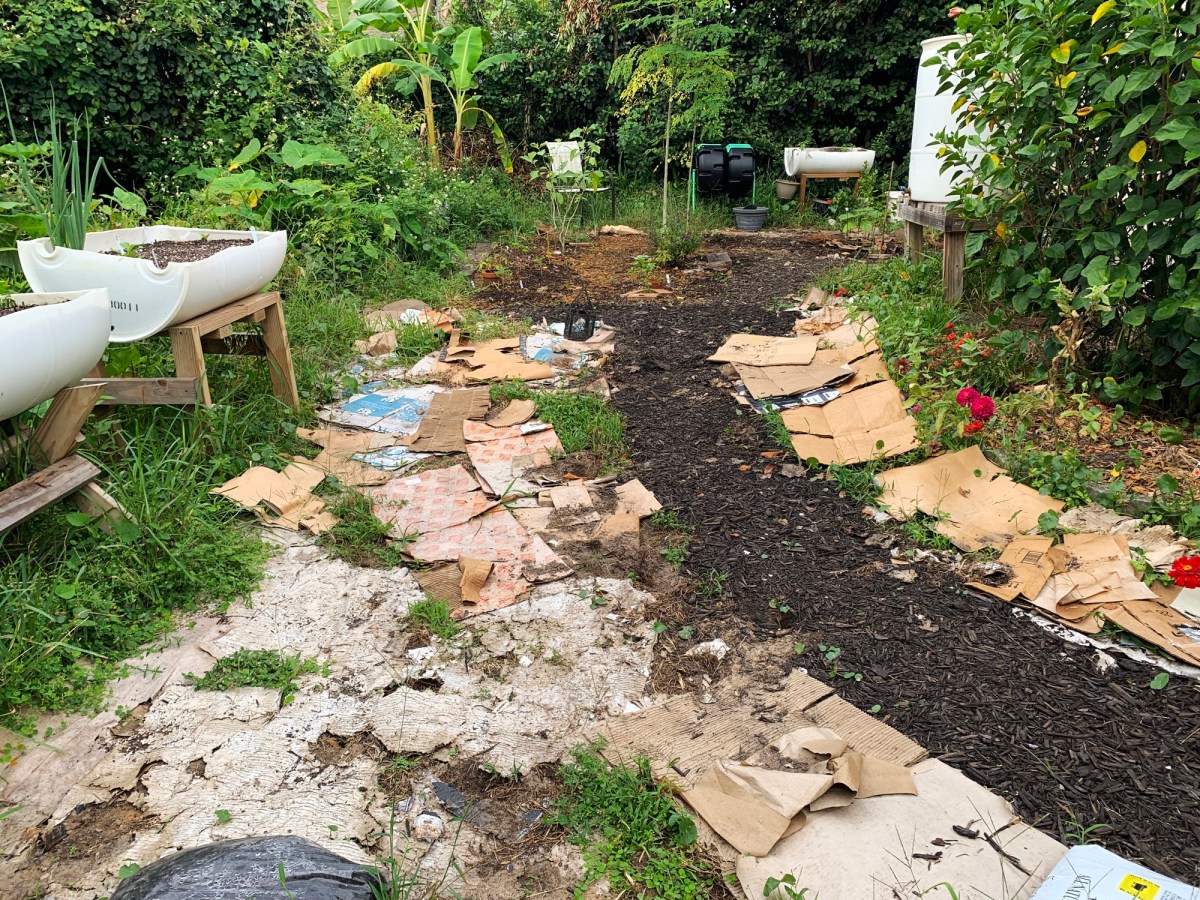
The grow boxes were dug and amended with some good stuff, like bone meal and compost, in September. Seed packets laid out to take stock, notebook scribbles about what I did, plant names written on markers, and everything ready to go.

Water Problems and Compacted Soil

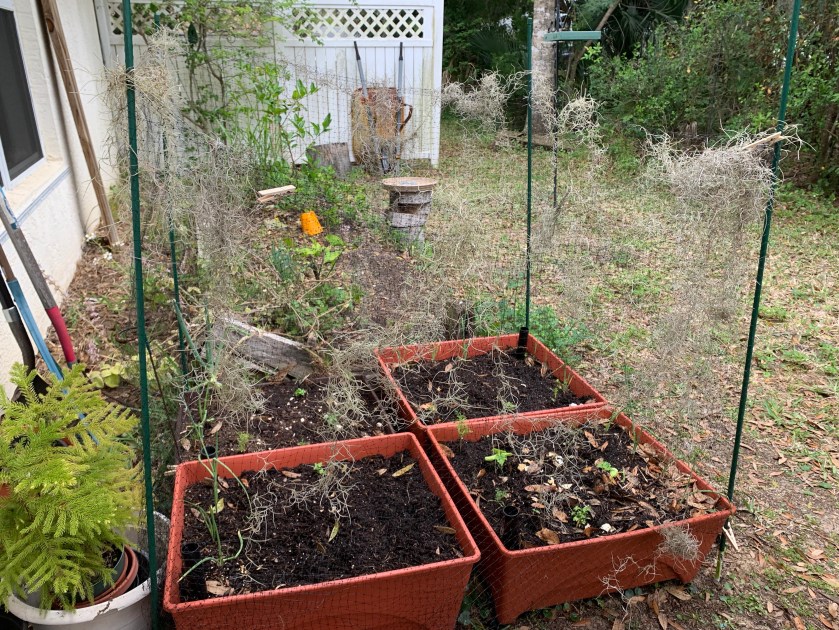
At the end of September a little pocket of moisture hovered over my area of Florida. We got days and days of rain. I measured 9 inches in two days alone, and it rained for about a week. Florida can handle lots of rain, but my grow boxes were super soggy. They do have drainage, but I realized that I needed to add something to aerate the soil. It had become very compacted.

I bought Vermiculite (link to the organic brand I purchased at Amazon) and Perlite. I liked the Vermiculite better, and bought some more. Once again, I went through the grow boxes and added bunches of vermiculite for drainage.

Animal Pests

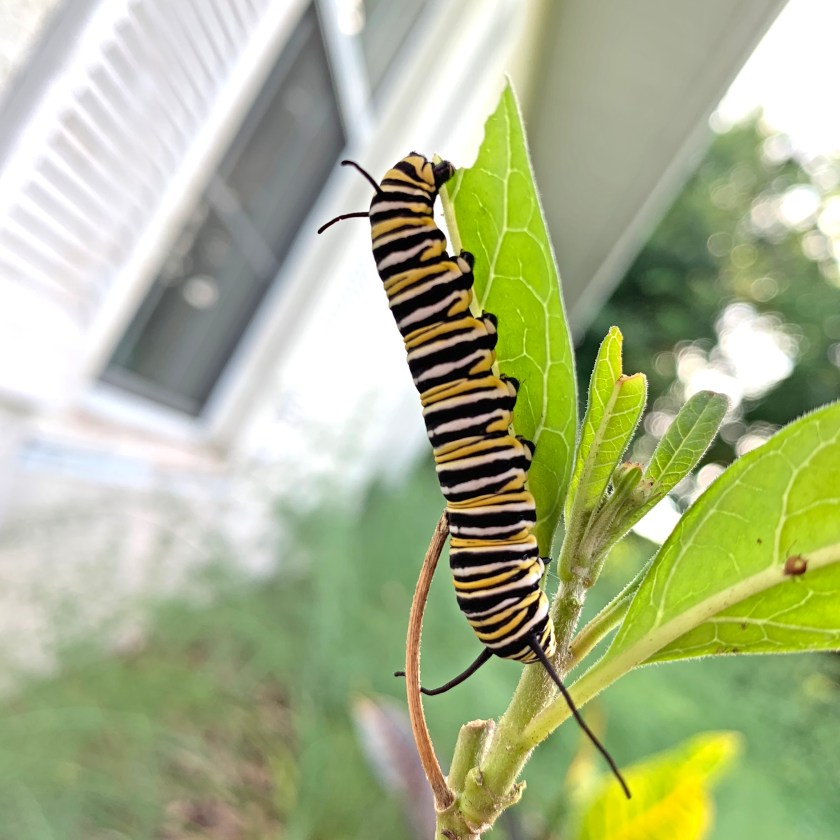
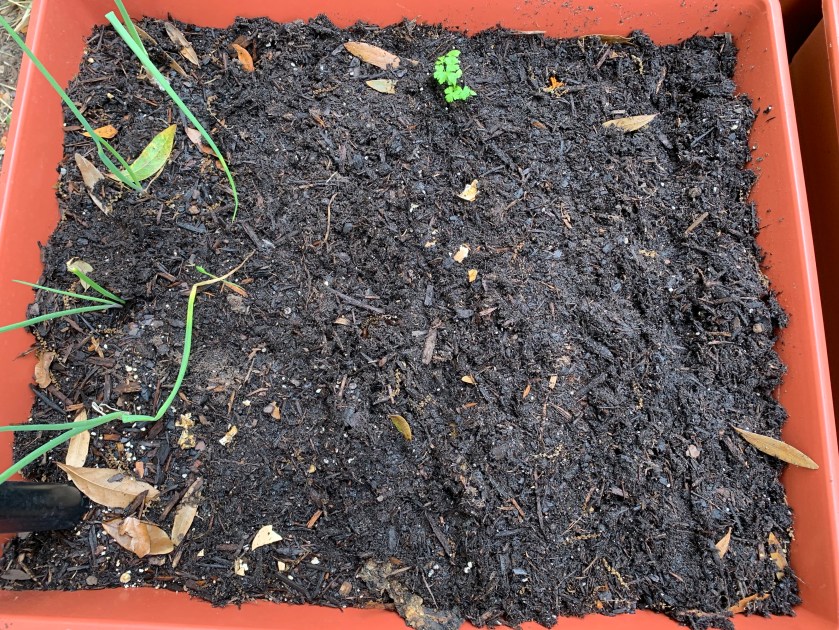
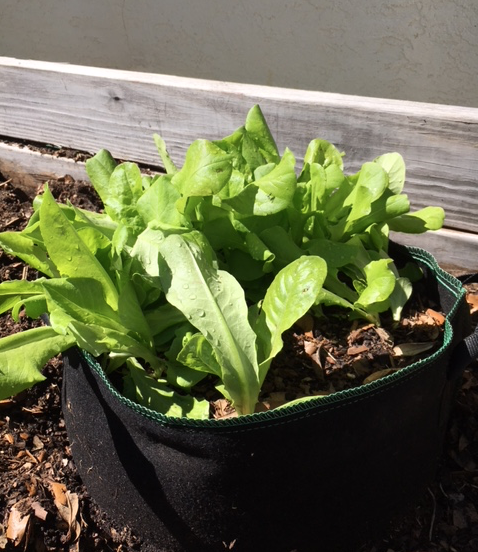
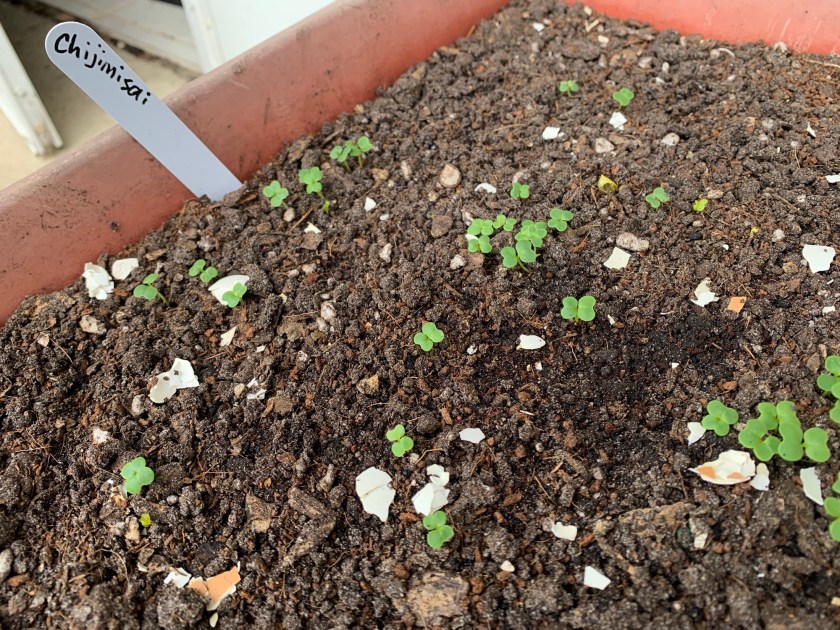
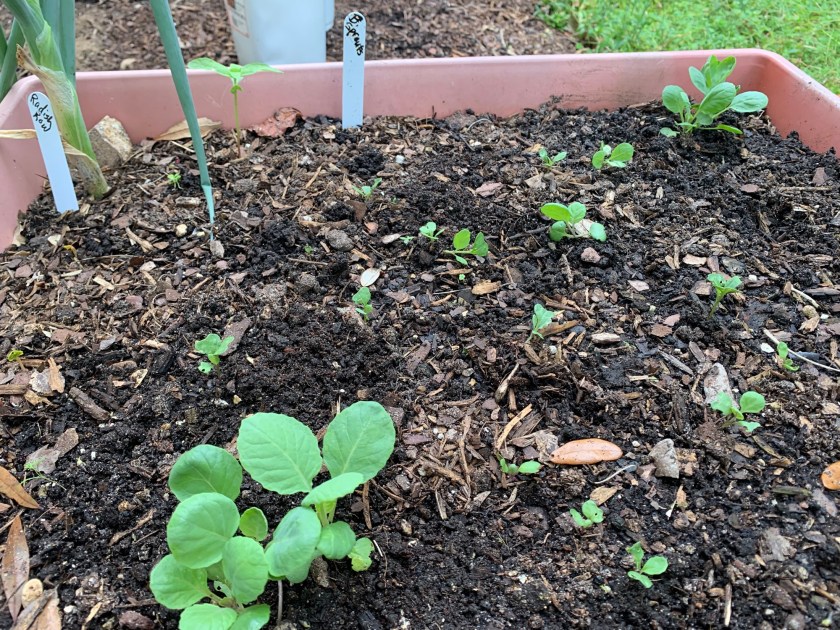
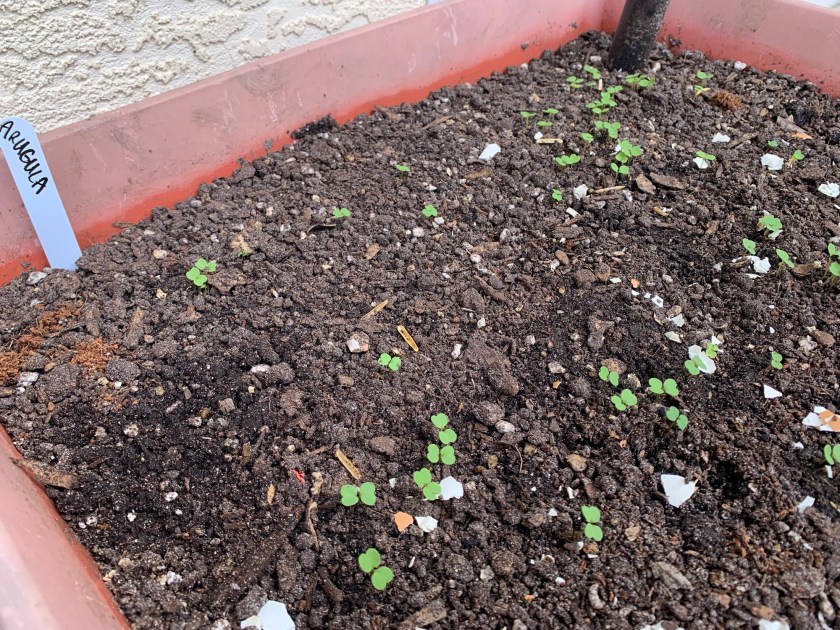
Finally I was able to put seeds into the boxes. Once the lettuce, arugula, chijimisai, Brussel sprouts, and cauliflower were in the boxes I had another problem to deal with. Raccoons are walking through my low grow boxes, and sometimes digging.

  • Chijimisai seedlings
  • cauliflower seedlings
  • Brussel sprouts seedlings
  • Bell pepper seedlings
  • arugula seedlings in grow box

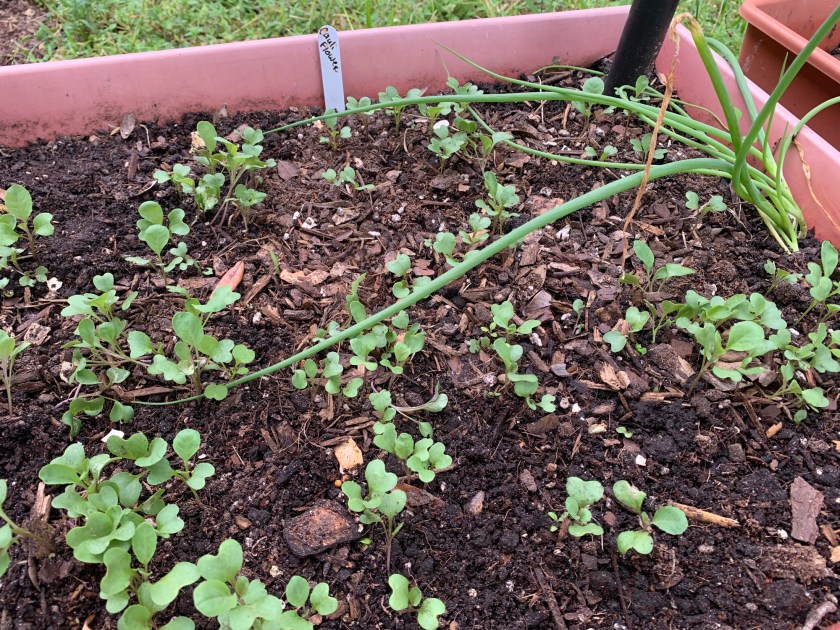
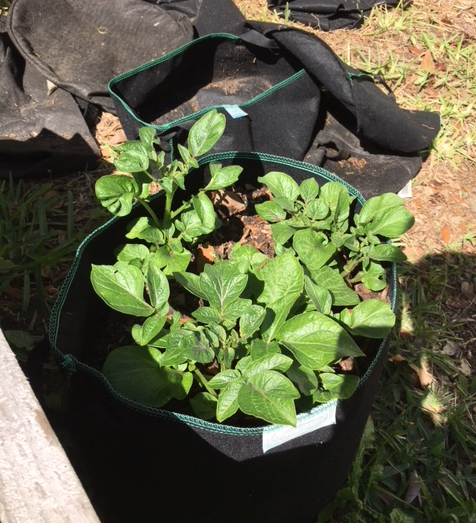
Raccoons and armadillos are always around, and especially pesky raccoons. Each morning when I check the (in the ground) garden, there are big holes and some plants pulled up. I’ve lost some pepper and tomato plants, which has made me change my plans a bit.

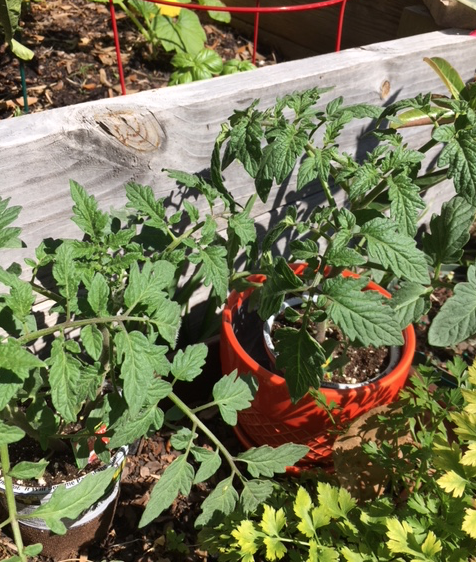
Instead of having my tomatoes all in the ground, I have to put a few up in the larger, white barrels that are off the ground. This means that I don’t have all the space I had hoped to have for planting.

This white barrel, where I planted the Eva tomato seedlings, was being used as a composting area. So I’ve lost the compost space, but the tomatoes should grow great!

tomato plants in raised bed
Eva tomato plants

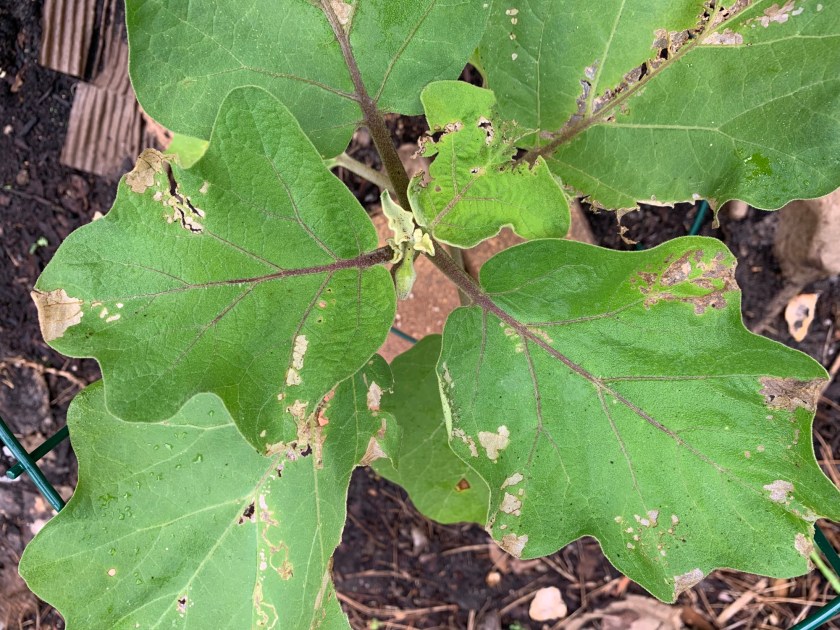
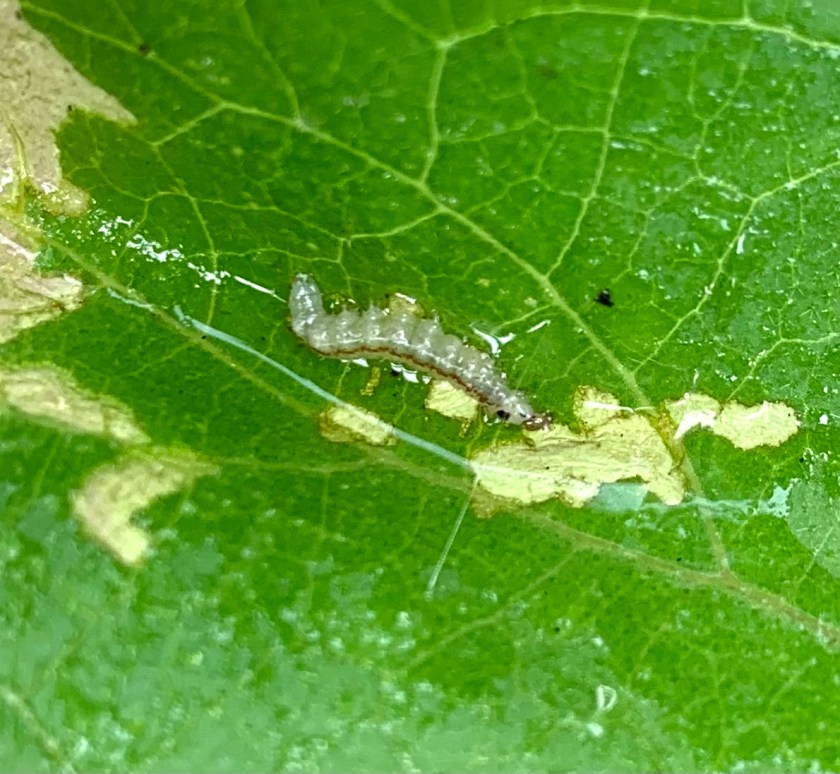
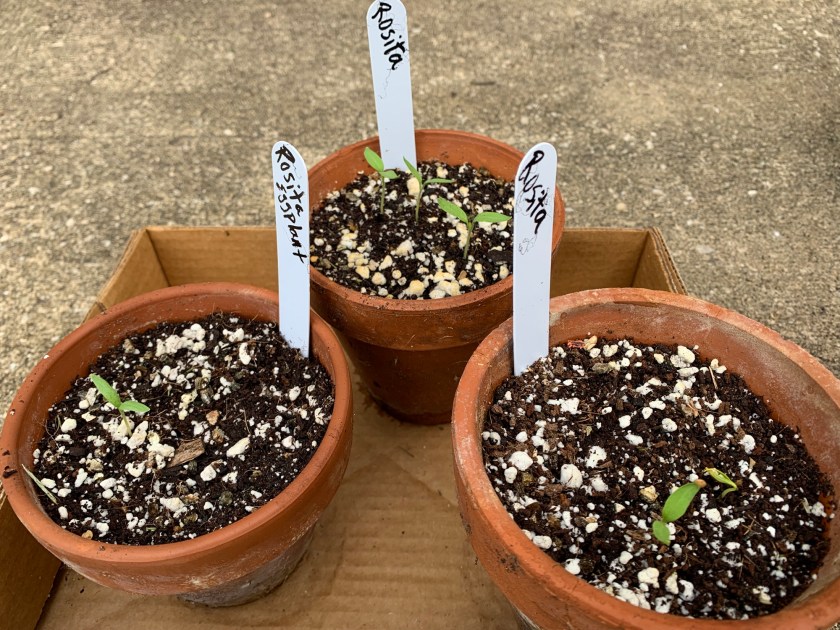
Worm Problems on Rosita Eggplant

The two Rosita eggplants growing in my backyard were begun from seed. They were planted on August 4th and have had worms on the leaves off and on since they were planted. I have only 2 plants, so it’s easy to pull the worms off and throw them onto the ground for the lizards.

I don’t have this worm problem on my other type of eggplant. I do have some more Rosita seedlings growing in clay pots, but if this type of eggplant is prone to worms, I will not continue to grow them.
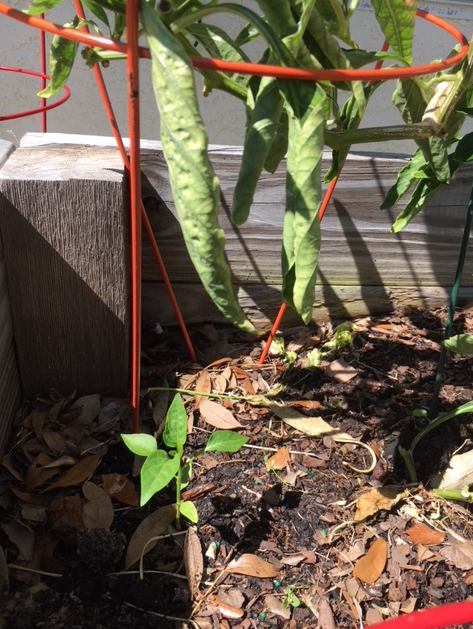
  • Rosita eggplant worm problem
  • worm on eggplant leaf
  • Rosita eggplant clay pots

Bell Pepper

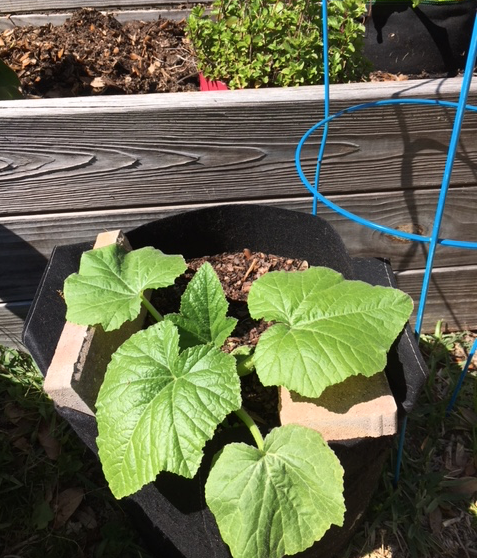
Another plant that I had hoped to have in the ground is the Bell Pepper. The seedlings I put into the garden were pulled up by animals. So, I planted more seeds in one of the tall grow beds. This bed will now be the nursery for pepper plants, which means I can’t use it for something else. (I have a pineapple growing in the corner.)

Bell pepper seedlings
Bell pepper seedlings in raised barrel bed

Keep Gardening Notes

I have a small notebook where I write things down. These notes keep track of what I buy and when. I keep dates for when seeds are planted in pots and / or in the garden. I also make entries about the weather, bug infestations, and information about certain types of vegetables. That is very important because I am beginning to grow things I have never grown before. Some of these things – the Chijimisai, for instance – are very new to me.

I also keep all the seed packets, and make notes on them. They have good information about when to harvest (pumpkin and watermelon) and contain the date packaged. Seeds only last about a year, so they need to be used up before they get old. I rarely use all seeds at once because my garden areas are so small.

Hoping to Grow

This fall I am hoping to grow lots of greens. Kale, lettuce, arugula, and parsley, to name a few, like cool weather. All I have had over the summer is some sweet potato leaves.

I am hoping the tomatoes will grow and produce. Peppers like the heat, but they are so slow growing that I don’t expect peppers until Spring. I might have to do something to keep them warm enough through winter.

Carrots have been planted in the deep raised bed, and I have yet to find a place for the kale and snap beans. Today I planted the remaining Borage seeds and will soon find a pot for the Nasturtiums. They did not like the heat, so I’ve been waiting for cooler days.

I’ve never done much vegetable growing in Florida and this is the first time I am planting in Fall. I feel like my research has prepared me, and I could be successful. The gardens are not as big and ready as I’d like, but it’s a process.

Read on for more garden stories

Fill the Yard With Milkweed – The Right Kind!

Be sure to select a native milkweed for the yard, or you could be harming the Monarchs instead of helping. Don’t take store and seller’s word for it – be informed.

When I wrote this blog post, over two years ago, I had read an article about Tropical milkweed being horribly bad for Monarchs. It seems that is not completely true. As I’ve continued to learn about growing milkweed, I think the Tropical variety can be used as a good stand in if native milkweed is not available. But it must be cared for correctly.

Back then: On a trip to the Farmer’s Market, we found some plants for the yard. I was happy to find this plant at the market. It cost me $15.00 but I was very excited to find such a wonderful, big plant to help the monarchs. What I didn’t realize is that it is NOT native. I bought Tropical Milkweed which is becoming a problem in the south.

Two-colored flowers (red and orange/yellow) with pointed leaves – this is the non-native Tropical Milkweed. But, the only reason it seems to be a problem is that it does not die back in Fall / Winter.

Good Intentions

I want to fill my yard with food for the bees and butterflies (namely Monarchs)… BUT… this is not the right kind of milkweed for my area. When this milkweed plant began to drop its seeds, I looked for information about planting them. I’m so glad I searched for information. BUT, now there is more information.

I suggest removing the seed pods so the plant doesn’t spread into the wild where it can’t be cut back over winter.

This is when I realized that I have the wrong type of milkweed. Wrong meaning not native. It was time to learn more about milkweed.

Updated Info on Tropical Milkweed

Tropical Milkweed (Asclepias curassavica) is NOT a native Florida plant. It is native to Mexico. It’s always best to plant native. However, I have not easily been able to find nice, native milkweed plants at local nurseries and garden shops. Tropical milkweed is easy to grow, and it grows fast. No wonder plant sellers prefer this one.

If you have tropical milkweed, the most important thing is to cut it back by December. It won’t die back on its own in many locations. This keeps the Monarchs from migrating. If they stick around and continue to breed, the caterpillars can develop a lethal parasite (OE). Read the article about this at IFAS for more info.

I doubt that many sellers of the tropical milkweed even realize it is not native to Florida. And many probably don’t understand the need for cutting it down.

Non-native, flowers are bi-color red and yellow.

Tropical milkweed is not native to Florida and can cause problems for the Monarch butterflies.

When is it Okay to Plant Tropical Milkweed?

So what if you have this milkweed growing in your yard? After I removed my Tropical milkweed plants, two more plants grew – 2 years later. Right away I began to see caterpillars. I knew this was the wrong milkweed, but it was feeding those hungry caterpillars. So, is it better to help the Monarchs even if the milkweed is not native? I say yes.

monarch caterpillar

I now believe that having some tropical variety can be good to supplement the native types. Native milkweed is hard to find to buy. Certain types need sun and lots of moisture (swamp variety). Others need sun and dry conditions (Sandhill). Milkweed is meant to grow in Florida’s diverse ecosystem, which is vanishing. It should not be grown in a yard that is sprayed with chemicals.

All these things make native milkweed hard to find. With roadsides mowed, and lawns taking the place of fields, butterflies are now endangered. If we can help by providing some plants – native or not – I say let’s do it.

Right now I am trying to grow native milkweed for my yard. I have planted seeds, and purchased milkweed seedlings online. My goal is to have a variety, with many native plants (mainly) for the butterflies.

Florida Native Milkweed Links

  • Sandhill Milkweed – Big, dark leaves and pink flowers. Likes to grow in sand and doesn’t need lots of water.
  • Orange Butterfly weed – Not preferred by monarchs (so I’ve read) but great for butterflies and other insects.
  • Swamp Milkweed, white / pink – Moist, well-drained soil. Full sun to part shade.
  • Whorled Milkweed – blooms longer, into Fall, and can supplement if other native milkweed has died back.

Find Milkweed Seeds and Plants Online

You may find what you want, along with other Florida native plants, from this list of growers / nurseries on the Plant Real Florida site.

I have purchased seeds from Johnny Butterfly seed. They have sprouted at this stage, but are still tiny.

Keep reading the blog…

Transplanting Eggshell Seedlings to Grow Boxes

It is now mid-March and my grow boxes have been readied for vegetable seedlings. Just as I was thinking that the cold was behind us here in central Florida, we had a night in the 40’s. That will be rare from here on out.

I wouldn’t be in a huge hurry, but I know that the heat is coming. Yes, vegetables need sun and heat, but not the kind of heat Florida throws at us. I’m not even planting peas until September because I am sure it will get too hot for them now.

So here it was, a cloudy, somewhat cool, morning and I decided to get the seedlings into the grow beds.

Gardening table in the backyard, with seedlings and seed packets ready to plant.

I was a little tired of setting the eggshells outside and having to check on them. Something was eating some of the plants too. The seedlings were mostly large enough for the ground. Rain was in the forecast, so it was a good day to plant.

You can see my three new garden boxes in the background. I also have an old grow box to make four total in the group. My old raised bed is in the background. The wood has rotted and it is no long usable. We’ve switched to using smaller garden boxes.

The grow boxes I used were similar to the one below (which is an affiliate link to Amazon), but I bought mine at Home Depot. I bought them early before the growing season really began, just in case they were hard to find.

The box is called self-watering because you pour the water into a tube which sticks up in one corner. A mesh layer keeps the dirt up and away from the bottom and the idea is for the water to soak up through into the dirt. I also water from the top because anything with shallow roots will need that.

Really, I treat the box as a regular garden and don’t count on the self-watering part. Florida gardening is very different from other places.

Transplanting the Seedlings

I spent some time researching and studying where my little seedlings would go. Each box is quite small and will not hold a lot of plants. Things can’t be too crowded.

My tomato seedlings (2 only) went into the old box in the back. Planting tomatoes is easy because they can be planted deep. Some people plant them on their sides too. What this does is cause more roots to grow from the stem to create a (hopefully) better plant.

Cherry Tomatoes

I planted both cherry tomatoes deep in dirt up to the top leaves. I added cosmos plants, basil and a marigold.

Two cherry tomato plants
Cherry tomato plants in grow bed

Zucchini

One garden bed has zucchini seeds. I put three seeds in a mound in the center. I will probably keep only the best one. I planted little marigolds and cosmos on one side. The red onion plants were put in a few weeks ago when the dirt was added.

Zucchini seeds planted
Will be zucchini

Cucumbers

Two cucumber plants are the main items in this bed. Parsley, cosmos and dill are also in this garden. I don’t have much luck with dill and the plants don’t look all that great. More onions line one edge.

Cucumber garden

Carrots and Beets

This garden has four rows of seeds. Two rows of carrots – which I never have much luck with, and two rows of beets, which I’ve never grown. This is a bit of a trial and error box for me. One little parsley plant was also added and there are onions along one side.

Like the zucchini, I decided to use seeds here and not try to start root vegetables in eggshells. There is no reason to.

Carrot and beet seeds planted in grow box

Transplanting from Eggshells

I wrote a previous post about growing seeds in eggshells. This year was the first time I attempted this. Some plants did better than others and altogether I believe it was a good thing to do. I was able to keep a close eye on the little plants making sure they had sun and water and could be indoors during the cold.

As far as transplanting goes, I carefully broke most of the eggshell away from the roots and then set the plant into the dirt. The broken shell can stay in the garden, but I wanted to be sure the little roots would be able to spread.

This was pretty easy to do. You can see all the roots on this cucumber – he was ready to be set free!

Cucumber seedlings going into the ground.

The Garden is Planted! March 15th

Once all my little seedlings had a new outdoor home, I put up some posts (also bought at Home Depot) and wrapped the whole thing with some mesh I had. I only did this to keep my cats out of the garden! When they see fresh dirt, they think it’s an outdoor litter box.

I draped some Spanish moss, picked up in the yard, all around the mesh so hopefully birds won’t get entangled.

Four planting boxes with seedlings

I will take down this mesh fence once the plants get larger and the cats are no longer interested. It’s a good way to keep the raccoons out too, I hope.

Update on Garden Hydrangea, Surviving Summer

Now my little hydrangea is in the ground and here is what I’ve learned. Deadheading Florida hydrangeas is a good idea. I found new growth and new flowers hidden beneath those huge, dying blooms.

blue flowers turning green
Blooms turning green and dying

Until a few weeks ago I had not tried to grow a hydrangea in my Florida yard. I kept thinking there was no way it would do well in all this heat. So the fact that my little hydrangea plant is doing so well is a nice surprise. If it has been growing in a greenhouse it would adapt well to warmth, and it does seem to be thriving this summer.

Continue reading “Update on Garden Hydrangea, Surviving Summer”

Building a Garden is Slow and Steady Work

Building a garden is slow and steady work, but once the ground is prepared, the fun begins. This may take days, weeks, months or years depending on the size of the garden and how much help you have in doing it.  Cats not included.

As a new gardener you may think that growing things is pretty straightforward. Buy the plants, dig a hole and put them in the ground. A little water here and there and soon you’ll see flowers or vegetables emerge.

Experienced gardeners know it is far from being that simple.

A Little Back Story

The first house I bought in New Hampshire had ready-made, lovely garden areas. I enjoyed picking asparagus from the perennial asparagus bed. Stunning tulips popped up in Springtime all over the yard, and the large perennials included wisteria, dogwood, and hydrangea trees! I enjoyed that yard for only two years, then moved on, through no fault of my own.

tulips and daffodils
My old New Hampshire Garden in Spring

The nice thing was the fact that the gardens were ready for planting. I could go buy pretty plants, or vegetables and put them into the ground and they grew nicely alongside already established additions. Prepared beds and established perennials are a wonderful treat for a homeowner.

After that, I have never lived in a ready-made gardening landscape. This means planning the site, tilling the soil, adding amendments, and finally buying the plants which will hopefully grow happily in their designated spots.

Without the extra finances (or help in the yard) to put toward all this, it can take years to accomplish a garden plan. Really.

In New Hampshire I had loam delivered each year. I moved wheelbarrows full of the dirt to various areas in my yard over the course of weeks. I’m an older lady and can’t do a lot in any one day, so I had to pace myself. Within five years time I had some pretty nice gardens in my yard – then I moved away.

The Here and Now

I moved into my Florida home in Fall 2016. My son built me a raised bed and I’ve been working on filling it since then. At the time this writing it is April 2018 and finally the bed is full of good soil which is ready for planting.

raised bed garden dirt
The raised bed is ready for planting

I’ve been using the raised bed as a mixing station. One end is free of plantings so I can dump bags of dirt and compost in and mix it up. After adding blood meal, bone meal, and fertilizer, I mix it up like a big stew and fill black pots to grow individual plants.  (By the way, as I was writing this, I discovered that not all “organic” labeled fertilizer is really organic.  Read my post about identifying real organic fertilizer and even bags of dirt.)

I also had to re-plant a big bucket in the yard where everything froze over the winter.  This pot used to hold a huge croton.  Now you can see what’s left in the background.

bucket of flowering plants
Big pot re-planted with crotons and flowering plants

Now that I’ve used that good dirt mix everywhere it was needed, I will plant more vegetables in the raised bed. From here on out, all that is needed is to amend the dirt with compost every so often and re-plant when needed. The hard work is complete.

Yahoo! Yippee! Hallelujah!

Spring Again, March in the Backyard Garden

Planting some vegetables in the March garden in central Florida.

Here in Central Florida we are still having “cool” weather which I love. The neighbors are wearing winter clothing (seriously?) and complaining. When I say “I love this weather”, they tell me to go back to Vermont (I’m from New Hampshire).

I guess Floridians get grumpy when it’s cold.

The weather is perfect for planting the garden, and truly I should have begun sooner. Unfortunately I still have the lack-of-dirt problem. I’ve continued to add leaves, grass, and kitchen compost to the raised bed, but need to buy bags of dirt.

Now I have the money, but need the help lugging all those bags of soil and fertilizer / compost from the store and to the backyard.

For now I am using a few fabric bags where I have planted zucchini (or summer squash, I can’t remember which), lettuce and potatoes.  All are doing very well and growing fast.

Check out my other posts to see how things are going: May in the Garden.

squash plant
Zucchini or yellow squash (can’t remember which)

Tonight I will snip off the tops of this bib lettuce for supper. It will continue to grow back unless the hot weather moves in. Lettuce likes it cool.

lettuce growing in a fabric pot
The lettuce is loving the cooler weather

Yesterday I searched the Home Depot for some decent vegetable plants. I came away with a Celebrity tomato, and something called a Bonnie Original. One is a determinate and one an indetermanent, and as I stood there in the garden center I couldn’t remember what that meant. I thought one was grown within a cage and the other was sprawling. I think I was sort of right. Read more here about the difference between the two types.

tomato plants
Little tomato plants

I have tomato-stealing raccoons, so I’m not going nuts with the tomato plants. I also have a limited amount of space to grow things. The tomatoes may end up in bags with handles so I can easily move them inside at night away from tiny raccoon paws.

Potatoes growing in fabric pot
Potato vines

I planted some red potatoes, from my kitchen, with big “eyes” and that is what is growing in one of the fabric bags. I have good luck with potatoes. Although they are usually quite small, they are delicious.

I am so excited to see this little “volunteer” pepper plant! Glad I didn’t weed it out before I recognized it. My original pepper plant is still living and growing from last Spring! Even with all the cold weather over the winter, it survived (although it has a few aphids) and is flowering now. Amazing. I trimmed off the curling leaves and will see what it does. Apparently a seed was dropped, and now a new pepper plant is growing. I’d never heard of a “volunteer” plant until I lived in New Hampshire. My preferred word for them is “free”!

little pepper plant
“Volunteer” pepper plant

On my latest trip to Pell’s Nursery in Osteen I picked up this little Navel orange tree. I have left it in it’s original pot for now, but bought that ceramic one for later use. It has a few little oranges growing which I hope don’t fall off. Sometime between October and March I should be picking an orange or two from my yard.

little navel orange tree in pot
My new Navel orange tree

I’ve had good luck with growing the Persian Lime, so thought I’d add more citrus to the yard.