I just bought a new iPhone XR and wanted to try out the camera so I took a quick walk around the yard this evening. The no-see-ums were brutal so it was a quick photo shoot. Not all photos were taken with the new camera.
My caladiums are doing well. The white-leafed variety is not looking so good, but the red looks nice. Did you know they come back each year after winter?
Caladium with red leaves
My bromeliad is shooting off some new little babies. I already started two new plants from this one and it looks like I will have more.
Bromeliad with “babies”
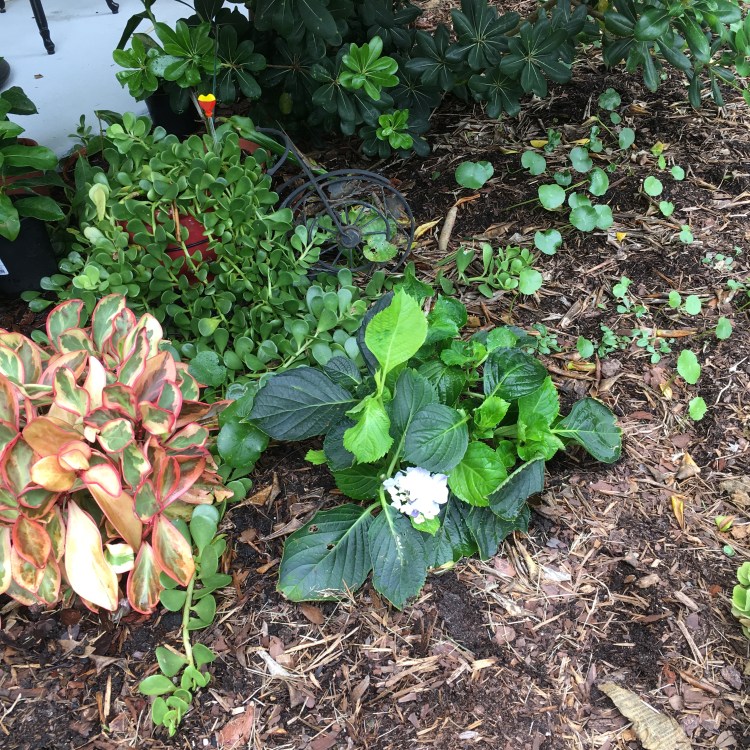
The hot house hydrangea, which I planted in the garden, is doing very well! It is in the shade most of the day and I think that helps a lot. I just cut off the dead blooms to find new flowers hidden among the greenery.
The hydrangea shrub is doing well!
The swallowtail butterfly has been busy laying her eggs on my fennel plant and I counted 40 worms, in all stages, crawling on the stems and chowing down on the flowers. The cardinals have grabbed some, but many remain. I hope some of them survive to become butterflies.
This worm will become a Swallowtail butterfly if it survives the cardinal attacks
Along the back hedge I spotted this pretty white flower which looks quite exotic. I believe it is an invasive species (it’s Florida, what else is new?) called the Japanese Honeysuckle. On the other side of the house I have the invasive Brazilian Pepper plant growing like mad.
Japanese Honeysuckle?
The frogs were napping in their usual spot on top of my front door light. They make an awful mess, pooping all over the place. At night they travel over the window, front door and walls catching bugs.
If you look closely you can see the head of the third frog in the lower left of the photo. They are literally piled on top of each other. I believe this is an invasive species of frog which has killed off the beautiful green tree-frogs that used to be plentiful in Florida. I don’t know if these are Cuban tree frogs, but our outdoor security camera captured a possum climb the wall and snatch a frog off the light in the back yard! I also find dead frogs in the yard, so something is after them. The University of Florida has a page about frogs comparing the unwanted invaders with the cute green tree frogs which I never see these days.
Frogs on my front light
Of course my two cats followed me all around the yard. They love having my company outdoors and since it’s usually too hot, I don’t do much outside with them. Below is Skittle who is always interested when I am pulling weeds.
Skittle
Beautiful Fontana is my older cat but she loves to be outside as well. Both cats spend most of their day sleeping outdoors even though it is extremely hot this time of year. I am home, and always let them in to cool off and fill their bellies, but they usually go right back out.
Fontana
So that is my yard at the end of July. When we get through the next two months I will feel better. Nights will become cooler and I look forward to having a fan in the window at night. Aside from cutting the grass, not much is getting done in the yard. My vegetable garden is producing nothing much and my citrus trees are doing very poorly. I keep the bird bath filled and enjoy watching the birds that come to eat bugs and take baths.
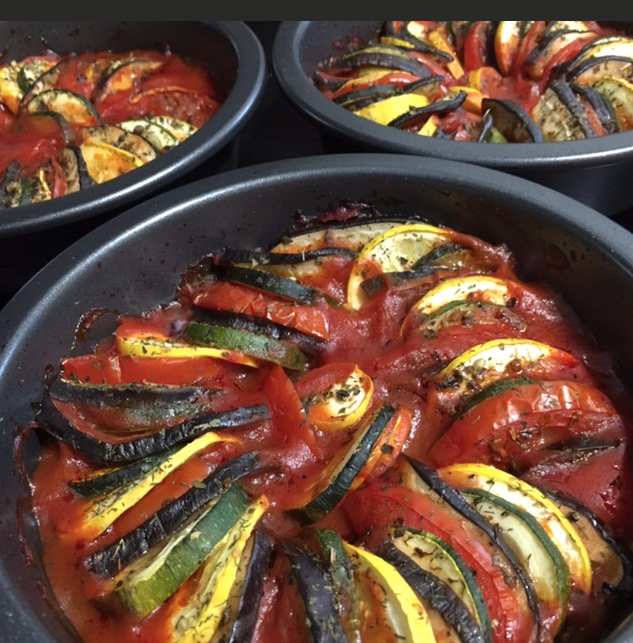
Although it seems like you will be slicing and layering forever, this recipe does not take many vegetables at all so slicing was minimal. I used 2 very small summer squash, 1.5 small zucchini, 2 medium size tomatoes, and half (or less) of a large eggplant. I thought about digging out my mandarin slicer, but I really didn’t need it.
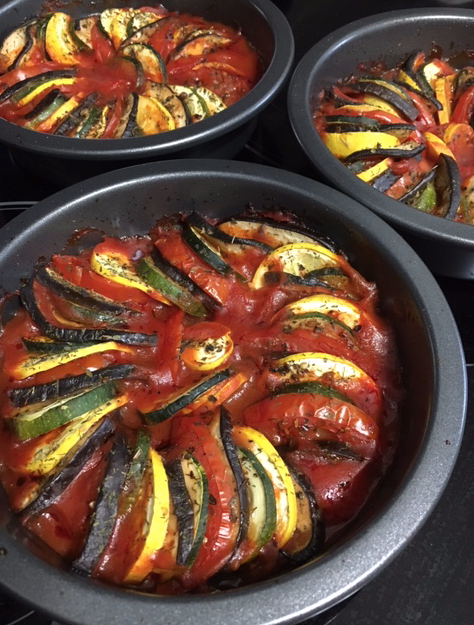
Most cooks used a large pan of some sort to create this dish. I decided to use three small round pans (about 6 inches across) because I am the only one who will eat it and I can freeze one of the servings.
What is Ratatouille?
The word “ratatouille” brings to mind that Disney cartoon about the mouse in the French kitchen helping a new young chef learn to cook. The dish for which the movie is named, is made of vegetables, usually the type that are harvested at around the same time in summer. This could mean all sorts of vegetables were used, and way back when, they probably used whatever was in abundance in the backyard garden.
I don’t know about the old original ratatouille recipes, but these days you see the dish as sliced and layered colorful vegetables. Because of this, all the various veggie flavors mingle while they bake. I was very happy with the outcome and ate it with some leftover noodles.
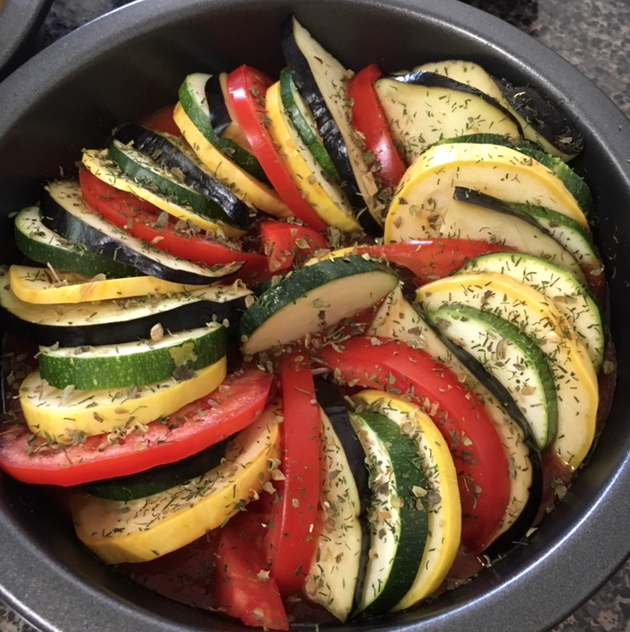
I sprinkled spices on before covering and baking
My own homemade sauce is my favorite, but this time I used store bought, low sodium, organic spaghetti sauce to save time. One medium size jar worked well to divide up between three small pans. I did sprinkle a little sugar on top of the sauce because the store bought sauce was not sweet enough for my taste.
I oiled the pans, then divided the sauce into each of the three pans. The sliced vegetables were layered on a plate (a few at a time) and then plunked into the pan. Once the pans were full, I tucked the remaining slices into the center and to fill in around the edge.
Vegetables to Use
The eggplant I bought was huge, so I cut each slice into fourths for layering. First I salted the slices and let them sit in my colander for about 20 minutes. This gets the bitterness out. Rinse the salt off before using. A Japanese eggplant, which is long and skinny, would probably work better.
I used 2 small yellow squash and only 1 and 1/2 zucchini. Since I only had small tomatoes, but not Roma, I cut the slices (from 2 small tomatoes) in half. The large eggplant slices I cut into fourths but only used about half the large eggplant.
Other vegetables that would work are thinly sliced bell pepper and onion.
Topping the Veggies
The original recipe I found said to add the herbs and oil after baking, but I sprinkled herbs over my slices before I covered them with foil to bake. It didn’t make sense to me to add all that nice flavor later on. Once the food was baked, I added nothing except a tiny bit of salt (because I add no salt when baking).
My Baking Time Was Reduced For the Smaller Size Pans
I used three small, round baking pans and baked them at 375 for 30 minutes, not 40. (They are covered with foil for the first baking sequence.) Once they were uncovered I baked them for an additional 10-15, which is less time than the 20 minutes suggested. My pans were small, so that makes sense. Just watch your baking time if you use smaller dishes.
Ready to cover and bake.
If you have a garden and can grow all these vegetables, your meal will be super cheap, and fresher than most. No wonder peasants were known for creating this dish! I wonder if they waited all year looking forward to tasting the first Ratatouille of summer?
I’ve seen some Ratatouille recipes baked in cast iron, but with the acidic tomatoes and sauce, I would use something other than cast iron. This recipe would work nicely in a pretty covered casserole dish. Or individual serving dishes / small cake pans like I used.
What to Serve With Your Ratatouille
Ideas for serving and eating the finished vegetable dish.
Serve over rice or noodles as a vegetarian dish.
Cook ground beef to combine with the tomato sauce to use as the base.
Make garlic bread (softened butter, minced garlic, parmesan cheese mixed and spread on bread and broiled to golden brown). Bread and ratatouille would make a perfect meal!
Serve Ratatouille as a side dish to any type of meat / fish, or in addition to a salad or other vegetable.
It’s awesome with macaroni and cheese! I liked it so much that the second time I made this recipe I put mac and cheese in the bottom of the pans, then the sauce, and vegetable layer.
Bon Appetit
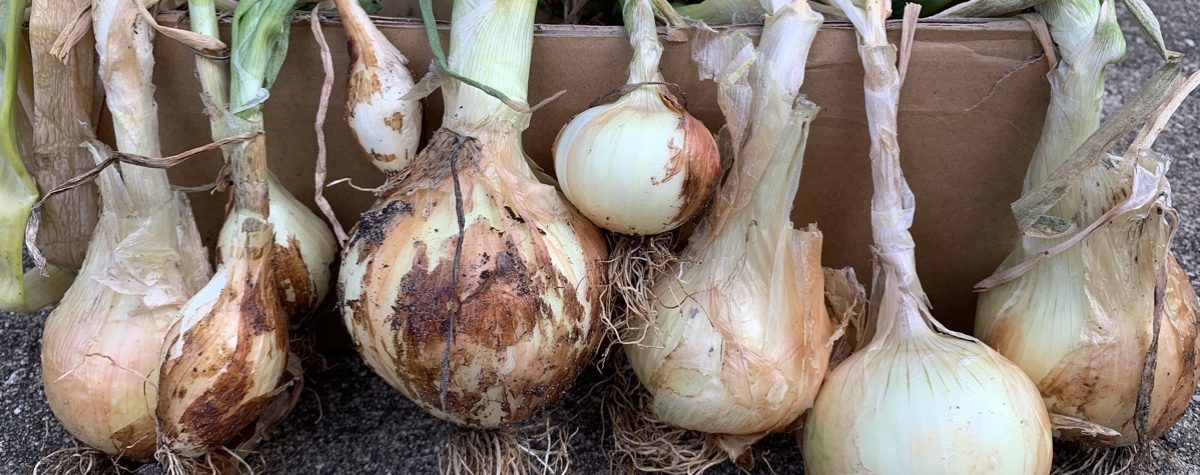
Ever since I found Ingrid’s Produce just down the street I have been a veggie cooking fool. Over the weekend I made a scrumptious tomato soup with fresh ingredients.
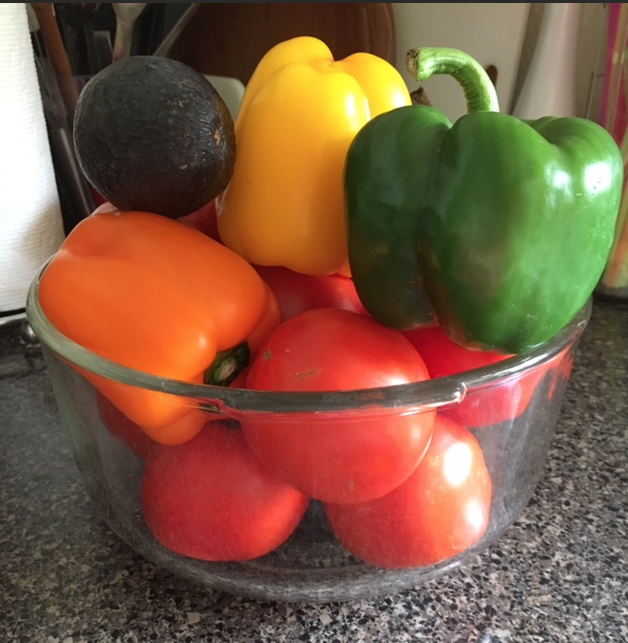
Fresh vegetables are difficult to find, or have been for me. You may think that a sunny, hot place like Florida would be full of wonderful produce, but that is not the case. Apparently it is too sunny and too hot. I’ve tried to garden here without luck. So the local Florida growers who are able to supply beautiful peppers and tomatoes like the ones in my photo here, make me feel grateful. Now that I have found some luscious produce, I will make homemade tomato soup from scratch.
Searching For a Tomato Soup Recipe
If you have ever searched online for any type of recipe you know how overwhelming it can be to find a good version. Food blogs are popular and in many cases copies of other food blogs. In other words the writer has never made the food themselves. Food photos are available for free and to buy, so anyone who wants to can pretend to be a foodie. There is money in the advertising and if you notice, most food blogs have many ads and popups everywhere. For this reason I have been wading through blogs featuring tomato soup recipes to find what I want.
My soup will be made entirely from fresh ingredients, as opposed to canned, and all I need to know is what basic additions to make to the obvious one.
Here’s a list of the ingredients I will be using:
Fresh, delicious tomatoes (thank you Ingrid’s Produce)
bell peppers (yellow orange red and green)
chopped onion
garlic, finely chopped – about 6 cloves
vegetable broth (my own from the freezer)
basil, parsley (from my garden)
celery
heavy cream
sugar (cuts down the acidity of the tomatoes)
Putting it All Together
My plan was to roast the peppers on the grill and remove the skins. That didn’t work out too well because they didn’t blacken enough and the skin didn’t come off. Today I will roast them in the oven and try again. This worked, and I peeled the skin and chopped the pepper pieces to add to the vegetables in the pot.
Broiling the peppers to remove the skins
The 12 tomatoes will be blanched in boiling water and then the skin will be removed.
While the water heats to boiling, cut “X” marks in the bottom of each tomato. I read somewhere to do this and it greatly helps when peeling off the skin!
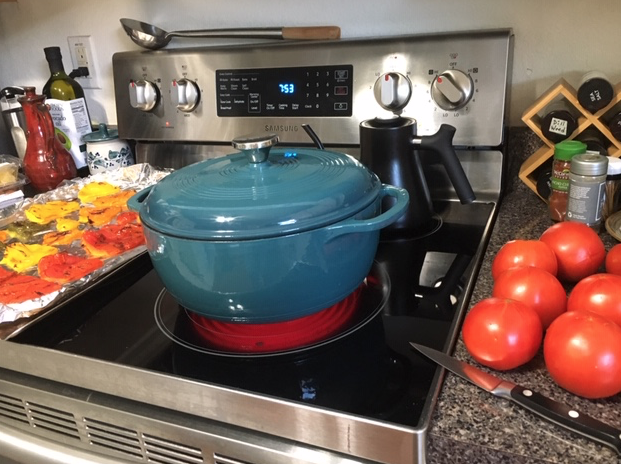
Boiling water to blanch the tomatoes
Use a big pot, like a dutch oven like mine, and bring the water to a full boil. Use a slotted spoon or some large scoop to put the tomatoes into the boiling water. They only need to be in the water for 30 seconds to a minute – seriously… Get them out when they look wizzled. I did all my tomatoes at once, but I should have done 6 at a time.
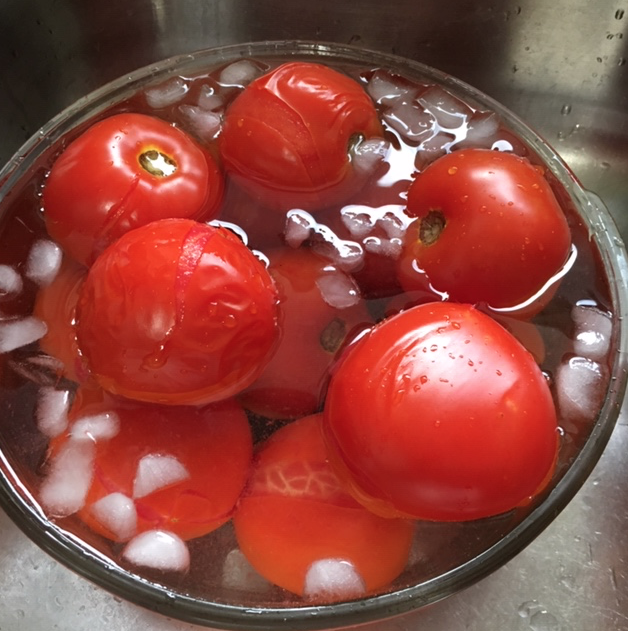
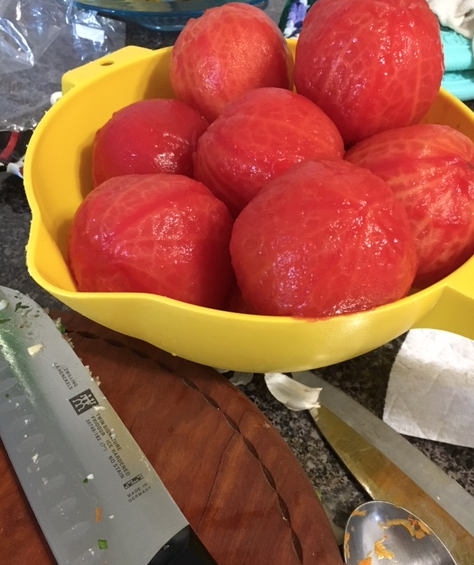
Be sure the ice water is ready so the tomatoes can go directly in when they come out of the boiling water. I needed a bigger bowl for this! All my tomatoes barely fit. As you can see, the skins have split and are ready to be peeled. Start at the bottom where you made that X and they come right off.
Boiled tomatoes need an ice bath
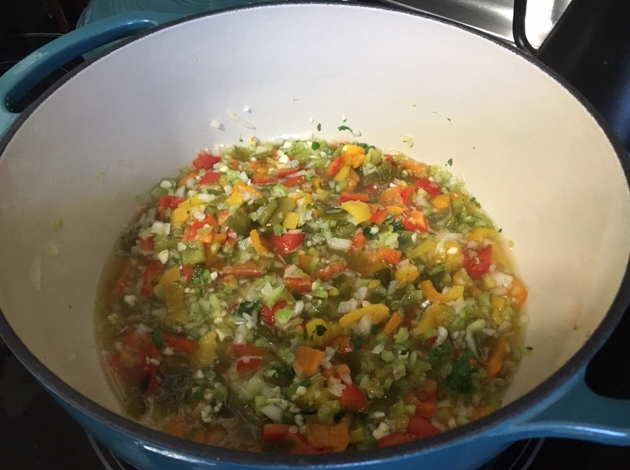
While I waited for the water to come to a boil for the tomatoes I chopped the roasted peppers, celery (3 stalks), whole onion, garlic cloves (around 6), and put them into the broth in my dutch oven. I used my big 6 quart Lodge pot because my LeCreuset pot was too small.
Save Your Own Broth
By the way, the broth I used was saved in my freezer from previously cooked vegetables. Don’t dump that vitamin rich water down the drain when cooking beans, peas, carrots, asparagus, etc., save it in the freezer in a large container and add to it as you boil veggies. It can be used in soup, stew, gravy, chili, and whatever later on.
Finely chopped veggies simmer in broth
While the vegetables and broth simmered, I chopped up the tomatoes. I’m not sure they really needed to be chopped, but I did. I coarsely chopped them and removed the top stem area, and then added them to the other veggies in the pot. At this point I added chopped parsley and basil from my garden and other herbs from my spice rack, including a tiny bit of salt and some black pepper.
Tomato skins are removed and they are ready to chop
I almost forgot the sugar, so added a couple tablespoons to the mix. I always add sugar to homemade tomato sauce and it helps with the flavor. Then I let it simmer for 3-4 hours. I didn’t time it, but I figured the softer the vegetables the better.
I simmered all the veggies for about 3-4 hours.
Cooling, Blending, Straining, and Reheating The Soup
Once I had let the pot of vegetables cook a long while, I turned off the heat and began to cool the food. I used a pyrex measuring cup to scoop out the hot mix and put it into large bowls which I set on a wire cooling rack. Once the soup mixture was cool, I used the measuring cup to pour small amounts into my Oster Blender.
From there I poured the blended soup through my colander which has the perfect size holes! I had no idea how this would work out, but since I had removed the skins from the peppers and tomatoes, all that was left was the tomato seeds. And my yellow colander caught those! So use something with holes large enough for the sauce to easily pass through, but will catch the seeds.
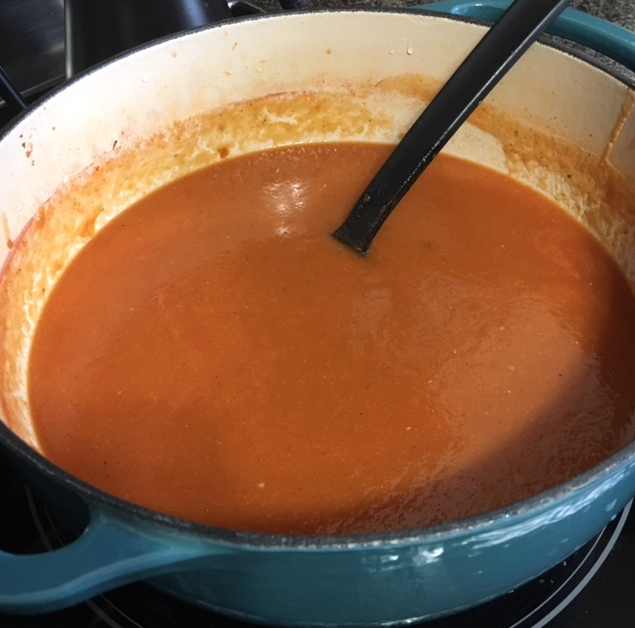
I repeated the process of blending and straining the seeds until all the soup was back in the same dutch oven. I reheated it and then added some heavy cream (this lightens the color of the soup to more orange than red). I didn’t measure, just poured, but probably a half a cup or so. I’m considering using yogurt or Kite Hill non-dairy yogurt next time.
Reheating the soup and adding some heavy cream
I’m pleased with the taste and I know exactly what is in my homemade soup. Because I am the only one who will eat it, I filled several small freezer containers which I labeled and froze. Grilled cheese and tomato soup for supper tonight! Can’t wait.
Yum… this was my supper!
Making this soup was time consuming. Between chopping all the vegetables and doing the tomatoes then cooling, blending and reheating it took some time. But I love homemade soup and this is worth making again.
Use common sense when looking for “recipes” online. Some tomato soup recipes called for flour or canned tomato paste. Sometimes a few good recipes will give you ideas and when combined, you get a stunning result. I wanted fresh ingredients only, and I believe I have achieved that.
Done and ready to freeze!
Butternut Squash Tomato Soup
When I visited New Hampshire last Fall, the Fiddleheads Café, in Hancock featured butternut squash tomato soup on their menu, which sounded so good! Unfortunately they were out of it the day I wanted some, so I decided that one day I would make my own. Since then I have been searching my local Florida area for good tomatoes to use. Most tomatoes here taste like nothing. Once you eat garden fresh tomatoes it really does spoil you. I gave up on making soup because of that.
Just the other day I discovered a fresh produce store just down the road from me. And the tomatoes are fresh and tasty! The owner also had little butternut squash, so I bought two. I love the size because I can’t eat a whole, large squash myself. Now I am thinking about adding some to my soup.
I love the small size of this squash
Update on the squash. I baked them both and wasn’t happy with the flavor. They tasted like they needed more time to grow! So maybe that is the case. I ate the squash and did not add it to my soup.
I’m thinking that I could cook some squash (a larger, more tasty one) and simply add it to my already made tomato soup. Why not?
Many years ago when I began blogging I started a Google blog. It was difficult. I went to WordPress and found it much easier to understand, although I had a lot to learn.
Now WP has given us the Guttenberg blocks to use whenever we write a post. I hate it. I have a simple site, without wanting to deal with plug-ins or css or whatever people with experience use to “fix up” their blogs. I’m not a technology wizard, I just want to blog – quickly and without problems.
Now I will go to add a “block” and will have to add the block on top of the block I just wrote because no little “+” will appear where I want it.
Sometimes I will highlight something to make a link and the linking ability will show up right there – at other times it appears all the way at the top of the page! ( Learned how to fix this: uncheck “top toolbar” – use dropdown to access in the top right corner)
Twice now I have tried to schedule a page to post later and boom… it goes live.. right then! Why? I couldn’t tell you. Sometimes the entire right hand side with page settings completely goes away. I can’t make it come back.
Sometimes the “featured image” block doesn’t work. On one of my blogs I can never see the Preview of the page. I get an “Oops, that page can’t be found”.
Adding photos means add descriptions to the right of the page, but it isn’t saved in the media area, so it has to be done twice to the same image, if I want to save it in my media. And so on….
I’ve been writing using the stupid thing for a while now and I still hate it.
I think it makes double the work, triple the aggravation, and makes writing my blogs a lot less fun these days. I was doing fine with the old WP. Now every time I blog I feel like I am in a class where there is no teacher and I have to fend for myself to figure out how to create a decent blog page. A lot of the time I am winging it.
I know I can go back to the old editor, but if I do, and have to make changes on the page, it seems to want me to convert to the new editor. It’s all awful. For people like me, who just want to share their hobbies or local happenings, blogging shouldn’t be a chore. Now it is.
Today I wanted to make a peach pie. When I shopped at my local Publix, there were no peaches so I bought nectarines. I also bought some apples while I was there. Often the produce I buy at this store is not all that great, but I was hopeful.
So I mixed the flour, sugar and cinnamon and then went to cut the nectarines. They were hard and dry. I couldn’t use them. I had 3 apples. I thought maybe I can make a small apple pie instead. One apple was okay. One apple was partially brown inside and the other had only a small spot of brown. They did not look great, but I salvaged around 2 cups of slices. This was not enough for a decent pie so I wrapped the filling with one piece of dough and baked it that way.
My apple turnover concoction
Sometimes we must improvise. Since this was a total change in plans to begin with I used coconut flour, brown sugar (only a little), and some real maple syrup for the filling. I dotted it with butter and wrapped the filling with the bottom crust. I’ll freeze the other crust for a later time when maybe I can find some decent fruit.
Back to my title question. When I moved from Florida to New Hampshire one of the things I missed most was shopping at Publix. Since my return to the South, I have been quite disappointed in the stores. Things are different these days.
First of all, Publix stores are all different. Some are large, and some are set up similarly and some are confusing to me when I enter. But the most disappointing thing is the produce area. Only the New Smyrna store, on state road 44, had good produce. It has been under construction for many months now and I can only hope the produce there will remain good once it re-opens. My fingers are crossed.
October 2016, shopping for Hurricane Matthew at Publix in Deltona, Florida
Publix is still pretty good at getting you out the door fast. Usually every store I’ve shopped in opens registers when lines form. They were great when we were all shopping for the hurricanes (photo above)! The lines were long but every register was open.
When my kids were little that is what drew me in. I was willing to pay more for food (compared to Winn Dixie) to have a quick check out.
But my local store in Edgewater is disappointing. I’ve found food which is out of date. Right now I have a jar of fresh oysters in the fridge which is bulging at the top and bottom. The expiration date is 5 days away, but that container doesn’t look good. It looked fine when I bought it, but what’s up with it now? I don’t take risks with food so I won’t be eating oysters.
Oysters
My son often orders sliced meats and cheeses for pick up and has gotten the wrong cheese twice! It’s pre-sliced and wrapped, which is fast and easy, but when you get home you want to see that you have the correct item!
I do like the cashiers and baggers in Edgewater. They are friendly, talkative and mostly bag my groceries with care. I usually leave the store in a good mood even when shopping is not exactly a pleasure. The bakery is a nice area as well, although I try to avoid eating that type of food. Their Brioche loaf is amazing and I can’t pass it up.
For now I will stick to buying frozen fruit and vegetables whenever possible and continue to check expiration dates carefully. Hoping for happy shopping days ahead when the New Smyrna store opens this summer. Until then, I can’t help but wonder what has happened to Publix?
It is January, and the weather has cooled off nicely here in central Florida. The windows are open, and it’s a pleasure to be outdoors. Finally I wanted to shop for plants because walking through the nursery was fun!
Christmas spending is over and I decided to add a few essential plants to my home. I traveled to Lindley’s Garden Center in New Smyrna and bought a little Staghorn Fern which is hanging under the Brazilian pepper trees in my backyard.
For inside the house I added a little thyme plant to the kitchen windowsill – a necessity for cooking – and a Fiddleleaf Fig tree to the dining room. Yes, I have a Fig Tree! I have wanted one for a very long time, and finally splurged on this beauty. Now I need to find a suitable decorative pot to complete the look. I’m in the process of finding the perfect pot.
My new Fiddle leaf fig tree
If this fig tree looks familiar, I wouldn’t be surprised. It is used often as backdrop greenery for commercials, tv shows, and movies. You can hardly watch any show or read any magazine without seeing one somewhere in the background. If you are a fan of the Fixer Upper show, Joanna uses them often when decorating finished homes. The gorgeous fiddle-shaped leaves grow in bunches from a straight trunk to create a tall, textured green space. Various size trees can be grouped together to make a big accent area, but single trees are enough to decorate any room with interest. They can grow tall without being overwhelming, and the combination of stalks and fat leaves is such fun. Smaller trees can even go on countertops or tables. If my house was larger, I would have many of these trees scattered about. As it is, I could barely find room for just one.
At Lindley’s I paid $39.50 for this tree which is about 4 feet tall. Mind you the pot is nothing special. To get it home I set it on the floor of the passenger side of my Subaru and tilted it back toward the seat. I did have to grab the pot as I went around corners as it wanted to roll, but no leaves broke off- phew. I got it home safely and am so pleased to finally have this tree to enjoy.
How to Care For the Fiddle-leaf Fig Tree
After a day or two I took the tree outside and sprayed it down with the hose. I added a little fish fertilizer and watered it good. I am lucky to live in a tropical location because these trees love sunlight (filtered, not direct) and warmth (with humidity thrown in). Because of this, I have a good chance of keeping this tree happy and healthy. I can give it some playtime outside now and then, which I do with all my houseplants.
I’m not sure how well a Fiddleleaf Fig would fare in a northern climate, but the HGTV website has some advice for those of you who would like to try to grow one.
Fig Tree Artwork
One afternoon I decided to draw the fig tree. After I finished the drawing I uploaded it and used Pixelmater to remove the background and add color. Then I played around with the image and used it to create artwork for sale in my Zazzle store, Clara’s Desk. Below is the poster I made.
My drawing as a poster for sale in my online store.